Home » Misc » How thick concrete for basketball court
How thick concrete for basketball court
Artificial Grass & Pets Guide | Pros & Cons
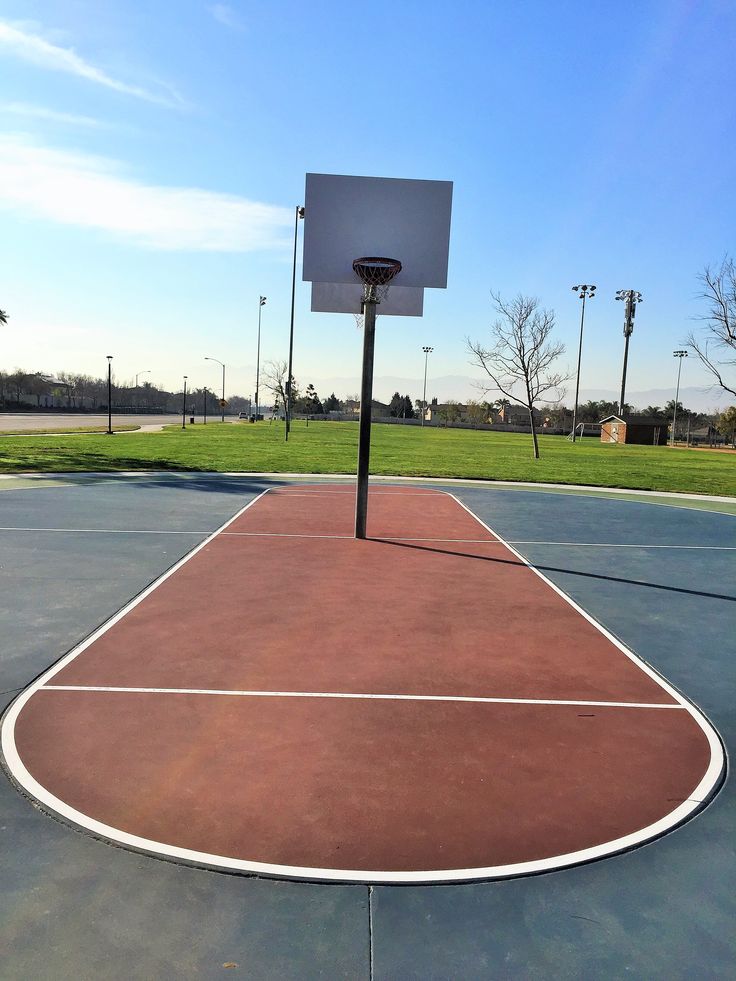
There is nothing like being able to play your favorite sport in the comfort of your backyard. Basketball combines strategy, physical ability and determination into one fast-paced activity. Sure, you could drive you kids to a local park or gym, but there’s always the chance that all the courts will be taken. Having a high-quality basketball court in your own yard gives you peace of mind of where your kids are; in the convenience and safety of your own backyard!
Once you’ve settled on the idea to construct a basketball court, you’ll need to think about some considerations. Review the information below to see all that goes into building a court and how doing this can benefit your lifestyle.
Table of Contents
Outdoor Basketball Court Considerations
Creating the perfect basketball court will require you to think about your applications. Are you investing in a home court to improve your skills or to enjoy time with your kids? Someone training for high school, college or traveling teams should follow league regulation dimensions, while families wanting to enjoy some time together may be more lenient with the court size and layout.
Recognizing your uses will help you finalize the design and construction specifications of your outdoor basketball court. Here are a few additional questions to ask yourself:
What type of surface do I want for my basketball court?
What league dimensions will I follow?
Where do I want to place the court in the yard?
What do I hope to gain from having my own basketball court?
You can expect a backyard basketball court to cost anywhere from $11,000 to over $70,000 depending on site preparation, size and features you include.
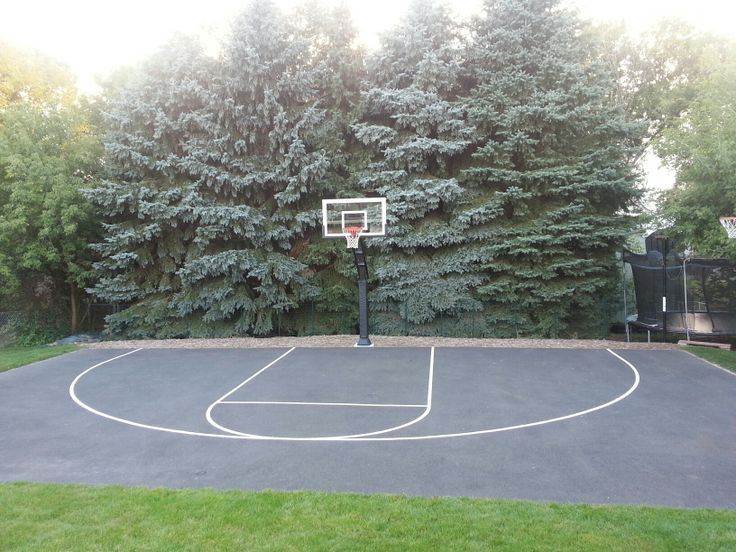
Court Flooring Options for an Outdoor Basketball Court
We have all seen outdoor basketball courts made of concrete or asphalt. These materials are some of the most common for home-court construction, but they are far from the only options. The type of surface you select will affect the safety, performance and even aesthetics, maintenance and lifespan of your court.
Review what materials you can use for an outdoor basketball court:
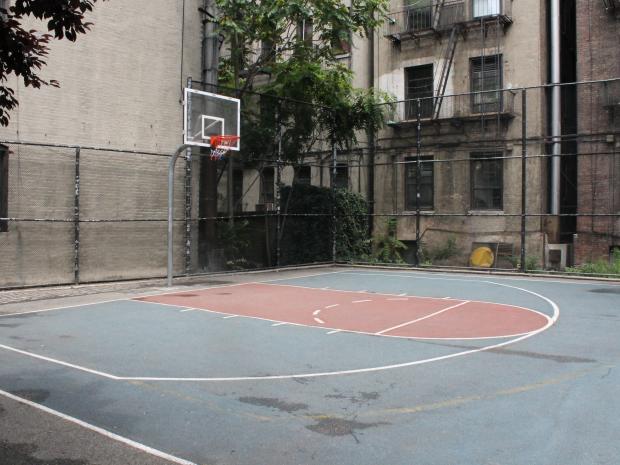
Asphalt Basketball Courts
You can find asphalt basketball courts within public parks and community centers. Builders choose asphalt because it is the usually the least expensive option. These courts are made by mixing stone and tar.
Asphalt is susceptible to cracking. It can be cosmetically repaired or resurfaced, but once a crack develops, it is structural and will return year after year. One other thing to keep in mind about asphalt basketball courts, is they are unforgiving. Jumping or pivoting on hard asphalt surfaces may result in injuries.
Multi-Purpose Outdoor Basketball Courts
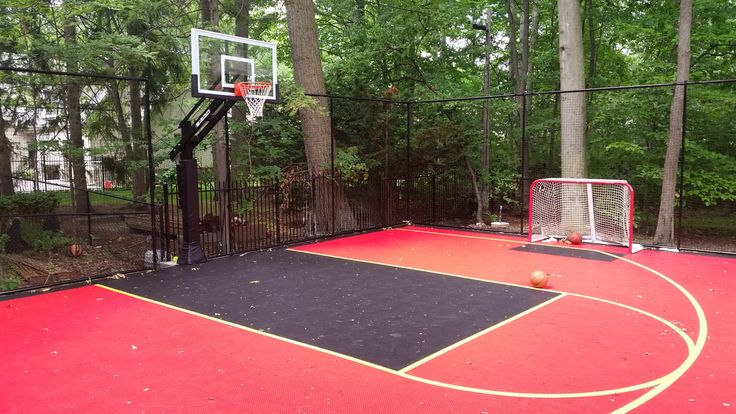
Players who will use their basketball court for more than one activity might consider a multi-purpose court surface. These installations are excellent at minimizing the chances of injuries since they are made with shock-absorbing polypropylene materials. Courts are typically built on top of flat concrete slabs. Surface materials can be created in various colors along with graphics and game lines.
Multi-purpose outdoor basketball courts offer exceptional traction for players. The surfaces are forgiving on the body unlike asphalt or concrete courts. A multi-purpose court allows you to play multiple games, including pickleball, volleyball and soccer, making your purchase more versatile. Also, this court type survives in hot and cold environments without jeopardizing performance.
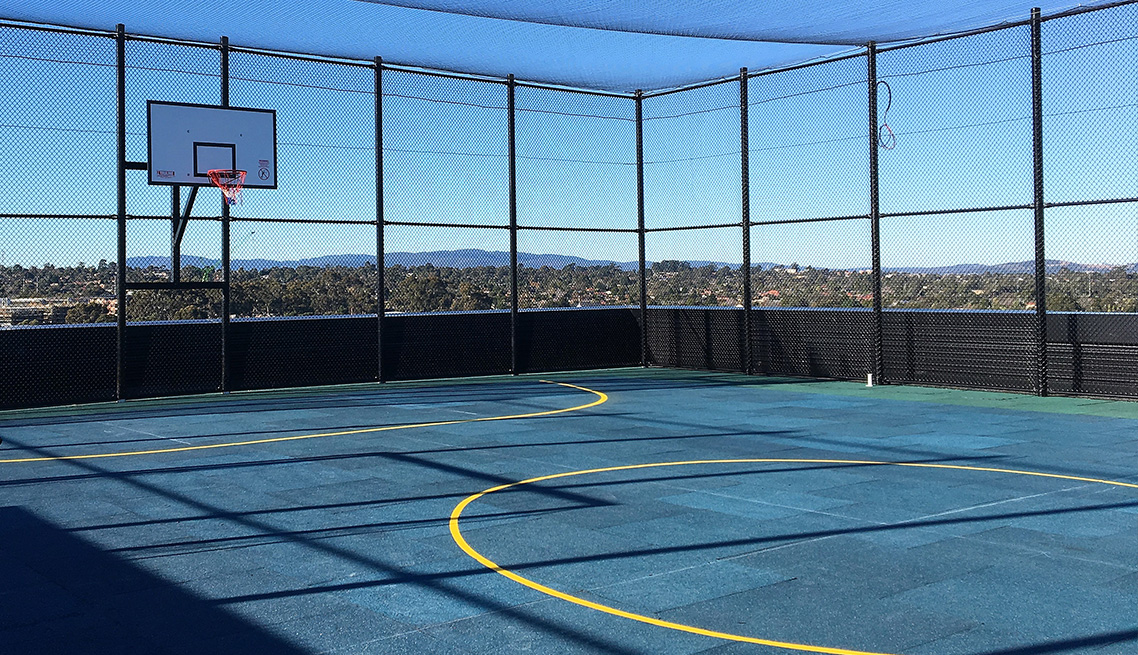
Advanced Outdoor Basketball Courts
Advanced court systems are similar to multi-purpose installations. The main difference is that an advanced court surface is engineered with enhanced features to provide a true ball bounce, traction and shock absorption. An advanced outdoor basketball court system will be similar to playing on an indoor performance sports floor.
How Thick Does Concrete Need to Be for a Basketball Court?
All the court materials mentioned will require a concrete base level. You should expect to build an outdoor basketball court on a slab that’s no less than 4 inches thick. Rebar reinforcements are recommended to prevent the concrete from cracking, thus providing years of maintenance-free enjoyment.
Home Basketball Court Dimensions
Basketball court dimensions change according to age group and league level. It’s common for different high schools, gyms and recreation centers to have unique court dimensions based on who is using the court. If you’re in the process of figuring out how to turn your backyard into an outdoor basketball court, the dimensions below will be helpful:
Official NBA court: Professional basketball courts measure 94 feet long by 50 feet wide.
High school regulation courts: High school games are played on courts 84 feet long by 50 feet wide.
Junior high school regulation courts: Middle school-age courts are smaller, measuring 74 feet long by 42 feet wide.
Backyard residential basketball courts can be built in as little as a 26 foot by 26 foot space, and go all the way up to a full size 60 foot by 110 foot NBA full court.
How Far Is the Three-Point Line?
The distance of the three-point line in basketball changes in relation to the court dimensions. An official NBA court has the three-point line 23 feet and 9 inches away from the center of the rim. NCAA athletes shoot 22 feet 1 3/4 inches, while High school students shoot three points from 19 feet and 9 inches away.
Where to Position Foul Lines and Key Lines
All basketball foul lines sit 15 feet from the front of the backboard. Make sure you measure from the backboard surface and not from the basket. Professional NBA courts feature a 16-foot key (width). High school regulation courts should have a 12-foot wide lane.
Backboard Size for Outdoor Basketball Court
There is room for flexibility in your backboard installation. Official NBA backboards measure 72 inches wide and 42 inches tall. However, manufacturers make smaller backboard sizes for home applications. You might choose a more compact backboard to save space if you’ll use your court for multiple sports or if you have limited space.
Where to Construct Your Court
Your yard layout will come into play when building an outdoor basketball court. The court’s location is entirely up to you, but it helps to choose an area that’s relatively flat from the get-go. How will the court impact existing drainage? How close can you construct in relation to tree lines? Do you have any underground utilities or other obstacles to consider? These are questions that a professional court builder can assist you in answering.
Possibilities and Benefits of a Home Court
Having a home basketball court is a great idea, as you’ll see in the benefits below:
You will always know where your kids are.
Invite friends and family over to play tournaments.
Play basketball anytime you want when you install an outdoor lighting system.
Should I Construct the Court Myself or Hire a Professional?
You’ll be using your outdoor basketball court for family time, recreational games and in some cases practice, so it’s important that your investment meets your design expectations. Having a professional team create your outdoor court ensures your installation is done correctly and its’ surface and components are responsive to competitive gameplay.
Choose each component of your outdoor basketball court when you work with CBA Sports. We serve residents in Atlanta to help make backyard dreams a reality.
Count on CBA Sports for Your Outdoor Basketball Court Installation
CBA Sports has over 30 year of experience building custom outdoor basketball courts. Choose the best surface materials for your project, and rely on our experts to make recommendations for courts of any size. Contact us today for a free consultation or to learn more about our capabilities.
How to DIY Build a Basketball Court (8 Step Guide)
Inspired to build your own backyard basketball court?
If you're interested in DIY'ing a basketball court or having a local contractor install a court for you then you've come to the right place.
Last Updated 2nd of April, 2020.
1. Choose the Size and Location of Your Court
Ideally you’ll choose a location that is reasonably flat, to keep excavation needs to a minimum.
Recommended subsurface base: Concrete (100mm thick, 25MPA, Reinforced, Helictoper/smooth finish, Standard slope to allow water to drain off the slab)
We strongly recommend a concrete base for any new base being built for a MSF PRO sports court. Concrete provides by far the best longevity, performance and value over the long run and requires virtually no ongoing maintenance or repairs for many years. Other suitable bases include Pavers, Asphalt or Decking.
Option 1: Have an elevated concrete slab & then fit your landscaping requirements around it.
Option 2: Level the slab with the rest of your backyard. This option involves more excavation work/costs.
The size of a full size NBL court is identical to the FIBA regulation sized basketball court of 28m x 15m (420sqm), which is usually too large to fit into the average backyard. We recommend considering a half court, which can be customised to suit your space. Sizing can range from very small approx 4m x 6m (24sqm), 9m x 5m (45sqm), 10m x 7m (70sqm) to a 3X3 regulation half court of 15m x 11m (165sqm).
Precise measurements and planning are crucial in order to end up with the best result.
2. Purchase the Hoop & Sports Court Surface Tiles
The in-ground Hoop anchor kit should be installed during the concrete pour, so ensure you’ve ordered your Hoop in time to arrive before you schedule the concrete. Take note of the hoop's overhang in centimetres so you can plan accurate placement of the hoop anchor, free throw and three point lines.
Surfacing your court with a specially designed synthetic sports surface such as Australia's #1 selling, top rated MSF Pro™ will not only produce an amazing looking result, but will also provide more accurate ball bounce, sound reduction and minimises joints strain/injuries.
3. Level the Ground
Prior to concreting, the space must be dug up and levelled. If you require the concrete to be flush with the surrounding ground then you must excavate 115mm below surface level to allow for the concrete slab (100mm) and sports surface tile (15mm). If you are opting for the elevated slab then you may not need to excavate but you do need to remove any grass and level the ground.
IMPORTANT SAFETY PRECAUTION:Before you dig, call 1100 (Australia) or your local utilities to rule out the presence of buried cables including power, water, gas and phone lines. Failure to do so could result in serious or fatal injury. Dial Before You Dig is a FREE national referral service designed to assist in preventing damage and disruption to Australia’s vast infrastructure networks which provide essential services we use every day.
4. Pour a 100mm Concrete Slab
Prepare and pour a 100mm thick slab of concrete (25MPA, reinforced, standard slope, helicopter/smooth finish) matching your exact MSF PRO™ Court Design measurements. Ensure you have someone experienced with concrete slabs on hand for this step. Plan the concreting for when the weather is dry and allow for 72 hours to let the concrete set.
It's recommended to install the hoop anchor at the same time as pouring the slab to save on expenses. The recommended hole size for a hoop anchor system is approx 500mm x 500 mm and 1.2m deep. Please note: Always remember to closely follow the installation & safety instructions that come with your in-ground hoop.
Always be sure to follow the official basketball hoop installation instructions. Goalrilla in-ground hoops generally require 3-5 strong labourers with multiple ladders and power tools. Hoop installation can take up to a few hours for those inexperienced with installing. The below videos provide an example of the procedure involved for installing a popular Goalrilla in-ground basketball hoop system yourself...
Concrete preparation for playgrounds, football or basketball mini field - Profifloor
Arrangement of industrial floors
updated
Recently, more and more children's playgrounds, mini football fields, basketball courts are being built and reconstructed in Kyiv. One of them was an old abandoned site on 3 Alekseevskaya Street in Kyiv.
One of the sponsors decided to do a good deed and financed the construction of a mini football field on it.
This mini field measures 12 x 22 meters.
The first step was to level the surface and install the boards.
Then followed: backfilling the site with a crushed stone-sand mixture of two fractions 40-70 with an average thickness of 100 mm and 0-40 with an average thickness of 50 mm
After which it was possible to start laying a polyethylene film and reinforcing with a mesh. A plastic film is needed so that the moisture from the concrete does not go too quickly into the soil. All materials were provided by the customer.
Laying polyethylene film, reinforcing with mesh and laying the route of the concrete pump
After that, we started pouring concrete.
The thickness of the concrete was about 120 mm. But it was necessary to fill in below the side by 12 mm. since further a coating of rubber crumb will be made, the thickness of which should be from 9 to 15 mm. The peculiarity of the work was that the site should have a slope of 1.5% in the longitudinal and 1% in the transverse direction, so that the water does not stand on it, but goes down the slope.
The next step was grouting the surface. In such cases, it is imperative to grind concrete, because. if you do not rub it, then the rubber crumb of the future coating will stick to the concrete milk, which will eventually shoot off and fall off along with the crumb.
Grout was done with discs and once with paddles. Thus, the adhesion of the rubber coating to the concrete on the site will be the best.
The final step was to moisten the concrete surface with water and cover it with plastic wrap so that the concrete does not release moisture too quickly.
On the second day, the seams (one longitudinal and three transverse) were cut into 6x5.5 meter cards so that the concrete would not crack during operation.
Site construction is still going on. Photos of the finished area of the mini sports field will be added later.
If you need the same concrete preparation or other concrete work, call us +380672114111 or leave a calculation request on our website, or send us your project to [email protected]. We work without days off. We will come to your site, take measurements, offer the most optimal floor design option, calculate the cost for free, and fill your floor as soon as possible.
Construction of bases for sports fields for football and rugby fields
Support the project
Download the database in one archive
Download updates playgrounds (volleyball, basketball, handball, mini-football), tennis courts and fields for field hockey
For the construction of sports fields with artificial coatings use different types of bases. Typically, based on play characteristics, solid bases made of concrete or asphalt concrete.
Substrate Requirements:
- Concrete or an asphalt concrete base is built in the form of a "single roof".
- Recommended base slope - lateral, 0.5%. Slopes along the length of the court are not allowed, since this causes the height level of the game grid to change in relation to supply lines.
- Basic condition - flatness finished cover. The gap under the 3 m rail in any direction must be no more than 3 mm.
- Thickness concrete or asphalt pavement - 10-12 cm.
- Concrete or asphalt concrete pavement must be free of potholes, cracks, protrusions, dirty stains and dust.
Concrete base construction:
grounds.
Zero cycle includes binding, stakeout and topographic survey of the site; development and removal of soil to the dump; preliminary ground planning with slope assignment 0.8-1%; soil rolling with a self-propelled roller until compaction 350-450 kgf/cm 2 . Fine planning of compacted soil with a laser-guided planer or manual ground planning.
2. Laying drainage pipes along the perimeter of the tennis court in accordance with the project.
3. Device underlying layers of the base of sand with a thickness in a dense body of 150-200 mm with shedding water, from crushed granite with a thickness of 150 mm in a dense body, fractions of 20-40 mm and 10-20 mm with thermally bonded geotextile separating layers with overlapping rolls 30 cm.
4. Waterproofing polyethylene film 200 microns, overlapping of film edges at joints not less than 0.5 m. The joints are glued with adhesive tape. Mandatory waterproofing of concrete ends.
5. Laying reinforcement road grid.
6. Concrete works.
Installed and beacon rails are fixed after 2.0-2.5 m. Concrete B 25 (M 300) is laid with a thickness layer 120-150 mm. For grouting concrete surfaces, it is recommended to use zatirochnye (mosaic-grinding) machine type Splitstone. Forbidden “ironization” of concrete, surface repair with mortar compositions. Cannot be applied hardeners and concrete hardening accelerators.
7. Cutting temperature seams.
Temperature seams for the concrete base of the open area are cut with cards, the seams are filled with sealant.
8. Installation of plastic spillway trays.
The construction of an asphalt concrete base involves the following steps:
1. Preparation ground base. Foundation preparation includes the following activities: removal of vegetative soil, soil planning with a given slope (the slope is at least 2.5 cm for every 3 m of length) and sealing. Soil if necessary should be treated with special means for the purpose of sterilization in order to avoid germination fauna.
2. For ensuring reliable stability of the structure on the planned ground a layer of sand, crushed granite, or gravel is laid with a degree of compaction not less than 95%.
First layer - coarse or medium fraction, second layer - fine fraction, the third layer of ASG (screening) of fine fraction.
3. Installation asphalt mix.
Asphalt concrete the mixture is laid in two layers with a total thickness of at least 8 cm (one layer of at least 4 cm). Asphalt concrete mixture is used high-quality, fine-grained, hard. The type of binding agent is bitumen. After the completion of the asphalt work, at least 14 days must elapse before laying the coating - the degassing period. Watering the surface with cold water speeds up the degassing process.
4. Installation of plastic spillway trays.
5. Installation side stones. Additionally, during the construction of a concrete base for sports sites, it is necessary to take into account the installation of embedded elements of various racks, sports ground fencing and foundations for lighting poles.
Unlike other sports fields, based on playing characteristics, solid foundations are not recommended for platforms for rugby and football.
Base requirements:
- Stability and evenness of the base: field slope - less than 1% (recommended slope 0. 5-0.6%), field evenness - ±10 mm above or below the 3-meter rail in any direction;
- Drainage system.
Option No. 1
1. Ground preparation bases:
- binding, breakdown, approximate top survey of the site;
- development and moving the soil to the dump by a motor grader and a forklift;
- preliminary soil planning with a motor grader and a forklift;
- rolling soil with self-propelled smooth vibratory rollers 1.5 t up to compaction 350-450 kgf/cm 2 ;
- processing soil with chemical reagents - sanitation of the soil;
- fine planning of compacted soil with a laser-guided planner or soil planning by hand.
2. Device (cutting) drainage ditches, laying a drainage pipeline with a diameter of 100 mm (ceramics).
3. Installation of permeable membranes.
4. Installation and compaction of crushed stone of granite grade 1200 fraction 20-40 mm in layers of 50 mm with a total thickness 250 mm.
5. Installation and compaction of crushed stone of granite grade 1200 fraction 5-20 mm in layers of 50 mm total 150 mm thick.
6. Installation and compaction of granite screenings (fraction 2-5 mm) with a layer thickness of 50 mm.
7. Installation plastic spillway trays along the perimeter of the field, installation of sand traps.
8. Installation of onboard stones.
Option no. 2
1. Preparation ground base:
- binding, breakdown, approximate top survey of the site;
- development and removal of soil to the dump by a motor grader and a forklift;
- preliminary soil planning with a motor grader and a forklift;
- rolling soil with self-propelled smooth vibratory rollers 1.5 t up to compaction 350-450 kgf/cm 2;
- processing soil with chemical reagents - sanitation of the soil;
- fine compacted pound planning by a laser-guided planner or soil planning by hand.
2. Device (cutting) drainage ditches, laying a drainage pipeline with a diameter of 100 mm (ceramics).
3. Installation of water-permeable membranes.
4. Installation and compaction of crushed stone of granite grade 1200 fraction 20-40 mm in layers of 50 mm total 150 mm thick.
5. Installation and compaction of crushed stone of granite grade 1200 fraction 5-20 mm in layers with a total thickness 120 mm.
6. Installation and compaction of granite screenings (fraction 2-5 mm) with a layer thickness of 30 mm.
7. Installation separating waterproof geotextile.
8. Installation cushioning pad BROCR F24. Substrate provides coating stability, resistance to temperature changes environment, excellent drainage properties.
9. Installation plastic spillway trays along the perimeter of the field, installation of sand traps.
10. Installation of onboard stones.
Use BROCK F24 underlays in the field base system allows to reduce the thickness of the crushed stone "pie" and reduce the total cost tulle construction, including artificial grass cover.

 Builders choose asphalt because it is the usually the least expensive option. These courts are made by mixing stone and tar.
 A multi-purpose court allows you to play multiple games, including pickleball, volleyball and soccer, making your purchase more versatile. Also, this court type survives in hot and cold environments without jeopardizing performance.
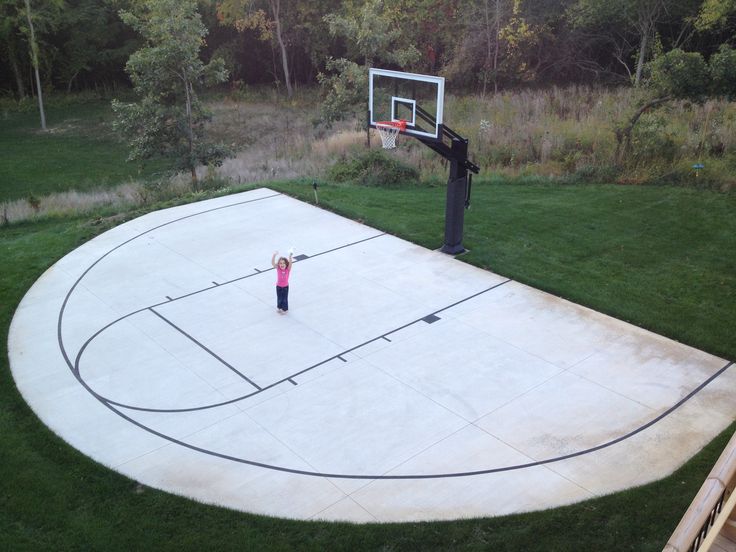 It’s common for different high schools, gyms and recreation centers to have unique court dimensions based on who is using the court. If you’re in the process of figuring out how to turn your backyard into an outdoor basketball court, the dimensions below will be helpful:
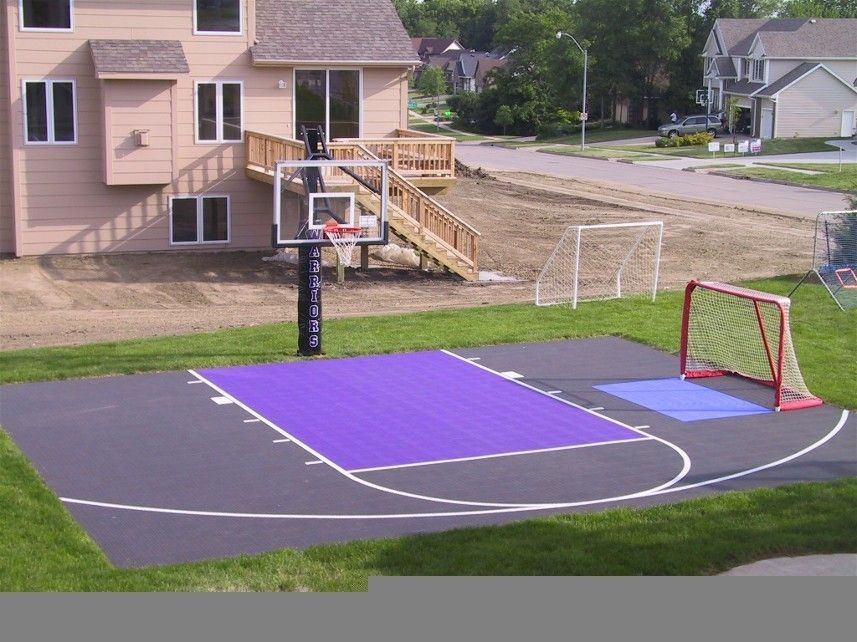 NCAA athletes shoot 22 feet 1 3/4 inches, while High school students shoot three points from 19 feet and 9 inches away.
 How will the court impact existing drainage? How close can you construct in relation to tree lines? Do you have any underground utilities or other obstacles to consider? These are questions that a professional court builder can assist you in answering.
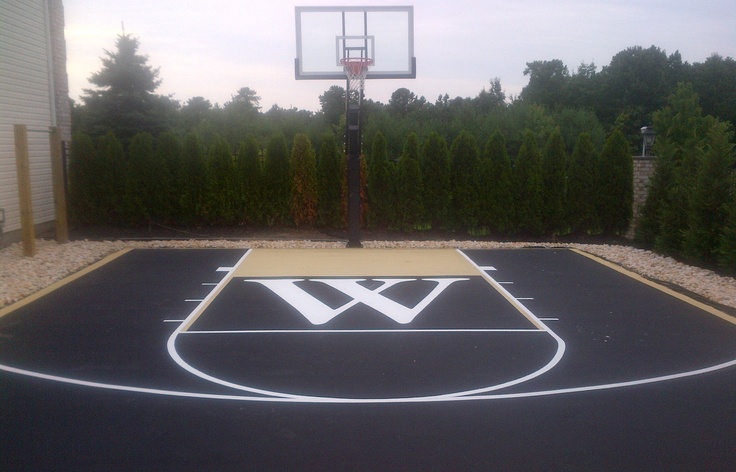
 Sizing can range from very small approx 4m x 6m (24sqm), 9m x 5m (45sqm), 10m x 7m (70sqm) to a 3X3 regulation half court of 15m x 11m (165sqm).
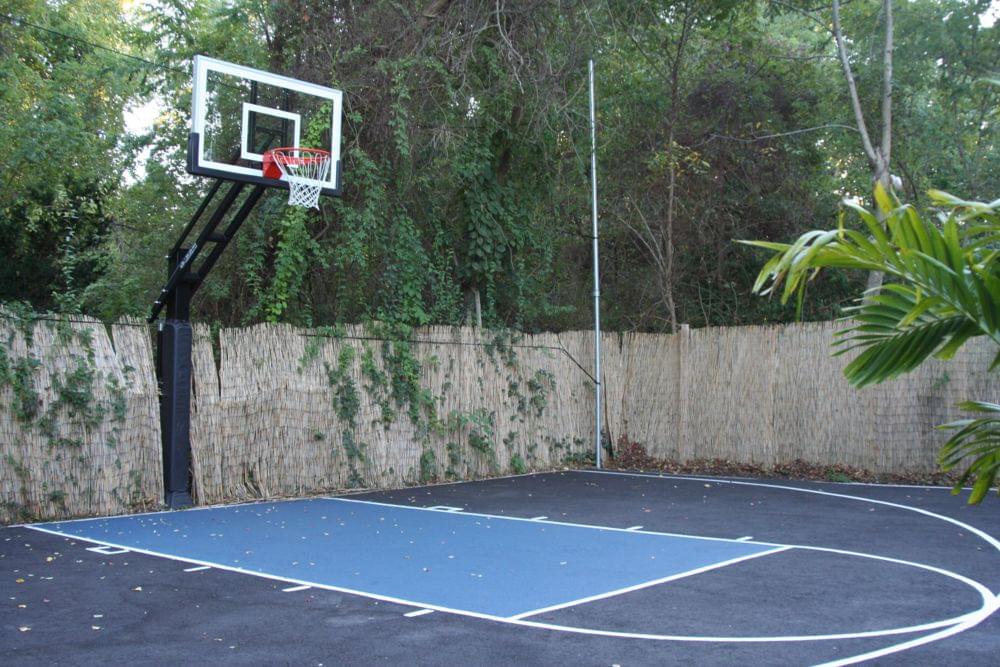 If you require the concrete to be flush with the surrounding ground then you must excavate 115mm below surface level to allow for the concrete slab (100mm) and sports surface tile (15mm). If you are opting for the elevated slab then you may not need to excavate but you do need to remove any grass and level the ground.
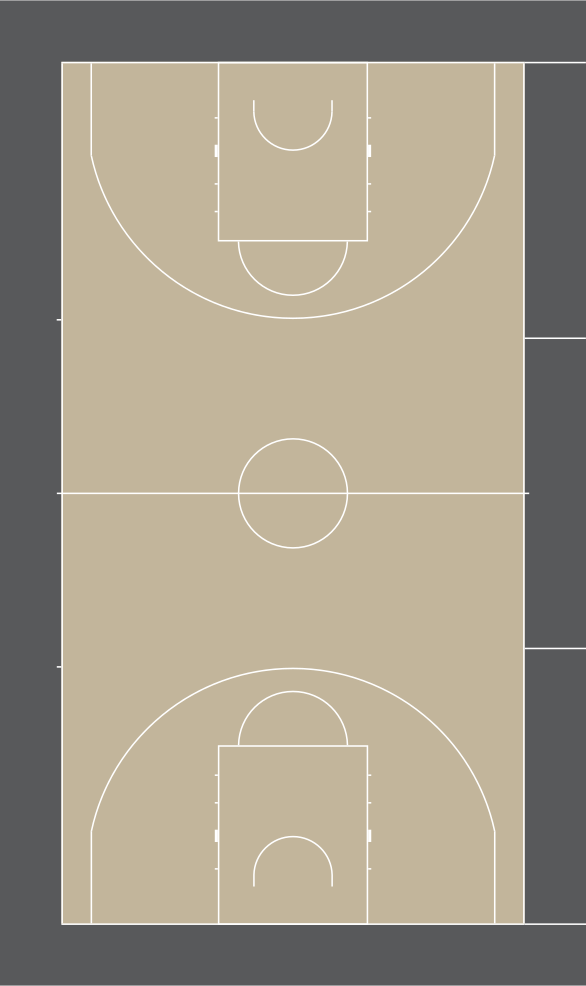 Ensure you have someone experienced with concrete slabs on hand for this step. Plan the concreting for when the weather is dry and allow for 72 hours to let the concrete set.
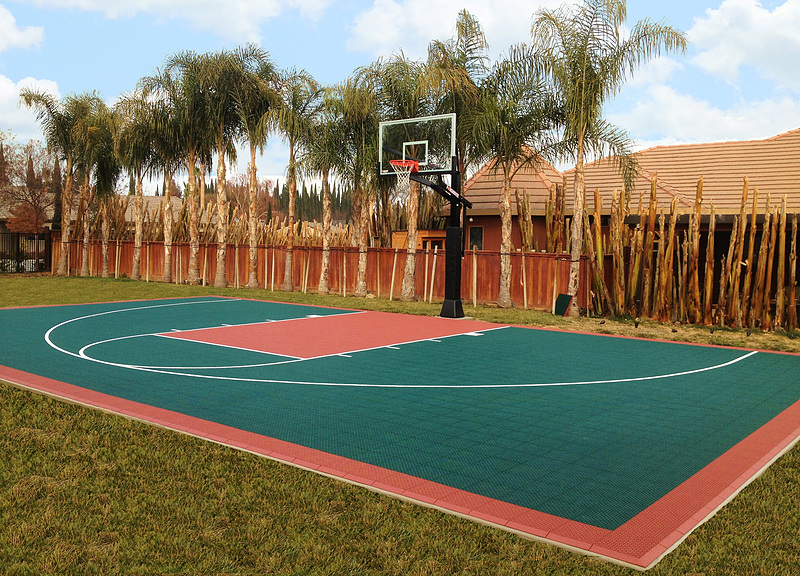 One of them was an old abandoned site on 3 Alekseevskaya Street in Kyiv.
 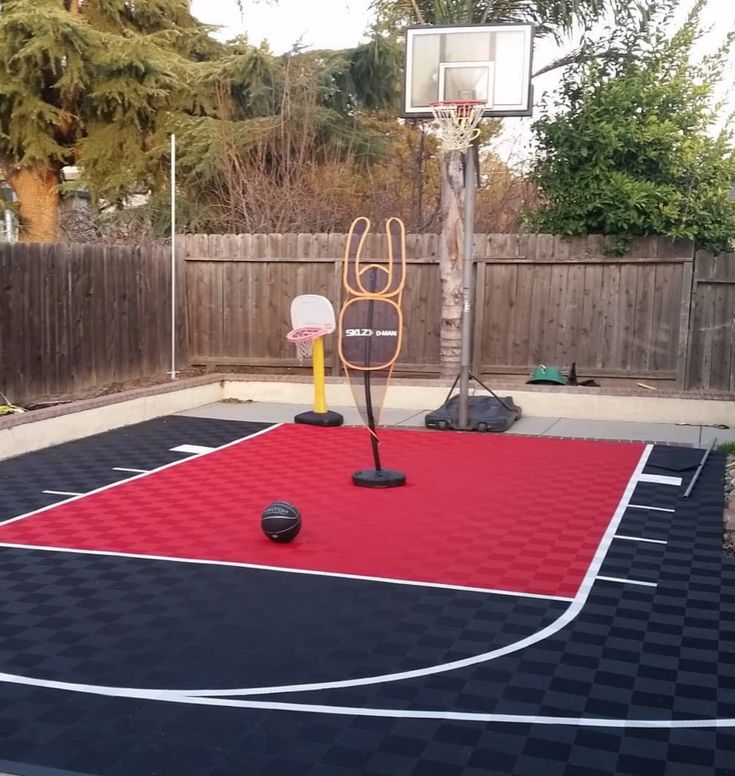 since further a coating of rubber crumb will be made, the thickness of which should be from 9 to 15 mm. The peculiarity of the work was that the site should have a slope of 1.5% in the longitudinal and 1% in the transverse direction, so that the water does not stand on it, but goes down the slope.
 Typically, based on play characteristics, solid bases made of concrete or asphalt concrete.
 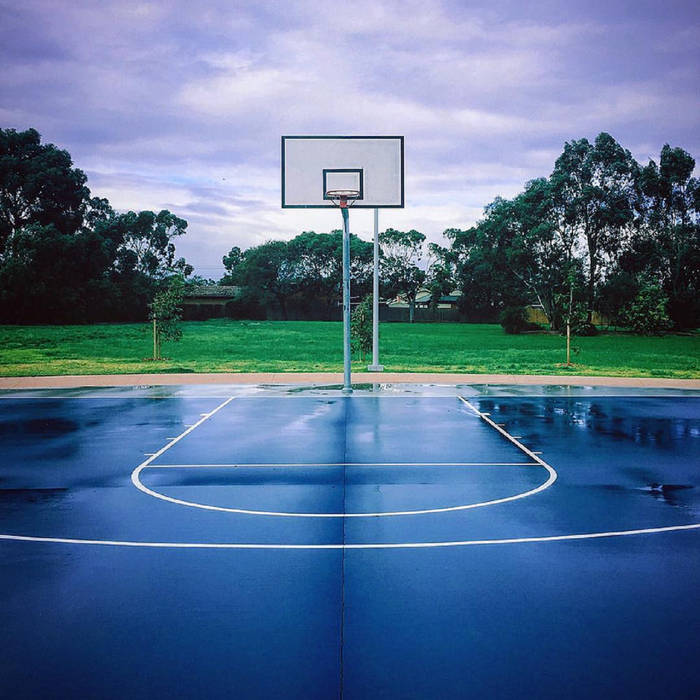 Fine planning of compacted soil with a laser-guided planer or manual ground planning.
  Forbidden “ironization” of concrete, surface repair with mortar compositions. Cannot be applied hardeners and concrete hardening accelerators.
 5-0.6%), field evenness - ±10 mm above or below the 3-meter rail in any direction;