Home »
Misc »
How to always make a basketball shot
How to always make a basketball shot
21 Easy Ways to Improve Your Basketball Shooting Percentage – The Breakthrough Basketball Blog
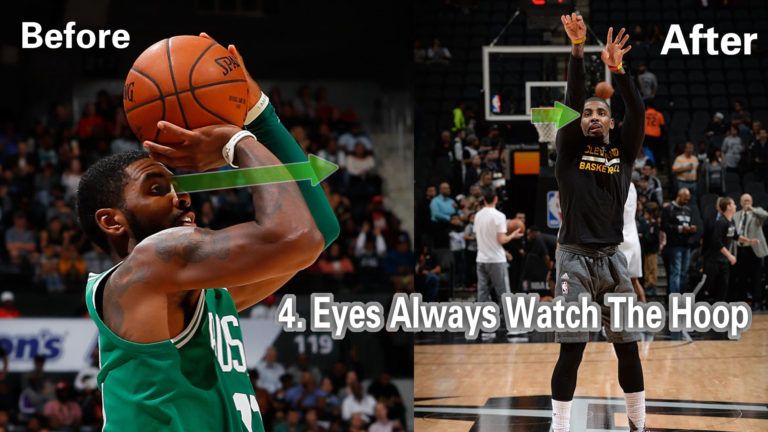
Tip #1 – Locate Your Target (the Rim) Earlier
Getting in the habit of locating your target (the rim) earlier will improve your shooting percentage. Why?
Locating the rim just a split second earlier gives your brain more time to subconsciously calculate distance and focus on your objective. Your eyes should be on the rim as early as possible. To make this little trick work, you need to develop this habit in practice, which carries over into games.
Tip #2 – Always Hold Your Follow Through
You’ve probably heard this a hundred times but there’s good reason for it. Holding your follow through solves a multitude of shooting problems. This simple movement helps you maintain good basketball shooting technique without even thinking about it.
Tip #3 – Finish with a Relaxed Wrist
A common mistake is for players to follow-through with a tense wrist.![]() Your wrist should be as relaxed as possible. Your hand should finish on line and even bounce a little during the follow-through.
Your wrist should be as relaxed as possible. Your hand should finish on line and even bounce a little during the follow-through.
Tip #4 – Use a Colored Ball to Improve Rotation
To improve the straightness of your shot, try a colored basketball during practice. This makes it easy to see the rotation and direction of the ball. The immediate feedback makes it quick and easy for you to adjust and improve your shot.
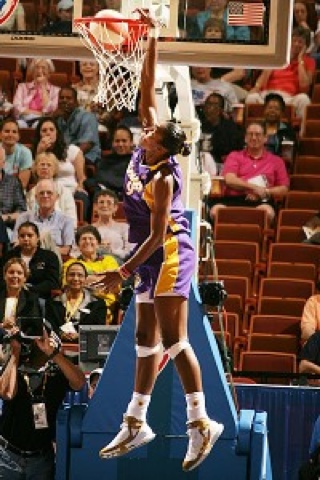
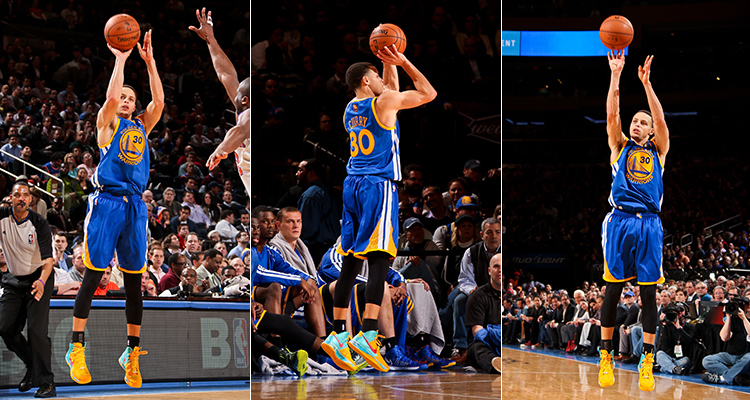
Tip #5 – Don’t Shoot like Kobe (By Hanging In The Air)
TOO many kids try to copy Kobe and end up with bad shots for the REST OF THEIR LIVES!
Youngsters have no business trying to hang like Kobe and shoot. Kobe is a freak of nature! You should shoot as you’re going up (at least 1 inch before you reach the top of your jump). Trying to mimic Kobe’s shot will just earn you a place on the bench and lots of frustration.
Tip #6 – Stop Thinking about Your Shot During Games
One of the worst things you can do is think about your shooting mechanics during a game.
Thinking about your shot is for practice, NOT for games! In fact, you should only think during certain parts of your practice. It’s ok to think during a form shooting session or when learning a new skill, but once you start developing rhythm and get further into practice, don’t think!
During games, train yourself to think about other things or nothing at all.
You’re going to miss a few. So what! Don’t think, just shoot the damn ball!!!
If you adopt this mentality, your shooting percentage will go UP.
Tip # 7 – Eliminate Negative Thoughts with this Simple Trick
Eliminating negative thoughts can dramatically improve your basketball shooting percentage.
To stop thinking and eliminate bad thoughts, you can try this little trick…
Before each game, practice, and shooting session, tell yourself that you don’t care if you make any baskets. Say it out loud or in your head several times.
THEN, when you go to shoot (right as you’re catching the ball), say something to yourself like, “Nice shot.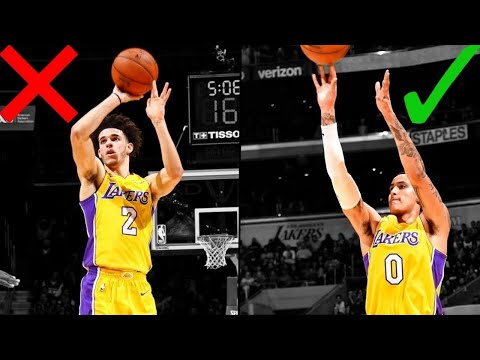 I can do better.” In other words, try not to care if it goes in or not.
This simple little trick helps you to relax into the process and not think about the result. Using this technique will be enough to break you out of mini slumps and restore your confidence.
Tip #8 – Develop Optimal Arc
DID YOU KNOW that a shot with a flat 35 degree arc only has .6 inches of margin for the ball to clear without hitting the rim? The shot has to be almost perfect to get a swish.
BUT a shot with a 45 degree medium height arc has a 3 inch margin of error!
That’s right. Just by increasing the arc of your shot, your margin of error could increase as much as 500%!
How many shots bounce OUT of the basket because you missed by just a fraction?
As a general rule of thumb, finish your follow through with the rim clearly visible beneath the fingers of your shooting hand. That way you will ensure that you have a decent arc on the shot. Shots with proper arch have a much better chance of going in.
Just don’t go too high. Because if your arc gets too high, you’ll loose your distance control.
Tip #9 – Watch DVDs
Simply by watching great shooters groove their shots over and over, you can improve your confidence and form.
The good habits and examples can be contagious. As you watch, the good form becomes ingrained in your mind.
Not to mention, you should never stop learning. There are lots of good shooting DVDs and books for you to learn from.
Tip #10 – Use a Partner to Tune your Shot Alignment
Spend a little time during each practice lined up along a court line about 20 feet from a partner, shooting back and forth and trying to have the ball bounce as close to the line as possible. This simple practice technique will help you to fine tune your control of the precision of your shot.
Tip #11 – Land In Front
Balance is a very important aspect of shooting. You achieve balance primarily through a proper stance and footwork.
After your shot, you should land in front of where you started. You can do this by making sure that your momentum is going towards the basket on every catch. You should also establish good balance from your stance.
Tip #12 – Film Your Shot
You’d be amazed at how filming your shot in both games and practices can help you.
The most common response from players is… “That’s how I shoot!!??”
That’s right. Most players haven’t seen their own shot before. Seeing your shot on film can help you to detect poor mechanics and motivate you to make commitments for improvement. Bottom line– it’s a great way to refine your shot.
Tip #13 – Get a Partner
When possible, try to shoot with a partner. Because when you’re alone, you end up chasing the rebound before following through properly.
This is important. Think about how you practice…
You shoot and then you start following the shot immediately so you can get lots of reps. Guess what? This can mess up your follow-through. You need to FINISH each shot and hold your follow-through. That’s why we recommend getting a partner to rebound for you. Now just because you can’t find a partner you can (and should) still practice by yourself. Just be aware of holding your follow through.
Tip #14 – Fix Bad Habits by Immediately Correcting Your Shot
This is one of the easiest ways to break bad shooting habits. For example, let’s say you forgot to hold your follow-through. Well, immediately after you shoot, raise your hand back up and put your hand in the correct follow-through position. This simple technique will help you quickly correct the bad habit
Tip #15 – Use a Return Device
Using basketball rebounding and return devices can literally double the number of shots you can take in practice. Just think how much time you spend chasing the ball when you practice. A return device solves that problem and lets you take more shots in less time.
Tip #16 – Get To Set
When you catch the ball, you should get the ball to your set position as quickly as possible. This will speed up your shot. Your set point can be anywhere between your hip and your shoulder.
Tip #17 – Don’t Fall for Gimmicks
Too many players spend their hard earned money on shooting gloves and gimmicks, thinking this will make them great shooters.
You can’t use these devices during a game so it really doesn’t do you much good. You need to learn how to shoot effectively without these devices. There is NO magic pill.
Tip # 18 – Keep Your Shot Motion Balanced, Fluid, and Consistent
A fluid motion means that there are no jerky movements or stopping points, just one constant flow from start to finish.
Consistency can’t be stressed enough. Your feet, arms, set point, and jump height should use a consistent motion every time you shoot. All the greatest shooters in the world have amazingly consistent movements.
Tip #19 – Groove 50 Shots Before Every Game
Before every practice and game, face the basket and shoot 50 EASY shots about four to ten feet from the basket.
Not only does this improve your shooting form, but it helps to develop phenomenal confidence.
You’ll quickly become very good at grooving these shots over and over. You’ll see the ball going in the basket over and over. You’ll swish the ball repeatedly and probably shoot 60%, 70%, 80%, or more, which is great for your psyche.
Why do you think that NBA players do this before games? Why do you think that Tiger Woods starts all of his practice sessions by making 100 three-foot putts?
Because it works! Don’t overlook this powerful strategy.
Tip #20 – Quickly Chart Your Shot to Determine Tendencies
Head to the gym and shoot a bare minimum of 50 shots. Ask your partner to chart your shots. The KEY is to chart the detailed results of each shot. You will track how many shots fell short, too long, to the left, and to the right.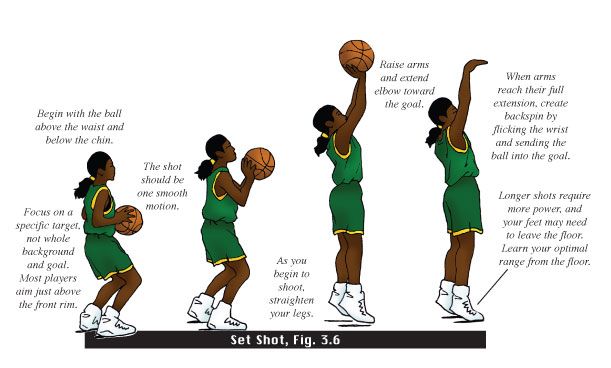 This information will help you to determine what you need to work on.
For example, if you consistently miss short (like many players do), you’ll need to work on your power and distance control. If you consistently miss to the right and the left, you need to fix the mechanics of your foot and/or arm alignment.
Tip #21 – Work Game-Like Movement into Your Practice
To make game shots, you need to practice game shots. You should use good shooting drills and practice movement off screens, cuts, chairs, and pivoting in both directions.
Get to the Gym and Apply What You’ve Learned
There ya go… 21 simple ways for you to improve your basketball shooting percentage. Now get to the gym, apply what you’ve learned, and knock down more shots!!
Recommended Shooting Resources
FREE Basketball Shooting Workouts, Drills & Guide
Baden 28.5″ Shooting Basketball
Baden Heavy Training Basketball – 29.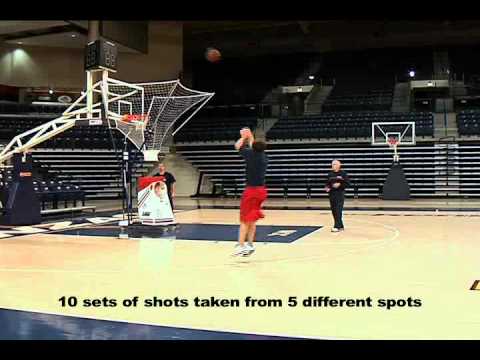 5″
5″
Baden 35″ Oversized Training Basketball
Proper Basketball Shooting Technique, Fundamentals, Form, Mechanics
By Jeff Haefner
Home > Player > Basketball Skills > Shooting > Proper Basketball Shooting Technique, Fundamentals, and Form
It's often said that great shooters have a place on any team.
Even if you aren't blessed with tremendous speed, strength or athleticism, great shooting is one of the surest ways you can stand out on the basketball court.
If you spend the time developing and practicing your shot, it will pay off in:
- Making the team
- Getting more playing time
- Scoring consistently
- Feeling confident and having fun every time you step on the floor
Now, let me start with some good news!
Yes, you do need very good shooting form and technique to shoot consistently well.
But it does NOT need to be "perfect".
If you watch enough great shooters, you'll see that their form varies quite a bit based on what's comfortable (and what works) for them.
But almost all great shooters follow the principles I'll explain in this article. So keep reading for (all the good stuff)!
In this section, we give you the raw form and mechanics of stationary shooting.
In other words, this section does NOT address the fundamentals of shooting on the move and more advanced footwork you'll need for game situations.
Here's a quick roadmap of the stationary shooting fundamentals that we'll be covering:
- Eyes on Target
- Stance and Balance
- Shot Pocket
- Grip
- Balance Hand
- Delivery
- Upforce and Landing
- Follow Through
- Correct Shot
EYES ON TARGET- To improve accuracy, locate the target (rim) as early as possible.
 - Keep your eyes on the target and do not follow the flight of the ball.
- Keeping your target focus is very important!
|
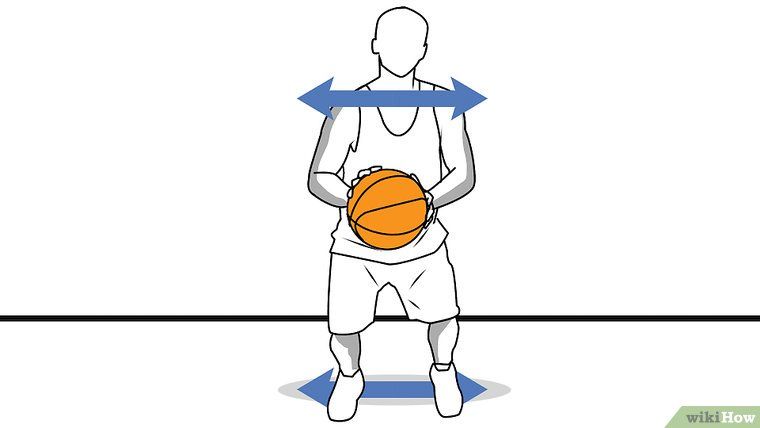
STANCE AND BALANCE- Feet are shoulder width apart for good balance.
- Feet should be in a slightly staggered stance that is consistent and comfortable for you. Your shooting foot is slightly ahead of the non-shooting foot in a comfortable position.
- Point your feet in the general direction of the basket, but not necessarily directly at it. We prefer an open stance, but you can also use the closed (squared) stance if that's more comfortable for you. With an open stance, your feet point towards one side of the basket. For example, a right handed shooter will point his or her feet just to the left of the rim for a more natural position and shooting motion.
- Once you develop a comfortable stance, line up your feet the exact same way on every shot.
-Step-5.jpg/aid43486-v4-728px-Play-21-(Basketball)-Step-5.jpg) Whatever stance you use, consistency is critical. Whatever stance you use, consistency is critical. - Flex/bend your knees on every shot.
|
SHOT POCKET- As you catch the ball, move it quickly into the shot pocket.
- Line everything up so the ball and your shooting eye form a straight line to the basket. This is VERY important.
- Position the ball several inches above your waist.
- Grip the ball properly and be ready to shoot.
- Position the ball in your shot pocket the SAME way every time you catch it.
|
GRIP- Place the air hole between the middle and index fingers.
- Line up your fingertip pads parallel to the long seams of the ball, so you can monitor the back spin.
- Leave space between the ball and the middle of your palm. You should be able to insert a pencil between the ball and your palm area.
|
|
- Spread your fingers far enough apart to comfortably balance the ball in one hand.
 - The ball should sit on your finger pads.
|
|
BALANCE HAND- Your non-shooting hand should be on the side of the ball.
- Your balance hand should not add force or spin to the shot.
|
|
- Your non-shooting hand should not move on delivery and should ALWAYS come off the ball FIRST.
|
|
DELIVERY- The ball should start motion directly upwards from the shot pocket.
- Your elbow should be positioned comfortably under the ball.
- The ball stays in front of you and should not go behind your head.
|
|
- Uncoil your body with your legs, core, and arm power all coordinated.
- Your elbow and wrist should extend in a straight line to the basket.
|
|
- Your shooting hand should extend in a straight line to the rim.
- Hand position on delivery is very important. The ball should come off the hand with perfect symmetrical backspin.
- As shown in the picture to the right, your guide hand stays to the side and does not influence the flight of the ball.
|
|
UPFORCE AND LANDING- Release the ball on the way up, just before the top of your jump.
- Use your legs to generate upforce.
- You should land in the same spot that you jumped, which shows that you have good balance on your shot.
|
|
FOLLOW-THROUGH- Your wrists should be floppy (relaxed).
- Fingers should be pointed at the target (rim).
- Finish high. You should see your fingers at the top square of the back board.
- Hold your follow through position until the ball hits the rim.
|
NOTE: If youd like specially-designed workouts for shooting and scoring, download our FREE Breakthrough Shooting Workout. It includes over 30 drills you can do by yourself or with a partner all you need is a ball and a hoop!
Click here to get your FREE Shooting Workout.
Related Products & Helpful Resources
Basketball Shooting Camps
Free Basketball Shooting Workouts
Basketball Workout App - Shooting Workouts, Guard Play Workouts, Post Workouts, etc.
Basketball coaching hacks: how to score goals for beginners
Even if you are a novice basketball player, we will not give you a training plan, but we will tell you why the ball flies anywhere but into the ring and into your hands.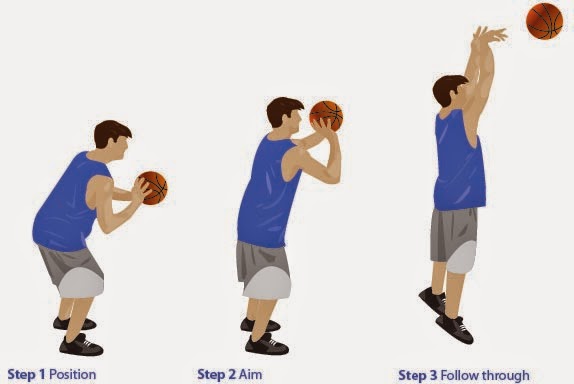 It's all about technique: even with regular training and perseverance, novice adults and children often make simple mistakes. It's a shame, let's fix it. Below are 11 life hacks on how to hone your technique to increase the likelihood of a goal for your team.
Basketball Shot Rules for Beginners
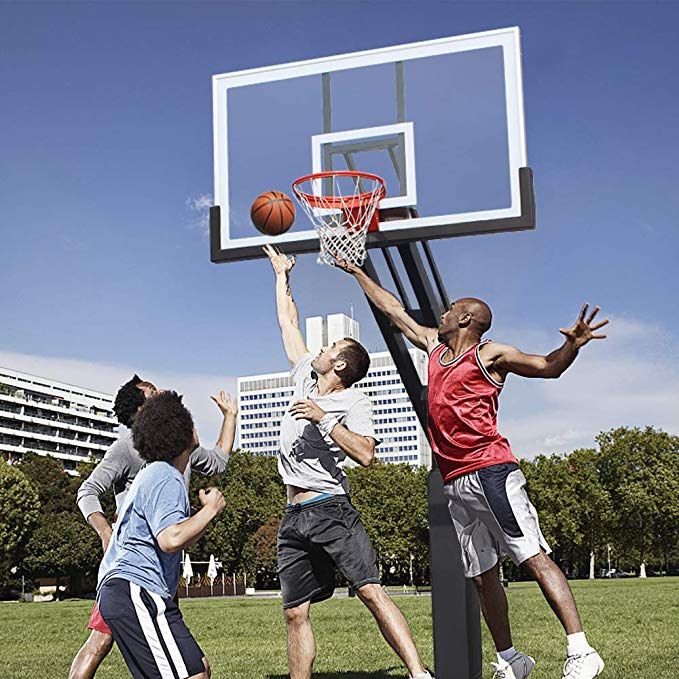
1. Hands up
In pursuit of the attacker, raise your hands, even if you are standing with your back to the pass, and even more so if the ring is in front of you. Your raised hands will increase the chance of intercepting the ball from the opponent by 2 times. Don't overlook this little thing!
2. Make shield rolls
Even Tim Duncan did not neglect them! A square is drawn on the basketball backboard. If you are standing opposite the ring, then aim at the middle of the upper part of the square, if you are standing on the side, then at the corner. If you hit this square, then the ball is at 90% of cases will fall into the ring. The law of physics and no cheating!
3.
Look at the ring, not at the ball
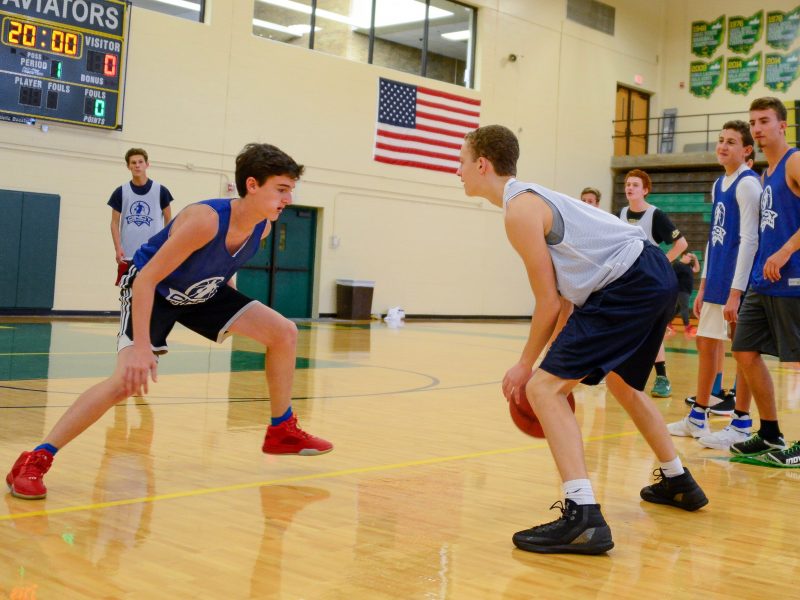
Practice driving the ball with your hand, not your eyes, develop tactile control. Your eyes should be on the hoop while dribbling and be aware of the position of your body in relation to the hoop. Then you will be able to take the correct posture, and the throw will be effective.
4. Dribble with the balls of your fingers only
The palm should not touch the ball, only the pads of the fingers. Dribbling should become familiar to you, like an extension of your hand. Then you can change its trajectory at any time and you will have more chances to score goals. Practice with the ball constantly.
5. Throw with one hand
If you throw the ball with two hands, you reduce the chance of hitting the basket. All the efforts of the throw are in one hand (in the right for right-handers, in the left for left-handers). The other hand only holds the ball, the leading one holds it with the fingers, not the palm.
6.
Do not jump when protecting the ring
Jumping is the main mistake of rookie defenders. To intercept the ball and block the shot, simply stick out your hands. When you are in a jump, the attacker will easily bypass you.
7. Don't look back
When you dribble, don't look back, but dribble and aim for the ring, focus on shooting (or passing to another player on your team).
8. Bring the throw to automatism
Incorporate the most basic basketball techniques into your training plan and bring the shot to automatism. Throw first from a distance of half a meter from the ring, gradually increasing it. Learn to throw the ball so that it hits the hoop without touching the edge.
Throw the ball with all fives and jump
Throwing Rules:
- Head in the center of the body - if tilted, accuracy is lost.
- Look at the ring: mentally build a trajectory. If you are far away, the ball flies in a curved curve with a maximum height of 2 meters above the hoop.
- A strong hand is in front and throws, a weak hand is on the side and directs, only holding the ball. The elbow of the throwing hand must be in line with the ring.
- The ball must rest on the fingers without touching the palm. The fingers are as far apart as possible and grab the ball.
- Throwing arm bent 90 degrees, forearm perpendicular to the floor. If you bend less, then you get not a throw, but a throwing of the ball horizontally.
The main thing in the throw is the position of the body and its balance. Place your feet apart and parallel to each other: it is important to orient them in the middle of the basket. Then the direction of the body during the jump will coincide with the direction of the throw, and the ball will fly straight into the ring. When the feet are uneven, the ball flies in the wrong direction or does not reach (although the throw was normal).
Take a deep breath and release as you exhale.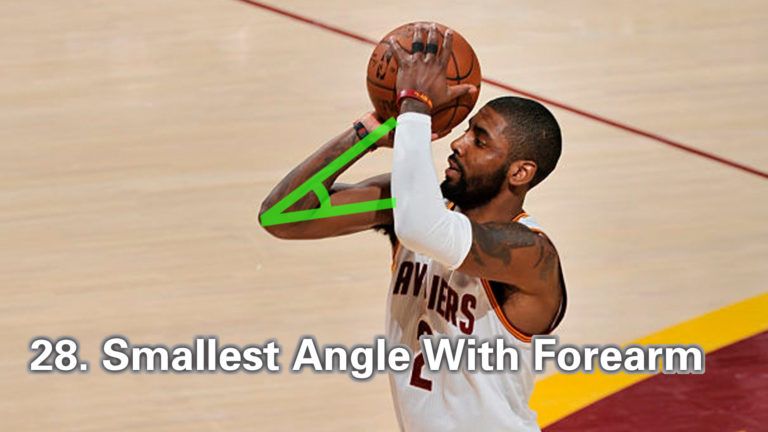
How to hold the ball and shoot in basketball
How to throw correctly: straighten your arm, point your wrist up, and with your hand set the ball to rotate in the opposite direction from the flight. The ball should seem to "roll" off your fingers.
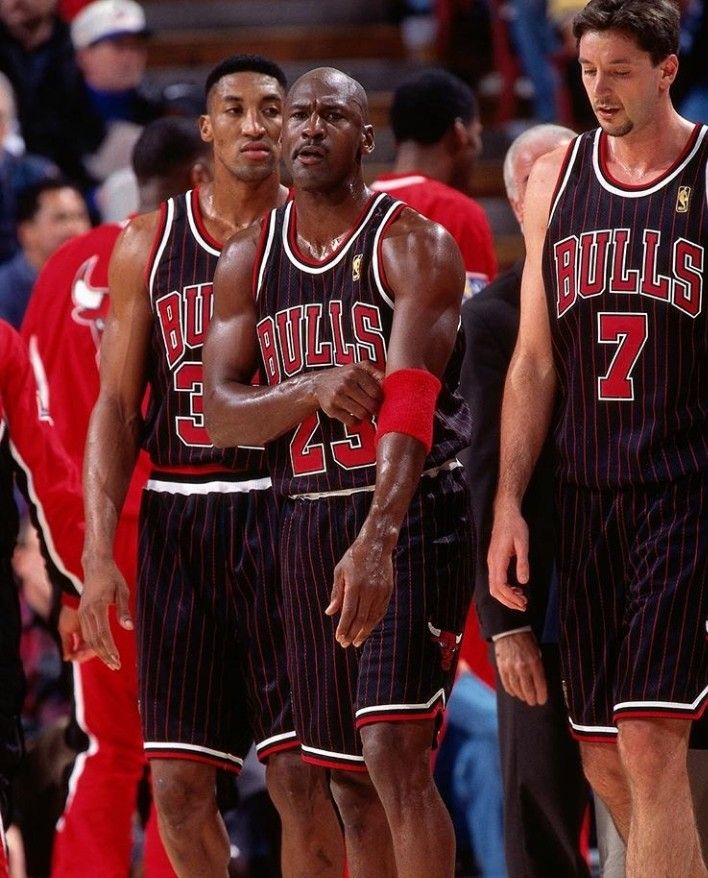
9. Copy masters and play as a team
Watch professional basketball games and try to copy the movements of your favorite players in training. And be sure to conduct game sparring - this will allow you to develop more techniques.
10. Do not throw in a straight line
The higher the arc of the ball, the greater the chance of a goal and the less chance of blocking by the opponent.
11. Do not throw the ball from a full height stand
This is the biggest newbie mistake!
Before the throw, bend your knees slightly and at the moment of the throw, straighten your body, making a jump. You need to straighten up and push off the ground at the same time. When squatting, keep the elbow of the throwing arm close to the body and towards the ring.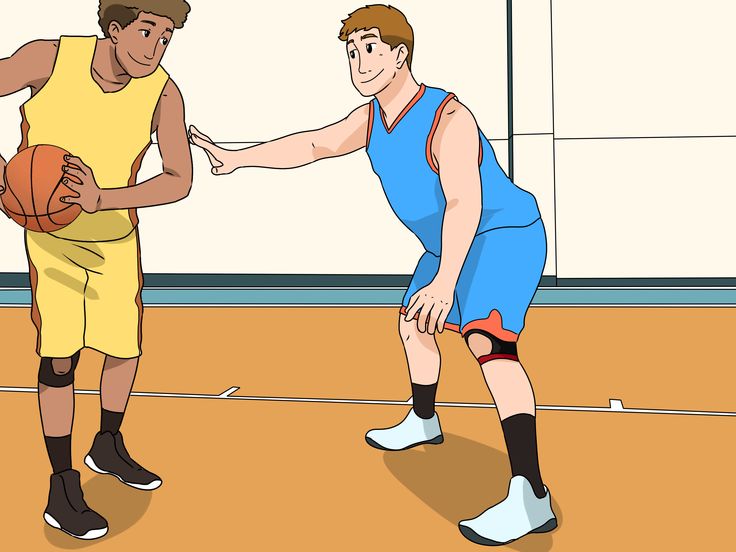
The jump will give momentum to the ball and will allow you not to make sudden movements with the brush.
***
And to be a long-term player, do not forget about your health: take care of your joints and muscles, use tapes, do a warm-up. And be sure to strengthen your arms, legs and shoulder girdle, develop coordination. Regular exercises on uneven bars and horizontal bars will help you with this.
Shooting exercises
replica swiss watches
Basketball is a great team game, the team consists of players whose skill is achieved by great effort. The only person who can understand that you are working hard is yourself. Remember, you only get out of the game what you put into it. Give yourself to her without a trace.
Jump shot
In basketball, an outstanding sniper is a piece item. If you want to be a great sniper, all you need to do is just want to be one.
First, you must improve your craft.
This includes having a good coach and years of training. Secondly, you must improve in game mode.
This means that you must perform throwing drills at the same intensity as in the game. It's far better to hit 100 shots in play than 500 sloppy shots that a good defender would never let you make in a game. Finally, you must understand that working on a roll is like investing in a bank. If you don't deposit anything into your account, you won't receive dividends when you need them.
The sniper must have "throw school". When throwing after a dribble, one of the main features is the last hit of the ball on the court, which must be fast and strong so that it bounces higher, right into your hands - this will help you not waste time handling the ball.
Individual Shooting Exercises
Exercise 1 Attention Concentration
- Start from a distance close to the ring.
- Throw with one hand. Follow correct technique.
- Make five from each position.
 Take a step back and repeat (Fig. 1).
Exercise 2 7 throwing positions and rebound (4 meters)
- Jump shot from position 1.
- Pick up the ball, dribble quickly to position 7, shoot.
- Pick-up, fast with guiding back to position 1.
- Make 10 rolls.
- Repeat the same steps using positions 6 and 2, 5 and 3, 4 (Fig. 2).
Exercise 3 7 shooting positions and a rebound (from behind the three-point line)
1. Repeat the same steps as in exercise 2 (fig. 3).
Exercise 4 Throw after stop
- Start from position 1, toss the ball to position
- Pick it up, while you have to run around the ball so that you are facing the ring.
- Make 10 rolls, then advance to the next position.
Ex.5 Shooting from five positions after a fake move (from four meters or from behind the three-point line)
- Start from any position.
- On bent knees and with your head up, you do a throw feint, hit the ball one or two with your right hand, stop and jump.
- Return to position, throw feint, one or two hits with the ball with the left hand, stop, throw.
- At each position, 5 attempts (Fig. 5).
Exercise 6 Jump shots after dribbling
- Start the exercise from the center of the field, move to the hoop with dribbling at game speed, after stopping quickly shoot.
- The shot must be taken from a middle distance or from behind a three-point arc. Perform the exercise, both on the right and on the left and in the middle of the site.
- Use different types of dribbles: fast dribbles, broken tempos, pivots, etc.
- Make 5 attempts in each direction (Fig. 6).
Exercise 7 Playing with a virtual opponent
- Make a free throw. If you have implemented it, you get one point. If not, then your "opponent" is three.
- You make subsequent throws from any position except the three-second zone, imitating the rhythm of the game. Work on different moves and throws. Each of your successful attempts is estimated at the bottom of the point, unsuccessful at two for the "opponent". The game goes to 11 points.
- This is a very good exercise to consolidate what you have learned. Try! Improve! (Fig. 7).
Double shots
Dr. 8 2 players, shot and rebound (4 meters or from behind the three-point line)
- Drill starts with a good, clear pass. The player who made the pass from under the basket goes to the place of the thrower.
- The player in position 1 catches the ball and shoots.
- After the throw, the player runs to the rebound and then passes the ball 1 position and so on.
- Each player must make five rolls. The exercise is performed at a fast pace, but the throws should not be sloppy.
- Then the transition to another position and everything is the same (Fig.
 8).
8).
Exercise 9 Two players, throw and rebound (per result)
- The exercise is performed as described above.
- The player who made the pass tries to interfere with the shot, but does not block.
- Game up to 5 hits.
- Then we move to another position, and so on. (Fig. 9).
Exercise 10 Two players, throw and rebound, throw feint
- The exercise is performed in the same way as the previous one.
- The defender who made the pass tries to interfere with the player in position 1, but does not block the shot.
- The attacker makes a throw feint and beats the defender.
- Performs a short dribble, stops and throws.
- Do 5 times each and change position (Fig. 10).
Ex. 11 2 players, shot after a stoppage (from four meters or from behind the three-point line)
- The forward is in position 1, ready to receive the pass.

- The player under the basket passes.
- After the throw, the attacker waits for the rebound to be made.
- The player receives a pass by making a stop, but already in position 2. Then back.
- Make 7 throws, two free throws and switch (fig. 11).
Ex. 12 Moving shots (from four meters or from three-point arc)
- Attacker moves around the perimeter at game speed.
- A player passes to the hand farthest from the ring.
- The attacker must stop, catch the ball and throw.
- Make seven throws, two free throws and change (fig. 12).
Note: The previous exercise has three options.
A) Receive the ball and throw it.
B) After receiving, throwing feint, dribbling in the same direction, throwing.
B) Receives a pass, throw feint, dribbling to the ring in the other direction, stop, throw.
Ex.13 Various dribbling options and a jump shot
- The attacker starts from the center of the field and, dribbling at game speed, moves towards the ring, stops and takes a jump shot.

- The player under the basket picks up the ball, the attacker runs to the center of the field, and receives the ball on the opposite flank. Moves with dribbling to the ring, stop, jump shot.
- Right side dribble with right hand, left dribble with left hand (fig.13)
Note: Use speed dribbling, change of pace, transitions, pivots.
Three players, two balls
Exercise 14 Warm-up exercise
- One player throws, another passes, a third rebounds.
- Thrower becomes rebounder after seven tries.
- Passer - thrower. Picking up - passing (Fig. 14).
Note: different options are possible
1) From seven positions (four meters)
2) From seven positions (from behind the three-point arc)
3) From five points with feints to shoot
4) Throw after stoppage
5) Throw and rebound (constant rotation around the circle)
Double shots: using screens
To use the screen effectively, you must read the defender correctly.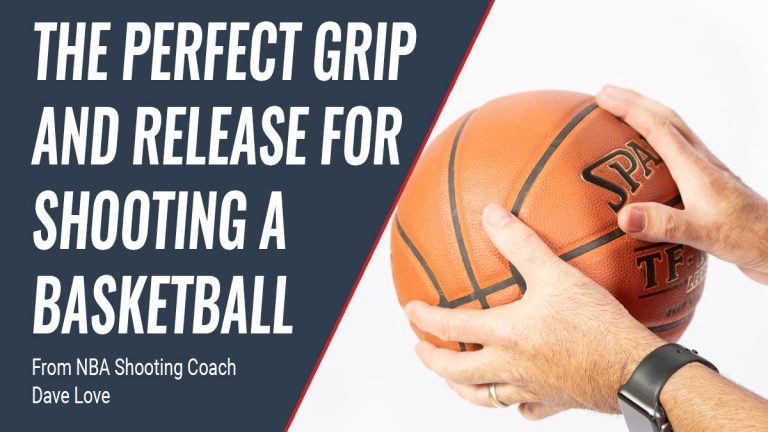 You must always see the player with the ball and how the defender defends against you. A player who moves well off the ball and knows how to use screens correctly is very useful offensively. When you watch a match that has good players, notice how well they move off the ball. The hardest thing to defend against is a well-moving attacker.
Exercise 15 Back screen and snatch
- The player imitates opening and screening behind his back, makes a dash to the corner of the court.
- Throw to the nearest hand.
- Attacker catches the ball and shoots.
- The attacker picks up his shot, passes to a partner and returns to his original position.
- Make seven attempts and change (Fig. 15)
Note: do not back away when dashing, turn and run, but do not lose sight of the ball.
Exercise 16 Screening behind the back, "false" screening
- 1. Attacker starts on the base of the trapezoid and moves up to simulate a screening.
- 2. After the imaginary breakout runs, the screening attacker rises to the ball and prepares to receive the pass.
- 3. Having caught the pass, he immediately makes a throw.
- 4. Make seven attempts and change (Fig. 16).
0003
- An attacker imitates a defender aiming for a screen and rises sharply towards the ball.
- The player must be ready to receive the ball.
- The attacker catches the ball and makes a quick throw.
- Make seven attempts and change (Fig. 17)
Exercise 18 Screening the ball carrier, moving away from the ring
- The attacker screens the ball carrier.
- The ball carrier passes through the screen aggressively.
- Instead of pulling back to the basket (deuce), the screening attacker moves away from the basket and prepares to receive the pass.
- Having caught the ball, he immediately makes a throw.
- Make seven attempts, then switch.
Exercise 19 Barrier at the base of the trapezoid - opening to the flank
- The attacker takes the player under the ring, breaks shoulder to shoulder through the barrier and makes a dash to the flank.
- When catching the ball, the player must turn to the ring.
- Use different throw options: just throw, and dribbling to the right or left after a throw feint. Change after five attempts (Fig. 19).
Exercise 20 Barrier at the base of the trapezoid - opening into the corner of the court
- The attacker leads the player into the three-second zone, pretends that he will break through to the flank through the barrier, the defender starts running around the shielder through the three-second zone.
- An attacker makes a dash to the corner of the court, and the defender hits the screen.
- Next, the same as in the previous exercise (Fig. 20).
Exercise 21 Screen at the base of the trapezoid - dash inward
- The defender is chasing you, not falling behind until the very screen.
- Then you run through the screen as close to the screener as possible and break into the three-second zone or foul line area.
- Receive the ball by turning towards the hoop and throw it.
- Also work out various options for continuing after receiving the ball. After five attempts, change (Fig. 21).
Throws in pairs: pass and discount
Exercise 22 Pass and discount - starting from the center of the field flank.
The receiving player is opened for the transfer. Player receives a pass and shoots. The player who made the pass picks up the ball and gives it to the thrower. Players change roles. Everyone makes ten throws (fig.22).
Exercise 23 Pass and discount - start from the flank
Variation of exercise 22 (Fig. 23)
Exercise 24 Pass and discount - start from the corner of the site one more
exercise 2
more variation 3 .