Home »
Misc »
How to build a basketball hoop out of wood
How to build a basketball hoop out of wood
How to Build a Basketball Hoop Out of Wood
Building a basketball hoop out of wood is relatively inexpensive, requires only moderate woodworking skills, and can provide years of fun and excitement when completed. The nice thing about basketball hoops is that they are a standard size on all levels of play. While youth leagues often lower the height that the hoop suspends over the court, the backboard and rim continue to be uniform throughout all levels. Here is a step-by-step guide on how to build a basketball hoop out of wood.
Cut a wooden board to the dimensions of 6 feet horizontally by 3.5 feet vertically. This board will serve as the backboard. This is the standard size of a basketball hoop backboard, although it can be reduced, or even rounded off at the top corners to fit any size restrictions.
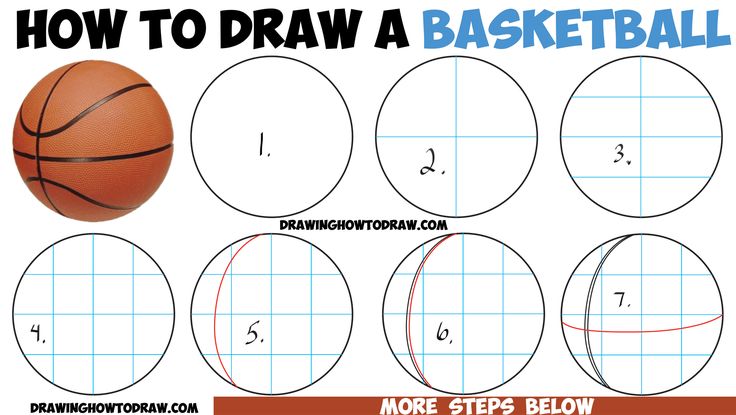
Take a piece of wood at least 20 inches long and wide, and 3/4 inches thick. Using a ruler and compass, select a center point on the piece of wood and draw a circle 18 inches in diameter.![]() Using the same center point, draw a second circle that is 18.75 inches in diameter. These two circles provide the outline for the rim of the basketball hoop. Cut along the two lines using a jigsaw.
Using the same center point, draw a second circle that is 18.75 inches in diameter. These two circles provide the outline for the rim of the basketball hoop. Cut along the two lines using a jigsaw.
Use a power sander, or sand paper if you prefer, and round the edges of the rim to create a cylindrical shape approximately 5/8" in diameter. Do not sand too much off the inside of the rim, as the hole inside the rim should be 18 inches in diameter at all points. Once complete, screw the rim onto the 6"x6" block of wood at the top of the square so the top of the rim and the top of the block are level. Once this is complete, you can make a diagonal cut in the block to eliminate the protruding corner if you wish. This is not required, but may keep the ball from taking odd bounces after passing through the net.
Attach the rim and block to the backboard. The rim should be positioned in the horizontal center of the backboard, with the 6"x6" block aligned to the bottom edge of the backboard. This setup allows for the required 6 inches of separation between the edge of the rim and the backboard. Using a ruler, draw a 2-inch-thick square centered directly above and touching the 6-inch block. This square should be 24 inches horizontally and 18 inches vertically. Paint the square outline in a solid color. Traditionally, white, orange, red or black is used.
Measure exactly 10 feet from the ground, where you plan to mount your basketball hoop. Mounting on a garage or barn provides stability, but mounting on a pole that is cemented into the ground provides flexible and will not damage your house. Decide where to place the basketball hoop, then secure mounting brackets to the back of the basketball hoop using nuts, bolts and washers. The location of these fasteners will depend on where you decide to mount your hoop. Attach a basketball net using tiny hooks screwed into the bottom of the basketball rim. Position the hooks around the bottom of the basketball rim to match the basketball net accordingly.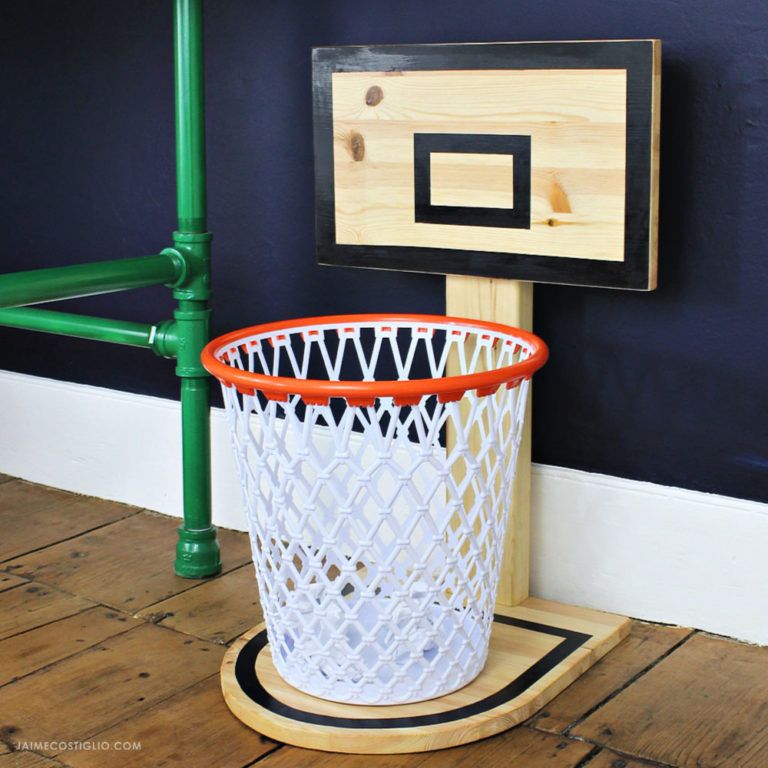
Tips
If mounting on a garage, be sure the basketball net hangs clear of the garage door. Having a net get caught in the door can be dangerous.
Before mounting the basketball hoop, considering spraying it with a heavy layer of water seal protection. The hoop will be outside in the elements year-round.
How to Build a Super DIY Wood Basketball Hoop in Hours!
Our DIY Reclaimed Wood basketball Hoop was incredibly easy to make & only took a few hours to build for just the cost of a basketball rim. Sharing all of our tips & tricks for how to make an awesome DIY wood basketball hoop with pictures. It’s a hit with our kids for those home bound rainy days when they are stuck indoors!
Table of Contents
DIY Reclaimed Wood Basketball Hoop
*this post contains affiliate links for more information check out our disclosure page here*
Hands down our family’s favorite sport is basketball.
With the kids home this Spring & so many rainy days to come we decided to make an indoor DIY wood Basketball Hoop for our new home gym/ office.
With most of the furniture out of the room, thanks to our new bookcase turned entertainment center (see that here) we have plenty of room for the kids to let out ALL this extra energy they have!!!
Although our basement ceilings are low (7 feet), we decided it would still be fun to make the kids a DIY reclaimed wood basketball hoop since they love playing basketball together & can’t play outside when the weather is bad.
Supplies Needed for a DIY Wood Basketball Hoop
Our DIY Basketball Hoop Backboard Dimensions are 27″ inches high & 44″ wide.
- Reclaimed Wood for Basketball Wood Backboard
- Saw to Cut the Wood to Size
- Basketball Hoop (we purchased this one Here)
- Spray Paint
- Scrap Wood to Secure the Wood Basketball Backboard to the Wall
- Screws & Screwdriver
How to Build/ Make a DIY Wood Basketball Hoop in 4 Steps…
Step ONE – Creating the Wood Backboard for the DIY Basketball Hoop
Jason had some leftover wood from our former dining room church pew (see that here) that there had been some controversy over.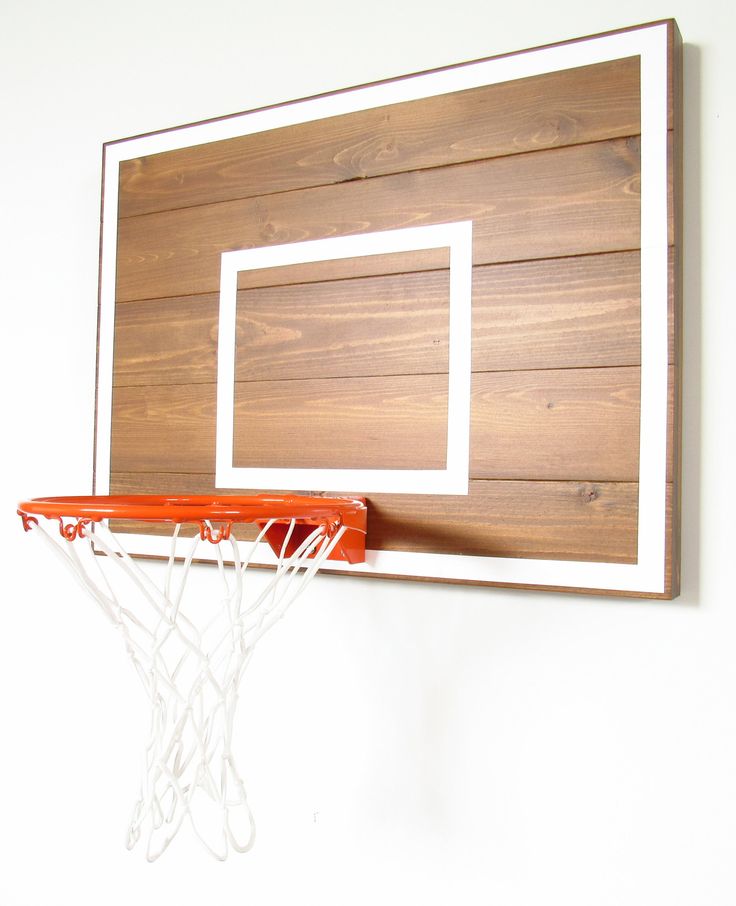
Long story short, I wanted to keep the church pew & Jason wanted to build benches for our dining room instead.
Jason won & he built 2 benches to replace the pew.
However, I do have to admit that I love the character the old reclaimed wood from our former church pew gives to both the DIY wood basketball hoop backboard as well as our bookcase/ entertainment center.
Our custom DIY wood basketball hoop backboard is a bit smaller than regulation size so we could fit it in our room. Jason cut the reclaimed wood boards for the backboard to be 27 inches high and 44 inches long.
Once the pew boards were cut to the same length Jason attached some spared oak boards to the attach to span any board seams and hold the boards together.
Step TWO – Painting the White Square on the Wood Backboard
Once the DIY wood basketball hoop backboard was together Jason painted on the white square with the same spray paint we used for Audrey’s nightstand & desk.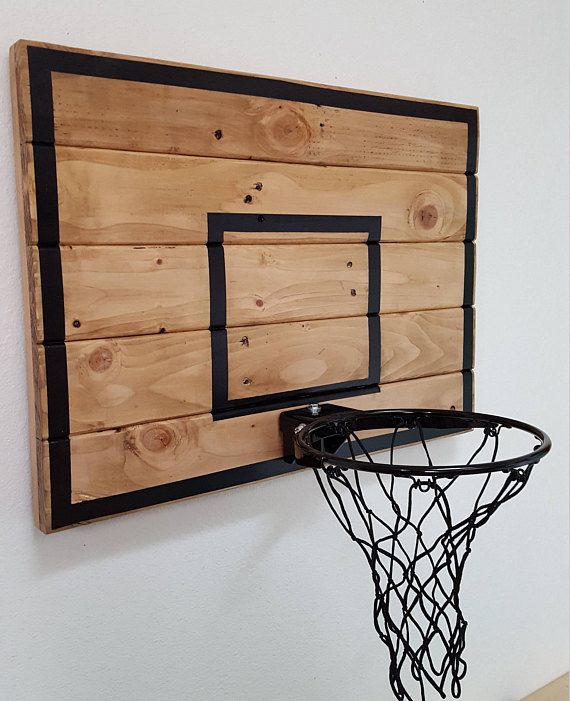 (see those makeovers here)
Printer paper & masking tape did a great job creating the perfect square for our wood basketball hoop with spray paint.
Step THREE – Securing the Basketball Hoop Wood Backboard to the Wall
To secure something heavy to a wall a good method is to cut 2 boards at a 45 degree angle the length of it.
You can then attach one board to wall securely finding the studs to screw into such that it will receive the similar board attached to the backboard and draw it into the wall.
For the DIY wood basketball backboard Jason doubled this up and did 2 boards on the wall and 2 boards on the back of the backboard.
Measure carefully to space out the angled boards appropriately that are attached to the wall and the angled boards attached to the back of the wood basketball hoop backboard.
Once these are attached you should just be able to lift the backboard up to the wall and set it in place.
Jason found that the backboard rattled when a ball bounced against it more than he liked so he also put 2 screws through the front of the wooden backboard to the wood he had already screwed into the wall.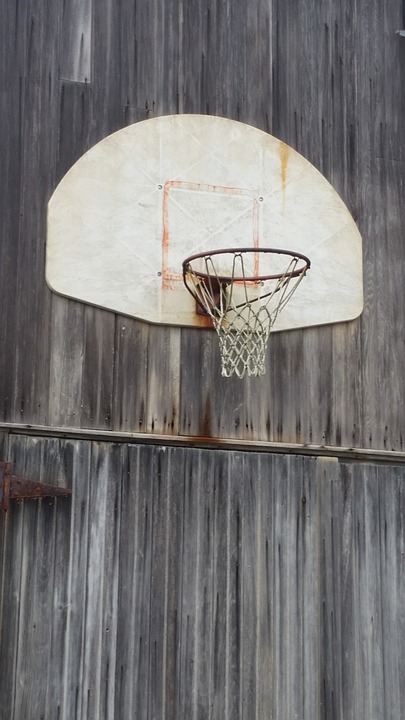
As you noticed from the picture of the back of the backboard Jason finished off the sides with some wood from the pew to give it a nice finished look and hide the support boards on the back of the wood basketball hoop backboard.
Step FOUR – Attaching the Hoop to our DIY Wood Basketball Hoop Backboard
We added this basketball hoop to the wood baseboard.
It took the kids no time to start putting our DIY Reclaimed Wood Basketball Hoop to use.
Our family is not known for our height & everyone was excited to FINALLY be able to dunk. 🙂
See our Home Gym & Exercise Room with our DIY Wood Basketball Hoop (
here)
I hope this inspires you & answers all your questions about how to create a DIY Wood Basketball Hoop at your home!
by Tara Lehman
DOn’t forget to pin & save our DIY Wood Basketball Hoop to your Favorite Pinterest Board!
Spray Painted Furniture Makeover
8 DIY Desks to Try
Basketball hoop - how to make a stand with a backboard with your own hands
Love basketball and want to make a hoop? I wanted to make it myself, not buy it, and I ended up making it. It's pretty cheap, especially if you have some of the stuff you need to assemble.
Let's start assembling the basketball hoop with our own hands.
Step 1: Shape the Ring
The first thing you will need is a ring, I made it with 12mm rod, but it doesn't have to be that size. The standard diameter of a basketball hoop is 450 mm.
To make it flat you need something to wrap it around, this thing should be about 400mm in diameter.
I found an old car rim of the right size, you will need to clamp it to the table with a clamp using a piece of wood.
As shown in photo 2, place another clamp a little further from the first with a rod between them.
As shown in photo 3, slowly wrap the rod around the disk, once you wrap the rod and its edges overlap, cut off the straight ends.
Use a clamp to press the ends together, then weld them together.
To complete this part, place the ring on the ground and straighten out all the curves.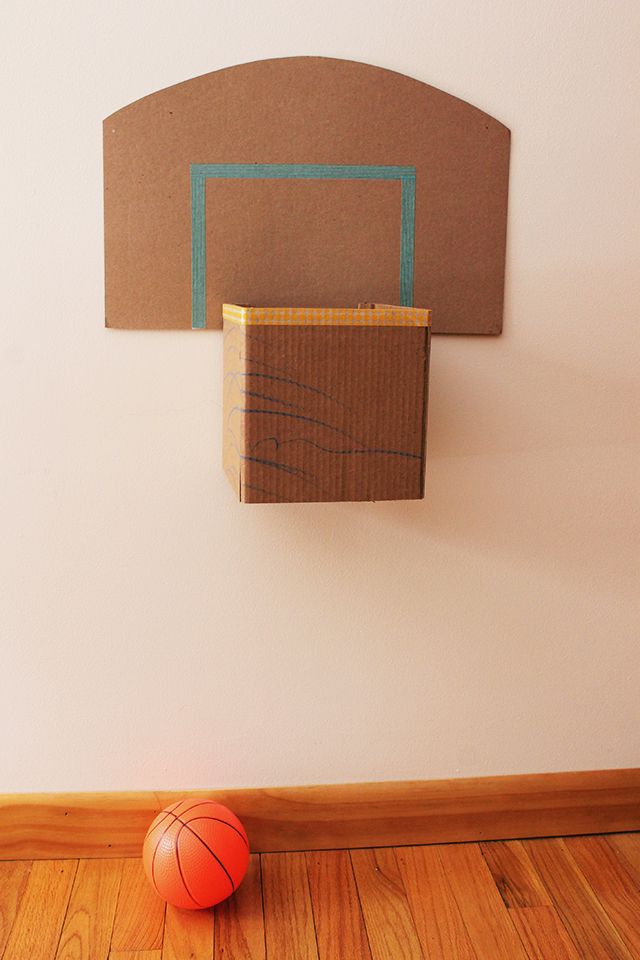
Step 2: Frame
- Bend a piece of flat metal, mine was 4mm thick.
- Weld it to a flat point in the ring.
- Cut two rods 320 mm long.
- Weld them as shown in the photo.
- Drill four holes to match your existing bolts.
- If you need a netball ring, you can simply attach it to the pole and skip the rest of the steps.
Step 3: Mesh Staples (Optional)
Show 7 More Images
Do this step if you need mesh. If you need a network, you will have to buy it.
This step is not as difficult as it seems.
- cut 12 pieces of wire 90 mm long (I would recommend making a few spare parts, as they are easy to ruin.)
- bend them in the middle (it doesn't matter if the tips are the same length)
- clamp the wire in a vise with a steel rod at one end
- bend wire over rod
- repeat this with all parts of
- retighten the wire wrapped around the rod (see photo)
- bend it
- repeat with all parts
- retighten the wire wrapped around the rod
- bend it (at this point you can't just remove the wire from the rod - you will need to slide it to one of its edges and remove it from the edge)
- repeat with all parts of
- divide into 12 pieces and weld on the brackets
Step 4: Backboard
Cut the board to size.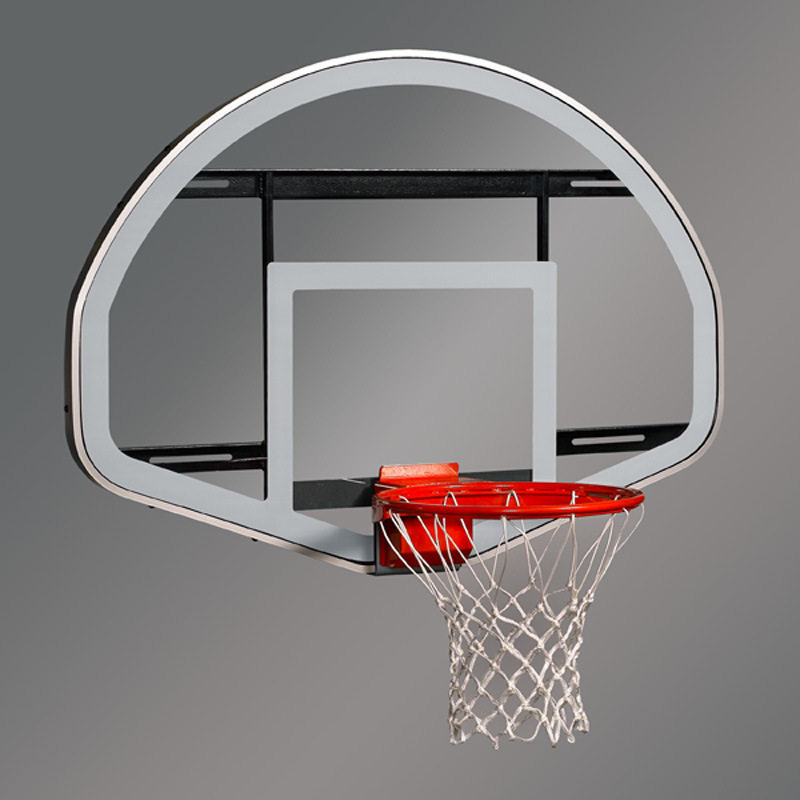 My board does not fit the full size of basketball boards. (the second picture shows the dimensions of a standard shield).
My measurements are 1100mm wide, 700mm high and 25mm thick. (You don't have to be that size.)
Step 5: Paint the Shield
Once you've drawn all the lines on the shield, lay masking tape over them. If you try, everything will look neat.
If you are using MDF, you will need to take care to protect the edges from moisture (as shown in photo 2).
Carefully paint over the areas around the masking tape.
Remove masking tape after enough coats of paint have been applied and the board looks complete.
Step 6: Paint the ring
First you need to sand the metal. I used a grinding disc on a grinder.
The ring must not be black or white, it must stand out from the shield. Usually the ring is painted orange or red.
The easiest way to paint inventory is from a can.
Step 7: Assemble
Put it all together.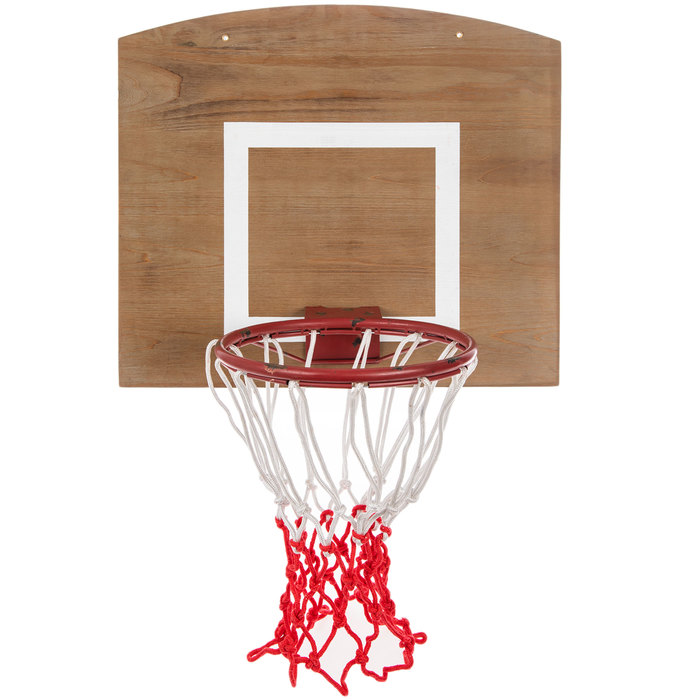 Screw the ring to the shield, hang a net on the ring.
Step 8: Installation
DIY Basketball Post is great to mount on a garage or house wall, but if you want to mount it on a pole, you can create one too.
I installed my ring in the yard using heavy duty wood screws.
A standard basketball hoop must be placed 3 meters from the ground.
I am not responsible for any damage you cause to yourself or your property - you make your own ring.
Successful throws!
Basketball hoop - how to make a stand with a backboard with your own hands
Love basketball and want to make a hoop? I wanted to make it myself, not buy it, and I ended up making it. It's pretty cheap, especially if you have some of the stuff you need to assemble.
Let's start assembling the basketball hoop with our own hands.
Step 1: Shape the ring
The first thing you need is a ring, I made it with 12mm rod, but it doesn't have to be that size. The standard diameter of a basketball hoop is 450 mm.
To make it flat, you need something to wrap it around, this thing should be about 400mm in diameter.
I found an old car rim of the right size, you will need to clamp it to the table with a clamp using a piece of wood.
As shown in photo 2, place another clamp a little further from the first with a rod in between.
As shown in photo 3, slowly wrap the rod around the disk, once you wrap the rod and its edges overlap, cut off the straight ends.
Use a clamp to press the ends together, then weld them together.
To complete this part, place the ring on the ground and straighten out all the curves.
Step 2: Frame
- Bend a piece of flat metal, mine was 4mm thick.
- Weld it to a flat point in the ring.
- Cut two rods 320 mm long.
- Weld them as shown in the photo.
- Drill four holes to match your existing bolts.
- If you need a netball ring, you can simply attach it to the pole and skip the rest of the steps.
Step 3: Mesh Staples (Optional)
Show 7 More Images
Do this step if you need mesh. If you need a network, you will have to buy it.
This step is not as difficult as it seems.
- cut 12 pieces of wire 90 mm long (I would recommend making a few spare parts, as they are easy to ruin.)
- bend them in the middle (it doesn't matter if the tips are the same length)
- clamp the wire in a vise with a steel rod at one end
- bend wire over rod
- repeat this with all parts of
- retighten the wire wrapped around the rod (see photo)
- bend it
- repeat with all parts
- retighten the wire wrapped around the rod
- bend it (at this point you can't just remove the wire from the rod - you will need to slide it to one of its edges and remove it from the edge)
- repeat with all parts of
- divide into 12 pieces and weld on the brackets
Step 4: Backboard
Cut the board to size. My board does not fit the full size of basketball boards. (the second picture shows the dimensions of a standard shield).
My measurements are 1100 mm wide, 700 mm high and 25 mm thick. (You don't have to be that size.)
Step 5: Paint the Shield
Once you've drawn all the lines on the shield, lay masking tape over them. If you try, everything will look neat.
If you are using MDF, you will need to take care to protect the edges from moisture (as shown in photo 2).
Carefully paint over the areas around the masking tape.
Remove masking tape after enough coats of paint have been applied and the board looks complete.
Step 6: Paint the ring
First you need to sand the metal. I used a grinding disc on a grinder.
The ring must not be black or white, it must stand out from the shield. Usually the ring is painted orange or red.
The easiest way to paint inventory is from a can.
Step 7: Assemble
Put it all together.