Home »
Misc »
How to draw a basketball ring
How to draw a basketball ring
Basketball Hoop Drawing - How To Draw A Basketball Hoop Step By Step
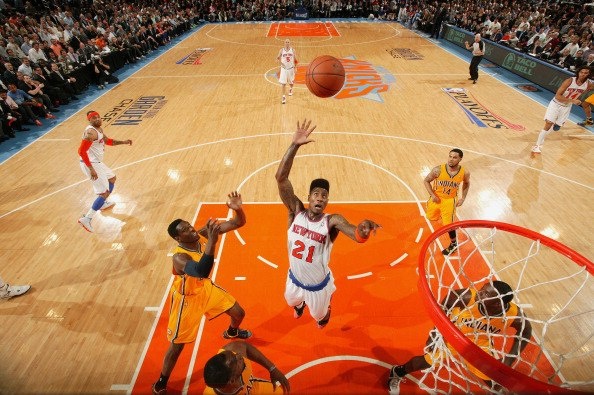
The basketball hoop refers to the orange rim attached on a backboard. This is where basketball players try to shoot the ball through.
One shoot through the hoop is equivalent to either one, two, or three points depending on where the player is standing when he shoots the ball.
If you’re passionate about sports and would like to make it a subject on your drawings, then you’ve come to the right place!
In this guide, we will be learning how to draw a basketball hoop, an essential equipment in the sports game called basketball.
We have created a step-by-step tutorial on how to draw a basketball hoop, summarized in 9 quick and easy steps. What’s more, each instruction comes with an illustration to make the entire process a lot easier for you to follow!
Take advantage of your artistic skills to draw a basketball hoop!
What's in this Blog Post
- How to Draw a Basketball Hoop – Let’s get started!
- Step 1
- Step 2 – Create the Backboard
- Step 3 – Draw the Backboard’s Details
- Step 4 – Draw the Hoop or the Rim
- Step 5 – Draw a Space on the Backboard
- Step 6 – Outline the Net of the Hoop
- Step 7 – Add the Patterns of the Net
- Step 8 – Add More Criss-Cross Details
- Step 9 – Finalize the Basketball Hoop
- Do this to take your basketball hoop drawing to the next level
- Your Basketball Hoop Drawing is Complete!
Step 1
Begin by drawing a rectangular shape.![]() This creates an outline of the backboard’s shape.
This creates an outline of the backboard’s shape.
A basketball hoop primarily consists of straight lines. So, you may need to use a ruler to help you draw straight lines quickly and easily.
Step 2 – Create the Backboard
Draw an outline inside the backboard following its rectangular shape. Then, inside the outline, draw a smaller outline with a similar form.
When drawn correctly, this should form a parallel rectangle shape within the backboard. This adds an extra detail on the backboard.
Step 3 – Draw the Backboard’s Details
Draw a symmetrical square shape on the bottom middle of the backboard. This outlines the square-shaped opening right above the hoop, which we will be drawing later on.
Don’t forget to erase the part of the outline that overlaps inside the square shape! This helps keep your drawing polished and refined.
Step 4 – Draw the Hoop or the Rim
Draw an elongated sideways rectangular shape at the bottom of the square that we drew in the previous step.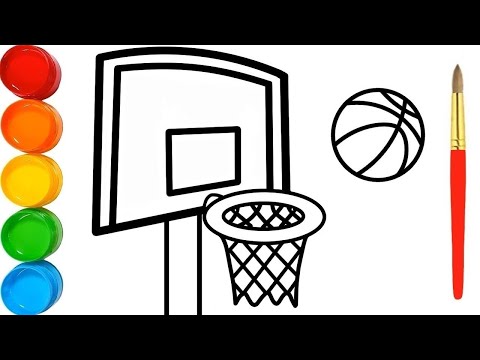
This forms the hoop or the rim, which is where basketball players try to shoot the ball through.
Make sure that the rectangle is a bit wider than the width of the square shape.
Step 5 – Draw a Space on the Backboard
Draw an open-bottom square inside the square shape that we drew previously in the third step. When drawn correctly, you should now be seeing two parallel square shapes.
Step 6 – Outline the Net of the Hoop
Right underneath the rim or the hoop, draw two curved lines leaning towards each other. This should form a figure that is wide at the top and gradually goes narrower at the bottom.
This creates the outline of the net attached beneath the rim or the hoop.
Step 7 – Add the Patterns of the Net
After drawing the outline of the net, we will now be drawing the distinct criss-cross patterns that nets typically have.
Proceed by drawing V-shaped lines right underneath the rim or the hoop.
Step 8 – Add More Criss-Cross Details
Draw a second layer of V-shaped lines right underneath the ones that we drew in the previous step.
This time, however, the V shapes should align with the gaps on the first layer. This should form a diamond shape on the net, as shown in the illustration above.
Repeat the same step underneath the second layer to create the third layer of the same pattern. Remember, the V shapes should align with the upside down V shapes to form diamond figures all over the net.
Step 9 – Finalize the Basketball Hoop
Complete the basketball hoop by drawing the last two layers of V shapes pattern right underneath the last layer we drew in the previous.
At this point, you should have a total of 5 layers of the similar pattern forming the entire net.
Bear in mind that the shapes at the bottom layer should be relatively smaller than the ones at the top. This ensures that the shapes are consistent with the figure of the net.
Now that we’ve successfully drawn a basketball hoop, it’s finally time for the most exciting part. In this final step, we’ll be coloring the basketball hoop to make the artwork vibrant and colorful.
This step is optional but we recommend doing so to make the most out of your experience.
Backboards come in a wide range of colors while the hoop or the rim is primarily orange in color, similar to the basketball. The color of the backboard mostly depends on which team is currently playing on the court.
Feel free to use whichever color you like! You can even use more than one color to create a multi-colored basketball hoop! How fun is that?!
Do this to take your basketball hoop drawing to the next level
You have a great basketball hoop drawing, now let’s see how we can make it better! It’s great to have a basketball hoop, but it’s not much use without a basketball!
That is why we would recommend adding one to this basketball hoop sketch. Basketballs seem simple, but they can also be more challenging than you think to draw!
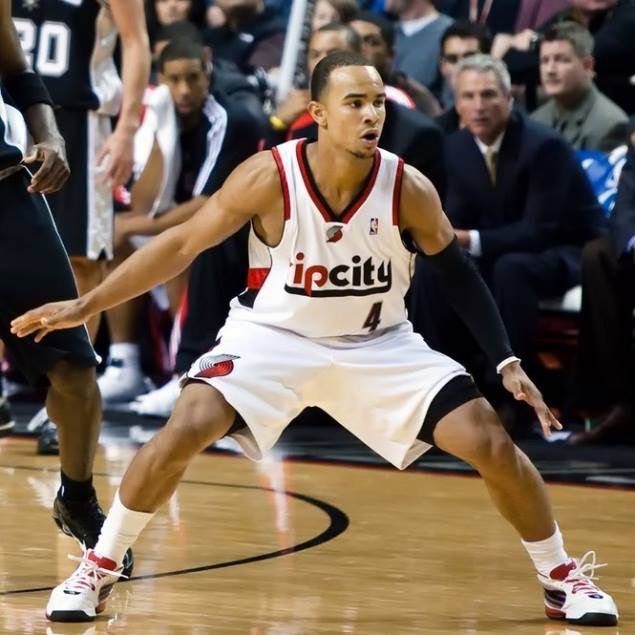
If you have one of your own, then you have the perfect model to use. Otherwise, you can find many pictures online to use as a reference.
You can draw it as it’s about to go inside of the basket or in any other position you like!
Adding a basketball is one thing you could do, but you could also draw some players beneath it. If you were to do this, then you would have lots of options.
You could draw yourself and your friends, or maybe use some of your favorite basketball players.
These could be added in a realistic or a cartoon style, and it all depends on what you’re comfortable with! Will you add some players to this basketball hoop drawing?
We’ve spoken about adding a ball and some players, but there are other ways to add to the background as well.
You could draw more of the surroundings of this basketball hoop, and this could include the crowd in the background.
There are many fun and creative settings you could go for, and you could make it anything you wish!
This leads us to our final suggestion for this drawing of a basketball hoop, and it involves color. This is something we spoke about in the guide, but there is so much you can do here.
We would suggest mediums like colored pens and markers for many of the details, as they can get quite fiddly.
Mediums such as these can help with these more intricate details. Even if you want to use some paints, you can get paintbrushes with small tips for more precision.
Be sure to get creative with your colors and see what you can do!
Your Basketball Hoop Drawing is Complete!
Hopefully, you enjoy this step-by-step basketball hoop drawing tutorial. If you had fun drawing a basketball hoop, then you might be interested in drawing a baseball or any other sports objects.
Check out our “How to Draw” catalog to enjoy many more fun drawing tutorials like this!
After you finish drawing and coloring a basketball hoop, don’t forget to show off your masterpiece! Take a photo of your artwork and share it on our Facebook page and on Pinterest.
Don’t be embarrassed. We’re sure your drawing looks impressive!
We would love to see your colorful basketball hoop drawing!
How to Draw a Basketball Hoop
994 shares
Learn how to draw a great looking Basketball Hoop with easy, step-by-step drawing instructions, and video tutorial.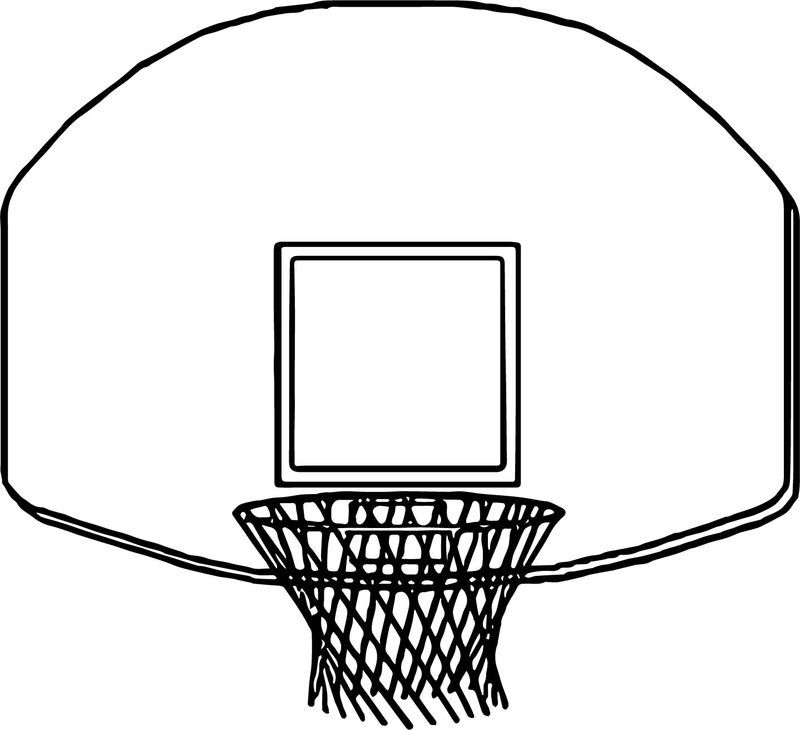 You can now easily create a beautiful Basketball Hoop drawing.
Complete Basketball Hoop drawing
Jump to the step-by-step instructions.
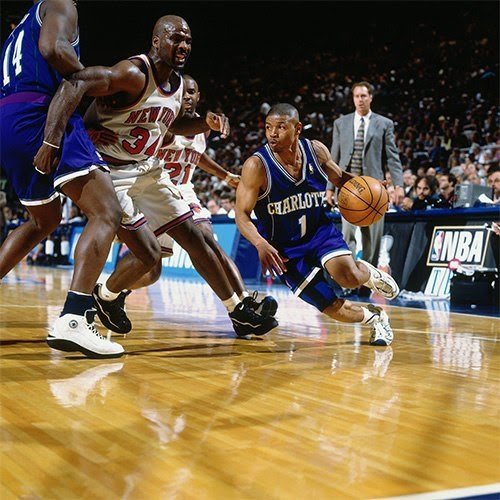
Basketball is an iconic American sport. Its legendary players, such as Michael Jordan and LeBron James, are considered heroes. It is the only sport to date whose origins lie solely in America.
How did basketball begin? It was a rainy day in 1891. James Naismith was teaching a P.E. class at a YMCA school in Massachusetts. Stuck inside, what was his class to do? With a soccer ball and two half-bushel peach baskets, Naismith invented the game we now call basketball.
Scroll down for a downloadable PDF of this tutorial.
School football teams helped popularize the sport; when the weather was too cold to practice outside, they would go inside and play basketball.
Did you know? Early basketball baskets had bottoms, so each time points were scored, the ball had to be retrieved from the basket. Later, the bottom of the basket was removed, but the balls were too large to fall through.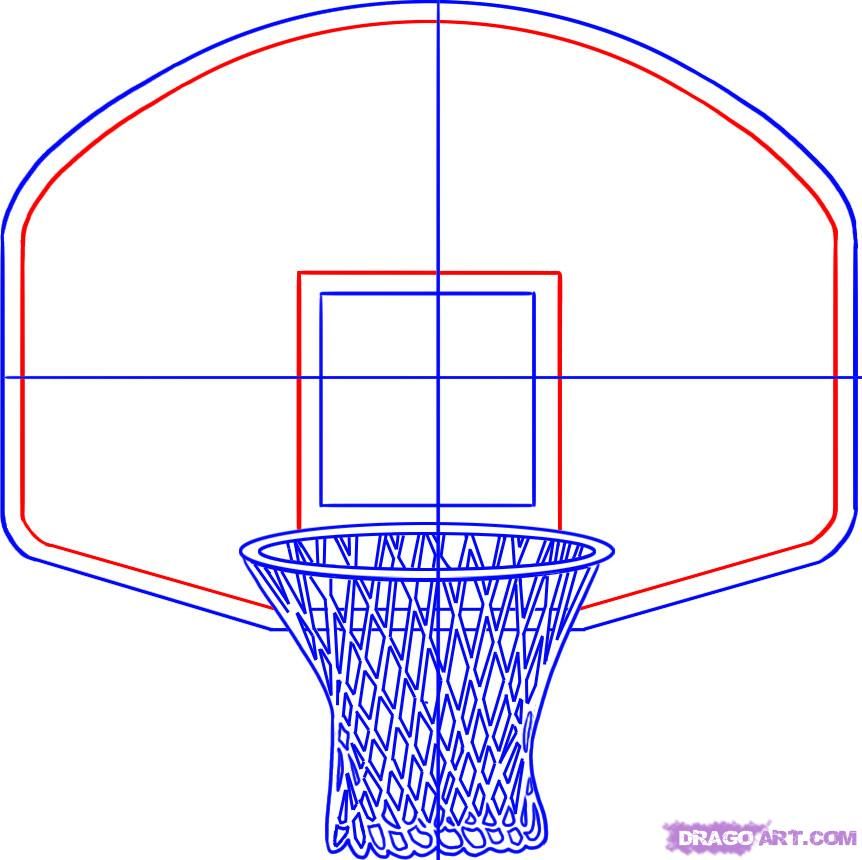 Instead, a long pole was used to propel the ball out the top of the basket.
Actual baskets were used until 1906, when the metal rim and backboard was introduced. The backboard also prevented fans with balcony seats from interfering with the shots, and allowed for rebounds.
From its humble roots, basketball has now spread across the world. Not only do professional teams exist in many countries, but public parks often sport outdoor basketball courts.
Recreational basketball goals can be seen outside homes and on neighborhood streets. This half-court version of the game is often called "streetball." Other spin-offs of the game, including a beach version that allows carrying of the ball, have been invented.
Would you like to draw a basketball goal? Doing so is easier than ever with the help of this simple, step-by-step drawing guide. All you will need is a pencil, pen, or marker and a sheet of paper. You may also wish to color your finished drawing.
If you liked this tutorial, see also the following drawing guides: Baseball Bat, Baseball Cap, and Basketball Player.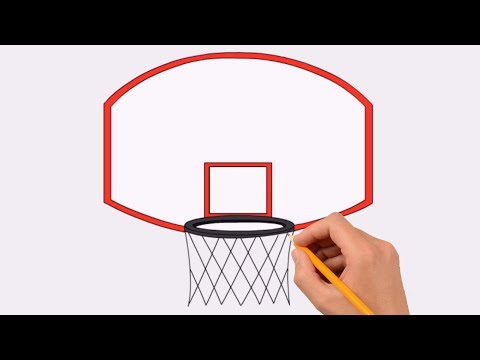
Step by Step Instructions for Drawing a Basketball Hoop
How to Draw a Great Looking Basketball Hoop for Kids, Beginners, and Adults - Step 1
1. Begin by drawing a flattened oval. Then, draw a smaller oval inside the first. This forms the rim of the basketball hoop.
Easy Basketball Hoop Drawing - Step 2
2. Extend two straight lines horizontally from one side of the rim. The top line should be longer than the other. Then, extend lines downward from the ends of these lines. Connect them at the bottom using a straight line. This connects the rim to the backboard.
Easy Basketball Hoop Drawing - Step 3
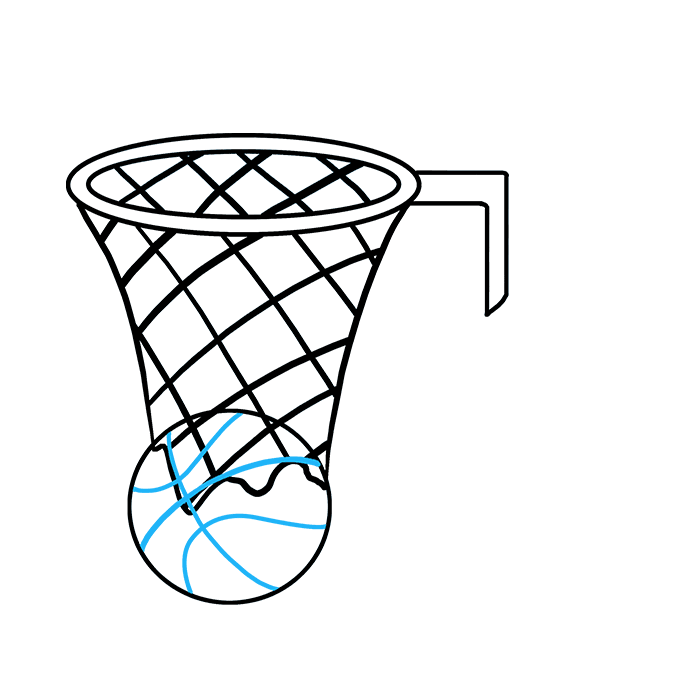
3. Draw a curved line downward from one side of the rim. This begins the outline of the net.
Easy Basketball Hoop Drawing - Step 4
4. Draw a curved line extending downward from the other side of the rim. Connect the lines at the bottom using a wavy, irregular line. Then, draw diagonal parallel lines across the net. Follow these by parallel lines on the opposite diagonal.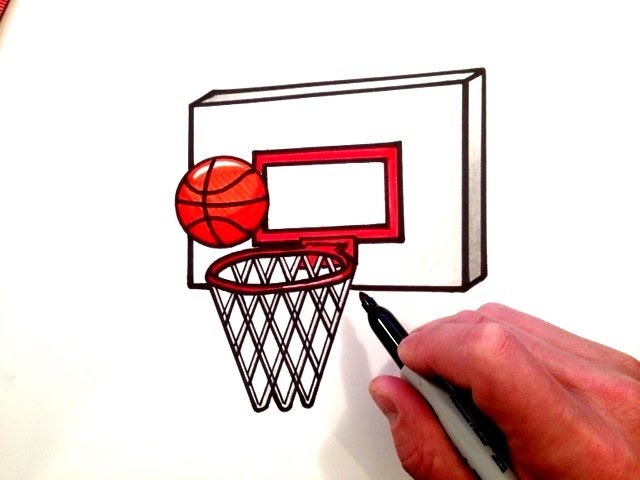 The result will be a crosshatching or checkerboard pattern that indicates the strings of the net.
Easy Basketball Hoop Drawing - Step 5
5. Draw perpendicular diagonal lines in the inner oval of the hoop, indicating the opposite side of the net.
Easy Basketball Hoop Drawing - Step 6
6. Draw a circle overlapping the bottom of the net. This will become the basketball.
Easy Basketball Hoop Drawing - Step 7
7. Draw a curved line across the basketball. Perpendicular to this line, draw three additional curved lines. These are the seams of the basketball.
Add More Details to Your Basketball Hoop Picture - Step 8
8. Draw a four-sided shape using four straight lines. The extension from the rim should be in the center of this shape. This is the basketball goal's backboard.
Complete the Outline of Your Basketball Hoop Drawing - Step 9
9. Draw a smaller four-sided shape within the first. Extend a pair of straight lines from the rim to the point that it attaches to the backboard, giving the rim additional support.
Color Your Basketball Hoop Drawing
Swish! That was nothing but net. Check out our people drawing guides for tips on how to assemble your team.
For more great Things to draw tutorials, see the 100 Best Things to draw Tutorials post.
Easy, step by step Basketball Hoop drawing tutorial
Click HERE to save the tutorial to Pinterest!
Basketball Hoop Drawing Tutorial - Easy & Fun Printable Pages
MEMBER TROUBLESHOOTING
Still seeing ads or not being able to download the PDF?
First, check that you're logged in. You can log in on the member login page.
If you're still not able to download the PDF, the likely solution is to reload the page.
You can do this by clicking the browser reload button.
It is a circular arrow-shaped icon at the top of the browser window, typically found in the upper-left side (you can also use keyboard shortcuts: Ctrl+R on PC and Command+R on Mac).
How to draw a basketball hoop and ball step by step Easy Drawing Tutorials
Basketball is an iconic American sport.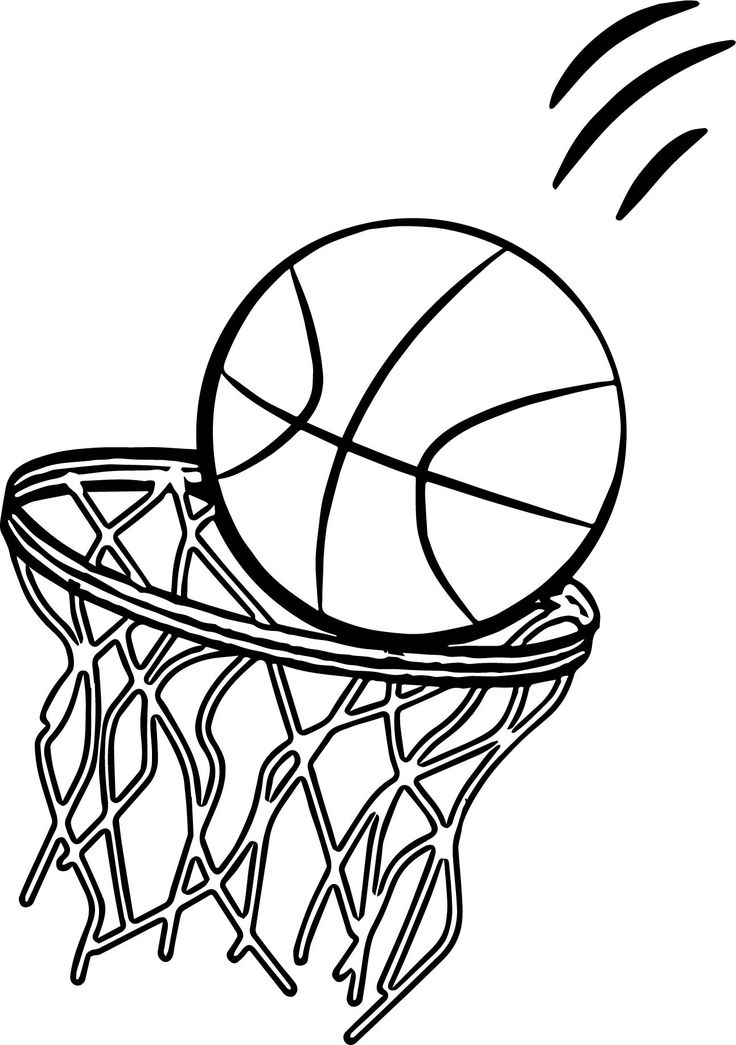 Its legendary players such as Michael Jordan and LeBron James are considered heroes. Today it is the only sport whose origin lies exclusively in America.
How did basketball start? It was a rainy day in 1891. James Naismith taught physical education at the YMCA in Massachusetts. Stuck inside, what was his class supposed to do? With a soccer ball and two hemisphere peach baskets, Naismith invented the game we now call basketball.
School football teams helped popularize the sport; when the weather was too cold to practice outside, they would go inside and play basketball.
Did you know? Early basketball baskets had a bottom, so each time a point was scored, the ball had to be retrieved from the basket. The bottom of the basket was later removed, but the balls were too big to fall through. Instead, a long pole was used to push the ball out of the top of the basket.
Actual baskets were used until 1906 when a metal rim and backplate was introduced. The rear shield also prevented fans with balcony seats from getting in the way of shots and allowed for rebound.
From its humble roots, basketball has spread throughout the world. Not only do professional teams exist in many countries, but public parks often have outdoor basketball courts.
Recreational basketballs can be seen outside houses and on the streets. This half-court version of the game is often referred to as "streetball". Other side effects of the game, including a beach version that allows you to carry a ball, have been invented.
Would you like to draw a basketball? Doing so is easier than ever with this easy, step-by-step drawing guide. All you need is a pencil, pen or marker and a sheet of paper. You can also color your finished drawing.
If you liked this tutorial, see also the following drawing guides: Baseball Bat, Baseball Cap, and Basketball Player.
Basketball Hoop Step by Step Instructions
1. Start by drawing a flattened oval. Then draw a smaller oval inside the first one. This forms the rim of the basketball hoop.
2. Extend two straight lines horizontally from one side of the rim. The top line should be longer than the other. Then extend lines down from the ends of those lines. Connect them at the bottom using a straight line. This connects the rim to the back panel.
3. Draw a curved line down one side of the rim. This starts the outline of the network.
4. Draw a curved line down from the other side of the rim. Connect the lines at the bottom using a wavy, irregular line. Then draw diagonal parallel lines across the net. Follow them in parallel lines on the opposite diagonal. The result will be a hatch or checkerboard pattern that indicates the lines of the network.
OTHER EASY DRAWING GUIDES:
5. Draw perpendicular diagonal lines in the inner oval of the hoop, indicating the opposite side of the mesh.
6. Draw a circle covering the bottom of the net. This will become basketball.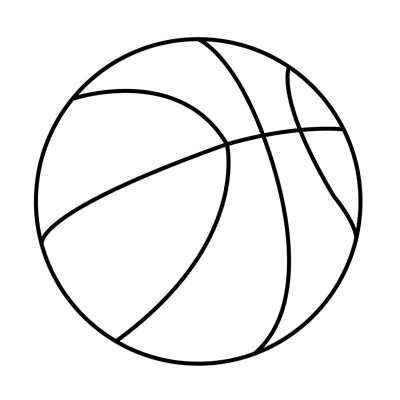
7. Draw a curved line across the basketball. Perpendicular to this line, draw three additional curved lines. These are basketball stitches.
8. Draw a four-sided shape using four straight lines. The extension from the rim should be in the center of this shape. It's a basketball shield.
OTHER EASY DRAWING GUIDES:
9. Draw a smaller four-sided shape inside the first one. Extend a pair of straight lines from the rim to the point where it attaches to the backrest, providing additional support for the rim.
Whoosh! It was nothing but a network. Check out our drawing guides for tips on how to put together your team.
The Complete Basketball Hoop Drawing Tutorial in One Image
Like this Drawing Guide?
Leave a comment below or follow on Pinterest.
DIY basketball hoop
Home » DIY
DIY
Reading 2 min Views 5. 4k.
4k.
Basketball is a sport that is popular not only in America but also in Russia. Many fathers seek to build a playground for their children in the yard. What are the requirements to follow when arranging a basketball hoop.
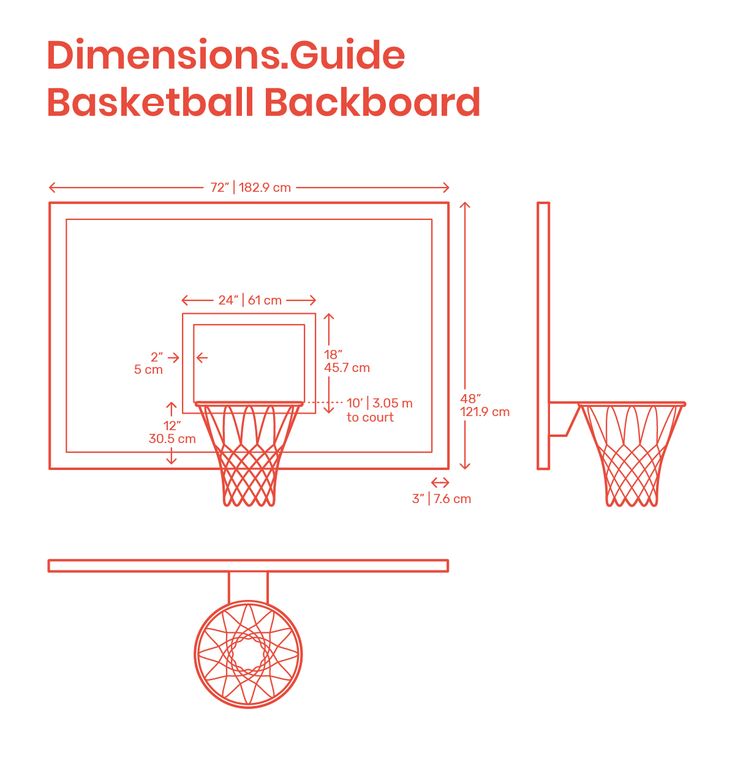
Shield and ring standards:
- Height 105 cm;
- Width 180 cm;
- Square in the center of the shield - height 45 cm, width 59cm;
- Indent from the edge of the shield to the red square - 15 cm;
- Ring diameter -45 cm;
- Mesh for a ring 45 cm long;
- The ring is attached at a distance of 15 cm from the shield;
The shield itself is raised to a height of 3.05 meters.
Contents
- Required materials for the ring and shield
- Making the shield
- Making the ring
- Fixing the structure
Required materials for the ring and shield
Basketball circle can be made from plastic pipe, metal rod or other suitable materials.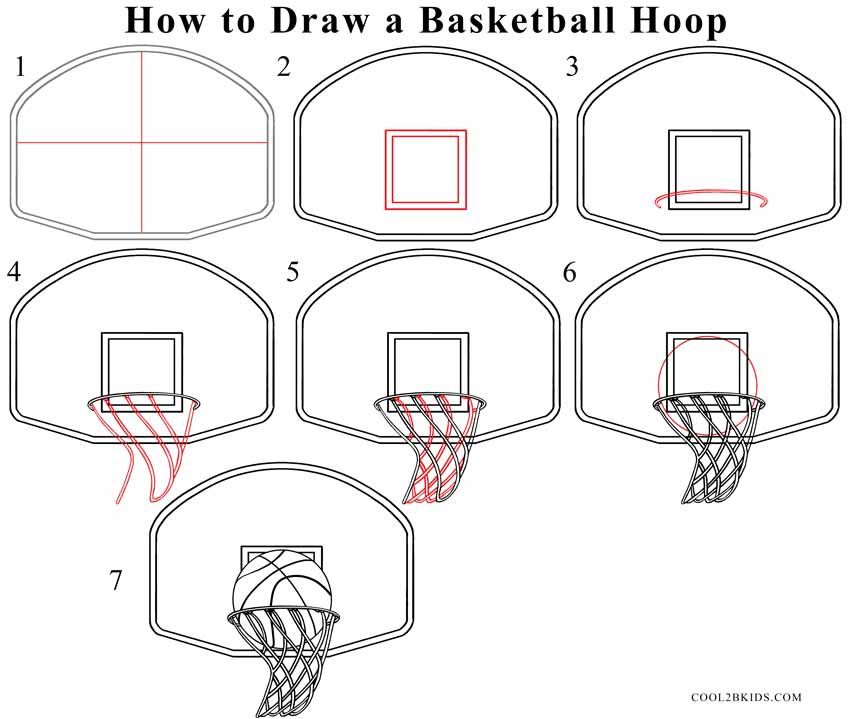 Also, the ring needs a mesh, which is made of lace, rope, braid or chain.
The shield is made of fiberboard, MDF, multilayer plywood, high-quality and thick organic glass, plastic. You also need fasteners and red or black paint for marking, white for the base.
When choosing the material for the shield, weather conditions must be taken into account. The location for the basketball court should be comfortable and allow the hoop to be hung at the desired height.
Making the shield
Steps:
- With a pencil, draw the lines along which the blank will be cut.
- Cut out the shield with a jigsaw.
- Paint white.
- In the center, draw with black or red lines a rectangle for aiming before throwing. The base of the target must be at the top edge of the ring.
- The stripes of the rectangle must be 5 cm wide.
- You also need to circle the outer edge of the shield.
Making a ring
Steps:
- Pick up a pipe or twig 45 centimeters long with a little margin.