Home »
Misc »
How to draw a easy basketball
How to draw a easy basketball
How to Draw a Basketball
Throw some hoops with us today! Learn how to draw a realistic Basketball the easy way! Follow along and learn how to draw a realistic basketball in this full step-by-step tutorial where we cover the very basic elements of detailing and coloring! This will be a great challenge for experienced and beginner artists.
Table of Contents
- 1 Step-by-Step Easy Basketball Drawing Tutorial
- 1.1 Step 1: Drawing a Perfect Circle
- 1.2 Step 2: Create Quadrants in Your Basketball Shape
- 1.3 Step 3: Adding More Gridlines
- 1.4 Step 4: Finishing the Foundation Grid
- 1.5 Step 5: Drawing the Lines on Basketballs
- 1.6 Step 6: Constructing the Second Strip
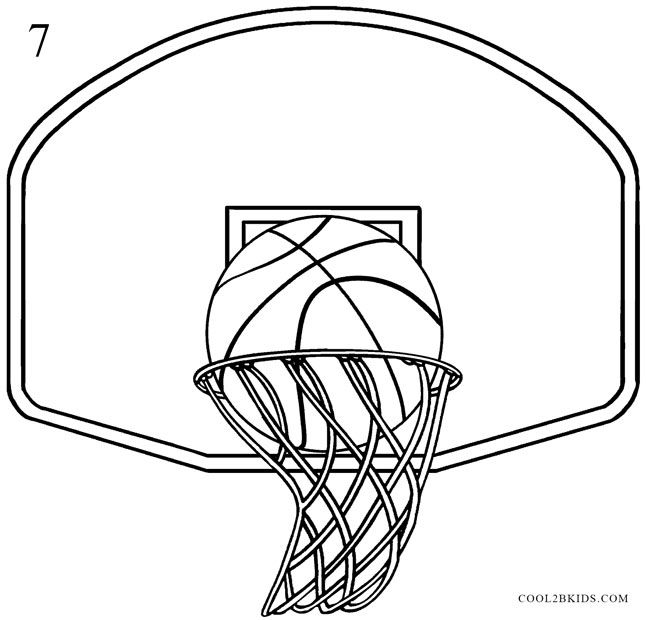
- 1.7 Step 7: Drawing the Third Basketball Strip
- 1.8 Step 8: Finishing the Lines on Basketballs
- 1.9 Step 9: Creating Realistic Basketball Drawing Texture
- 1.10 Step 10: Applying a Base Color Coat to Your Basketball Drawing
- 1.
![]() 11 Step 11: Coloring the Lines on Basketball
11 Step 11: Coloring the Lines on Basketball - 1.12 Step 12: Contouring Your Realistic Basketball Drawing
- 1.13 Step 13: Adding More Shading
- 1.14 Step 14: Begin Highlighting Your Easy Basketball Drawing
- 1.15 Step 15: Strengthening Your Highlights
- 1.16 Step 16: Finishing Your Highlights and Shadows
- 1.17 Step 17: Finishing Your Realistic Basketball Drawing
- 2 Video Tutorial on How to Draw a Basketball
- 3 Frequently Asked Questions
- 3.1 How Do You Draw a Simple Basketball?
- 3.2 How Do You Draw Basketball Texture?
Step-by-Step Easy Basketball Drawing Tutorial
Basketballs are a fantastic object to draw for beginner and experienced artists alike. The perfectly round shape and lines on a basketball can pose a challenge to all artists. A slightly oval ball with crooked lines will lack the realism that many of us crave. To help you create that perfect shape of a basketball drawing, we begin the tutorial with a series of construction steps. These initial steps will set up the round shape and help you plan out the path of the signature lines on a basketball. Take a look at the basketball drawing outline below.
As you will see from the outline above, the last eight steps of the tutorial involve coloring and shading. For these coloring steps, you can use any medium that you choose. If you prefer to work with a more physical medium like acrylic paints or coloring pencils, then you can simply adjust the instructions to suit your process.
A digital drawing tablet is also a great medium for this drawing tutorial.
Step 1: Drawing a Perfect Circle
The first step of this realistic basketball drawing tutorial is arguably the hardest. Once you have your circular base, you can build off of it to create the lines on basketballs with ease.
A quick note, if you are working with a physical medium, we suggest using a light and easily erasable pencil for the construction steps. If you are using a digital medium, draw the construction steps on a separate layer to the final outline and details.
Begin by locating the center of your drawing area. Once you have found it, you can now draw a large circle. If you do not feel comfortable drawing a perfect circle by hand, try using any round object that you can find. You can easily trace this round object to get a perfect base for your easy basketball drawing.
Step 2: Create Quadrants in Your Basketball Shape
In this step, we are going to divide our base circle into four different quadrants. These divisions will help us to place the lines of basketballs in later steps. You can easily divide the circle into four quarters by drawing a center vertical line and center horizontal line.
Step 3: Adding More Gridlines
Continuing to set up the gridlines, simply draw two vertical lines on either side of the central division lines. This step is quick and easy.
Step 4: Finishing the Foundation Grid
To finish the grid, begin by drawing a rectangle that lines horizontally, with the top and bottom line sitting alongside the middle dividing line. Where these lines meet the edge of the circle, draw two short verticle lines to join them. For the vertical grid lines, do the same, by drawing two shorter lines connecting the outer two verticle lines.
This will achieve a full grid on the circle that will help us wrap the pattern lines around the ball.
Step 5: Drawing the Lines on Basketballs
In this step, you are going to begin using the grid to help you draw the signature lines on basketballs. Begin with the first strip that wraps around the ball from the upper left side to the bottom right side.
Step 6: Constructing the Second Strip
You can now draw the second line, curving up and around the top left segment of the basketball drawing. You want this second strip to run from the bottom left corner of the horizontal rectangle, and meet the edge of the circle in the segment between the two grid rectangles on the top right.
TIp: you want these two lines to cross just around the top left overlap of the two grid rectangles.
Step 7: Drawing the Third Basketball Strip
You can now draw the third strip. This one should curve up and away from the bottom of the basketball drawing, with the top being almost parallel to the first strip, and then back down to the right side of the basketball.
Step 8: Finishing the Lines on Basketballs
To finish the lines on your easy basketball drawing, create a shorter, slightly curved strip at the top left corner of the ball. This strip should curve underneath the other strip at this point.
Once completed you are ready to erase any still visible construction lines, grid lines, and overlapping lines.
Step 9: Creating Realistic Basketball Drawing Texture
We now begin to add details and texture to our easy basketball drawings. Along the right edges of the basketball, and along the lines of each strip, use small dots to create a realistic basketball texture.
Try to make the dotting more condensed around the edges of the ball, as this will help create a more three-dimensional and realistic basketball drawing.
Step 10: Applying a Base Color Coat to Your Basketball Drawing
For the base color coat, find a slightly brown-orange shade. Use a large regular brush and apply an even coat of this shade to the entire shape of your basketball drawing.
Step 11: Coloring the Lines on Basketball
For the signature basketball strips, you will need a smaller fine brush and some black paint. Using these tools, carefully trace the strips and fill them to create an even and dark coat.
Step 12: Contouring Your Realistic Basketball Drawing
In this step, you are going to use a soft blending brush and some black paint to create some contouring on your basketball drawing. Contouring is a fantastic way to add more dimension to a drawing. Apply a light layer of contouring to the edges of the basketball.
The strips on a basketball are slightly indented, so you can also apply thin strips of light contouring around the strips to emphasize this.
Step 13: Adding More Shading
In this step, you are simply going to emphasize the contouring from the last step in certain places. Use a soft brush and a little more black paint and enhance the contoured areas, particularly around the edge of the ball.
Step 14: Begin Highlighting Your Easy Basketball Drawing
The very left upper right side of the basketball will catch the light, emphasizing the three-dimensional nature of your basketball drawing. Using a soft brush and some white paint, lightly color this area. Once you have applied the white paint, use a clean brush to gently blend all of your colors together.
This blending technique will create a much smoother and more realistic transition between all of your colors.
Step 15: Strengthening Your Highlights
Now that you have the highlighted base, you can begin building up the intensity of the white color. Again, using a soft brush, apply highlights to the part of the ball where all of the strips converge. You can also add highlights to these parts of the black strips.
Step 16: Finishing Your Highlights and Shadows
Just before we finish our easy basketball drawing tutorial, you can now further emphasize your highlights and shadows. Use a fine brush and some white paint to add final highlight strips between the black lines. Finally, use a soft blending brush and some black paint to add a final layer of shading around the edges of the ball.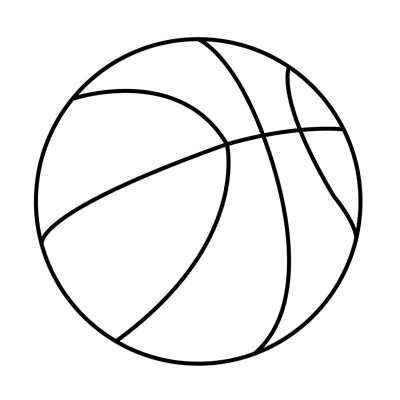
Step 17: Finishing Your Realistic Basketball Drawing
To complete this step, make use of a fine sharp brush and the corresponding color to trace the outline and inner texture lines to create a final seamless result without any visible dark outlines or texture lines. This helps us achieve a more natural look.
Complete the step by using a soft brush and black paint to apply a ground shadow.
Hopefully, by the end of this tutorial, you will have created a realistic basketball drawing with texture and contouring. Drawing a basketball is actually very easy when you break it down into simple steps, although it can seem intimidating at first. You now have all of the necessary drawing skills to draw many more types of balls, including tennis balls, soccer balls, and cricket balls.
Video Tutorial on How to Draw a Basketball
Frequently Asked Questions
How Do You Draw a Simple Basketball?
Although a basketball drawing may seem intimidating, it is actually very simple when you can break it down into construction, detail, and coloring steps. In this easy basketball drawing tutorial, we show you exactly how to create a perfect realistic basketball drawing.
How Do You Draw Basketball Texture?
Basketballs have a rough, dotted texture. To create this texture in a basketball drawing, you can simply create a pattern of small dots throughout the ball.
Basketball Hoop Drawing - How To Draw A Basketball Hoop Step By Step
The basketball hoop refers to the orange rim attached on a backboard. This is where basketball players try to shoot the ball through.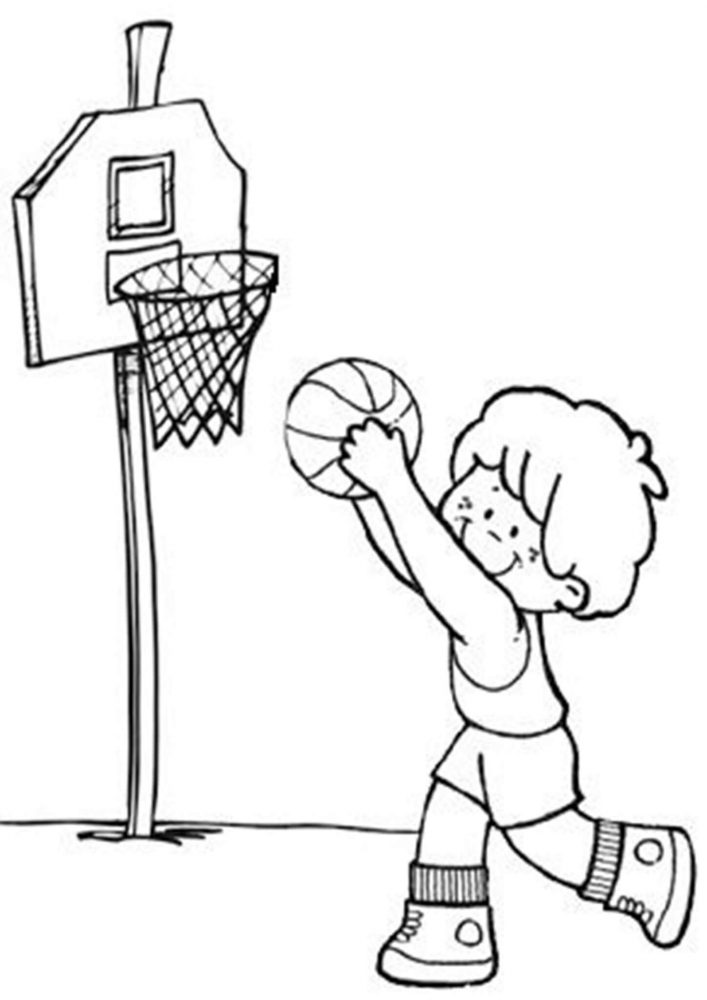
One shoot through the hoop is equivalent to either one, two, or three points depending on where the player is standing when he shoots the ball.
If you’re passionate about sports and would like to make it a subject on your drawings, then you’ve come to the right place!
In this guide, we will be learning how to draw a basketball hoop, an essential equipment in the sports game called basketball.
We have created a step-by-step tutorial on how to draw a basketball hoop, summarized in 9 quick and easy steps. What’s more, each instruction comes with an illustration to make the entire process a lot easier for you to follow!
Take advantage of your artistic skills to draw a basketball hoop!
What's in this Blog Post
- How to Draw a Basketball Hoop – Let’s get started!
- Step 1
- Step 2 – Create the Backboard
- Step 3 – Draw the Backboard’s Details
- Step 4 – Draw the Hoop or the Rim
- Step 5 – Draw a Space on the Backboard
- Step 6 – Outline the Net of the Hoop
- Step 7 – Add the Patterns of the Net
- Step 8 – Add More Criss-Cross Details
- Step 9 – Finalize the Basketball Hoop
- Do this to take your basketball hoop drawing to the next level
- Your Basketball Hoop Drawing is Complete!
Step 1
Begin by drawing a rectangular shape. This creates an outline of the backboard’s shape.
A basketball hoop primarily consists of straight lines. So, you may need to use a ruler to help you draw straight lines quickly and easily.
Step 2 – Create the Backboard
Draw an outline inside the backboard following its rectangular shape. Then, inside the outline, draw a smaller outline with a similar form.
When drawn correctly, this should form a parallel rectangle shape within the backboard. This adds an extra detail on the backboard.
Step 3 – Draw the Backboard’s Details
Draw a symmetrical square shape on the bottom middle of the backboard. This outlines the square-shaped opening right above the hoop, which we will be drawing later on.
Don’t forget to erase the part of the outline that overlaps inside the square shape! This helps keep your drawing polished and refined.
Step 4 – Draw the Hoop or the Rim
Draw an elongated sideways rectangular shape at the bottom of the square that we drew in the previous step.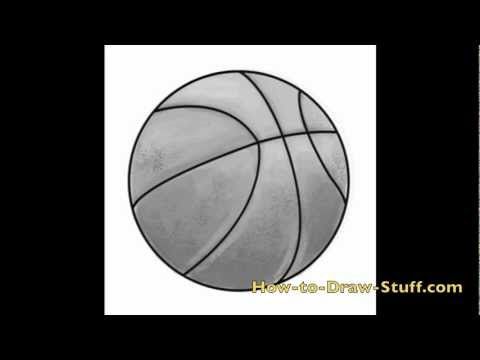
This forms the hoop or the rim, which is where basketball players try to shoot the ball through.
Make sure that the rectangle is a bit wider than the width of the square shape.
Step 5 – Draw a Space on the Backboard
Draw an open-bottom square inside the square shape that we drew previously in the third step. When drawn correctly, you should now be seeing two parallel square shapes.
Step 6 – Outline the Net of the Hoop
Right underneath the rim or the hoop, draw two curved lines leaning towards each other. This should form a figure that is wide at the top and gradually goes narrower at the bottom.
This creates the outline of the net attached beneath the rim or the hoop.
Step 7 – Add the Patterns of the Net
After drawing the outline of the net, we will now be drawing the distinct criss-cross patterns that nets typically have.
Proceed by drawing V-shaped lines right underneath the rim or the hoop.
Step 8 – Add More Criss-Cross Details
Draw a second layer of V-shaped lines right underneath the ones that we drew in the previous step.
This time, however, the V shapes should align with the gaps on the first layer. This should form a diamond shape on the net, as shown in the illustration above.
Repeat the same step underneath the second layer to create the third layer of the same pattern. Remember, the V shapes should align with the upside down V shapes to form diamond figures all over the net.
Step 9 – Finalize the Basketball Hoop
Complete the basketball hoop by drawing the last two layers of V shapes pattern right underneath the last layer we drew in the previous.
At this point, you should have a total of 5 layers of the similar pattern forming the entire net.
Bear in mind that the shapes at the bottom layer should be relatively smaller than the ones at the top. This ensures that the shapes are consistent with the figure of the net.
Now that we’ve successfully drawn a basketball hoop, it’s finally time for the most exciting part. In this final step, we’ll be coloring the basketball hoop to make the artwork vibrant and colorful.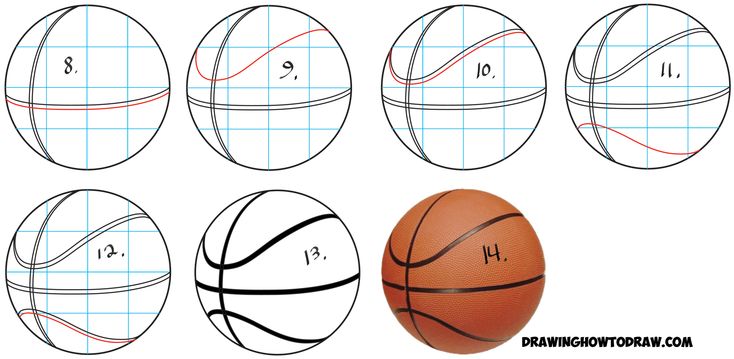
This step is optional but we recommend doing so to make the most out of your experience.
Backboards come in a wide range of colors while the hoop or the rim is primarily orange in color, similar to the basketball. The color of the backboard mostly depends on which team is currently playing on the court.
Feel free to use whichever color you like! You can even use more than one color to create a multi-colored basketball hoop! How fun is that?!
Do this to take your basketball hoop drawing to the next level
You have a great basketball hoop drawing, now let’s see how we can make it better! It’s great to have a basketball hoop, but it’s not much use without a basketball!
That is why we would recommend adding one to this basketball hoop sketch. Basketballs seem simple, but they can also be more challenging than you think to draw!
If you have one of your own, then you have the perfect model to use. Otherwise, you can find many pictures online to use as a reference.
You can draw it as it’s about to go inside of the basket or in any other position you like!
Adding a basketball is one thing you could do, but you could also draw some players beneath it. If you were to do this, then you would have lots of options.
You could draw yourself and your friends, or maybe use some of your favorite basketball players.
These could be added in a realistic or a cartoon style, and it all depends on what you’re comfortable with! Will you add some players to this basketball hoop drawing?
We’ve spoken about adding a ball and some players, but there are other ways to add to the background as well.
You could draw more of the surroundings of this basketball hoop, and this could include the crowd in the background.
There are many fun and creative settings you could go for, and you could make it anything you wish!
This leads us to our final suggestion for this drawing of a basketball hoop, and it involves color. This is something we spoke about in the guide, but there is so much you can do here.
We would suggest mediums like colored pens and markers for many of the details, as they can get quite fiddly.
Mediums such as these can help with these more intricate details. Even if you want to use some paints, you can get paintbrushes with small tips for more precision.
Be sure to get creative with your colors and see what you can do!
Your Basketball Hoop Drawing is Complete!
Hopefully, you enjoy this step-by-step basketball hoop drawing tutorial. If you had fun drawing a basketball hoop, then you might be interested in drawing a baseball or any other sports objects.
Check out our “How to Draw” catalog to enjoy many more fun drawing tutorials like this!
After you finish drawing and coloring a basketball hoop, don’t forget to show off your masterpiece! Take a photo of your artwork and share it on our Facebook page and on Pinterest.
Don’t be embarrassed. We’re sure your drawing looks impressive!
We would love to see your colorful basketball hoop drawing!
How to draw a basketball step by step - DrawingNow
Basketball is the only mobile equipment needed to play the game of the same name. Basketball has become an American icon; in fact, it is the only major sport that originated entirely in America.
Basketball is a relatively young sport. In 1891, a physical education teacher at a college in Massachusetts was instructed to develop a new game "for the amusement of schoolchildren in the winter." The teacher organized eighteen young people into two teams and appointed team captains for each.
The first basketball game was played with a soccer ball; the targets consisted of half-bushel-sized peach baskets that hung at each end of the gymnasium. During the game, the guys scored only one point.
The first basketball baskets had bottoms; The referees were supposed to pick up the balls when the basket was made. By the early 1900s, the first string nets were being used. Early basketballs were made from leather, which worked well on indoor courts but was damaged by the asphalt surface of outdoor courts. K 19In the 90s, most consumer basketballs were made from rubber or other durable materials to alleviate this problem.
Did you know? Warm basketballs bounce better than cold ones because materials are more flexible in warm conditions. Professional basketball should be able to bounce about four feet when dropped from a height of six feet. Today, basketball is a symbol of both the sport and athletics in general.
Dive into the game and hone your skills with this easy, step-by-step basketball lesson. All you need is a pencil, a piece of paper and an eraser. You can also use markers, crayons, crayons or whatever to shade your finished basketball!.
If you liked this tutorial, see also the following drawing guides: Guitar, Soccer Ball, and Teddy Bear with Heart.
Basketball Step by Step Instructions
1. Start by drawing a circle. This outlines the shape of basketball.
2. Draw a curved line across the basketball, not in the center but close to one side. This is the first edge of the ball or recessed lines.
3. Draw another curved line going in the opposite direction and intersecting the first one at a perpendicular angle. This is the second edge of the ball.
4. Draw a curved line from the side of the basketball to a vertical curved line, forming another edge.
OTHER EASY DRAWING GUIDES:
5. Continue the edge drawn in the previous step on the other side of the vertical line, attaching it to the edge of the ball on the opposite side.
6. Next, draw a curved rib line below the horizontal line, extending from the side of the ball to the vertical rib line.
7. Continue the line on the other side of the vertical edge, continuing towards the ball.
8. Next, you'll specify the depth of the recessed lines, giving the ball a three-dimensional look. To do this, draw a curved line parallel to the vertical and horizontal lines of the ribs.
OTHER EASY DRAWING GUIDES:
9. Draw curved lines parallel to those of the upper and lower ribs. Then, carefully erase the guide lines from the dots that the lines intersect each other with. This allows you to get a solid recessed line.
10. Color your basketball. The most common colors are orange with black ribs. Basketballs, however, can be found in a wide variety of colors. Early balls were brown. Some have white markings or represent the country's national colors such as red, white and blue. Others may be pink, black, green, or other colors.
Are you in the mood for more fun and games? Learn to draw soccer balls, teddy bears and more with our easy object drawing tutorials.
The Complete Basketball Drawing Tutorial in One Image
Like this Drawing Guide?
Leave a comment below or follow on Pinterest.
How to draw a basketball hoop and ball step by step Easy Drawing Tutorials
Basketball is an iconic American sport. Its legendary players such as Michael Jordan and LeBron James are considered heroes. Today it is the only sport whose origin lies exclusively in America.
How did basketball start? It was a rainy day in 1891.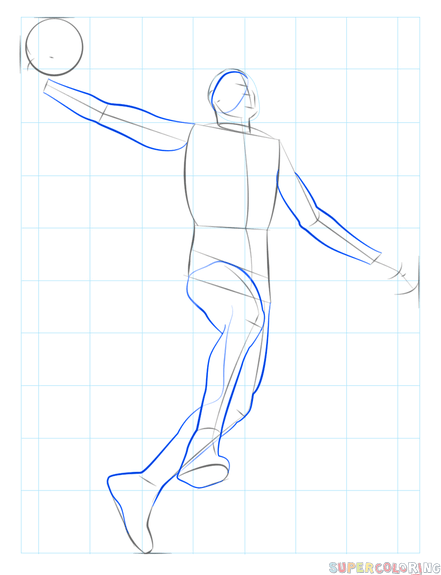 James Naismith taught physical education at the YMCA in Massachusetts. Stuck inside, what was his class supposed to do? With a soccer ball and two hemisphere peach baskets, Naismith invented the game we now call basketball.
School football teams helped popularize the sport; when the weather was too cold to practice outside, they would go inside and play basketball.
Did you know? Early basketball baskets had a bottom, so each time a point was scored, the ball had to be retrieved from the basket. The bottom of the basket was later removed, but the balls were too big to fall through. Instead, a long pole was used to push the ball out of the top of the basket.
Actual baskets were used until 1906 when a metal rim and back panel was introduced. The rear shield also prevented fans with balcony seats from getting in the way of shots and allowed for rebound.
From its humble roots, basketball has spread throughout the world. Not only do professional teams exist in many countries, but public parks often have outdoor basketball courts.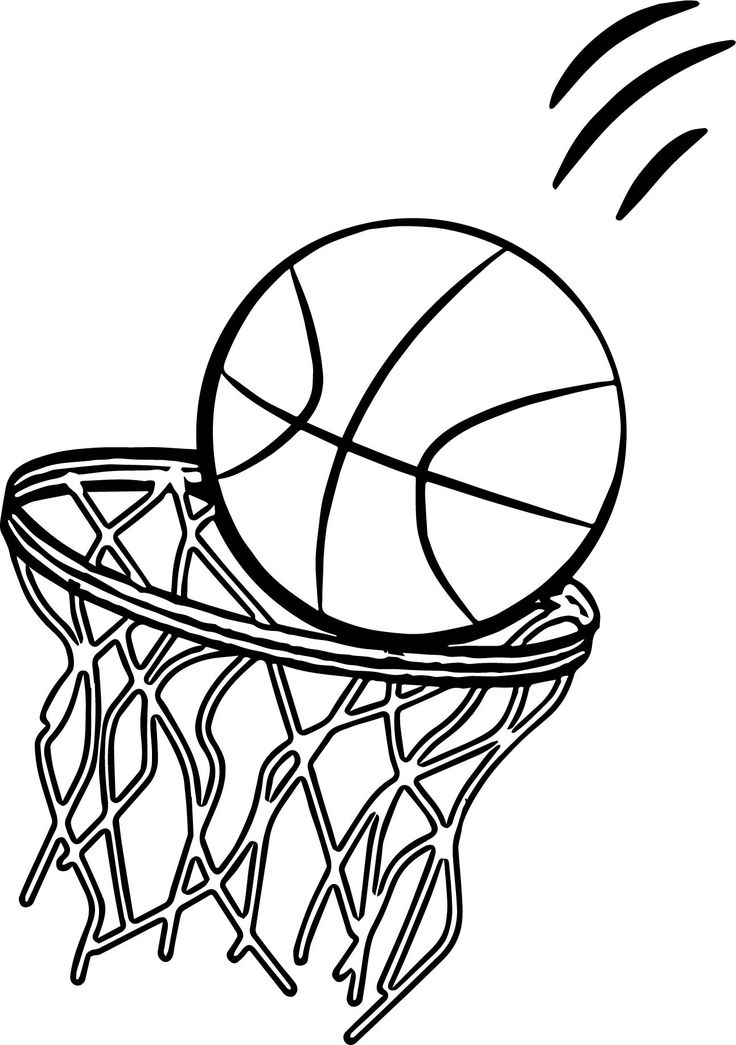
Recreational basketballs can be seen outside houses and on the streets. This half-court version of the game is often referred to as "streetball". Other side effects of the game, including a beach version that allows you to carry a ball, have been invented.
Would you like to draw a basketball? Doing so is easier than ever with this easy, step-by-step drawing guide. All you need is a pencil, pen or marker and a sheet of paper. You can also color your finished drawing.
If you liked this tutorial, see also the following drawing guides: Baseball Bat, Baseball Cap, and Basketball Player.
Basketball Hoop Step by Step Instructions
1. Start by drawing a flattened oval. Then draw a smaller oval inside the first one. This forms the rim of the basketball hoop.
2. Extend two straight lines horizontally from one side of the rim. The top line should be longer than the other. Then extend lines down from the ends of those lines.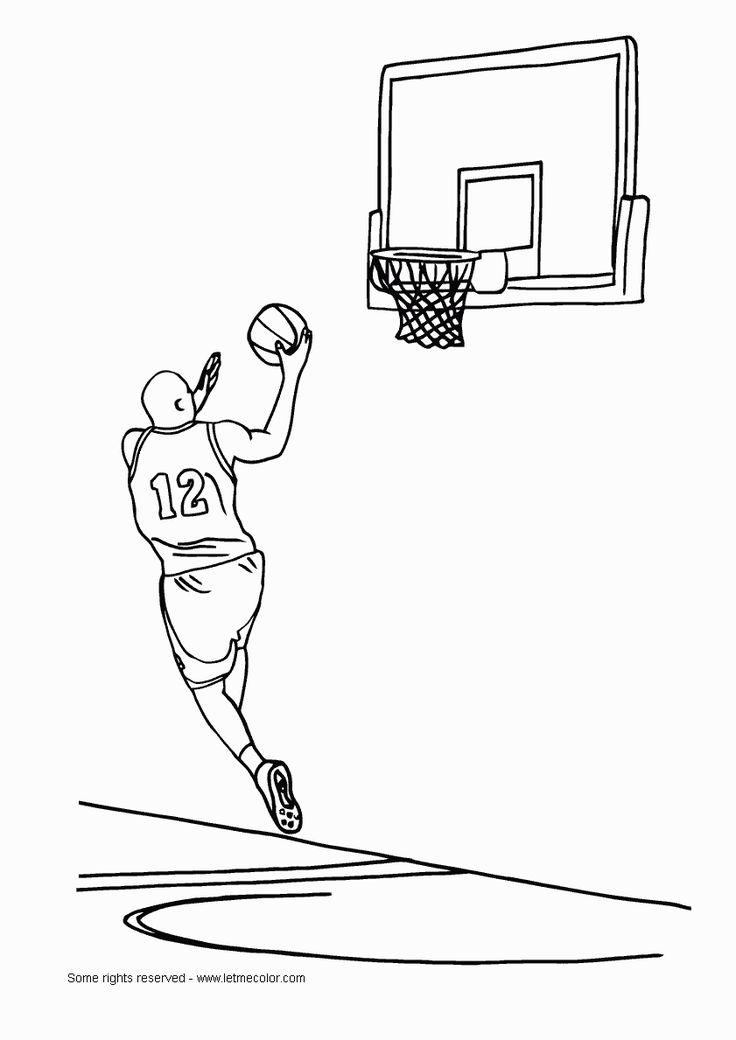 Connect them at the bottom using a straight line. This connects the rim to the back panel.
3. Draw a curved line down one side of the rim. This starts the outline of the network.
4. Draw a curved line down from the other side of the rim. Connect the lines at the bottom using a wavy, irregular line. Then draw diagonal parallel lines across the net. Follow them in parallel lines on the opposite diagonal. The result will be a hatch or checkerboard pattern that indicates the lines of the network.
OTHER EASY DRAWING GUIDES:
5. Draw perpendicular diagonal lines in the inner oval of the hoop, indicating the opposite side of the mesh.
6. Draw a circle covering the bottom of the net. This will become basketball.
7. Draw a curved line across the basketball. Perpendicular to this line, draw three additional curved lines. These are basketball stitches.
8.


:no_upscale()/cdn.vox-cdn.com/uploads/chorus_asset/file/13128999/KELDON_JOHNSON_MBB2018_01_CW_600x900.jpg)