Home »
Misc »
How to improve catching a basketball
How to improve catching a basketball
8 quick drills to build your passers, catchers
Passing and catching is becoming a lost skill in today’s game. Many players are spending more time dunking, trying to dunk or attempting 3-point shots.
Photo: Thomas Sorenes
Passing and catching is really one action and should be treated as such. Much of a team’s success in running a motion offense, or a set play, is contingent on the fact that the ball will be passed and caught properly.
Coaches tend to place a great deal of importance on their team’s offensive turnovers. They feel they must average less than 12 turnovers a game to be successful. By being able to simply pass and catch the basketball, you can save two to five turnovers a game. These eight drills will help your players handle the ball better.
1. No Walk Drill (5 minutes)This drill consists of two players and one ball. The players are 10 to 12 feet across from each other. The player with the ball will pass to his or her partner the partner will catch the ball with both feet in the air.![]() This continues until you stop the drill. Utilize the chest bounce, overhead and skip pass in this drill.
This continues until you stop the drill. Utilize the chest bounce, overhead and skip pass in this drill.
2. Two-Ball Passing (2 minutes)This drill consists of two players and two balls. The players are again 10 to 12 feet across from each other. The players will make right-handed and left-handed chest passes, and right-handed and left-handed bounce passes simultaneously. The purpose of the drill is getting them to pass as quickly as possible without making a turnover.
3. Bad Pass (2 minutes)This drill consists of two players and one ball. The bad-pass drill is where the players throw bad passes to each other. The receiver must move both feet to the ball to get into position to catch it with two hands. This drill is especially good for working on short hops, bad bounces and odd-spinning passes.
4. Back To Passer (2 minutes)The back-to-the-passer drill is where one player has his or her back turned to the other one. The player with the ball will call out the player’s name and makes a chest pass to the receiver. Upon hearing their name called, the receiver will turn completely to the ball with both hands, ready to catch the pass already on its way.
5. Keep Away (1 minute)This drill consist of three players and one ball. The defender will be within the jump circle or the free-throw circle on the court, and the two passers will be standing on the circle. The passer’s job is to complete the pass without allowing the defender to touch it. If it is touched, the defender replaces the passer.
6. Three-Player Weave (5 minutes)In this drill, have five groups of three and each group has a ball. The passer will pass to the teammate next to him or her and follow the pass, going behind the teammate. This is continued up the court until a layup is shot. The group will then come back down the floor the same way.
7. Machine Gun Passing (5 minutes)This drill consists of seven players and two balls. One player in the middle must continuously make completed passes to the remaining players scattered along the 3-point line for 30 seconds. The players on the 3-point line must have his or her knees bent and hands ready. As soon as a ball is caught, it is passed back to the middle player. The middle player must pass the ball out immediately, but they cannot pass it to the same player that threw it to them. If a ball gets free on the perimeter, it equals 10 push-ups done at the end of the drill.
8. Four-Corner Passing (1 to 3 minutes)This drill consists of 12 to 16 players and four balls. The players get in lines at the two blocks and the two elbows of the lane. Each line will have a ball. On the whistle, the players will pass to the right, follow their pass for a hand-off, return the hand-off, and rotate to the back of the line.
This is a continuous drill with all four balls moving at the same time. Have your players call out the player’s name they are passing to. On a second whistle, the players will switch the direction of the passes.
These are eight quick fundamental drills on passing and catching to make your players better passers and catchers. Practice at least two of these drills daily, spending at least 5 minutes — but usually 10 minutes — somewhere in practice on these drills. These drills, as well as the emphasis on passing and catching in scrimmage situations, will make your team much better ball handlers.
Beginner Drill To Improve Passing Technique and Catching
Home > Coaching > Drills > Passing > Beginner Drill To Improve Passing Technique and Catching
The following Free-Throw Lane 4 Corner Passing Drill is effective because it not only develops fundamental passing ability, but it also adds multiple different movements and forces your players to focus on the many actions going on around them.
When teaching players a new passing drill, coaches typically use exercises that center only on form and crisp passing fundamentals.-Step-5.jpg/aid43486-v4-728px-Play-21-(Basketball)-Step-5.jpg) While this is very important to developing passing skills, one important aspect can be forgotten. In a real game situation, there are many variables that contribute to successful passing. These variables consist of teammates who are constantly in motion, the defense floating in and out of passing lanes and many other aspects your passers have to be aware of.
While this is very important to developing passing skills, one important aspect can be forgotten. In a real game situation, there are many variables that contribute to successful passing. These variables consist of teammates who are constantly in motion, the defense floating in and out of passing lanes and many other aspects your passers have to be aware of.
Step 1:
The drill begins with your team breaking up into four
lines, one at each of the four corners of the free-throw
lane. To become familiar with the pattern, your team
should start with just one ball. As shown on the right,
player 1 will begin with the ball. #1 will pass up the
lane to #2 and will follow the pass and run toward #2.
Step 2:
Player #2 will catch the pass from #1 and immediately
pass the ball back to player #1.
Step 3:
Player #1 will catch the return pass from #2. At this
point, player #1 should now be within arm's length from
#2. #1 will then hand off the ball to #2 and move to the
back of the line behind #6.
Step 4:
Player #2 receives the handoff from #1 and then passes
the ball across the lane to player #3. As soon as 2 passes
to #3, player #2 will follow the pass and run to where 3 is
on the right elbow. Just as in step 2 above, player #3 will
catch the pass from #2 and immediately pass the ball
back to player #2. Following step 3 above, player #2 will
catch the return pass from #3 and then hand off the ball
to #3 and move to the back of the line behind #7.
This drill continues by moving in a counter clockwise
motion as shown in the three diagrams on the right. The
drill keeps the same pattern the entire time – pass, pass
back and handoff. #3 will use this pattern with #4. Then
#4 will do the same with #5 and so on.
Step 5 (Add Another Ball):
Once your players feel comfortable with the drill using
one ball, you can increase the tempo by adding a
second ball. To begin with this increased difficulty,
start with the basketballs in diagonal corners. As shown
in the diagram to the right, you can start with players #1
and #3 as your first passers.
Just like with one basketball, your players will use the
same pattern of pass, pass back and handoff, following
in a counter clockwise motion.
Step 6 (Add Third Ball):
To make things even more difficult, you can add a third
basketball. In this case, players #1, #2 and #3 will begin
as passers. Instead of #1 passing to #2, player #1 will
now pass to player #6. At the same time, player #2 will
pass to player #7 and player #3 will pass to player #4.
Adding a third basketball will likely create confusion
for your players. This will simulate game situations
where there are multiple variables going on at one time.
Encourage your team to focus on the same pattern
as above. Just like with one or two basketballs, your
players will follow the same pattern of pass, pass back and handoff, repeating in a counter clockwise motion.
This drill works your players’ minds, passing ability and conditioning.
You can see the drill in action by watching this video that I found on youtube:
Here are more great games and basketball drills.
What do you think? Let us know by leaving your comments, suggestions, and questions. ..
..
Methodological development "Training and improving the technique of passing the ball in basketball." 7th grade
Basketball is very popular among students of general education institutions. Passing the ball is one of the most important and most technically complex elements of basketball. The ability to correctly and accurately pass the ball is the basis for a clear, purposeful interaction of basketball players in the game.
Over the years, working with students at the initial stage in grades 5-6, I have identified a number of problems in mastering basketball techniques, in particular in teaching ball passes. To solve these problems in training, I picked up a set of exercises that helps me solve and achieve my goals. According to my observations, students most of all experience difficulties in the technique of passing the ball. Below are exercises for learning and improving the technique of passing the ball in basketball, with the help of which they help to solve these difficulties.
PASSING THE BALL ON THE PLACE Starting position: limbs too tight; the player is located on straight legs or irrationally distributes body weight; lowered (rejected) head or averted gaze; the ball is held with the fingertips or palms.
Typical errors: Initial position:
- excessively stiff limbs;
- the player is positioned on straight legs or distributes body weight irrationally;
- lowered (rejected) head or averted gaze;
- the ball is held with the fingertips or palms.
Learning activities: Explanation and demonstration. Imitation of the studied method of passing without the ball in divisions with a mirror return to the sp. Imitation of passing-catching the ball in pairs by transferring the ball from the hands of one player to the hands of another. Individual implementation of the studied method of passing the ball into the wall. Passing the ball in a studied way to the target - partner's pre-set hands. The same, but with a step behind the standing, but not the supporting leg. Passing the ball in pairs with a step, changing the distance and trajectory of the ball. The same, but with the subsequent performance of various motor actions (for example, after the pass, a jump with a push with two legs with a turn of 360 ° - catching the ball from a partner, etc.). Passing the ball in the studied way in pairs in various and. p .: standing, kneeling, sitting, lying on his stomach, etc. The same, but changing and. n. after each transfer or series of transfers. The alternation of the studied ways of passing the ball in response to the sound and visual signals of the teacher or partner. Passing the ball on the spot in various formations: in opposite columns, in ranks, in a triangle, square, circle, etc. - with subsequent movement after the ball. The same, but with subsequent movement away from the direction of the completed transfer (for example, when building in a triangle: transfer to one of its vertices, movement to another).
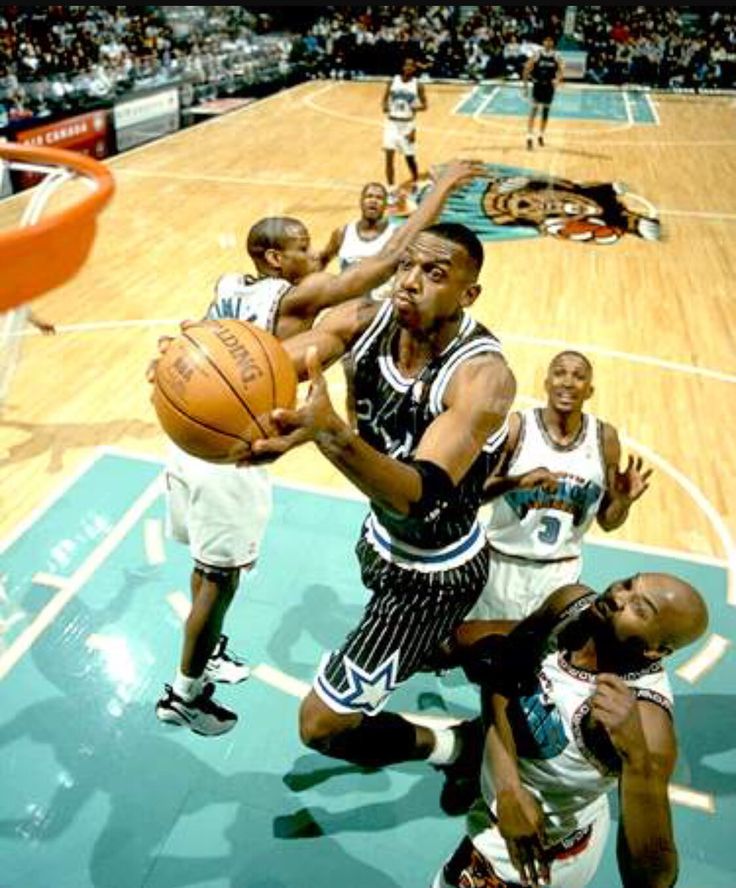 Passing the ball from a place to a moving partner: to a landmark (marking the site, a raised hand, etc.) or according to his sound signal. The same, but arbitrarily changing the moment of passing the ball.
PASSING THE BALL Develop arm strength. Sending the ball accurately across the entire field is not an easy task; you can’t cope with it with weak hands. Therefore, when teaching passes, more exercises to develop hand strength should be included in training.
Learning activities: Medicine ball exercises are effective for this purpose. They develop the muscles of the arms and shoulder girdle, contribute to the development of dexterity, flexibility.
Exercises with stuffed balls are performed in groups, in pairs and individually. Here are some of them:
- Throwing, pushing the ball up and catching it while standing, in a jump, after a turn, sitting.
- Passing the ball from the right hand to the left behind the back, from the left hand to the right in front of you, without touching the body.
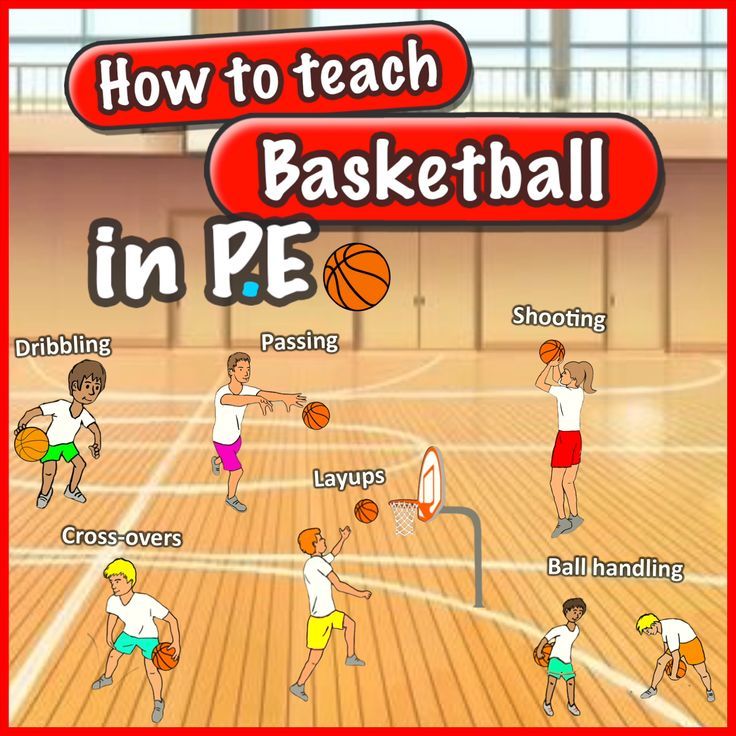
- I. p. - the ball behind the back. Leaning forward, throw the ball up and catch it.
- I. p. - standing with your back to your partner. Bending, throwing the ball over the head.
- I. p. - the same, legs apart. Leaning forward, throwing the ball between the legs.
- Lying on the back. Throwing the ball over the head.
- The same, but perform the throw while leaning forward.
- Passing the ball with two hands from the chest, from below, from the side, from behind the back, from behind the head.
- The same in running (in the relay races "Overrunning", "Passing in a circle").
Develop arm strength exercises on simulators, with dumbbells, barbells, flexion and extension of the arms in emphasis, sipping on the crossbar. To strengthen the hands, exercises with tennis balls (squeezing-unclenching) and weighting the hands with special cuffs are effective.
PASSING THE BALL WITH TWO HANDS FROM THE CHEST It is used to deliver the ball to a partner who is at a distance of 6-8 meters.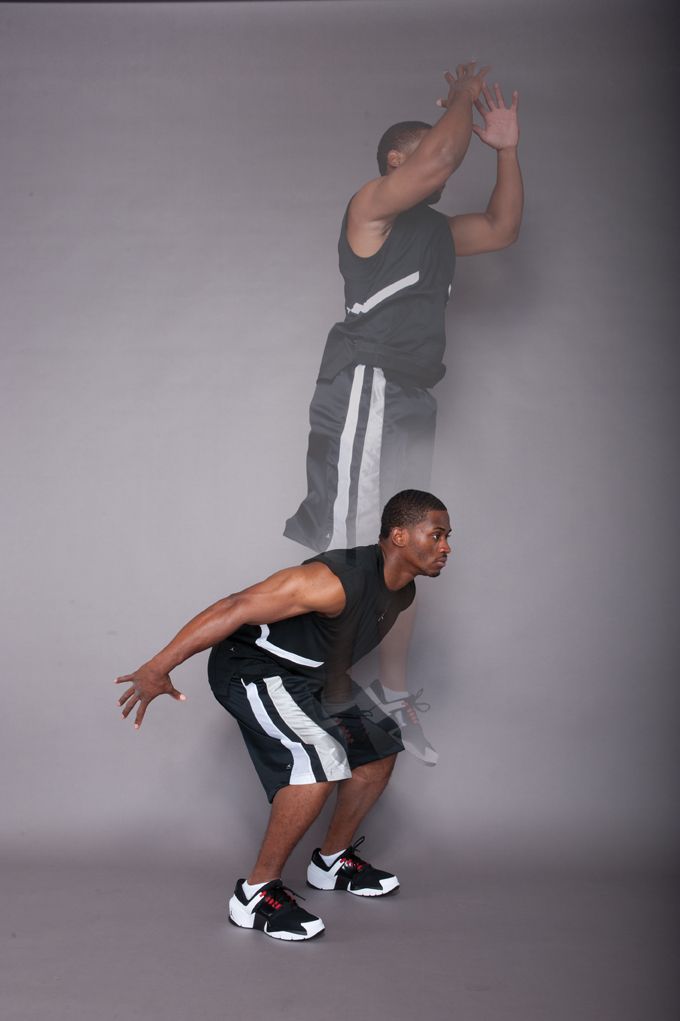 A pass is made from the main stance, when the ball is held with both hands at the chest, the elbows are freely lowered, the fingers are widely spaced - large at the back, directed towards each other at an angle of 90-120 °, the rest are up and forward. The swing begins with a small circular movement of the arms down (with the fingers looking forward, and the legs are bent) towards you - up, to the starting position in front of the chest (the legs begin to straighten), after which the arms quickly unbend forward (fingers look up). The weight of the body is transferred to the front leg. The transfer ends with an active movement of the brushes. The ball is spinning backwards.
After the ball is released, the arms are straight and parallel to each other, directed towards the pass, and the hands are lowered. Then the weight of the body is transferred to both legs evenly, the arms are bent to the chest. The position of the main rack is taken.
The training of this transmission is carried out first on the spot, then with all sorts of rearrangements.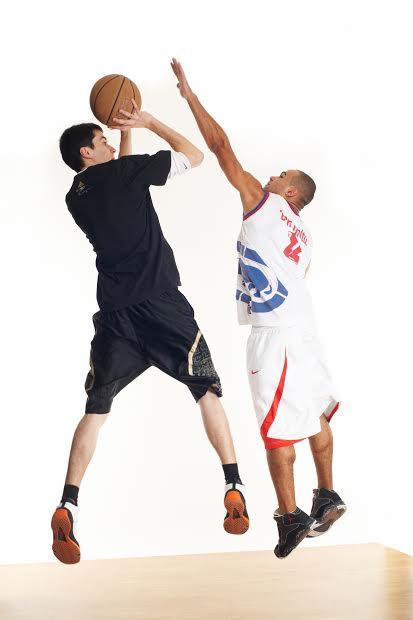 You can carry out these exercises in the form of outdoor games, but paying attention to the technique of performing passes and excluding jogging. The player must receive the ball while standing still, pass it and then run to another place.
Typical errors:
- movements of the upper and lower extremities are not coordinated;
- when swinging, the elbows are widely spaced to the sides;
- excessive swing amplitude;
- no brush whip;
- loss of balance;
- when swinging, the torso leans back.
Teaching actions:
It is advisable to start learning the transfer with two hands from the chest with the final movement of the hands. In the initial position, when the arms are half-bent and directed forward, the elbows are lowered down - to the sides, the thumbs look at each other at an angle of 90-120 °, and the rest are directed upwards, a sharp straightening of the arms and a sweeping movement of the hands are performed. The ball is sent to the chest of a partner located 2-3 meters away. Having mastered this movement, it is advisable to connect the work of the legs.
The next exercise could be from the starting position, with the ball down, arms half-bent, fingers pointing forward. Simultaneously with the straightening of the legs, the ball is brought to the starting position of the previous exercise, and the same movements are performed.
Once you have mastered these exercises, you can begin to pass from the starting position of the main stance. In this technique, the greatest attention is paid to the final movement of the hands.
Depending on the number of balls, the formation form of students is selected. It is desirable to have one ball for two, the players are located in two lines. If this is not possible, then you can perform the exercise in triples (triangle), fours (square). It is better if, at the initial stage of training, students perform these exercises while standing still, without rebuilding.
After mastering the movement structure on the spot, it is necessary to move on to teaching this transmission step by step. The student from the position of the main stance begins the movement of the swing. At the moment when the ball starts to rise from the bottom position, the weight of the body is transferred forward and a step is taken. Behind the standing leg straightens forward and upward. The torso leans forward a little, the arms are straightened, and the pass is made. The ball must be released from the hands until the foot touches the field.
ONE-HAND PASS One-hand pass from the shoulder while standing still - hands with the ball are moved to the right shoulder so that the elbows do not rise and at the same time the player turns slightly towards the backswing. Then the left hand is retracted from the ball, the right immediately straightens, the body turns after it, the body weight is transferred to the front leg. The ball is released by the movement of the arm and hand.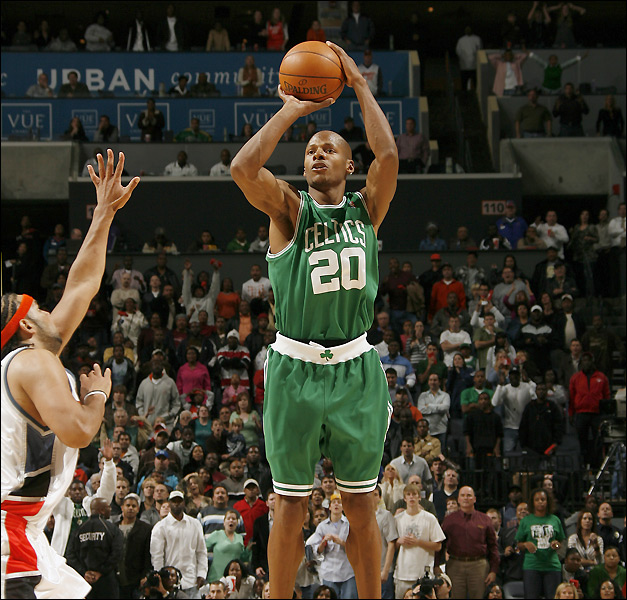 After the ball takes off, the right hand accompanies it for a short moment, then the player returns to its original position - the basketball player's stance.
Typical errors:
- Inconsistency in arm and leg movements.
- Wide elbows, excessive swing.
- No sweeping motion with brushes.
- Trunk excessively leaning forward.
- When passing with one hand: lift the ball high above the shoulder.
- When transferring to motion, also vertical oscillation of the torso or jumps, instead of sliding "soft" steps.
- Passing and catching the ball are learned at the same time.
Bounce PASS This is the most effective way to pass the ball to the post when he is heavily guarded. Use it in the final phase of a fast break when beating a defender or when you need to give a short back pass to a player going to the shield.
Passing is similar to a two-handed pass from the chest. The ball hits the floor at a point 2/3 of the distance from the sender to the receiver, and must bounce to it at a comfortable height for catching, best at waist level. When passing over short distances, the ball does not need to spin. But at a distance of more than 5 m. Rotation increases the speed of the ball. Rotation technique: the palms are shifted higher on the ball, the final movement of the hands is sharp, the hands seem to accompany the ball with the palms down.
ONE-HAND SHOULDER PASS One-hand shoulder pass is the most common way to pass the ball over any distance with minimal swing time and good ball control. With the active resistance of the defender, it is much easier to pass the ball with one hand than with two. To perform it, the player, supporting the ball with his left hand, transfers it to his right hand (when passing from the right) to the right shoulder, while simultaneously turning his torso in the same direction and bending his legs. Then he lowers his left hand and, straightening his right hand, directs the ball towards the sing with a sweeping movement of the brush. At the same time, the legs unbend, the torso turns, helping to perform the transfer. If the ball needs to be passed over a long distance, then the arm with the ball, when swinging, is taken further back over the shoulder, and the leg standing behind is brought forward with a sharp movement.
Typical errors:
- does not fully extend the arm;
- no brush overlap;
- feet are parallel or the leg of the same name is in front - often confused with the starting position for throwing one from the shoulder;
- lack of coordination of movements, especially over long distances.
Teaching actions:
It is advisable to start learning the transfer, as well as transfer with two hands from the chest, with the final movement of the hand from the initial position of the half-bent arm. The left hand is holding the ball. In the following exercises, depending on the assimilation of the material, the previous ones join in the transfer of movement. In this way, one gradually proceeds to complete transmission. Forms of construction of those involved - as in teaching the transfer with two hands from the chest.
PASSING THE BALL IN MOTION - DOUBLE STEP Learning to pass the ball on the move (double step) should start as early as possible. Trainees must be able to pass forward and catch the ball in motion with a two-step stop.
Typical errors:
- Inaccurate and very strong passes that make it impossible to correctly execute the "double step".
Learning activities:
Initially, the fulfillment conditions are eased by introducing a stationary ball. One of the students or the teacher holds the ball with his arm outstretched to the side. The player approaches, puts his foot half a meter before the ball, then takes a step and takes the ball from his hands in a single-support position, only after that he puts his foot on the floor (“one”), takes a step with the other foot (“two”) and already with the next step ( "three") transmits. The ball must be released from the hands until the foot touches the floor. Initially, it is desirable to perform these movements under the count, slowly, with stops, then a step, then a run. In subsequent exercises, the ball is thrown first up, then towards the partner. After that, the double step should be performed after catching the oncoming pass, but when the partner is standing. The next stage is the "double step" when moving in parallel columns. It is advisable to perform the first exercises in conditions when the partner is standing on the side and passes the ball. Inaccurate transmissions will not allow you to perform the exercises correctly. These exercises should teach those involved in catching and passing the ball on the right and left.
COUNTER PASSING OF THE BALL IN MOTION: Counter-passing of the ball in motion in the game is used in the process of interaction of forwards during the development and completion of the attack. It can be performed with one or two hands from the chest, from the shoulder, from the head (from above) or from below.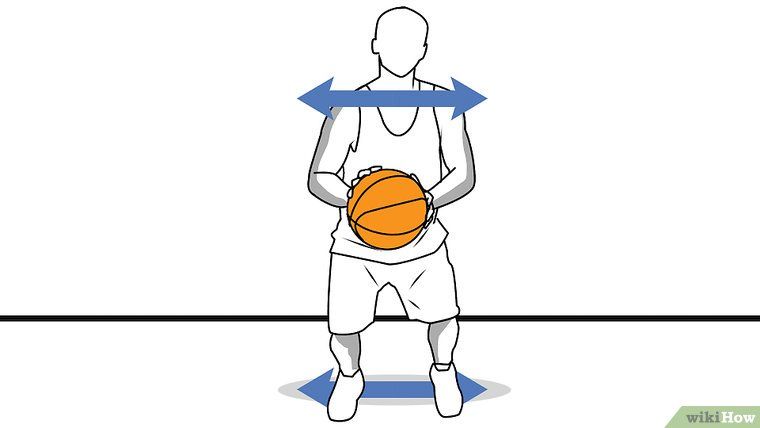
Typical errors:
- Untimely access to the ball. Stopping before catching the ball or slowing down the speed of movement at the moment of contact with the ball.
- Lack of extended stride when catching the ball.
When catching the ball: meeting the ball with bent arms at the torso or there is an attempt to grab the ball with the palms;
Learning activities:
- Explanation and demonstration. Performing the studied method of passing the ball in motion to a motionless player after a two-step run from a place, removing the ball from the partner’s hand extended to the side;
- The same, but removing the ball after walking and then running.
- The same, but the partner, when approaching the player performing the technique, slightly throws the ball vertically upwards.
- Execution of a catch-pass in motion, directing the ball to a stationary partner: the ball is thrown to the oncoming player at a predetermined point on the court, indicated by a marking line, medicine ball, etc.
- The same, but after an oncoming pass of a partner with a rebound from the floor, made from a place on the sound signal of an oncoming player.
- The same, but after the oncoming transfer of a partner along a hinged, and then along a straight trajectory.
- Performing the studied technique in general when students move from opposite columns: passes with a rebound from the floor when players move in the opposite direction; transfers in a straight trajectory with the oncoming movement of players. The same, but constantly varying the speeds of oncoming movements.
Having used these exercises over the years, I can note that these exercises help to improve the accuracy of passes that can be tracked when passing control standards (passing the ball in pairs, threes for a while), as well as the effectiveness of passes during the game. I hope that my experience will help solve similar problems with my colleagues.
Literature - Basketball.
 Publishing house "Physical culture and sport", Moscow, 1967.
 - Basketball for everyone. E.R. Yakhontov. Publishing house "Physical culture and sport", Moscow, 1984.
- Basketball. Concept and analysis. B. Causi. F. Power. (translated by E.R. Yakhontov), Publishing house "Physical culture and sport", Moscow, 1975.
- Basketball. Tutorial for beginners. L.M. Zetkin, Publishing house "Physical culture and sport", Moscow, 1959.
- We play basketball. S. Stonkus. Publishing House "Prisveshchenie", Moscow, 1984.
- Individual basketball exercises. E.R. Yakhontov, L.S. Kit, Publishing house "Physical culture and sport", Moscow, 1981.
- .Kostikova L.V. Basketball: ABC of sports / L.V. Kostikova. - M.: FiS, 2002. - 176 p.
- Nesterovsky D.I. Basketball: Theory and methods of teaching: textbook. allowance / D.I. Nesterovsky. - M.: Publishing Center "Academy", 2007. - 336 p.
- . Sports and outdoor games. Textbook for physics.
 technical schools / Ed. Yu.I.Portnykh. - M .: "Physical culture and sport", 1977. - 382 p.
 - Sports games: Technique, tactics, teaching methods: Proc. / Ed. Yu.D.Zheleznyak, Yu.M.Portnova. - M.: Publishing Center "Academy", 2004. - 520 p.
- Chernova E.A. Outdoor games in the training system of basketball players / E.A. Chernova. - M.: Physical culture and sport, 1997. - 82 p.
5 Basketball Exercises to Move the Ball with Passes
There is nothing better than watching a team move the ball quickly and efficiently around the court without greed.
Overcoming the defense with smart passing the ball to each other, creating situations for open shots and passes is one of the great offensive techniques.
Want your team to do it?
Basketball passing exercises in this article will help you with this.
But first let me explain something very important...
There are two types of training exercises:
1.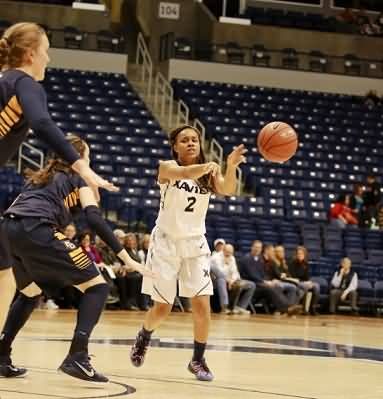 Ball passing technique.
2. Decision making during transfers.
Unfortunately, most coaches only focus on the "technical" aspect of training and forget how to train their team's decision-making ability when it comes to sharing the ball.
Your players will not improve their game passes by doing thousands of repetitions of the chest pass.
While technical drills have their place, they are far less important than passing drills with decision making.
We must let the players learn how to read the defense and make the right decisions.
In addition, ball passing exercises are great for starting a workout to warm up your team and get them to communicate and work together.
5 ball passing exercises.
1. Advance
How the drill works:
Players form 3 columns evenly distributed along the end line. The two outside players start with the balls.
3 players advance across the court passing the ball back and forth to the middle player and then finish the exercise with two shots from under the basket.
Goal:
A fun passing exercise that works on catching and passing without running, with communication, timing, and basket shots at playing speed.
Formation:
Players form 3 columns behind the end line.
Two players on the outside lines have balls.
Instructions:
3 players (1, 2 and 5) begin to move forward on the court. The 1st outside player passes the ball to the 2nd player in the middle line.
Immediately upon receiving the ball, the center line player returns the ball to the same player on the touchline.
The 1st middle player then turns to the other side and receives a pass from the 5th outside player and immediately returns the ball to him.
Outside players may use 1-2 steps to avoid running.
The drill continues until the players reach the opposite 3-point line. When this happens, the two outside dribblers go to the basket and shoot.
Then the group waits at the opposite end for the rest of the groups to complete the exercise before starting the exercise on the other side. On the right scheme at the top, the three players (4, 3 and 2) continue the exercise according to the scheme described above.
Options:
Medium or 3-point shots. Instead of ending with a run to the basket, players may end with mid-range shots or 3-point shots.
Back and forth - instead of waiting at the other end, the troika can complete the exercise to both ends of the court. Only now the threes are placed on both end lines and begin the exercise when the three from the opposite side return to their half of the court.
One Ball - If you are coaching very young players, you can run this exercise with one ball until the players understand how it works.
Coach's Note:
Passes must be passed on the move in front of the player using proper passing technique.
The receiver must hold his hands at goodie level, showing 10 fingers and calling for the ball to be passed to him.
The middle player must catch the ball and quickly pass the ball to a running partner. Don't run!
Shooting technique while moving from under the basket is very important in this exercise. Watch your footwork and make sure all players are doing it right.
2. Monkey in the middle
How the exercise works:
Players are divided into groups of three. Each group has one ball. The two transmitters lined up 12 to 15 feet apart. The third player in the group is the "monkey in the middle". He tries to hit or steal the ball. The two outside players must pass the ball to each other without using cross passes or dribbling. Simply turning and using feints to open up the passing line and pass the ball past the defender.
Goal:
A fun exercise that works on defense at the same time. This exercise will teach players how to use feints and turns to create a passing zone and also to protect the ball.
Lineup:
• Groups of 3 players.
• Each group has one ball.
• The passers are lined up 12-15 feet apart with the third player (back) in the middle.
Instructions:
1. The drill starts with the defender attacking the player who starts the drill with the ball.
2. The attacker uses feints and steps to pass to another attacker while the defender attempts to parry or intercept the pass.
3. After each pass, the defender rushes towards the ball carrier and tries to press the ball again.
4. When the defender recovers the ball or kicks the ball, the players change positions.
Variations:
Change after a certain time - Players can change positions
after a certain period of time (depending on the age of the players, their strength and stamina), and not after each interception and elimination. For example, 30-40 seconds.
One dribbling available. Let the attacking players hit the ball once to the floor to open up the passing corner. It will be tougher for the defender.
Only bounce passes allowed - in order to make it more difficult for attackers, allow them to only bounce passes.
Notes:
• It is very important for a defender to have active arms and legs at all times. This is the best way to intercept.
• Passing players must wait for the defender to recover before making the next pass. The purpose of the training is to learn how to pass and create passing angles.
• If there is no set time, the offensive player must not hold the ball for more than 5 seconds without passing the ball.
• No passing in an arc! They make the drill too easy for the attackers and will not lead to improvement.
3. Swing passes
How the exercise works:
The team is divided into 4 groups in the corners on half the court. The players make a pass to the player on the right, who start running along the sideline towards the endline. The sender then joins the end of the column into which he passed the ball.
Purpose:
A drill intended to be used primarily with young players or as a warm-up. This training will improve passing the ball on the move, as well as improve reception and passing without dribbling.
Lineup:
• The team is divided into 4 groups. One group located in each corner.
• The first player in one of the groups has the ball.
Instructions:
1. The drill is started by ball carrier 02 passing the ball 01 to the player on the right.
2. Before passing the ball, the receiver must start running in the direction of the next group, where he will make the next pass of the ball.
3. 01, having received the ball, passes it to player 05, who starts a dash towards 03.
4. After each pass, the passer joins the end of the group where the ball was passed.
5. The exercise continues according to the same scheme with passes and jerks of the players along the square in the same direction.
6. After a certain period of time, the coach changes the direction of the passes.
Options:
Turn on the second ball. If the players perform confidently, then you can enter the second ball in the opposite corner.
Various types of passes - The drill can be performed with one or two hand passes, bouncing, etc. One Dribbling - Players are allowed to make one dribbling before passing to the next player. This can be useful if you are passing with one hand.
TIPS:
• The receiver does not need to slow down or speed up to catch a transmission. Transfers must be accurate, timely and forward.
• The receiver must initiate the snatch in a timely manner with arms outstretched to assist the passing player in making a timely and accurate pass.
• It is very important that you do not make any mistakes during the exercise. Don't let them fall into this bad habit.
• Begin the exercise at medium speed at the beginning until the players understand it. Then increase the intensity.
4. Bronze gears.
How the drill works:
Starting at the end line at the edge of the penalty area, pairs of players pass the ball back and forth using various passes as they run across the court to the other end line. When they get there, they move closer to the touchline and come back using various passes over the players in the middle of the court.
Purpose:
An excellent warm-up that provides many passes in a short amount of time. Including passes of various lengths and types for players in training.
Line-up:
• All players find a partner.
• Each pair has one ball.
• Pairs split into two columns behind the endline at the edge of the SR.
Instructions:
• 1. The first pair move to the opposite side at a slow pace in the middle of the court, passing the ball from the chest to each other.
• 2. As soon as the first pair is closer to the 3-point line, the next pair starts.
• 3. When the first pair of players reach the opposing endline, they move to the touchlines and return, passing the ball over the pairs of players moving in the middle of the court.
• 4. When the players return to their starting position, they rejoin the pairs in the middle of the court and continue continuous training.
• 5. Every couple of minutes, change the type of passes players make for middle pairs and outside pairs.
Options:
Gears for pairs in the middle. For the mid lanes, there are several types of passes that I recommend: from the chest, with a rebound, one-handed from the chest, and one-handed with a rebound.
Outline Passes - For outside lines there are several types of passes that I recommend: chest passes, overhead passes, one hand passes.
Remember to consider your team's age, strength and skill level when deciding which passes they should use during practice.
Tips:
• Follow the pace of the exercise; especially if it is used as one of the warm-up exercises. Walking should not be allowed, but too much traffic should also be avoided. Accurate transmission is the main focus of training.
• Players on the outside lines must not make too many passes in an arc and with a very high trajectory on their passes. They should be at a height that is safe enough not to hit the midlines, but straight enough to reach your partner quickly.
• The ability to pass the ball with either hand is an important skill to develop. Expect mistakes when your players first perform a drill, but make sure you train them properly.
• Footwork is very important during this workout. Players must be able to catch the ball and pass back to their partner in two steps. If you are training young children and they cannot pass the ball at speed yet, slow down the pace of the exercise.
• After each run around the court, the players must switch to the sides so that they practice passing short and long passes from both sides of their body.
5. Netball
How the exercise works:
Regular battle without dribbling the ball is allowed at any time. Games can be played 3 on 3, 4 on 4, or 5 on 5.
Target:
An excellent exercise that improves not only passing the ball, but also moving without the ball, positioning, jerking, etc. This exercise will lead to less use of dribbling in games and fewer losses.
Lineup:
• Divide the players into two teams based on the number of players available for training.
• Try to make teams of the same height and skill level.
• Only one ball is needed for training.
Instructions:
1. Teams play normal full game - no dribbling!
2. The exercise is performed within the time specified by the trainer.
3. Start with the arrangement shown in the diagram.
Point system:
• The game is played up to either 5 or 11 points.
• Each 2-point roll is worth 1 point.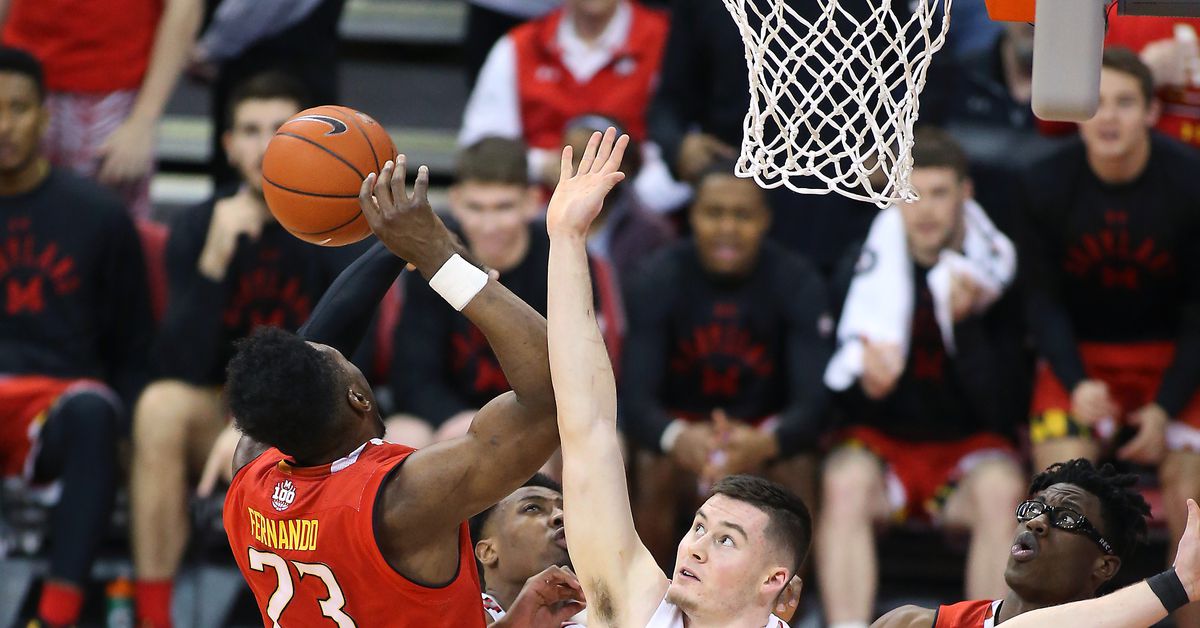
• Each 3-point roll is worth 2 points.
• Must win by 2 points.
• In the event of a shooting foul, the offensive player throws one free throw for 1 point.
Variations:
One Shot Allowed - Players are allowed 1 dribbling when they gain possession of the ball. This is not a requirement, just an option.
Only bounce passes allowed - Restrict your players to only use bounce passes.
3 teams. The exercise starts by dividing your team into 3 groups of 3 to 5 players. Two teams start defense in each half. The third team is in the middle of the court on offense. The offensive team chooses one side and tries to score the ball without dribbling. Same scoring system as above. After a goal is scored or the possession of the ball is changed, the defensive team receives the ball, attacks in the opposite direction. The previous offensive team may play defense up to the center line of the court. Play until one team reaches 5 or 11 points.
Tips:
• It's very important to give players instructions on how to set up wide and run smart to get the ball.