Home » Misc » How to improve your layups in basketball
How to improve your layups in basketball
Five basketball training drills to improve your layups
by Mofe Owolabi | Sep 28, 2020
Layups are almost definitely the easiest way to score in basketball. This means that training to improve your layups is just common sense!
Here are five drills to improve all aspects of your layup game.
The first three are solo drills, while the last two require a second player.
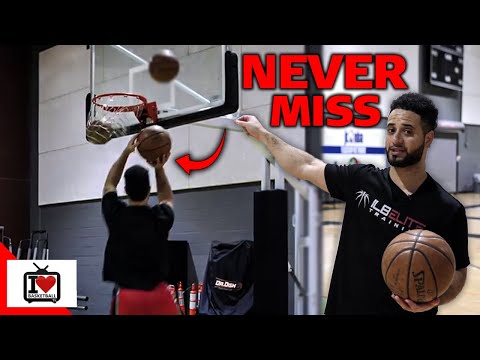
Drill #1: Mikan drill
In this drill, you stand under the basket and take layups from alternating sides, also switching hands each time.
This is a classic drill, and justifiably so.
Not only will it get your standing layups up to scratch, but it will also develop your “touch” and control for other types of layups as well.
Here’s a video showing exactly how it’s done:
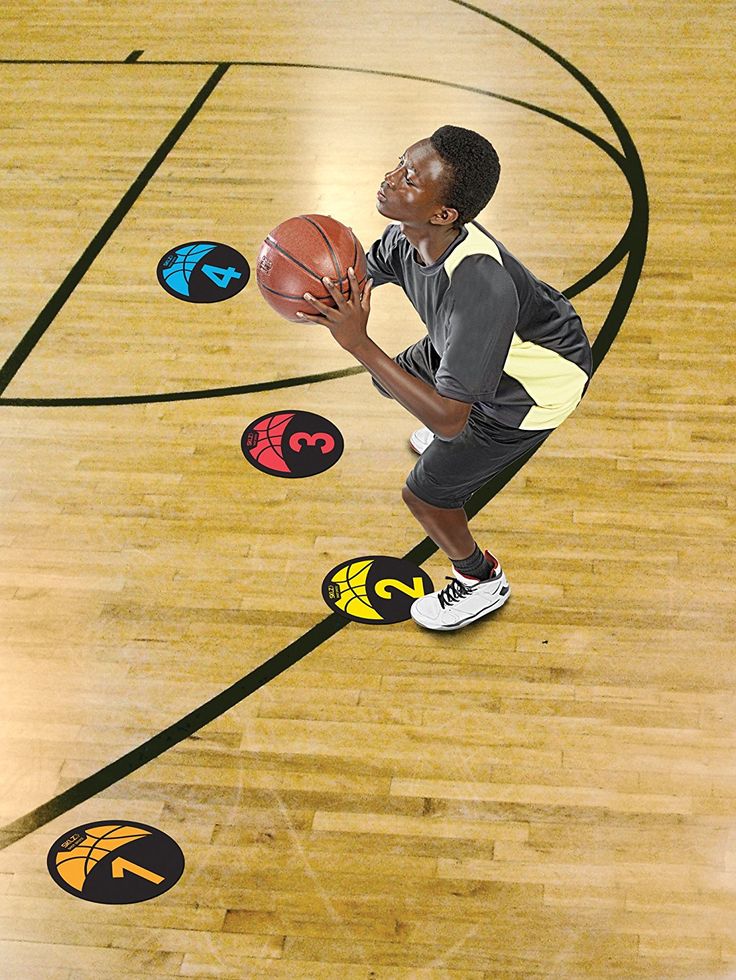
Drill #2: Game-speed layups
Don’t worry if your court doesn’t have markings, just estimate the starting position.
Here, you’re going to start at the left corner of the court (as marked in the diagram), working your way around to the right corner.
From each of the five spots, attack the basket aggressively as if in a game.
Then collect the ball, run quickly to the next spot and do the same thing, until you reach the right corner.
On the two first spots (left corner and left wing), use your left hand and use your right hand on the two final spots (right wing and right corner).
For the middle spot at the top of the key, use your weaker hand so that it improves.
This drill will not only get you better at hitting layups at game speed, but will also help you work on your endurance and stamina.
Drill #3: Advanced layup practice
This is an opportunity to work on tougher finishes at the rim.
Start at around the free throw line, attack the basket with one dribble and finish with a layup.
You can work on any type of layup you like: eurostep, double clutch, spin move etc.
There are just two points of focus:
Clean footwork – get to the basket without traveling
Mirror each layup – after you do any type of layup, but repeat it with the mirrored footwork for the opposite hand, to keep your layup game balanced
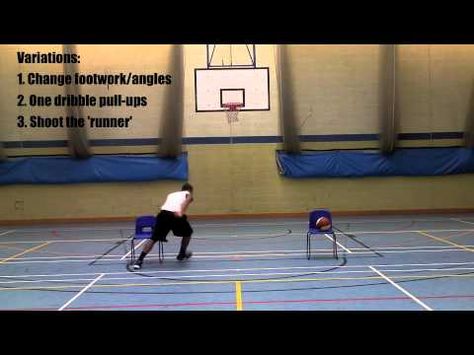
Drill #4: layup contest (two player)
Get another player to stand in front of the basket and reach their hands straight up.
Attack the basket, avoiding the defender as you jump in the air to score the layup.
Afterwards, you can swap positions and whoever makes the most out of five attempts wins.
By mimicking an in-game situation, this drill helps you to improve your contested layups.
Drill #5: reverse layup contest (two player)
Here, attack the basket side-on (either from the corner or the wing) and have the second player trailing you.
In this case, we’re working on your reverse layups under pressure.
Attack the basket and score with a reverse layup. Then swap, and again, the most out of five attempts wins.
NOTE: as the player trailing and defending, act as if you don’t know which type of layup the attacker will do. Don’t defend too aggressively to avoid injury.
Lay up techniques & exercises
What is a lay up in basketball?
How does a lay up work?
Four types of lay ups
Overhand lay up
Underhand lay up
The power move
The up and under
How do I practice the lay up?
Common lay up mistakes
Excercise to improve your jump
What is a lay up in basketball?
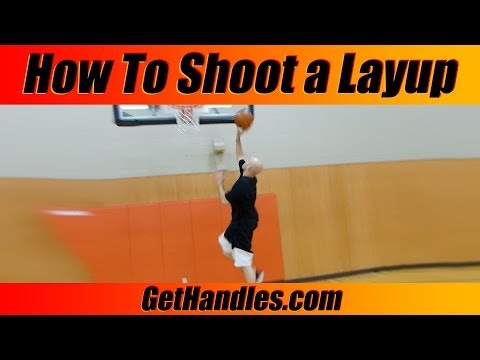
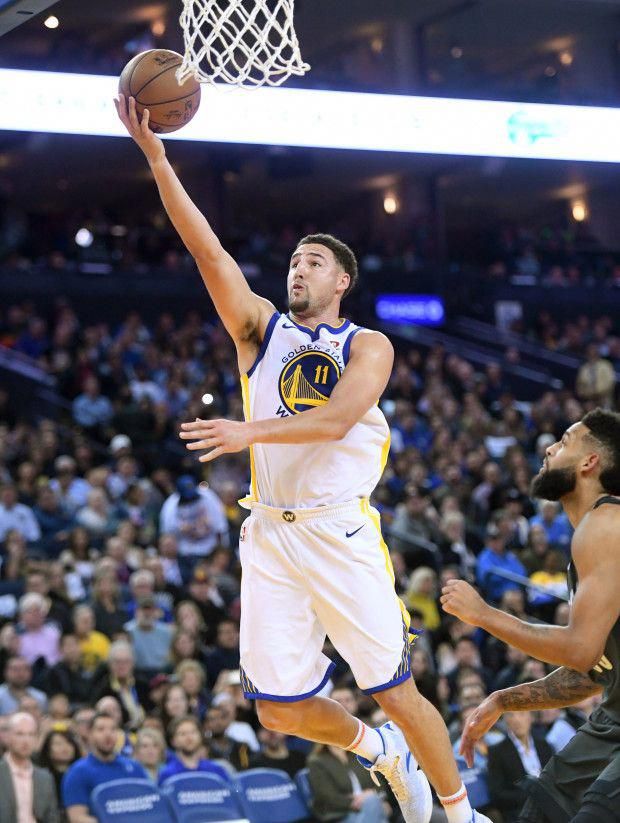
Approach the hoop while dribbling. Grab the ball with both hands, jump into the air and flick the ball onto the backboard and into the hoop. The lay up is one of the most fundamental offensive basketball manuevers and can be performed by beginners and professionals alike.
Due to the short distance to the basket, the basket lay up is a sure way to score points.
With the lay up, the correct step sequence and jump are most important.
Did you know? The lay up and jump shot are the oldest shooting techniques in basketball.
How does a lay up work in basketball?
To learn the sequence of movements and steps, we recommend starting your lay up from a standing position with a single dribble.
Ad
Here's how a basketball lay up works with your right hand:
Step 0: Positioning, 10 feet from the right of the basket
Position yourself about 10 feet from the basket, half way to the 3 point line, and run to the basket at a 45° angle.
Assume the starting classic shooting position.
Hold the ball close to your body with both hands at hip level.
Step 1: Dribble the ball with your right hand and place the left foot on the ground
Dribble with your right hand, the ball one step ahead of you. At the same time, step with your left foot.
Step 2: The right foot in front
Grab the ball with both hands, and hold it close to the right side of your body. Then take a step forward with the right foot.
3. Jump off with your left foot
Now take a step forward with your left foot and jump up and towards the basket.
At the same time, pull the right knee up. This helps stabilise your shot and accelerate you to the basket.
Important: When jumping off, focus on jumping upwards more than forwards.
Step 4: Guide the ball towards the basket and shoot
When taking to the air, bring the ball from the waist on the right side of your body. In one fluid motion, your right hand should be under the ball. Your left hand is kept to the side of the ball.
Once in the air, stretch out your right arm. At the apex, straighten your arm and elbow to shoot the ball towards the backboard. Your goal is the upper right corner of the square on the backboard.
In this video, you can see how a fluid lay up looks:
The lay up with the left hand works exactly the same but inverted, so start with your left foot, jump off with your right leg, and lay up with your left arm.
Our tip: Be sure to train both hands. This will help step up your game.
The following exercise helps beginners practice and internalise the lay up:
Here's another step by step guide on how to perform the lay up.
Step 1: Catch the ball landing with your left foot Step 2: Step forward with your right foot Step 3: Jump off with your left foot Step 4: Drive forward with your right knee Step 5: Simultaneously, bring the ball up with your right hand Step 6: Lay it up softly
The 4 different types of lay ups
There are four different lay up techniques. The technique we've mentioned is simple and well suited for beginners. The other lay up techniques are more difficult and suited for experienced basketball players.
The overhand lay up
The original and simplest version of the basketball lay up is suitable for children and beginners.
The ball is thrown from the hand onto the backboard. The basketball lay up can be done with or without the backboard.
Underhand Lay Up
This lay up variation is also called the finger roll and suited for experienced basketball players.
When laying up, the whole arm is stretched out. The hand is placed under the ball. Snap your wrist upwards so that the ball rolls off the fingertips. This will help the ball rise and fall softly into the basket.
The underhand lay up is:
easier to block,
for lay ups farther from the basket,
only possible with a strong jump.
The following video shows how to do the finger roll with the underhand lay up:
The Power Move
The only difference between the overhand lay up and the power move is that you jump with both legs. This is where a strong jump is a necessity.
Ad
The Up and Under
The most difficult lay up variation is the up and under. Here, the lay up is faked to bring the opponent out of position.
The player starts by jumping past the opponent, fakes the throw, bringing the ball around, and then lobbing the ball just before landing. In action, here's how the up and under lay up looks:
How do I practice the lay up?
The lay up is a very elaborate technique and can best be trained methodically in a series.
This means: For the lay up, first practice the individual steps and start with the simplest part. If you manage these steps individually, connect the steps in the correct order one by one.
Here's how the process works: Step 1: Perfect your accuracy on the back board. Stand 45° from the backboard and practice. Step 2: Practice the two-contact rule: Right - left - jump - back board shot. Step 3: Add in a single dribble then repeat step 2. Step 4: Add more dribbling in to feel more comfortable transitioning from dribbling to shooting. Then repeat step 2. Step 5: Practice these steps with your weaker hand.
It takes a few training sessions before the basketball lay up can be used in a game.
Common lay up mistakes
Since the lay up is quite complex, problems are sure to arise in the beginning. Perfect practice makes perfect execution. Here's how to counteract typical mistakes:
Jumping with the wrong leg or approaching the basket with the wrong sequence of steps
Go through the steps slowly, one at a time.
Have your coach or teammate tell you right leg during the step sequence.
Missing arm extension with the standing shot
t
Train the standing throw for a while.
Jump is not high enough
Pull the non-jumping knee actively up.
Do excercises that isolate your jump.
Strength and jumping exercises for a better lay up
A strong jump is vital for a successful lay up. We'll show you how to practice this.
Important before starting your lay up exercises: Warm up to get your muscles and joints ready for the strain. Be sure to plan sufficient breaks while practicing your jumping. Take care of your body to prevent injuries.
Genetically speaking, you can increase your jump height by a maximum of 10 to 20 percent. In addition to leg strength, a stable core is a necessity. A stable core allows you to better catapult yourself upwards, as your jump and core then work together to throw yourself up.
Along with jumping excercises, you can strengthen the core with the following excercises:
Plank
Push up
Sit ups
We recommend the following excercises if you'd like to train your jump.
Lunge Jumps
The jump lunge trains your explosive power:
Place your feet hip wide.
Take a large step back with your right foot.
Knee is just over the ground.
Jump and change legs.
Half squats
Half squats train your jumping power from a squating position. This excercise is helpful because many basketball manuevers involve jumping.
.
Place feet hip wide apart.
Bend your knees to go into a squating position.
Expload upwards into the air.
Half deadlift
As with the last excercise, perform this exercise from a half squat. Place the weight on two boxes.
Note: Only perform this exercise once you've mastered the dead lift. If not, you could injure your back.
Box Jumps
To do box jumps, you'll need a stable box or bench.
Stand upright with feet hip-wide in front of the box.
Bend the knees until your thighs are parallel to the floor.
Jump upwards and swing your arms forward.
Land as gently as possible on the box in a squatting position.
Jump back down gently to the ground.
Ball catching
This exercise trains your reflexes as well as your jump.
Throw the basketball against the backboard and try to catch it at the apex of its flight path.
One legged jumps
For this exercise, put one leg in the air, bend your knees and explode upwards. Once your leg is exhausted, switch legs. We recommend this excercise at the end of your training session.
Even more ideas for your next basketball practice
Still looking for more tips for your training? Sport psychologist and performance coach Sebastian Altfeld shows you how to effectively plan a basketball practice session. Or take a look at our other articles on the same topic:
The Dunk
Basketball Rules
The Jump Shot
If you're still looking for the training jersey for you or your team, we recommend taking a look at our Online Shop. Or design your own jersey with our 3D Designer.
How to throw the ball correctly in basketball: technique, tips, video lessons
The first thing taught in any basketball section is how to throw the ball correctly in basketball. This is where all the NBA stars once started. In addition to throwing technique, many more qualities will come in handy on the court: speed, strength, agility, quick reaction, but it all starts with technical improvement. For basketball players, this process never ends; in training, they work out tactical schemes and constantly work on the shot. In this article, you will learn how to throw and score the ball correctly, what types of shots are, which ones are the most effective, and how to improve your basketball shot.
If a basketball player does not progress, he becomes less successful. Therefore, after training, the players do not leave the court and for a long time just throw the ball into the basket from different points, this can go on for several hours in a row. So do both schoolchildren who have recently joined the section, and athletes from the best leagues in the world. It is extremely important to master the technique, but it is just as important to continue to work on it, to include throwing exercises in basketball in training so that all movements are not only memorized, but also verified.
Types of throws
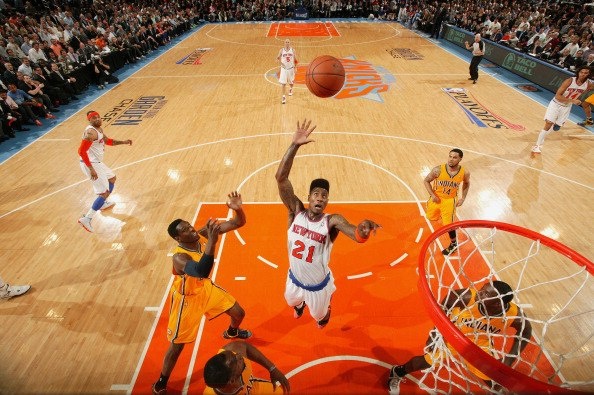
Almost the whole game consists of throws, and they differ from each other. There are different types according to the execution technique, for example, a dunk or a half-hook, as well as by range: directly from under the shield, from a short or long distance. There are also differences in the method of implementation, for example, after dribbling or in a jump.
The simplest in terms of technical implementation are lay-up and dunk. The first is performed from below, usually right from under the basket, it will not be difficult even for a child to master the correct throw in basketball from such a distance. The dunk will be a little more difficult, as physics intervenes. It is necessary not only to throw the ball, but to group well, to jump high in order to be as close to the basket as possible. In this case, it will be possible to simply put the ball into the ring with two hands or one. You can learn more about this from the article “What are dunks in basketball and how to do them correctly?”.
In the case of the dunk, it is important not only to know how to shoot correctly in basketball, but also to work on the strength of your legs and improve your jump. That is why training begins not only with throws, but with general physical preparation. The very first to be mastered will be from an average distance, this is the basis of everything, these are exactly what they do as a free kick. To implement it is simple and difficult at the same time, the moment is not technically difficult, but extremely responsible.
The worst thing that can happen to a beginner is learning the wrong technique to throw a basketball. The body has muscle memory, so learning something from scratch is easier than relearning. Incorrectly learned movements are reflected in accuracy. Sometimes even high-level basketball players spend several years to correct the wrong technical points that they found in school.
In terms of efficiency, there is no technique that will make any player successful. Much depends on individual characteristics, primarily on height and other anthropometric data. Therefore, you need to master the correct shooting technique in basketball in different performances in order to understand which one makes you more effective.
Correct execution
When learning any throw, you need to watch the position of the body. In the case of the usual, the legs should be shoulder-width apart, this gives stability and enhances coordination of movements. The throwing leg is slightly forward relative to the supporting leg, about half a step. The heels are torn off the floor surface by just a couple of millimeters, the knees are slightly bent, this gives the body springiness.
The main characteristic of basketball shots is accuracy, and it depends on the position of the head. The head should be located strictly in the center of the body, if you tilt it to the right or left, then a deviation will occur, accuracy will suffer.
Let's move on to the most important thing - the work of the hands. When taking out, the thrower is bent at the elbow at a right angle, her forearm is located perpendicular to the floor. With proper implementation, the ball will come off your hand at the level of your forehead or a little higher, this should be taken into account when training a shot in basketball. The second hand is the insurer, it should not firmly fix the ball, just hold it slightly. If you do not listen to this rule, then in flight there will be a deviation from the desired trajectory. In this case, before the throw, the projectile is fixed exclusively with the throwing hand.
Spread your fingers wide for better control of accuracy. The larger the captured area, the easier it is to control.
Accuracy is also affected by backspin, which is given to the ball by fingertips at the very last moment. Twist the middle and index fingers. The throwing arm should not be tense, the ball is escorted exclusively by the hand. The faster it is released, the more accurate its flight will be.
Basketball throwing technique consists of many tiny details, and each of them is important. Before you throw, you need to sit down slightly in order to straighten up at the right moment, this is not done abruptly, but quickly. Such actions allow you to transfer an additional momentum to the projectile. The flight range depends not only on the force that is invested by the throwing hand, so there is simply no need for its tension and sharp movements with the brush.
Last but not least is the trajectory. Players constantly calculate it to understand how to hit the basket in basketball from the distance they are at the moment. The trajectory should always be curved, throwing in a straight line is not worth it for two reasons: it is more difficult to get into the ring, and it is easier for representatives of the other team to intercept the blow. The higher the trajectory, the more likely it is to hit the basket, and not the bow. In addition, according to the rules of the game, block shots can only be placed during the ascending phase of the movement. It turns out that the higher the highest point of the flight is located, the more difficult it is to intercept it.
How to choose a throwing technique?
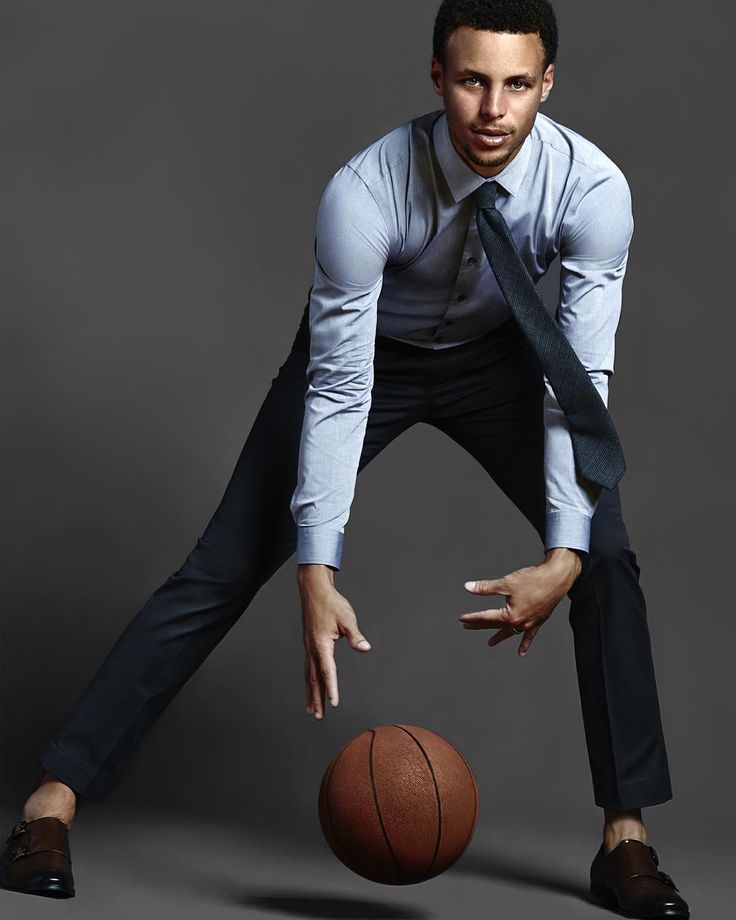
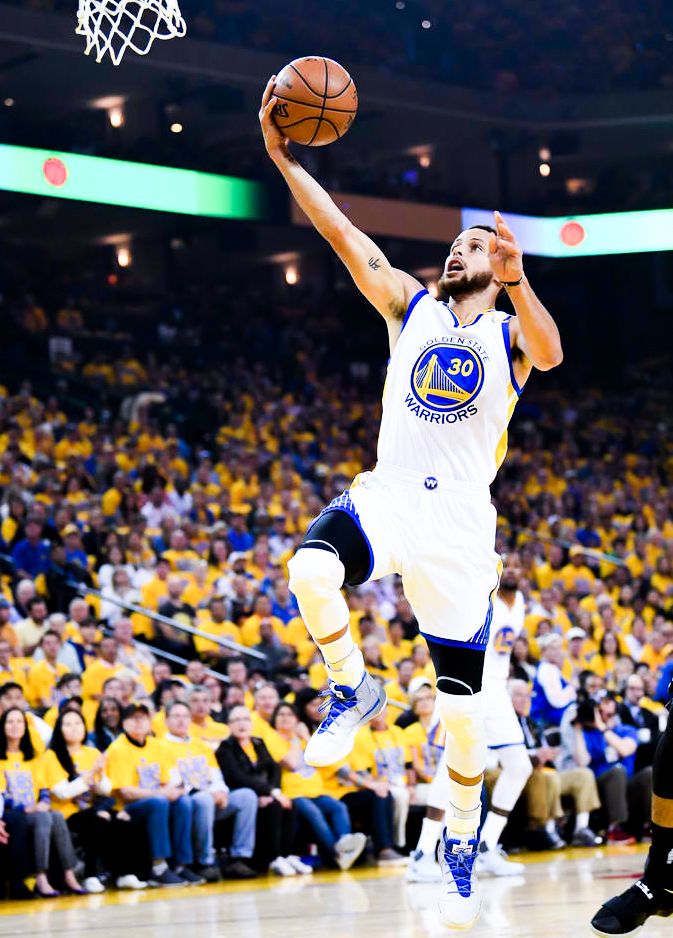
Do not try to master complex throws until the most common one is brought to automatism. It is necessary to constantly do throwing exercises in basketball on technique, initially not even paying attention to accuracy and speed. Muscle memory should be replenished with basic movements, and only after that you can try to repeat the tricks of Kevin Durant or Stephen Curry. You can learn about a complex and very effective technique from the article “How to do a hook throw in basketball?”.
What is needed is automatism, since in real game conditions there will be no time to think about how to place a foot or place hands. Opponents simply will not provide such an opportunity. Over time, you will realize that, technically, the execution of a jump shot is very similar to a free kick. The basic principles are exactly the same, the only difference is in the position of the legs. They must be positioned so as to maintain good coordination of movements at the time of the throw and after it.
When teaching how to shoot in basketball, a lot of attention is paid to the position of the body. High-level basketball players can shoot from any position, with the head and torso always in the correct position: perpendicular to the court and turned towards the basket. This position allows you to achieve high control over the ball in any implementation of the throw. It is also worth remembering that when performing in a jump, you need to move only forward, not to the side or back.
How to throw the ball correctly in basketball comes with practice. Therefore, the most successful players are those who spend more time practicing than others.
Pistol Pete's Homework – Shooting. Throw training by Pete Maravich
Hello, dear visitors of basketball-training.org.ua! Today we will continue to review educational basketball films from Petya Maravich. This time the legend of the past will tell us about the methods and ways to improve the cast in a DVD titled: Pistol Pete's Homework - Shooting .
This video, as Maravich himself says, is designed to teach us how to throw the ball into the ring. But what to do for those who already know how to throw, you ask. I answer: in the process of watching the video, you will learn a lot of useful little things that will help not only improve the accuracy of the throw, but also make it stable. I will say more: this video teaches the same “ correct throw in basketball ”.
Correct shot in basketball: Pete Maravich
The training video is built on the principle: from elementary to simple, and then to complex. In addition, it will be useful for connoisseurs of the English language to listen to some funny stories, as well as the features of the psychological preparation of the sniper player. And for those who are not familiar with English, or simply do not perceive it by ear, we have prepared a short review of the video.
At the very beginning of the video, Petya Maravich starts from the most elementary: what position is the ball in before the throw . First note from Petya: the ball should lie on the base of the fingers and on the fingers themselves. In the place where the palm is located (or rather its base) there should be free space, as it were, a hollow. Why is she needed? Without it, as Maravich shows, the ball will easily fall off the hand at the slightest contact.
Now the brush. The hand must be exactly centered on the basketball. Please note that the index finger in any case should be in the center of the ball. In slow motion, you can see that it is he who is the last to break away from the ball, is the guide.
Next is the forearm. It must be perpendicular to the floor and therefore to the ring. Why perpendicular? If it moves at an angle other than 90 degrees, then the hand (as a rule) will also move, and will no longer be in the center of the ball. By the way, my forearm of the right hand (throw) also collapses to the left side.
The left hand does not play a role in the throw, but only supports the ball (for a left-hander, of course, the opposite is true). She does not just lie on the ball - she firmly rests on it. And the position of the hand - you will feel it yourself in the process of practicing the throw.
Feature of the throwing process
Reverse rotation. This element is important when rebounding from a hoop or backboard: good backspin allows the ball to go down immediately after contact with the surface (backboard, bow). The reverse rotation of the ball is achieved due to the movement of the brush itself: it is important to throw with the brush. The movement of the brush is perfectly shown in the video.
Right after that, Pete says that the throwing movement starts from the feet, goes through the body, reaches the shoulder, goes through the forearm and ends in the hand. The hand is fully extended, the index finger, as it were, points to the ring. The hand is fixed in the final position (freeze).
Before the ball leaves your hands, look at the ring, and only then at the ball (such a banal advice, but I witness how many people throw like this: first look at the ring, then throw (eyes are already walking somewhere), then back to the ring or somewhere else).
About the trajectory. This has already been discussed in the article on " 9 tips for practicing shooting ": the higher the trajectory, the higher the likelihood that the ball will fall into it after contact with the ring. Another shot with a high trajectory creates a predictable rebound that your partners can compete for.
So, one more very important point: when throwing, you should see the ring with both eyes . If the hand (forearm) closes your view - this is very bad. Just lift the ball up and move your throwing hand: maybe a couple of centimeters is enough for both eyes to see the target.
Head does not move when thrown. The shoulders are directed to the ring. If you are right-handed, then the right leg is in front of the left (4-7 cm). Elbows, both when throwing and when passing the ball, should be almost close to the body (do not push them apart).
A bit of psychology. Petya Maravich talks about how, as a child, he literally never parted with a basketball. He took him anywhere, including sleeping with him. Before falling asleep, he lay on his back and practiced throwing with one arm vertically upwards. This allows you to train the reverse rotation of the ball, the stability of the throw and the stability of its position (the base of the fingers and the fingers themselves).
This exercise was performed for 30-45 minutes. You ask: why so long? The answer is that this approach teaches you to stay focused, to discipline both the mind and the body so that they are always ready to shoot.
Confidence. Confidence is the next component of the player's psychological preparation. The scheme that Pete is talking about is this: first he throws his usual throws (for example, this is the middle distance) and if 1 or 2 of the first five throws hit, then he goes to the ring and starts to make the so-called lay-ups. The point is to always hit more than 50% of your shots in practice. This builds subconscious confidence in your throws.
Next, Pete shows the throwing technique itself, going through all the elements of the throwing mechanics, which were discussed in the first part.
While we're watching Pete send ball after ball into the basket, it's useful to listen to him talk about the height of 's Jump Shoot. In short, he emphasizes that when performing a jump shot, it doesn’t matter if you jump high (like Michael Jordan) or practically do not leave the ground (like Larry Bird). It is important to make a throw as if in one movement, without breaking it into stages, elements. Everything should be smooth (in one motion).
Lay-up as a way to attack the ring from close range
Now Pete Maravich will talk about several different ways to perform a lay-up (it can be called a throw after a double step).
We put the ball on the left hand, take a step, raise the right knee and, as it were, push the ball up, straightening the right arm. This is the most elementary version of a lay-up (also called a lay-up from above). On the other side of the ring, we do the same thing, but mirrored (other leg, other arm, other side). Alternate lay-up: underhand throw. In both cases, we use a shield.
A more complicated version of the lay-up is that the ball is sent along a higher trajectory (either against the shield or just with a parachute). Such a throw is harder to cover , even if a very tall opponent is playing against you. The main thing is to throw before the opponent jumps out, says Petya, otherwise a block shot cannot be avoided.
We continue to complicate the completion of the attack: lay-up with reverse. We show on the near side of the ring, and complete on the other. Moreover, you can do this with or without a body turn.
I advise you to pay attention to the execution technique: Petya shows simply flawlessly.
Let's look at a long lay-up next. Personally, I am not a supporter of such an end to the attack: I am embarrassed by the execution of the throw from below. But if you throw it as if from above (a good example is a parachute from Tony Parker), then this element can become a formidable weapon in your hands.
Now hook (hook, hook, side throw). This is George Mikan's signature move. We start by warming up with small hooks under the basket (this is how Ganon Baker makes all the centers in his camp warm up). Then the distance increases and the throws continue.
Next is Karim's trademark Sky Hook. This shot needs to be learned by all centers and power forwards. I won’t write here - just look at the execution technique that Maravich shows.
Instead of a conclusion
The video ends with a list of the most common mistakes that are made when making shots in basketball. They are written quite simply, so any translator can help you. In addition, anyway, we have already talked about them above. And for dessert - a couple of dozen throws from Petya Maravich: from the simplest to the most difficult (note that these videos are very old, so the elements that Petya shows are akin to the best And1 tricks of our time).


 The technique we've mentioned is simple and well suited for beginners. The other lay up techniques are more difficult and suited for experienced basketball players.
  This is where a strong jump is a necessity.
 Or design your own jersey with our 3D Designer.
  In this article, you will learn how to throw and score the ball correctly, what types of shots are, which ones are the most effective, and how to improve your basketball shot.
 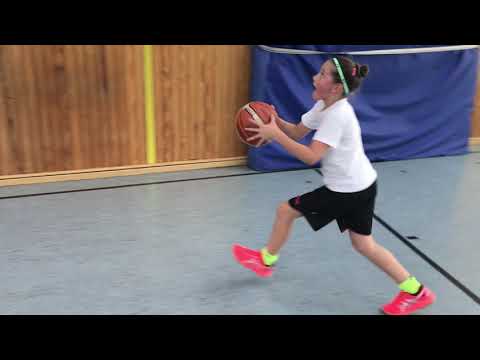 There are also differences in the method of implementation, for example, after dribbling or in a jump.
  The very first to be mastered will be from an average distance, this is the basis of everything, these are exactly what they do as a free kick. To implement it is simple and difficult at the same time, the moment is not technically difficult, but extremely responsible.
 The second hand is the insurer, it should not firmly fix the ball, just hold it slightly. If you do not listen to this rule, then in flight there will be a deviation from the desired trajectory. In this case, before the throw, the projectile is fixed exclusively with the throwing hand.
 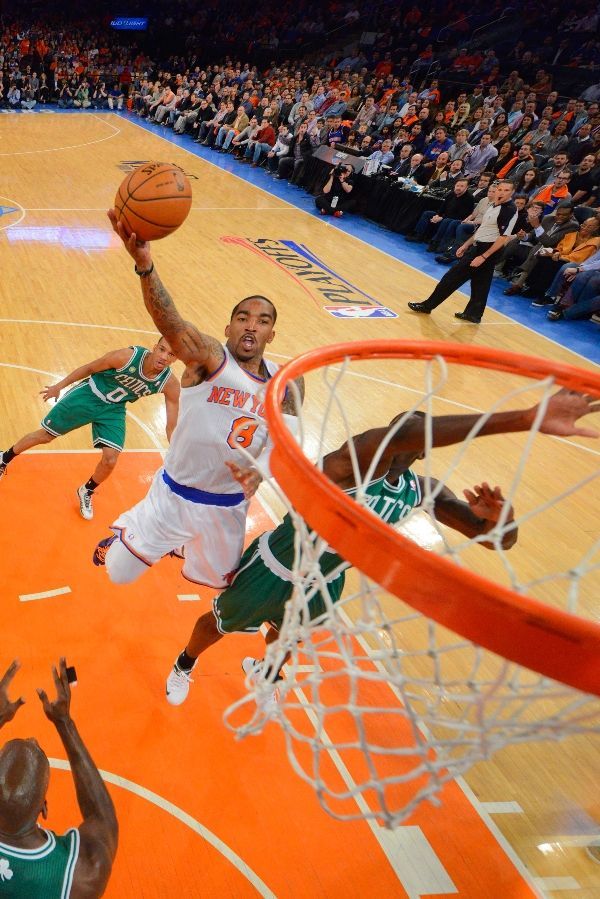 The flight range depends not only on the force that is invested by the throwing hand, so there is simply no need for its tension and sharp movements with the brush.
 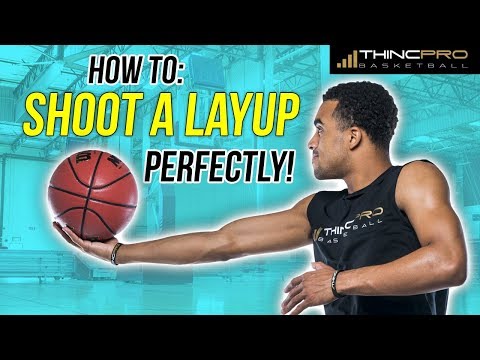 It is necessary to constantly do throwing exercises in basketball on technique, initially not even paying attention to accuracy and speed. Muscle memory should be replenished with basic movements, and only after that you can try to repeat the tricks of Kevin Durant or Stephen Curry. You can learn about a complex and very effective technique from the article “How to do a hook throw in basketball?”.
  High-level basketball players can shoot from any position, with the head and torso always in the correct position: perpendicular to the court and turned towards the basket. This position allows you to achieve high control over the ball in any implementation of the throw. It is also worth remembering that when performing in a jump, you need to move only forward, not to the side or back.
  But what to do for those who already know how to throw, you ask. I answer: in the process of watching the video, you will learn a lot of useful little things that will help not only improve the accuracy of the throw, but also make it stable. I will say more: this video teaches the same “ correct throw in basketball ”.
  She does not just lie on the ball - she firmly rests on it. And the position of the hand - you will feel it yourself in the process of practicing the throw.
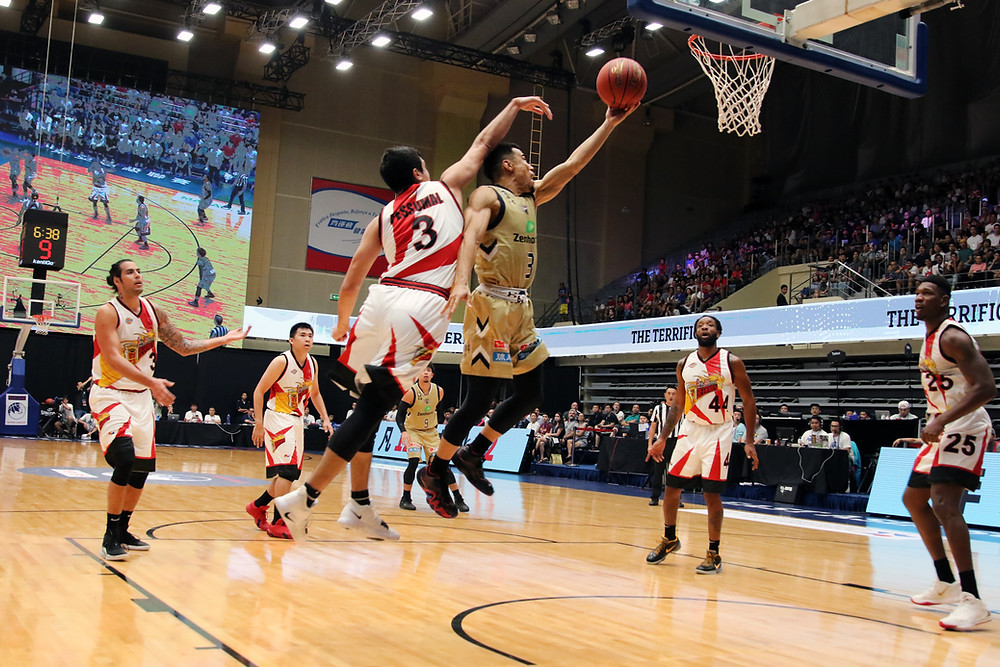
 He took him anywhere, including sleeping with him. Before falling asleep, he lay on his back and practiced throwing with one arm vertically upwards. This allows you to train the reverse rotation of the ball, the stability of the throw and the stability of its position (the base of the fingers and the fingers themselves).
 On the other side of the ring, we do the same thing, but mirrored (other leg, other arm, other side). Alternate lay-up: underhand throw. In both cases, we use a shield.
 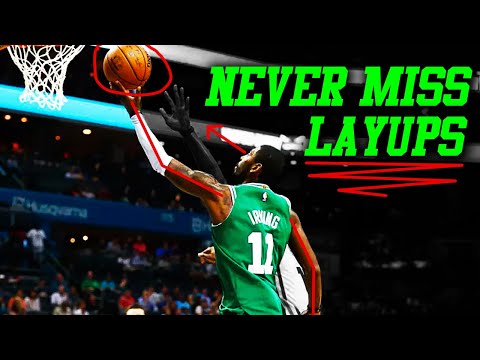 But if you throw it as if from above (a good example is a parachute from Tony Parker), then this element can become a formidable weapon in your hands.