Home » Misc » How to install an inground basketball system
How to install an inground basketball system
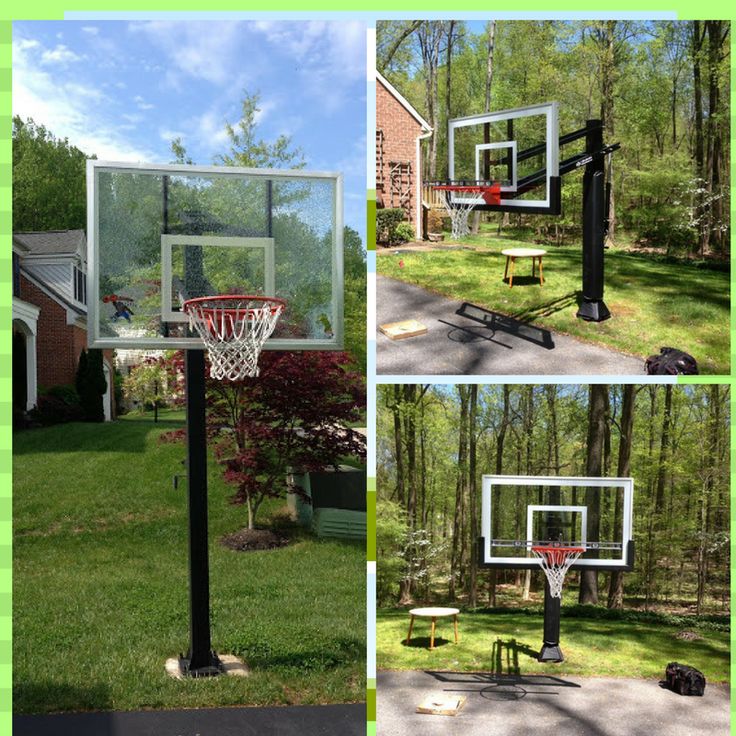
How To Install an In-Ground Basketball Hoop
How To Install an In-Ground Basketball Hoop
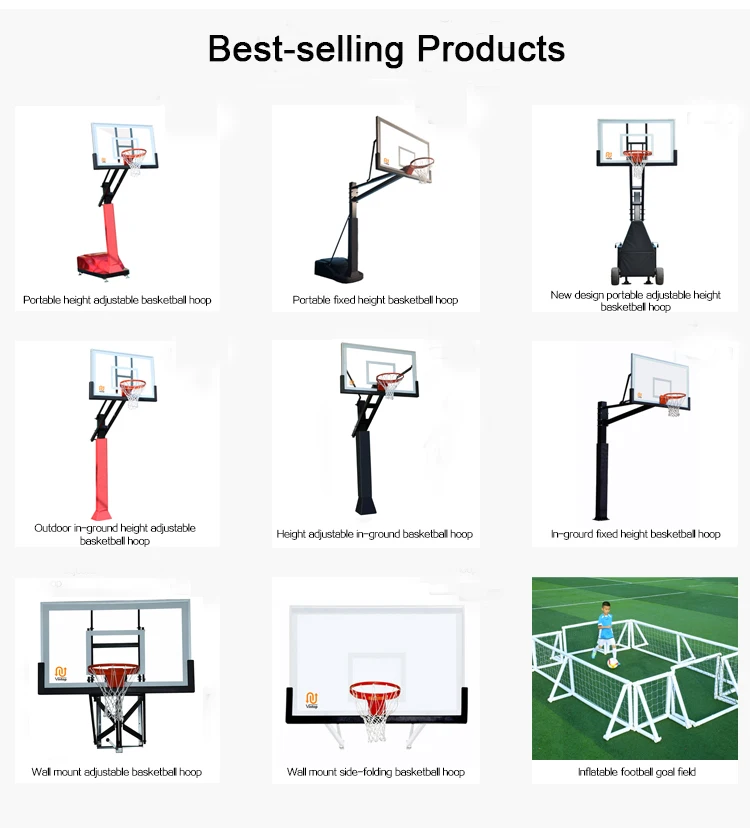
Factors to Consider When Buying a Basketball Hoop
How to Install a Basketball Hoop In-Ground
Why Should You Have a Professional Install Your Basketball Hoop?
Choose Superior Play Systems® for Your Basketball Hoop Installation
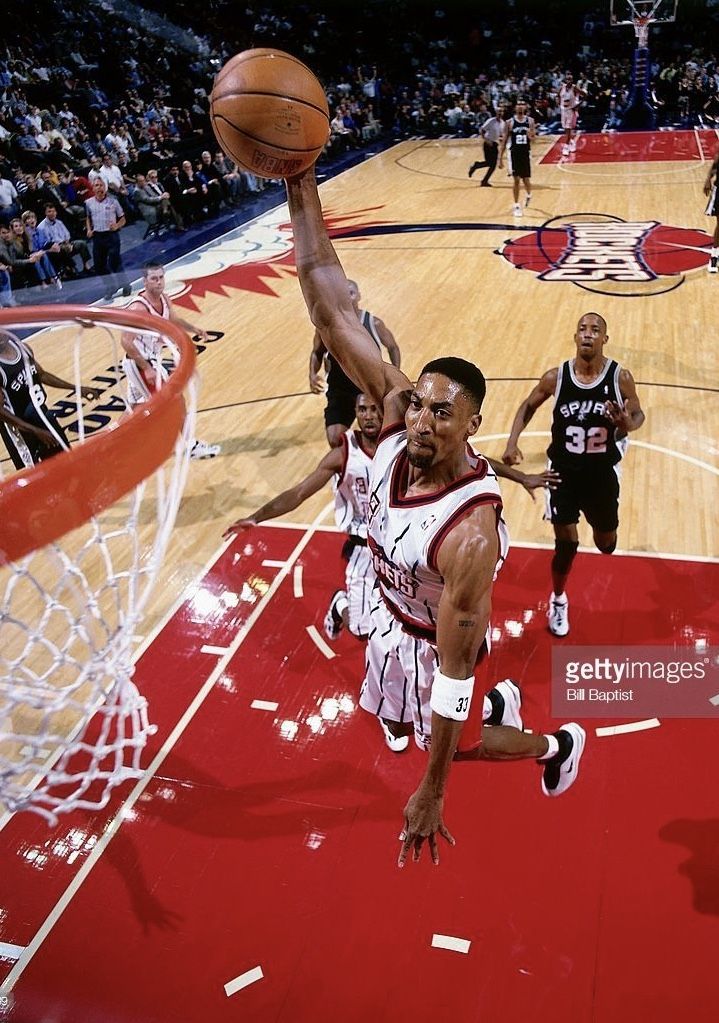
If you and your family love basketball, you may be dreaming of having your own hoop right in your yard. There are several different types of basketball hoops available, but an in-ground system offers the most stability and professional-level play. Here’s everything you need to know when shopping around for a basketball hoop, how to install a basketball hoop, and why you should consider professional installation.
Factors to Consider When Buying a Basketball Hoop
When you’re looking to buy a basketball hoop for your home, there are many things to consider, including where you’ll install your basketball hoop and what type you’ll need. A basketball hoop can be a big purchase and a big decision for your property, so you’ll want to make sure you get the best kind for your family and install it in the best location. Here are some of the most important things to think about before you buy your basketball hoop:
1. Choosing a Seller
An in-ground basketball hoop is a large purchase, so you’ll want to make sure you choose the right seller. The best sellers are those that offer post-purchase support such as installation and customer care. Superior Play Systems® is the safest and most trusted name in play and offers high-quality in-ground systems from PROformance Hoops®. When you purchase your basketball hoop from us, we’ll work with you to provide a seamless installation process that gets your family on the court in no time.
2. Location
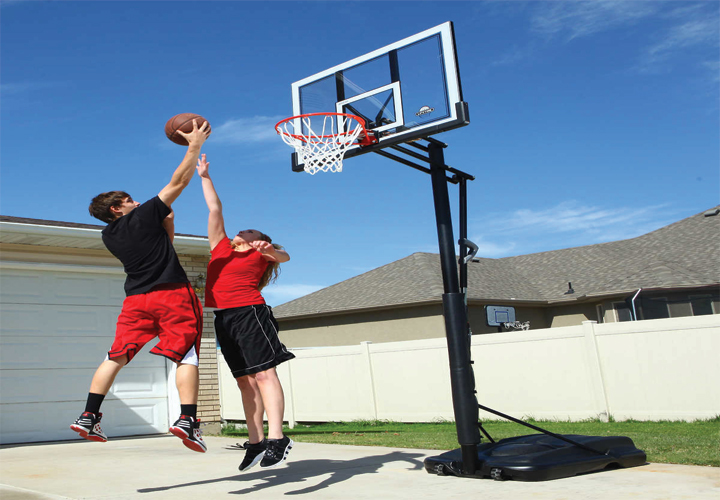
One of the most important factors to consider is selecting the location for your new basketball hoop. The most popular choice for a basketball hoop placement is in a driveway, but you should make sure that you have a level driveway, as it’s much harder to play when the driveway is on an incline. If you have a larger backyard and enough room in the budget, you may want to consider a dedicated area or even a full-size basketball court. Just be sure that you have a patio or paved area — a basketball just doesn’t bounce in the grass. The hoop should not be hanging over the street to keep players safe. It’s also a good idea to check for any local and neighborhood ordinances or homeowner’s association rules for any restrictions on basketball hoop installation or placement.
3. Backboard Size
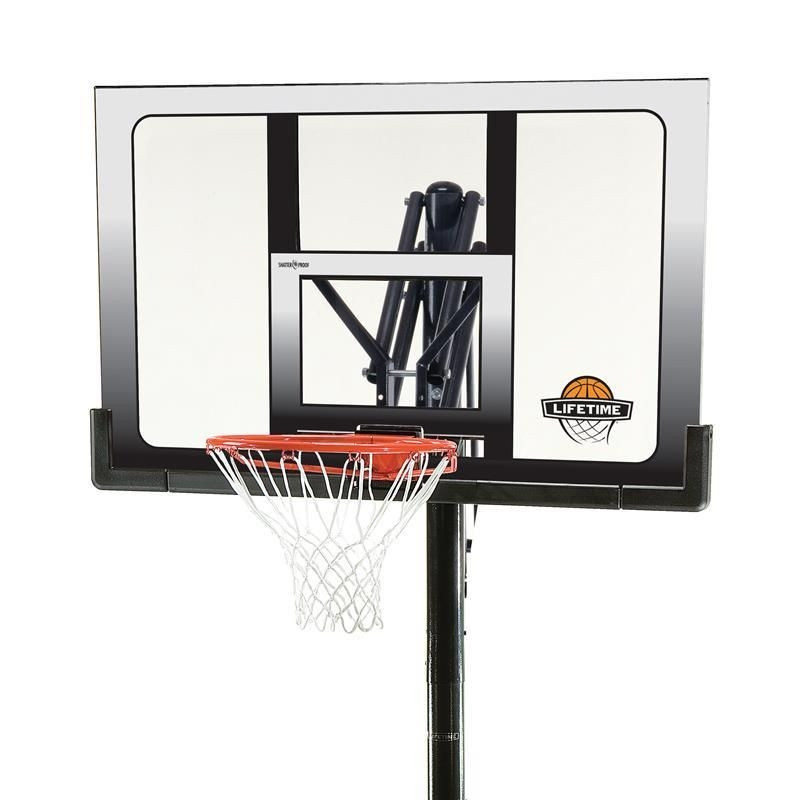
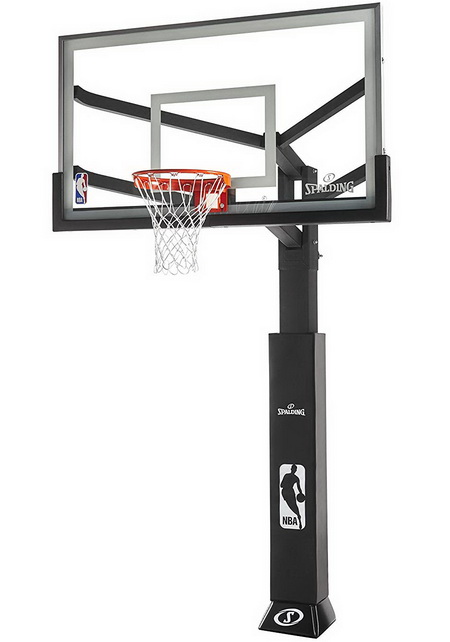
The size of the backboard on a basketball hoop can affect the shot opportunities into the hoop, and generally bigger is better here. However, you’ll want to think about the size of your driveway or the place where you are installing the hoop. In a small driveway, a too-large backboard can overwhelm the space, or look out of place. Consider also the level of professionalism you want — if you have a child with aspirations for professional basketball, a 72-inch backboard is regulation size, and would give the best practice for real basketball courts. However, a larger backboard is more expensive and may not be necessary if the hoop’s main purpose is for family recreation.
4. Height
You’ll want to think about the height of the basketball hoop before you install, making sure that it fits in with your location of choice. Professional regulation height is 10 feet for a basketball hoop, but just as with backboard size, you may want to go with an adjustable hoop or a shorter hoop if its just for fun. You can also check out hoops with adjustable height so it can grow along with your kids. Also consider the size of the overhang — the distance between the pole and the backboard, making sure to have about 2.5 to 4 feet of overhang available.
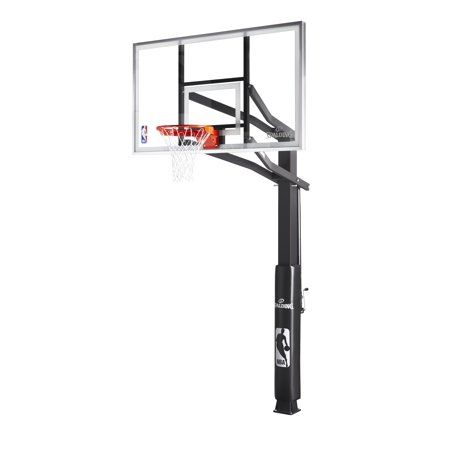
5. Type of Pole
Selecting a pole for your basketball hoop may seem simple, but there are actually many choices available. Poles come in both round and square shapes, in sizes between 4 and 6 inches, and either as a single piece or a multi-piece system. Poles are generally made of metal and are either painted or have a powder coating.
6. Net and Rim
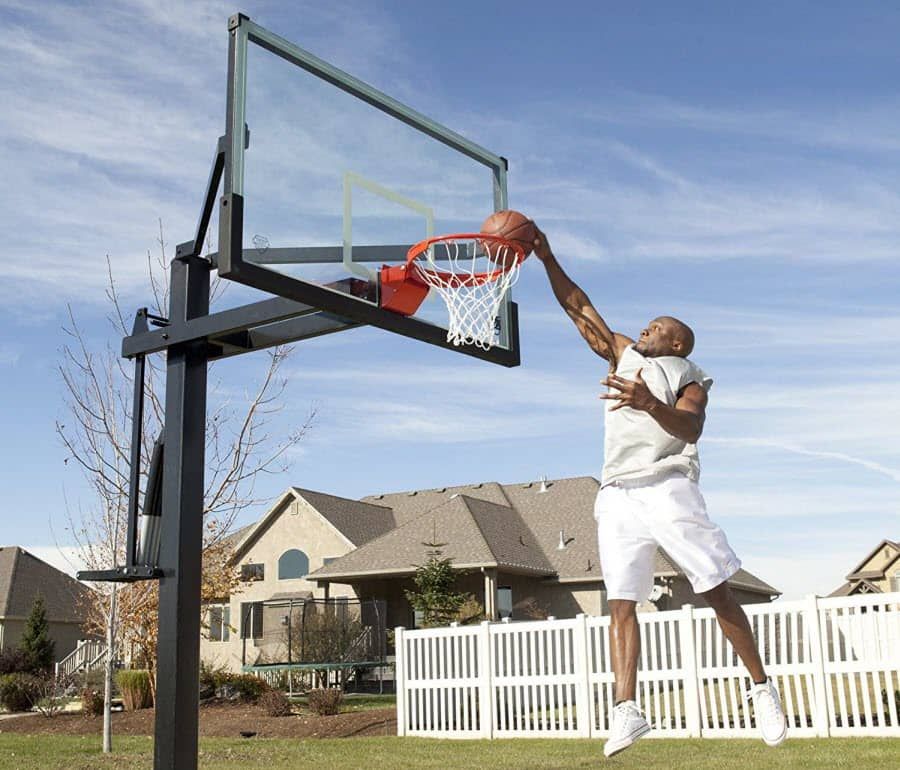
Standard basketball setups have an 18-inch diameter rim, with hooks to attach the net. There are two main types of rims available for home basketball hoops — static and breakaway. A static rim stays in place without moving, and is a great option for beginners or as a more economical choice, but should not be used for dunking. If you anticipate some slam dunks on your home setup, a breakaway rim is the best choice. These rims include special springs that flex and absorb the force of the dunk. This protects the safety of the player, as well as the longevity of your basketball setup.
Once you’ve considered all of the options available for your basketball hoop, you can decide what is best for your family and your location. Next, it’s time to purchase the basketball hoop setup and install it in your yard.
View PROformance Hoops® Installation Guides & Owner’s Manuals Here
How to Install a Basketball Hoop In-Ground
You’ve done your research and found the right basketball hoop for your family — now it’s time for the exciting part! Installing your basketball hoop can be a lot of work, but here, we will lay out all of the steps involved. You’ll have your own basketball hoop up in no time and ready for the whole family to shoot some hoops! Consider this your step-by-step basketball hoop installation guide:
Step 1: Choose Your Location and Call Before You Dig
As mentioned in the section on things to consider, one of the most important steps in the basketball hoop installation process is choosing the right location. You may have already picked the location where you want your basketball hoop, but since you’ll need to dig a hole, it is a must that you Call Before You Dig (dial 811) to check for any utility lines. Ask your Superior Play System for more info.
Be sure that you’ve checked with any neighborhood ordinances or homeowner’s association rules on the placement of your in-ground basketball hoop on your property. You should also read all the instructions and check for any manufacturer recommendations for your particular model before you start digging.
Step 2: Dig a Hole
You’ll need to dig a hole where the pole for the basketball hoop will be located. Check with your manufacturer and your specific model for recommendations on how to dig the hole, and how big it should be. You can dig by hand with a shovel, or use an auger or other digging equipment. See owners manual for specific instructions.
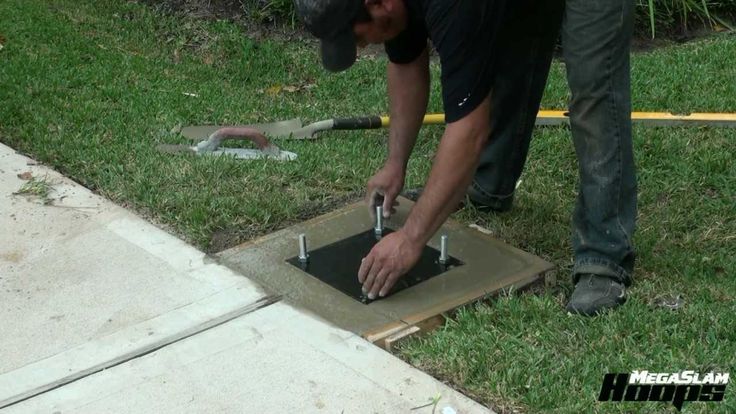
Step 3: Pour the Concrete
Once you’ve dug the hole, you’ll secure the basketball hoop pole in the ground with poured concrete. Some models simply have a single pole that you pour the concrete around. If this is the case, have someone — or two people — hold the pole level while another pours the concrete around it. More commonly, there is a rebar-mounted anchor that you’ll set into the concrete after it’s been poured. Either way, as you’re pouring the concrete, make sure to regularly agitate it with a shovel to remove any pockets of air.
To finish off, smooth out the top of the concrete with a trowel, and make sure everything is level. Clean off any excess with a damp towel or sponge. Now, you’ll have to leave the cement to dry for at least 24 to 48 hours. For the first few hours, keep checking the cement to make sure that the pole hasn’t shifted and isn’t leaning. Correct the pole if necessary and keep re-checking until the cement has hardened. Wait on the rest of the assembly until the cement has dried and hardened completely.
Step 4: Raise the Pole
If your basketball hoop setup is simply a pole in the cement, you can skip ahead to the backboard. But if your setup includes a mounting anchor, it’s time to assemble and raise the pole. Each model is a little different, so be sure to follow the directions for your specific unit. If you have an adjustable-height type of basketball hoop, you’ll assemble the lift mechanism and support arms according to the directions.
The post will likely be very heavy and may require a few people to lift it into place. Take any necessary safety precautions, and have your team lift up the pole so that it matches up with the anchor piece in the cement. Make sure that the post is level, and use the bolts to secure it into place. Leveling nuts should also be a part of the setup — adjust these as necessary to make the pole completely level.
Step 5: Attach the Backboard
In some basketball hoop setups, the backboard is attached before the pole is raised, but with many upscale models, you’ll attach it after the pole is secured. Note that the backboard is also generally very heavy, and it may take several people working together to lift it up and get it installed. Make sure you have a few extra helpers around and take precautions for safe lifting.
Have several of your helpers lift the backboard up in place to the support arms, while another person secures it to the support mount. Each model is different, but there may be other support arms or cross braces to attach at this point. Follow the directions to get all of the right parts securely in place.
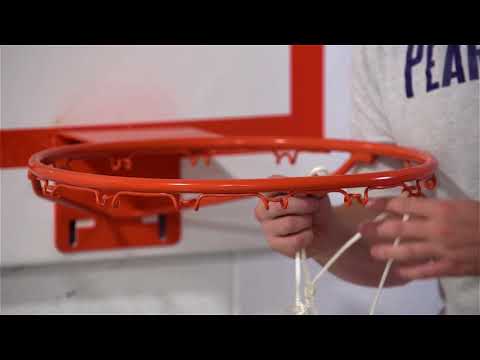
Step 6: Install the Rim and Net
When the backboard is fully attached, it’s time to add the basketball rim and net. The rim will simply get bolted to the backboard in place. If you’ve opted for a breakaway rim, there may be some extra assembly required. With the rim attached, you can then loop the net around each of the hooks on the rim to have your net fully installed.
Step 7: Finishing Touches
By this point, your basketball hoop is almost ready to play! There are just a few extra steps to fully finish and customize your setup, some of which are optional. Some upscale models have extra padding that you can attach around the corners of the backboard, and around the pole. These are generally optional touches, but can ultimately protect the safety of any players, preventing bumps and bruises, or other injuries when accidentally bumping into the basketball hoop.
If you have an adjustable-height basketball hoop, you can now adjust to the desired height for your family. It may be necessary first to place it at the regulation 10 feet so that you can mark the height on the pole or use provided height stickers. Measure the height of the rim to check for accuracy. Now it’s ready to adjust to whatever height you want to use — with the height stickers, it’s easy to see at a glance where to adjust the mechanism.
If you have any additional accessories, such as court lighting, now is the time to install these. Follow the manufacturer’s instructions for any accessories to get them installed properly. Depending on the size of the area where you install your hoop, you may want to paint court lines on the pavement. This is totally optional, but if you choose to paint lines, pressure wash the area first to ensure you have a clean surface for the paint to adhere to. Measure out where the lines need to be and mark off with painter’s tape. Paint in your lines and remove the tape. Now you’re truly ready with your very own basketball court! Gather up the family and get ready to play!
Why Should You Have a Professional Install Your Basketball Hoop?
If following these basketball hoop installation tips and steps has your head spinning, you’re not alone. Even in today’s DIY culture, installing a basketball hoop yourself can be a bit involved. If you decide that installing the system yourself is just a little too much, why not let the professionals handle it? With professional installation, you’ll save yourself a lot of time and hassle.
Consider the amount of time necessary to complete the installation process yourself. Even if you follow every direction exactly, the process still involves at least two days of work. And any delays in the process or simple mistakes can drag it out even longer. Even the research and preparation work can take more time than expected.
Installing an in-ground basketball hoop can also take a lot of tools and specialized equipment. Digging a hole large enough for the basketball hoop post is not easy to do by hand, and if you don’t have an auger or backhoe, you may need to rent equipment to complete the task. This can add time and expense to the project. Consider also the fact that you will need extra adults around to help. Raising the heavy pole and lifting up the backboard require at least three to five adults, so you’ll need to convince family, friends or neighbors to help out, possibly spending money on food and drinks to feed and thank your crew.
Attempting a project of this scale can lead to a lot of aggravation, especially if you lack the proper tools or underestimate the amount of time and effort necessary to complete the project. Even when everything goes right, the amount of time and effort required for a project of this scale can simply be frustrating.
Having a basketball hoop in your yard should be about fun, not frustration. And having a professional install your hoop means you can get to the fun part much faster. When you buy your basketball hoop from Superior Play Systems®, you get some of the best equipment on the market as well as white-glove installation services. The experience and expertise of the professionals mean they can get the job done faster and easier than you could on your own, and you know it will be done correctly the first time.
Choose Superior Play Systems® for Your Basketball Hoop Installation
If you’re shopping around for a basketball hoop for your family, come to Superior Play Systems® and experience the best in expertise and customer service. Our experts can help you every step of the way, from selecting the right equipment for your needs to scheduling professional white-glove installation services. To get started, contact Superior Play Systems® today — we can answer any of your questions and help you find the right basketball hoop for your family. Shop our equipment online or use our search tool to find the closest showroom where you live. Come experience our top-quality equipment and superior customer service in person!
How To Install Your Own Inground Basketball Hoop
Home > Guide to Hoops / Goals > How To Install Your Own Inground Basketball Hoop
If you love basketball and want to practice your shots any time of the day, purchasing your own basketball hoop is the best option.
There are a number of different basketball hoops available, but in-ground hoops are a better option because they provide you with stability and professional-level experience.
There is a lot to consider when purchasing a basketball hoop e.g. choosing the right seller, the perfect location, the ideal backboard size and the type of pole etc.
If you are having trouble knowing what suits you best, check out our Home Hoops Guide.
Know what you want, but don't know where to find it? Check out some high-quality stuff here.
This article is a step-by-step guide on in-ground basketball hoop installation.
Before You Begin with The First step, Keep A Few Things In Mind
Find a suitable ground where you can fit your basketball hoop. The area must ideally be flat and paved e.g. driveways. The ideal scenario should be to have enough space to accommodate your hoop and the number of players.
Overhang is the distance between the pole and the backboard, and affects how much room you have to land after you shoot layups. For good balance and safety, 2 feet to 4 feet of overhang is ideal. Anything greater than that could cause shaking because the weight of the backboard would
be suspended too far.
Take into consideration the position of the sun when installing your basketball hoop. Face the hoop towards the north, so the sun does not get in your eyes.
Make sure the goal is at least 20 ft. (7m) from any overhead power lines, and no overhead power lines are within a 20 ft. (7m) radius of the goal.
Make sure you have enough room to shoot 3pt shots at tops, wings and corners. If you want to have a regulation three point line as well as some room behind it, 28 - 30 ft from the pole is what you need. For a full three-point arch, you need around 40 ft of width.
Before you dig a hole, you must contact Call Before You Dig (dial 811) to check for any underground power, gas, telephone, water and other utility lines.
Digging the perfect hole for your basketball hoop is vital.
The most important thing to keep in mind is that the hole is deep enough, and of the right size, so the metal bars that form the anchor fit perfectly. This will provide stability to your basketball hoop.
You can dig by hand with a shovel, or use an auger or other digging equipment.
The hole should be 48" to 50" (1.2 m - 1.3 m) deep and 16-18" (0.4 m - 0.5 m). Follow the instructions manual to check the exact measurements required for the hole.
Remember, a strong foundation is your key to success!
2. Pour The Concrete
Now that you have dug the hole, the next step is to pour the concrete.
Installing an in-ground hoop would require 10-14 60lb bags of concrete, but it is recommended that you buy an extra bag or two just in case you need them.
Mixing the concrete can be a tricky procedure. You need to make sure that the right amount of dry concrete and water is used. If the mixture is too thin, it will lack the strength required to hold the pole, and if it is too thick, you will struggle to fill voids.
For a 60lb concrete bag, 1.9 liters of water is PERFECT!
To prepare the concrete mix, pour dry concrete in a container and create a depression at the center of the dry mix. Add water, and mix thoroughly until it's firm enough. Do not allow the mix to sit for a long period of time or it might dry out.
Fill half of the hole with concrete, and insert steel bars inside. Make sure the bars are properly aligned. Once the bars are aligned, fill the hole with concrete and level it using a trowel tool. Make sure the surface is smooth and there are no pockets of air.
When the above is done, place the assembled anchor in concrete, and push it down the concrete solution. It must be fixed deep enough so it provides stability to the basketball hoop.
It is important to make sure the assembled anchor is completely level!
Give the concrete at least 72 hours to cure, in case the weather is warm. For cooler surroundings, wait an extra day or two.
3. Fix The Main Pole
In-ground basketball hoops come with one-piece, two-piece and three-piece poles. A one-piece pole is highly recommended because it minimizes vibration and shake. It is also rust and corrosion resistant.
A 4"-6" diameter pole provides excellent performance and stability. Shape-wise, square poles are preferred over round ones because they are more rigid.
A 7-gauge thickness on the pole is preferred over 11-gauge because the former is the STRONGER choice. A thicker pole provides you with a better playing experience. It is stronger, causes less shake, and provides greater durability and professional experience.
Fixing a pole depends on the type of anchor being used.
There are two types of anchors used in in-ground basketball hoops: the threaded j-bolt and the hinge anchor system.
The latter is easier to install.
With a j-bolt anchor system, you will have to lift the pole above the anchor, position it rightly, and then bolt it down to the j-bolt anchor. This process will require greater physical effort as you will have to go up and down a ladder to attach the backboard,
extension arms and the hoop.
The hinge ground anchor system, on the other hand, is simpler to install, and does not require much physical effort. You can assemble the pole, extension arms and the backboard on ground, and then align the pole using the hinge mechanism. The pole is then placed
in an upright position, and secured with a bolt.
A huge advantage of the hinge ground anchor system is that it can be easily moved from one place to another. When you move, you can take the fully-assembled pole with you and relocate it without much hassle.
Do not forget to follow the instructions manual.
4. Install The Backboard
There are three main types of backboards: acrylic, tempered glass, and polycarbonate. For a professional experience, tempered glass is the BEST CHOICE!
Out of the three, the tempered glass provides the best bounce and spin. It is also shatter proof, and therefore safe.
Acrylic backboard is suitable to use in public places. However, it does not provide the same bounce and spin as the tempered glass backboard.
In some basketball hoop setups, the backboard is already attached to the pole, but for hoops with a separate backboard, there are a few things that one must keep in mind before installation.
Since the backboards are heavy, it is advised to use additional manpower to lift and install the backboards, while taking safety precautions. Lift the backboard up in place to the support arms, and secure it to the top mount.
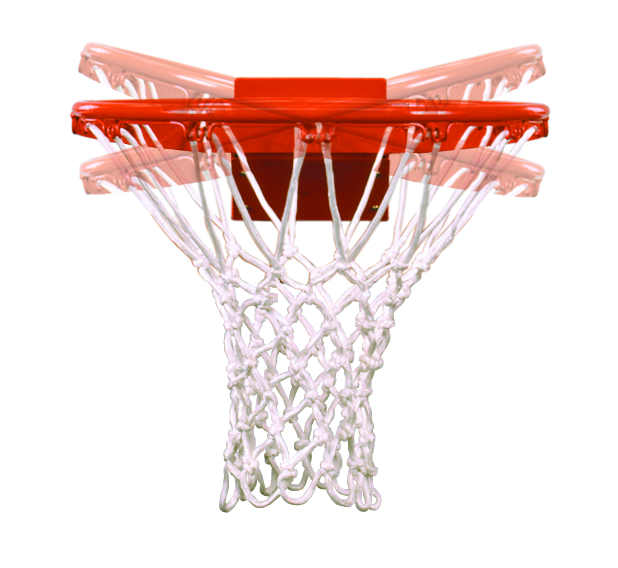
5. Install The Rim And Net
Choosing the best rim for your hoop is another important step. This piece of the system absorbs the greatest physical impact, and therefore, must be durable.
A breakaway rim is recommended. It consists of a hinge and spring at the point where it attaches to the backboard, and can bend downward when a player dunks. It is DURABLE.
Once you have chosen the perfect rim, installing it would not be much of a problem.
All you have to do is fix it with screws to the backboard. Then loop the net around each of the hooks on the rim to have your net fully installed, and you are all ready to SHOOT!
Hire A Professional To Do The Job
If you have prior experience in installing a basketball hoop, or doing similar work, you might consider installing the hoop yourself.
However, hiring a professional to do the job can save you from damages, injuries and unpleasant situations since installing a basketball hoop requires a number of tools, and expertise.
Consider this: if you are going to install it yourself, you will have to buy or rent the tools, request for additional manpower, and the overall process will likely be slower than when done by a professional.
Knowing that you have spent quite a lot of money on purchasing the setup, you would not want to risk damages to save a few dollars.
Need Help?
Contact us if you have any questions, need help with installation or need any help choosing a basketball hoop. Our experts are here to help.
What do you think? Let us know by leaving your comments, suggestions, and questions...
Laser weapons: provocation or reality? | e1.ru
Experts from Boeing and the US Air Force have developed and tested fundamentally new laser combat systems that can instantly hit a target anywhere on the planet and near-Earth space. The ARMS system includes super-powerful land-based or sea-based stationary lasers and a system of mirrors, which is located on airships and unmanned aircraft, and, in the future, on space satellites.
The project took four years to complete and cost $20 million. Tests conducted at Kirtland Air Force Base in New Mexico confirmed the combat capability of the new system. The official goal of the project is to create a missile defense system. But, in addition, the system of mirrors allows you to direct the beams of super-powerful lasers to almost any point on the Earth. The new weapon overcomes any adverse effect of the atmosphere.
For several weeks, a prototype of a new weapon under the ARMS project (Aerospace Relay Mirror System) was tested at the base in Kirtland (Kirtland AFB, NM). Specialists from the US Air Force and Boeing used a 1 kW laser and a reflective system located at a distance of 3 km. The laser beam was successfully redirected and hit the target. The system consisted of two mirrors 75 cm wide placed close to each other.
They were suspended at a height of 30 m with a crane. In the future, American specialists intend to place the reflective system at high altitudes using various platforms: high-altitude airships, unmanned high-altitude aircraft or satellites. This will allow you to hit any targets on the ground and in the air almost instantly. The receiving mirror will collect the light and then redirect it through a special focusing system that detects atmospheric interference and corrects the signal.
After correction, the second mirror sends a beam to the specified target. The laser installation should have a power of 1,001,000 kW, according to New Scientist magazine. Work on the creation of the ARMS system began four years ago and has already cost $20 million. For the first time, the US Department of Defense officially announced work on the creation of a strategic laser system on May 8, 2003.
Laser weapons: provocation or reality? In general, laser weapons as such are already in service with the US Army. True, we are talking about the so-called non-lethal laser guns. Such laser guns, depending on their power, are capable of blinding, for example, the driver of enemy armored vehicles, a sniper, a pilot of a low-flying attack helicopter, or disable sensitive elements of enemy electronic-optical systems.
The American command decided to equip its military in Iraq with similar "guns" in order to temporarily blind drivers who ignore warnings at checkpoints. In their opinion, this should reduce the number of casualties among local residents who did not pay attention to warning signals and fell under the fire of American soldiers. The M-4 carbines used by the US Army in Iraq will carry a 27mm tubular device capable of delivering a laser beam. According to the military, this should temporarily blind drivers and does not lead to complete loss of vision.
Although Lieutenant Colonel Barry Venable, who told the press about the new experiment, said he didn't know how long the blinding effect lasted, CNN reported in May. There are also more serious developments. Back in November 2004, the US Missile Defense Agency announced the successful testing of the ABL (Airborne Laser) airborne combat laser installed on board a modified Boeing 747-400F aircraft. During the tests, which received the designation First Light (First Light) and held on November 10 at Edwards Air Force Base, the combat laser itself was tested at full power and all elements of the system.
However, for the time being the laser was on the ground in a special building at the air base, a Boeing fuselage was placed, in which all the elements of the combat system were located. All six emitting elements of the COIL laser of megawatt power (Chemical Oxygen Iodine Laser), as well as its optical system, were involved. The ABL combat laser system is designed for autonomous detection, tracking and destruction of ballistic missiles in the active part of the flight trajectory.
Megawatt infrared laser with a radically new optical system focuses laser radiation on a spot the size of a basketball at distances of many hundreds of kilometers to the target. The laser and optics are controlled by a computer system that provides tracking, identification of potential targets and determination of priority targets for destruction.
The airborne laser-based system, which is closer than ever to being put into service today, represents a significant step forward in providing reliable layered missile defense, dramatically reducing the chances of a potential adversary to launch their own ballistic missiles. Such an aircraft, even while flying over the territory of neighboring states, is capable of tracking missile launches from any complexes, including mobile ones, over a vast territory and immediately destroying them. Such a system could pose a significant threat to Russia as well.
"Golden Eye".љ However, in this case we are talking about things much more dangerous. These tests, a milestone in the development of re-emitting (relay) laser technology, have shown that reflective mirrors are quite capable of concentrating the energy of a ground-based laser installation at the right point, thereby increasing the range of the laser, said Pat Shanahan, vice president and general manager of Boeing Missile Defense Systems ( division of the company conducting research in the framework of PRO. Ed.).
Judging by the statements, the purpose of the work is the creation of an anti-missile defense system. However, it is already clear that the matter will not be limited to this task alone. Such a mirror can also be placed in space. Then the scenario played out in many fantastic action films (for example, Golden Eye from the famous Bond movie) may well become a reality. Although this will require astronomical sums, a laser of gigantic power and many years of research, the country that first received such a weapon will be able to intervene at lightning speed in processes anywhere on Earth and in space.
A system of space mirrors is capable of redirecting a laser pulse to any point on the planet or in outer space. With its help, it is possible to hit stationary objects on the surface of the Earth, moving in the air and outer space of the target, while minimizing side factors.
"Missiles have nothing to oppose." љ Meanwhile, it would be a mistake to talk about the creation of a kind of analogue of the "Golden Eye" in the coming decades. The system is too complicated, there are too many purely technical issues to be solved. At 19In 1996, then US President Bill Clinton and his Israeli counterpart Shimon Peres discussed the issue of destroying missiles fired from southern Lebanon.
The idea of creating a so-called tactical high-energy laser (THEL, another name "Nautilus"), capable of destroying any flying targets, seemed then very tempting. Laser units located on Israel's northern border were supposed to withstand Hezbollah rocket attacks. The idea came to an end with literally nothing.
Laser systems tested in 2000 and 2002 were able to intercept rockets and artillery shells. However, the military admitted that no more than two missiles were fired at the same time during the tests, according to a New York Times article. At the same time, military expert Yifta Shapir from Tel Aviv University recalls that some installations used by militants are capable of firing up to 40 missiles in one salvo.
Beginning in 1996, the United States and Israel invested $400 million in the Nautilus project, a working prototype of a laser gun was created, but it turned out to be too cumbersome, and further work was frozen. Another problem with air raid protection is that the laser must be supplied with highly toxic chemicals in order to produce enough of the energy needed.
At the same time, he is capable of only a couple of shots of 3 thousand dollars each without reloading. In addition, a laser mobile unit the size of 6 huge tourist buses is too tasty a target for the enemy.
"It's like shooting at a shooting range," admits one MIT developer who has been working on the project since 1996 as a military analyst. A former Pentagon official named Albright put it succinctly about the decade-long effort to create laser weapons: "There's simply nothing to counter the missiles, except control over the place of their launch or their entry into the bunker."
Speeder flying motorcycle will be able to reach speeds of 644 km/h
Stepan Ikaev
The American company JetPack Aviation, known for the jetpack project, has announced a new stage in the development of flying motorcycles Speeder Air Utility Vehicle . Engineers have begun the first test flights of the P1.5 prototype, which is smaller and more stable in flight than the earlier version of the device. The company believes it will be able to build, successfully test and obtain approval for serial production of a jet flying motorcycle that can reach speeds of more than 600 km/h and cover up to 1250 km on one gas station.
According to New Atlas, although JetPack Aviation is primarily known for its jetpack, the company now devotes 70% of its time to motorcycles. This is due to the fact that, based on the same technologies, the device can offer more in terms of safety, payload, as well as speed and range. In the long term, according to JetPack Aviation, Speeder will allow flying at a speed of 644 km/h for a range of up to 1250 km.
Founder and CEO David Maiman said the Speeder P1.5 uses the same control systems and jet engines as the P1, which the company first showed last July. However, the new model has become more compact. JetPack engineers have shrunk the landing gear, reduced the fuel tank, and reconfigured the way the engines are checked for foreign objects.
Installations that lift the prototype into the air also remained unchanged. The company relies on a design that resembles a regular quadcopter, but with jet engines instead of rotors. These turbos are attached to the body with pivot joints that change position when the bike changes from vertical to level flight.


 If you have a larger backyard and enough room in the budget, you may want to consider a dedicated area or even a full-size basketball court. Just be sure that you have a patio or paved area — a basketball just doesn’t bounce in the grass. The hoop should not be hanging over the street to keep players safe. It’s also a good idea to check for any local and neighborhood ordinances or homeowner’s association rules for any restrictions on basketball hoop installation or placement.
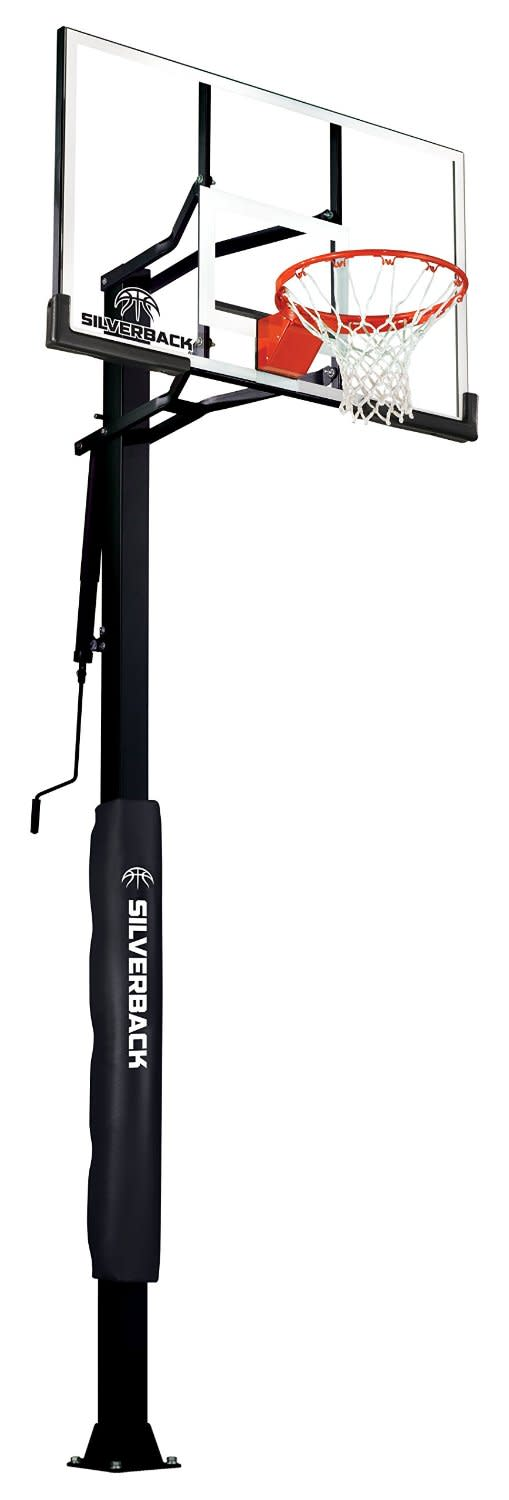 However, a larger backboard is more expensive and may not be necessary if the hoop’s main purpose is for family recreation.
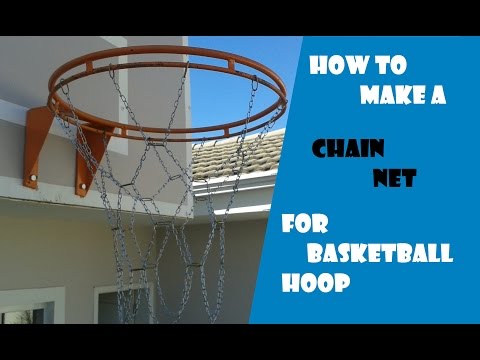
 You’ll have your own basketball hoop up in no time and ready for the whole family to shoot some hoops! Consider this your step-by-step basketball hoop installation guide:
 Check with your manufacturer and your specific model for recommendations on how to dig the hole, and how big it should be. You can dig by hand with a shovel, or use an auger or other digging equipment. See owners manual for specific instructions.
 For the first few hours, keep checking the cement to make sure that the pole hasn’t shifted and isn’t leaning. Correct the pole if necessary and keep re-checking until the cement has hardened. Wait on the rest of the assembly until the cement has dried and hardened completely.
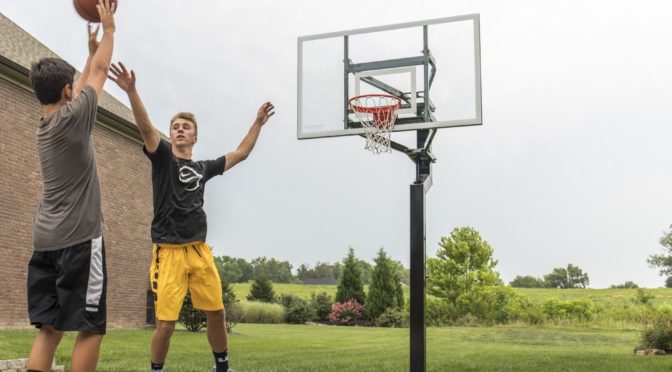 Leveling nuts should also be a part of the setup — adjust these as necessary to make the pole completely level.
 If you’ve opted for a breakaway rim, there may be some extra assembly required. With the rim attached, you can then loop the net around each of the hooks on the rim to have your net fully installed.
 Now it’s ready to adjust to whatever height you want to use — with the height stickers, it’s easy to see at a glance where to adjust the mechanism.
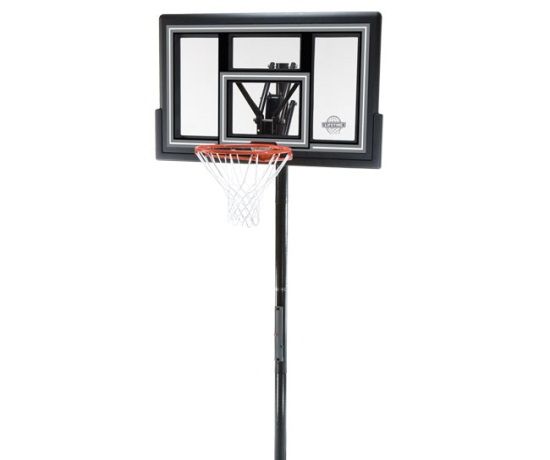 Even in today’s DIY culture, installing a basketball hoop yourself can be a bit involved. If you decide that installing the system yourself is just a little too much, why not let the professionals handle it? With professional installation, you’ll save yourself a lot of time and hassle.
 Raising the heavy pole and lifting up the backboard require at least three to five adults, so you’ll need to convince family, friends or neighbors to help out, possibly spending money on food and drinks to feed and thank your crew.
 For good balance and safety, 2 feet to 4 feet of overhang is ideal. Anything greater than that could cause shaking because the weight of the backboard would
be suspended too far.
For good balance and safety, 2 feet to 4 feet of overhang is ideal. Anything greater than that could cause shaking because the weight of the backboard would
be suspended too far.
 If the mixture is too thin, it will lack the strength required to hold the pole, and if it is too thick, you will struggle to fill voids.
 For cooler surroundings, wait an extra day or two.
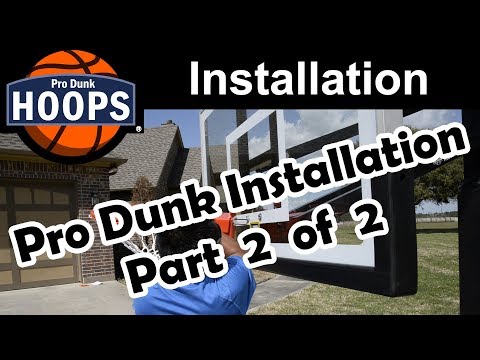 This process will require greater physical effort as you will have to go up and down a ladder to attach the backboard,
extension arms and the hoop.
This process will require greater physical effort as you will have to go up and down a ladder to attach the backboard,
extension arms and the hoop. It is also shatter proof, and therefore safe.
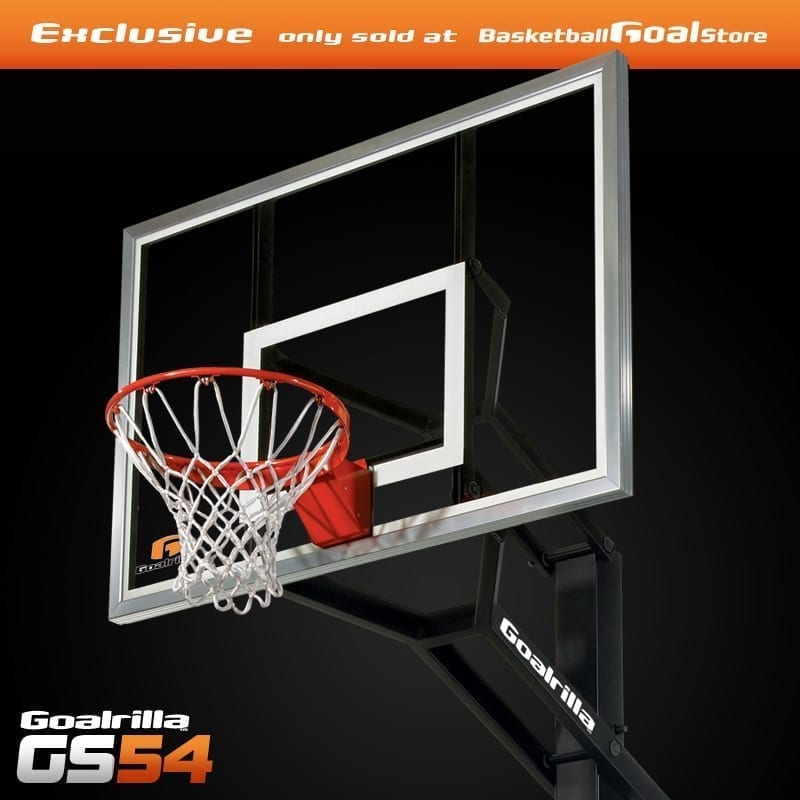
 The new weapon overcomes any adverse effect of the atmosphere.
  The laser installation should have a power of 1,001,000 kW, according to New Scientist magazine. Work on the creation of the ARMS system began four years ago and has already cost $20 million. For the first time, the US Department of Defense officially announced work on the creation of a strategic laser system on May 8, 2003.
 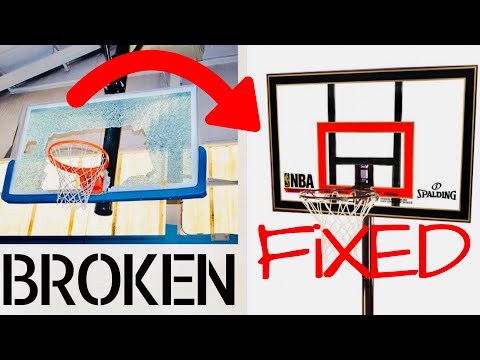 The M-4 carbines used by the US Army in Iraq will carry a 27mm tubular device capable of delivering a laser beam. According to the military, this should temporarily blind drivers and does not lead to complete loss of vision.
 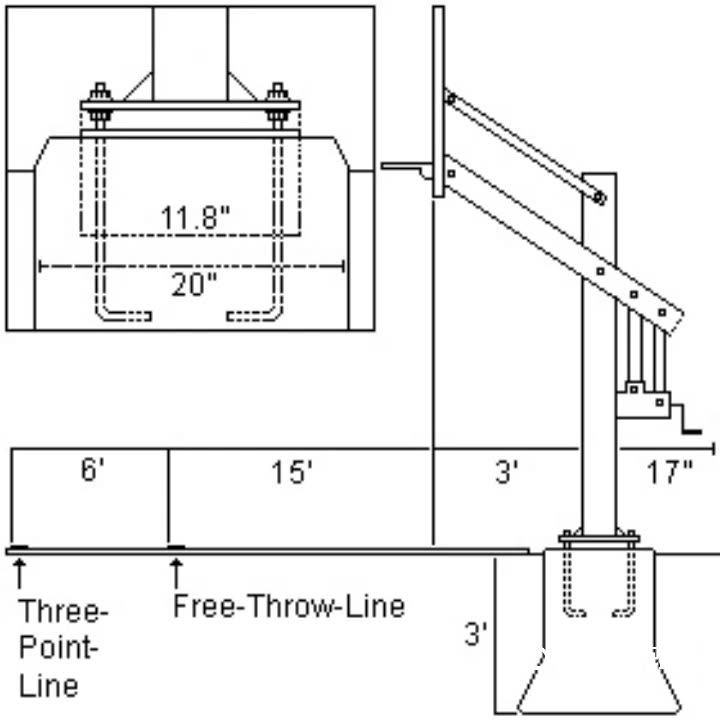 All six emitting elements of the COIL laser of megawatt power (Chemical Oxygen Iodine Laser), as well as its optical system, were involved. The ABL combat laser system is designed for autonomous detection, tracking and destruction of ballistic missiles in the active part of the flight trajectory.
 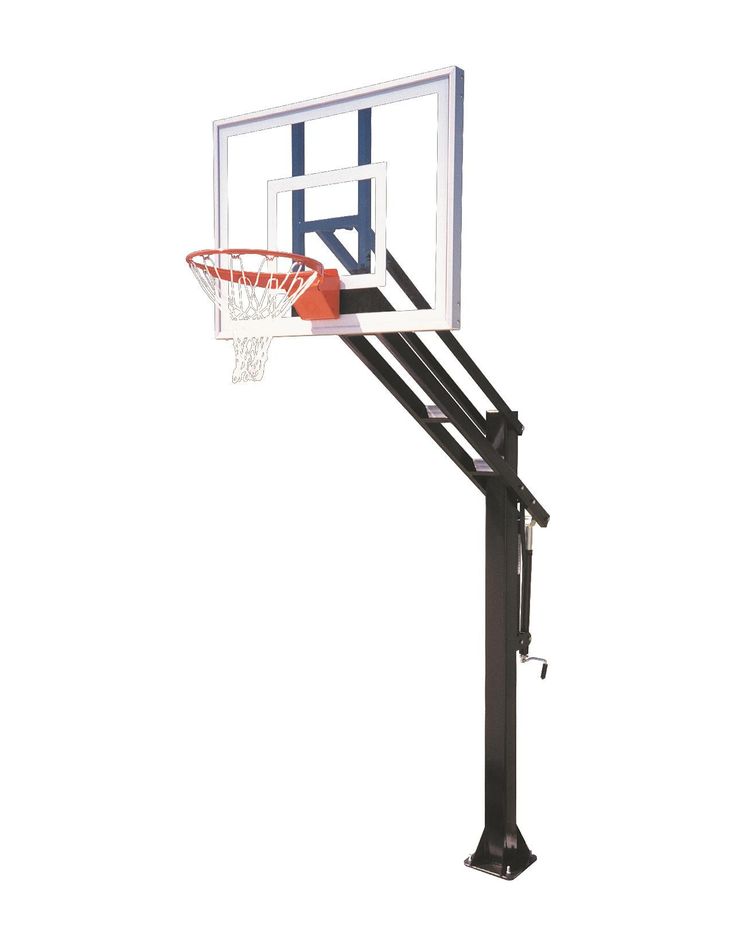 Such a system could pose a significant threat to Russia as well.