How To Practice Basketball Alone [12 Tips for playing alone]
Three similar questions
How to practice basketball at home? And How do I get better at basketball at home? Or when I’m alone?
Although basketball will forever be known as a team sport, you shall realize the importance of practicing basketball alone at some point in time. Because right now, group or team practice may not be doing enough to sharpen your skills as previously you thought it would do.
You will find some individuals who learn best if they are allowed to practice basketball alone. But how to practice basketball alone? I definitely will come back to answer this question later.
Nevertheless, let me tell you one thing first, this is by no means a wrong decision to practice yourself. As an athlete, you need to motivate yourself to reach your goals. Learning self motivation is equally important as other court skills.
So, you can help yourself to climb up the ladder without being dependent on others. You shall get the chance to work on your weakness, rectify mistakes, and finally can concentrate on enhancing your skills. You can even experiment with a few new basketball tricks, techniques, moves that you can call your own.
Yeah, this is true that while playing alone you won’t have the same kind of fun and enjoyment, compared to playing with teammates or friends. Yet doing practice alone is useful.
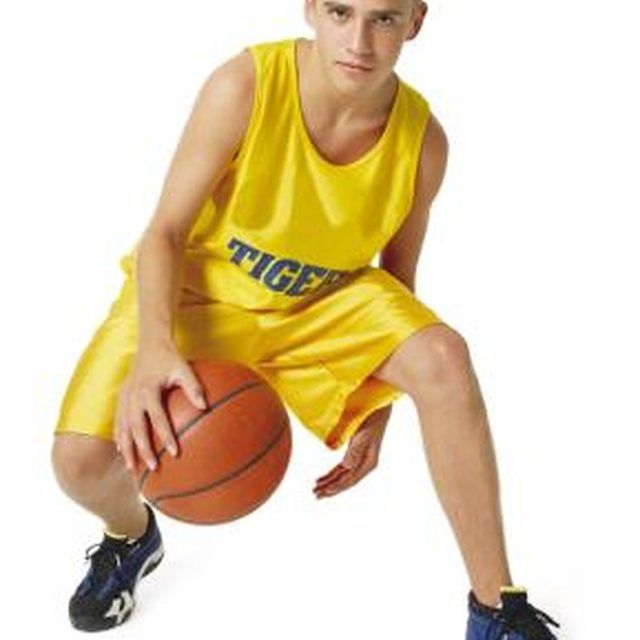
May be the court is not always free or available for you, but playing alone is possible. There are a handful number of skills available which you can master by playing alone. Passing, shooting, dribbling, vertical dribble on the wall with fingertips, controlled dribbling are some of them.
The primary objective is to push yourself to the limit to get the most out of your workout session and increase your speed and agility than ever before.
Table of Contents
12 Steps For playing basketball alone
1. Feel the need
2. Arrange a schedule
3. Choose a suitable place
4. Do not forget the Equipment
5. Warm up yourself
6. List the skills
7. Ball handling
8. Shoot
9. Passing
10. Conditioning
11. Cherish the opportunity to examine yourself
12. Find the delight in between practice
Let me give you some instructions that may come in handy when you practice basketball alone.
1. Feel the need
As a basketball athlete, you must recognize that you should have a practice session on your own. If you are a varsity player, you also need to spend some time in your reading room. So your grades are taken care of. As a result, often, you may not get the chance to practice.
And if you are a pro, there is always a busy schedule prior to the matches and after that. Even you may require to travel more than doing practice. This is so common. With all those busy schedules in between, you must think of how you can raise the bar by trumping the old you.
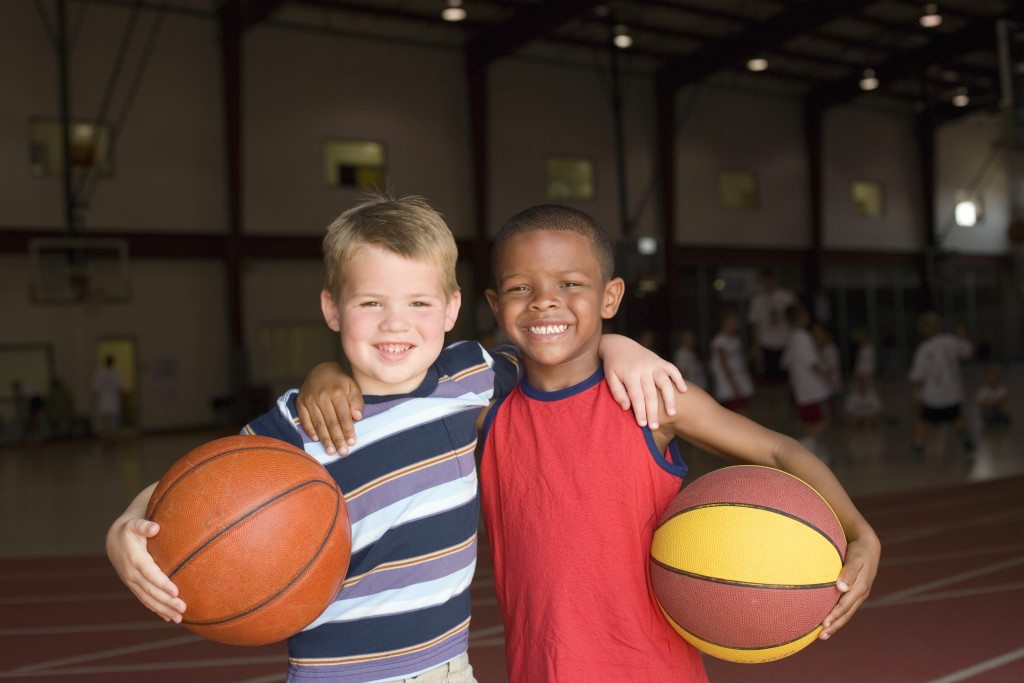
If you want your kid to develop affection towards basketball right from a young age, you can gift him/her a toddler basketball set.
So, self study is the best study, and these individual basketball workouts will undoubtedly help you emerge as a better player.
2. Arrange a schedule
May be there are plenty of things you do everyday. Even sometimes, you forget to finish the most important ones. This can happen to anyone. So, how to get rid of this problem?
Organize a daily routine where you are gonna listed all schedules or planned activities. Now that you accept the necessity of practicing by yourself, so make room from your timetable.
It would be best if you did it for your cause, not to show others. By doing this, you won’t be feeling hesitant when or how to make time for self practice.
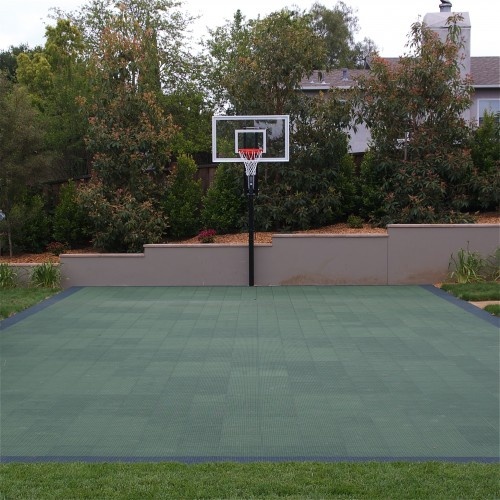
3. Choose a suitable place
Choose a location that has enough space for you to run around and show off some of your mastered basketball moves. Also, you can experiment with new moves.
You need to make the best use of your practice hours. So, do not just get satisfied after some dribbling and shooting. Change directions, cross over, fake, and do all sorts of things. So, to perform all these little things, you will probably need a location which is good enough spacious.
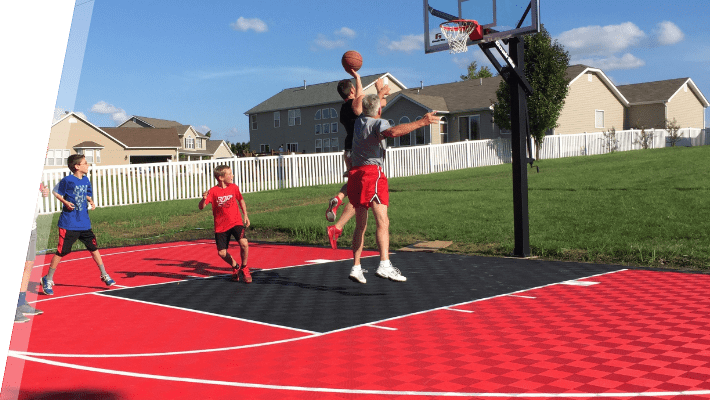
It can’t be more significant than if you find the vacant area near your living house or in your backyard. That means you will be much more comfortable because none is observing you, and you can relaxedly perform all kinds of drills.
Want to make the sport more interesting? Enjoy your moments in water with these pool basketball hoops.
4. Do not forget the Equipment
While practicing, make sure you have all accessories and equipment close to your hand grabs. To learn new things, techniques, moves do have your equipment ready.
Always remember to put on sports gear. Shirts, shorts, socks, shoes, and ankle brace are the most common of all. To reduce the injury of your leg or muscle, you must wear shoes. Shorts will help you to run more freely.
5. Warm up yourself
Always remember to do some warm-up exercises before practicing. It will help your muscle to get ready for the stretches in the practice session because sudden stretches can lead to severe injury. Blood flow and the cardiovascular system will be accustomed to all these jogging and movements.
We also recommend warm up after you’re done with your practice because your muscles need to relax a bit after heavy physical activity.
6. List the skills
When it comes to building skills, do not just practice blindly; make a list of basketball moves you want to work on. You gotta be smart and practical. Take your time and go after it.
7. Ball handling
Dribble from an as low position as you can. Change hands. Dribble the ball around your legs. Move from right to left and then left to the right hand. You can even set up lines of cones in a pattern known as “zig-zag”.
Let me help you with an example that will make you understand it better.
At the very first cone dribble, then a simple crossover dribble. At the next cone, change direction by dribbling between legs, go behind or do spin dribbling at the last one. Also, be watchful about the speed you are passing the basketball. Try to speed up each time. Handling will help you in shooting, passing, catching, driving, and making layups.
8. Shoot
You can follow the steps described below to achieve a better result. Here are some basketball shooting drills to do alone:
a. Set your feet, bend your arm and line up elbow with the basket.
b. Try to use a proper follow through so, you can get a superb visualization.
c. Take 10 shots in a row without hitting the rim by standing in front of the basket.
d. Compete with yourself everytime. Shoot without dribbling, after one dribble or even you can try a last second shot.
Shooting is something where you always do not require the hoop. You can fix a target or set up a basket just like what people used to do in the early days of inventing basketball. There is a cheap mini basketball hoop that you can purchase without spending a fortune. However, this is not recommended for adults yet perfect for a little 1-on-1 or to practice your three-pointers.
9. Passing
a. On the wall you need to keep marking of passing target by tape.
B. Try two hand passes, one hand passes, use right and left hand.
C. Adjust the distance according to your capability.
D. Work on pivoting. protecting the ball from defenders is really important too. study on that aspect of the game too.
E. Hit the target zone as many times as you can.
10. Conditioning
a. You can use various kinds of basketball related drills to improve your physical condition. For e.g to increase your upper body strength, do push ups.
B. Sprint up and down into the court to improve cardiovascular fitness.
C. Do jumping drills to jump from a standing position.
D. Stand under the basket, jump and try to touch the backboard 10 times in very quick succession.
E. Try to slide your feet quickly so you can change the directions frequently. By doing this, your defensive footwork will be improved a lot.
11. Cherish the opportunity to examine yourself
That’s a personal decision to practice alone. This is the only way to observe yourself by yourself. Try to judge yourself as an athlete from your point of view. Do everything possible you require to become a better player than now. That will give you great satisfaction at the end of the day because you’re putting in extra practice hours to reach your goal. Be your coach.
12. Find the delight in between practice
All your hard work will be valued more if you enjoy the practice sessions from the core of your heart. There is absolutely nothing more satisfying and wonderful than playing the sport you dream of playing.
Yeah, you won’t be taking your practice sessions lightly but also try to enjoy and take fun out of it. Even though you are doing all alone, do not forget to have the jubilation at times.
Spend the time to discover yourself and know about various aspects of your game where you need to grow as a basketball player to achieve your lifelong dream. Furthermore, this may prove to be a catalyst for speeding up your learning and development process of skills and a better understanding of the game.
Article you may find interesting:
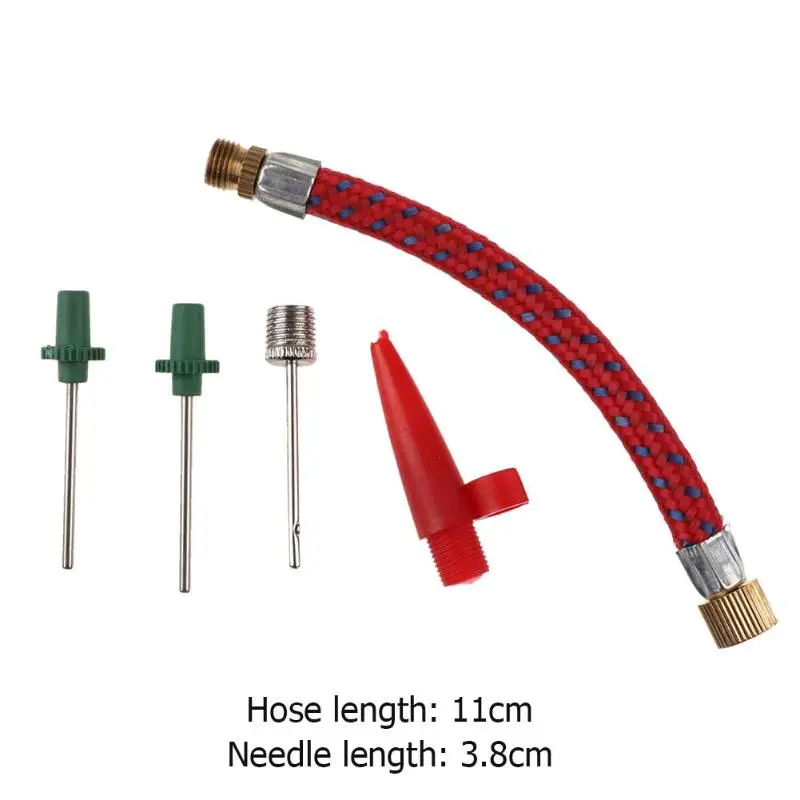
Techniques for fixing a leaking basketball Valve
Guide to Adjusting Basketball Hoop Height At Your Comfort
Different Ways of Practising basketball without A Hoop
How Tall Is A Basketball Hoop?
13 Easy Steps To Make A Complete Paper Ball
Tips for becoming a basketball Player In 2 Months
The Top 10 Best Basketball Drills to Do By Yourself
You notice something as you walk onto the basketball court.
Nobody’s on the court with you!
Somebody else might join you later. But for now, the court is all yours!
No matter how long you have on the basketball court, picture the drills you will do by yourself.
What drills should you do?
Ask yourself this question: what drills will prepare you to succeed in the game? How will these drills make you a better basketball player?
The key to getting better is to consistently perform as many game-like reps as possible in practice.
You practice like you play. But you will also play like you practice!
So what do your practice habits looks like?
Whether consciously or subconsciously, how you end up practicing will translate over to the game.
If you practice HARD, then you will end up playing HARD.
If you do NOT practice hard, you will be used to playing SOFT.
So how do you want to practice?
With that said, here are the top 10 basketball drills to do by yourself!
Drill #1 – Warm Up & Ball-Handling Combo Drills
When time is limited, it is essential to multi-task while practicing on the basketball court.
Lunges and Dribbling – the main benefit of doing lunges while dribbling the basketball is that you are improving your basketball skill while simultaneously warming up your muscles.
You are taking two productive steps at once!
To start, do 10 lunges down the court while dribbling with your right hand. Then do 10 more lunges while dribbling with your left hand.
Lateral Dribbling – there are three benefits for lateral dribbling: dribbling while maintaining an athletic stance, sliding your feet, and controlling the ball while moving laterally.
To do this exercise, dribble down the court with one hand while simultaneously doing defensive slides.
As always, stay in an athletic stance and pound the ball.
Jog in Place Dribbling – this dribbling exercise is also a great way to warmup your muscles while also developing your basketball skills!
It raises your heart rate. It reinforces your ability to change directions and to dribble while looking up.
Box Dribbling – changing direction/speeds; defensive slides, and eyes up.
Ultimately, your warmup should raise your core temperature and to give you a dynamic stretch in each muscle stretch in each body part.
Drill #2 – Find your range shooting
There are four key teaching points for this drill.
Try to put the ball right over the front of the rim
Put your hand and elbow under the ball (remember, your arm should look like an L when you are about to take the shot)
Hold your follow through
Stand up on your toes
To begin, take 10 shots about five feet from the basket. Make at least 6 of 10 shots before advancing to the next spot.
After making at least six shots, take a step back and again make at least six out of 10 shots.
Then, take another step back and do the same thing. By the third or fourth step, you should be at the free-throw line.
After you make at least six out of 10 free-throws, then move out to a step behind the top of the key.
Knock down at least six out of ten three-pointers and then take a step back.
You probably want to go no further than 25 feet from the basket while doing this drill.
If you find that your shot is consistently falling short, move closer to the basket to readjust your shooting form.
The main point of this drill is to develop good habits while shooting the ball. Maintain perfect shooting technique as you move back.
As a rule of thumb, where your shooting limit is located is also where you have to alter your shooting mechanics in order to generate enough power to get the ball in the basket.
I would not extend past that point in this drill. Wait to develop the strength to shoot behind the three-point line until you practice shooting three-pointers.
Your mind and body mechanics will subconsciously adopt the habits that helped put the ball in the basket.
If you are shooting the ball correctly in this drill, then your shooting form will look good come game-time.
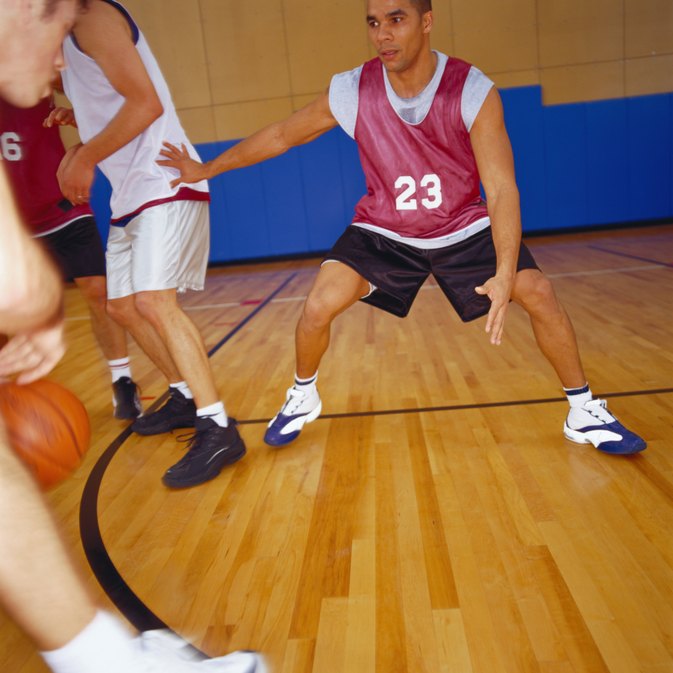
Drill #3 – Defensive Slides with Jumper
This drill is intended to improve defensive agility, shooting, and footwork at the same time!
To do this drill, you do a defensive slide to the opposite free-throw lane and back. Then, you grab the ball to take a short jump shot.
Like in drill #2, focus on shooting the ball with good form.
It is important to develop the muscle memory behind moving laterally in a triple-threat stance – on both offense and defense!
Drill #4 – Attack, Retreat, and Finish
This a basketball drill for dribbling, conditioning, and finishing skills at the rim.
Start the drill at the elbow. Dribble the ball hard to the block.
Then take a retreat dribble back to about 10 feet away from the basket.
On the right side, plant your left foot as you are making the retreat dribble.
You will need to explode off your left foot to create separation between you and your defender.
Normally, you would go in a straight line while attacking off a retreat dribble. However, you can also cross over as a more advanced technique.
This drill also presents a good opportunity to practice your footwork while finishing at the basket.
You can take two normal steps, jump stop, or even practice your Euro Step during this drill.
Drill #5 – Shooting Footwork
What do the greatest shooters in NBA history have in common? They ALL have mastered their shooting footwork!
This drill teaches you five scenarios that will test your shooting footwork.
Part #1: 1-2 footwork, alternating
Alternate your pivot feet after each shot. The goal is to develop a muscle memory of your catch-and-shoot mechanics for both your right and left feet.
Once your shot mechanics are intact, your muscle memory will allow you to shoot the ball when you’re tired.
You will also improve your footwork while coming off screens in both directions, in transition, or when shooting off the dribble.
Get into your shooting footwork quickly as you catch the ball. Getting into a quick stab will allow you to shoot the ball much more quickly.
Part #2: 1-2 footwork, lateral
This is the perfect warmup drill for players who rely on sidestep jumpers, such as Chris Paul.
You will improve on your catch-and-shoot footwork from drive and kick passes from your teammate.
And if your teammate’s pass is off target, you will also improve your footwork from having to slide your feet laterally to catch the ball in your shot pocket.
Moreover, this will also improve your ability to come off flare screens.
To start, alternate stepping between your right and left foot after each shot.
Focus on staying in a low, athletic stance before you get into your shot. If your stance is too high, you may drift to the left or to the right when you shoot the ball.
Part #3: Hop footwork, forward
For this part, you roll the ball to yourself and jump stop just as you receive the pass.
A good habit to start now is to hop to the ball BEFORE you receive the pass. Oftentimes, players catch the ball and THEN setup their footwork, which can be a travel if it takes two or steps to square up for the shot.
Part #4: Hop Footwork, Lateral
Like when practicing the lateral movements for the 1-2 footwork, it is imperative you stay in a low, athletic stance.
Make sure to jump before you receive the pass. Ideally, your teammate will lead you to where you can immediately catch and shoot. But if not, you may have to slide back to the correct spot.
Part #5: Coming out of a curl screen
Start off with your back to the basket and throw the ball to yourself. Then, turn your hips and feet towards the basket right after you pass ball to yourself.
As you spin the ball, make sure your inside foot is tight and directly towards the basket.
Drill #6 – Stationary Dribbling Into 1V1 Jumpers
This drill develops your off-the-dribbling jump shot via the crossover, through the legs, and behind the back dribbles.
The key is to stay in a low stance and to go full speed!
If this drill is done correctly, your eyes are up, you pound the ball, and you keep the ball close and tight.
Once you pull up for the jump shot, then you progress into your quick 1-2 footwork you practiced in drill #5.
Part #1: Crossover
Make sure your eyes are up, you pound the ball, and your dribble is tight as you dribble up the court. Go into your 1-2 crossover as you cross the top of the key.
Alternate between going left and right on the crossover.
Part #2: Through the Legs
The key is to chop your steps as you approach the three-point line. Going through the legs has a similar idea to the hesitation move. Chopping your steps will make the defender think you are about to shoot the ball.
By going through the legs instead, you can use the defender’s temporary pause to get yourself an open midrange shot off the dribble.
Part #3: Behind the Back
Similar to going through the legs, you will almost come at a jump stop as you go behind the back. Going behind the back is a good move when you think your defender is anticipating either a straight line drive or a crossover.
Once you master the three basic moves, you can move into an advanced drill progression: attack with double moves.
Drill #7 – Spin Out Shooting
Spinning out the ball to yourself is a classic way you can pass the ball to yourself! Time out your spin-out pass to yourself as if you are receiving a live pass in the game.
There are several spots on the court where you can practice your shot!
But where should you shoot the ball?
You should reinforce your strengths! Prioritize taking shots where you make them in the game.
Once you take enough shots from your strong spots, then address your weak points where you are struggling to make shots in the game.
Drill #8 – Perimeter Footwork with Jumpers
Be creative with this drill – but start simple. This will reinforce your footwork and shooting skills as long as you practice with game-like speed and intensity.
Make sure to practice going both right and left from various spots on the court.
One thing to remember: most of these off-the-dribble shots will be taken in the midrange area during the game. I would practice shots that would be forced to take during games.
As defenders aggressively closeout on three-point shooters, the off-the-dribble midrange shot will be open more often than not.
Part #1: Jab Step Then Jump Shot
Your jab step is intended to make the defender react to your initial move. Make sure you take a hard and decisive jab step before putting the ball on the floor.
Also, practice taking a pump fake before going into your jab step. Take one dribble and then take a pull-up jumper from the midrange area.
Part #2: Back Pivot Then Jump Shot
Back pivots are great to use against pressure defense. The pivot gives you extra space against your defender.
Then you can attack the defender’s lead foot to take an open pull-up jumper.
Drill #9 – Spot Up, Pull Up, Layup Series
For all three components, be sure to hustle, get your rebound, and come back to the same spot. Maintain your good habits in order to reinforce the skills developed earlier in the workout.
Also, practice going to both your right and left. I cannot emphasize enough how important it is to be able to finish going both ways.
Part #1: Spot Up
Spin the ball to yourself and shoot the ball immediately off the catch. Similar to drill #7, prioritize your strengths and then address your weaknesses.
Part #2: Pull Up
This is similar to drill #8. Do not forget to practice your footwork as you get into the drill.
Part #3: Layup Series
Use this as an opportunity to practice your finishes at the basket.
Given this is towards the end of the workout, it makes sense to practice layups when you are tired.
Drill #10 – 1V1 Moves Into Jumpers
Part #1: In-and-Out Dribble
Start by staying stationary. This part of the drill is intended to reinforce your in-and-out dribble at the top of the key.
Jab with your left foot as you are going left to right, and vice versa.
Part #2: In-and-Out Crossover
This is an extension of Part #1. Now you add a crossover immediately after the in-and-out dribble.
When doing this crossover, do not allow your shoulders to get too far forward. This will help you stay balanced.
Part #3: In-And-Out Crossover Then Through Legs
In this part, add a through the legs dribble right after the crossover. When a defender is anticipating the crossover, this is a good countermove to still get to your spot on the court.
Of course, there are several other variations of this drill that you can do! Be creative!
Struggling for ideas? See our PDF workout for even more variations of this drill!
You can download this FREE Top Drills Workout schedule PDF that gives you a recommended plan to follow and shows you exactly how to utilize the drills to get the biggest benefit…
https://oneupbasketball. com/top-drills-workout/
How to learn to play basketball on your own?
How to learn to play basketball on your own?
Instructions:
1. Winning basketball is easy if you know how to throw and throw the ball into the basket. You also need to prevent the opponent from scoring more balls. Practice technique from various positions, using throws from the shield and without, in motion and with a stop. First, master the technique of a normal throw without rebounding from the backboard, standing in front of the basket. Take the ball in your right hand, and with your left hand lightly grab it from the side. Throw the ball with a jump, straightening your right arm.
2. Maintain. The player can move with the ball on the court with a periodic hit of the ball on the floor. In this case, you need to take no more than two steps. You cannot dribble the ball with both hands at once and you cannot carry it. The rebound during the dribble must not exceed the height of the player. It is recommended to immediately start by learning how to dribble with both hands, hitting the ball with them one by one.
3. Passing is one of the main tactics in basketball e. Even the fastest basketball east cannot move faster than the ball on the court. Pass the ball to your partner and immediately take a comfortable place closer to the basket. Passing is the basic principle of this game.
4. Selection. "Winning the shield" and securing a quick counter-attack is a very important element of the game. Rebounding also involves keeping the ball even after a failed shot. The number of rebounds is reflected in the statistics of the individual player and the entire team.
5. Moving without the ball is one of the keys to successfully completing an attack.
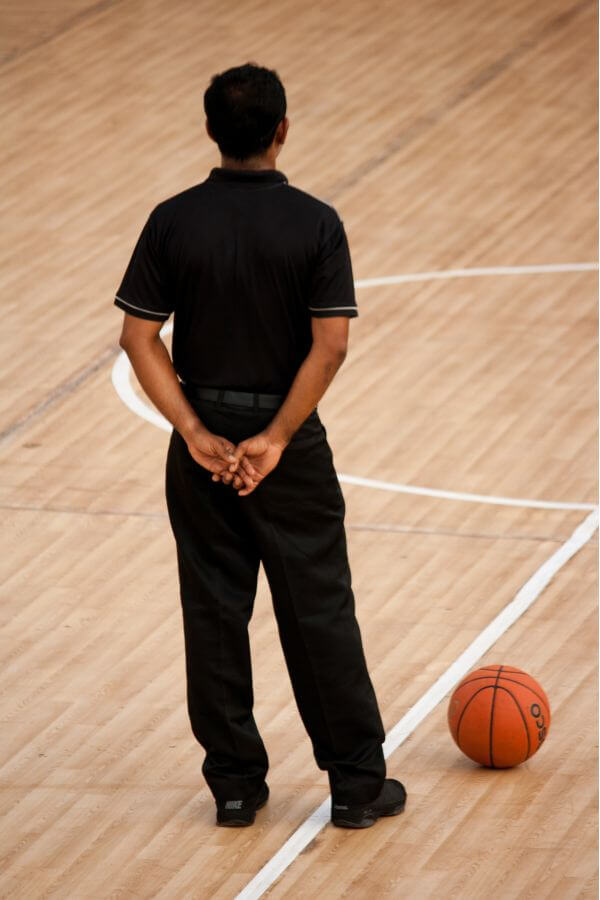
6.Here are some more general tips: - Involve the whole team. Even if there are scoring leaders, the rest of the players must also get the ball, if only to allow the first to open under the net. - Play hard, but within the rules. advantage in basketball e have tall and physically strong players, although undersized take their speed and agility. - Never argue with the judge. He will not change his point of view, but you can get a foul. - Do not try to win at the expense of accuracy of throws, dribbling, high jumps or interceptions alone. Train all together. - And the last thing: do not neglect tactics. It is necessary during the game not only to score, but also to think.
Today basketball is quite a popular sports team game with a ball. For an inexperienced player, this sport can seem like a rather difficult game, despite the simple task of hitting a basketball into the opponent's basket. Proper dribbling, throwing technique, blocking players, technique for distributing players on the court - these are all the nuances that complicate the game. In order to learn basketball, you need to remember the basic ingredients.
1. Maintain. Moving a player around the court is possible only with a periodic (no more than 2 steps) hitting the ball on the floor. It is forbidden to dribble a basketball with both hands, as well as carrying it. The height to which the ball bounces must not exceed the height of a person. An inexperienced player should practice dribbling the ball with each hand separately, following it only with peripheral vision.
2. Transfer. Passing is the basic principle of basketball. Even the fastest player cannot move around the court at the speed of the ball. Therefore, after passing the ball to another player on your team, you must take the appropriate place to receive or ensure that the ball is thrown unhindered.
3. Movement without a ball. Only one player has the ball at any time during the game. For other players on the team, the task is to successfully complete the attack, and for opponents it is to intercept, tackle or defend.
4. Throwing the ball into the basket. In order to win basketball, you need to score as many balls as possible in the opposing team's basket, as well as protect your own basket. You must practice throwing technique from different positions on the court, body positions, while standing still or moving.
5. Selection. The ball must be in the possession of the team even if you have made a bad shot. The number of rebounds is a pretty important indicator for both the player and the team as a whole.
How to learn to play basketball from scratch
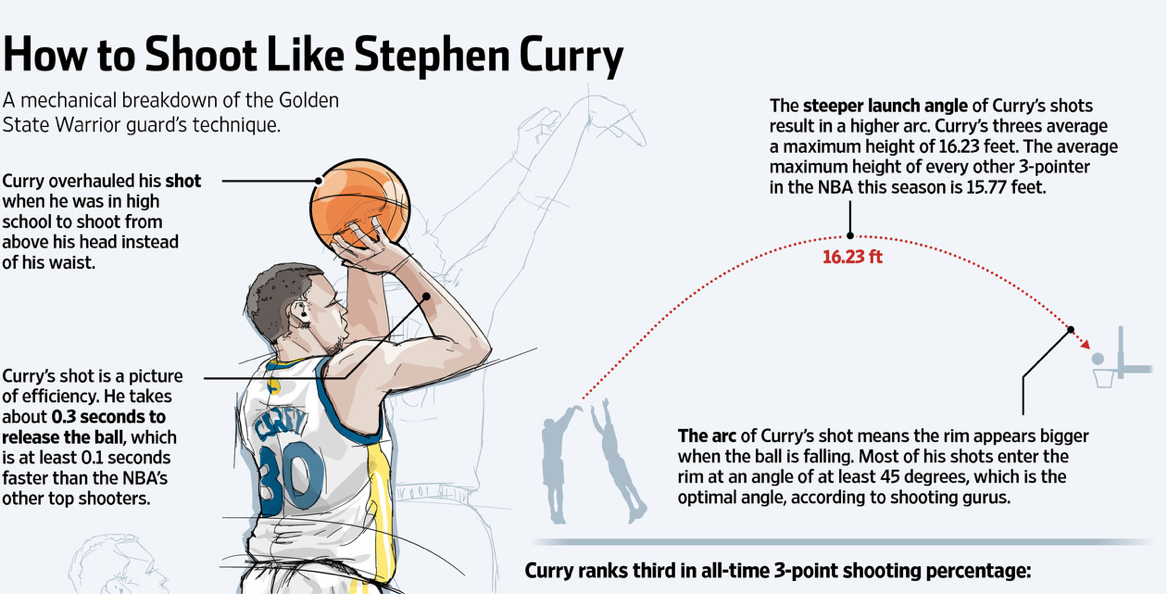
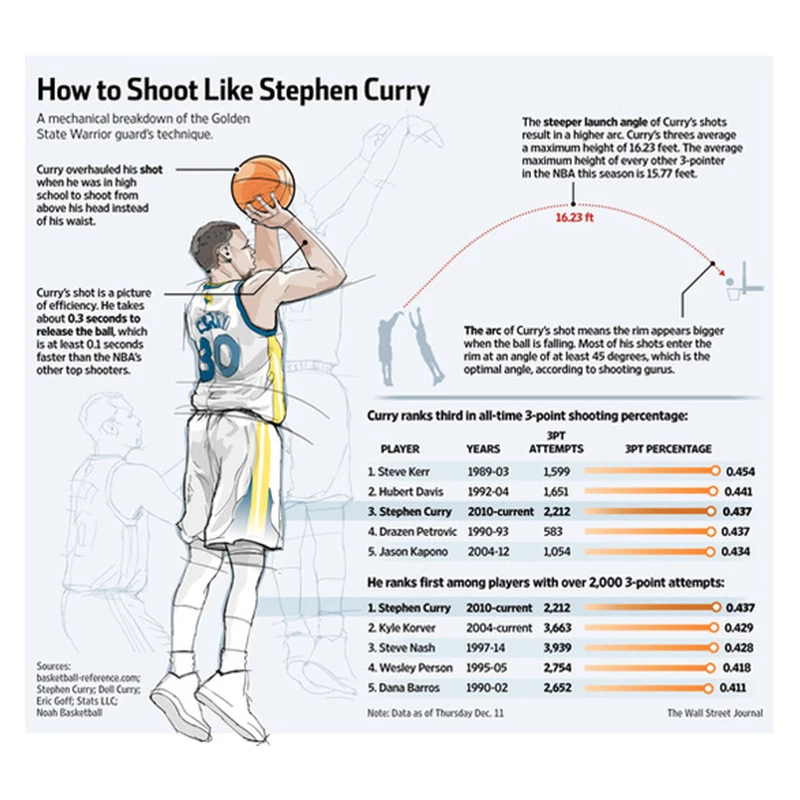
“School 2.0” is the best educational project in the history of Russian basketball, which has collected in one material all the basic skills that are needed for those who want to jump like Michael Jordan and shoot a three-pointer like Steph Curry. We literally chew on you how to play basketball and become cool. Lots of videos are included.
Passion for basketball usually begins with the ball hitting the basket. Do not deprive yourself of this pleasure, learn to score from under the basket, then from two steps ... But after that, you should think about what elements to master in order to become a “correct” basketball player. We won't let you get bored - we won't fill all basketball practice with boring stops and turns. But in general, you can’t do without it, because the correct work of the legs, the habit of standing firmly, not mincing, not taking extra steps, quickly and correctly changing the direction of movement is an absolute must for a basketball player. Plus, of course, dribbling and passing.
In general, to start the basketball path, School 2.0 recommends exercises to develop the following skills during basketball training:
Shooting
Footwork
Transmission
Maintenance
Do two or three dozen workouts, combining the exercises from the following list, and you will notice real progress. Start each workout with 2-4 minutes of quiet running and such a joint warm-up:
Exercises are performed one after the other without stopping.
Shoulder warm-up. Stand up straight and stretch your arms out to the sides. Make circular movements with straight arms 10 times forward, then 10 times back.
Pelvic warm-up. Put your hands on your belt, feet shoulder-width apart. Perform rotations in the hip joint, as if twisting a hoop, 10 times in each direction.
Back workout. Bend your elbows and press to your chest, feet shoulder-width apart. Do rotations in the lower back 5-10 times in each direction.
Knee warm-up. Stand up straight, feet together. Squat down a bit and put your hands on your knees. Then perform rotational movements with your knees, helping yourself with your hands. Do 10 times in each direction.
Ankle warm-up. Put your hands on your belt. Place one foot on the toe slightly behind you. Resting on your toes, do 10 rotations in the ankle joint in each direction, then change legs.
Squats. At the end, do 5 deep squats, keeping your heels on the floor and extending your arms in front of you.
Shooting
Get used to throwing correctly right away - with one hand (the other can only hold the ball), with reverse spin. The forearm is perpendicular to the floor, the arm straightens completely, the hand “closes”. Listen to how the ball blows up the net - it's a thrill.
1. Shooting stand
Stand straight, feet shoulder-width apart, ball in hand.
At the signal, take a throwing stance, and at the next signal, return to the starting position.
Ready to throw: legs bent, back straight, slightly tilted forward. Throwing hand behind the ball (not sideways!), the second hand holds the ball in front-side.
Raise the ball to shoulder level.
Repeat 10 times with right and left hand.
2. Single handed throw on the spot
Get into the throwing position. The ball lies in one hand at the level of the head, the elbow is directed forward, the second hand does not help.
Sit down a little and with simultaneous extension of the legs and elbow, throw the ball up in front of you. Stay in the final position until the ball hits the floor.
Repeat 10 times with right and left hand.
3. Throw with one hand into the hoop from one meter
Stand under the hoop with the ball in your hand at shoulder height. The other hand does not help!
Squat down and at the same time extend your legs and arms, make a throw around the ring. Keep the final position of the straightened arm and closed hand until the ball hits the floor.
Try to hit the ball in the corner of the rectangle drawn on the shield, then the ball will be in the ring.
Throw from different positions. 10 times with the right and left hand.
4. Medium throw
Stand at a distance of 3-4 meters from the ring and take a throwing stance. Sit down and with the simultaneous extension of the legs and arms, make a throw around the ring. Keep the final position of the straightened arm and closed hand until the ball hits the floor.
Throw from different positions.
Stand a few meters from the ring. Make yourself an autopass, take a small jump forward, catch the ball, take a shooting stance, and hit the basket.
Perform the exercise 10 times with your stronger arm.
5. Two steps - throw
Stand three meters from the ring. Take two steps from the spot and throw the ring.
Get on the three-point line. Take a couple of hits with the ball, then two steps and throw the ring.
From the three-point line, make yourself an autopass. Then catch the ball, take two steps and shoot the ring.
Try to hit the ball in the corner of the rectangle drawn on the shield.
Repeat 10 times with right and left hand.
6. Two steps - low shot
Get on the three-point line. Take a couple of hits with the ball, then two steps and throw from the bottom of the ring.
Stand three meters from the ring. Take two steps from the spot and throw the ring from below.
From the three-point line, make yourself an autopass. Then catch the ball, take two steps and shoot the ring.
Try to hit the ball in the corner of the rectangle drawn on the shield.
Repeat 10 times with right and left hand.
Footwork
Glue your feet to the floor. No extra steps! Otherwise - "jog", whistle, give the ball to the opponents.
1. Jump stop
The exercise is performed on the spot. Make yourself an autopass, catch the ball with two hands and at the same time do a two-foot jump into a basketball stance.
Determine the axial (supporting) leg and perform turns on this leg forward and backward.
Then imitate the following sequence of actions: take the ball in your hands, being completely in the air; land on both (!) feet at the same time; do turns around the same (!) leg.
Repeat the exercise 10 times: 5 times turning on the right foot and 5 times on the left.
2. Stop by steps
The exercise is performed on the spot. Make yourself an autopass, catch the ball with both hands and stop at the same time with two steps into the basketball stance.
The axial (supporting) leg will be the one with which you took the first step - on this leg, perform forward and backward turns.
Repeat the exercise 10 times: 5 times turning on the right foot and 5 times on the left.
3. Zigzag without a ball with a jump stop
All changes in the direction of movement are made by a clear turn around the near leg - even through the “face”, even through the “back”. This is very important in basketball!
4. Zigzag without a ball with a stop in steps
It is performed in the same way as the previous exercise, but the stop at the cone is one-two, not a jump.
Transmission
Mastering the culture of passing will not only earn you the respect of your playmates, but it will also give you a lot of fun. Maybe even more than hitting the ring.
1. Passing with both hands into the wall
Stand 3-5 meters from the wall. Pass the ball into the wall with both hands from the chest.
Hold the ball with both hands from the sides and direct it to the wall with a wrist movement. As a result, the arms at the elbows should straighten, and the hands should “close”.
Move further back to make longer passes. At the moment of such a transfer, one leg takes a step forward. Catch such a transmission from the floor.
Repeat the exercise 15-20 times.
2. Passing with one hand into the wall
Stand 3-5 meters from the wall. Pass the ball into the wall with one hand from the shoulder.
Hand behind the ball, thumbs up. Carpal movement.
Repeat the exercise 15-20 times for each hand.
3. Lying One-Hand Pass
Lying on your back, pass with one hand up.
Repeat the exercise 15-20 times for each hand.
Dribbling
Great basketball dribbling is the key to all doors. Not to mention how effective it is.
1. Palms on the ball
Take the ball in your hands and move it from hand to hand, hitting it with your palms.
Start slowly and then speed up. 15 seconds slow, 15 fast.
Repeat 1-2 times.
2. Ball on fingers
Quickly toss the ball with your fingertips from one hand to the other: raise and lower in front of you; sit down and get up; raise and lower in motion.
Perform each exercise 2-3 times for 15 seconds.
3. Ball around the body
Pass the ball from one hand to the other as quickly as possible: around the body; around the head; in the round-leg basketball stance; in a basketball stance figure eight around the legs.
Do 5 reps each side.
4. Low dribbling on the spot
Low ball dribbling in different positions:
Basketball stance, feet parallel. Dribble to the side of your foot. Free hand in defense position.
Sit on the floor and dribble from your side, moving the ball closer or further away.
Repeat 15 times with each hand. Do 2-3 sets.
5. Medium dribbling in motion
Medium dribbling of the ball (height - to the waist) in motion. Do it at speed.
Make a turn, leaving the ball in place and picking it up with your other hand.
Dribble two courts with each hand.
6. V-dribbling in front of you
Stand in a basketball stance.
Dribble with one hand in front of you in a V, with your right and left hands in turn.
Repeat 15 times with each hand. Do 2-3 sets.
7. Crossover
Move the ball in place in front of you from one hand to the other.
First do the exercise for each stroke.
Then - for every third hit.
After translation, touch the floor with your free hand.
Repeat 15 times with each hand. Do 2-3 sets.
8. Underfoot transfers
Transfer the ball between the legs from one hand to the other.
Translate every third hit with the ball.
After translation, touch the floor with your free hand.
Repeat 15 times with each hand. Do 2-3 sets.
That's it for a start. Of course, it would be nice to learn how to fly - in the sense of jumping high without a trampoline. But that's another story. If you only jump, you are a jumper. And if you have mastered these exercises, you are almost a basketball player. Then you can already learn to play in a team, in real contact conditions.
Why Andrey Kirilenko created School 2.0:
And remember,
"School 2.0"
will introduce you to people who you want to follow an example from: winners in whom at first no one believed; music and movie stars going crazy about basketball; heroes who, thanks to sports, managed to overcome themselves.


 Choose a suitable place
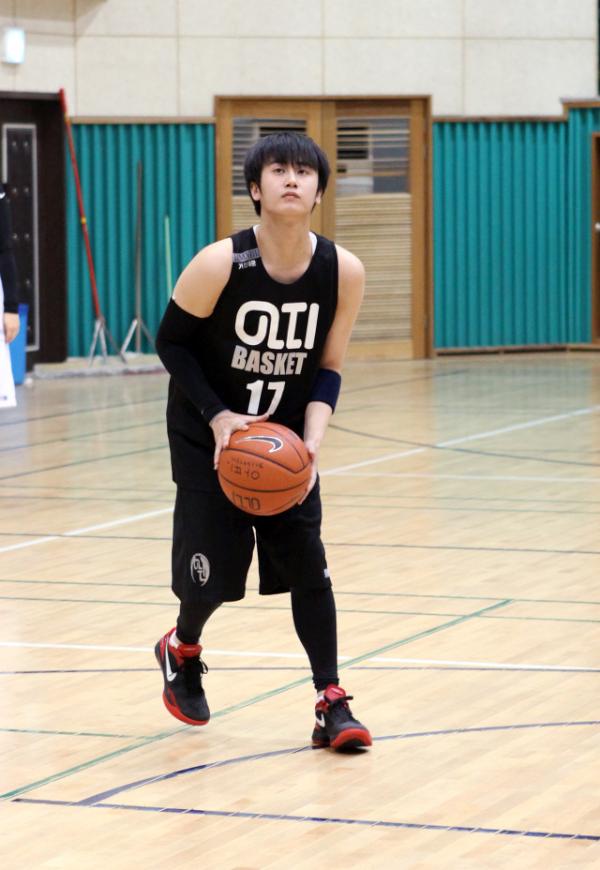
 Also, you can experiment with new moves.
 To reduce the injury of your leg or muscle, you must wear shoes. Shorts will help you to run more freely.
 Move from right to left and then left to the right hand. You can even set up lines of cones in a pattern known as “zig-zag”.
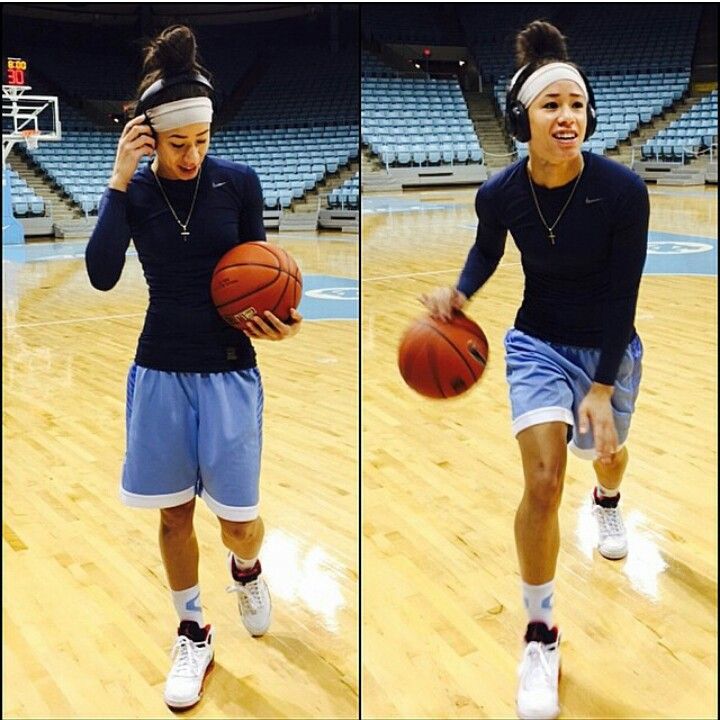
 That will give you great satisfaction at the end of the day because you’re putting in extra practice hours to reach your goal. Be your coach.
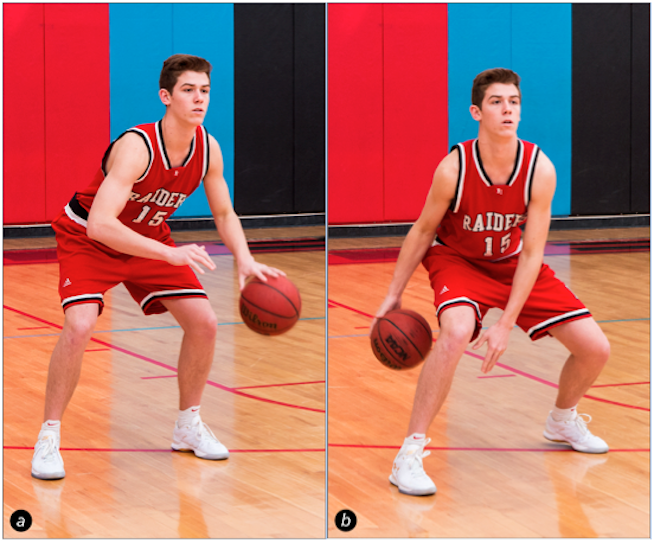
 Make at least 6 of 10 shots before advancing to the next spot.


 I would practice shots that would be forced to take during games.
  Maintain your good habits in order to reinforce the skills developed earlier in the workout.
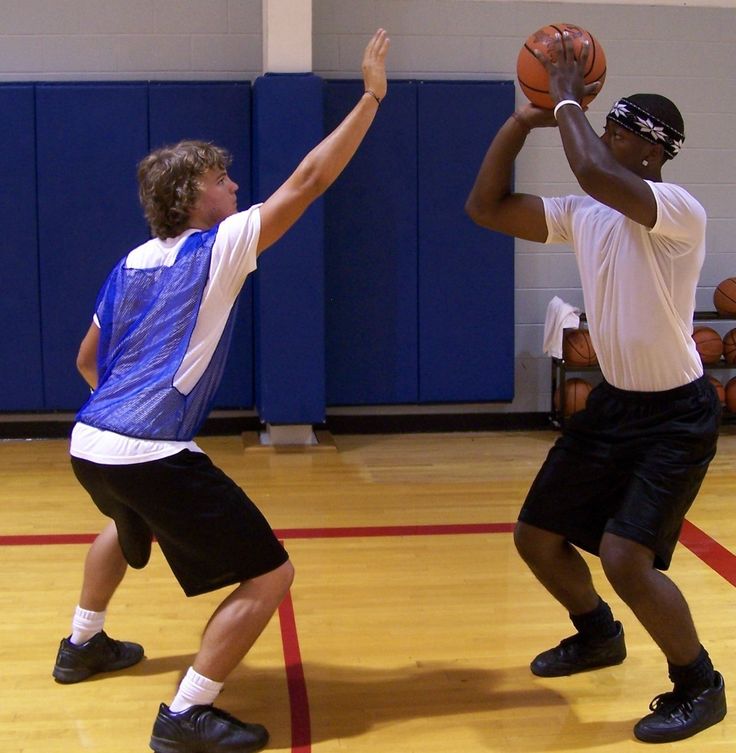 This part of the drill is intended to reinforce your in-and-out dribble at the top of the key.
  com/top-drills-workout/
 In this case, you need to take no more than two steps. You cannot dribble the ball with both hands at once and you cannot carry it. The rebound during the dribble must not exceed the height of the player. It is recommended to immediately start by learning how to dribble with both hands, hitting the ball with them one by one.
 In order to learn basketball, you need to remember the basic ingredients.
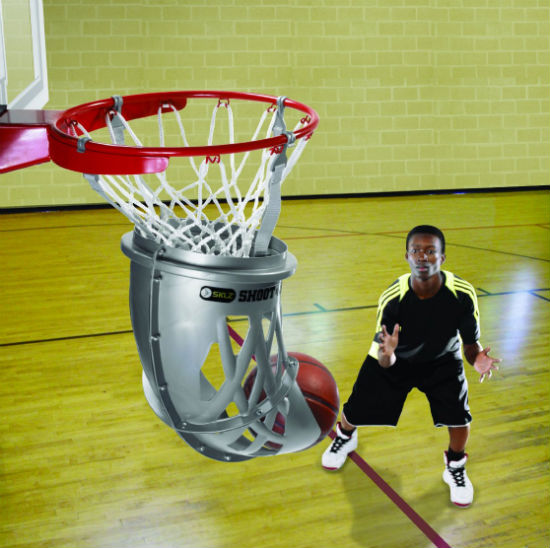
 Do not deprive yourself of this pleasure, learn to score from under the basket, then from two steps ... But after that, you should think about what elements to master in order to become a “correct” basketball player. We won't let you get bored - we won't fill all basketball practice with boring stops and turns. But in general, you can’t do without it, because the correct work of the legs, the habit of standing firmly, not mincing, not taking extra steps, quickly and correctly changing the direction of movement is an absolute must for a basketball player. Plus, of course, dribbling and passing.
 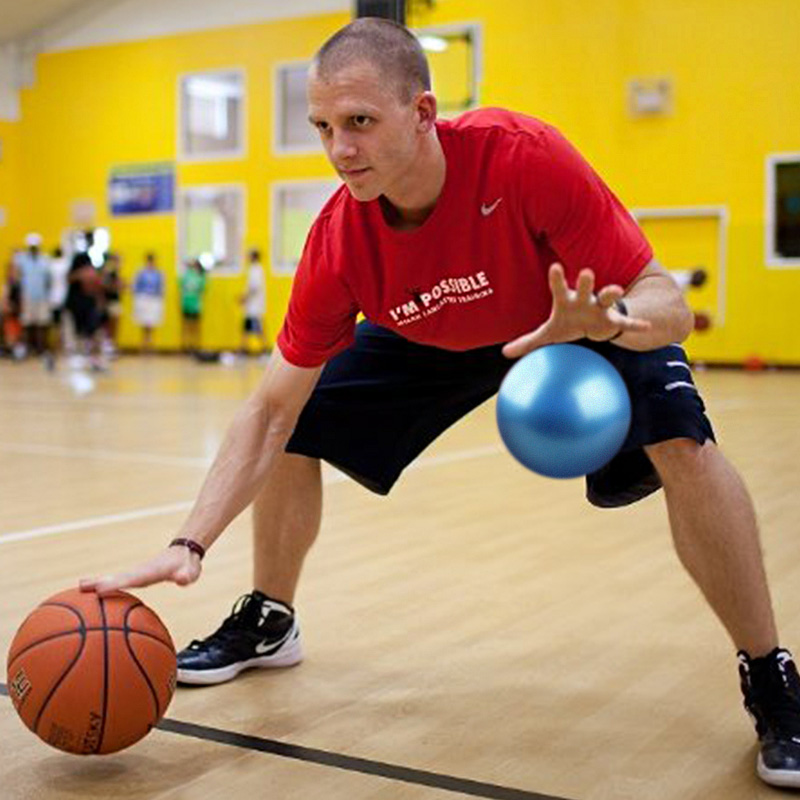 Start each workout with 2-4 minutes of quiet running and such a joint warm-up:
  Then perform rotational movements with your knees, helping yourself with your hands. Do 10 times in each direction.

 Then catch the ball, take two steps and shoot the ring.
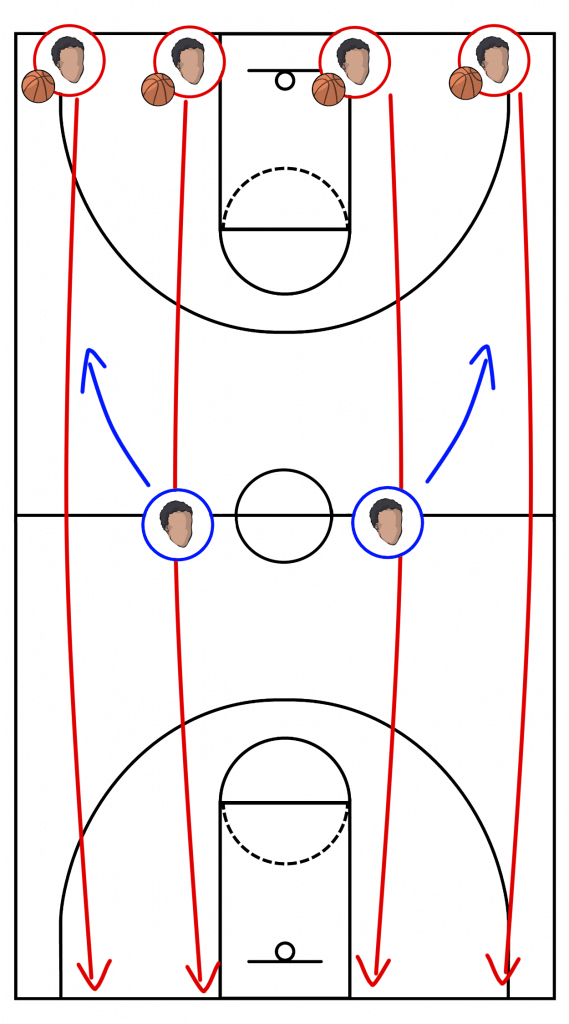
 Not to mention how effective it is.
 V-dribbling in front of you