Home »
Misc »
How to work on your left hand in basketball
How to work on your left hand in basketball
3 Tips to Help You Improve Your Weak Hand
Basketball Tip
Most players don’t know the value of being able to dribble, shoot, and pass with both hands no matter the position they play. Many athletes tend to favor one hand over the other because it’s their dominant hand and more comfortable. If you're looking to play in high school or college, it is expected of you to be able to use both hands and can even be the deciding factor when getting a spot on a team.
The players that are comfortable using both hands are the athletes that stand out. They can crossover and overtake their defender quickly with eyes on the court. They can swiftly curve any bounce pass through the defender’s arms, and they can make that breakaway layup no matter which way they’re being pushed. Here are three tips from the Doug Bruno Girls Basketball Camp staff to help players become more comfortable using both hands.![]()
1. Dribble with Both Hands
When trying to develop your non-dominant hand, dribbling should be the first place that you start. Begin by keeping your dominant hand behind your back, forcing yourself to use your weak hand to dribble. Practice this and after time it will start to feel more and more comfortable.
Once you have mastered that, try adding in a second basketball and dribble with each hand at the same time. Remember to keep your elbows behind the ball and force the ball into ground while keeping your head up. This will improve your coordination and ball handling skills in both hands. Being able to dribble with both hands provides a huge advantage over your opponent, you can now dribble down the court on the right and left side which makes it much harder for the defender to guess which direction you plan to go.
2. Weak Hand Passing
Another way to develop your weak hand is through various passing drills. Grab a partner, stand ten feet apart, and put your dominant hand behind your back. With one ball, pass and receive with only your weak hand. As you progress, you can increase the speed and challenge your partner! Each player should pass with their non-dominant hand twenty times equaling one set. Start with four sets and increase as you feel more comfortable.
3. Off-Court Tips
Although it is important to make a point to emphasize using both hands in practice, steps need to be made around the clock to master this skill. Doing daily activities with your non-dominant hand will form the proper habits and allow you to feel more comfortable using that hand. We recommend you eat and cut your food, open doors, drawers and packages, comb your hair, brush your teeth and use your phone all with your non-dominant hand. Initially, all these tasks will feel foreign but if you stay consistent, it will become a routine.
Implementing these practice tips will help you feel more comfortable using your non-dominant hand, which allows for a smooth transition onto the court. For further help with your game, check out more drills and tips and join us this summer at a Doug Bruno Girls Basketball Camp!
Share This
How Can You Improve Your Left (Weak) Hand Dribbling?
If you are asking yourself this question, the first thing I would tell you is congratulations!
While 99% of players have one hand that is definitely stronger and better at ball handling, most players don’t spend any time trying to make sure that both hands are equal or at least VERY CLOSE to equal in terms of ball handling. Most players realize they have a problem but won’t do anything about it.
They continue to have a dominant hand that they are comfortable using in games.
And soon defenses realize this as well…
Good defenses will take your one strong hand away and force you to use your weak hand. That is when you feel like a below average player.
So why am I congratulating you???
You realize that great players are great with BOTH hands.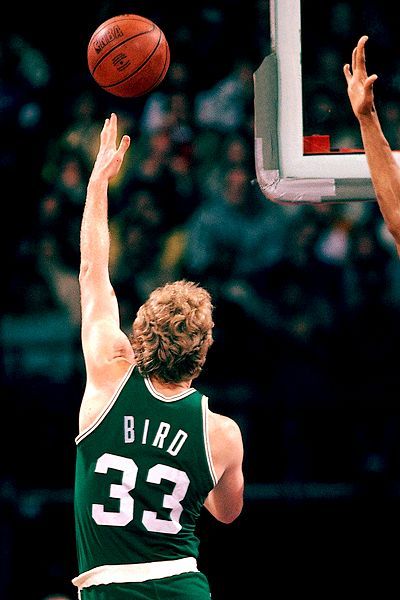
You realize the need to improve.
You realize that the time to get better is NOW!
Two Strong Hands Equals Better…If you have 2 strong hands and you don’t have a weak hand, what will that mean for you? Well it means….
- You can attack both ways off the dribble equally well….which makes you a match-up nightmare.
- Teams must guard you straight up and can’t try to force you a certain direction.
- You are an instant asset to your coach against pressure defense.
- You must be on the floor at the end of the game because of your ball handling skills.
- You will have more scoring opportunities because you can drive right or left.
So let’s get straight to it. Below is a list of 5 different ways to help you improve your ball handling with your weak hand.
5 Ways To Improve Your Left Hand (Weak Hand) Dribbling1. Increase The RepsIf you are a right handed player who is trying to improve your left hand, start by increasing your left hand reps when doing ball handling drills.
In other words, if you are doing a ball handling drill that calls for 10 reps right hand and 10 reps left hand, simply increase your left hand reps. So maybe do 10 reps right hand and 15 reps with your left hand. Just make this a part of your workout routine. It may not seem like a big difference, but if you consistently do more QUALITY reps with your weak hand, you’ll begin to see improvement.
2. Give Me 10!I’m not asking for an extra hour or two hours a day. I’m asking that you show up 10 minutes early to each work out. This 10 minutes is going to be dedicated to ONLY USING YOUR LEFT HAND.
Below is a list and brief explanation of simple yet effective drills to do with your weak hand in the first 10 minutes of each workout.
Stationary Weak Hand Drills
- Left Hand (Weak Hand) Ball Rolls. Simply roll the ball on the floor in a circle with your left hand. Make sure you go both directions. Do 3 circles clockwise and 3 circles counterclockwise.

- Left Hand Pound Low. Pound the ball as low and as hard as you can for 20 seconds.
- Left Hand Pound High. Pound the ball as high and hard as you can for 20 seconds.
- Left Hand Kills. Pound the ball high and hard and then after 5 seconds try to pound the ball as low as you can (almost kill your dribble) and gradually bring the ball up to as high as you can go. Repeat for 5 reps.
- Left Hand Side To Side. On the left side of your body, push and pull the ball at your side low and fast for 20 seconds.
- Left Hand Windshield Wipers. Put the ball out in front of you and go back and forth from left to right low and hard. Do this for 20 seconds.
On The Move Ball Handling for Weak Hand (Do These Drills Full Court & Back)
- Left Hand ½ Speed. You should go at approximately 50% speed with your left (weak) hand.
- Left Hand Hesitation.
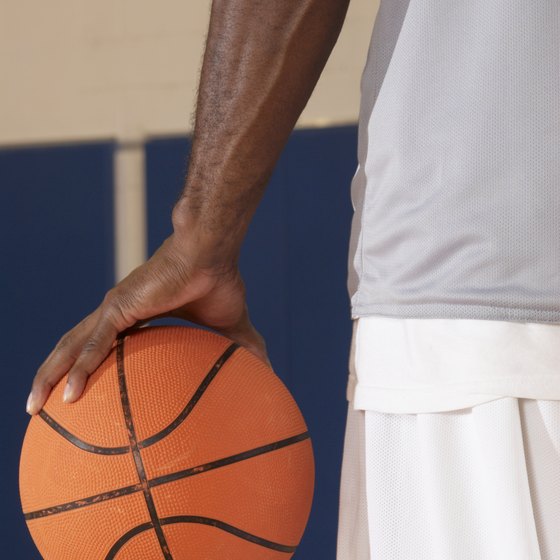 Take 2 dribbles forward and perform your hesitation with your left hand and then explode forward. Repeat until you get to the opposite baseline.
 - Left Hand In And Out. Take 2 dribbles forward and perform in and out move with your left hand. Repeat until you get to the opposite baseline.
- Left Hand Retreat Dribble. Take 4 hard dribbles forward. Stop. Take 2 hard dribbles backwards trying to cover as much ground as possible. Continue with 4 dribbles forward followed by 2 retreat dribbles backwards until you get to the opposite baseline.
- Left Hand Low Pound. Walk to the opposite baseline while pounding the ball in your left hand low and hard
- Left Hand Speed Dribble. Now it is time to fly. Speed dribble as fast as you can to the opposite baseline. Do this drill full court and back three times with a short rest between reps.
These 11 drills give you a great place to start each of your workouts.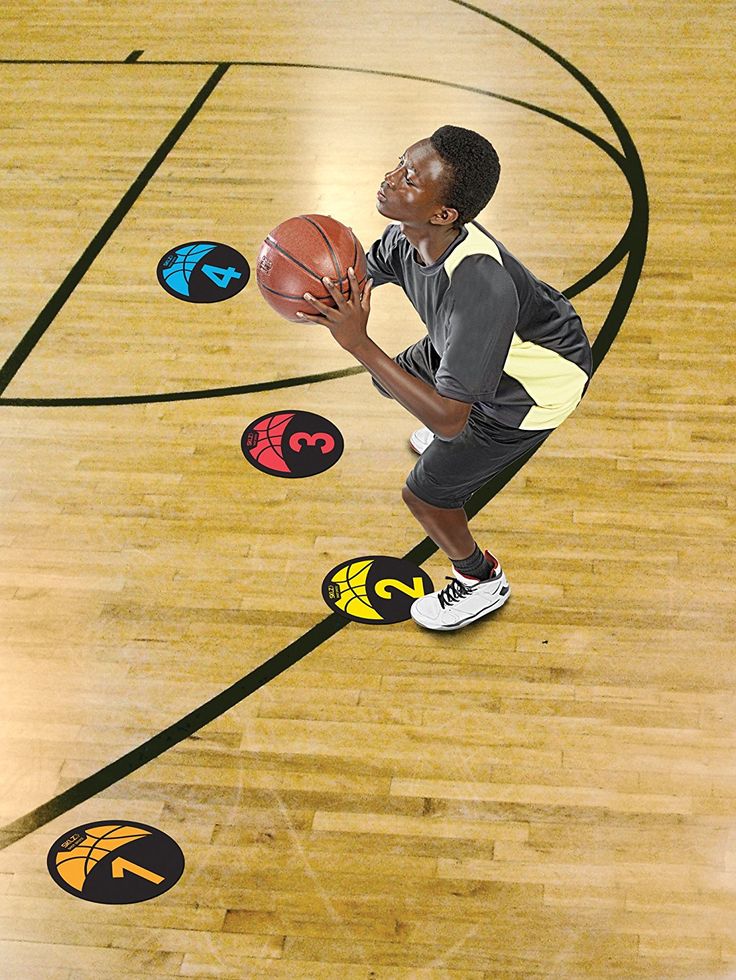 And the best thing is you don’t have to be at the gym to do these, so if you want to improve faster, do these beginner basketball drills twice a day at home.
Key Points of Emphasis:
- Make sure you keep your eyes up for every drill and look around the gym as you are using your left hand.
- Work on hard, quick dribbles while you are using your left hand. You may lose the ball occasionally – that’s OK – you are getting BETTER!
3. Left Only Bonus DayEveryone knows to improve at something it takes extra time. How bad do you want to become an elite ball handler with both hands? If your left (weak) hand is holding you back stop making excuses. Go to the gym 1 extra day a week.
Maybe you are going 3 days, so go 4.
Maybe you are going 5 days, so go 6.
But make that extra gym day a LEFT HAND DAY. Spend your time at the gym that day doing everything with your left hand.
Do all left handed stationary ball handling.
Do all left handed on the move ball handling.
Do all scoring moves with left hand dribbling.
Do all your pull up jumpers to the left.
Pass against the wall to yourself only using your left hand.
This doesn’t have to be an extremely long workout. Maybe you are only at the gym an extra 45 minutes for this workout. And you can still do most of the normal shooting drills you do, but make sure any time you are to dribble, use your weak hand.
4. Left In Daily LifeOk, how often do you use your left hand in your daily life? Using your opposite or weak hand in everyday life helps strengthen neural connections in your brain.
Try using your left hand for EVERYTHING you do throughout the day.
Try opening doors with your left hand.
Try brushing your teeth with your left hand.
Try eating with your left hand.
You get the point. Everything you normally would use your right hand for, try using your left hand. It will be awkward at first, but you will gradually feel more comfortable. And this new found comfort with your left hand will carry over to the court.
5. Game SituationsMake sure you use practices, pick-up games and scrimmages, to work on using your weak hand as well.
You will have to make a concerted effort throughout these live action games to use your left hand more!
What might that look like?
If you are forcing yourself to use your weak hand during off-season games, what might that look like? Maybe you are…
- Dribbling the ball down the court with your left hand when dribbling in transition.
- Attacking LEFT the first five times you put the ball on the floor to get to the rim.
- Bringing the ball down the floor every time with your left hand.
- Making push passes with your left hand.
Work = ConfidenceRemember, your current habit is to use your right hand and your strength is using your right hand. This means the tighter the game and the better the competition, the more likely you are to resort back to what you do best….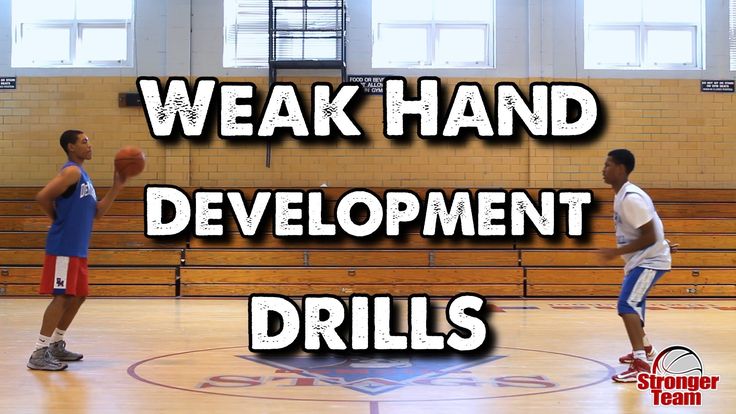 using your strong hand.
You must develop your weak hand so you are AS CONFIDENT using your left hand as you are using your right hand. And the only way for you to become confident in using your weak hand is by putting in the work! Put in the work and you’ll gain the confidence.
It is crucial that you implement your action plan for improving your weak hand into scrimmages, pick-up games, and summer league games, as well as practices. It is the only way you can achieve your ultimate goal of having NO WEAK HAND and having 2 STRONG HANDS.
Now let’s get to work!
How to develop your left hand if you are right-handed?
Most people during their lives train and develop only the right hand, and the left is given only an auxiliary role. But if our hands are the same, why not try to learn how to perform the same actions with your left hand, and why is this necessary?
The answer to this question lies in the peculiarities of the human brain. The left hemisphere controls logical thinking, speech, writing and is responsible for the work of the right half of the body, while the right hemisphere is the focus of intuition, creative perception, and coordinates the left half.
According to the observations of art therapists, the drawings made by the left hand are distinguished by extraordinary figurativeness, emotionality and realism. This is typical for artists, and those who have never been involved in drawing. In addition, people who have managed to develop the left hand along with the right, note how their life has changed with the inclusion of intuition in it and the activation of the creative perception of reality.
According to one of the theories of classical psychology, the human personality is a set of subpersonalities - different internal images: Parent, Adult, Child. The first two are critical, reasonable and rational. They live in the left hemisphere. And the third, the Inner Child, spontaneous, irrational, creative - in the right.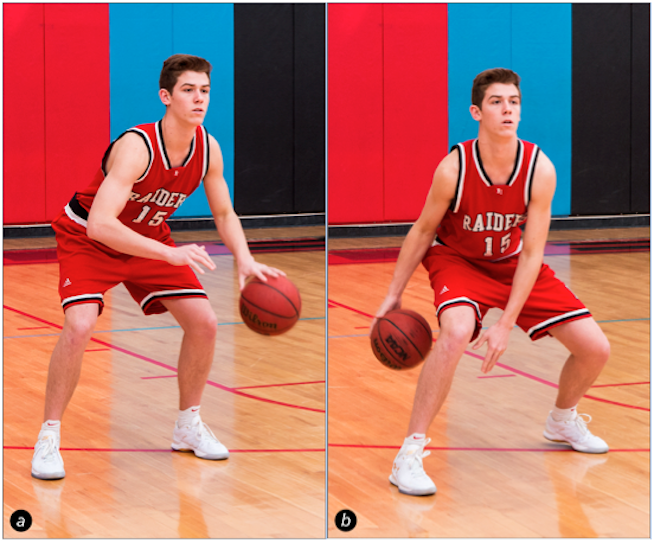
Therefore, the development of the left hand is the establishment of contact with the creative essence of oneself.
Developing the left hand, a person makes the brain work more productively, connecting intuitive, creative channels to logic and rationalism.
There are several effective ways to develop the left hand, and regular training will certainly lead you to achieve your goal.
Learning to write with your left hand
It's a fun, if not easy, activity. Motivation is needed to be successful in this business. For a person striving for self-development, the goal will be to enrich logical thinking with creative potential.
To make training enjoyable, you need to comfortably equip your workplace. The table lamp is now on the right, while the left side of the table is left free, as there is now a hand and a writing pad.
A stylish pen and a bright notebook with a notebook will create the right emotional mood, so that when you look at them, a desire to work arises. You will need lined paper for writing, as you will have to learn to write again. The main thing is that the process of writing with the left hand brings joy, otherwise the training will soon get bored and become ineffective.
How to arrange the notebook? To make your hands less tired during work, the upper left corner should be placed slightly higher than the right, and the left elbow should be conveniently placed on the table.
For writing with the left hand, you will need writing instruments longer than usual, since the left-hander holds the pencil a little higher than the right-hander, the distance from the sheet of paper to the grip of the pen is 3-4 cm. , and then phrases, as first graders do. This will develop the technique of writing and develop a beautiful handwriting. If such activities are not to your liking, then you can write down your thoughts or write out your favorite quotes from books, catch phrases.
In the early stages of training, it is better to write in block letters, then switch to capital letters. You need to start by writing the alphabet. You can also use the technique of tracing text written in pencil with a pen. For fun, the method of mirror writing is suitable. The letter on the contrary, with a turn of letters by 1800, will help to achieve the desired result. So did Leonardo da Vinci, in whom both hands were equally developed. In addition, writing from right to left is natural for left-handed people with a dominant right hemisphere.
To be successful, you need to practice regularly for a few minutes. This will bring more benefits than infrequent but long workouts.
Training is not limited to the time allotted for it. The left hand should be loaded at every opportunity. For example, write down phone numbers, prescriptions and other useful information.
Left arm training requires a lot of patience, time and effort.
And it is unlikely that you will be able to immediately achieve visible quick results, so on the way to self-development you will have to stock up on patience and endurance. You should not expect a good writing speed at the first stages of training, the quality of writing, that is, a practiced skill, control of a previously naughty left hand, will be more important. The speed of writing will develop in the next stage of work.
Drawing with the left hand
The most successful way to practice. After all, the right hemisphere of the brain develops, where the creative potential is laid. Drawing allows you to better develop the motor skills of the left hand. First you need to put dots on paper, then connect them, make a schematic drawing. It is useful to start synchronous drawing by using both hands, gradually leaving the left hand in the work.
American art therapists recommend the following exercises for the development of the left hand:
- Try to draw a symmetrical object using both left and right hands at the same time.
- Without synchronous actions, try to draw the same thing, each hand moves in its own way.
- Draw with both right and left hands at the same time, but the patterns and trajectory of the hand movements are different.

- Make a drawing with the right hand, then draw the same with the left.
More detailed instructions can be found in the article "How to learn to draw beautifully".
Use the left hand in everyday work
Always use the left rather than the right hand in everyday situations: brush your teeth, comb your hair, use a fork, spoon and other cutlery. When the skills have not yet been worked out, you can not use sharp objects: a knife, a needle, a straight razor, so as not to injure yourself.
The left hand must be constantly used, bringing the movements to automatism. Do not forget about the goals of developing the left hand, reinforce the work with positive motivation so that the classes do not get bored and bring benefits.
The following techniques will help you remember to train. For example, write on the palms: "Right", "Left". Performing this or that action, use not the right, but the left hand. Visual memory will definitely work. It is useful to wear a watch not on the left, but on the right hand.-Step-4.jpg/aid8503602-v4-728px-Do-a-Euro-Step-Layup-(Basketball)-Step-4.jpg) An unusual sensation will remind you that everything is now done by the left hand. You can stick stickers with the inscription: "Left" on various household items (door handles, telephone, refrigerator, electric kettle).
An unusual sensation will remind you that everything is now done by the left hand. You can stick stickers with the inscription: "Left" on various household items (door handles, telephone, refrigerator, electric kettle).
Strengthen the left arm
In addition to writing, exercise is essential for training the left hand.
- Ball exercises. Throw a tennis ball up and catch it with your left hand. After hitting the ball against the wall, catch it with your left hand. It is advisable to use rackets and, as the skill improves, change large ones to small ones. Classes in the gym with a basketball court will help improve the actions of the left hand. Stand to the right of the basketball basket and throw the ball into it with your left hand. Make 10 - 20 throws. In addition, it is useful to learn to dribble as easily with the left hand as with the right. To achieve the result, keep your right hand behind your back.
- Playing badminton with your left hand will bring tangible results.
- Weight lifting. It is necessary to shift the power loads from the right hand to the left. For this, manual expanders, dumbbells are suitable. Weight should be increased gradually.
- Juggling. This is a useful, exciting and spectacular activity that develops dexterity and coordination of movements. You need to juggle three to four balls.
- Playing musical instruments. The construction of most musical instruments requires the use of both hands equally. Yes, you can learn how to play the guitar. Guitarists pay great attention to the development of the fingers of the left hand. For this, a whole system of exercises has been developed. It will be useful to learn how to beat out a drum roll.
- Swimming. Perfectly develops coordination and, accordingly, the brain. In all types of swimming, both hands are equally involved.
- Spinning Another good way to develop the left hand. For the lesson you will need balls on the ropes. Holding the ends of the ropes with your hands, perform rotational movements.

The list of exercises can be supplemented by anyone who wants to engage in self-development, in accordance with their own imagination and hobbies.
The development of motor skills has a positive effect on the work of the brain, makes the reaction faster, thinking becomes flexible. However, at first, you should not expect a quick result. The opposite effect is possible. Due to the increased load on the brain, the speed of thinking and concentration slow down significantly, but as soon as the brain adapts, it will begin to work much more efficiently than before.
Skeptics are wondering if this is a myth? And is it worth the effort? However, scientists have long proven the connection between manual development and brain function. When exposed to reflex points located on the hands, impulses are sent to the central nervous system. Acupressure affects the internal organs. For example, when massaging the thumb, an increase in brain activity is achieved.
The development of the left hand improves not only brain activity, forcing the “gray cells” to work more actively, but also encourages sports, makes you move more, improve the body. And as a result - the achievement of the next step on the path to self-improvement.
Acquisition of the skill of using both hands to the same extent is the development of new thinking, the transition to a qualitatively new level of life, the enrichment of the logical, rational principle with creativity and intuition.
Shooting exercises
replica swiss watches
Basketball is a great team game, the team consists of players whose mastery is achieved with great effort. The only person who can understand that you are working hard is yourself. Remember, you only get out of the game what you put into it. Give yourself to her without a trace.
Jump shot
In basketball, an outstanding sniper is a piece item. If you want to be a great sniper, all you need to do is just want to be one.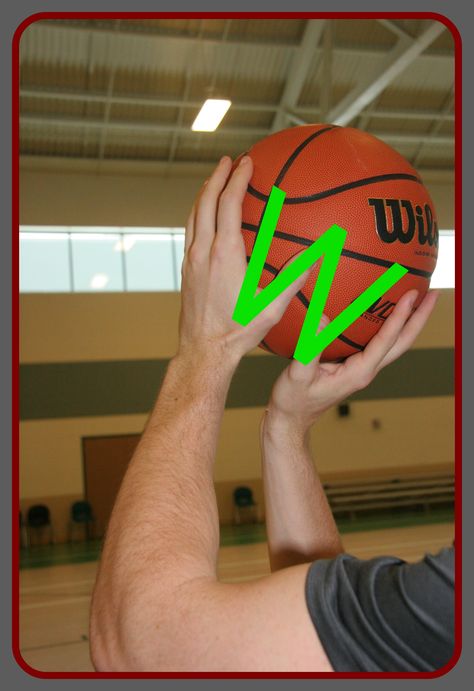
First, you must improve your skills.
This includes having a good coach and years of training. Secondly, you must improve in game mode.
This means that you must perform throwing drills at the same intensity as in the game. It's far better to hit 100 shots in play mode than 500 sloppy shots that a good defender would never let you make in a game. Finally, you must understand that working on a roll is like investing in a bank. If you don't put anything into your account, you won't receive dividends when you need them.
The sniper must have "throw school". When throwing after a dribble, one of the main features is the last hit of the ball on the court, which must be fast and strong so that it bounces higher, right into your hands - this will help you not waste time handling the ball.
Individual Shooting Exercises
Exercise 1 Attention Concentration
- Start from a distance close to the ring.
- Throw with one hand.
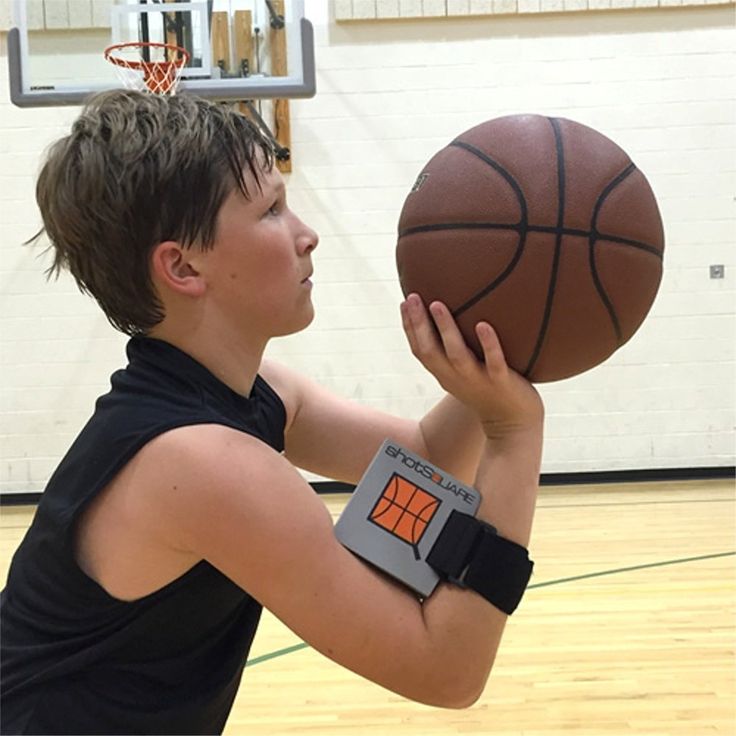 Follow correct technique.
 - Make five from each position. Take a step back and repeat (Fig. 1).
Exercise 2 7 throwing positions and rebound (4 meters)
- Jump shot from position 1.
- Pick up the ball, dribble quickly to position 7, shoot.
- Pick-up, fast with guiding back to position 1.
- Make 10 rolls.
- Repeat the same steps using positions 6 and 2, 5 and 3, 4 (Fig. 2).
Exercise 3 7 shooting positions and a rebound (from behind the three-point line)
1. Repeat the same steps as in exercise 2 (fig. 3).
Exercise 4 Throw after stop
- Start from position 1, toss the ball to position
- Pick it up, while you have to run around the ball so that you are facing the ring.
- Make 10 rolls, then advance to the next position.
Ex.5 Shooting from five positions after a fake move (from four meters or from behind the three-point line)
- Start from any position.

- On bent knees and with your head up, you do a throw feint, hit the ball one or two with your right hand, stop and jump.
- Return to position, throw feint, one or two hits with the ball with the left hand, stop, throw.
- At each position, 5 attempts (Fig. 5).
Exercise 6 Jump shots after dribbling
- Start the exercise from the center of the field, move towards the hoop with dribbling at game speed, after stopping quickly shoot.
- The shot must be taken from a middle distance or from behind a three-point arc. Perform the exercise, both on the right and on the left and in the middle of the site.
- Use different types of dribbles: fast dribbles, broken tempos, pivots, etc.
- Make 5 attempts in each direction (Fig. 6).
Exercise 7 Playing with a virtual opponent
- Perform a free throw. If you have implemented it, you get one point. If not, then your "opponent" is three.

- You make subsequent throws from any position except the three-second zone, imitating the rhythm of the game. Work on different moves and throws. Each of your successful attempts is estimated at the bottom of the point, unsuccessful at two for the "opponent". The game goes to 11 points.
- This is a very good exercise to reinforce what you have learned. Try! Improve! (Fig. 7).
Double shots
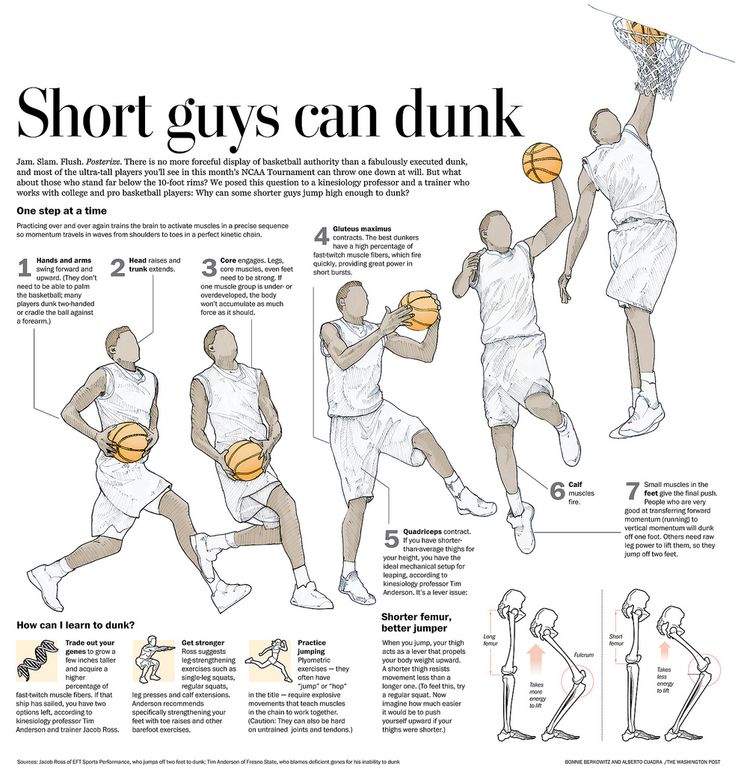
Dr. 8 2 players, shot and rebound (4 meters or from behind the three-point line)
- The drill starts with a good, clear pass. The player who made the pass from under the basket goes to the place of the thrower.
- The player in position 1 catches the ball and shoots.
- After the shot, the player runs to the rebound and then passes the ball 1 position and so on.
- Each player must make five throws. The exercise is performed at a fast pace, but the throws should not be sloppy.
- Then move to another position and everything is the same (Fig.
 8).
8).
Exercise 9 Two players, throw and rebound (per result)
- The exercise is performed as described above.
- The player who made the pass tries to interfere with the shot, but does not block.
- Game up to 5 hits.
- Then we move to another position, and so on. (Fig. 9).
Exercise 10 Two players, throw and rebound, throw feint
- The exercise is performed in the same way as the previous one.
- The defender who made the pass tries to interfere with the player in position 1, but does not block the shot.
- The attacker makes a throw feint and beats the defender.
- Performs a short dribble, stops and throws.
- Do 5 times each and change position (Fig. 10).
Ex. 11 2 players, shot after a stoppage (from four meters or from behind the three-point line)
- The attacker is in position 1, ready to receive the pass.
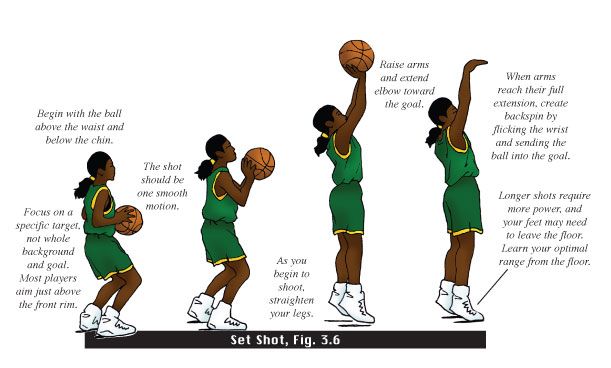
- The player under the basket passes.
- After the throw, the attacker waits for the rebound to be made.
- The player receives a pass by making a stop, but already in position 2. Then back.
- Make 7 throws, two free throws and switch (fig. 11).
Ex. 12 Moving shots (from four meters or three-point arc)
- Attacker moves around the perimeter at game speed.
- A player passes to the hand farthest from the ring.
- The attacker must stop, catch the ball and throw.
- Make seven throws, two free throws and change (fig. 12).
Note: The previous exercise has three variations.
A) Receive the ball and throw it.
B) After receiving, throwing feint, dribbling in the same direction, throwing.
B) Receives a pass, throw feint, dribbling to the ring in the other direction, stop, throw.
Ex.13 Various dribbling options and a jump shot
- The attacker starts from the center of the field and, dribbling at game speed, moves towards the ring, stops and takes a jump shot.
- The player under the basket picks up the ball, the attacker runs to the center of the field, and receives the ball on the opposite flank. Moves with dribbling to the ring, stop, jump shot.
- On the right side, dribble with the right hand, on the left - with the left (Fig. 13)
Note: Use speed dribbling, change of pace, transitions, pivots.
Three players, two balls
Exercise 14 Warm-up exercise
- One player throws, another passes, a third rebounds.
- Thrower becomes rebounder after seven tries.
- Passer - thrower. Picking up - passing (Fig. 14).
Note: different options are possible
1) From seven positions (four meters)
2) From seven positions (from behind the three-point arc)
3) From five points with feints to shoot
4) Throw after stoppage
5) Throw and rebound (constant change around)
Double throws: using screens
To use the screen effectively, you must read the defender correctly. You must always see the player with the ball and how the defender defends against you. A player who moves well off the ball and knows how to use screens correctly is very useful offensively. When you watch a match that has good players, notice how well they move off the ball. The hardest thing to defend against is a well-moving attacker.
Exercise 15 Back screen and snatch
- The player imitates opening and screening behind his back, makes a dash to the corner of the court.
- Throw to the nearest hand.
- Attacker catches the ball and shoots.
- The attacker picks up his shot, passes to a partner and returns to his original position.
- Make seven attempts and change (Fig. 15)
Note: do not back away when dashing, turn and run, but do not lose sight of the ball.
Exercise 16 Screening behind the back, "false" screening
- 1. Attacker starts on the base of the trapezoid and moves up to simulate a screening.

- 2. After the imaginary breakout runs, the screening attacker rises to the ball and prepares to receive the pass.
- 3. Having caught the pass, he immediately makes a throw.
- 4. Make seven attempts and change (Fig. 16).
0003
- An attacker imitates a defender aiming for a screen and quickly rises to the ball.
- The player must be ready to receive the ball.
- The attacker catches the ball and makes a quick throw.
- Make seven attempts and change (Fig. 17)
Exercise 18 Screening the ball carrier, moving away from the ring
- The attacker screens the ball carrier.
- The ball carrier passes through the screen aggressively.
- Instead of pulling back to the basket (deuce), the screening attacker moves away from the basket and prepares to receive the pass.
- Having caught the ball, he immediately makes a throw.
- Make seven attempts, then switch.
Exercise 19 Barrier at the base of the trapezoid - opening to the flank
- The attacker takes the player under the ring, breaks shoulder to shoulder through the barrier and makes a dash to the flank.
- When catching the ball, the player must turn to the ring.
- Use different throw options: just throw, and dribbling to the right or left after a throw feint. Change after five attempts (Fig. 19).
Exercise 20 Barrier at the base of the trapezoid - opening into the corner of the court
- The attacker takes the player into the three-second zone, pretends that he will break through to the flank through the barrier, the defender starts running around the shielder through the three-second zone.
- The attacker makes a dash to the corner of the court, and the defender hits the screen.
- Next, the same as in the previous exercise (Fig. 20).
Exercise 21 Screen at the base of the trapezoid - dash inward
- The defender is chasing you, keeping up to the very screen.

- Then you run through the screen as close to the screener as possible and break into the 3-second zone or foul line area.
- Receive the ball by turning towards the hoop and throw it.
- Also work out various options for continuing after receiving the ball. After five attempts, change (Fig. 21).
Throws in pairs: pass and discount
Exercise 22 Pass and discount - starting from the center of the field flank.
The receiving player is opened for transmission. A player receives a pass and shoots. The player who made the pass picks up the ball and gives it to the thrower. Players change roles. Everyone makes ten throws (Fig. 22).
Exercise 23 Pass and discount - start from the flank
Variation of exercise 22 (Fig. 23)
Exercise 24 Pass and discount - start from the corner of the site one more
another 2 2 exercise 900 .