Home »
Misc »
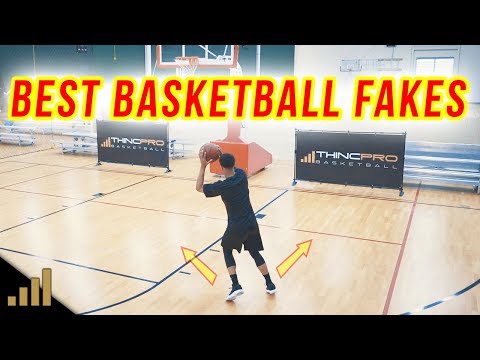
How to beat a 1-3-1 zone defense in basketball
How to beat a 1-3-1 zone defense in basketball
How to Beat a 1-3-1 Zone Defense (16 Strategies and Plays)
If you’ve played against a 1-3-1 zone defense, you know how effective it can be.
It’s an aggressive, disruptive, in-your-face defense that attempts to “speed up” the offense and confuse them with traps and irregular defensive positioning.
To defeat it, the offense must be calm under pressure and make smart decisions.
(This defense shouldn’t be used in youth basketball… but many coaches do anyway)
Below we’ll go through 16 strategies your team can use to break open a 1-3-1.
Let’s get started:
1-3-1 Zone Offense Strategies
1. Use an Even Front Setup
Most teams will use an “even front” setup when playing against a 1-3-1 defense.
The two main options are:
2-1-2 Setup -- Two players in the slots, a player in the high post, and two players in the corners.![]()
2-3 Setup -- Two players in the slots, a player in the high post, and two players on the wings.
The point of this is to split the “chaser” at the top of the zone.
The two players at the top will usually be your point guard (1) and either a trailing big (4) or a second guard (2), but all players should understand the responsibilities of each position.
2. Shift the Defense
Continuing on from the last point…
Two players at the top gives you the option to easily shift the defense from side to side.
This is super effective at the beginning of the possession when the chaser first steps up to guard the ball, especially if the defense likes to trap at the top.
Before crossing the halfway line or just as the defender commits, players have the option to reverse the ball to a trailing teammate on the opposite side of the court.
This stifles any traps and forces the defense to shift to the opposite side of the floor.
The receiver will have several important seconds to attack / create if there’s a gap.
3. Best Playmaker in the High Post
Many coaches choose the wrong player to put in the high post.
It’s common for teams to automatically put the tallest player on the team there -- which somewhat makes sense because it’s a difficult pass and they’re a bigger target -- but I’ve found teams have more success putting their best playmaker in the high post.
“Best playmaker” meaning a player who can score themselves AND create for others.
You need someone there who can quickly read the defense and make smart decisions.
4. Disciplined Court Spacing
Nothing you read in this article will help if your players don’t keep good spacing.
They should constantly search for and move into open space on the perimeter.
The 1-3-1 defense is effective because it creates havoc and confusion, so having off-ball players continually working to get open and find holes is crucial.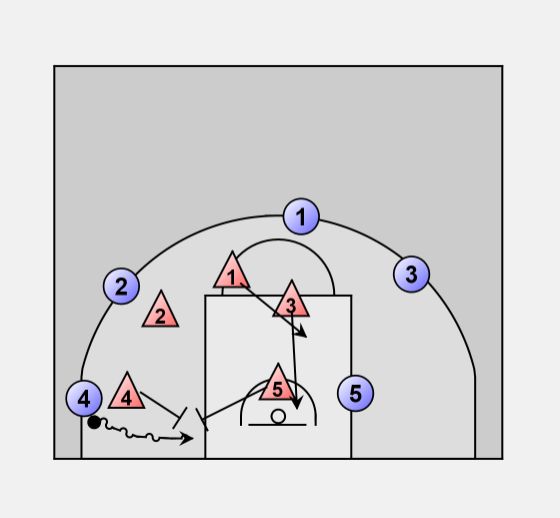
Using a 2-1-2 or 2-3 setup will help your team achieve this.
5. Attack the Gaps
If your players are spaced correctly and constantly moving into open space, there will be many opportunities to “attack the gaps” in the zone.
The key to this is reading the defense BEFORE catching the ball.
(Players who catch the ball and then survey the defense will be too slow)
If a player already knows there’s a drivable gap as they catch, they can immediately put the ball on the floor and attack before the defense has a chance to rotate.
The goal is to “collapse” the defense.
Attacking the gaps in the zone will force help which leaves teammates open.
6. Overload the Zone
“Overloading” is one of the best ways to defeat the 1-3-1 zone defense.
This involves bringing four offensive players to one side of the court, forcing defenders to move out of their regular 1-3-1 positions if they want to cover all offensive players.
(this works best if your best shooter is on the opposite wing)
For example... (1) at the top, (3) in the corner, (4) on the elbow, (5) in the short corner, and (2) on the opposite wing.
If your players can move the ball quickly and intelligently, open shots will appear as the defenders scramble from closeout to closeout.
7. Screen the Chaser
Another smart way to break down a 1-3-1 defense is to screen the top defender (the chaser).
Any offensive player can be the screener, but most coaches will have the player in the high post step out to set an on-ball screen for the ball-handler.
This can be done at the start of the possession, but it’s even more effective when executed after a ball reversal to catch the top defender off guard.
Done correctly, the ball-handler will find themselves with a ton of space to attack the gap, collapse the defense, and either score themselves or create a shot for a teammate.
8. Screen the Warrior
Perhaps the most difficult role in a 1-3-1 defense is being the “warrior.”
This player is responsible for covering both baseline corners. That’s no easy task and requires continually sprinting from corner to corner throughout a possession.
An offensive player in the low post or short corner can make the warrior’s job even harder by screening them as they sprint the baseline.
Even if you don’t bring them to a complete stop, just slowing them down for a half-second can give a shooter in the corner a wide open look.
9. Utilize Skip Passes
On-time and on-target skip passes can be devastating to a 1-3-1 defense.
The way the zone loads up to the ball makes switching to the opposite side of the court on a skip pass very difficult for the defensive team.
This is especially true for the Warrior, who is forced to sprint from sideline-to-sideline in order to cover the offensive player in the ball-side corner.
Done correctly, you’ll get many opportunities to attack late closeouts.
(these are difficult passes to throw for young players… they can get the ball there, sure… but it won’t be a powerful / on-target pass which gives a teammate time to shoot or attack before the defense rotates... and that’s a big reason why the 1-3-1 is so effective in youth basketball)
10. Utilize Pass Fakes
“Fake a pass to make a pass.”
That’s an important quote for all players to remember, but it’s especially important for teams playing against a 1-3-1 zone defense.
You see, the 1-3-1 is an aggressive zone that emphasises deflections...
When playing against one, you’ll see defenders flying around the court... jump passing lanes and leaping / lunging at every opportunity, doing their best to get a fingertip on the ball.
Disciplined teams can take advantage of this aggressiveness by utilizing pass fakes.
A quick pass fake on the perimeter can open up a driving lane, and any pass fake from the high post is guaranteed to get every defender taking a step or two in that direction.
11. Lob Passes
Coaches would be surprised by how many “lob pass” opportunities there are against a 1-3-1.
Due to the rotations in the 1-3-1 defense and the lack of big bodies close to the hoop, there’s often a large amount of open space on the weak-side low block.
(this is also the reason why offensive rebounding is crucial, which we’ll get to in a minute)
So, if you have players who can throw an accurate lob pass and players who can go up and get it, there’s a big opportunity to get a few easy points.
Remember -- you can take advantage of this action even if you don’t have players who can finish an alley-oop dunk. The receiver can catch, land, and then go back up and finish the layup.
12.
Offensive Rebounding
A good offensive rebounding strategy is essential against a 1-3-1 defense.
Because of the positions defenders usually find themselves in when a shot goes up, defensive rebounding is one of the biggest weaknesses of the defense.
So you need to take advantage!
Some teams send 3 players to the offensive glass while dropping 2 back to safety, others send everyone below the free-throw line in to rebound.
Whichever strategy you choose, make sure you’re exploiting this weakness.
If your players are quick to react and aggressive in their pursuit of the ball, you're going to get plenty of offensive rebounds, 2nd chance points, and draw a ton of fouls inside.
13. Beat Them Down the Floor
As with all zones, one of the best ways to defeat them is to get down the floor quickly.
Do this by encouraging your point guard to advance the ball with a pass instead of dribbling the entire length of the floor by themselves.
Even if you don’t get a quick score, this can force defenders into poor positions as they scramble to pick up the ball to prevent a layup or wide open shot.
14. Figure Out Where They Trap
As the team’s coach, one of the first things you should be evaluating in the first 5 minutes of the game is where the opposition likes to trap.
> Are they trapping the high post?
> Are they trapping the corners?
> Are they trapping at the top?
A 1-3-1 zone defense provides many trapping opportunities.
Figuring out which traps your opponent likes to use will allow you to give players the most appropriate advice and put players in the right positions to be successful.
Teams can change it up during the game, of course… but most teams have a specific set of rules they use 90% of the time to keep things simple for the defenders.
1-3-1 Zone Offense Plays
Below I’ll share two highly-effective basketball plays to use against a 1-3-1 zone.
Both are designed to finish in an “overload” position.
So, if you don’t get a clean shot opportunity off any of the initial actions, your team is now in the perfect position to start picking apart the defense using the strategies outlined above.
Because my audience is primarily youth coaches, both plays are aimed at getting the ball inside the paint for an easy finish or to draw the foul.
a. 1-4 High Play
Players start in a 1-4 high setup.
POST ENTRY
1. The point guard’s first option is to get the ball to one of the players in the high post.
2. Whoever catches the ball, the opposite post immediately cuts towards the basket and looks to get a deep seal on the “warrior,” who will usually be a smaller defender. If available, dump the ball inside and score an easy two-point layup.
3. As this happens, (1) slides across to the wing and (2) slides down to the corner.
4. If the pass inside isn’t open, players will now find themselves in an “overload” setup.
PERIMETER ENTRY
1. The point guard’s second option is to pass the ball to a teammate on the perimeter.
2. When this happens, the ball-side high post immediately steps towards the basket and attempts to get a deep seal on their opponent. If the pass is open, give it.
3. (2) takes a few dribbles towards the baseline to improve the passing angle, (5) slides across to the ball-side high post, and (1) steps towards the ball to provide an outlet pass.
Again, players will find themselves in an “overload” setup and must take advantage.
How you attack from this position will vary depending on what the defenders choose to do, but the key is exploiting mismatches and the confusion that follows as the defense attempts to figure out the best way to defend so many players on one side of the court.
b. 2-1-2 Play
Players start in a 2-1-2 setup.
1. The first option is to get the ball to the high post if they can get open.
2. On the catch, (5)’s first option is to attack or pass to the players in the short corner for an open shot or one-dribble and then they go up.
3. If those options aren’t open, (5) passes out to the ball-side corner.
4. As soon as that happens, the opposite short corner (2) steps up and sets a strong back-screen on (5)’s defender. (5) should then dive to the hoop for the potential catch and layup.
If that’s not open, the team will now find themselves in an overload position and should work to take advantage of that.
Conclusion
The 1-3-1 defense is effective because it’s aggressive, disruptive, and confusing.
Defenders are placed in “awkward” spots on the court that make things complicated for offensive players who haven’t had experience playing against it.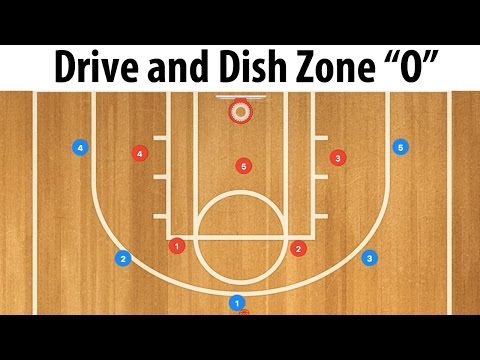
But it’s definitely not impossible to beat.
With patience, good spacing, smart ball movement, and knowledge of the most effective “strategies” to use against a 1-3-1, your team should have no trouble picking them apart.
1-3-1 Basketball Zone Offense, Coach's Clipboard Basketball Coaching
Home >
Offenses >
Zone Offenses >
1-3-1 Zone Offense
By Dr. James Gels, from the Coach’s Clipboard Basketball Playbook
There are a number of ways of attacking the 1-3-1 zone defense, but most success will come with attacking from the corner or short corner, and underneath the zone. Screening the low defender and back-screening the middle defender create opportunities as well.
As in any zone offense, move the ball with good quick passing, use skip passes, look to dribble penetrate the gaps, and drive and dish (either inside to a post player, or a kick out to the opposite side for a 3-point shot).
Also, we try to take of advantage of how the defense covers the corner. Offensive rebounding is important for second and third shots, especially since there is only one inside defender.
Zone Offenses vs the 1-3-1 Zone
- "Zone-2" - adapting the "Zone-2" offense to the 1-3-1
- "Corners" - 4-Out Zone Offense
- "Zone-23" - adapting the 2-3 zone offense to the 1-3-1
Set Plays vs the 1-3-1 Zone
- "4"
- "45"
- "22"
- "24" & "34"
- "24-Wide" & "34-Wide"
- "35"
"Zone-2" ("Runner") - adapting the "Zone-2" offense to the 1-3-1
Use a two-guard front to attack the 1-3-1 zone defense, and attack it from the corner where it is most vulnerable. See the "Zone-2" offense. Put O2 (your best shooter) in the ball-side corner. O2 runs the baseline, always to the ball-side corner. Have both posts low on opposite sides of the lane.
In the first diagram, O1 engages the top outside defender with the dribble, and passes to O2 in the corner. After the ball is passed into the corner, the weak-side post can flash to the ball-side elbow. If nothing is there, reverse it back out and to the opposite side.
After a ball-reversal or two, things tend to open up. Notice how the corner is defended, especially after ball-reversal. In diagram C, if the low X5 defender runs out to the corner to defend O2, a quick pass to the ball-side low post is sometimes open for the lay-up - note that for this to work, O4 must "stay" on the opposite side.
"Corners" - 4-Out Zone Offense
See the 4-Out Zone Offense. Notice in the diagram below how we position the 4 outside players. O1 and O3 are on top staggering the X1 defender, and O2 and O4 are below the free-throw line, half-way between the wing and the corner. O5 has a better chance of getting open on the low blocks, since there is only one low defender (X5), but he/she can move up to the elbows and high post as well.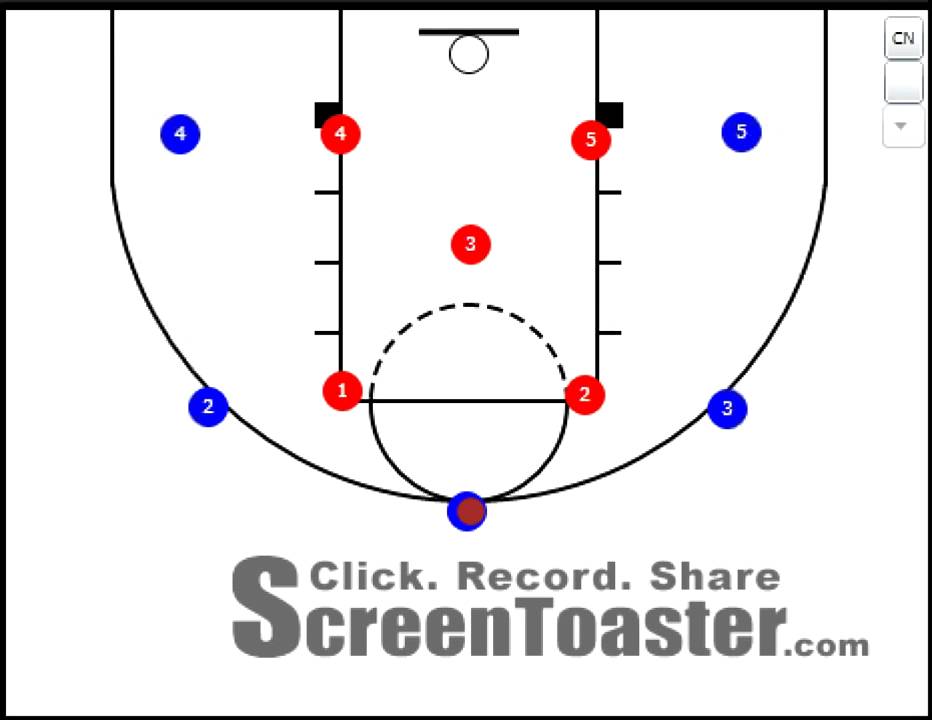
Quick perimeter passing, reversing the ball from side-to-side, and skip passing should eventually cause the zone to become over-shifted and out of position - creating open shots, chances to pass into the post, and gaps that our outside players can attack. Patience is a key.
Notice in diagram B how O1 engages the top outside X2 defender with the dribble. This makes the pass to O2 easier. O2 can shoot, but if X5 runs out to defend O2, O5 might be open for the quick pass inside. Again, ball-reversal tends to open things up. Notice in diagram C, after a skip pass, O4 could shoot. But if the X3 defender flies out, O4 should shot-fake and dribble baseline for the lay-up or short jump-shot.
"Zone-23" - adapting the 2-3 zone offense to the 1-3-1
Usually we think of attacking a zone with a "one guard front" (like the 1-3-1 or 1-2-2 zone), with a two-guard offense. But we have discovered that we can use "Zone-23", our standard 2-3 zone offense, in attacking the 1-3-1 zone.
The "Zone-23" offense uses a 1-3-1 set, which positions us directly lined up with the defenders, instead of in the gaps. With this, the zone defenders tend to match-up, almost like man-to-man.
A trapping 1-3-1 defense that traps the wings and corners may have a more difficult task with our "zone-23", as with three perimeter players, there is usually an easy pass out of the trap. The defense tends to "stay at home" more.
But probably the main reason this offense works is because it attacks the zone from the short corner, and below the zone, which is where it is weakest. Here, we'll discuss how to use it against the 1-3-1 zone.
In the left diagram below, notice how O1 makes the pass to the wing a little easier, by dribbling at the X2 defender. O2 pops out for the pass. This pass is usually not too difficult, as most zone defenses don't deny outside passes very well. O5 runs short corner to short corner, always on the ball-side, and we try to pass from the wing to O5 in the short corner.
If O5 is a good shooter, we allow O5 to take the shot from the short corner, or take his defender 1-on-1 with a shot-fake and dribble-penetration along the baseline. Meanwhile, O4 seals the middle defender, and then cuts hard up the lane to the hoop for the pass from O5 and lay-up.
We look at penetrating the gaps. Diagram B shows how O3 might be able to attack the top seam in the zone. Sometimes we can open this gap a little with a pass fake to O2 or O1, and get the X4 and X1 defenders to lean opposite. If O3 is able to split the X3 and X4 defenders, he/she will have a 2-on-1 inside with a possible dish to O4, our weak-side post. Or, O3 might kick the pass out to a wide open O2, for the 3-point shot.
Diagram C shows a skip pass, and the zone is over-shifted. O3 might have an open 3-point shot. But if the X3 defender is flying out out-of-control, O3 should shot-fake and dribble baseline for the lay-up, or pass to O5 inside.
Set Plays vs the 1-3-1
"4"
Using an inside screen. O2 runs the baseline, always in the ball-side corner. The ball-side post (O4) is positioned halfway up the lane (diagram A), near the elbow. We once again pass to the corner. O2 can shoot the 3-pointer or dribble-penetrate the baseline.
Meanwhile O4 screens the middle defender in the zone, resulting in a 2-on-1 situation with O2 driving to score, or dish off to O5 (diagram B). The screener O4 must be aware of the three-second violation, but if the initial screen is set above the free-throw line, O4 could release up the middle as another option (diagram C).
"45"
Set O3 and O4 on the blocks and O5 at the free-throw line. Use a two-guard front (diagram A). O1 draws the defense and passes to O4 who has cut out to the corner. O5 now cuts to the ball-side block for the pass (diagram B).
If the pass to the block is not open, usually O2 will be open for the skip pass on the opposite wing (diagram C). O2 can shoot the outside shot or pass into either O3 or O5 who should have good position after pinning their defenders.
"22"
When we are looking for a 3-point shot, we use "22". See diagram C above. Here, we run the play exactly the same as "45", but have O3 and O1 back-screen the zone so that O2 is wide open for the pass and shot.
Get more 1-3-1 Zone Plays in the complete article in the Premium Members section or the Playbook download.
It also includes:
- Plays 24 and 34
- Plays 24-Wide and 34-Wide
- Play 35
1-3-1 Offensive vs. Zone Defense
This offense is one of the most popular and is often used as a basic offense against both personal and zone defenses. It also has good potential to be used against adaptive defenses. Player 1 at the top of the free throw area should be the best at passing and shooting from long range. During interactions, he has to swap positions with players 2 and 3, who must be good at jump shots and dribble, as they often have the opportunity to dribble to the basket at a 45° angle. At the same time, they need to be able to stop clearly for mid-range jump shots or passes to an open player during zone defense shifts.
Player 4, on the free-throw line, is an agile, technical center player. Player 5, at the baseline, must be more mobile and more accurate at medium range shots than Player 4. If these players are of equal ability, they may switch places.
Combinations of a continuous attack in the arrangement 1-3-1 against the zone defense are shown in fig. 167-171.
Fig. 167. Player 1 passes the ball to player 2. Player 5 runs into the corner. Player 2 passes the ball to player 5 moving into the corner. Player 5's movement will be determined by the defensive formation. He steps aside just enough to be able to receive the pass. In some zone defenses, such as 2-3, the back row end of the zone can move forward to player 2, allowing player 5 to stay much closer to the basket. Player 5 must turn to face the basket after receiving the ball, ready to shoot for the basket. Player 2 breaks through the zone, waiting for a pass from player 5. Player 1 moves to the side of the ball. Player 4, center, takes a turn towards the ball into a position from which he can move to the basket on the side of the ball after player 2's pass. Player 3 must take a step towards the basket on player 2's pass, because in the case of passing the ball to player 2, player 3 should break through to the basket on the left. In this case, it may turn out to be open, since the zone should shift towards player 2. Knowing this, player 2 must be ready to make the transfer in advance. If the ball is not passed to player 2, he goes to the far side of the court from the ball.
Rice. 168. Player 5 receives the ball in the corner but can neither pass it to player 2 or 4 nor shoot for the basket. He passes the ball back to player 1, who is in position to receive the pass. Player 4, after his exit, remains in the post position in the lower zone of the free throw area.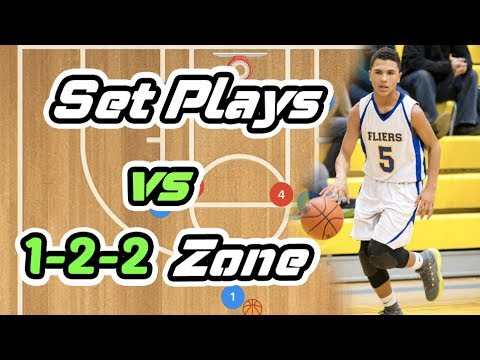 Player 3 also changes his position. He quickly enters the outer semi-circle of the free-throw area, ready to receive the ball from player 1 and take the jump shot.
Fig. 169. If none of the above options are implemented, player 3 goes to the top of the free throw area and receives a pass from player 1. Player 4 moves to the left corner of the court, anticipating the development of an attack to the left. Player 5 exits the corner towards the free throw line. Player 3 passes the ball to player 2, who, in turn, to player 4, and the continuous attack can continue in the other direction. Players 1, 3 and 2 change places, as do players 4 and 5.
170 (variant of the previous combination). The attack begins in the same way as the previous one, with a pass to player 2 and the movement of players 5 and 4 in accordance with the plan shown in fig. 167. But in this variation player 2 returns the ball to player 1 and goes through the zone to the far corner. Players 5 and 4, anticipating this maneuver, perform a V-shaped movement towards the ball. Player 3, having taken a step towards the basket, comes back and receives the ball from player 1. The players have the same opportunities to attack as in fig. 167.
Fig. 171 (continuation of the option shown in Fig. 170). If the zone moves quickly towards the ball, player 5 will go to the ball on the endline, and player 4 will go to the middle zone of the free throw area on the side of the ball. The attention of the defenders is now riveted to the left side of the site. This allows player 1 to go to the right side and receive a pass over the top of the shooting area. Such interaction, carried out from time to time, will keep the players in the zone on their toes and will facilitate the actions of the attackers in the main attack.
1-3-1 defense and offense Defense and formation
1-3-1 defense and offense is a popular strategy used in basketball.
Typical 1-3-1 formation
The 1-3-1 zone defense is a defensive basketball formation. It was originally used by legendary basketball coach Red Saracek. This defense is named for its build, as one defender is on point, three defenders are at free throw level, and one defender is on the baseline. The focus of this defensive strategy is forced withdrawal. This is achieved through the use of fast intrusive protection and the prevention of any transmissions for attempted theft. In this defense, a double trap is implemented. The defense tries to get the ball carrier to the corner and get close to him quickly, as well as doubling down on the attacker by creating a trap with the defenders and touchlines. This trap often forces the dribbler to dispose of the ball, bringing the offense out of his setup prematurely. This often results in poor passes or shots. These bad passes are meant to be used in this defense, so the weak side's defenders must anticipate passes in order to create passes.
Defense
Defensive use 1-3-1 is mainly used to create losses rather than protect the paint due to only one player losing. Teams usually have two quarterbacks to double the ball carrier's team.
Another version of the 1-3-1 defense - the full press version. The lead defenseman will apply pressure to the ball in the backcourt and may also move to the side and create a two-man trap with the defenseman in a 3-set when the offensive defenseman tries to pick up the ball down the touchline.
One effective press break against full court 1-3-1 press breaks is to have either the power forward or center fly into the middle zone and then quickly overtake a weak sideline running back to prevent formation trap.
There are several ways to approach defense in basketball. They are usually divided into human protection and zone protection. The 1-3-1 zone defense is a zone defense. He falls into this category because each player guards a specific area in formation. This defense is named after her education. On the right is an image of education. In basketball, positions are numbered from one to five. One and two are defensemen, third and fourth are forwards, and fifth is center in a typical basketball lineup. The guards are fast and usually have good ball control and shooting skills. Attackers are usually the most athletic and usually taller than defenders. The center is the tallest player and specializes in playing close to the basket.
Formation
In this formation, one will take over and meet the advancing defender. Two and three positions are separated at the edges of the court at free throw level or on the wing. The fourth position is down below the basket and acts as a rover along the baseline. The rover position is usually the best position for the rider as there is the most space around the basket for protection. The fifth position is placed in the center of the formation approximately at the level of the free throw.
Zone duties
The purpose of zone 1-3-1 defense is to create momentum. This defense focuses additional pressure on the dribbler and puts more effort into forcing the ball. Turnover under this protection is created by a couple of key features of this strategy. The two defenders will try to catch the dribbler in one of the corners of the half court. In basketball, the ball may only be held for five seconds before passing, shooting or dribbling. If a player is stuck in a corner, he will usually stop the dribble before deciding to pass or shoot. This creates problems for the attacker, but that's what the defense wants. When players work on two teams without a lead, they tend to make bad decisions. Often bad passes and shots are made by the player only to get the ball out of the corner. For players not guarding the dribbler, it is vital to anticipate a bad pass or shot in order to make an interception or rebound. This will help create the most turnover.
Each player will have their own responsibility in the zone. Each of them has its own area for protection on the court. Players will also move as the ball moves to get into a better defensive position. This means moving to a better place to cut off passes and collect rebounds. The one usually takes the first place. They will meet the dribbler and force him to move in one direction while playing in close defense. Depending on the direction the ball carrier dribbles, the wingback, in two or three positions, will approach the double team ball carrier. The intention is to quickly force a double team and corner the attacker. The double team creates a lot of free space on the court. The other three players must move to cover that area equally during the trap. The trap can be made in any of the four corners, either on the baseline or on the half court. The only difference is that the baseline is protected by the rover and they will capture with a wing instead of a single position. By forcing these double teams, the attackers will make long passes across the floor. These passes are more likely to be stolen because they are less accurate and last longer in the air. More space is available during a double team, so defenders who are not trap must use long passes and force any possible passes.
Coaching strategy
Defensively Coaches usually do this to slow down the offense. It is used to mix up the defensive look and force the offense to adapt or face intense defensive pressure. Usually the 1–3–1 defense is used to create losses and occurs at a fast pace, so players cannot maintain it throughout the game. By putting pressure on the handler, the defense plans to take advantage of any errors caused by the pressure. The added defensive pressure often causes the ball carrier to lose his temper and flip the ball. Using this at key points in the game, this strategy can change the pace, cause quick shifts in scoring, and create an advantage big enough to break opponents' morale. This defense is very effective when used correctly and can take a team out of the game both physically and mentally.
Attacking Defense 1-3-1 tries to block the attack. The key to winning in the 1-3-1 zone is to get the defenders out of position. This is achieved by quickly passing the ball around the perimeter.