Home »
Misc »
How to do a basketball floater
How to do a basketball floater
How to Master the Floater in Basketball (6-Step Guide)
The floater can be one of the most efficient shots in basketball...
...if players spend enough time working on it.
Analytics tell us that open three-point shots and layups are still the best ways to finish a possession when you can get them, but I’m a big fan of a well-practiced floater.
It’s a great way to exploit the in-between space in the lane that defenders often concede in an effort to take away those much-feared layups and threes.
A floater can take advantage of drop coverage or defenders back-pedaling to the rim.
And because it’s executed in the flow of movement, the timing of a floater’s release is quick and often unpredictable for blocking defenders.
Below I’ll show you how to shoot one.
What is a Floater in Basketball?
There’s some disagreement over how to define a floater.![]() ..
..
Some people insist it’s only a real floater if it’s taken off two feet (one foot would be a runner).
Others insist it’s only a real floater if executed one-handed (two hands is more of a “ jump shot”).
The exact definition isn’t important to me.
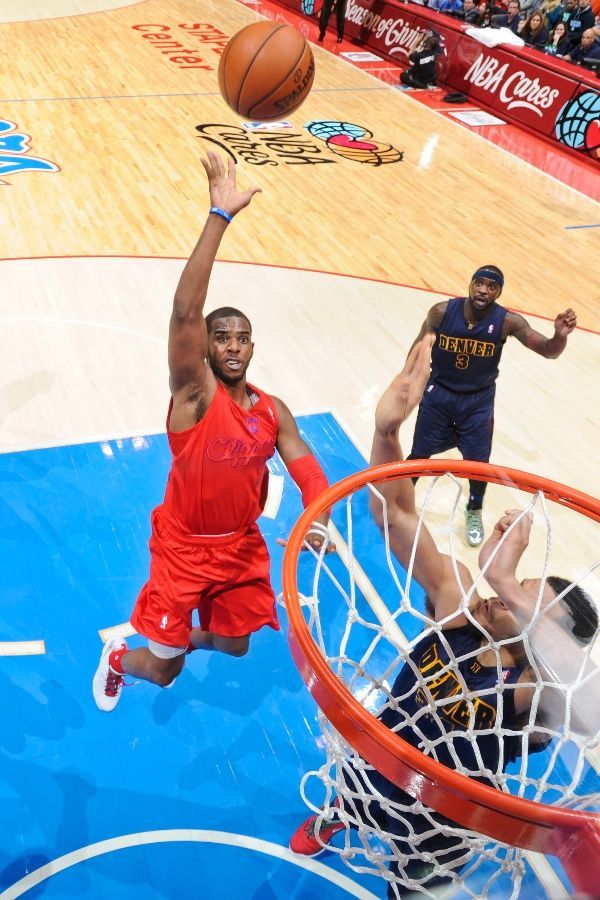
The shot I’m describing today is any high-arching shot, over any incoming defender, that you execute on a drive to the hoop, exploiting the space between the lines of defense.
Whether you jump off one foot or two feet and how you release the ball will vary depending on the situation and what you’re most comfortable with.
How to Shoot a Floater in 6 Steps:
1. Identify the Space
The first step is identifying where on the floor you’re going to be using your floater.
When working on this shot during a workout, practice as if there’s a defender on your hip and another defender stepping up late to provide help.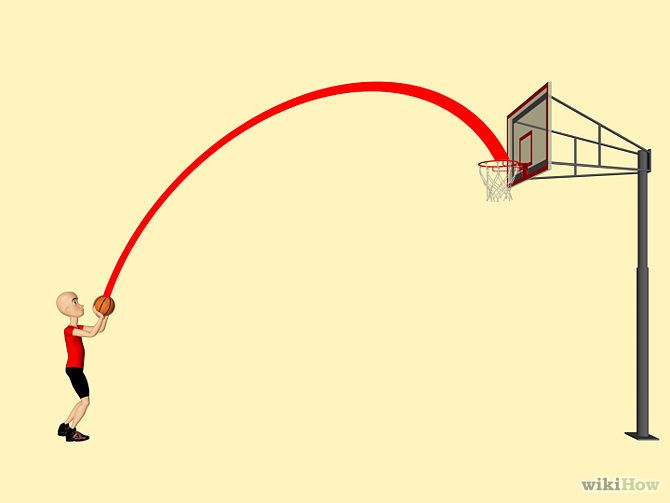
The space between those two lines of defense is where you want to take off from, releasing the ball high and soft over the incoming second defender.
2. Start Slow
The most aesthetically pleasing floaters are fast, mid-run, high-arching shots.
It can be tempting to think quickness is key to the efficiency of a floater, but it’s not as important as balance and control… especially when you’re first learning them.
When practicing your floater, start slow.
Start by practicing no-dribble floaters with just a couple of steps to set yourself up.
Then, drive to the rim at half-speed and pull up at a similar range until you’ve got real control of each of the steps below, and then start speeding up your drives.
I’d recommend starting with a two-foot jump before moving onto one-foot floaters, as the more balance + control you have, the easier they’ll be to execute.
3. Keep Your Head Up
Many players hamper their floater before they ever release it.
They do this by keeping their head down as they drive into the lane.
A floater takes advantage of the space between the defense, and you can only be sure that space is available to you if you can see it.
Keep your head up.
4. Go Up Straight
The basic floater is a near-vertical jump.
Remember -- you’re exploiting the space between recovering defenders…
…so if you’re letting your momentum carry you too far forwards, you’re reducing the space between you and the rotating defender and thus reducing the space you have to shoot.
The defender under the basket is likely to be tall with a long reach, so you don’t want to get your release close to where they can swat it away.
Jumping forwards also makes it more likely you’ll pick up an offensive foul.
5. Release High
When shooting a floater, you want to release the ball just before the peak of your jump.
Release the ball too late and you mess up the rhythm of the shot, as well as give the defender extra time to rotate and potentially block the shot.
6. Practice Variety (and Get in the Reps)
No defense is going to give you an easy drive and wide-open floater from your favorite spot.
That’s why it’s important to practice floaters from a variety of different areas and angles.
From the top
From the wing, with backboard
From the wing, without backboard
From the baseline
From different distances
Different arc heights
etc
The footwork before your floater is important as well. ..
..
Practice a variety of drives leading up to your floater.
Going left
Going right
Euro step
Speed change
Jump stop
(the euro step floater is demanding of your balance and coordination, but is an important skill to master for situations when the help defender closes down faster than you expected)
Some of these different moves will require slightly adjusting your form.
You won’t be jumping quite so vertically with a euro step floater or squaring your shoulders the way you would with a jump stop floater – so build up to them as you build confidence.
Master the basics and make sure you practice many different situations.
Conclusion
The finesse of the floater can make it look like a tough shot to grasp.
And admittedly, it’s not the easiest skill to master on the court…
But it’s a highly replicable shot, especially useful for undersized players, and extremely helpful against modern defenses.
It doesn’t take range, it doesn’t take size, it doesn’t take power – it only takes work, repetition, and discipline.
Find your space, keep your head up, and shoot with control.
Basketball Shooting Technique: How To Shoot A Floater
Skip to content
The basketball shooting technique I cover in this article is mostly for shorter players. I will show you exactly how to shoot a floater and explain when and where to use it.
Here is a list of different shots you can use to finish around the basket:
- Layup
- Reverse Layup
- Hook Shot
- Runner
- Floater
- Slam Dunk
First, let’s talk about the precise technique of shooting floater.
How to Shoot a FloaterYou shoot off both feet, but you don’t have to land on both feet simultaneously. In fact, if you watch players in college or the NBA, you will notice that 90 percent of the time they don’t. There are a few reasons for this.
- Balance: Landing on one foot at a time can slow down your forward movement better than landing on two feet. It resembles the basic footwork you use to shoot a layup, which helps your balance as well.
- Protection: If you go into a full jump stop, you will open up your hips and expose the basketball to your defender. By using 1-2 footwork, you will be able to keep your body between the ball and the defender. This is especially important if you shoot a floater off the glass when attacking from the wing.
RELATED: Master the Screen-to-Floater With Damian Lillard
After you get your feet set, it’s time to get the shot off. This shot does not require a follow-through. It’s a one-handed shot. The important thing is to put a good amount of arc on it. The floater is a difficult shot to block, but only if you make sure to get it over a helping big man.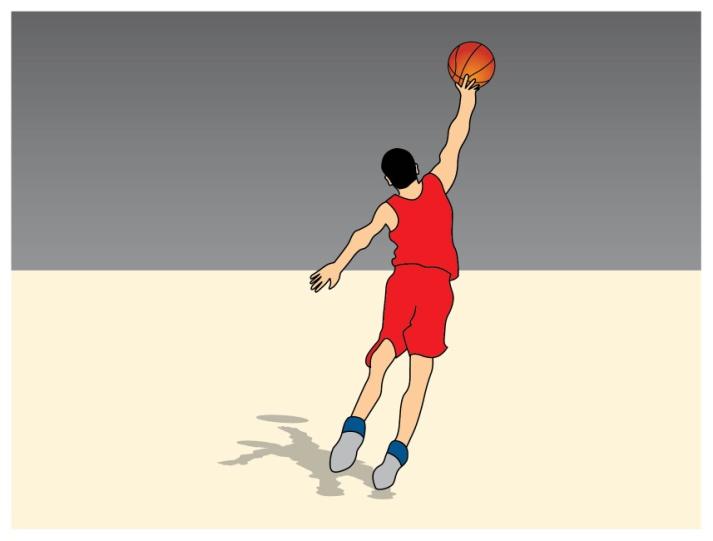 Check out the video player above to learn how to master the Screen-to-Floater of All-Star point guard Damian Lillard.
Here is a complete breakdown on how to shoot a floater:[youtube video=”78141A5MPxI” /]
When To Shoot A FloaterYou want to shoot a floater when you get past your defender—or at least get him on your hip—but don’t want to go all the way to the basket for a layup. Maybe there is a good shot blocker under the basket, and he would most likely block your shot if you challenge him. Instead, stop short and shoot a floater.
You might be thinking, “Why not shoot a pull-up jump shot instead?” A floater has a much quicker release, and in this situation, if you were to shoot a pull-up jumper, you would give the defender time to contest your shot.
Where To Shoot A FloaterThis is an in-between shot, meaning you are too close to the basket to shoot a jump shot but too far away to shoot a layup. Instead, you shoot a floater, which has a quick release and an unblockable high arc.
Who Shoots Floaters?This basketball shooting technique is primarily for guards. NBA players such as Chris Paul, Stephen Curry and Tony Parker use floaters as one of their main ways to finish around the basket. I compare this shot to the hook shot for big men. Although the hook shot is difficult to make, it is one of the hardest shots for a defender to block.
RELATED: Point Guards: Learn How to Attack in Transition
[cf]skyword_tracking_tag[/cf]
Share This Story!
MOST POPULAR
The basketball shooting technique I cover in this article is mostly for shorter players. I will show you exactly how to shoot a floater and explain when and where to use it.
Here is a list of different shots you can use to finish around the basket:
- Layup
- Reverse Layup
- Hook Shot
- Runner
- Floater
- Slam Dunk
First, let’s talk about the precise technique of shooting floater.
How to Shoot a FloaterYou shoot off both feet, but you don’t have to land on both feet simultaneously. In fact, if you watch players in college or the NBA, you will notice that 90 percent of the time they don’t. There are a few reasons for this.
- Balance: Landing on one foot at a time can slow down your forward movement better than landing on two feet. It resembles the basic footwork you use to shoot a layup, which helps your balance as well.
- Protection: If you go into a full jump stop, you will open up your hips and expose the basketball to your defender. By using 1-2 footwork, you will be able to keep your body between the ball and the defender. This is especially important if you shoot a floater off the glass when attacking from the wing.
RELATED: Master the Screen-to-Floater With Damian Lillard
After you get your feet set, it’s time to get the shot off. This shot does not require a follow-through.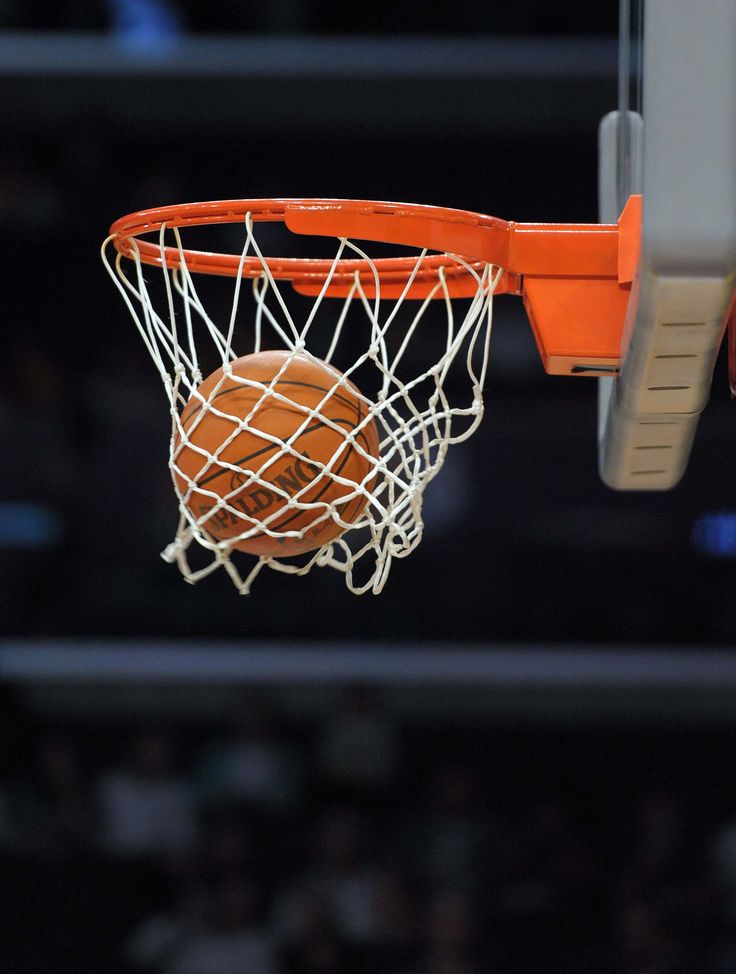 It’s a one-handed shot. The important thing is to put a good amount of arc on it. The floater is a difficult shot to block, but only if you make sure to get it over a helping big man. Check out the video player above to learn how to master the Screen-to-Floater of All-Star point guard Damian Lillard.
Here is a complete breakdown on how to shoot a floater:[youtube video=”78141A5MPxI” /]
When To Shoot A FloaterYou want to shoot a floater when you get past your defender—or at least get him on your hip—but don’t want to go all the way to the basket for a layup. Maybe there is a good shot blocker under the basket, and he would most likely block your shot if you challenge him. Instead, stop short and shoot a floater.
You might be thinking, “Why not shoot a pull-up jump shot instead?” A floater has a much quicker release, and in this situation, if you were to shoot a pull-up jumper, you would give the defender time to contest your shot.
Where To Shoot A FloaterThis is an in-between shot, meaning you are too close to the basket to shoot a jump shot but too far away to shoot a layup. Instead, you shoot a floater, which has a quick release and an unblockable high arc.
Who Shoots Floaters?This basketball shooting technique is primarily for guards. NBA players such as Chris Paul, Stephen Curry and Tony Parker use floaters as one of their main ways to finish around the basket. I compare this shot to the hook shot for big men. Although the hook shot is difficult to make, it is one of the hardest shots for a defender to block.
RELATED: Point Guards: Learn How to Attack in Transition
[cf]skyword_tracking_tag[/cf]
Share This Story!
Page load link
How to learn how to spin a basketball on your finger
To skillfully spin a basketball on your finger, you need to learn a few simple techniques, find the ball and set aside 10 minutes of training per day. After a week of practicing your skills, you will master the technique of this trick and show it to your friends. In the step-by-step instructions below, we will show you how to learn how to spin a basketball on your finger.
Tossing the ball correctly
You can train on the sports ground, near the house or even in the apartment, but in any place you need to take into account the environment. For example, when practicing a trick in a room, the ball can bounce and break fragile objects. When a place is found and inventory is prepared, you can begin training. Initially, you need to learn how to properly hold and throw the ball in the air:
- Hold the ball with the stripes vertical. Horizontal scrolling looks ineffective and it is very difficult to catch a projectile from this position.
- Select throw method:
- Two hands. You need to keep the ball not on the sides, but so that 1 hand “looks” at you, and the second from you. Having fixed the object, sharply spread your arms and slightly “throw” the ball up.
- With one hand.
 To throw with one hand, place your fingers along the lines of the ball. It is important that there is free space between the palm and the inventory. Lightly squeeze the ball. Turn the brush outward until it stops, and then gently turn it back. At the last moment, you need to give additional rotation to the ball with your fingertips. But we do not recommend using a large one, because. this will upset the balance and the ball will fly away.
- Throw the ball parallel to the floor, do not allow the ball to wobble. It is important that when thrown, the projectile rises above eye level. When its bottom surface is visible, the ball is easier to catch.
These steps must be repeated until fully automatic. Usually it takes two days. When the throws are confident, you can move on to the second level.
Learning to catch the ball
Once you have learned how to throw correctly, try catching the ball with your finger. To do this, remember the following nuances:
- You need to catch the projectile on the nail, not the finger itself.
 In this case, it is important that the brush is turned with the palm towards you.
 - The finger must be placed strictly in the center, at the junction of the vertical lines, otherwise the ball will slide off.
- When your finger touches the ball, gently and smoothly lower your hand down. So you will improve the cushioning, the inventory will not bounce, and you will not damage your finger.
This stage is one of the most difficult and requires patience on the part of the freestyler, athlete and just wanting to master the skill. When you learn how to catch the ball, at first it can control you: jump off and make you “run” after it to keep your balance. Be patient and keep practicing.
Once you are comfortable with a spinning ball, try to keep it spinning and spin it further. To do this, with light flapping movements, move your free hand along a tangent. But remember that strong twists can shift the center of gravity and the projectile will lose balance.
Tips
Here are some helpful tips from the pros:
- practice throwing a few times a day before moving on to other stages;
- workouts can be quite tiring, so take breaks between sets to give your hands a rest;
- use only a well-inflated ball;
- when accelerating the rotational movements, do not apply much force, otherwise the ball will slip off the finger;
- Trim your nails before practicing, this will increase rotation control;
- do not throw the ball very high: you can damage or break the phalanges;
- You can reduce the risk of wrist injury by warming up before practicing the exercise.
Knowing how to spin a basketball on your finger and approaching the matter responsibly, in a week you will be able to show a cool trick to friends or sports colleagues.
universal, indoor or outdoor
How to choose a good basketball and not be disappointed in your purchase.
How to choose a good basketball and not be disappointed in the purchase.
What types of basketballs are there.
First you need to decide where you will play: do you need a ball for the hall, for the street, or is a universal ball best for you? This is one of the most important selection criteria.
Indoor basketball differs markedly from outdoor basketball. It properly "sticks" to the athlete's hand and has good adhesion to the smooth surface of the parquet. Such balls are made of genuine leather or synthetic materials, additionally covered with composite compounds and microfiber inserts, which provides a comfortable grip. They are forbidden to play on the asphalt surface: on the street they quickly lose their qualities and become unusable.
How do you choose a good basketball for street play? For open areas, models made of synthetic materials or ordinary rubber are suitable. The first option is more expensive, but will last longer and will be better in the hand. Outdoor balls are much more durable, and additional surface treatment improves traction.
The third type is universal. Picking it up is the most difficult, since such a ball must combine the characteristics of both “parquet” and “street” - for hard surfaces like asphalt. In order to make the material wear-resistant, special synthetic additives are added to the composite leather, but only top manufacturers do this. Most of the universal models that you can buy at an average and low price are made from cheap PVC, which is called “synthetic leather” in the composition. Such balls quickly deteriorate, crack and lose their playing qualities.
When choosing, pay attention to the raw materials used in production. The most durable balls are made from artificial materials, while professional indoor balls with parquet, on the contrary, are made from genuine leather. If it has the mark "Supreme Leather" on it, then premium leather was used in the production. Not a single serious basketball tournament can do without such balls.
How to check the quality of the ball.
Having decided on the type and material, you should pay attention to the properties and quality. The first indicator of evaluation is the rebound. A good and properly inflated ball bounces to a height of about 130 centimeters. There is a more practical way to test this characteristic: raise the ball to the level of the head, and then release it. He must bounce to the height of the belt.
Flexibility is another important quality indicator. A good ball retains its shape and does not become soft during a short game or practice.
An important point: the initial characteristics matter a lot, but no less important is how you use the ball. You can’t sit on it, you can’t kick it with your foot and the ball must be periodically pumped up, but this must be done using a special nozzle, and not a football needle. Proper operation will help maintain its original playing qualities for as long as possible.
How to choose the right size for a basketball?
We have decided on the purpose, material and quality. It remains to choose the size: weight and circumference. Everything here, as in the previous paragraphs, depends on the players.
- #7. Diameter - 749-780 millimeters, weight - 567-650 grams. The largest size is suitable for adult men's competitions.
- #6. Diameter - 724-737 millimeters, weight - 510-567 grams. Balls of this size are used in women's basketball.
- #5. Diameter - 690-710 millimeters. Weight - 470-500 grams. These balls are used in mini basketball.
- #3. Diameter - 560-580 millimeters. Weight - 300-330 grams. Balls of this size and weight are intended for children's basketball.
As you can see, the main defining characteristics for different categories of balls are weight and size. They directly affect the dynamics of the game, the accuracy of the shots and the results.
Children's basketballs are lighter and smaller than adults so young athletes can grab the ball and hold it in their hand, and the reduced weight allows them to make accurate basket shots even from outside the 3-second zone. For children under 7 years old, balls at number 3 are suitable, and for children from 7 to 12, the best choice would be the option for minibasketball at number 5.
Why are all basketballs orange?
We are used to all basketballs being orange, although this is not a requirement. Until the middle of the 20th century, balls were made from natural leather without much post-processing, which is why they had a natural brown color. But the problem was that such balls merged with the parquet, and this created some inconvenience for the players. In the 50s of the last century, it was decided to play only with brighter orange balls, but today this rule is conditional. Top manufacturers try different shades and it is not uncommon to find basketballs in blue, purple, black and other colors in stores.
A basketball is one of the main elements of the game along with sneakers and sportswear. Its parameters, materials, quality characteristics and even color affect the outcome of the game, so professional players, teams and leagues do not save on balls, choosing the best options for their game.