Home »
Misc »
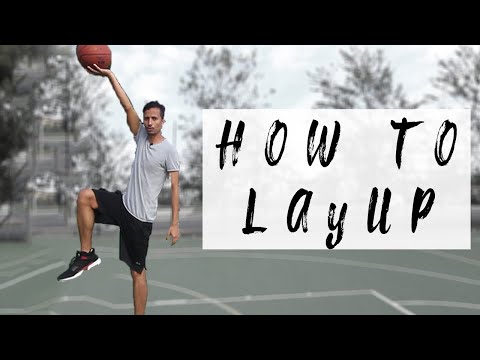
How to do a lay up in basketball
How to do a lay up in basketball
Lay up techniques & exercises
- What is a lay up in basketball?
- How does a lay up work?
- Four types of lay ups
- Overhand lay up
- Underhand lay up
- The power move
- The up and under
- How do I practice the lay up?
- Common lay up mistakes
- Excercise to improve your jump
What is a lay up in basketball?
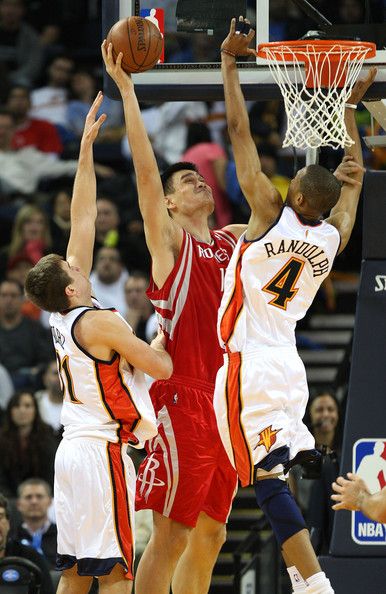
Approach the hoop while dribbling. Grab the ball with both hands, jump into the air and flick the ball onto the backboard and into the hoop. The lay up is one of the most fundamental offensive basketball manuevers and can be performed by beginners and professionals alike.
Due to the short distance to the basket, the basket lay up is a sure way to score points.
With the lay up, the correct step sequence and jump are most important.
Did you know?
The lay up and jump shot are the oldest shooting techniques in basketball.
How does a lay up work in basketball?
To learn the sequence of movements and steps, we recommend starting your lay up from a standing position with a single dribble.![]()
Ad
Here's how a basketball lay up works with your right hand:
Step 0: Positioning, 10 feet from the right of the basket
Position yourself about 10 feet from the basket, half way to the 3 point line, and run to the basket at a 45° angle.
Assume the starting classic shooting position.
Hold the ball close to your body with both hands at hip level.
Step 1: Dribble the ball with your right hand and place the left foot on the ground
Dribble with your right hand, the ball one step ahead of you. At the same time, step with your left foot.
Step 2: The right foot in front
Grab the ball with both hands, and hold it close to the right side of your body. Then take a step forward with the right foot.
3. Jump off with your left foot
Now take a step forward with your left foot and jump up and towards the basket.
At the same time, pull the right knee up. This helps stabilise your shot and accelerate you to the basket.
Important: When jumping off, focus on jumping upwards more than forwards.
Step 4: Guide the ball towards the basket and shoot
When taking to the air, bring the ball from the waist on the right side of your body. In one fluid motion, your right hand should be under the ball. Your left hand is kept to the side of the ball.
Once in the air, stretch out your right arm. At the apex, straighten your arm and elbow to shoot the ball towards the backboard. Your goal is the upper right corner of the square on the backboard.
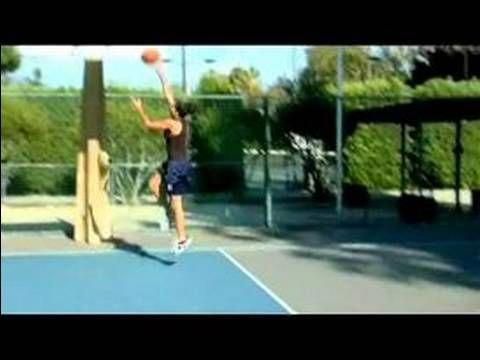
In this video, you can see how a fluid lay up looks:
The lay up with the left hand works exactly the same but inverted, so start with your left foot, jump off with your right leg, and lay up with your left arm.
Our tip: Be sure to train both hands. This will help step up your game.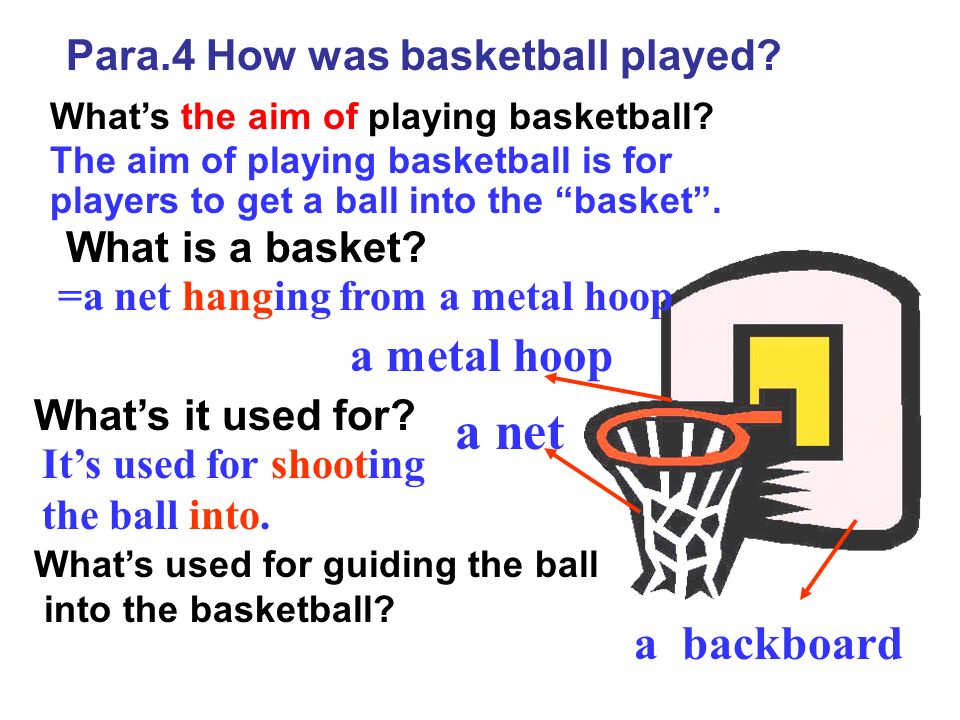
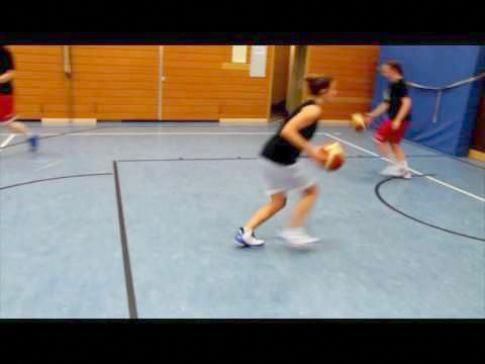
The following exercise helps beginners practice and internalise the lay up:
Here's another step by step guide on how to perform the lay up.
Step 1: Catch the ball landing with your left foot
Step 2: Step forward with your right foot
Step 3: Jump off with your left foot
Step 4: Drive forward with your right knee
Step 5: Simultaneously, bring the ball up with your right hand
Step 6: Lay it up softly
The 4 different types of lay ups
There are four different lay up techniques. The technique we've mentioned is simple and well suited for beginners. The other lay up techniques are more difficult and suited for experienced basketball players.
The overhand lay up
The original and simplest version of the basketball lay up is suitable for children and beginners.
The ball is thrown from the hand onto the backboard. The basketball lay up can be done with or without the backboard.
Underhand Lay Up
This lay up variation is also called the finger roll and suited for experienced basketball players.
When laying up, the whole arm is stretched out. The hand is placed under the ball. Snap your wrist upwards so that the ball rolls off the fingertips. This will help the ball rise and fall softly into the basket.
The underhand lay up is:
- easier to block,
- for lay ups farther from the basket,
- only possible with a strong jump.
The following video shows how to do the finger roll with the underhand lay up:
The Power Move
The only difference between the overhand lay up and the power move is that you jump with both legs. This is where a strong jump is a necessity.
Ad
The Up and Under
The most difficult lay up variation is the up and under. Here, the lay up is faked to bring the opponent out of position.
The player starts by jumping past the opponent, fakes the throw, bringing the ball around, and then lobbing the ball just before landing. In action, here's how the up and under lay up looks:
How do I practice the lay up?
The lay up is a very elaborate technique and can best be trained methodically in a series.
This means: For the lay up, first practice the individual steps and start with the simplest part. If you manage these steps individually, connect the steps in the correct order one by one.
Here's how the process works:
Step 1: Perfect your accuracy on the back board. Stand 45° from the backboard and practice.
Step 2: Practice the two-contact rule: Right - left - jump - back board shot.
Step 3: Add in a single dribble then repeat step 2.
Step 4: Add more dribbling in to feel more comfortable transitioning from dribbling to shooting. Then repeat step 2.
Step 5: Practice these steps with your weaker hand.
It takes a few training sessions before the basketball lay up can be used in a game.
Common lay up mistakes
Since the lay up is quite complex, problems are sure to arise in the beginning. Perfect practice makes perfect execution. Here's how to counteract typical mistakes:
Jumping with the wrong leg or approaching the basket with the wrong sequence of steps
- Go through the steps slowly, one at a time.
- Have your coach or teammate tell you right leg during the step sequence.
Missing arm extension with the standing shot
t- Train the standing throw for a while.
Jump is not high enough
- Pull the non-jumping knee actively up.
- Do excercises that isolate your jump.
Strength and jumping exercises for a better lay up
A strong jump is vital for a successful lay up. We'll show you how to practice this.
Important before starting your lay up exercises:
Warm up to get your muscles and joints ready for the strain. Be sure to plan sufficient breaks while practicing your jumping. Take care of your body to prevent injuries.
Genetically speaking, you can increase your jump height by a maximum of 10 to 20 percent. In addition to leg strength, a stable core is a necessity. A stable core allows you to better catapult yourself upwards, as your jump and core then work together to throw yourself up.
Along with jumping excercises, you can strengthen the core with the following excercises:
We recommend the following excercises if you'd like to train your jump.
Lunge Jumps
The jump lunge trains your explosive power:
- Place your feet hip wide.
- Take a large step back with your right foot.
- Knee is just over the ground.
- Jump and change legs.
Half squats
Half squats train your jumping power from a squating position. This excercise is helpful because many basketball manuevers involve jumping.
.- Place feet hip wide apart.
- Bend your knees to go into a squating position.
- Expload upwards into the air.
Half deadlift
As with the last excercise, perform this exercise from a half squat. Place the weight on two boxes.
Note: Only perform this exercise once you've mastered the dead lift. If not, you could injure your back.
Box Jumps
To do box jumps, you'll need a stable box or bench.
- Stand upright with feet hip-wide in front of the box.
- Bend the knees until your thighs are parallel to the floor.
- Jump upwards and swing your arms forward.
- Land as gently as possible on the box in a squatting position.
- Jump back down gently to the ground.
Ball catching
This exercise trains your reflexes as well as your jump.
Throw the basketball against the backboard and try to catch it at the apex of its flight path.
One legged jumps
For this exercise, put one leg in the air, bend your knees and explode upwards. Once your leg is exhausted, switch legs. We recommend this excercise at the end of your training session.
Even more ideas for your next basketball practice
Still looking for more tips for your training? Sport psychologist and performance coach Sebastian Altfeld shows you how to effectively plan a basketball practice session. Or take a look at our other articles on the same topic:
- The Dunk
- Basketball Rules
- The Jump Shot
If you're still looking for the training jersey for you or your team, we recommend taking a look at our Online Shop. Or design your own jersey with our 3D Designer.
BS5 Pro Shooting Shirt
To our basketball shooting shirt »
B5 Pro Basketball Jersey
To our basketball jerseys »
Basketball Softshell XJS5 Pro Jersey
To our basketball team jackets »
Ad
Image credits: Image 1: lechatnoir/ Gettyimages/E+; Image 2: 4x6/Gettyimages/E+; Image 3: miodrag ignjatovic/ Gettyimages/E+
How to Do a Layup in Basketball (6-Step Guide)
If you want to win basketball games, your players must be able to finish at the rim consistently.
While knowing “how to do a layup” will sound easy to most players, it’s actually much more difficult than most people realize.
Think about it:
Players attack the hoop at varying speeds...
Players attack the hoop from many different angles...
And when they do get to the hoop, there’s usually a second defender waiting who will attempt to swat their layup into the 5th row.
Despite these challenges, players must learn how to score layups in a variety of situations if they want to experience individual and team success.
In this article, I’ll show you how.
I’ll start by teaching you (1) exactly what a layup is, (2) the six steps for how to do a layup, (3) the process for teaching layups to young kids, (4) the seven layup variations all players must master, before finishing with (5) some important layup tips.
Let’s get started…
What is a Layup?
Here’s the general definition most coaches would use:
“A layup is the action of a player dribbling towards the hoop, taking two steps, and then laying the basketball into the hoop off the backboard. ”
”
For a traditional layup — this is correct.
With that said…
There are MANY variations of a layup (I’ll share 7 of them with you later in this article) and no two in-game layups are identical.
There’s an endless number of situations a player will face when they attack the hoop in a 5-on-5 game.
The two things all layups do have in common:
(1) All layups are shots close to the basket
(2) All layups are worth two points
How to Do a Layup (6-Steps)
Now, let’s talk about how to do a layup correctly.
Learning correct footwork and layup technique is crucial for young players.
We don’t want players to develop poor habits that will be difficult to break out of as they get older and advance to higher levels of basketball.
For the purposes of this beginner’s guide, I’ll assume players are executing a regular right-handed layup.
Here we go:
1.
Eyes UpThe very first thing a player must do when they decide to attack the defense and finish with a layup is get their eyes up.
This is important for two main reasons:
a. To Lock onto the Target
The target they aim for will be either the hoop or the backboard depending on the player’s angle and speed.
Knowing which target to choose as the ball is released from the shooter’s hand is something players will get used to as they gain more experience.
b. To Read the Defense
Every time a player attacks the hoop, multiple defenders will step across to provide help and challenge the layup.
Players need to get their eyes up and use their peripheral vision to read these defenders.
This will help the player decide which layup variation will give them the best chance of scoring (or which teammate is now open to receive a pass).
2.
Outside Foot Step (Long)Remembering that we’re using a traditional, unguarded layup as the example for this blog post…
The first step a player makes as they pick up the basketball should be with their “outside” foot (closest to the sideline).
For right-handed layups, this is the right foot.
For left-handed layups, this is the left foot.
There are two important coaching points you should emphasize to players when you’re teaching them this step:
(1) Long Step
We want players to gain distance with the first step, and a long step also helps with the second point…
(2) Controlled
Players MUST be in control of their body as they perform their layup.
Too often we see young players sprint towards the hoop out of control and then launch the ball hard off the backboard.
Encourage them to slow down to increase their chances of scoring.
3.
Inside Foot Step (High)The second step of a traditional layup should be with the inside foot (closest to the middle of the court).
For right-handed layups, this is the left foot.
For left-handed layups, this is the right foot.
The key coaching point for the second step is the following:
“High Jump”
Along with ensuring players slow down and are in control of their layup, the emphasis to jump high will give young players the upward momentum they need to complete the layup.
This is done by driving the shooting-side knee up into the air as they jump off their opposite foot.
(Right knee on right-handed layups. Left knee on left-handed layups)
4.
Protect the BallIt’s crucial that a player protects the ball while attempting their layup.
Two things to watch out for:
a. Getting Stripped
Smart defenders will look to strip (steal) the ball from the offensive player during their two steps.
To prevent this from happening, the offensive player needs to (1) have strong hands and (2) keep the ball close to their body.
b. Getting Blocked
Tall defenders will attempt to block the shot during the upward shooting motion or as the ball leaves the offensive player’s hands.
To prevent this, the offensive players must use their non-shooting hands to protect the ball and increase the likelihood of getting fouled.
5.
Follow ThroughThe fifth step when learning how to do a layup…
Teach your players to bring the ball up above their head, extend their arm, and then flick their wrist to guide the basketball into the hoop.
The traditional overhand layup is very similar to a regular jump shot when it comes to this part of the layup technique.
Important Note:
If you’re coaching very young players, you might find they push the basketball up from their chest instead of bringing the ball above their head before shooting… this is due to a lack of strength.
This isn’t a big issue while they’re young, but make sure they’re growing out of this habit as they get older and stronger.
6.
Practice!Now that your players understand correct layup technique, it’s time they start doing some serious layup practice!
A few important things for coaches to think about:
a. Different Angles and Speeds
Run layup drills that involve players attacking the hoop from different angles and at different speeds.
- Left / right side
- Front of the rim
- Along the baseline
It’s important that they’re comfortable and confident driving to the hoop from anywhere on the court.
b. Right Hand and Left Hand
Allow players to mainly use with their dominant hand when they’re first learning how to perform a layup…
But make sure they start practicing with both hands once they understand correct technique and develop the strength to do so.
This is important to help them protect the ball and finish around good defenders as they get older and play against tougher competition.
c. Competition!
Almost immediately you should start running drills where players are required to attack the defense and finish with a layup against live defense.
Add both layup technique and layup competition drills to every practice.
For example:
Spend 10 minutes using a layup technique drill and then spend 10 minutes playing half court 2-on-1.
Your players might struggle against competition at first — they might commit a travelling violation, jump off the wrong foot, or rush their two steps — but they’ll benefit from the struggle in the long run.
Teaching Layups to Kids - The Process
I’m guessing that most people reading this article are youth basketball coaches wanting to know the best way to teach layups.
If so, you’re in the right place.
I’m going to provide you with the step-by-step instructions.
These steps should be used to teach “overhand” and “underhand” layups to all players who have signed up to learn the game of basketball.
One final piece of advice before we get started:
Be patient.
These steps might seem simple to you… but to a young kid who’s trying to understand footwork, ball pickup, where to focus, distance, etc… it’s hard!
Let’s get stated…
1.
One-Step LayupThe first step is to start players on the low block.
Since most players are right-handed, I recommend starting on the right block since this will be most comfortable for them.
Give everyone a basketball, line everyone up behind the low block, and then get them to execute the following:
a. Start with feet together
b. Take one step with their left foot (inside foot)
c. Jump off the left foot and shoot a layup off the backboard
2.
Two-Step LayupNext, let’s add a second step…
Get everyone to start one step back from the low block.
Reminding them that they don’t need to dribble the basketball yet, ask them to do the following:
a. Start with feet together
b. The first step is with their right foot (outside foot)
c. The second step is with their left foot (inside foot)
d. Jump off the left foot and shoot a layup off the backboard
Players grab their own rebound before joining the end of the same line.
3.
One-Dribble LayupNow let’s take another step back…
For the third step in this process, we ask players to take one dribble before completing their two steps and finishing with a layup.
Here are the instructions:
a. Start with feet together
b. The initial step is with their left foot. As this foot touches the ground, the player should take one dribble with their right hand.
c. As the player catches the ball, they take their first layup step with their right foot (outside foot)
d. The second layup step is with their left foot (inside foot)
e. Jump off the left foot and shoot a layup off the backboard
4.
Multiple Dribble LayupThe final step when learning to shoot off the dribble requires players to retreat back behind the three-point arc.
From here, players will before multiple dribbles before gathering the ball, taking their two steps, and laying the ball in off the glass.
Here’s how it works:
a. Start behind the three-point line with a basketball.
b. Take multiple dribbles towards the hoop (eyes up!)
c. At the low block, take the first step with the right foot (outside foot)
d. The second layup step is with their left foot (inside foot)
e. Jump off the left foot and shoot a layup off the backboard
5.
 Catch and Layup
Another thing players must learn to do is receive the basketball while on the move and then finish with a layup without dribbling.
Players are put in this situation often during games…
They might make an off-ball cut to the hoop, receive a pass from a teammate on a fast break, or pass to a player in the post then cut off them.
My recommendation is to set up a quick “give and go” drill.
As follows:
a. Put one player on the free-throw line without a basketball.
b. Line everyone else up behind the three-point line with a basketball.
c. The player with the ball passes to the middle of the floor, sprints towards the hoop, and then receives the ball back for a no-dribble layup.
d. Change the “passer” every minute or two.
Video:
To help you better understand the whole process, check out this brilliant video from FIBA that shows the first four progressions:
Seven Layup Variations
As I spoke about in the step-by-step section, it’s important for players to master more than one type of layup.
When you’re playing a real 5-on-5 game, there will be help defenders trying to block / alter your shot when you get to the hoop.
Being comfortable with a variety of layups will allow players to finish around any kind of defense that’s thrown at them.
Here’s the must-know list:
1.
Overhand LayupThis traditional layup is often the first one we teach young players. It’s similar to a regular jump shot in that a player gets their hand under the ball and “shoots” it off the backboard.
2.
Underhand Layup (Finger Roll)Also known as the “finger roll”. This involves players putting their shooting hand under the ball with their fingers facing forward, and then rolling the ball off their fingertips as they extend their arm to the hoop.
3.
FloaterThe floater is a great way for smaller players to score inside against bigger defenders. It involves a player “pushing” the ball up over the defense.
4.
Off-Foot LayupIf you really want to catch the defense by surprise, an off-foot layup should be in your bag of tricks. This involves jumping off the same foot you’re shooting with. For example, jumping off the right foot for a right-hand layup.
5.
Euro Step LayupThe Euro Step involves taking your first step in one direction, and then changing directions for your second step. This is a great way to step around defenders and change the angle as you complete a layup.
6.
Reverse LayupA reverse layup allows the offensive player to attack the hoop and finish on the opposite side of the rim. For players at high levels, the rim acts as protection from shot blockers.
7.
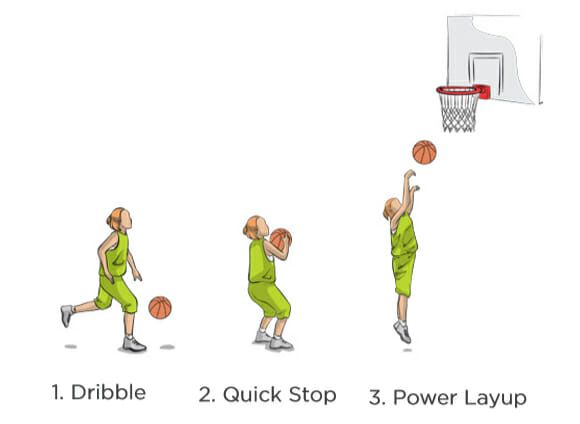
Power LayupA power layup involves performing a 2-foot jump stop before raising up to shoot. The benefit of this variation is it will give the player a stronger base, which is essential if you’re anticipating contact.
Advanced Layup Tips
Before you go, here are a few extra layup tips that will help players be more successful when attacking the hoop.
Some of the tips I’ve mentioned already throughout the article (but they need repeating), and some of them I’ve saved for this section.
Onward:
a.
Slow Down!One of the main reasons for missed layups at the youth basketball level is players are going way too fast.
If you were to spend just 2 minutes sitting on the sidelines of an U10’s game, and I guarantee you’ll see a 100mph fast break that results in the shooter slamming the ball off the backboard.
Encourage players to slow down, use a long first step to gain control of their body, and then jump high off the second step to finish.
Control is key.
b.
Create Space to FinishOnce a player gets past their defender off the dribble, teach them to step in front of the defender to “lock them behind”.
This creates space in front to finish with a floater or to draw the defense before dropping the basketball off to a teammate.
c.
Swish or Backboard?Coaches will often get players asking whether they should aim to swish the ball or use the backboard on their layups…
This is an impossible question to answer as every situation is different.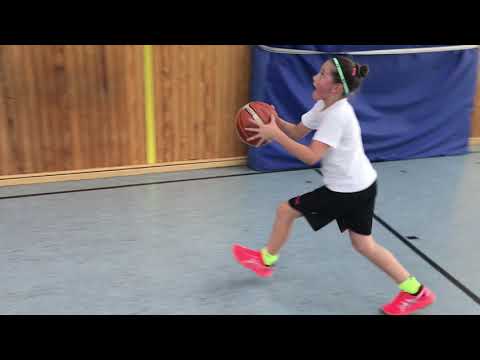
The best advice you can give players is to practice finishing with a swish and off the backboard from all angles and at all speeds.
The more finishes a player is comfortable with, the more options they’ll have when confronted by a defender during games.
d.
Keep the Ball TightThis is something I spoke about in the “protect the ball” section above…
When going through the two-step motion of a layup, keep a strong grip on the ball and hold it close to your body.
Smart defenders will attempt to strip the basketball before you go up into the shooting motion of the layup.
e.
Don’t Be Scared of ContactGetting fouled on a layup will give you a chance at a three-point play (or free throws) and will push your opponent one step close to foul trouble.
But many young players are scared of contact.
To avoid contact or getting blocked, they angle away from the defense giving themselves a much more difficult shot attempt.
Encourage players to embrace contact and attack the defender!
f.
 Practice Against Real Defenders
Learning layup technique is important, but all the individual layup practice in the world isn’t going to make you an elite finisher at the rim.
You must practice scoring against live defenders.
Once you’re comfortable with technique, it’s time to add defense take your finishing skills to the next level.
These will all help build the skills you need.
Conclusion
Learning how to do a layup is crucial for all young players.
Because they lack strength to make outside shots consistently, 90% of points scored in youth basketball are from layups.
Start by using the four progressions outlined in this article to teach them the basics, and then progress to teaching them the seven layup variations and also adding defenders.
If you do this well, your team should have no trouble attacking the hoop and scoring against any defense.
Basketball coaching hacks: how to score goals for beginners
Even if you are a novice basketball player, we will not give you a training plan, but we will tell you why the ball flies anywhere but into the ring and into your hands. It's all about technique: even with regular training and perseverance, novice adults and children often make simple mistakes. It's a shame, let's fix it. Below are 11 life hacks on how to hone your technique to increase the likelihood of a goal for your team.
Basketball Shot Rules for Beginners
1. Hands up
In pursuit of the attacker, raise your hands, even if you are standing with your back to the pass, and even more so if the ring is in front of you. Your raised hands will increase the chance of intercepting the ball from the opponent by 2 times. Don't overlook this little thing!
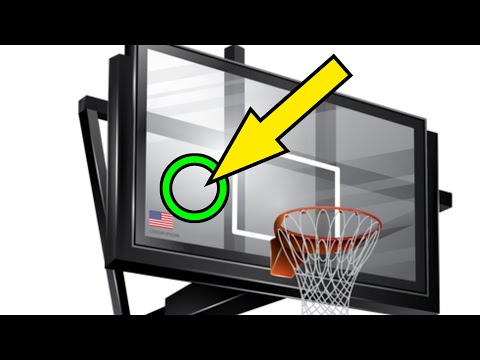
2. Make shield rolls
Even Tim Duncan did not neglect them! A square is drawn on the basketball backboard. If you are standing opposite the ring, then aim at the middle of the upper part of the square, if you are standing on the side, then at the corner. If you hit this square, then the ball is at 90% of cases will fall into the ring. The law of physics and no cheating!
3.
Look at the ring, not at the ball
Practice driving the ball with your hand, not your eyes, develop tactile control. Your eyes should be on the hoop while dribbling and be aware of the position of your body in relation to the hoop. Then you will be able to take the correct posture, and the throw will be effective.
4. Dribble with the balls of your fingers only
The palm should not touch the ball, only the pads of the fingers. Dribbling should become familiar to you, like an extension of your hand. Then you can change its trajectory at any time and you will have more chances to score goals. Practice with the ball constantly.
5. Throw with one hand
If you throw the ball with two hands, you reduce the chance of hitting the basket. All the efforts of the throw are in one hand (in the right for right-handers, in the left for left-handers). The other hand only holds the ball, the leading one holds it with the fingers, not the palm.
6.
Do not jump when protecting the ring
Jumping is the main mistake of rookie defenders. To intercept the ball and block the shot, simply stick out your hands. When you are in a jump, the attacker will easily bypass you.
7. Don't look back
When you dribble, don't look back, but dribble and aim for the ring, focus on shooting (or passing to another player on your team).
8. Bring the throw to automatism
Incorporate the most basic basketball techniques into your training plan and bring the shot to automatism. Throw first from a distance of half a meter from the ring, gradually increasing it. Learn to throw the ball so that it hits the hoop without touching the edge.
Throw the ball with all fives and jump
Throwing Rules:
- Head in the center of the body - if tilted, accuracy is lost.
- Look at the ring: mentally build a trajectory. If you are far away, the ball flies in a curved curve with a maximum height of 2 meters above the hoop.

- A strong hand is in front and throws, a weak hand is on the side and directs, only holding the ball. The elbow of the throwing hand must be in line with the ring.
- The ball must rest on the fingers without touching the palm. The fingers are as far apart as possible and grab the ball.
- Throwing arm bent 90 degrees, forearm perpendicular to the floor. If you bend less, then you get not a throw, but a throwing of the ball horizontally.
The main thing in the throw is the position of the body and its balance. Place your feet apart and parallel to each other: it is important to orient them in the middle of the basket. Then the direction of the body during the jump will coincide with the direction of the throw, and the ball will fly straight into the ring. When the feet are uneven, the ball flies in the wrong direction or does not reach (although the throw was normal).
Take a deep breath and release as you exhale.
How to hold the ball and shoot in basketball
How to throw correctly: straighten your arm, point your wrist up, and with your hand set the ball to rotate in the opposite direction from the flight. The ball should seem to "roll" off your fingers.
9. Copy masters and play as a team
Watch professional basketball games and try to copy the movements of your favorite players in training. And be sure to conduct game sparring - this will allow you to develop more techniques.
10. Do not throw in a straight line
The higher the arc of the ball, the greater the chance of a goal and the less chance of blocking by the opponent.
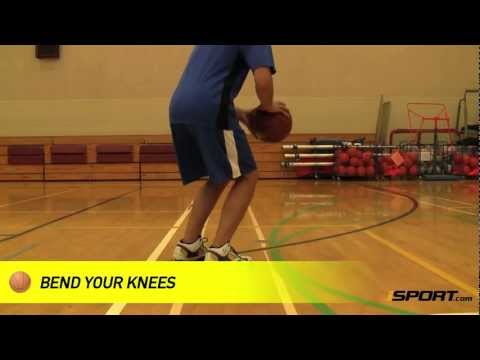
11. Do not throw the ball from a full height stand
This is the biggest newbie mistake!
Before the throw, bend your knees slightly and at the moment of the throw, straighten your body, making a jump. You need to straighten up and push off the ground at the same time. When squatting, keep the elbow of the throwing arm close to the body and towards the ring.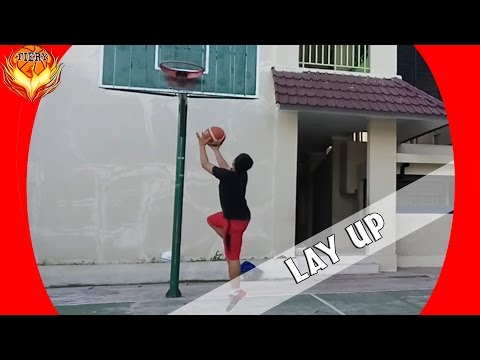
The jump will give momentum to the ball and will allow you not to make sudden movements with the brush.
***
And to be a long-term player, do not forget about your health: take care of your joints and muscles, use tapes, do a warm-up. And be sure to strengthen your arms, legs and shoulder girdle, develop coordination. Regular exercises on uneven bars and horizontal bars will help you with this.
Shooting exercises
replica swiss watches
Basketball is a great team game, the team consists of players whose skill is achieved by great effort. The only person who can understand that you are working hard is yourself. Remember, you only get out of the game what you put into it. Give yourself to her without a trace.
Jump shot
In basketball, an outstanding sniper is a piece item. If you want to be a great sniper, all you need to do is just want to be one.
First, you must improve your craft.
This includes having a good coach and years of training. Secondly, you must improve in game mode.
This means that you must perform throwing drills at the same intensity as in the game. It's far better to hit 100 shots in play than 500 sloppy shots that a good defender would never let you make in a game. Finally, you must understand that working on a roll is like investing in a bank. If you don't deposit anything into your account, you won't receive dividends when you need them.
The sniper must have "throw school". When throwing after a dribble, one of the main features is the last hit of the ball on the court, which must be fast and strong so that it bounces higher, right into your hands - this will help you not waste time handling the ball.
Individual Shooting Exercises
Exercise 1 Attention Concentration
- Start from a distance close to the ring.
- Throw with one hand. Follow correct technique.
- Make five from each position.
 Take a step back and repeat (Fig. 1).
Exercise 2 7 throwing positions and rebound (4 meters)
- Jump shot from position 1.
- Pick up the ball, dribble quickly to position 7, shoot.
- Pick-up, fast with guiding back to position 1.
- Make 10 rolls.
- Repeat the same steps using positions 6 and 2, 5 and 3, 4 (Fig. 2).
Exercise 3 7 shooting positions and a rebound (from behind the three-point line)
1. Repeat the same steps as in exercise 2 (fig. 3).
Exercise 4 Throw after stop
- Start from position 1, toss the ball to position
- Pick it up, while you have to run around the ball so that you are facing the ring.
- Make 10 rolls, then advance to the next position.
Ex.5 Shooting from five positions after a fake move (from four meters or from behind the three-point line)
- Start from any position.

- On bent knees and with your head up, you do a throw feint, hit the ball one or two with your right hand, stop and jump.
- Return to position, throw feint, one or two hits with the ball with the left hand, stop, throw.
- At each position, 5 attempts (Fig. 5).
Exercise 6 Jump shots after dribbling
- Start the exercise from the center of the field, move to the hoop with dribbling at game speed, after stopping quickly shoot.
- The shot must be taken from a middle distance or from behind a three-point arc. Perform the exercise, both on the right and on the left and in the middle of the site.
- Use different types of dribbles: fast dribbles, broken tempos, pivots, etc.
- Make 5 attempts in each direction (Fig. 6).
Exercise 7 Playing with a virtual opponent
- Make a free throw. If you have implemented it, you get one point. If not, then your "opponent" is three.
- You make subsequent throws from any position except the three-second zone, imitating the rhythm of the game. Work on different moves and throws. Each of your successful attempts is estimated at the bottom of the point, unsuccessful at two for the "opponent". The game goes to 11 points.
- This is a very good exercise to consolidate what you have learned. Try! Improve! (Fig. 7).
Double shots
Dr. 8 2 players, shot and rebound (4 meters or from behind the three-point line)
- Drill starts with a good, clear pass. The player who made the pass from under the basket goes to the place of the thrower.
- The player in position 1 catches the ball and shoots.
- After the throw, the player runs to the rebound and then passes the ball 1 position and so on.
- Each player must make five throws. The exercise is performed at a fast pace, but the throws should not be sloppy.
- Then the transition to another position and everything is the same (Fig.
 8).
8).
Exercise 9 Two players, throw and rebound (per result)
- The exercise is performed as described above.
- The player who made the pass tries to interfere with the shot, but does not block.
- Game up to 5 hits.
- Then we move to another position, and so on. (Fig. 9).
Exercise 10 Two players, throw and rebound, throw feint
- The exercise is performed in the same way as the previous one.
- The defender who made the pass tries to interfere with the player in position 1, but does not block the shot.
- The attacker makes a throw feint and beats the defender.
- Performs a short dribble, stops and throws.
- Do 5 times each and change position (Fig. 10).
Ex. 11 2 players, shot after a stoppage (from four meters or from behind the three-point line)
- The forward is in position 1, ready to receive the pass.
- The player under the basket passes.
- After the throw, the attacker waits for the rebound to be made.
- The player receives a pass by making a stop, but already in position 2. Then back.
- Make 7 throws, two free throws and switch (fig. 11).
Ex. 12 Moving shots (from four meters or three-point arc)
- Attacker moves around the perimeter at game speed.
- A player passes to the hand farthest from the ring.
- The attacker must stop, catch the ball and throw.
- Make seven throws, two free throws and change (fig. 12).
Note: The previous exercise has three options.
A) Receive the ball and throw it.
B) After receiving, throwing feint, dribbling in the same direction, throwing.
B) Receives a pass, throw feint, dribbling to the ring in the other direction, stop, throw.
Ex.13 Various dribbling options and a jump shot
- The attacker starts from the center of the field and, dribbling at game speed, moves towards the ring, stops and takes a jump shot.
- The player under the basket picks up the ball, the attacker runs to the center of the field, and receives the ball on the opposite flank. Moves with dribbling to the ring, stop, jump shot.
- Right side dribble with right hand, left dribble with left hand (fig.13)
Note: Use speed dribbling, change of pace, transitions, pivots.
Three players, two balls
Exercise 14 Warm-up exercise
- One player throws, another passes, a third rebounds.
- Thrower becomes rebounder after seven tries.
- Passer - thrower. Picking up - passing (Fig. 14).
Note: different options are possible
1) From seven positions (four meters)
2) From seven positions (from behind the three-point arc)
3) From five points with feints to shoot
4) Throw after stoppage
5) Throw and rebound (constant rotation around the circle)
Double shots: using screens
To use the screen effectively, you must read the defender correctly. You must always see the player with the ball and how the defender defends against you. A player who moves well off the ball and knows how to use screens correctly is very useful offensively. When you watch a match that has good players, notice how well they move off the ball. The hardest thing to defend against is a well-moving attacker.
Exercise 15 Back screen and snatch
- The player imitates opening and screening behind his back, makes a dash to the corner of the court.
- Throw to the nearest hand.
- Attacker catches the ball and shoots.
- The attacker picks up his shot, passes to a partner and returns to his original position.
- Make seven attempts and change (Fig. 15)
Note: do not back away when dashing, turn around and run, but do not lose sight of the ball.
Exercise 16 Screening behind the back, "false" screening
- 1. Attacker starts on the base of the trapezoid and moves up to simulate a screening.
- 2. After the imaginary breakout runs, the screening attacker rises to the ball and prepares to receive the pass.
- 3. Having caught the pass, he immediately makes a throw.
- 4. Make seven attempts and change (Fig. 16).
0003
- An attacker imitates a defender aiming for a screen and rises sharply towards the ball.
- The player must be ready to receive the ball.
- The attacker catches the ball and makes a quick throw.
- Make seven attempts and change (Fig. 17)
Exercise 18 Screening the ball carrier, moving away from the ring
- The attacker screens the ball carrier.
- The ball carrier passes through the screen aggressively.
- Instead of pulling back to the basket (deuce), the screening attacker moves away from the basket and prepares to receive the pass.
- Having caught the ball, he immediately makes a throw.
- Make seven attempts, then switch.

Exercise 19 Barrier at the base of the trapezoid - opening to the flank
- The attacker takes the player under the ring, breaks shoulder to shoulder through the barrier and makes a dash to the flank.
- When catching the ball, the player must turn to the ring.
- Use different throw options: just throw, and dribbling to the right or left after a throw feint. Change after five attempts (Fig. 19).
Exercise 20 Barrier at the base of the trapezoid - opening into the corner of the court
- The attacker leads the player into the three-second zone, pretends that he will break through to the flank through the barrier, the defender starts running around the shielder through the three-second zone.
- An attacker makes a dash to the corner of the court, and the defender hits the screen.
- Next, the same as in the previous exercise (Fig. 20).
Exercise 21 Screen at the base of the trapezoid - dash inward
- The defender is chasing you, not falling behind until the very screen.

- Then you run through the screen as close to the screener as possible and break into the three-second zone or foul line area.
- Receive the ball by turning towards the hoop and throw it.
- Also work out various options for continuing after receiving the ball. After five attempts, change (Fig. 21).
Throws in pairs: pass and discount
Exercise 22 Pass and discount - starting from the center of the field flank.
The receiving player is opened for the transfer. Player receives a pass and shoots. The player who made the pass picks up the ball and gives it to the thrower. Players change roles. Everyone makes ten throws (fig.22).
Exercise 23 Pass and discount - start from the flank
Variation of exercise 22 (Fig. 23)
Exercise 24 Pass and discount - start from the corner of the site one more
exercise 2
more variation 3 .