Home »
Misc »
How to do spin moves in basketball
How to do spin moves in basketball
Basketball Spin Move
Home>Sports>Basketball>Basketball Skills
PreviousNext
A spin move in basketball is a move used by an offensive player with the ball to get by the defense. It involves the ball handler getting to a defender and spinning his body 360 degrees while moving laterally to create space between himself and the defender.
Table of Contents
- How To Perform A Spin Move
- Common Mistake
- When To Use A Spin Move
- Combinations
- Picking Up The Ball
How To Perform A Spin Move
The instructions here pertain to a spin move that starts with the ball in the player’s right hand. For a spin move that starts in the player’s left hand, simply reverse the directions.
To start, the offensive player begins by dribbling the ball in his right hand to approach the defender. Once the ball handler reaches the defender, he gets low and puts his left shoulder into the defender’s chest. As the offensive player does this, he places his left foot, angled to the right, between the defender’s feet.![]() Both feet should be on the court at this point.
Both feet should be on the court at this point.
Simultaneously, the ball handler takes a strong, but controlled, dribble. This allows the offensive player to keep his hand on top of the ball through the entire move while still being in control of it. A stronger dribble will give the ball handler more time with the ball in his hand.
The offensive player stops his forward progress, but leans forward, placing more weight on the ball of his left foot, making sure to stay balanced. He then pivots on his left foot and picks up his right foot, turning in a clockwise fashion so he is facing the opposite basket.
Now, the ball handler’s body weight shifts to the heel of his left foot as he continues to swing his right foot around. This foot should not stretch very far from the pivot foot. As the offensive player spins back so he is facing the defender again, he takes one more dribble with his right hand. This dribble, however, should be snatched back and end up in his left hand to make sure the ball is protected. Finally, the offensive player pushes off his right leg and blows by the defender.
Common Mistake
One thing for players to avoid when performing a spin move is transferring the ball to their other hand immediately after taking that strong, controlled dribble discussed before. This makes it more difficult to get away from the defender and gives the defender an opportunity to steal the ball.
When To Use A Spin Move
A dribbler can use a spin move in a few different situations. The first is in the open court, when the defender is pressing, or at least playing far away from his team’s basket. A quick, explosive spin move against a defender in this position can put the ball handler ahead of the defensive player and set up a good possession for the offense.
A spin move can also be used to find an opening for a jump shot. With the defender on the offensive player’s hip, the offensive player can create an open window to shoot the ball.
Moreover, a spin move is good for layups or other shots close to the basket.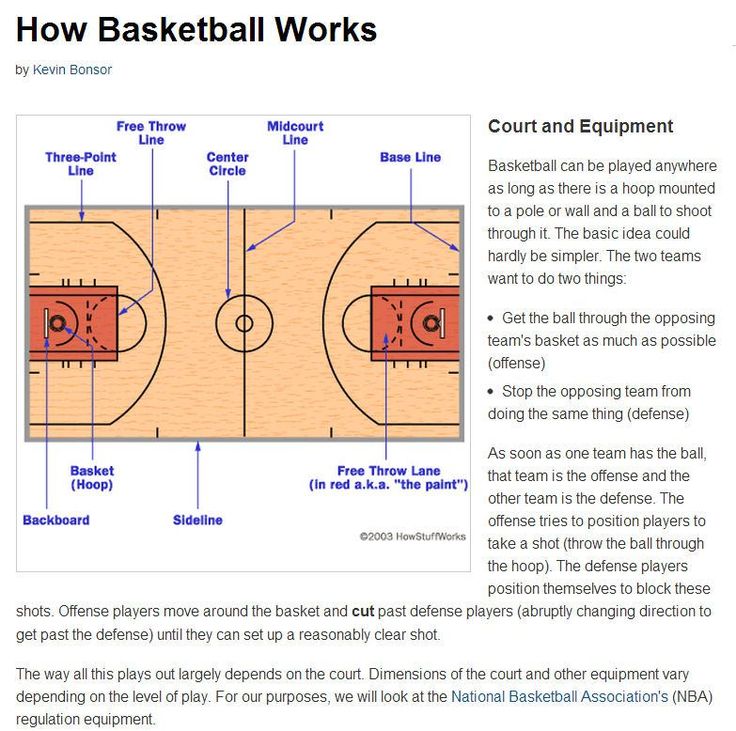 This can mean beating the offensive player’s initial defender near the basket or against help defenders who are scrambling to help their teammate.
Finally, a spin move can be used as a reaction to good initial defense. When a defender beats the ball handler to the spot, the ball handler can smoothly transfer his forward momentum into a spin move that will set him up in the other direction, away from the primary defender. The spin move as a reaction or counter can be incorporated into any of the three above uses.
Combinations
Setting up a spin move can help it to be more effective. Either stepping in the direction away from the intended spin move or crossing over, for example, can help to move the defender in the other direction. This will create more space between the ball handler and the defender.
Picking Up The Ball
On some plays the ball can be picked up after the dribble that starts the move off. Picking the ball up is effective if the ball handler is in heavy traffic and needs to protect the ball. As long as the player shoots the ball, or at least gets rid of it, by the time he takes two steps, this is not a traveling violation.
PreviousNext
Pages Related to Basketball Spin Move
- Basketball Step Over
- Basketball Stance Types
- Basketball Skills And Techniques
- Basketball Stride Stop
- Basketball Shuffle Step
- Basketball Slam Dunk
PreviousNext
How To Spin Move in Basketball
The Spin Move is a fundamental ball handling technique that should be universally instilled in any serious basketball player. It’s just too juicy a move to ignore. Guards especially, should make the most out of this move.
The Spin Move does it all:- Protect the ball in the open court
- Blow by defenders, especially as a counter move
- Get a controlled jump-shot off with the space created
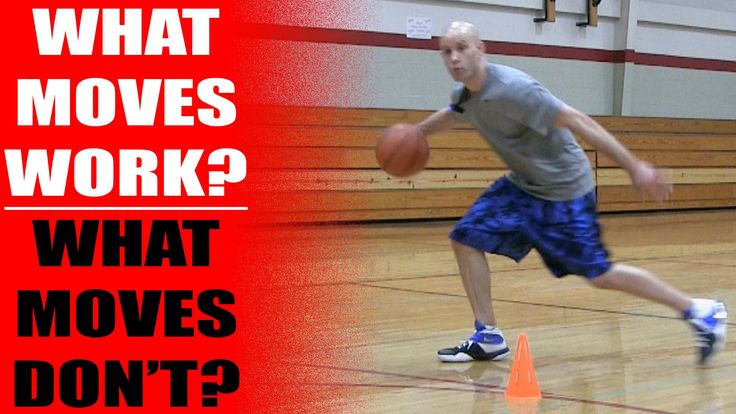
Peep this in-depth Spin Move video guide below: The Important Details About the Spin Move:Pound Dribble: We want that ball to be in our hand as long as possible. When we “switch hands” during the move, we haven’t created as much space as we could have by really pulling that ball around and in front of us. The harder the ball comes up in your hand, the longer it’s going to be there. As I say in the video, “that’s just physics.”
Basketball Tip:
In order to make the Spin Move more effective, and your ball-handling in general, it's important you get used to really pounding the ball into the ground during ball handling workouts. You need to build that ball-handling strength to really keep the "ball on a string."
Stride-Stop into the Spin: When setting up the footwork for the spin move, both feet should be stable and on the ground.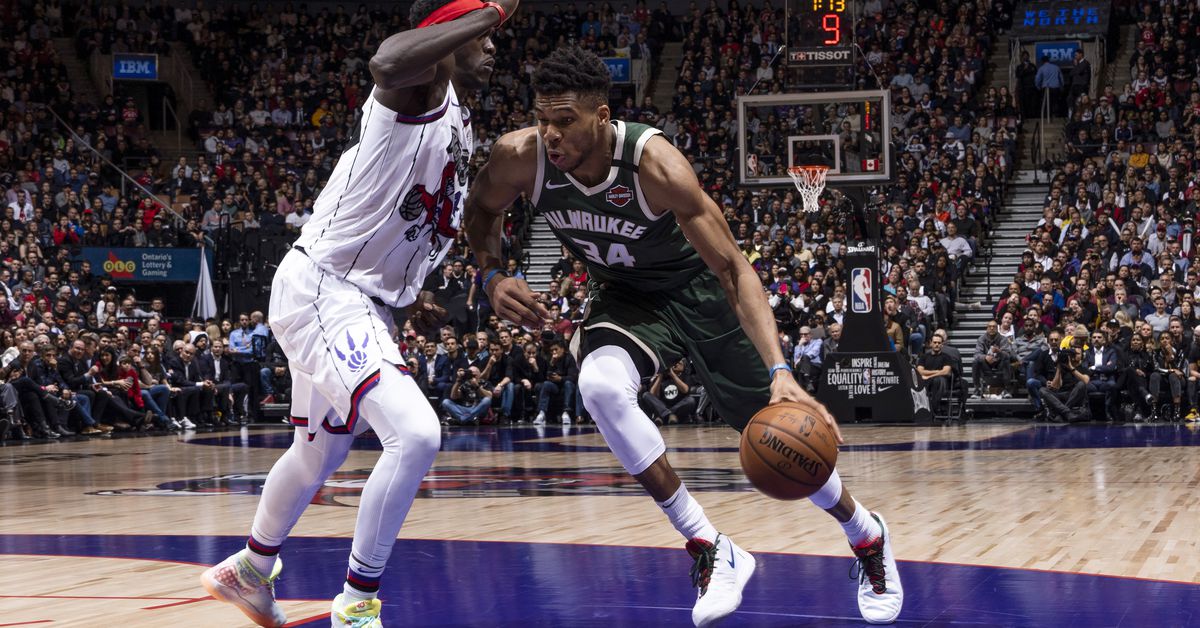 This is almost a jump-stop, but both feet don’t have to hit the floor at the same time. You can almost take a “1-2” step into it, while learning the move. However for the maximum explosiveness, you’re really looking to cock back those fast-twitch muscles and land your two feet at the same time. Try not to be too “flat-footed” with the footwork, get yourself on the balls of your feet in order to be as quick and athletic as possible. If it’s athletically intense, but much quicker, you know you’re working on something good.
Pulling the Ball Back: It may feel like the ball is exposed with the dribble after the spin. In actuality, you’re not dribbling the ball to be exposed in front of you. Limit this exposure by making sure you’re “pulling” the ball back to you on that last dribble. Get the ball into the opposite hand, after the spin portion of the move, and in a “blow by stance”, to really take advantage of the space you’ve just created. Now you’re ready to explode and create some offense.
The Best Spin Move Drill and Variations:
Main Spin Move Drill:
- 1
Start from the base-line
The base-line where the lane line intersects.
- 2
Pound the Ball
Keep it controlled. Use that arm strength. Really push that ball into the ground.
- 3
Spin move
Make sure to bring the ball back into your other hand at the end of the move. Keep it protected.
- 4
Repeat The Spin Move with the Other Hand
- 5
End Your Repetitions on the Elbow
You can do more Spin Moves if you want, and end the drill further down the court. Don't do too many spins to get dizzy though. Just enough reps to get the muscle memory down.
Variation #1 of the Spin Move Drill:
Same steps as above, but every dribble needs to be on the opposite side of the key line and you must be facing forward when the move is complete. This proves you’re truly creating space and not just doing ballerina spins in front of your defender. That hard ball pound is what’s going to make sure you have that ball control. Make sure you’re pounding the ball.
Variation #2 of the Spin Move Drill:
Again, same steps as the main drill, but this time, incorporate a behind the back move after the spin is finished. Pound it, spin move, then behind the back. Every part of the move has to be tight and efficient. Make sure you already have a stable and gathered position for a strong behind the back dribble. Any “extra” and/or weak dribbles are cracks in your ball-handling’s armor. Rep it out where necessary. No gaps for a defender to exploit.
If you need more Spin Move inspiration, check out how Lebron spins his way into shot after shot. It’s great to see him execute the move from all different angles and distances. Sometimes it’s an elbow spin, sometimes base-line. Sometimes he spins on a fast break, sometimes he spins a help defender.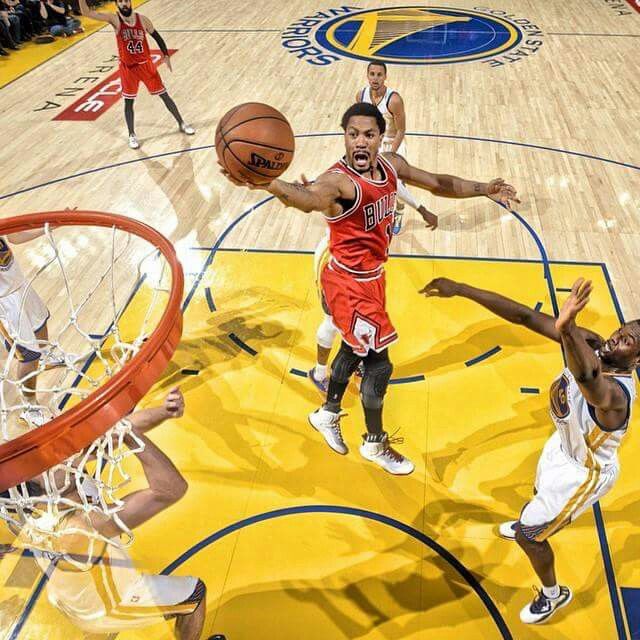 As long as you understand the fundamentals and muscle memory mechanics of the move, there are a plethora of opportunities to use this move.
Don’t forget guys, if you want even MORE basketball moves and workouts— in fact, one of the BEST basketball programs you could pick up– make sure to check out The Scoring Academy. It’s not just one move you’ll be learning, step up your entire game at once.
How to learn how to spin a basketball on your finger
To skillfully spin a basketball on your finger, you need to learn a few simple techniques, find the ball and set aside 10 minutes of training per day. After a week of practicing your skills, you will master the technique of this trick and show it to your friends. In the step-by-step instructions below, we will show you how to learn how to spin a basketball on your finger.
Tossing the ball correctly
You can train on the sports ground, near the house or even in the apartment, but in any place you need to take into account the environment. For example, when practicing a trick in a room, the ball can bounce and break fragile objects. When a place is found and inventory is prepared, you can begin training. Initially, you need to learn how to properly hold and throw the ball in the air:
- Hold the ball with the stripes vertical. Horizontal scrolling looks ineffective and it is very difficult to catch a projectile from this position.
- Select throw method:
- Two hands. You need to keep the ball not on the sides, but so that 1 hand “looks” at you, and the second from you. Having fixed the object, sharply spread your arms and slightly “throw” the ball up.
- With one hand.
 To throw with one hand, place your fingers along the lines of the ball. It is important that there is free space between the palm and the inventory. Lightly squeeze the ball. Turn the brush outward until it stops, and then gently turn it back. At the last moment, you need to give additional rotation to the ball with your fingertips. But we do not recommend using a large one, because. this will upset the balance and the ball will fly away.
- Throw the ball parallel to the floor, do not allow the ball to wobble. It is important that when thrown, the projectile rises above eye level. When its bottom surface is visible, the ball is easier to catch.
These steps must be repeated until fully automatic. Usually it takes two days. When the throws are confident, you can move on to the second level.
Learning to catch the ball
Once you have learned how to throw correctly, try catching the ball with your finger. To do this, remember the following nuances:
- You need to catch the projectile on the nail, not the finger itself.
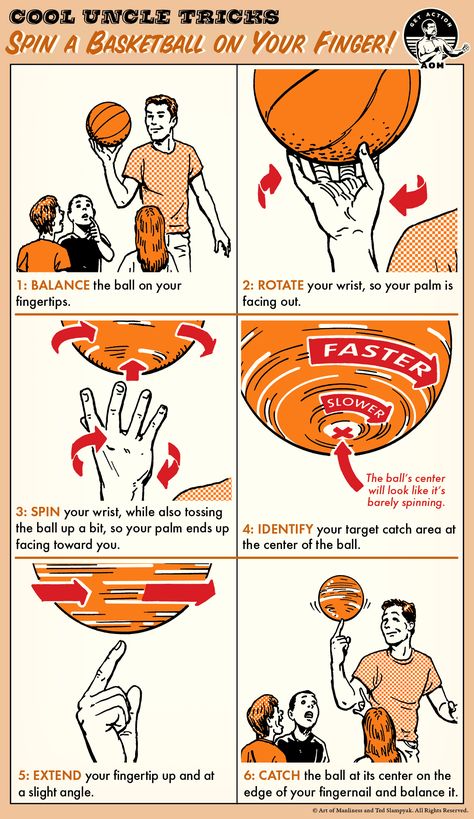 In this case, it is important that the brush is turned with the palm towards you.
 - The finger must be placed strictly in the center, at the junction of the vertical lines, otherwise the ball will slide off.
- When your finger touches the ball, gently and smoothly lower your hand down. So you will improve the cushioning, the inventory will not bounce, and you will not damage your finger.
This stage is one of the most difficult and requires patience on the part of the freestyler, athlete and just wanting to master the skill. When you learn how to catch the ball, at first it can control you: jump off and make you “run” after it to keep your balance. Be patient and keep practicing.
Once you are comfortable with a spinning ball, try to keep it spinning and spin it further. To do this, with light flapping movements, move your free hand along a tangent. But remember that strong twists can shift the center of gravity and the projectile will lose balance.
Tips
Here are some helpful tips from the pros:
- practice throwing a few times a day before moving on to other stages;
- workouts can be quite tiring, so take breaks between sets to give your hands a rest;
- use only a well-inflated ball;
- when accelerating the rotational movements, do not apply much force, otherwise the ball will slip off the finger;
- Trim your nails before practicing, this will increase rotation control;
- do not throw the ball very high: you can damage or break the phalanges;
- You can reduce the risk of wrist injury by warming up before practicing the exercise.
Knowing how to spin a basketball on your finger and approaching the matter responsibly, in a week you will be able to show a cool trick to friends or sports colleagues.
5 Basketball Exercises to Move the Ball with Passes
There is nothing better than watching a team move the ball quickly and efficiently around the court without greed.
Overcoming the defense with smart passing the ball to each other, creating situations for open shots and passes is one of the great offensive techniques.
Want your team to do it?
Basketball passing exercises in this article will help you with this.
But first let me explain something very important...
There are two types of training exercises:
1. Ball passing technique.
2. Decision making during transfers.
Unfortunately, most coaches only focus on the "technical" aspect of training and forget how to train their team's decision-making ability when it comes to sharing the ball.
Your players will not improve their game passes by doing thousands of repetitions of the chest pass.
While technical drills have their place, they are far less important than passing drills with decision making.
We must let the players learn how to read the defense and make the right decisions.
In addition, ball passing exercises are great for starting a workout to warm up your team and get them to communicate and work together.
5 ball passing exercises.
1. Advance
How the drill works:
Players form 3 columns evenly distributed along the end line. The two outside players start with the balls.
3 players advance across the court passing the ball back and forth to the middle player and then finish the exercise with two shots from under the basket.
Goal:
A fun passing exercise that works on catching and passing without running, with communication, timing, and basket shots at playing speed.
Formation:
Players form 3 columns behind the end line.
Two players on the outside lines have balls.
Instructions:
3 players (1, 2 and 5) begin to move forward on the court. The 1st outside player passes the ball to the 2nd player in the middle line.
Immediately upon receiving the ball, the center line player returns the ball to the same player on the touchline.
The 1st middle player then turns to the other side and receives a pass from the 5th outside player and immediately returns the ball to him.
Outside players may use 1-2 steps to avoid running.
The drill continues until the players reach the opposite 3-point line. When this happens, the two outside dribblers go to the basket and shoot.
Then the group waits at the opposite end for the rest of the groups to complete the exercise before starting the exercise on the other side. On the right scheme at the top, the three players (4, 3 and 2) continue the exercise according to the scheme described above.
Options:
Medium or 3-point shots. Instead of ending with a run to the basket, players may end with mid-range shots or 3-point shots.
Back and forth - instead of waiting at the other end, the troika can complete the exercise to both ends of the court. Only now the threes are placed on both end lines and begin the exercise when the three from the opposite side return to their half of the court.
One Ball - If you are coaching very young players, you can run this exercise with one ball until the players understand how it works.
Coach's Note:
Passes must be passed on the move in front of the player using proper passing technique.
The receiver must hold his hands at goodie level, showing 10 fingers and calling for the ball to be passed to him.
The middle player must catch the ball and quickly pass the ball to a running partner. Don't run!
Shooting technique while moving from under the basket is very important in this exercise. Watch your footwork and make sure all players are doing it right.
2. Monkey in the middle
How the exercise works:
The players are divided into groups of three. Each group has one ball. The two transmitters lined up 12 to 15 feet apart.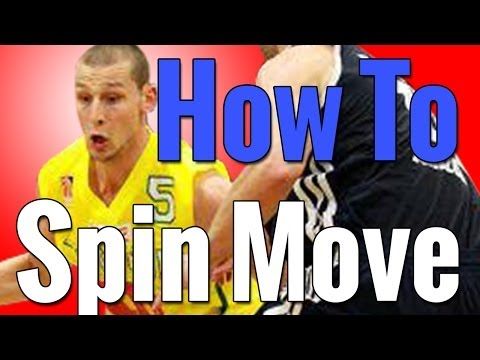 The third player in the group is the "monkey in the middle". He tries to hit or steal the ball. The two outside players must pass the ball to each other without using cross passes or dribbling. Simply turning and using feints to open up the passing line and pass the ball past the defender.
Goal:
A fun exercise that works on defense at the same time. This exercise will teach players how to use feints and turns to create a passing zone and also to protect the ball.
Lineup:
• Groups of 3 players.
• Each group has one ball.
• The passers are lined up 12-15 feet apart with the third player (back) in the middle.
Instructions:
1. The drill starts with the defender attacking the player who starts the drill with the ball.
2. The attacker uses feints and steps to pass to another attacker while the defender attempts to parry or intercept the pass.
3. After each pass, the defender rushes towards the ball carrier and tries to press the ball again.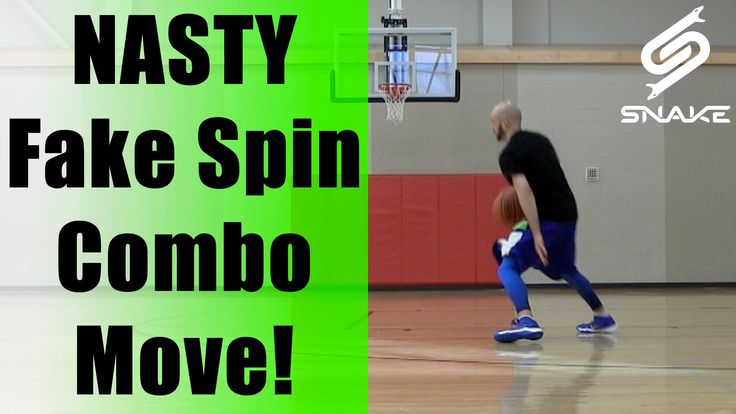
4. When the defender recovers the ball or kicks the ball, the players change positions.
Variations:
Change after a certain time - Players can change positions
after a certain period of time (depending on the age of the players, their strength and stamina), and not after each interception and elimination. For example, 30-40 seconds.
One dribbling available. Let the attacking players hit the ball once to the floor to open up the passing corner. It will be tougher for the defender.
Only bounce passes allowed - in order to make it more difficult for attackers, allow them to only bounce passes.
Notes:
• It is very important for a defender to have active arms and legs at all times. This is the best way to intercept.
• Passing players must wait for the defender to recover before making the next pass. The purpose of the training is to learn how to pass and create passing angles.
• If there is no set time, the offensive player must not hold the ball for more than 5 seconds without passing the ball.
• No passing in an arc! They make the drill too easy for the attackers and will not lead to improvement.
3. Swing passes
How the exercise works:
The team is divided into 4 groups in the corners on half the court. The players make a pass to the player on the right, who start running along the sideline towards the endline. The sender then joins the end of the column into which he passed the ball.
Purpose:
A drill intended to be used primarily with young players or as a warm-up. This training will improve passing the ball on the move, as well as improve reception and passing without dribbling.
Lineup:
• The team is divided into 4 groups. One group located in each corner.
• The first player in one of the groups has the ball.
Instructions:
1. The drill is started by ball carrier 02 passing the ball 01 to the player on the right.
2. Before passing the ball, the receiver must start running in the direction of the next group, where he will make the next pass of the ball.
3. 01, having received the ball, passes it to player 05, who starts a dash towards 03.
4. After each pass, the passer joins the end of the group where the ball was passed.
5. The exercise continues according to the same scheme with passes and jerks of the players along the square in the same direction.
6. After a certain period of time, the coach changes the direction of the passes.
Options:
Turn on the second ball. If the players perform confidently, then you can enter the second ball in the opposite corner.
Various types of passes - The drill can be performed with one or two hand passes, bouncing, etc. One Dribbling - Players are allowed to make one dribbling before passing to the next player. This can be useful if you are passing with one hand.
TIPS:
• The receiver does not need to slow down or speed up to catch a transmission. Transfers must be accurate, timely and forward.
• The receiver must initiate the snatch in a timely manner with arms outstretched to assist the passing player in making a timely and accurate pass.
• It is very important that you do not make any mistakes during the exercise. Don't let them fall into this bad habit.
• Begin the exercise at medium speed at the beginning until the players understand it. Then increase the intensity.
4. Bronze gears.
How the drill works:
Starting at the end line at the edge of the penalty area, pairs of players pass the ball back and forth using various passes as they run across the court to the other end line. When they get there, they move closer to the touchline and come back using various passes over the players in the middle of the court.
Purpose:
An excellent warm-up that provides many passes in a short amount of time. Including passes of various lengths and types for players in training.
Line-up:
• All players find a partner.
• Each pair has one ball.
• Pairs split into two columns behind the endline at the edge of the SR.
Instructions:
• 1. The first pair move to the opposite side at a slow pace in the middle of the court, passing the ball from the chest to each other.
• 2. As soon as the first pair is closer to the 3-point line, the next pair starts.
• 3. When the first pair of players reach the opposing endline, they move to the touchlines and return, passing the ball over the pairs of players moving in the middle of the court.
• 4. When the players return to their starting position, they rejoin the pairs in the middle of the court and continue continuous training.
• 5. Every couple of minutes, change the type of passes players make for middle pairs and outside pairs.
Options:
Gears for pairs in the middle. For the mid lanes, there are several types of passes that I recommend: from the chest, with a rebound, one-handed from the chest, and one-handed with a rebound.
Outline Passes - For outside lines there are several types of passes that I recommend: chest passes, overhead passes, one hand passes.
Remember to consider your team's age, strength and skill level when deciding which passes they should use during practice.
Tips:
• Follow the pace of the exercise; especially if it is used as one of the warm-up exercises. Walking should not be allowed, but too much traffic should also be avoided. Accurate transmission is the main focus of training.
• Players on the outside lines must not make too many passes in an arc and with a very high trajectory on their passes. They should be at a height that is safe enough not to hit the midlines, but straight enough to reach your partner quickly.
• The ability to pass the ball with either hand is an important skill to develop. Expect mistakes when your players first perform a drill, but make sure you train them properly.
• Footwork is very important during this workout. Players must be able to catch the ball and pass back to their partner in two steps. If you are training young children and they cannot pass the ball at speed yet, slow down the pace of the exercise.
• After each run around the court, the players must switch to the sides so that they practice passing short and long passes from both sides of their body.
5. Netball
How the exercise works:
Regular battle without dribbling the ball is allowed at any time. Games can be played 3 on 3, 4 on 4, or 5 on 5.
Target:
An excellent exercise that improves not only passing the ball, but also moving without the ball, positioning, jerking, etc. This exercise will lead to less use of dribbling in games and fewer losses.
Lineup:
• Divide the players into two teams based on the number of players available for training.
• Try to make teams of the same height and skill level.
• Only one ball is needed for training.
Instructions:
1. Teams play normal full game - no dribbling!
2. The exercise is performed within the time specified by the trainer.
3. Start with the arrangement shown in the diagram.
Point system:
• The game is played up to either 5 or 11 points.
• Each 2-point roll is worth 1 point.
• Each 3-point roll is worth 2 points.
• Must win by 2 points.
• In the event of a shooting foul, the offensive player throws one free throw for 1 point.
Variations:
One Shot Allowed - Players are allowed 1 dribbling when they gain possession of the ball. This is not a requirement, just an option.
Only bounce passes allowed - Restrict your players to only use bounce passes.
3 teams. The exercise starts by dividing your team into 3 groups of 3 to 5 players. Two teams start defense in each half. The third team is in the middle of the court on offense. The offensive team chooses one side and tries to score the ball without dribbling. Same scoring system as above. After a goal is scored or the possession of the ball is changed, the defensive team receives the ball, attacks in the opposite direction. The previous offensive team may play defense up to the center line of the court. Play until one team reaches 5 or 11 points.
Tips:
• It's very important to give players instructions on how to set up wide and run smart to get the ball.
• If you need to step in to make adjustments or re-emphasize the most important points of the exercise (distance, snatches), step in but keep it short.
• All passes must be at least 3 feet long. Don't let the players run up and pass the ball from each other's hands.
• Footwork is important in this exercise. Make sure the players are not running and that they are using turns correctly.