Home » Misc » How to install a basketball hoop anchor
How to install a basketball hoop anchor
How To Install Your Own Inground Basketball Hoop
Home > Guide to Hoops / Goals > How To Install Your Own Inground Basketball Hoop
If you love basketball and want to practice your shots any time of the day, purchasing your own basketball hoop is the best option.
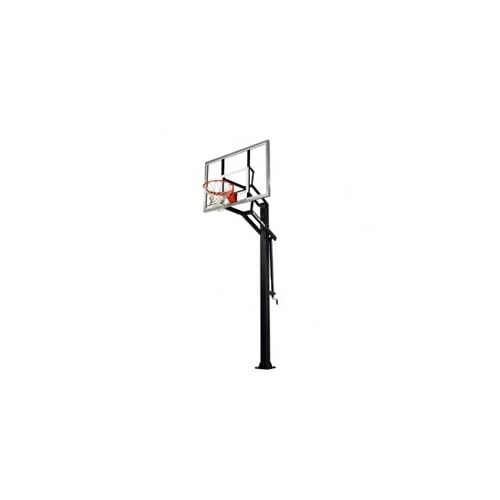
There are a number of different basketball hoops available, but in-ground hoops are a better option because they provide you with stability and professional-level experience.
There is a lot to consider when purchasing a basketball hoop e.g. choosing the right seller, the perfect location, the ideal backboard size and the type of pole etc.
If you are having trouble knowing what suits you best, check out our Home Hoops Guide.
Know what you want, but don't know where to find it? Check out some high-quality stuff here.
This article is a step-by-step guide on in-ground basketball hoop installation.
Before You Begin with The First step, Keep A Few Things In Mind
Find a suitable ground where you can fit your basketball hoop. The area must ideally be flat and paved e.g. driveways. The ideal scenario should be to have enough space to accommodate your hoop and the number of players.
Overhang is the distance between the pole and the backboard, and affects how much room you have to land after you shoot layups. For good balance and safety, 2 feet to 4 feet of overhang is ideal. Anything greater than that could cause shaking because the weight of the backboard would
be suspended too far.
Take into consideration the position of the sun when installing your basketball hoop. Face the hoop towards the north, so the sun does not get in your eyes.
Make sure the goal is at least 20 ft. (7m) from any overhead power lines, and no overhead power lines are within a 20 ft. (7m) radius of the goal.
Make sure you have enough room to shoot 3pt shots at tops, wings and corners. If you want to have a regulation three point line as well as some room behind it, 28 - 30 ft from the pole is what you need. For a full three-point arch, you need around 40 ft of width.
Before you dig a hole, you must contact Call Before You Dig (dial 811) to check for any underground power, gas, telephone, water and other utility lines.
Digging the perfect hole for your basketball hoop is vital.
The most important thing to keep in mind is that the hole is deep enough, and of the right size, so the metal bars that form the anchor fit perfectly. This will provide stability to your basketball hoop.
You can dig by hand with a shovel, or use an auger or other digging equipment.
The hole should be 48" to 50" (1.2 m - 1.3 m) deep and 16-18" (0.4 m - 0.5 m). Follow the instructions manual to check the exact measurements required for the hole.
Remember, a strong foundation is your key to success!
2. Pour The Concrete
Now that you have dug the hole, the next step is to pour the concrete.
Installing an in-ground hoop would require 10-14 60lb bags of concrete, but it is recommended that you buy an extra bag or two just in case you need them.
Mixing the concrete can be a tricky procedure. You need to make sure that the right amount of dry concrete and water is used. If the mixture is too thin, it will lack the strength required to hold the pole, and if it is too thick, you will struggle to fill voids.
For a 60lb concrete bag, 1.9 liters of water is PERFECT!
To prepare the concrete mix, pour dry concrete in a container and create a depression at the center of the dry mix. Add water, and mix thoroughly until it's firm enough. Do not allow the mix to sit for a long period of time or it might dry out.
Fill half of the hole with concrete, and insert steel bars inside. Make sure the bars are properly aligned. Once the bars are aligned, fill the hole with concrete and level it using a trowel tool. Make sure the surface is smooth and there are no pockets of air.
When the above is done, place the assembled anchor in concrete, and push it down the concrete solution. It must be fixed deep enough so it provides stability to the basketball hoop.
It is important to make sure the assembled anchor is completely level!
Give the concrete at least 72 hours to cure, in case the weather is warm. For cooler surroundings, wait an extra day or two.
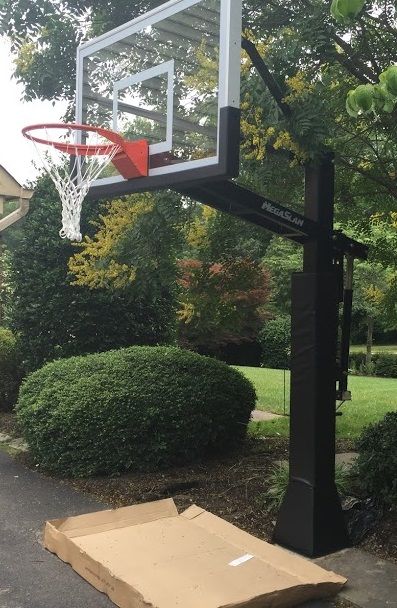
3. Fix The Main Pole
In-ground basketball hoops come with one-piece, two-piece and three-piece poles. A one-piece pole is highly recommended because it minimizes vibration and shake. It is also rust and corrosion resistant.
A 4"-6" diameter pole provides excellent performance and stability. Shape-wise, square poles are preferred over round ones because they are more rigid.
A 7-gauge thickness on the pole is preferred over 11-gauge because the former is the STRONGER choice. A thicker pole provides you with a better playing experience. It is stronger, causes less shake, and provides greater durability and professional experience.
Fixing a pole depends on the type of anchor being used.
There are two types of anchors used in in-ground basketball hoops: the threaded j-bolt and the hinge anchor system.
The latter is easier to install.
With a j-bolt anchor system, you will have to lift the pole above the anchor, position it rightly, and then bolt it down to the j-bolt anchor. This process will require greater physical effort as you will have to go up and down a ladder to attach the backboard,
extension arms and the hoop.
The hinge ground anchor system, on the other hand, is simpler to install, and does not require much physical effort. You can assemble the pole, extension arms and the backboard on ground, and then align the pole using the hinge mechanism. The pole is then placed
in an upright position, and secured with a bolt.
A huge advantage of the hinge ground anchor system is that it can be easily moved from one place to another. When you move, you can take the fully-assembled pole with you and relocate it without much hassle.
Do not forget to follow the instructions manual.
4. Install The Backboard
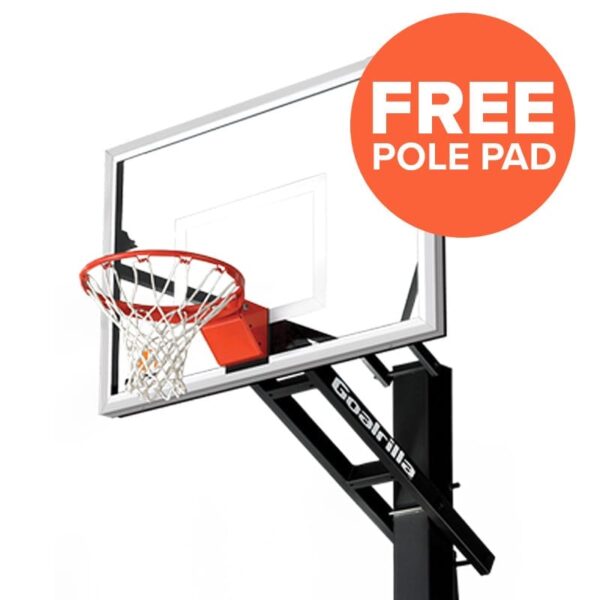
There are three main types of backboards: acrylic, tempered glass, and polycarbonate. For a professional experience, tempered glass is the BEST CHOICE!
Out of the three, the tempered glass provides the best bounce and spin. It is also shatter proof, and therefore safe.
Acrylic backboard is suitable to use in public places. However, it does not provide the same bounce and spin as the tempered glass backboard.
In some basketball hoop setups, the backboard is already attached to the pole, but for hoops with a separate backboard, there are a few things that one must keep in mind before installation.
Since the backboards are heavy, it is advised to use additional manpower to lift and install the backboards, while taking safety precautions. Lift the backboard up in place to the support arms, and secure it to the top mount.
5. Install The Rim And Net
Choosing the best rim for your hoop is another important step. This piece of the system absorbs the greatest physical impact, and therefore, must be durable.
A breakaway rim is recommended. It consists of a hinge and spring at the point where it attaches to the backboard, and can bend downward when a player dunks. It is DURABLE.
Once you have chosen the perfect rim, installing it would not be much of a problem.
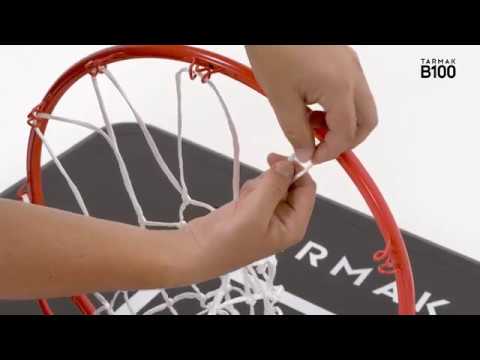
All you have to do is fix it with screws to the backboard. Then loop the net around each of the hooks on the rim to have your net fully installed, and you are all ready to SHOOT!
Hire A Professional To Do The Job
If you have prior experience in installing a basketball hoop, or doing similar work, you might consider installing the hoop yourself.
However, hiring a professional to do the job can save you from damages, injuries and unpleasant situations since installing a basketball hoop requires a number of tools, and expertise.
Consider this: if you are going to install it yourself, you will have to buy or rent the tools, request for additional manpower, and the overall process will likely be slower than when done by a professional.
Knowing that you have spent quite a lot of money on purchasing the setup, you would not want to risk damages to save a few dollars.
Need Help?
Contact us if you have any questions, need help with installation or need any help choosing a basketball hoop. Our experts are here to help.
What do you think? Let us know by leaving your comments, suggestions, and questions...
Basketball Hoop Installation – Goalrilla
INSTALLING YOUR GOAL
Never installed a basketball goal before and not sure where to start? Not a problem. Regardless of where you purchased your hoop, you’ll have the option of installing it yourself or paying a professional to do it for you. The following article will walk you through the steps.
The following videos will walk you step-by-step through the process of installing an in-ground basketball goal.
Installing the anchor kit
Part 2
Goal Installation
MIXING CONCRETE FOR AN IN-GROUND INSTALLATION
The secret to a long-lasting basketball hoop is in foundation. Achieving the correct mixture of dry concrete and water can give your goal additional years of life!
A mixture that is too thin lacks the strength needed to properly hold the steel pole in place. A mixture that is too thick will leave you struggling to fill voids that can’t be seen below, again compromising strength. So how do you achieve the perfect balance? Let’s find out!
Compressive Strength
Concrete is rated by its compressive strength, which means: how much pressure per square inch can a standard cylinder of concrete withstand before breaking. These ratings are derived from standardized machines which can evenly apply pressure across the surface of a concrete cylinder.
Compressive strength is largely determined by the composition of the mix. Walk into any home improvement store and you’ll see a variety of mixes that advertise ‘fast setting,’ ‘high-strength,’ ‘crack resistant,’ etc. The main difference between each of these is some mixes may contain additional ingredients, such as fiberglass, to provide even greater bond strength.
If you have a specific mix you’re looking for, then great, you already know what to get. However, if you’re simply trying to follow the instructions for your hoop, your standard ‘High-Strength’ mix will do just fine.
What Does Goalrilla Recommend?
Goalrilla recommends purchasing 12-13 bags of Quikrete concrete mix. This concrete meets the ASTM C387 Standard Specifications for concrete.
While directions state you only need 11 bags, it’s not a bad idea to have an extra bag or two on hand in the event the installation gets a little messy. As you’ll find out, concrete mix can be difficult to move and it’s very easy to accidentally tear a bag open.
Mixing the Concrete
Once you have all the appropriate materials, start by opening 1-2 bags and pouring them into a large container. Add water according to what the instructions dictate.
For an 80 lb. bag, you’ll want to use 6 pints or 2.8 L of water, or for a 60 lb. bag, you’ll want to use 4 pints or 1.9 L per bag of concrete. If you don’t have measuring bucket around, a 2 L soda pop bottle will work to get a close enough estimation.
Create a depression in the center of the dry mix and add your water here. Work the mix with a hoe or other tool and ensure consistency across the batch. Properly mixed concrete should be wet, but firm enough to hold its shape and in an oatmeal-like consistency. You can test its consistency by picking up a handful while wearing gloves.
Do not let the mix sit for extended periods of time or you run the risk of letting it dry out. Move the mix to the freshly dug hole as soon as possible and agitate as you pour to help alleviate any voids. A trench shovel and extra set of hands will be helpful here.
On especially hot days you may need to add more water to the mix as water will evaporate. Always keep the mix moving and ensure the mix maintains its consistency.
Repeat these steps as necessary until you have the appropriate amount of concrete.
Pouring Concrete in Cold Weather
Installing your basketball hoop in winter is possible but has a few caveats. If the outside temperature is below 40° F (4.44° C) for an extended period of time, you will want to reconsider your install date. Temperatures below this threshold can cause all sorts of problems your average DIY installer is most likely not equipped to handle, nor would want to.
If you choose to pour concrete during the winter months, there are few things you or your installer will want to remember.
If the ground is frozen, you will need to wait until it thaws before you can even consider starting. You should NEVER place concrete in frozen ground, since it poses a number of problems from cracking, crusting, and settling unevenly.
Use a fast-setting mix with hot water. As the name implies, a fast-setting mix will usually set in under an hour. While it may set in under an hour, it will still take several days to cure. When mixing concrete in these temperatures, regardless of type, use hot water.
Use an accelerator. If you don’t have access to fast-setting concrete or have already purchased regular concrete, you can purchase an accelerator that helps increase the concrete hydration rate. This helps to shorten the setting time and gets the concrete to a higher strength earlier. Avoid any accelerators or additives containing calcium chloride as this will cause the rebar to rust and could potentially cause the concrete to crack. Do not mix fast-setting concrete and an accelerator.
Use curing blankets. Specifically, for cold-weather applications, concrete curing blankets help to trap in the heat and moisture, so the concrete can reach its proper strength. Additionally, these “blankets” protect the concrete from freezing. Blankets can be purchased from your local home improvement store for around $50-$60 depending on your area. Keep in mind they do not look like the blankets you would use in your home. These blankets look more tarp-like and usually come in rolls.
In addition to these tips, some professional installers may have other methods or tricks they use to set concrete in colder weather. In this case, it may be better to hire a professional to do the job as they will often have the necessary supplies, like curing blankets, already on hand.
As the cost of additional materials begins to add up, combined with the inconvenience of working in the cold, you may find it’s better to have someone else do it.
The recommended hole size is 16 inches in diameter and 48 inches deep. You will need eleven 80-lb bags of concrete for the installation.
IMPORTANT SAFETY PRECAUTION: Before you dig, call your local utilities to rule out the presence of buried cables including power, water, gas and phone lines. Failure to do so could result in serious or fatal injury.
For safety purposes, we recommend you have at least three capable persons to assist you.
For best results with less vibration, your Goalrilla Anchor System should be independent of your court. If pouring concrete for both at the same time, add an expansion joint in between.
The anchor system is set in concrete on Day 1 and requires at least 72 hours to cure. We recommend erecting your system on Day 5 to ensure the superior rock-solid performance for which Goalrilla is famous.
Too much overhang can reduce the amount of court space and cause excessive shaking due to the weight of the backboard being suspended too far from the main pole. Look for approximately 2 feet to 4 feet of overhang for the best balance of safety and performance. A basketball hoop with an overhang of 5 feet or more can compromise performance because the weight of the glass backboard will increase shake in the system. A basketball hoop with an overhang of 5 feet will actually encroach on the play surface by more than 7 feet once you add the 25 inches of rim that come out from the backboard surface.
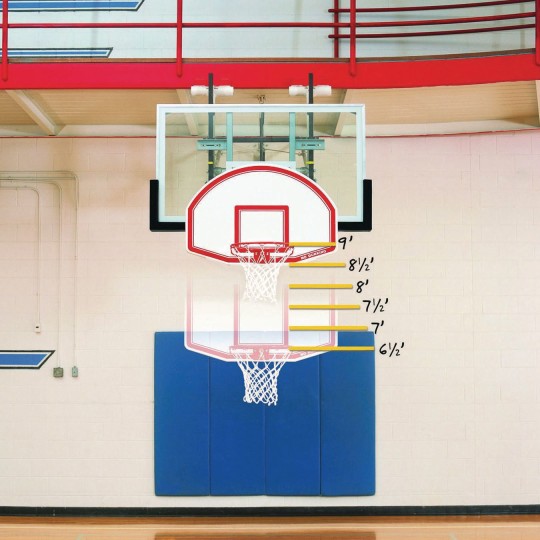
Overhang changes as the basketball goal is adjusted. Goalrilla basketball hoops are adjustable from the safety-approved height of 7.5 feet to the NBA and NCAA regulation height of 10 feet. Use the Goalrilla basketball goal overhang chart here to find your model and learn the distance in overhang at each height.
Not feeling up to the job? You can always hire a professional to install your basketball hoop for you. While you might be tempted to call a local construction company or handyman, and although some of these businesses might offer basketball goal installation, we recommend contacting a Goalrilla installation specialist. Installing a goal requires exact precision and specialized processes to ensure your goal is level and operating at peak performance. No one knows how to do this better than a Goalrilla specialist!
CHECK FOR GOALRILLA AUTHORIZED DEALERS
Step one should always be to see if there is an authorized dealer in your area, particularly a Goalrilla Platinum Dealer. Goalrillas are sold through a network of full service dealers throughout the country, and these Goalrilla specialists can not only help you find the best goal to purchase, but they can install it too. These dealers are installing hundreds of Goalrillas every year, and know our exact specifications, so you can trust that they will get it done right!
OTHER INSTALLERS TO CONSIDER
For some people living in more remote areas of the country, you may not have a Goalrilla dealer nearby. In that case, you might opt to purchase your Goalrilla online. Luckily, you can still find an installer by performing a Google search of “National installation and assembly service.” That will give you a good place to start.
If you don’t have a local Goalrilla dealer or installer in your area, then you may consider contacting a general contractor. A simple Google search for “basketball goal installers + [YOUR CITY],” should turn up some places to start. In this case, you may want to direct this service provider to our installation guide to make sure they have the correct information for a successful installation.
HOW MUCH SHOULD IT COST?
Managing the installation yourself has its own merit, but if you’re paying somebody to do it, you should expect professional quality. Professional installations should generally range anywhere from $400 to $600 from beginning to end. Especially if you are working with an installation company or local contractor, be sure to get a couple different quotes before committing to a purchase.
If you are considering a service provider that is not a Goalrilla authorized dealer for the installation of your basketball goal, you may want to consider asking the following questions…
This is by far the most important question to ask when evaluating an installer. It’s a no-brainer that if someone hasn’t done many other installations, you probably don’t want to be their first guinea pig. Most professional installers will have a gallery on their website showcasing their work. If they do not, it may be a good idea to see if they have a Facebook or other social media page where these photos are posted.
Installing a full in-ground system is a multi-step, multi-day process. The first day involves digging the hole and installing the concrete, followed by 3 days for the concrete to cure, and then final assembly of the goal. Make sure the quote you receive covers the concrete installation AND the assembly of the goal, as well as the materials to do the job.
Most installers have multiple projects running simultaneously, and this is especially true during the spring and summer months. You will likely not be the only project on the schedule.
Before committing to the installation, be sure to find out when they will start and when it will be completed. The installation for any Goalrilla will take at least 4 days, and a particularly busy installation schedule may delay your install date even further. Make sure your selected installer can get your goal installed in a timeline that works for you, so you can start playing as soon as possible!
Disregarding an installer’s other jobs, an installation may take more than 4 days depending on the weather. The concrete takes 3 days to cure in warm temperatures, so when the mercury begins to drop, the curing process can take significantly longer. Additionally, if the ground is frozen, it’ll be almost impossible to dig a hole.
More on cold-weather installations can be learned here. Be sure to discuss these conditions and other alternative options with the installer.
A botched installation can cause you and your family a lot of frustration and money. Check with the installer to see what their warranty policy is in the event of an error in installation. Be sure to make a note on the specifics of the warranty and get a copy if possible. If after the installation something seems wrong, immediately take notes and pictures to have as documentation when calling.
<>Accidents do happen and when there’s a several hundred-pound steel pole or backboard involved, the severity of some accidents can escalate quickly. If an independent contractor (aka the installer) ends up getting injured while doing an installation on your property, you could be responsible.
This is one of the major reasons hiring a professional from a reputable company is a must for this type of project. A reputable company will carry insurance for these types of accidents and injuries, so you don’t have to worry about a lawsuit. Always be sure to ask before agreeing to any installation and see the certificate of insurance for general liability.
For some people, there may be additional steps you need to take before an installer can begin work. The major task that needs to be completed is having the utility lines marked. Since there is a 4-foot deep hole that must be dug at the installation site, you and the installer need to be aware of any buried cables. Call 811 at least a few days ahead of the dig date to have the cables marked.
Additionally, most installers will need to have the area around the installation mowed, the driveway free of any cars, toys, or other debris, and the boxed goal easily accessible at the installation site (If you purchase your goal from a Goalrilla authorized dealer, they will likely deliver the goal themselves for installation).
Also, be sure to ask the installer if you need to be present for the installation. Even if you don’t have to be, being on-site during installation can help to resolve any questions that may arise.
Once the goal installed, there are a few final clean-up notes to consider. Be sure to ask how any excess dirt will be handled or disposed of. If you would like to reuse the dirt, agree upon where the excess dirt will be placed. A request to have the dirt placed on the side of the house or in a designated corner in the backyard shouldn’t be a problem.
Also, if you purchased your Goalrilla goal online, it will be delivered on a pallet via a freight shipment. Ask if your installer can take care of disposing of this pallet as well.
Find A Local Installer
Not feeling up to the job yourself? No problem. View our list below of Goalrilla basketball goal installers to get the help you need.
Store locator is loading from StoreRocket Store Locator Widget..
maintenance
In the following blog post, we will share basketball court ideas, basketball court dimensions, and basketball court size so you could start playing...
Read more
maintenance
After purchasing a Goalrilla basketball goal online from our website, here are the steps to expect.
Read more
maintenance
It’s important to know how to store your basketball goal and its accessories in the winter. Read our tips here!
Read more
Basketball hoop - how to make a stand with a backboard with your own hands
Love basketball and want to make a hoop? I wanted to make it myself, not buy it, and I ended up making it. It's pretty cheap, especially if you have some of the stuff you need to assemble.
Let's start assembling the basketball hoop with our own hands.
Step 1: Shape the Ring
The first thing you will need is a ring, I made it with 12mm rod, but it doesn't have to be that size. The standard diameter of a basketball hoop is 450 mm.
To make it flat you need something to wrap it around, this thing should be about 400mm in diameter.
I found an old car rim of the right size, you will need to clamp it to the table with a clamp using a piece of wood.
As shown in photo 2, place another clamp a little further from the first with a rod between them.
As shown in photo 3, slowly wrap the rod around the disk, once you wrap the rod and its edges overlap, cut off the straight ends.
Use a clamp to press the ends together, then weld them together.
To complete this part, place the ring on the ground and straighten out all the curves.
Step 2: Frame
Bend a piece of flat metal, mine was 4mm thick.
Weld it to a flat point in the ring.
Cut two rods 320 mm long.
Weld them as shown in the photo.
Drill four holes to match your existing bolts.
If you need a netball ring, you can simply attach it to the pole and skip the rest of the steps.
Step 3: Mesh Staples (Optional)
Show 7 More Images
Do this step if you need mesh. If you need a network, you will have to buy it. This step is not as difficult as it seems.
cut 12 pieces of wire 90 mm long (I would recommend making a few spare parts, as they are easy to ruin.)
bend them in the middle (it doesn't matter if the tips are the same length)
clamp the wire in a vise with a steel rod at one end
bend wire over rod
repeat this with all parts of
retighten the wire wrapped around the rod (see photo)
bend it
repeat with all parts
retighten the wire wrapped around the rod
bend it (at this point you can't just remove the wire from the rod - you will need to slide it to one of its edges and remove it from the edge)
repeat with all parts of
divide into 12 pieces and weld on the brackets
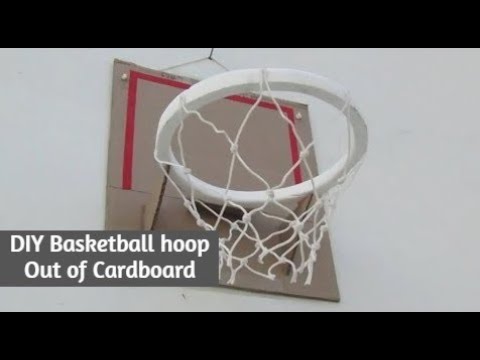
Step 4: Backboard
Cut the board to size. My board does not fit the full size of basketball boards. (the second picture shows the dimensions of a standard shield).
My measurements are 1100mm wide, 700mm high and 25mm thick. (You don't have to be that size.)
Step 5: Paint the Shield
Once you've drawn all the lines on the shield, lay masking tape over them. If you try, everything will look neat.
If you are using MDF, you will need to take care to protect the edges from moisture (as shown in photo 2).
Carefully paint over the areas around the masking tape.
Remove masking tape after enough coats of paint have been applied and the board looks complete.
Step 6: Paint the ring
First you need to sand the metal. I used a grinding disc on a grinder.
The ring must not be black or white, it must stand out from the shield. Usually the ring is painted orange or red.
The easiest way to paint inventory is from a can.
Step 7: Assemble
Put it all together. Screw the ring to the shield, hang a net on the ring.
Step 8: Installation
DIY Basketball Post is great to mount on a garage or house wall, but if you want to mount it on a pole, you can create one too.
I installed my ring in the yard using heavy duty wood screws.
A standard basketball hoop must be placed 3 meters from the ground.
I am not responsible for any damage you cause to yourself or your property - you make your own ring.
Successful throws!
How to equip a basketball court in the country or in the yard
Basketball develops the physical data of the child - coordination, endurance, educates strong-willed qualities, concentration, attentiveness and teaches non-standard thinking. Professionals recommend sending a child to the basketball section from the age of 8-9, but outside the city or in the yard, you can “chase the ball” from an early age.
I myself equipped a basketball court in my country house and now I am ready to share the secrets of its arrangement. I'll tell you what you need to do, how to choose the right equipment and how to care for it.
Prepare basketball court surface
To create a basketball court in accordance with all the rules, you need to select a flat horizontal surface for it and fill it with concrete. After that, I recommend applying a special rubber coating, like on playgrounds in the yard. There is a more expensive coating option - from rubber.
The coating will provide cushioning - the ball will bounce well.
If it is not possible to organize a special platform, you can simply place a rack or hanging basket on a dirt surface. In this case, the ball bounce will not be so strong. An important requirement for safety: the surface must be flat, without holes and bumps.
The dimensions of the site depend on the features of your yard or plot in the country. A full-fledged basketball court has dimensions of 28 × 15 meters. However, not everyone has the opportunity to build such a site in the country.
It is necessary to take into account the technical features of the game. The three-point line in basketball is 6.75 meters from the hoop. Therefore, it is necessary that the size of the site be at least 10 × 13 meters. If you are not going to train three-point shots, a 5 × 5 meter court will do.
Mark out
The second step is to mark up. It is important to use paints of contrasting colors. It is better to buy paints with a high content of rubber or polymer.
If you are equipping a basketball court for children, make the markings bright so that they cheer you up and attract attention. For the game of teenagers and adults, it is better to immediately apply technically correct markings.
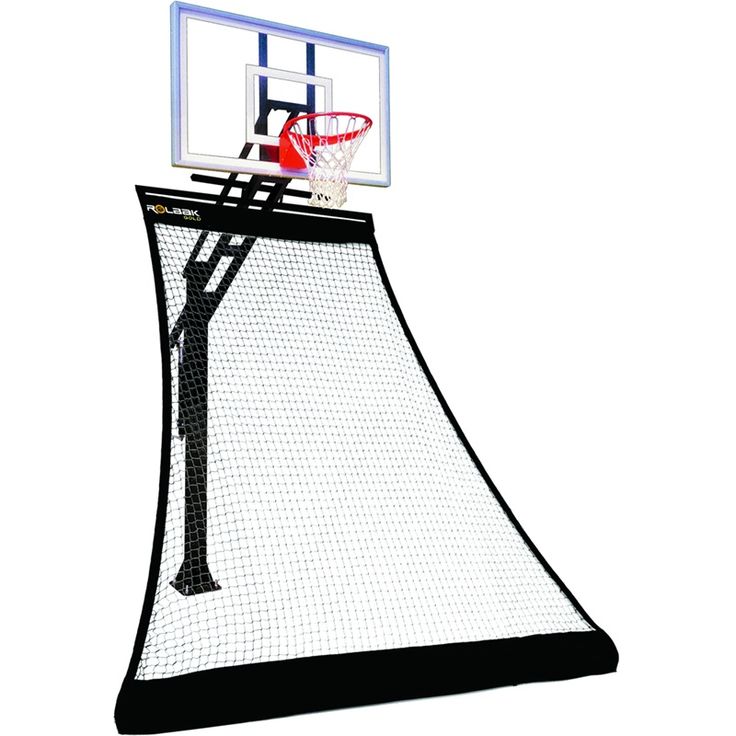
Place a small fence or protective net on the site. Thanks to them, you do not have to constantly run after the ball to the other end of the site.
Buy stand or backboard
It is difficult to answer the question of what is better - a basketball stand or a backboard. It all depends on taste, tasks and opportunities. Each of these types of equipment has its pros and cons.
There are two types of racks: mobile and static. The static one is mounted in the ground.
The base of the mobile rack is filled with sand or water - for stability. The main advantage of a mobile rack is that it can be moved from place to place. This is convenient when there is no dedicated basketball court or if you are going to play other games in this area, such as tennis or football.
The main requirement for racks is their stability. It will be much more comfortable and safer to play if you are sure that the stance will withstand a blow of any force.
Pay attention to the materials from which the racks are made. A static rack will be outdoors throughout the year, which means it must be made of reliable materials. It is better to buy racks from well-known manufacturers. So, the American companies Spalding or Royal Fitness guarantee high quality, durability and safety.
Basketball backboards can be made in the country with your own hands from a board, chipboard or plywood remnants. If this option does not suit you, you can purchase semi-professional or professional options in stores.
There are four types of materials from which the shield surface is made: composite, polycarbonate, acrylic and tempered glass. The first one is the cheapest. It is intended for entry-level players. Now manufacturers offer a large selection of colors. A carbonate backboard will provide a good bounce of the ball. An acrylic shield is bought to hold competitions or intense games.
The mobile stand can be moved, so it is suitable for a playground in the country and for those who want to play other games besides basketball
Shields and racks made of tempered glass look solid. They will be appreciated by experienced basketball players
Pay attention to rings
You can buy cheap rings, but I don't recommend doing that. In a year they will deteriorate and you will have to buy new ones. Basketball hoops from Spalding and Royal Fitness are made from quality metal that won't rust in the rain.
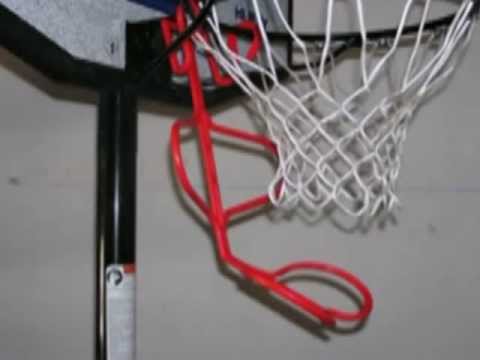
The ring must have a springy structure - no rigid attachment to the shield.
According to NBA rules, the ring must be fixed at a distance of about three meters from the ground. For a game with the participation of younger students, it can be hung lower so that it is not very easy to hit it, but at the same time it is quite possible.
Choose rings made from high quality metal to last for many years. For a game involving adults and teenagers, metal chain rings are suitable. They are distinguished by durability and strength.
Know what types of basketballs exist
Success in the game depends on the basketball.
They are divided by size. Size 7 is for men, 5 for women. Even smaller balls are bought for children. The size 6 ball is suitable for street ball or street basketball where the game is played on half the field.
You also need to take into account where you will play the ball: on the street or in the hall. The street ball has a stronger bounce, it is harder and more wear-resistant, but the indoor ball is more convenient to hold in your hands.
It is important to pay attention to the composition of the basketball. Well-known companies use complex polymer compositions for its production. The more expensive the ball, the more complex the polymer composition. The quality of the material determines how comfortable it will be for the players to hold the ball, what kind of rebound it has from the floor and from the bow of the ring.
Another important nuance: do not forget to purchase a pump with any needle.
If you want the ball to have good grip and bounce well, you need to choose polymer models from world famous manufacturers
Proper care
Professional athletes are ready to play in any weather, but amateurs are better off not following their example. If you don't properly store, use and care for your basketball arsenal, its lifespan will be shortened. Humidity will ruin the ball and all equipment, so you can’t leave them outside during rain and snow.
Balls should be stored only in a dry and ventilated room at a temperature of 10 to 20 °C.
Before winter storage, water must be poured out of the base of the mobile rack, and then removed from the street. If you don't feel like doing this every time, fill the rack with sand. Then it will not need to be constantly moved. Basketball stands from Royal Fitness can be left outside in the winter.
Points to Remember When Organizing a Basketball Court
The area needs to be determined. The classic version - 28 × 15 meters - is not suitable for everyone. For a dacha, a 5 × 5 meter area will be enough if you want to train three-point shots.
Don't forget the markup. It should be in a contrasting color. Bright colors will interest children and cheer them up.
It is necessary to install a protective net so as not to constantly run after the ball to the other end of the area.
If the shield is stable, then it is safe. A mobile stand from a well-known manufacturer will also not let you down, and it can be moved around the site.


 For a full three-point arch, you need around 40 ft of width.
 Once the bars are aligned, fill the hole with concrete and level it using a trowel tool. Make sure the surface is smooth and there are no pockets of air.
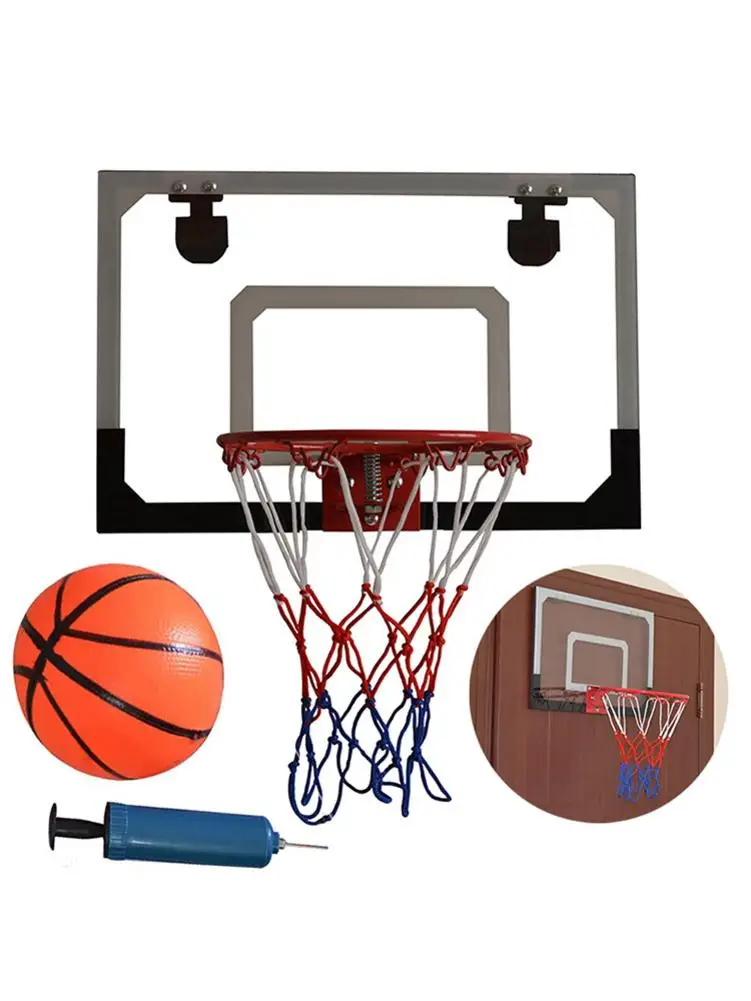 A thicker pole provides you with a better playing experience. It is stronger, causes less shake, and provides greater durability and professional experience.
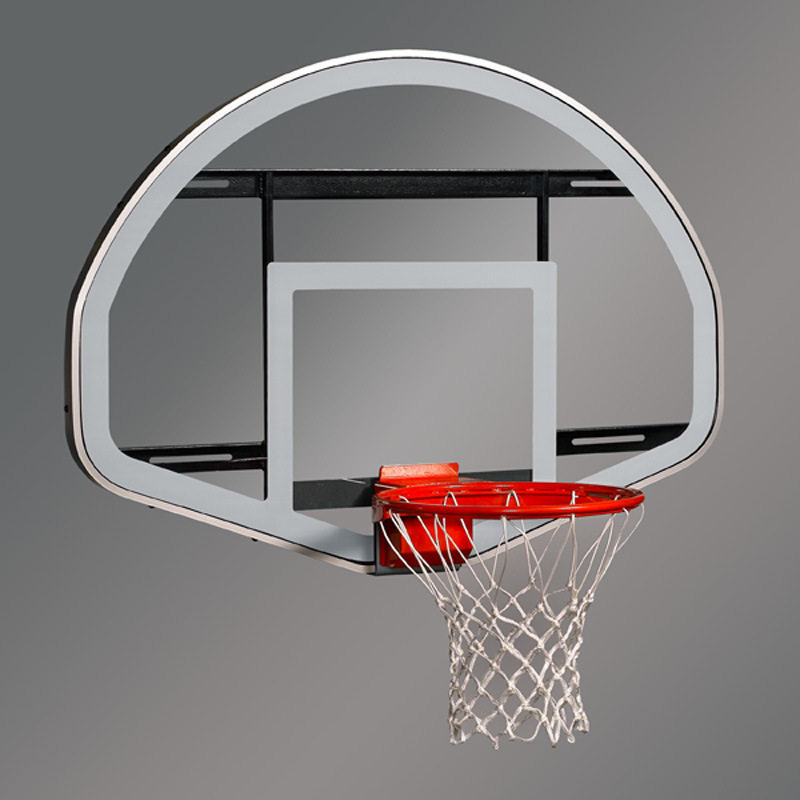
 Lift the backboard up in place to the support arms, and secure it to the top mount.
 So how do you achieve the perfect balance? Let’s find out!
 This concrete meets the ASTM C387 Standard Specifications for concrete.
 You can test its consistency by picking up a handful while wearing gloves.
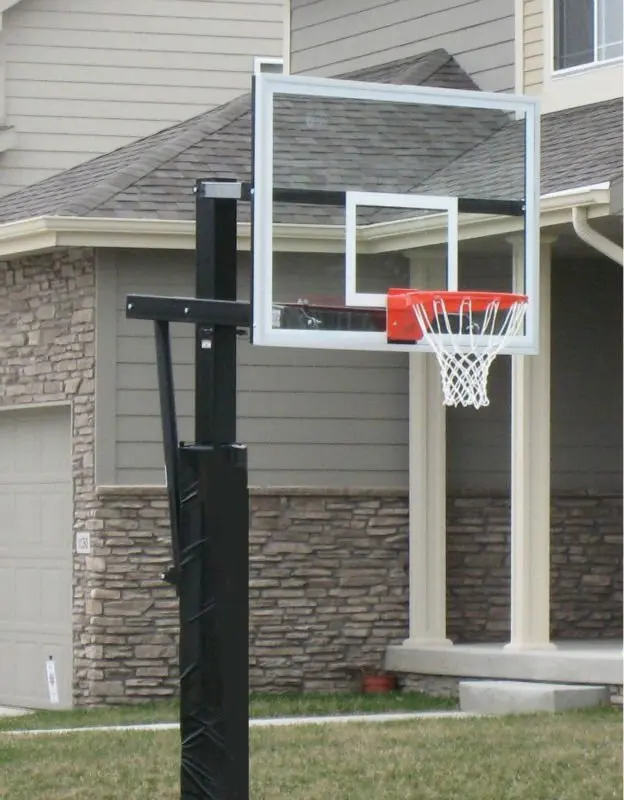
 Avoid any accelerators or additives containing calcium chloride as this will cause the rebar to rust and could potentially cause the concrete to crack. Do not mix fast-setting concrete and an accelerator.
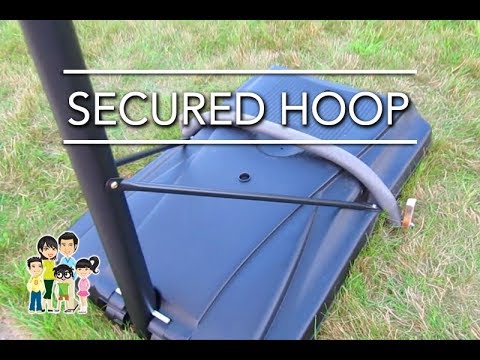
 While you might be tempted to call a local construction company or handyman, and although some of these businesses might offer basketball goal installation, we recommend contacting a Goalrilla installation specialist. Installing a goal requires exact precision and specialized processes to ensure your goal is level and operating at peak performance. No one knows how to do this better than a Goalrilla specialist!
 In that case, you might opt to purchase your Goalrilla online. Luckily, you can still find an installer by performing a Google search of “National installation and assembly service.” That will give you a good place to start.
 You will likely not be the only project on the schedule.
 Check with the installer to see what their warranty policy is in the event of an error in installation. Be sure to make a note on the specifics of the warranty and get a copy if possible. If after the installation something seems wrong, immediately take notes and pictures to have as documentation when calling.
 The major task that needs to be completed is having the utility lines marked. Since there is a 4-foot deep hole that must be dug at the installation site, you and the installer need to be aware of any buried cables. Call 811 at least a few days ahead of the dig date to have the cables marked.
 A request to have the dirt placed on the side of the house or in a designated corner in the backyard shouldn’t be a problem.
 (You don't have to be that size.)
 After that, I recommend applying a special rubber coating, like on playgrounds in the yard. There is a more expensive coating option - from rubber.
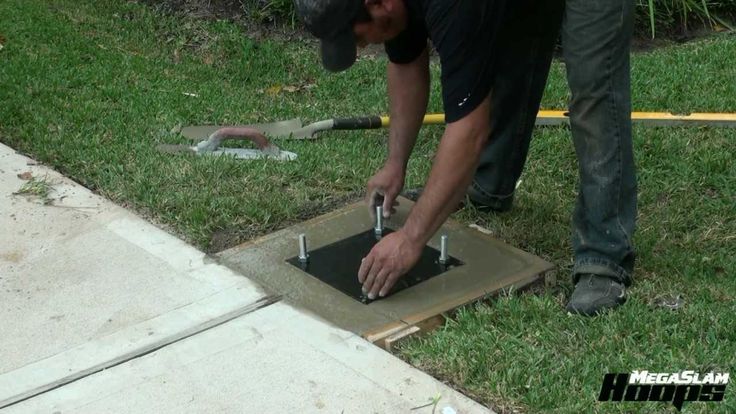
 The main advantage of a mobile rack is that it can be moved from place to place. This is convenient when there is no dedicated basketball court or if you are going to play other games in this area, such as tennis or football.
 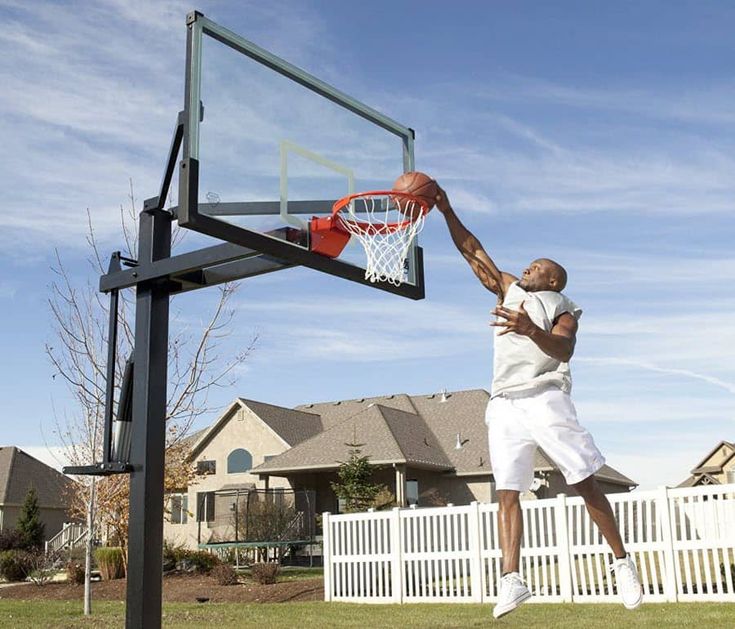 The first one is the cheapest. It is intended for entry-level players. Now manufacturers offer a large selection of colors. A carbonate backboard will provide a good bounce of the ball. An acrylic shield is bought to hold competitions or intense games.
  For a game with the participation of younger students, it can be hung lower so that it is not very easy to hit it, but at the same time it is quite possible.
 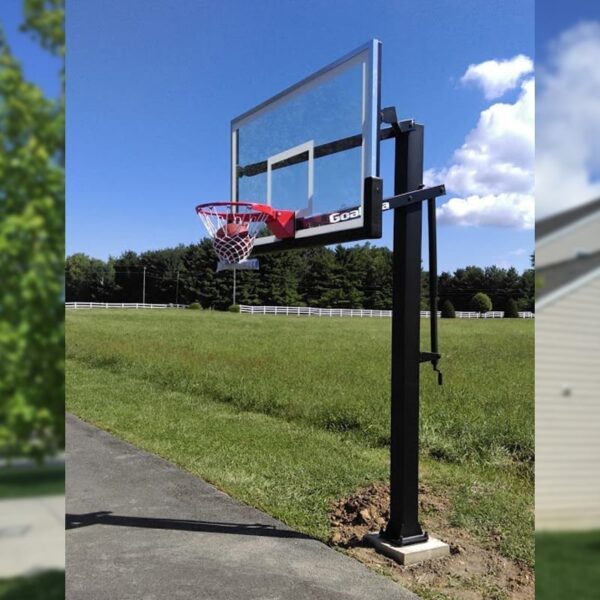 Well-known companies use complex polymer compositions for its production. The more expensive the ball, the more complex the polymer composition. The quality of the material determines how comfortable it will be for the players to hold the ball, what kind of rebound it has from the floor and from the bow of the ring.