USE CODE SBXGIFT TO GET A FREE ANNIVERSARY BALL OR BALL HOLDER WITH SILVERBACK SBX60 HOOP PURCHASE
Shop Now
Dealer Locator
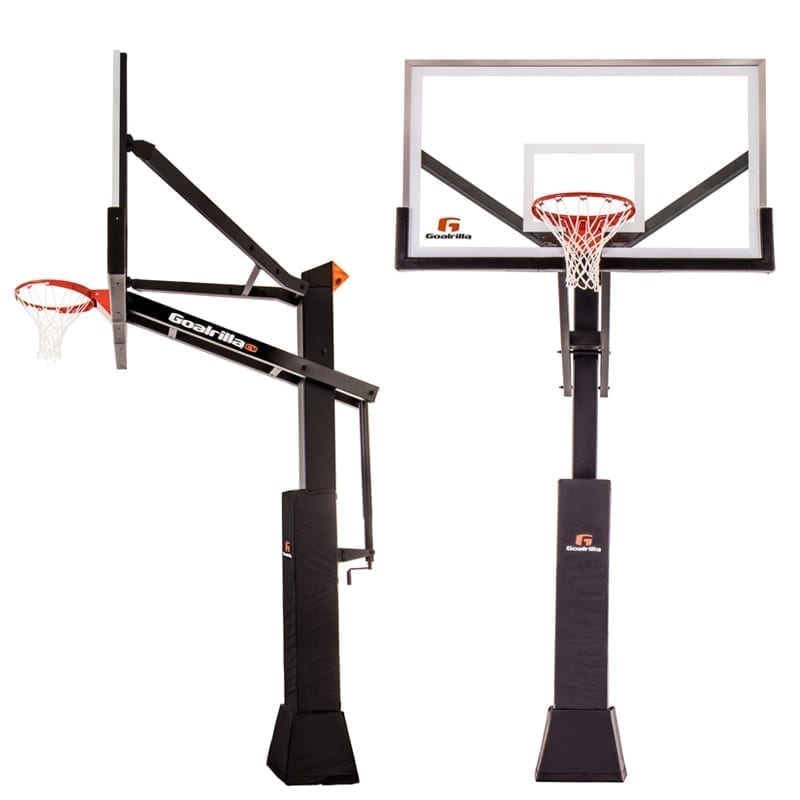
The following videos will walk you step-by-step through the process of installing an in-ground basketball goal.
Installing the anchor kit
Part 2
Goal Installation
MIXING CONCRETE FOR AN IN-GROUND INSTALLATION
The secret to a long-lasting basketball hoop is in foundation. Achieving the correct mixture of dry concrete and water can give your goal additional years of life!
A mixture that is too thin lacks the strength needed to properly hold the steel pole in place. A mixture that is too thick will leave you struggling to fill voids that can’t be seen below, again compromising strength. So how do you achieve the perfect balance? Let’s find out!
Compressive Strength
Concrete is rated by its compressive strength, which means: how much pressure per square inch can a standard cylinder of concrete withstand before breaking. These ratings are derived from standardized machines which can evenly apply pressure across the surface of a concrete cylinder.
Compressive strength is largely determined by the composition of the mix. Walk into any home improvement store and you’ll see a variety of mixes that advertise ‘fast setting,’ ‘high-strength,’ ‘crack resistant,’ etc. The main difference between each of these is some mixes may contain additional ingredients, such as fiberglass, to provide even greater bond strength.
If you have a specific mix you’re looking for, then great, you already know what to get. However, if you’re simply trying to follow the instructions for your hoop, your standard ‘High-Strength’ mix will do just fine.
What Does Goalrilla Recommend?
Goalrilla recommends purchasing 12-13 bags of Quikrete concrete mix. This concrete meets the ASTM C387 Standard Specifications for concrete.
While directions state you only need 11 bags, it’s not a bad idea to have an extra bag or two on hand in the event the installation gets a little messy. As you’ll find out, concrete mix can be difficult to move and it’s very easy to accidentally tear a bag open.
Mixing the Concrete
Once you have all the appropriate materials, start by opening 1-2 bags and pouring them into a large container. Add water according to what the instructions dictate.
For an 80 lb. bag, you’ll want to use 6 pints or 2.8 L of water, or for a 60 lb. bag, you’ll want to use 4 pints or 1.9 L per bag of concrete. If you don’t have measuring bucket around, a 2 L soda pop bottle will work to get a close enough estimation.
Create a depression in the center of the dry mix and add your water here. Work the mix with a hoe or other tool and ensure consistency across the batch. Properly mixed concrete should be wet, but firm enough to hold its shape and in an oatmeal-like consistency. You can test its consistency by picking up a handful while wearing gloves.
Do not let the mix sit for extended periods of time or you run the risk of letting it dry out. Move the mix to the freshly dug hole as soon as possible and agitate as you pour to help alleviate any voids. A trench shovel and extra set of hands will be helpful here.
On especially hot days you may need to add more water to the mix as water will evaporate. Always keep the mix moving and ensure the mix maintains its consistency.
Repeat these steps as necessary until you have the appropriate amount of concrete.
Pouring Concrete in Cold Weather
Installing your basketball hoop in winter is possible but has a few caveats. If the outside temperature is below 40° F (4.44° C) for an extended period of time, you will want to reconsider your install date. Temperatures below this threshold can cause all sorts of problems your average DIY installer is most likely not equipped to handle, nor would want to.
If you choose to pour concrete during the winter months, there are few things you or your installer will want to remember.
If the ground is frozen, you will need to wait until it thaws before you can even consider starting. You should NEVER place concrete in frozen ground, since it poses a number of problems from cracking, crusting, and settling unevenly.
Use a fast-setting mix with hot water. As the name implies, a fast-setting mix will usually set in under an hour. While it may set in under an hour, it will still take several days to cure. When mixing concrete in these temperatures, regardless of type, use hot water.
Use an accelerator. If you don’t have access to fast-setting concrete or have already purchased regular concrete, you can purchase an accelerator that helps increase the concrete hydration rate. This helps to shorten the setting time and gets the concrete to a higher strength earlier. Avoid any accelerators or additives containing calcium chloride as this will cause the rebar to rust and could potentially cause the concrete to crack. Do not mix fast-setting concrete and an accelerator.
Use curing blankets. Specifically, for cold-weather applications, concrete curing blankets help to trap in the heat and moisture, so the concrete can reach its proper strength. Additionally, these “blankets” protect the concrete from freezing. Blankets can be purchased from your local home improvement store for around $50-$60 depending on your area. Keep in mind they do not look like the blankets you would use in your home. These blankets look more tarp-like and usually come in rolls.
In addition to these tips, some professional installers may have other methods or tricks they use to set concrete in colder weather. In this case, it may be better to hire a professional to do the job as they will often have the necessary supplies, like curing blankets, already on hand.
As the cost of additional materials begins to add up, combined with the inconvenience of working in the cold, you may find it’s better to have someone else do it.
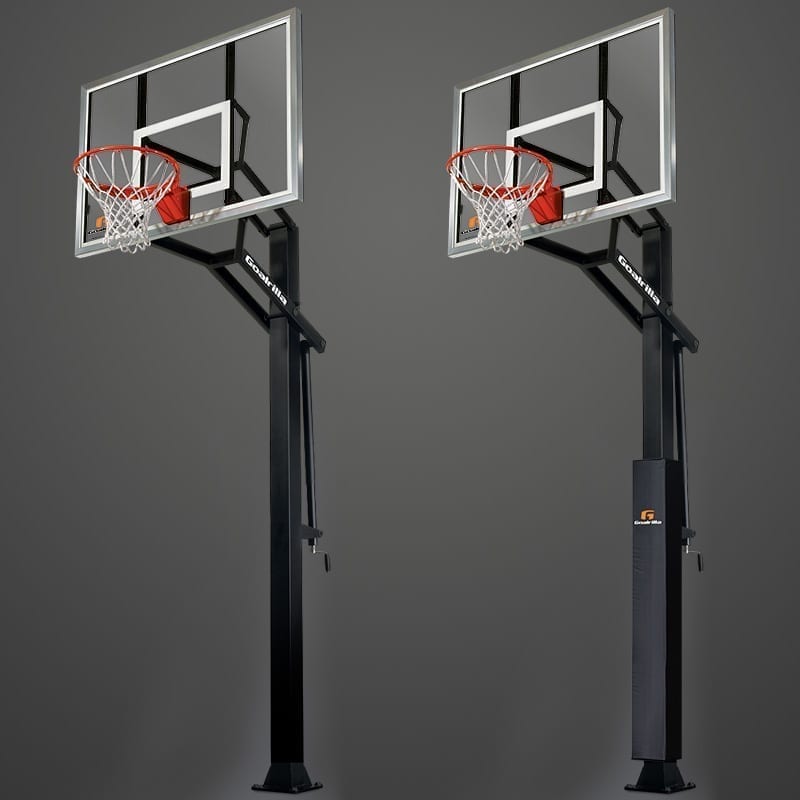
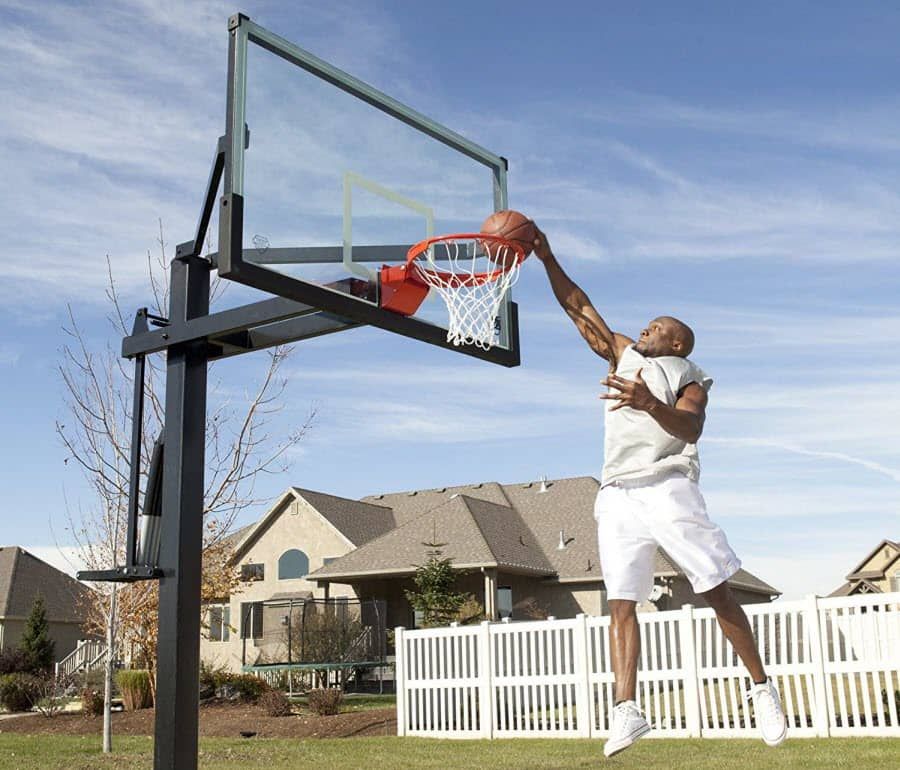
Basketball Hoop Installation – Goalrilla
INSTALLING YOUR GOAL
Never installed a basketball goal before and not sure where to start? Not a problem. Regardless of where you purchased your hoop, you’ll have the option of installing it yourself or paying a professional to do it for you. The following article will walk you through the steps.
The following videos will walk you step-by-step through the process of installing an in-ground basketball goal.
Installing the anchor kit
Part 2
Goal Installation
MIXING CONCRETE FOR AN IN-GROUND INSTALLATION
The secret to a long-lasting basketball hoop is in foundation. Achieving the correct mixture of dry concrete and water can give your goal additional years of life!
A mixture that is too thin lacks the strength needed to properly hold the steel pole in place. A mixture that is too thick will leave you struggling to fill voids that can’t be seen below, again compromising strength. So how do you achieve the perfect balance? Let’s find out!
Compressive Strength
Concrete is rated by its compressive strength, which means: how much pressure per square inch can a standard cylinder of concrete withstand before breaking. These ratings are derived from standardized machines which can evenly apply pressure across the surface of a concrete cylinder.
Compressive strength is largely determined by the composition of the mix. Walk into any home improvement store and you’ll see a variety of mixes that advertise ‘fast setting,’ ‘high-strength,’ ‘crack resistant,’ etc. The main difference between each of these is some mixes may contain additional ingredients, such as fiberglass, to provide even greater bond strength.
If you have a specific mix you’re looking for, then great, you already know what to get. However, if you’re simply trying to follow the instructions for your hoop, your standard ‘High-Strength’ mix will do just fine.
What Does Goalrilla Recommend?
Goalrilla recommends purchasing 12-13 bags of Quikrete concrete mix. This concrete meets the ASTM C387 Standard Specifications for concrete.
While directions state you only need 11 bags, it’s not a bad idea to have an extra bag or two on hand in the event the installation gets a little messy. As you’ll find out, concrete mix can be difficult to move and it’s very easy to accidentally tear a bag open.
Mixing the Concrete
Once you have all the appropriate materials, start by opening 1-2 bags and pouring them into a large container. Add water according to what the instructions dictate.
For an 80 lb. bag, you’ll want to use 6 pints or 2.8 L of water, or for a 60 lb. bag, you’ll want to use 4 pints or 1. 9 L per bag of concrete. If you don’t have measuring bucket around, a 2 L soda pop bottle will work to get a close enough estimation.
Create a depression in the center of the dry mix and add your water here. Work the mix with a hoe or other tool and ensure consistency across the batch. Properly mixed concrete should be wet, but firm enough to hold its shape and in an oatmeal-like consistency. You can test its consistency by picking up a handful while wearing gloves.
Do not let the mix sit for extended periods of time or you run the risk of letting it dry out. Move the mix to the freshly dug hole as soon as possible and agitate as you pour to help alleviate any voids. A trench shovel and extra set of hands will be helpful here.
On especially hot days you may need to add more water to the mix as water will evaporate. Always keep the mix moving and ensure the mix maintains its consistency.
Repeat these steps as necessary until you have the appropriate amount of concrete.
Pouring Concrete in Cold Weather
Installing your basketball hoop in winter is possible but has a few caveats. If the outside temperature is below 40° F (4.44° C) for an extended period of time, you will want to reconsider your install date. Temperatures below this threshold can cause all sorts of problems your average DIY installer is most likely not equipped to handle, nor would want to.
If you choose to pour concrete during the winter months, there are few things you or your installer will want to remember.
If the ground is frozen, you will need to wait until it thaws before you can even consider starting. You should NEVER place concrete in frozen ground, since it poses a number of problems from cracking, crusting, and settling unevenly.
Use a fast-setting mix with hot water. As the name implies, a fast-setting mix will usually set in under an hour. While it may set in under an hour, it will still take several days to cure. When mixing concrete in these temperatures, regardless of type, use hot water.
Use an accelerator. If you don’t have access to fast-setting concrete or have already purchased regular concrete, you can purchase an accelerator that helps increase the concrete hydration rate. This helps to shorten the setting time and gets the concrete to a higher strength earlier. Avoid any accelerators or additives containing calcium chloride as this will cause the rebar to rust and could potentially cause the concrete to crack. Do not mix fast-setting concrete and an accelerator.
Use curing blankets. Specifically, for cold-weather applications, concrete curing blankets help to trap in the heat and moisture, so the concrete can reach its proper strength. Additionally, these “blankets” protect the concrete from freezing. Blankets can be purchased from your local home improvement store for around $50-$60 depending on your area. Keep in mind they do not look like the blankets you would use in your home. These blankets look more tarp-like and usually come in rolls.
In addition to these tips, some professional installers may have other methods or tricks they use to set concrete in colder weather. In this case, it may be better to hire a professional to do the job as they will often have the necessary supplies, like curing blankets, already on hand.
As the cost of additional materials begins to add up, combined with the inconvenience of working in the cold, you may find it’s better to have someone else do it.
The recommended hole size is 16 inches in diameter and 48 inches deep. You will need eleven 80-lb bags of concrete for the installation.
IMPORTANT SAFETY PRECAUTION: Before you dig, call your local utilities to rule out the presence of buried cables including power, water, gas and phone lines. Failure to do so could result in serious or fatal injury.
For safety purposes, we recommend you have at least three capable persons to assist you.
For best results with less vibration, your Goalrilla Anchor System should be independent of your court. If pouring concrete for both at the same time, add an expansion joint in between.
The anchor system is set in concrete on Day 1 and requires at least 72 hours to cure. We recommend erecting your system on Day 5 to ensure the superior rock-solid performance for which Goalrilla is famous.
Too much overhang can reduce the amount of court space and cause excessive shaking due to the weight of the backboard being suspended too far from the main pole. Look for approximately 2 feet to 4 feet of overhang for the best balance of safety and performance. A basketball hoop with an overhang of 5 feet or more can compromise performance because the weight of the glass backboard will increase shake in the system. A basketball hoop with an overhang of 5 feet will actually encroach on the play surface by more than 7 feet once you add the 25 inches of rim that come out from the backboard surface.
Overhang changes as the basketball goal is adjusted. Goalrilla basketball hoops are adjustable from the safety-approved height of 7. 5 feet to the NBA and NCAA regulation height of 10 feet. Use the Goalrilla basketball goal overhang chart here to find your model and learn the distance in overhang at each height.
Not feeling up to the job? You can always hire a professional to install your basketball hoop for you. While you might be tempted to call a local construction company or handyman, and although some of these businesses might offer basketball goal installation, we recommend contacting a Goalrilla installation specialist. Installing a goal requires exact precision and specialized processes to ensure your goal is level and operating at peak performance. No one knows how to do this better than a Goalrilla specialist!
CHECK FOR GOALRILLA AUTHORIZED DEALERS
Step one should always be to see if there is an authorized dealer in your area, particularly a Goalrilla Platinum Dealer. Goalrillas are sold through a network of full service dealers throughout the country, and these Goalrilla specialists can not only help you find the best goal to purchase, but they can install it too. These dealers are installing hundreds of Goalrillas every year, and know our exact specifications, so you can trust that they will get it done right!
OTHER INSTALLERS TO CONSIDER
For some people living in more remote areas of the country, you may not have a Goalrilla dealer nearby. In that case, you might opt to purchase your Goalrilla online. Luckily, you can still find an installer by performing a Google search of “National installation and assembly service.” That will give you a good place to start.
If you don’t have a local Goalrilla dealer or installer in your area, then you may consider contacting a general contractor. A simple Google search for “basketball goal installers + [YOUR CITY],” should turn up some places to start. In this case, you may want to direct this service provider to our installation guide to make sure they have the correct information for a successful installation.
HOW MUCH SHOULD IT COST?
Managing the installation yourself has its own merit, but if you’re paying somebody to do it, you should expect professional quality. Professional installations should generally range anywhere from $400 to $600 from beginning to end. Especially if you are working with an installation company or local contractor, be sure to get a couple different quotes before committing to a purchase.
If you are considering a service provider that is not a Goalrilla authorized dealer for the installation of your basketball goal, you may want to consider asking the following questions…
This is by far the most important question to ask when evaluating an installer. It’s a no-brainer that if someone hasn’t done many other installations, you probably don’t want to be their first guinea pig. Most professional installers will have a gallery on their website showcasing their work. If they do not, it may be a good idea to see if they have a Facebook or other social media page where these photos are posted.
Installing a full in-ground system is a multi-step, multi-day process. The first day involves digging the hole and installing the concrete, followed by 3 days for the concrete to cure, and then final assembly of the goal. Make sure the quote you receive covers the concrete installation AND the assembly of the goal, as well as the materials to do the job.
Most installers have multiple projects running simultaneously, and this is especially true during the spring and summer months. You will likely not be the only project on the schedule.
Before committing to the installation, be sure to find out when they will start and when it will be completed. The installation for any Goalrilla will take at least 4 days, and a particularly busy installation schedule may delay your install date even further. Make sure your selected installer can get your goal installed in a timeline that works for you, so you can start playing as soon as possible!
Disregarding an installer’s other jobs, an installation may take more than 4 days depending on the weather. The concrete takes 3 days to cure in warm temperatures, so when the mercury begins to drop, the curing process can take significantly longer. Additionally, if the ground is frozen, it’ll be almost impossible to dig a hole.
More on cold-weather installations can be learned here. Be sure to discuss these conditions and other alternative options with the installer.
A botched installation can cause you and your family a lot of frustration and money. Check with the installer to see what their warranty policy is in the event of an error in installation. Be sure to make a note on the specifics of the warranty and get a copy if possible. If after the installation something seems wrong, immediately take notes and pictures to have as documentation when calling.
<>Accidents do happen and when there’s a several hundred-pound steel pole or backboard involved, the severity of some accidents can escalate quickly. If an independent contractor (aka the installer) ends up getting injured while doing an installation on your property, you could be responsible.
This is one of the major reasons hiring a professional from a reputable company is a must for this type of project. A reputable company will carry insurance for these types of accidents and injuries, so you don’t have to worry about a lawsuit. Always be sure to ask before agreeing to any installation and see the certificate of insurance for general liability.
For some people, there may be additional steps you need to take before an installer can begin work. The major task that needs to be completed is having the utility lines marked. Since there is a 4-foot deep hole that must be dug at the installation site, you and the installer need to be aware of any buried cables. Call 811 at least a few days ahead of the dig date to have the cables marked.
Additionally, most installers will need to have the area around the installation mowed, the driveway free of any cars, toys, or other debris, and the boxed goal easily accessible at the installation site (If you purchase your goal from a Goalrilla authorized dealer, they will likely deliver the goal themselves for installation).
Also, be sure to ask the installer if you need to be present for the installation. Even if you don’t have to be, being on-site during installation can help to resolve any questions that may arise.
Once the goal installed, there are a few final clean-up notes to consider. Be sure to ask how any excess dirt will be handled or disposed of. If you would like to reuse the dirt, agree upon where the excess dirt will be placed. A request to have the dirt placed on the side of the house or in a designated corner in the backyard shouldn’t be a problem.
Also, if you purchased your Goalrilla goal online, it will be delivered on a pallet via a freight shipment. Ask if your installer can take care of disposing of this pallet as well.
Find A Local Installer
Not feeling up to the job yourself? No problem. View our list below of Goalrilla basketball goal installers to get the help you need.
Store locator is loading from StoreRocket Store Locator Widget..
maintenance
In the following blog post, we will share basketball court ideas, basketball court dimensions, and basketball court size so you could start playing. ..
Read more
maintenance
After purchasing a Goalrilla basketball goal online from our website, here are the steps to expect.
Read more
maintenance
It’s important to know how to store your basketball goal and its accessories in the winter. Read our tips here!
Read more
The history of the goalie mask - About hockey
Masks have become an integral part of the goalkeeper's ammunition relatively recently - only in the second half of the last century. And not all goalkeepers happily accepted this invention, despite the fact that they constantly got the puck in the face.
The first to put on a mask (or rather, a semblance of a mask) was Montreal Maroons goalie Clint Benedict, who played in the 30s of the XX century. He, like all his colleagues, was constantly injured and eventually his patience ran out. In the Montreal Derby on January 7, 1930 years old in a match between the Canadiens and the Maroons, Clint Benedict suffered a broken nose and cheekbone. A month later, Benedict went on the ice wearing a frightening shell of leather and wire on his face, covering his nose, mouth and forehead, but not his eyes and ears.
Clint Benedict in his mask
Benedict could not play for a long time in this muzzle - a huge leather "nose" prevented him from seeing. Toward the end of the same season, the puck hit Benedict in the throat, and the goalkeeper-inventor was forced to retire. Oddly enough, his courageous and tragic example did not serve as an immediate stimulus for the improvement of goalkeeper ammunition.
The next person to appear on the ice wearing a hockey mask was Japanese goalie Teiji Honma.
Teiji Honma
He wore glasses, and the owl shape of that Catcher mask suited him perfectly.
The goaltending revolution didn't take place until 1959, led by one of the greatest goalies of all time, the legendary Jacques Plante of the Montreal Canadiens. As in the case of Benedict, Plant put on a mask not from a good life: one day, Jacques was once again hit in the face with a puck during training, crushing his cheekbone. Then he gave an interview to a Montreal radio station, in which he turned to the fans with a request to help him find a suitable mask. One listener volunteered to make a fiberglass cast of Jacques to fit the outline of his face. Plant tried out the mask at pre-season training camp, which his coach, Thaw Blake, didn't like. He believed that the mask would limit the visibility of the goalkeeper and, by creating a sense of security in him, would not allow him to properly focus on the game.
However, on January 1, 1959, a powerful flick by Rangers player Andy Busgate ended with a split cheek for Plant.
Jacques Plante
Plant retired to the locker room for stitches (the game had to be stopped for 45 minutes) and refused to return until he was allowed to wear a mask. Blake tore and metal, but Plant was adamant. He knew that a player of his caliber could dictate his terms even to a dictator like Blake. Moreover, the Canadiens did not have a backup goaltender.
Reproaches immediately fell on Plant from all sides: the fans mocked him, the press stigmatized him as a coward, Tou Blake did not stop trying to force him to take off his mask, but Jacques Plant did not pay any attention to it.
In the USSR, the mask appeared in 1962 on the long-suffering face of Anatoly Ragulin, the goalkeeper of the Resurrection Khimik, brother of the famous defender of CSKA and the USSR national team Alexander Ragulin. Once in training, the puck hit him in the eyebrow. The doctors pronounced a verdict: the eye muscle was damaged, and normal vision could not be restored. Hockey will have to end. But Khimik coach Nikolay Epshtein persuaded Ragulin to stand in the goal. Anatoly understood that his face must be protected, because even the slightest injury could lead to dire consequences. In a word, you need a mask. But how to do it? Ragulin was rescued by a familiar specialist in rocket engines. From a life-size metal bust of Zhdanov, an engine specialist sawed off the head with a hacksaw, sawed it lengthwise, discarded the occipital part, and drilled holes on the front in place of the eyes, nostrils and mouth. The mask is ready! Ragulin did not remember the name of the craftsman, so the first mask in the history of Soviet hockey remained nameless. The public, just like Plantu, stuck the label "coward" on Ragulin.
The fiberglass mask that Jacques Plante painstakingly introduced into the NHL had many drawbacks. It fit snugly to the face and only slightly damped the impact of the puck, protecting the goalkeeper from cuts, but not from shell shock. It broke, now and then slid up and down, her face sweated terribly, and besides, she really, as critics of the time claimed, limited peripheral vision. And those who tried to level this shortcoming by expanding the holes risked being left without an eye.
Subsequently, Plant made a new mask, in the style of "pretzel" (its weaves resembled pretzels).
Ken Dryden and Dank Wilson played in a similar mask.
Initially, the masks were made of fiberglass and were either brownish, unpainted, or pure white. But the simple white color seemed primitive to many. The first goalkeeper to decorate his mask was Jerry Chivers. During the 1968/69 season, Chivers began to paint on his mask the scars he would have received had his face not been protected by the mask.
Jerry Chivers
The first goaltender to wear a colored mask was Doug Favel of the Philadelphia Flyers. On Halloween night, his teammates painted his mask bright red as a joke. This color was reminiscent of the famous holiday pumpkin.
Doug Favel
But in the mask painted in the colors of the club, the goaltender of the New York Islanders, Glen Rash, appeared for the first time. The same mask can be considered the first artistically painted. And Linda Spinella, a student at an art college, worked on it. On a white mask, she depicted Long Island and the letters NY.
Glen Rash
Goalkeepers of other teams immediately picked up this idea.
Los Angeles Kings goaltender Roger Vachon first experimented with the mouth opening, turning the mask into a grinning face. And then he painted it in the colors of the club, adding two whole royal crowns to his forehead.
Gilles Meloche of the late Cleveland Barons
Naturally, the new fashion trend made many think about whether it is possible to earn extra money in this business. And many goalkeepers too. The first was veteran Ed Giacomin, then playing for the Detroit Red Wings. Arriving in the City of Motors, Giacomin signed a contract with a company that produced automobile candles and began to advertise their products. At some point, Ed decided that he could get more money from his sponsors if he started advertising directly on the game form. That is, on a mask - the only object of form open to free expression. Giacomin painted lightning bolts over the eyes to symbolize car ignition, and planned to add a promotional slogan. But the league banned advertising on masks. The ban on advertising, by the way, remains in force to this day. The zippers, however, remained because they resembled the Detroit badge.
One of the first goaltenders whose mask was supposed to terrify rivals was Gary Simons of the California Golden Seals that had sunk into oblivion. On his mask was a snake. She appeared on Simmons' mask for a reason - he was called "Cobra" since the days of the games for the farm clubs. Unfortunately, the artist commissioned by Gary for this revolutionary design has probably never seen a cobra in real life, and he provided this reptile with a rattlesnake tail.
Gary Bromley, who played for Vancouver, had an even more infernal mask. Bromley got the nickname "Bones" for his thinness, and what else could he crown his head with if not a realistic skull?
These masks protected the face but did not protect the throat. A solution was found: to lengthen the chin of the mask.
While goalkeepers in Canada and the US were enthusiastically painting their fiberglass masks, Europe went its own way. Most Europeans have already performed in helmets, and helmets have become an integral part of the new mask. No tricks were required to make this mask - the goalkeepers screwed the net to the helmet. Excellent visibility + excellent face protection. One of the first who played in such a helmet with a mesh was the legendary Vladislav Tretyak.
The real "cage" came into its own in the late 1970s, when the main flaws of fiberglass led to dire consequences: goaltenders Jerry Desjardins and Bernie Parent were seriously injured from hitting the puck in the eye hole of the mask.
This type of mask lasted until the late 2000s. Chris Osgood and Dominik Hasek were the last to wear this helmet.
Dominik Hasek
Chris Osgood
The first "hybrid" mask in the NHL was put on by Philadelphia Flyers goaltender Phil Mayr - without much artifice.
Over time, this type of mask became predominant.
And now a small selection of 5 modern masks:
Martin Brodo
Jonathan Kuik
Brian Hayword
Mike Richter
Basketball form to order in Moscow with a lot of logoty , numbers and names per team
Login
Registration
+7 495 797-35-69 [email protected]
minutes
seconds
Design development free of charge
Send all your wishes and the designer will prepare a creative layout
order
home
Sewing
Basketball
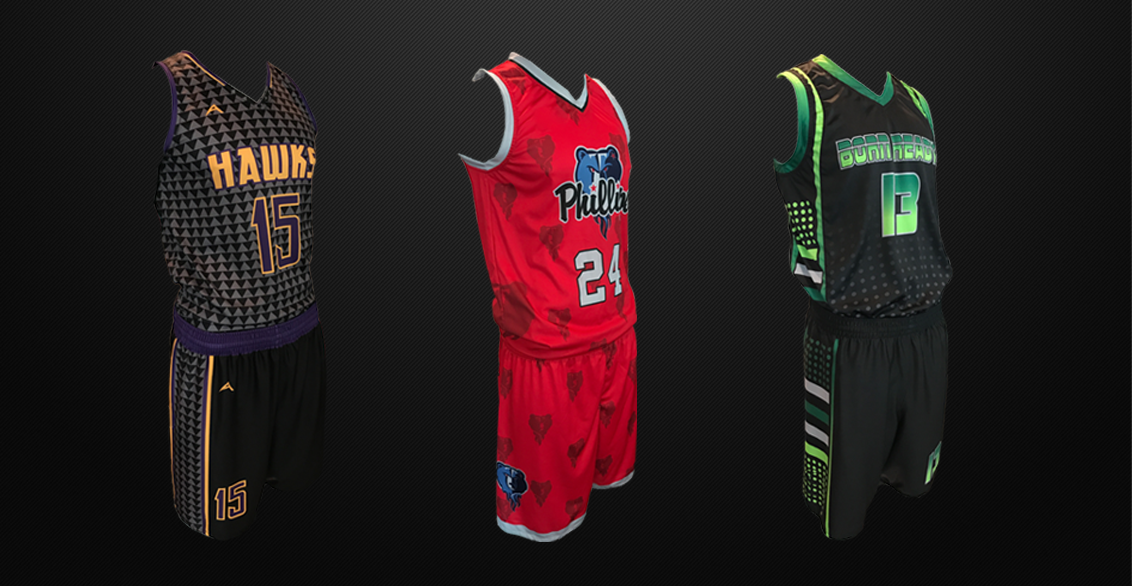
Custom made basketball uniforms for small and big teams!
The basketball uniform has its own specific cut: it consists of a loose sleeveless T-shirt and wide shorts (we can sew a double-sided basketball uniform). This is necessary so that the form is sufficiently ventilated and does not restrict movement. The Sport-Print company has been producing basketball uniforms since 1991 and we know all the nuances of the correct cut and tailoring. Our technologists choose the best fabric that improves thermoregulation and ventilation of the form.
Custom basketball kit with logo, number and name
We know how energizing a personalized uniform is. How the game improves in a stylish new form. We have heard this from many clients over and over again. That's why our designers develop a unique basketball uniform design for all teams that order it from us. We use sublimation printing as a method of applying an image to the fabric, as we consider this method to be the best, but we work with any other (embroidery, silkscreen printing) if our clients so desire.
Team basketball kit
For teams we offer the best prices on the market, the best conditions and the best uniforms. We have our own full production cycle, so we can guarantee quality at every stage. If you want to learn more about tailoring a basketball uniform, write or call us, we will be happy to answer your questions, invite you to visit, show production and start cooperation!
who are we?
Short terms production
OFFICE AND PRODUCTION IN MOSCOW
WE WORK WITHOUT STOPS
+200,000 SATISFIED CUSTOMERS
SHIPPING WORLDWIDE
LAYOUT FREE When ordering for a team, we give the development of an individual layout, focusing on all the wishes of the customer.
Prototype according to the picture
Logo design
Color matching
ALL SIZES AND COLORS Thanks to our own production, we can provide tailoring of any size, as well as the introduction of individual wishes of the client.
Sizes 26 to 64
Variety of colors
SEWING FROM 24 HOURS We know what "need for yesterday", "we urgently", "tomorrow game" means. We offer urgent tailoring within 24 hours.
Shortest terms
Urgent sewing
DELIVERY IN RUSSIA We ship throughout Russia, as well as abroad: by courier and mail. For residents of Moscow there is self-delivery.


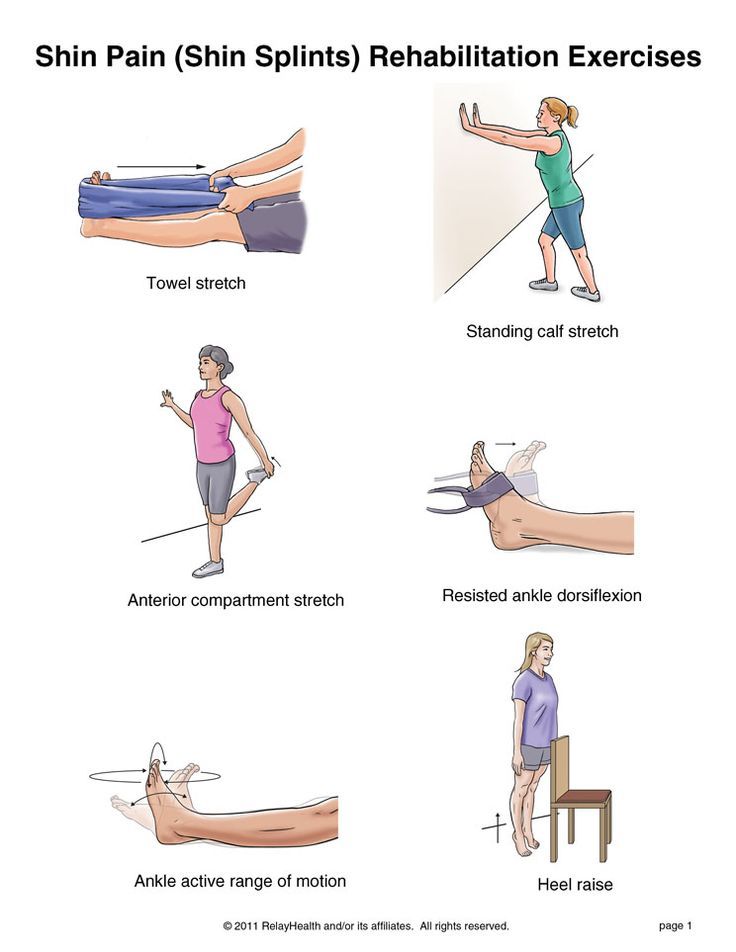
 Properly mixed concrete should be wet, but firm enough to hold its shape and in an oatmeal-like consistency. You can test its consistency by picking up a handful while wearing gloves.
 Avoid any accelerators or additives containing calcium chloride as this will cause the rebar to rust and could potentially cause the concrete to crack. Do not mix fast-setting concrete and an accelerator.
 Achieving the correct mixture of dry concrete and water can give your goal additional years of life!
 9 L per bag of concrete. If you don’t have measuring bucket around, a 2 L soda pop bottle will work to get a close enough estimation.
 When mixing concrete in these temperatures, regardless of type, use hot water.
 These blankets look more tarp-like and usually come in rolls.
 5 feet to the NBA and NCAA regulation height of 10 feet. Use the Goalrilla basketball goal overhang chart here to find your model and learn the distance in overhang at each height.
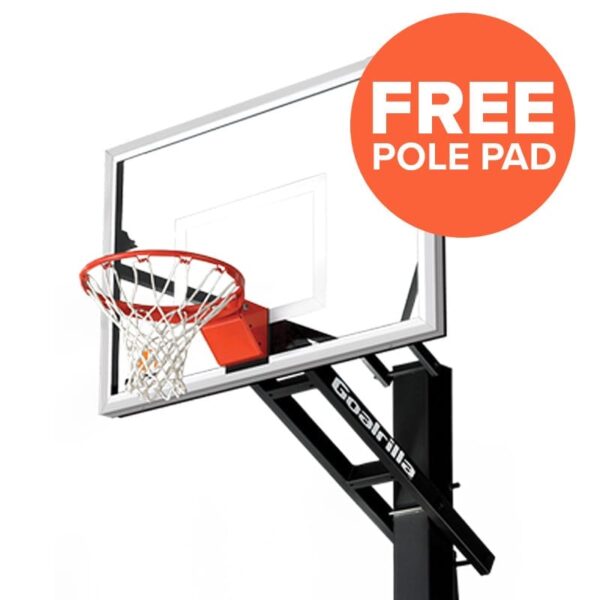 These dealers are installing hundreds of Goalrillas every year, and know our exact specifications, so you can trust that they will get it done right!
 Professional installations should generally range anywhere from $400 to $600 from beginning to end. Especially if you are working with an installation company or local contractor, be sure to get a couple different quotes before committing to a purchase.
 Always be sure to ask before agreeing to any installation and see the certificate of insurance for general liability.
-Step-5.jpg/aid43486-v4-728px-Play-21-(Basketball)-Step-5.jpg)
 ..
.. He, like all his colleagues, was constantly injured and eventually his patience ran out. In the Montreal Derby on January 7, 1930 years old in a match between the Canadiens and the Maroons, Clint Benedict suffered a broken nose and cheekbone. A month later, Benedict went on the ice wearing a frightening shell of leather and wire on his face, covering his nose, mouth and forehead, but not his eyes and ears.
 In a word, you need a mask. But how to do it? Ragulin was rescued by a familiar specialist in rocket engines. From a life-size metal bust of Zhdanov, an engine specialist sawed off the head with a hacksaw, sawed it lengthwise, discarded the occipital part, and drilled holes on the front in place of the eyes, nostrils and mouth. The mask is ready! Ragulin did not remember the name of the craftsman, so the first mask in the history of Soviet hockey remained nameless. The public, just like Plantu, stuck the label "coward" on Ragulin.
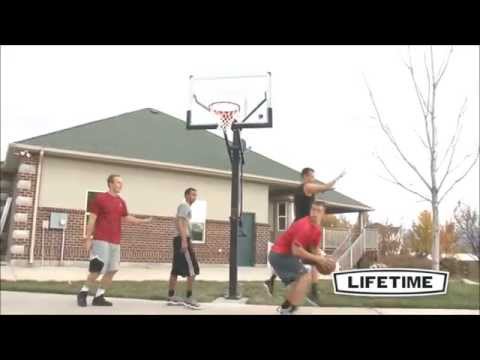
 And Linda Spinella, a student at an art college, worked on it. On a white mask, she depicted Long Island and the letters NY.
 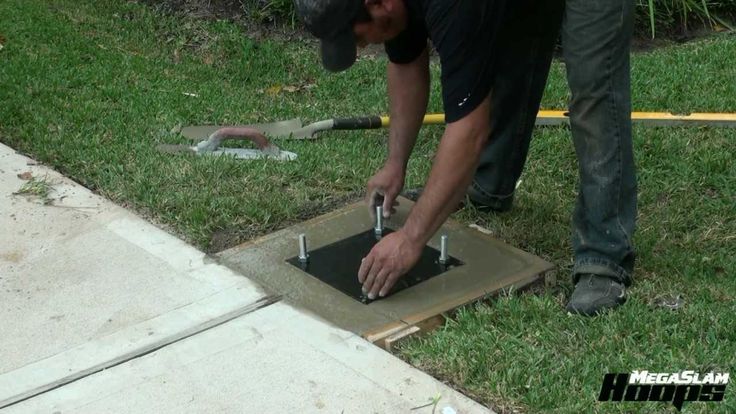 That is, on a mask - the only object of form open to free expression. Giacomin painted lightning bolts over the eyes to symbolize car ignition, and planned to add a promotional slogan. But the league banned advertising on masks. The ban on advertising, by the way, remains in force to this day. The zippers, however, remained because they resembled the Detroit badge.
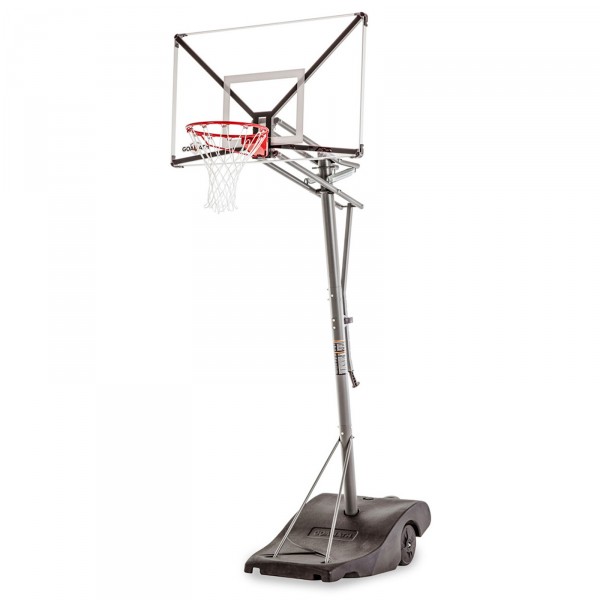
 This is necessary so that the form is sufficiently ventilated and does not restrict movement. The Sport-Print company has been producing basketball uniforms since 1991 and we know all the nuances of the correct cut and tailoring. Our technologists choose the best fabric that improves thermoregulation and ventilation of the form.