Home » Misc » How to make a diy mini basketball hoop
How to make a diy mini basketball hoop
STEAM@Home: Make Your Own Basketball Hoop!
No application or registration needed.
Location
Only virtual (online or over the phone).
Find an area where you can lay out materials and do some hands-on construction.
Additional information
Materials:
A wire hanger. It cannot be a partially metal hanger made substantially of wood or plastic.
A large, flat piece of cardboard.
The tape of your choosing. Masking tape may be the easiest to work with; duct tape would certainly make the hoop durable.
Markers or paint.
Scissors.
String (optional).
Instructions:
Bend the wire hanger into a circle. You do not even have to dismantle the hanger, but just reshape it into a hoop.
Bend the hook of the hanger so that it is at a 90 degree angle with the hoop. Do not cut away the hook, as it still can be of some use.
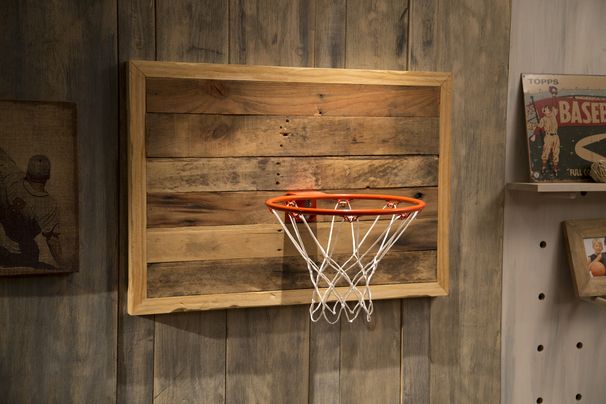
Cut the cardboard to the size and shape of your liking. Standard high school, college, and NBA backboards are rectangular, if you are looking to replicate that appearance. Try to make sure the relative scale of the hoop and backboard seem reasonable. For comparative purposes, an NBA backboard is 6 feet wide, while the basket opening is 18 inches (1.5 feet). That means the basket width is 1/4 (or 25%) as wide.
Decorate the hoop and backboard to your liking. Traditional hoops are painted red, but you can certainly customize it to fit whatever you desire. The backboard of most high schools, colleges, and all NBA franchises are now made of transparent glass; as there is no transparent cardboard, you can really be as creative as you want.
Tape the hoop to the backboard. You can attach the hook (which you bent up earlier) to lower back side of the backboard. Make sure the rim is as close to the backboard as possible.
Attach a net to the basketball rim (optional). You can make make a net out of string, or even out of twisted tape.
Hang the completed basket to a wall or door. Masking tape will work well for this purpose, as it will not leave a sticky mess behind like duct tape would. There are two different taping methods you can employ.
This activity supports the practice of these STEAM Habits of Mind: Develop craft, engage & persist, observe, reflect, stretch & explore.
Tips for Supporting Your Children's Learning
Get your child actively involved in their own learning and having their questions drive the learning. Let them observe and figure out, and try to hold back from answering questions for them. Instead, try to ask: What do we know? What else can we find out? How might we figure that out? Don't be afraid to ask your child questions. Also, don't be afraid to say "I don't know--let's find out together!" as a way to respond to their questions. Here's an article to help you support this kind of learning: Of the Value of Saying I Don’t Know
Want to learn more about making your own sports equipment?
Science Club for Girls at Home - Make you own sports equipment challenge
Instructables - MYO Basketball hoops
More hands on activities and learning opportunities:
Homecourt - basketball skill building app
Cambridge Public Schools Virtual Enrichment Recommendations
Exploratorium - Sports Science
Design Squad - Sports design challenges
Parkour Generations - Classes
Department of Human Services Sports Leagues
More STEAM@Home suggestions!
MIT Full STEAM Ahead
STEAM Habits of Mind - observe, reflect, engage & persist, stretch & explore, imagine, develop craft
how to make a diy basketball hoop mini
TikTok
Upload
For You
Following
motivatedbymylan
Mylan
CEO of DIY’s? Thanks for 100k followers!! 🙏🏽🧠💡🏀 #MotivatedByMylan #basketball #fyp #diy
263. 2K Likes, 581 Comments. TikTok video from Mylan (@motivatedbymylan): "CEO of DIY’s? Thanks for 100k followers!! 🙏🏽🧠💡🏀 #MotivatedByMylan #basketball #fyp #diy". That Way (Bonus Track).
2.1M views|
That Way (Bonus Track) - Lil Uzi Vert
moosedub223
moosedub223
Reply to @thimbuhl tutorial on how to build the hoop. #basketball #basketball #espn #fyp #foryou #for #nba #minihoop
4.1K Likes, 27 Comments. TikTok video from moosedub223 (@moosedub223): "Reply to @thimbuhl tutorial on how to build the hoop. #basketball #basketball #espn #fyp #foryou #for #nba #minihoop". original sound.
106.9K views|
original sound - moosedub223
dumb_.bumbthe3
dumb_.
bumbthe3
mini hoop#basketball #craft
207 Likes, 9 Comments. TikTok video from dumb_.bumbthe3 (@dumb_.bumbthe3): "mini hoop#basketball#craft". how to make a mini hoop out of a shoe box | first cut a hole in the middle | then set it up and play. original sound.
15K views|
original sound - dumb_.bumbthe3
secretweaponurai
Urai
made a basketball hoop for my room it was super wasy! Watch #diy #basketballhoop #basketball #easy #fun #fyp #fypage #viral #explore #share #howto
543 Likes, 18 Comments. TikTok video from Urai (@secretweaponurai): "made a basketball hoop for my room it was super wasy! Watch #diy #basketballhoop #basketball #easy #fun #fyp #fypage #viral #explore #share #howto". original sound.
31.2K Likes, 178 Comments. TikTok video from Mylan (@motivatedbymylan): "DIY Basketball Hoop 🏀 #MotivatedByMylan #basketball #fyp #howto #diy". Find a bucket | DIY BASKETBALL HOOP | Cut the bottom out | .... 3 Vets.
271K views|
3 Vets - The Future Kingz
d1_pablo
Your Local Midget
Homemade mini hoop 🥴 #fyp #4u #basketball #minihoop #homemade #viral
744 Likes, 38 Comments. TikTok video from Your Local Midget (@d1_pablo): "Homemade mini hoop 🥴 #fyp #4u #basketball #minihoop #homemade #viral". homemade mini hoop🥴. original sound.
TikTok video from Jaxen (@imjaxen): "@fnedom @zackary_vr @daddydayton69 #basketball #basketballminihoop #homemade #homemademinihoop". Making a indoor homemade basket ball hoop. original sound.
3360 views|
original sound - sped up drill
thuhrealjoey
thuhrealjoey
took a week to make this vid
138.9K Likes, 304 Comments. TikTok video from thuhrealjoey (@thuhrealjoey): "took a week to make this vid". making a mini bball court | first tape | basketballs | . ... ROOF.
1M views|
ROOF - DaBaby
motivatedbymylan
Mylan
DIY Mini Hoop Rebounder 🧠💡🏀 #MotivatedByMylan
22.1K Likes, 40 Comments. TikTok video from Mylan (@motivatedbymylan): "DIY Mini Hoop Rebounder 🧠💡🏀 #MotivatedByMylan". MINI HOOP REBOUNDER. Gimme That.
516K views|
Gimme That - Chris Brown
spladey
spladey
DIY mini basketball hoop 🏀 made out of paper!! 📝 Like And Comment If You Want A Tutorial!#minibasketballhoop #fyp #foryoupage #for_you_page #foruyoupage
1.2K Likes, 26 Comments. TikTok video from spladey (@spladey): "DIY mini basketball hoop 🏀 made out of paper!! 📝 Like And Comment If You Want A Tutorial!#minibasketballhoop#fyp#foryoupage#for_you_page#foruyoupage". DIY Paper Mini Basketball Hoop. original sound.
53.3K views|
original sound - spladey
Basketball hoop - how to make a stand with a backboard with your own hands
Love basketball and want to make a hoop? I wanted to make it myself, not buy it, and I ended up making it. It's pretty cheap, especially if you have some of the stuff you need to assemble.
Let's start assembling the basketball hoop with our own hands.
Step 1: Shape the Ring
The first thing you will need is a ring, I made it with 12mm rod, but it doesn't have to be that size. The standard diameter of a basketball hoop is 450 mm.
To make it flat you need something to wrap it around, this thing should be about 400mm in diameter.
I found an old car rim of the right size, you will need to clamp it to the table with a clamp using a piece of wood.
As shown in photo 2, place another clamp a little further from the first with a rod between them.
As shown in photo 3, slowly wrap the rod around the disk, once you wrap the rod and its edges overlap, cut off the straight ends.
Use a clamp to press the ends together, then weld them together.
To complete this part, place the ring on the ground and straighten out all the curves.
Step 2: Frame
Bend a piece of flat metal, mine was 4mm thick.
Weld it to a flat point in the ring.
Cut two rods 320 mm long.
Weld them as shown in the photo.
Drill four holes to match your existing bolts.
If you need a netball ring, you can simply attach it to a post and skip the rest of the steps.
Step 3: Mesh Staples (Optional)
Show 7 More Images
Do this step if you need mesh. If you need a network, you will have to buy it. This step is not as difficult as it seems.
cut 12 pieces of wire 90 mm long (I would recommend making a few spare parts, as they are easy to ruin. )
bend them in the middle (it doesn't matter if the tips are the same length)
clamp the wire in a vise with a steel rod at one end
bend wire over rod
repeat this with all parts of
retighten the wire wrapped around the rod (see photo)
bend it
repeat with all parts
retighten the wire wrapped around the rod
bend it (at this point you can't just remove the wire from the rod - you will need to slide it to one of its edges and remove it from the edge)
repeat with all parts of
divide into 12 pieces and weld on the brackets
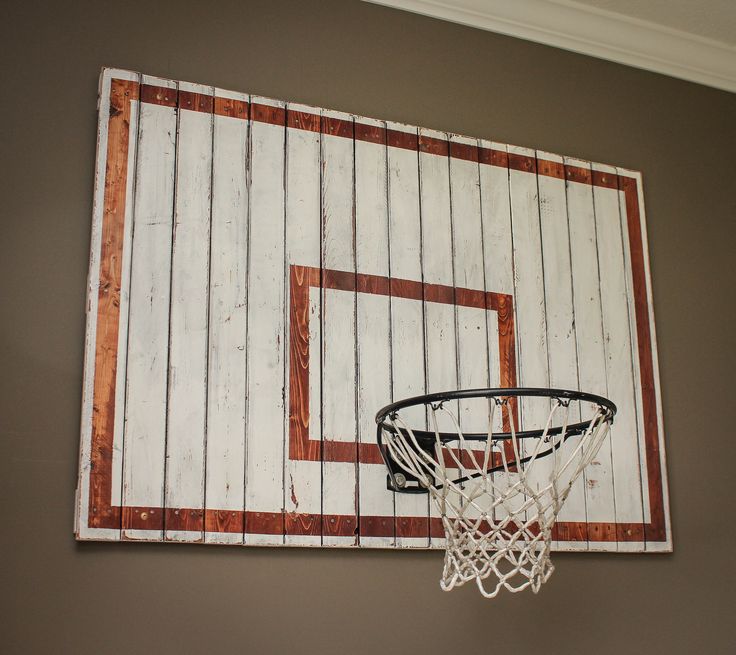
Step 4: Backboard
Cut the board to size. My board does not fit the full size of basketball boards. (the second picture shows the dimensions of a standard shield).
My measurements are 1100mm wide, 700mm high and 25mm thick. (You don't have to be that size.)
Step 5: Paint the Shield
Once you've drawn all the lines on the shield, lay masking tape over them. If you try, everything will look neat.
If you are using MDF, you will need to take care to protect the edges from moisture (as shown in photo 2).
Carefully paint over the areas around the masking tape.
Remove masking tape after enough coats of paint have been applied and the board looks complete.
Step 6: Paint the ring
First you need to sand the metal. I used a grinding disc on a grinder.
The ring must not be black or white, it must stand out from the shield. Usually the ring is painted orange or red.
The easiest way to paint inventory is from a can.
Step 7: Assemble
Put it all together. Screw the ring to the shield, hang a net on the ring.
Step 8: Installation
DIY Basketball Post is great to mount on a garage or house wall, but if you want to mount it on a pole, you can create one too.
I installed my ring in the yard using heavy duty wood screws.
A standard basketball hoop must be placed 3 meters from the ground.
I am not responsible for any damage you cause to yourself or your property - you make your own ring.
Successful throws!
How to make a DIY basketball shield ring?
Useful crafts
Hello do-it-yourselfers! Ball games are one of the most favorite among children, and in order to somehow diversify this activity, especially since kindergartens are not working now, I decided to make a simple shield with a basketball hoop. Making such a shield with a ring with your own hands is very simple. You just need to follow the step by step photos and repeat. And by the way, he literally did everything from trash, from scraps of metal to boards.
So let's get started! We will need:
some kind of ring (cut off from the gas cylinder stand)
two pieces of profile (one 4*2, the second 2*2)
two pieces of reinforcement
cutting boards (shield size 60*80)
First of all, we prepare the ring itself. For its manufacture, I took the base from a gas cylinder, marked a strip on it and sawed it off with a grinder.
Before cleaning the ring from rust and old paint, I drilled 12 holes in a circle at the same distance in order to pass the mesh through these holes in the future.
Further, as I wrote above, trimmings from the profile pipe will be needed. I don’t give sizes, since everything was done by eye, but if you suddenly decide to repeat it, write about it in the comments and I will measure everything and write to you.
Now all these components need to be welded into a single structure. Everything is done very simply and you can see the whole final result in the photo below. The only thing I needed was to add more crossbars to the main long crossbar, so that the structure on the shield would hold tighter, but as practice has already shown, everything holds up well too.
Next, you need to make a shield. To do this, he dissolved the trimmings of the board into components. My board was 10 cm wide. For an even cut, I used trimming, and also processed the front parts of the boards with a grinding wheel.
Then I fastened all the boards together with battens. The reverse side of the shield was not polished.
To add beauty and weather protection, I impregnated the shield with a special impregnation in the color of mahogany.
Then, when the impregnation dried, I fixed the ring on strong, yellow self-tapping screws. I used 4 self-tapping screws and, as practice has already shown, this is quite enough. Also installed a special grid. I bought such a grid on Aliexpress, if you need one, then here is the LINK: BUY NET FOR RING
And now you can install this shield on the street. So far, I have temporarily fixed it on the Swedish wall (in the future I will flood the pole and hang a shield on it).
And here is the first goal scored! Everything turned out just fine! The children were just delighted with this homemade product! And the joy of children is the most important thing!
I also recommend that you watch a very addictive ASMR video on how to make this basketball hoop.


 Here's an article to help you support this kind of learning: Of the Value of Saying I Don’t Know
 2K Likes, 581 Comments. TikTok video from Mylan (@motivatedbymylan): "CEO of DIY’s? Thanks for 100k followers!! 🙏🏽🧠💡🏀 #MotivatedByMylan #basketball #fyp #diy". That Way (Bonus Track).
 bumbthe3
 original sound.
 homemade mini hoop🥴. original sound.
 ... ROOF.
 DIY Paper Mini Basketball Hoop. original sound.
 )
)  If you try, everything will look neat.
 For its manufacture, I took the base from a gas cylinder, marked a strip on it and sawed it off with a grinder.
  My board was 10 cm wide. For an even cut, I used trimming, and also processed the front parts of the boards with a grinding wheel.