Home » Misc » How to jump off two feet in basketball
How to jump off two feet in basketball
Vertical Jump Technique - How to Jump off Two Feet?
As long as I can remember, I was always a natural two-foot jumper. Maybe this is because I played a lot of volleyball when I was younger or maybe I just adopted the vertical jump technique that fits my physique best.
When it comes to basketball players, two-foot jumpers seem to be in the minority. And I completely understand why: Single-foot jumping is taught from the very beginning and comes naturally to everybody who is capable of making a simple layup.
Two-foot jumping, on the other hand, seems to be a bit more complicated for the basketball players I know. However, it's a jumping technique that allows slower and heavier players to jump as high (or even higher) than lighter, quicker, one-foot jumpers.
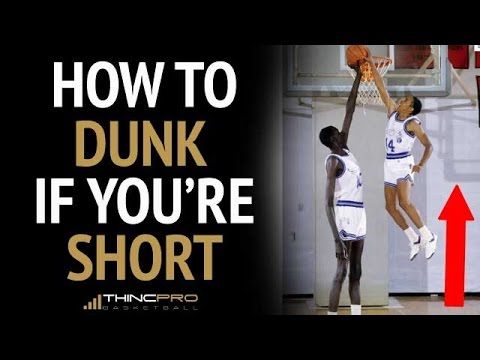
In the past, I have been asked a lot about how I manage to jump so high with two-feet. One reason is hard training (check out how I improved my vertical by 8 inches last summer), the other is proper jumping technique. In this blog post I want to share my best tips on how to improve your two-foot jumping technique, so that you can learn how to dunk off two-feet too!
Quick Navigation
Improve your two-feet vertical jump technique
1. Run-up
2. Penultimate step
3. Arm swing
4. Planting your feet
5. Takeoff
Conclusion
Improve your two-feet vertical jump technique
A lot of the basketball players have serious problems with the two-foot vertical jump technique. They often lack fluidity in the transition between run-up and takeoff, which makes for awkward looking, low jumps.
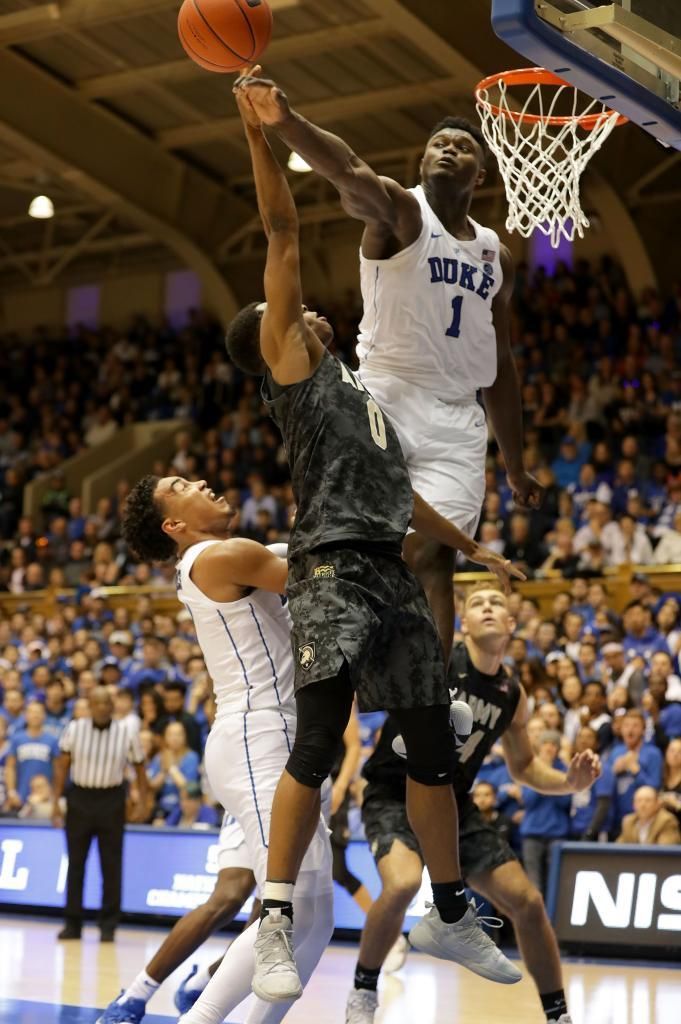
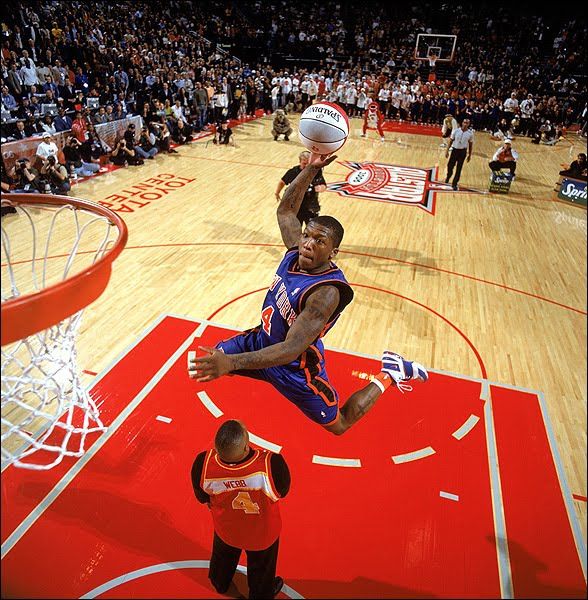
You often see what I call "jump stop dunk" attempts where the athlete plants both feet simultaneously before takeoff, which usually takes away a lot of momentum and makes jumping high incredibly hard. You sometimes see NBA players perform dunks like that, but they usually have considerable jumping ability.
You can watch great examples of proper two foot vertical jump technique in indoor volleyball. As volleyball players need to jump high (instead of far), single leg jumping is useless in a lot of cases. Therefore, volleyball training focuses heavily on two-foot jumping resulting in amazing hang time (watch this video to see what I mean).
If you think want to work on your vertical jump technique, check out this step-by-step explanation of the different phases of the two-foot vertical jump:
1. Run-up
Rule of thumb: The higher the speed of your run-up the better!
However, depending on the strength of your legs and the traction of your shoes, there is a certain speed after which either your knees will buckle (because of the high forces at take-off), or your shoes will lose traction on the surface and slip.
Try to find the maximum speed that still allows you to control the takeoff. You can test different speeds for your approach and see what works best.
2. Penultimate step
The second to last step before the jump is very important to achieve maximum jump height. This step should be longer than every other step, allowing you to lower your center of gravity and giving you more space to accelerate vertically at takeoff.
After this step, your hips will automatically be lower, allowing you the perfect angle for the takeoff.
3. Arm swing
The arm swing is a critical piece of the vertical jump players often ignore or completely forget.
However, it serves two very important purposes:
Similar to the penultimate step, the arm swing further lowers your center of gravity.
A full arm-swing allows you to generate more upward momentum at takeoff.
4. Planting your feet
You want to plant your feet in front of your body slightly tilted towards the outside of the foot which is planted first(in my case to the left). This creates an angle allowing for the efficient transformation of horizontal speed to vertical speed.
The faster your run up, the more extreme the angle of your body will need to be (see red line in picture above). If you overdo it, however, you will not be able to control your jump and you will lose significant height.
It takes a while to get a good feel for what you can do. Your angle will also change from indoor to outdoor surfaces or from dusty floors to freshly waxed floors with maximum traction.
The amount of knee bend will depend on the type of jumper. If you are a quick and explosive jumper, you will bend your knees significantly less than if you are one who is a bit slower but compensates with strength and power.
5. Takeoff
Prior to the takeoff, the athlete tries to lower the center of gravity to allow for more distance to accelerate vertically.
At takeoff, he now tries to raise the center of mass as fast and fully as possible. We achieve this by completely extending the main three joints responsible for the vertical jump: ankles, knees, and hips.
We also complete the full arm swing to generate as much upward momentum as possible, because once our feet leave the ground, the vertical acceleration is over and our jump height is predetermined.
Conclusion
These are my best tips on how to improve your 2-foot vertical jump technique. If you feel there is room for improvement, spend a week to work on your vertical jump technique. This really make a huge difference.
If you want to learn more about two-foot jump technique and see the proper two-foot jumping in action, check out this video by Adam Folker, the creator of the Vert Shock training program:
How to Jump Higher Off of 2 Feet
New sky-high concept on the way
Contents
1 Jump Start Your Technique
1.1 Tip #1: Rapidly Descend into Your Jump
1. 2 Tip #2: Speed up Your Penultimate Step
1.3 Why Falling Too Much Forward Is Bad?
2 Extra Resources
Today I want to show you a 2-feet jumping technique that will allow you add instant inches to your vertical and will help you jump higher immediately.
So let’s talk about jumping higher with 2 feet…
When it comes to 2-feet jumping there’s actually a whole category in vertical leap training dedicated to just that.
If you really want to maximize your 2-feet takeoff and get a lot of gains, there are several things you should do.
In this post I’ll reveal to you two tips that will help you really fast just by teaching you the basics of how to move more properly with your feet.
Surprisingly, when you shoot or dribble a basketball, you practice your technique a lot… but when it comes to jumping higher, no one ever practices their technique. You either expect you can do it or you expect you don’t.
Jump Start Your Technique
Your technique plays a huge factor in increasing your vertical jump, and this cool exercise I’m about to show you will instantly add inches to your vertical, all within one workout.
Tip #1: Rapidly Descend into Your Jump
Usually when jumping, most athletes focus all of their attention on the ascent portion of the jump (the part where you push).
But you’ll be surprised to know that one of the most important factors of the vertical jump is actually the descent, or should I say, the speed at which you do it.
A quick descent can actually help you in your ascension and the power you put out down to the ground.
Why?
Because you’re using your muscles elastic potential.
Here’s a quick experiment for you to try:
Get down into a squat position and wait one second at the bottom, now jump.
Now do the same thing without pausing at the bottom.
Notice how higher you’ve reached at the 2nd time?
This was not a coincidence.
When you drop slowly into your jump, you’re slowly losing that elastic rubber band-like effect in your muscle because it’s already elongated and it’s getting a bit tired.
What you need to do is to descend into the bottom position as fast as possible to be able to contract the muscles quickly and spring up.
Now, in order to perfect your descent into the jump you must practice this movement specifically.
Here’s how to do so:
Start by standing with both arms raised above your head, feet about shoulder width apart.
Now throw your arms down behind your hips as fast as possible and as you do so, descend rapidly into your jump as if you’re about to explode.
Repeat this motion 20-30 times each workout to isolate and perfect this part of the jump and you will rapidly see gains in your vertical.
I learned this technique from an eBook put together by Thincpro, creators of the famous Vert Shock program. You can download the free pdf here for more instant inches hacks like this.
Tip #2: Speed up Your Penultimate Step
Get to your last 2 steps extremely fast without getting your chest dropping more than 45 degrees forward when planting your feet.
The way this exercise works is this:
You start leaning a bit forward and then you kind of “snap in” your last 2 steps as quickly as possible.
There are 2 ways to for you to know if you’re doing this exercise right:
You go very fast and if you listen to your last 2 steps it almost sounds like one step because you’re going really quickly.
Control your body and don’t let your torso fall too much forward.
Why Falling Too Much Forward Is Bad?
When you fall too much forward, your core and upper body are not staying tall and you’re actually losing control. Whenever that happens, it’s a sure sign that you will jump forward and not up.
So if you can control that tendency without killing your momentum, you’ll be able to focus more of your motion up rather than forward.
One of the most important factors that determine your vertical jump is speed, and when you’re coming at max speed you’re actually in less control of your body. But you still need to dictate the direction of movement and jump straight up. A good way to do that is to start practicing jumping against a wall.
Tip: walls are a good tool to use for testing your vertical too
Jumping against a wall is a simple exercise you can add to your warm up 2-4 times a week. It will improve your 2 feet, 1 foot, and standing vertical get way more intense and more effective when you utilize this exercise.
Just make sure you’re doing it safely and that you’re not actually trying to crash into the wall like Juggernaut.
Don’t be a Juggernaut
Go through each step 3-4 times.
You don’t have to do this very often and you definitely don’t need to do this on every workout, just do it regularly and make this a part of your warm up every few days. With this exercise you will start seeing results very quickly and it will improve your vertical leap form.
This is my small tip for today..
If you liked this post and want more 2 foot/1 foot jump techniques for your vertical jump training, then I highly recommend that you checkout my post about the best programs which utilize these methods.
Lastly, I just want to mention quickly that I’m working on a new concept that’s coming up lately. This concept is something that I haven’t scientifically experimented with, but I’m planning on doing so in the near future, and at that point we’ll have an indisputable evidence of the benefits of it.
And while we’re on the subject, you might as well read the review I did for The Jump Manual, Jacob Hiller’s complete vertical leap program which aims to increase your vertical leap by 12 inches.
Here’s some more info on the jump manual program.
Let me know what you guys think on this post in the comments section below.
Extra Resources
Here are some more helpful 2-feet jumping techniques that you’ll want to learn:
1) Understanding how an arm swing enhances performance in the vertical jump – PubMed – NCBI – http://www. ncbi.nlm.nih.gov/pubmed/15519601
2) TD1 Minute on Stack.com – an excellent 2 feet vertical jump test technique demonstrated by Kurt Hester from the dominant one – http://www.stack.com/a/vertical-jump-technique
3) Vert Shock – An excellent plyometrics vertical leap program with an expanded section on 2-feet takeoff. Very affordable as well and you can get it for dirt cheap when using this Vert Shock coupon.
4) Vertical Jump Techniques – Topend Sports. Measurement methods and equipment variations. A description of the Countermovement Technique and how to use the arms properly for more inches – http://www.topendsports.com/testing/vertical-jump-technique.htm
Last Updated on by Matthew Godley
How to jump higher - with one leg or with two?
Material published:
Alexander
Cf. post rating: 3.84
Expert in bodybuilding and powerlifting. I have been training for over 20 years, subscribe to my social networks. networks.
Instagram: @alex_muskul.pro
A well-placed jump up is not only the pride of basketball, volleyball and gymnasts, but also an excellent additional skill in other sports. But in the study of the exercise there is a controversial point that haunts beginners: which jumps are higher - from one or two legs?
Contents
1 Learning the subtleties: how is jumping different?
2 Which jump is higher - with one leg or with two?
3 Jumping hazards
We study the subtleties: what is the difference between jumps?
There are 2 types of jumps in basketball and other sports:
Single leg (usually done with a double step). The main technique looks like this: the athlete runs up, pushes off the ground with a half-bent leg (usually the right one). He pulls his left leg to the belt and unbends at the knee, which allows you to increase the push. So the athlete manages to go up as much as possible when jumping from one leg.
From two legs (you can jump from a place or from a "jump", as in the first case). In a two-legged jump, the athlete is better able to control his body, and the landing becomes safer. With two legs, it is easier to perform several quick jumps in a row than with one. Basketball players often resort to such jumps in order to pick up the ball from an opponent.
Please note! In the case of jumping on one leg, the athlete has less control over his body, and after rising into the air, it completely goes out of control. Therefore, before jumping, you should make sure that nothing will interfere with movement and a successful landing.
Which jump is higher - with one leg or with two?
It is believed that an athlete jumps higher with one leg than with two. The fact is that such a jump always occurs after a double step, that is, from a running start. Therefore, the energy of horizontal movement (running) is transformed into vertical energy (the energy of jumping). It will not work to jump high from a place with one foot, even if you really want to.
The same applies to jumping with two legs. If they occur from a running start, then in any case they will be higher than jumps from a place. Therefore, which jump to use in each case will depend on the situation and the technique of the athlete. In training, it is important to practice the ability to jump sharply and quickly to the maximum height in both ways.
Dangers of standing jumps
If the athlete is not distinguished by the professionalism of gymnasts, it is not worth the risk and practice jumping from a place with one leg. In the absence of skills, such experiments can lead to falls or injuries. After all, “in flight” it is important to turn around correctly, orient yourself in space and think over a safe landing. If thoughts are occupied with the height of the jump, the result will be disastrous.
The most important factor that determines the height of the jump is the presence or absence of dynamics. If the movement is "stationary", a high jump will only work with two legs. If there is an opportunity to scatter, it is better to jump from one foot. But in pursuit of the highest possible jump, do not forget about the rest. Indeed, for a constant increase in the height of the jump, the muscles necessarily need time for a full recovery.
How to jump higher in basketball
High-level basketball is played beyond one's ability. Even hybrid point guards like Russell Westbrook can be the authority in today's NBA. Even though height and arm span play a leading role, young basketball players need to improve their vertical jump. Although jumping ability may not be as high as strength, it can be improved through targeted exercises and training. Basketball players can reap the rewards of a higher vertical jump when it comes to dribble, rebound and defense, just to name a few. We believe that young athletes can learn to jump higher through technique, movement understanding, strength training and functional training. Vertical Jump vs. Basketball Jump Ability Before we start improving vertical jump for basketball players, we must first define what vertical is and how jump ability and vertical jump are not exactly the same. Vertical jump, more commonly known as vertical jump, is the ability of a person to jump directly from a standing position with both feet on the ground. There can be no forward movement or movement of the legs going straight up. In real basketball, players rarely stand still and jump as high as possible on two legs. Most likely, basketball players will move in some direction and jump with some kind of momentum. It is important to distinguish that a higher tested vertical does not always correspond to a higher jump on the basketball court. One-foot vs. two-foot jumps for basketball As a continuation of this paragraph, young basketball players should train to improve both one-foot and two-foot jumps. Two-foot jumps are traditionally performed in a basketball game for bouncing balls and getting bounces. It also means jumping and blocking from a solid defensive base. From a relatively stationary position, jumping with two legs is more effective. One foot jumps are seen more often when the player goes under the basket. These are jumps that are used on a poster hanging on your bedroom walls. Michael Jordan and Dr. Jay jumped out of the free throw line on one leg, using the momentum and power of their running to lift themselves into the air. Strength training to improve vertical jump in basketball Traditional strength training can certainly allow basketball players and other athletes to jump higher. Jumping ability comes from fast muscle fibers. These muscle fibers can be developed from concentrated strength training. These exercises should be performed with good form and emphasis on speed and explosion. Kettlebell Swing - Not normally thought of as a bouncing motion, kettlebell swing actually mimics the explosion of a basketball jump very closely. The hips are loaded and all the power comes from the bent knee, the position of the hips back. Box Squats - The traditional back squat and front squat allow for some "bounce" at the bottom of the movement. Instead, try box squatting to eliminate that stretch reflex. For maximum results, keep your feet in a natural, athletic, jumping position. Keep your back tight, chest up, pause at the bottom and explode with the weight. Trap Bar Rows or Traditional Rows - These movements are great for overall strength, muscle building and developing fast muscle fibers. Any variation of the pull will load the posterior chain, strengthen the athlete's core, and the gain in strength naturally translates into a vertical jump. Jump Higher with Dynamic Training Traditional strength training is not the only way to improve your basketball vertical jump. More functional, unweighted moves can also increase your explosiveness and lead to a higher jump. Sit Box Jumping - Basketball players can start by sitting on a box or bench, allowing their knees to rest at about 90 degrees. Without leaning back or using momentum, athletes must explode from a seated position and jump onto a box in front of them. Obstacle Jumping - This exercise can be done in a variety of ways but essentially involves basketball players jumping over an obstacle or obstacles. Some youth players will react to single repetitive hurdle jumps, while others prefer to jump over multiple hurdles in a row. Single Leg Jumps - Single leg jumps are useful for a number of reasons. They strengthen the smaller, more specific muscles in the calves and thighs that stabilize basketball players' bodies as they jump. They also improve coordination and comfort level when jumping from one leg. Increase your vertical jump with Hustle Training Hustle Training - Created as a tool for coaches and players to take advantage of professional training and training, Hustle Training is quickly becoming one of the most popular sports training apps available. Based in Pittsburgh, Pennsylvania, this growing startup maximizes your performance potential through fundamental best practices with drills and workouts developed by professional players, college coaches, and seasoned coaches.


 As volleyball players need to jump high (instead of far), single leg jumping is useless in a lot of cases. Therefore, volleyball training focuses heavily on two-foot jumping resulting in amazing hang time (watch this video to see what I mean).
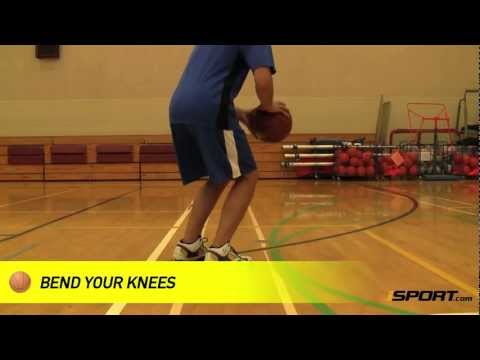 This step should be longer than every other step, allowing you to lower your center of gravity and giving you more space to accelerate vertically at takeoff.
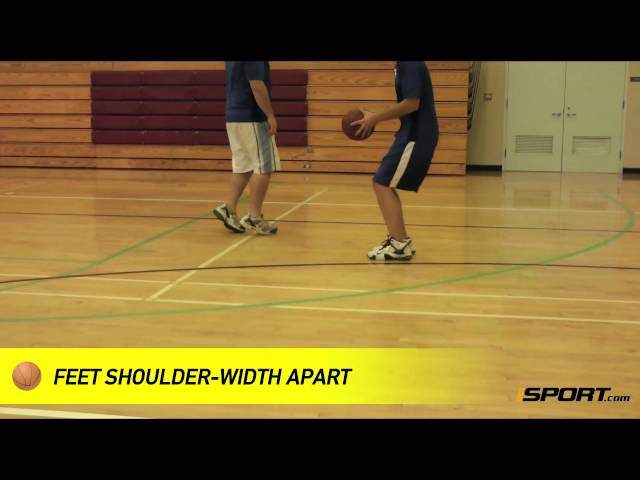 If you overdo it, however, you will not be able to control your jump and you will lose significant height.
 2 Tip #2: Speed up Your Penultimate Step

 A good way to do that is to start practicing jumping against a wall.
 ncbi.nlm.nih.gov/pubmed/15519601
 networks.
 It will not work to jump high from a place with one foot, even if you really want to.
  If the movement is "stationary", a high jump will only work with two legs. If there is an opportunity to scatter, it is better to jump from one foot. But in pursuit of the highest possible jump, do not forget about the rest. Indeed, for a constant increase in the height of the jump, the muscles necessarily need time for a full recovery.
 It also means jumping and blocking from a solid defensive base. From a relatively stationary position, jumping with two legs is more effective.
 Without leaning back or using momentum, athletes must explode from a seated position and jump onto a box in front of them.