Home » Misc » How to make a homemade basketball pump
How to make a homemade basketball pump
🏀 How To Pump A Basketball Without A Needle? [2022]
In today’s guide, I am going to show you how to pump a basketball without a needle.
Ideally, you would have a pump + needle to inflate your basketball in a more civilized way. But if you don’t have a needle and have to pump your basketball, you’ll have to improvise.
Below, I will introduce you to 4 ways to pump a basketball with no needles. These methods don’t require that you buy anything – that would defeat the guide’s purpose since if you had to buy something, you should buy a needle.
4 Ways To Pump A Basketball Without A Needle
1. Use your tubeless bike’s valve stem
If you have a tubeless bike and a pump, you may use one of its valves to pump your basketball. Essentially, you will be using the valve stem as a replacement for the needle.
Here’s how to use a tubeless valve stem to inflate your basketball.
Unscrew the fastener on the stem on one of your bike’s wheels and remove the stem.
If there is any rubber coating on the stem, pull it off.
Attach the stem to your pump.
Insert the free end of the stem into your basketball.
Start pumping.
And here’s a video demonstrating how to use a bike tubeless valve stem to inflate a ball:
If you have a tubeless bike, then this actually is the first option that you should try. Since the stem is similar to a regular ball needle, a tubeless valve stem allows you to essentially inflate the basketball traditionally.
But if you don’t have a tubeless bike, then read on for some other methods.
2. Use a can of compressed air
If you have a can of compressed air lying around, then you will be able to inflate your ball fairly easily. After using a tubeless valve stem, this is perhaps the easiest way of inflating balls without a needle.
Here’s how you should use a can of compressed air to inflate a basketball:
Insert one end of the tube that comes with the can into the ball’s air hole.
Hook the other end of the tube to your can of compressed air.
Start pumping air into the ball. Pump the air in short bursts – otherwise, the expanding gas will absorb heat from the can, cooling it down.
Compressed air works well when the ball is just slightly underinflated. If you need to inflate a ball fully, then you’ll probably need to go through several cans of compressed air. If you have no other option, this is fine, but you should avoid doing this often since you’ll literally be wasting your money by chewing through compressed air.
3. Use a balloon to inflate your basketball
Another popular way of inflating balls without a needle is to use a balloon. This method can be a little finicky, but it’s at least worth a shot if you can’t use other methods.
For this method, you will need:
A balloon, preferably a larger one.
A thin straw or anything else that can fit into your basketball’s air hole.
A paper clip or clamp.
And here’s how you would use a balloon to inflate your basketball:
Inflate the balloon as much as you can.
Seal the balloon with a paper clip or clamp.
Insert your thin straw into the balloon’s hole.
Insert the other end of the straw into the basketball’s air hole.
Remove the paper clip/clamp to let the air move from the balloon to the ball. I recommend that you hold the balloon to keep it from shooting itself away.
Depending on the balloon’s size, you may need to pump it several times to get the ball inflated.
I personally don’t really like this method. It requires plenty of tools – you may not have a balloon or a straw thin enough for the ball’s air hole lying around. Besides, the air may leak into your room rather than go into the basketball.
You could make this method work, but it requires a lot of effort.
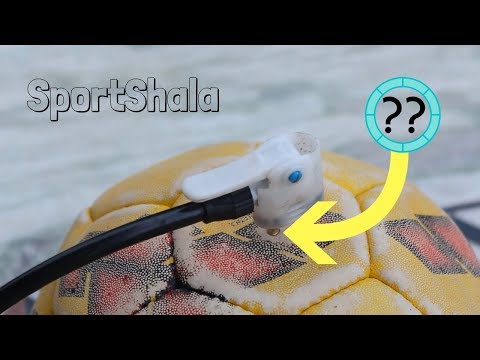
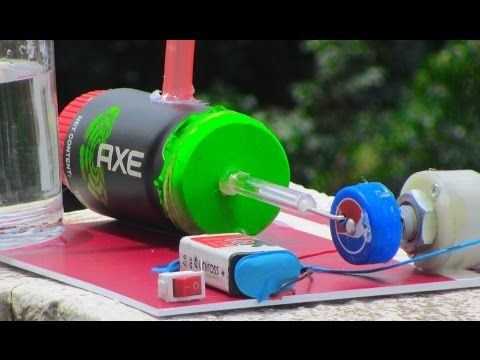
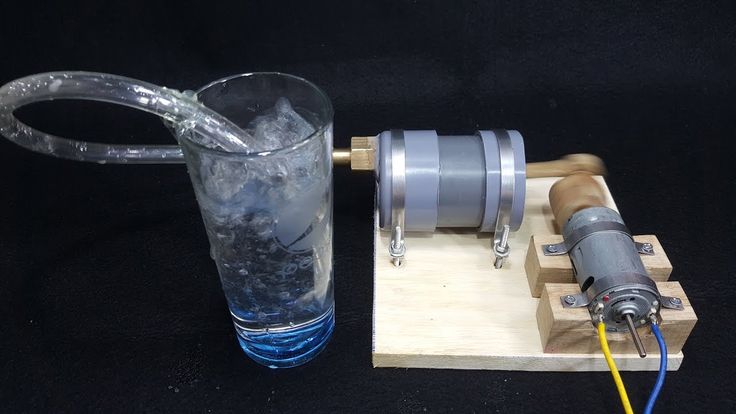
4. Use a pen ink tube to craft a needle
Finally, you may try to craft a temporary needle from a pen ink tube. This method is relatively simple and is a great option if the previous methods don’t work.
You will need four things:
A metal paper clip coated in plastic.
A ballpoint pen, ideally with little remaining ink so that you don’t have to drain it.
Tape.
Scissors.
This method has been proposed by Flickr user Wendel Fisher, so all credit goes to them.
And here’s how you make a homemade ball needle:
Take your pen apart and remove the ink tube. Keep the writing cap – you’ll need it later to connect the DIY needle to the pump.
You need about an inch of tube free of any ink. If necessary, drain the tube by removing the writing point and then clean the tube by running alcohol through it.
Use your scissors to cut about an inch of the tube.
Insert the ink tube into the writing cap.
Straighten your paper clip and insert it into the air hole of the ball.
Cut around the edges of the clip’s plastic coating and pull the metal wire out. The plastic coating should remain inside the ball.
Insert the plastic coating into your writing cap from the pointy end and tape the area to seal it.
Place the writing cap against the end of the pump and seal it with some tape.
Firmly holding your improvised “needle”, start slowly pumping the ball. You may need a friend to hold the needle in place while you are pumping.
This is a pretty complicated way of solving a rather simple problem, but if you need a pumped ball and have no other options, it should work just fine.
Other Useful Basketball Articles
Can You Pump Up A Basketball At The Gas Station?
You can inflate your basketball at a gas station, but you probably won’t be able to do so without a needle. So within the context of this guide, pumping your ball at a gas station isn’t an option. But if we were talking about pumping balls without a pump, then it would work.
You could pay a visit to a bike shop if there is one nearby. If you are outdoors and don’t have any tools with you, this would be an ideal option.
If the guys at the shop aren’t too busy, they should be able to help you. You should probably also pay them or purchase something (a needle, for example) just to be polite.
The 4th Quarter
If you need to pump your basketball often, then after you are done inflating it without a needle, do yourself a favor and buy a needle/pump – you won’t have to deal with any balloons or compressed air anymore.
You’d be just wasting your time if you were to stick to the listed methods rather than inflate balls the way they are supposed to be inflated.
How to Pump a Basketball Without a Needle (3 Methods)
When shooting hoops by yourself or playing basketball with your friends, there are few things worse than your ball going flat. While it would be great if everyone had a needle and basketball pump at all times, that isn’t always the case.
I can think of several times where my friends and I had to cut a game short due to no one having a needle to inflate the ball. It’s annoying and also incredibly frustrating. Thankfully, there are a number of different ways you can pump up a basketball (whether indoor or outdoor) without needing to have a needle at all. This guide is going to look at a few of them.
Quick Navigation
Method 1: Use a Can of Compressed Air
Best to use for: If you are without a needle and pump, a can of compressed air is probably the quickest and easiest way to fill up your ball. It offers you something very similar to the needle, so getting the air in the ball will be simple. Of course, you likely need to be at home for this to work as very few people take compressed air out with them. Even then, however, it is easy enough to go to a store near where you are and get a can of compressed air for a very affordable price.
Things to prepare:
The ball
Can of compressed air (make sure it isn’t empty)
Potentially a second can if your ball is incredibly flat
How to do:
Put the end of the straw of the can into the basketball. It should fit quite easily.
Slowly start to press the trigger to allow the air to go inside the ball. Do it slowly and carefully for the best results. Once the ball is inflated to the desired amount, take out the straw and hit the courts!
Method 2: Utilize a Balloon
Best to use for: This is great for people who are at home, as most of us have some balloons lying around. It is quite easy and quick but does require the use of a few other items like a thin straw, and a paper clip or clamp. It’s not great for those who are out at a public court, as you likely don’t have balloons with you.
Things to prepare:
The ball itself
The balloon (likely more than one to be safe)
A paper clip or clamp
A thin straw or a coffee stirrer
How to do:
The first thing to do is to blow up the balloon with an ample amount of air.
Once the balloon is blown up, don’t tie it like you normally would, but use the clamp or paper clip to close it up temporarily.
Next, you need to connect the thin straw or stirrer to the balloon, and put the other into or at the air hole of the ball.
Once the clip is taken off, the air should begin to flow through the straw into the opening of the ball, inflating it.
Do this as many times as it takes to get your ball to an air level that you are comfortable with. It might take a couple of balloons.
Method 3: Go to a Bike Shop or Gas Station
Best to use for: This is a great option for you if you are out and about, and don’t have a pump, needle or anything like that at home. If you don’t have the materials for the other two methods, this could work. Going to a bike shop or gas station is a good idea as they have air pumps and might even have the attachment you need. This method is very easy and simple but could take a while to find a gas station or bike shop nearby. Also, they might not have the needle attachment so it couldn’t hurt to call ahead.
Things to prepare:
The ball
Find a safe way to get to the shop or station
Potentially pick up a basketball needle if they don’t have them
How to do:
Get to the bike shop or gas station, after calling ahead to ensure they can help you.
Use the correct attachment to inflate the ball to your liking.
Be sure to thank them if they don’t charge you. Also, consider buying something small for their kindness.
Final Words
We hope that this guide has been able to help you learn how to pump up a basketball without a needle. When trying any of the aforementioned, be sure to do it safely to protect yourself and your basketball.
Have a method that wasn’t mentioned here? If so, let us know in the comments below.
4 easy ways :: SYL.ru
Margarine is ideal for puff pastry. When is it better to use it, and when is oil
Retinol Sandwich: how to use the new beauty trend in skin care
Simply fill the filling with flour: make an apple pie without kneading the dough
Spaghetti in the oven turns out delicious. Cooking with cheese and sauce
What will be the French manicure in 2023: French manicure trends
Add some sour cream. Rich lentil and eggplant stew
Gen Z bring back the popular 20-year-old parting
From potassium to zinc: homemade beauty recipes with parsley
Autumn nail polish colors for ladies 50+: what trends are suitable and what are not
Mixing different prints: fashion for women in their 20s
Author Yulia Abdulbarova
Almost every ball - football, volleyball, children's, basketball, gymnastics - is suitable for use only when it is properly inflated with air. Therefore, a special pump, a needle, and sometimes even silicone grease are often sold with it. But imagine that all this is simply not at hand. How to pump up a ball without a needle? We have selected for you several effective folk methods.
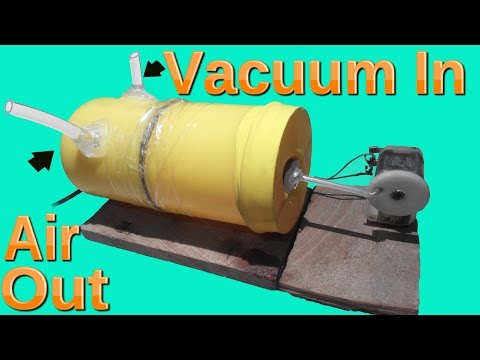
Method 1: Compressor
How to inflate a ball without a needle? Contact any of the car services in your locality - workers will help you for free or for a nominal amount. Do not ignore tire shops: there will definitely be powerful compressors for pumping car tires. One thing: there is a risk of pumping the product with air, which will lead to its damage or even explosion.
Compressor - equipment from which air is released under pressure. Therefore, this is a perfect answer to the question: "How to inflate a ball without a needle and a pump?" If possible, it is recommended to carry out the procedure together: one person will turn the compressor on and off, and the second person will hold the ball and press the cord, controlling the process of air intake. The hose with the nozzle is pressed tightly against the valve, after which the device turns on at full power. It must be deactivated immediately as soon as the surface of the ball becomes hard. That's all!
We also draw your attention to the fact that many models of car compressors have special nozzles for pumping balls with air.
The tools here are among the most affordable: a bicycle pump is in almost every home, you can easily buy electrical tape in a manufactured goods store, hypermarket, a syringe in a pharmacy. How to pump up a ball without a needle in this way? Easier than simple:
Take a needle from a syringe - first of all, you need to sharpen its sharp tip on asphalt, brick, stone, curb or with a special knife. Too sharp, it will easily pierce the nipple, which will make the ball unusable. The best will be a needle for blood transfusion systems - it is thick, durable, does not bend.
In the second step, you make a kind of adapter from electrical tape - 10-12 layers of it are enough. They need to be wound tightly so that the air does not come out when pumping back.
How to inflate a ball without a needle? Attach the invention to a bicycle pump and proceed with the procedure.
Method No. 3: syringe
How to inflate a ball without a needle - volleyball, basketball, football? Use a large medical syringe! This is in the most extreme case, because the method is quite exhausting - you will spend about 2 hours on the procedure.
As in the second method, you will need to blunt the needle, otherwise you will damage the nipple and the ball will deflate all the time. Which syringe to choose? The more the better:
It is possible to pump up the ball with 20cc in 30-40 minutes.
10cc syringe will keep you busy with the ball for one to two hours.
Before starting the procedure, we recommend that you treat the nipple with silicone grease - this will protect it from damage by an imperfect needle from a syringe. It is simple to act: insert the needle into the hole, pressing the lever of the syringe, release the air. Then remove the tool, return the lever to its original position and repeat the procedure.
Method 4: Needle but no pump
We've figured out how to inflate a ball without a needle (basketball, volleyball, football, etc.) But what if you have one (or you made your own needle), and is there no pump? We offer the following instruction:
The pump will be replaced by an ordinary plastic bottle from a carbonated drink. As a last resort - a dense plastic bag without holes.
Now you need to screw the needle into the cork of the container or solder it. This will be the adapter. Check that it does not let air through.
Then lubricate the ball nipple with silicone grease.
But now you need to pump air with your hands (or, if you prefer, with your feet) into our homemade pump, from where it will flow through the needle into the ball.
Other ways
Here are some more tips:
If you can't find a medical syringe, you can replace its needle with an empty ballpoint pen.
If you managed to pump up the ball just a little, then you can restore its hardness and elasticity like this: just hold it for a while in hot water. From this, the air inside the product will heat up, which will expand, which will complement the effect of jumping.
Silicone nipple grease can be replaced with machine oil.
The needle can be attached to the cap of a plastic bottle for a homemade pump with a glue gun.
Instead of a compressor, bicycle pump, bag or bottle, you can also use a regular rubber bulb.
A compressed air bottle, car spare tire or trash bag can also act as a pump.
So we have sorted out all the available ways to pump any ball with an air valve, if there was no pump and a special needle nearby. Contact a car repair shop, wield a medical syringe, build your own tool - choose what is most suitable for you.
Related articles
How to make a gel ball at home? How to make glowing balloons?
Gym wheel: how to train properly
How to choose a fitness ball?
How to choose a car pump. Car pump from the cigarette lighter
What is a fitball? Types, features and a set of exercises
How to pump up the "Brazilian ass"? Gluteus Maximus Exercises
Benefits of experimenting at home
Also read
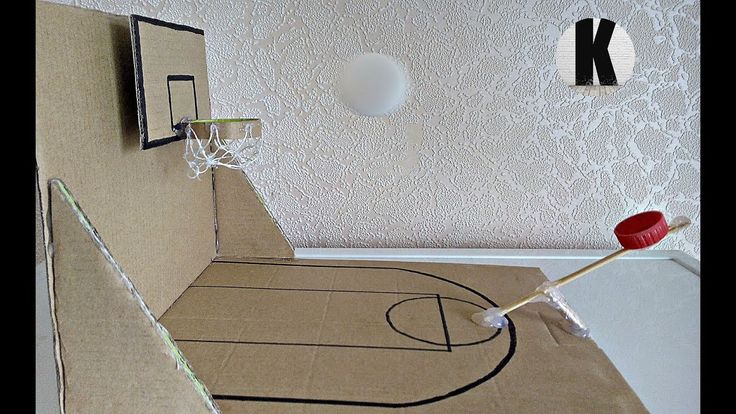
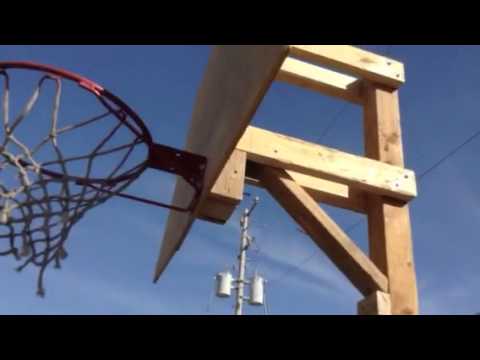
How to equip a basketball court in the country or in the yard
Basketball develops the physical data of the child - coordination, endurance, educates strong-willed qualities, concentration, attentiveness and teaches non-standard thinking. Professionals recommend sending a child to the basketball section from the age of 8-9, but outside the city or in the yard, you can “chase the ball” from an early age.
I myself equipped a basketball court in my country house and now I am ready to share the secrets of its arrangement. I'll tell you what you need to do, how to choose the right equipment and how to care for it.
Prepare basketball court surface
To create a basketball court in accordance with all the rules, you need to select a flat horizontal surface for it and fill it with concrete. After that, I recommend applying a special rubber coating, like on playgrounds in the yard. There is a more expensive coating option - from rubber.
The coating will provide cushioning - the ball will bounce well.
If it is not possible to organize a special platform, you can simply place a rack or hanging basket on a dirt surface. In this case, the ball bounce will not be so strong. An important requirement for safety: the surface must be flat, without holes and bumps.
The dimensions of the site depend on the features of your yard or plot in the country. A full-fledged basketball court has dimensions of 28 × 15 meters. However, not everyone has the opportunity to build such a site in the country.
It is necessary to take into account the technical features of the game. The three-point line in basketball is 6.75 meters from the hoop. Therefore, it is necessary that the size of the site be at least 10 × 13 meters. If you are not going to train three-point shots, a 5 × 5 meter court will do.
Mark out
The second step is to mark up. It is important to use paints of contrasting colors. It is better to buy paints with a high content of rubber or polymer.
If you are equipping a basketball court for children, make the markings bright so that they cheer you up and attract attention. For the game of teenagers and adults, it is better to immediately apply technically correct markings.
Place a small fence or protective net on the site. Thanks to them, you do not have to constantly run after the ball to the other end of the site.
Buy stand or backboard
It is difficult to answer the question of what is better - a basketball stand or a backboard. It all depends on taste, tasks and opportunities. Each of these types of equipment has its pros and cons.
There are two types of racks: mobile and static. The static one is mounted in the ground.
The base of the mobile rack is filled with sand or water - for stability. The main advantage of a mobile rack is that it can be moved from place to place. This is convenient when there is no dedicated basketball court or if you are going to play other games in this area, such as tennis or football.
The main requirement for racks is their stability. It will be much more comfortable and safer to play if you are sure that the stance will withstand a blow of any force.
Pay attention to the materials from which the racks are made. A static rack will be outdoors throughout the year, which means it must be made of reliable materials. It is better to buy racks from well-known manufacturers. So, the American companies Spalding or Royal Fitness guarantee high quality, durability and safety.
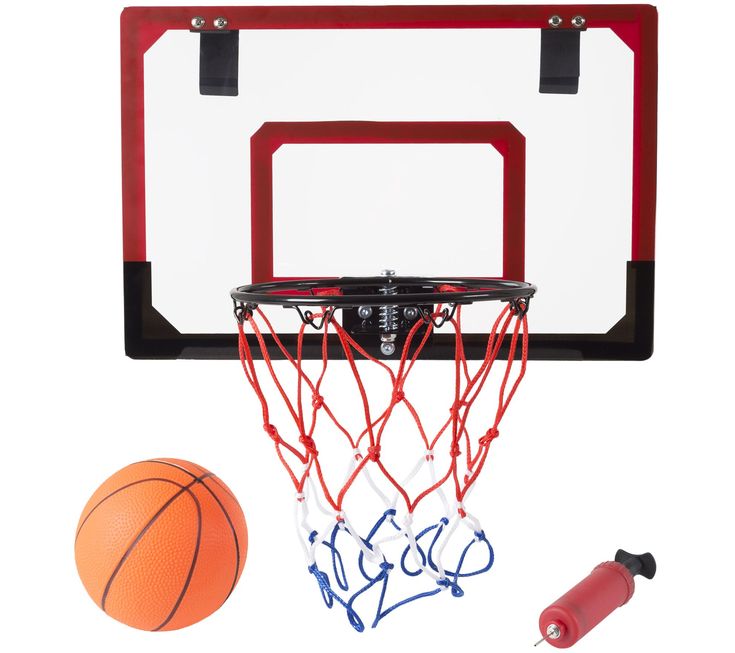
Basketball backboards can be made in the country with your own hands from a board, chipboard or plywood remnants. If this option does not suit you, you can purchase semi-professional or professional options in stores.
There are four types of materials from which the shield surface is made: composite, polycarbonate, acrylic and tempered glass. The first one is the cheapest. It is intended for entry-level players. Now manufacturers offer a large selection of colors. A carbonate backboard will provide a good bounce of the ball. An acrylic shield is bought to hold competitions or intense games.
The mobile stand can be moved, so it is suitable for a playground in the country and for those who want to play other games besides basketball
Shields and racks made of tempered glass look solid. They will be appreciated by experienced basketball players
Pay attention to the rings
You can buy cheap rings, but I don't recommend doing that. In a year they will deteriorate and you will have to buy new ones. Basketball hoops from Spalding and Royal Fitness are made from quality metal that won't rust in the rain.
The ring must have a springy structure - no rigid attachment to the shield.
According to NBA rules, the ring must be fixed at a distance of about three meters from the ground. For a game with the participation of younger students, it can be hung lower so that it is not very easy to hit it, but at the same time it is quite possible.
Choose rings made from high quality metal to last for many years. For a game involving adults and teenagers, metal chain rings are suitable. They are distinguished by durability and strength.
Know what types of basketballs exist
Success in the game depends on the basketball.
They are divided by size. Size 7 is for men, 5 for women. Even smaller balls are bought for children. The size 6 ball is suitable for street ball or street basketball where the game is played on half the field.
You also need to take into account where you will play the ball: on the street or in the hall. The street ball has a stronger bounce, it is harder and more wear-resistant, but the indoor ball is more convenient to hold in your hands.
It is important to pay attention to the composition of the basketball. Well-known companies use complex polymer compositions for its production. The more expensive the ball, the more complex the polymer composition. The quality of the material determines how comfortable it will be for the players to hold the ball, what kind of rebound it has from the floor and from the bow of the ring.
Another important nuance: do not forget to purchase a pump with any needle.
If you want the ball to have good grip and bounce well, you need to choose polymer models from world famous manufacturers
Proper care
Professional athletes are ready to play in any weather, but amateurs are better off not following their example. If you don't properly store, use and care for your basketball arsenal, its lifespan will be shortened. Humidity will ruin the ball and all equipment, so you can’t leave them outside during rain and snow.
Balls should only be stored in a dry and ventilated room at a temperature of 10 to 20 °C.
Before winter storage, water must be poured out of the base of the mobile rack, and then removed from the street. If you don't feel like doing this every time, fill the rack with sand. Then it will not need to be constantly moved. Basketball stands from Royal Fitness can be left outside in the winter.
Points to remember when setting up a basketball court
The area needs to be determined. The classic version - 28 × 15 meters - is not suitable for everyone. For a dacha, a 5 × 5 meter area will be enough if you want to train three-point shots.
Don't forget the markup. It should be in a contrasting color. Bright colors will interest children and cheer them up.


 This method is relatively simple and is a great option if the previous methods don’t work.
 The plastic coating should remain inside the ball.
 If you are outdoors and don’t have any tools with you, this would be an ideal option.
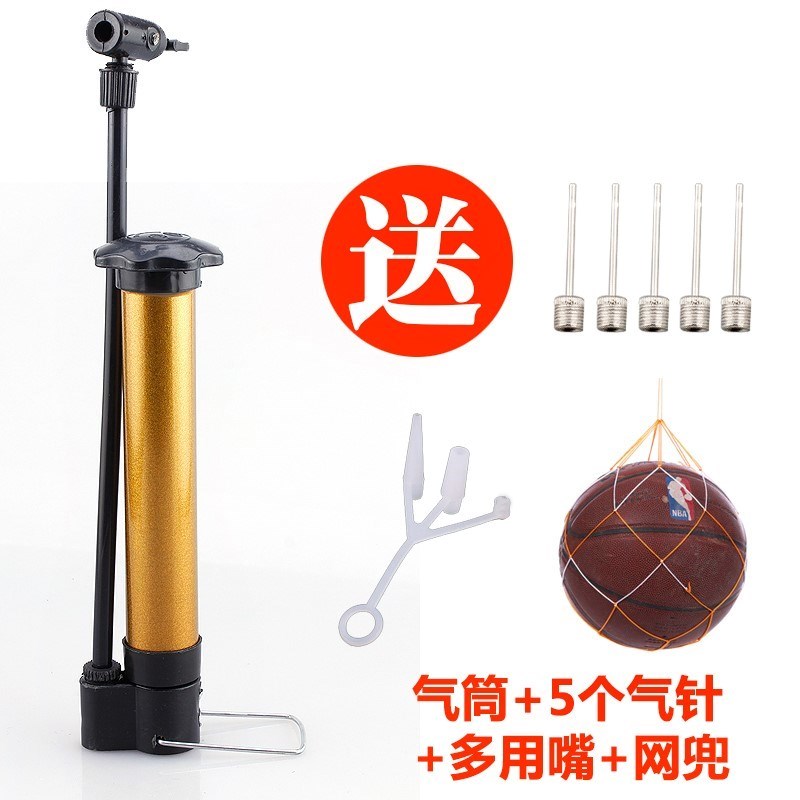 It’s annoying and also incredibly frustrating. Thankfully, there are a number of different ways you can pump up a basketball (whether indoor or outdoor) without needing to have a needle at all. This guide is going to look at a few of them.
 Also, they might not have the needle attachment so it couldn’t hurt to call ahead.
 When is it better to use it, and when is oil
  Therefore, a special pump, a needle, and sometimes even silicone grease are often sold with it. But imagine that all this is simply not at hand. How to pump up a ball without a needle? We have selected for you several effective folk methods.
  The hose with the nozzle is pressed tightly against the valve, after which the device turns on at full power. It must be deactivated immediately as soon as the surface of the ball becomes hard. That's all!
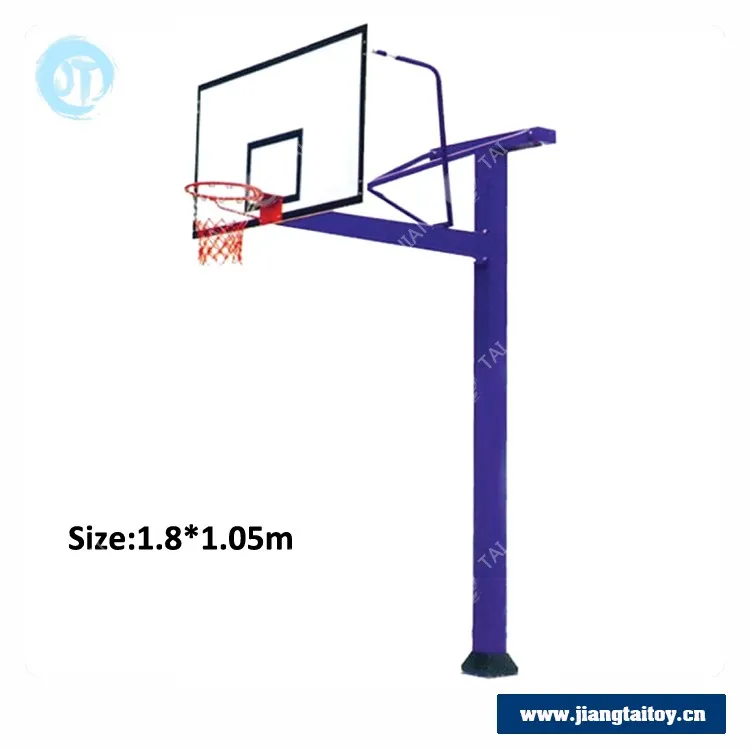
 It is simple to act: insert the needle into the hole, pressing the lever of the syringe, release the air. Then remove the tool, return the lever to its original position and repeat the procedure.
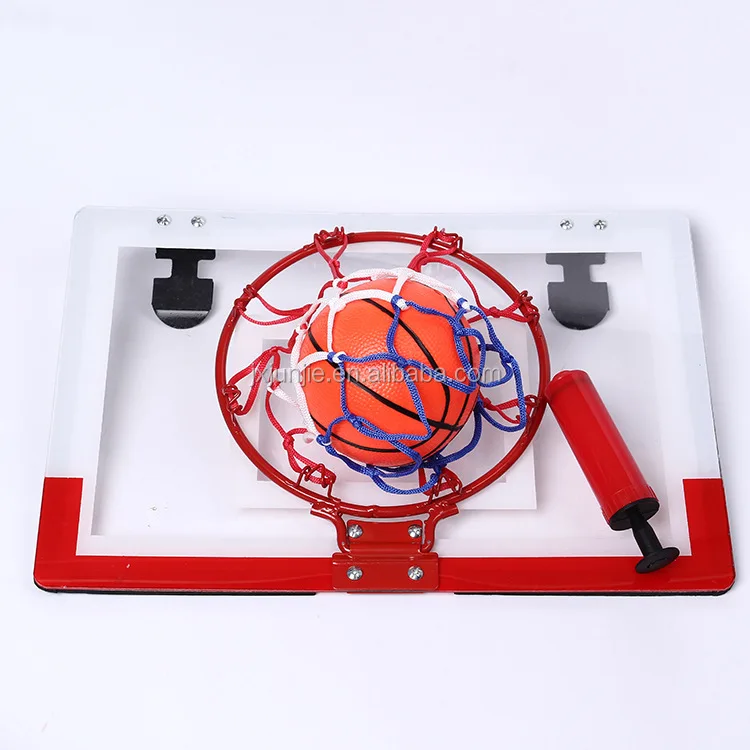
 Car pump from the cigarette lighter
 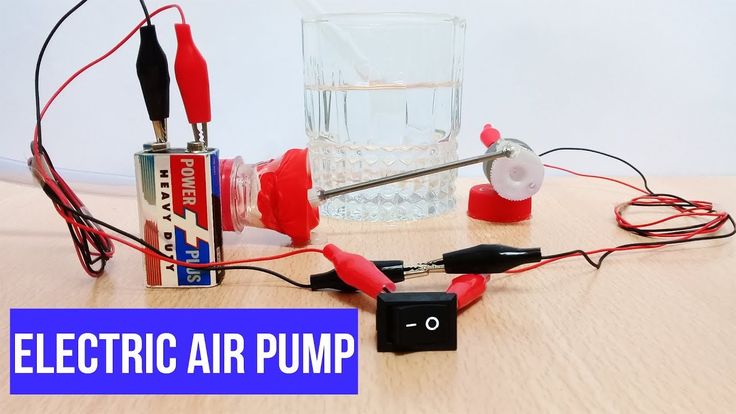 I'll tell you what you need to do, how to choose the right equipment and how to care for it.
 It all depends on taste, tasks and opportunities. Each of these types of equipment has its pros and cons.
 In a year they will deteriorate and you will have to buy new ones. Basketball hoops from Spalding and Royal Fitness are made from quality metal that won't rust in the rain.
 If you don't properly store, use and care for your basketball arsenal, its lifespan will be shortened. Humidity will ruin the ball and all equipment, so you can’t leave them outside during rain and snow.
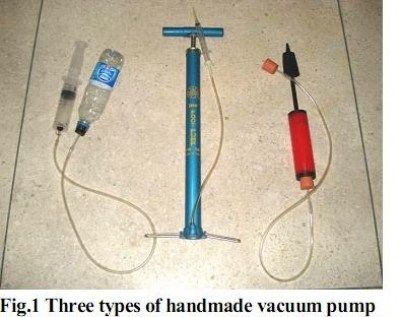


:no_upscale()/cdn.vox-cdn.com/uploads/chorus_asset/file/13128999/KELDON_JOHNSON_MBB2018_01_CW_600x900.jpg)