Home » Misc » How to master the spin move in basketball
How to master the spin move in basketball
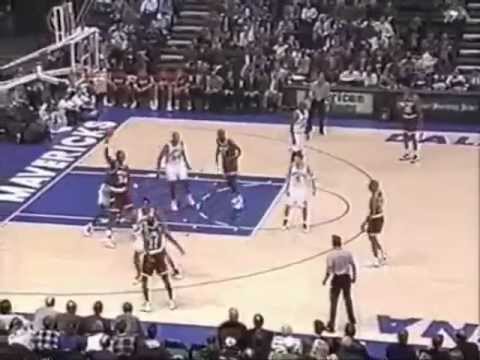
Basketball Spin Move
Home>Sports>Basketball>Basketball Skills
PreviousNext
A spin move in basketball is a move used by an offensive player with the ball to get by the defense. It involves the ball handler getting to a defender and spinning his body 360 degrees while moving laterally to create space between himself and the defender.
Table of Contents
How To Perform A Spin Move
Common Mistake
When To Use A Spin Move
Combinations
Picking Up The Ball
How To Perform A Spin Move
The instructions here pertain to a spin move that starts with the ball in the player’s right hand. For a spin move that starts in the player’s left hand, simply reverse the directions.
To start, the offensive player begins by dribbling the ball in his right hand to approach the defender. Once the ball handler reaches the defender, he gets low and puts his left shoulder into the defender’s chest. As the offensive player does this, he places his left foot, angled to the right, between the defender’s feet. Both feet should be on the court at this point.
Simultaneously, the ball handler takes a strong, but controlled, dribble. This allows the offensive player to keep his hand on top of the ball through the entire move while still being in control of it. A stronger dribble will give the ball handler more time with the ball in his hand.
The offensive player stops his forward progress, but leans forward, placing more weight on the ball of his left foot, making sure to stay balanced. He then pivots on his left foot and picks up his right foot, turning in a clockwise fashion so he is facing the opposite basket.
Now, the ball handler’s body weight shifts to the heel of his left foot as he continues to swing his right foot around. This foot should not stretch very far from the pivot foot. As the offensive player spins back so he is facing the defender again, he takes one more dribble with his right hand. This dribble, however, should be snatched back and end up in his left hand to make sure the ball is protected. Finally, the offensive player pushes off his right leg and blows by the defender.
Common Mistake
One thing for players to avoid when performing a spin move is transferring the ball to their other hand immediately after taking that strong, controlled dribble discussed before. This makes it more difficult to get away from the defender and gives the defender an opportunity to steal the ball.
When To Use A Spin Move
A dribbler can use a spin move in a few different situations. The first is in the open court, when the defender is pressing, or at least playing far away from his team’s basket. A quick, explosive spin move against a defender in this position can put the ball handler ahead of the defensive player and set up a good possession for the offense.
A spin move can also be used to find an opening for a jump shot. With the defender on the offensive player’s hip, the offensive player can create an open window to shoot the ball.
Moreover, a spin move is good for layups or other shots close to the basket. This can mean beating the offensive player’s initial defender near the basket or against help defenders who are scrambling to help their teammate.
Finally, a spin move can be used as a reaction to good initial defense. When a defender beats the ball handler to the spot, the ball handler can smoothly transfer his forward momentum into a spin move that will set him up in the other direction, away from the primary defender. The spin move as a reaction or counter can be incorporated into any of the three above uses.
Combinations
Setting up a spin move can help it to be more effective. Either stepping in the direction away from the intended spin move or crossing over, for example, can help to move the defender in the other direction. This will create more space between the ball handler and the defender.
Picking Up The Ball
On some plays the ball can be picked up after the dribble that starts the move off. Picking the ball up is effective if the ball handler is in heavy traffic and needs to protect the ball. As long as the player shoots the ball, or at least gets rid of it, by the time he takes two steps, this is not a traveling violation.
PreviousNext
Pages Related to Basketball Spin Move
Basketball Step Over
Basketball Stance Types
Basketball Skills And Techniques
Basketball Stride Stop
Basketball Shuffle Step
Basketball Slam Dunk
PreviousNext
How to Master the Kyrie Irving Cross Spin Move in Just 5 Minutes a Day!
Your mid-range game is fire. You consistently make shots from deep, but you just don’t have that move to get you closer to the basket for an easier shot. You want to be well rounded. You want to be a scorer, not just a shooter. You want to be able to score from anywhere on the court.
What move is missing from your arsenal?
The move you’re missing could be the Kyrie Irving cross spin move. Kyrie Irving has used this move throughout his career, and it has helped him score bucket after bucket. He puts defenders on a spin cycle with this move. He has them at his mercy.
How does he do this?
First, he identifies the defender overplaying him. He then may execute a half spin and come back right away. He may also completely spin 360 degrees and go all the way to the basket. He plays with the defenders and chooses his move based on how the defender tries to stop his move. They try. Oh, they try, but they rarely stop him.
Follow these steps below to learn how to use the Kyrie Irving cross spin move to blow by defenders on your way to the basket to score.
First Key
As you dribble, you must take your defender to one side or the other. Dribble purposefully to the right or to the left. You MUST go in either direction. A spin move does not work when you drive straight into your defender. You need to create space for your spin move.
How does the move begin?
You are coming down the court towards the top of the key, and the defender is waiting for you. You know the defender is going to try to cut off your drive to the right, so he/she is overplaying you. You take your first dribbles to the right knowing you are going to use the spin move to get by the defender going to the left.
As you take your last dribble to the right, you must PLANT with your left foot. This will allow you to pivot and swivel towards your backside. When you pivot, you want to pivot on the BALLS of your feet. By using the balls of your feet, you will have less friction which will cause you to go even faster on your spin/pivot.
Crossover -> Spin Move
You can set your spin move up with a crossover, through the legs or behind the back dribble. Remember, you want to take the defender in one direction. By crossing over, you are establishing the direction you want to go. The defender will think you want to go to the right because of your INITIAL move. When the defender jumps in front of you to stop the move, you IMMEDIATELY plant, pivot, and spin away from the defender going to the left.
As you execute your spin move to the left, your right foot should drop DIRECTLY to the basket, so you can attack. You want to execute your drop step quickly, so the defender will not have time to recover and get back in front of you.
What if the defender doesn’t jump in front of me when I dribble between my legs?
Keep GOING to the hoop. If you can beat your defender with just a quick change of direction move like an in between the legs move, use it. The spin move is there as a progression if the initial move is not there. Do not force it.
While you are making your spin move, it is important not to put your palm under the ball. This will result in a CARRY and a PALMING call. You also don’t want to change hands too early in your spin. If you change hands too early, the ball is left unprotected from the defender. The defender may be able to swipe it away from you.
When do I switch hands?
This takes practice. You should change your dribble hand when your back is to the basket. As soon as you change hands, you can immediately get into your move and attack the basket.
You could also do a DROP dribble. This allows you to get into your shot a little quicker. It also allows you to advance the ball up and create more space.
Both dribbling techniques work well. As soon you spin by your defender, use one of those techniques and go hard to the basket or pull up for a nice jump shot.
Remember, the purpose of the spin move is to get by a defender who is OVERPLAYING you to one side. It takes practice getting used to the move. Once you feel comfortable using the move, it will become an EFFECTIVE weapon for you on the court.
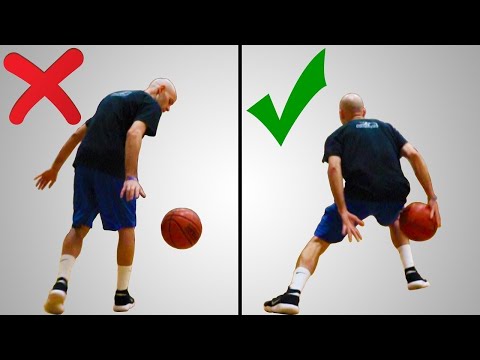
Drill #1 Ball Control (20 reps w/each hand)
This drill is one of the BEST drills to improve ball control, and you can do it anywhere. You don’t need a gym. You can also do this basketball drill alone, all you need is a hard surface and a line. If you don’t have a line, you could use tape. You could even use a string.
You stand with your legs a little more than shoulder-width apart. You will POUND dribble on your right side and then bring the ball over to the left side with the same hand. You will pound dribble on the left side and bring the ball over with the same hand to the right side. You will continue this pattern for 20 repetitions. Then you will complete the drill using your left hand.
Is this just a v-dribble or a windshield wiper dribble?
This is NOT a v-dribble or a windshield wiper dribble!! The ball is not going to bounce on the line in the ground between your legs. The ball will bounce in front of your leg, and you will CARRY the ball over the line to bounce in front of your other leg.
While you are doing the drill, make sure you stay LOW. Squat slightly as you dribble. Make sure you are keeping your eyes up as well. As you get more comfortable, spread your legs wider and wider. Your body will sway with the ball it goes over to each foot.
You want to smash the dribble down. Soft dribbles will not allow you to bring it all the way to your other foot. You need to use force.
Drill #2 Back Pivot (10 reps)
Another good drill to help with the Kyrie Irving Cross Spin move is the back pivot drill. You will be incorporating your ball handling with your footwork. Your focus is going to be on your PIVOTING.
If you are on a court, face the sideline so you are PARALLEL. If you are at home, in a garage, or even outside, make sure you have at least 10 feet of space. You will be continuously moving in one direction, so you will want to make sure you have a big enough area to allow for this movement.
To begin the drill, pound dribble in front of your right leg. Then execute a back pivot. Upon completing the back pivot exchange your dribbling hand by using a LATERAL dribble. Immediately pound dribble with your left hand in front of your left leg and execute another back pivot. Again upon completing the back pivot exchange your dribbling hand by using a lateral dribble. Continue this pattern four times, or until you run out of space. You can continue this drill going in the opposite direction.
A key thing to remember is you need to transfer the ball QUICKLY using the lateral dribble. When your lead leg hits the ground after your back pivot, the ball needs to already be exchanged from your initial dribble hand to your receiving hand. The ball should be transferred by the time your body is parallel to the sideline after your pivot.
This drill helps you with THREE important things:
Ball Handling
Footwork
Timing of Ball Exchange
You should complete 10 repetitions of this drill. You will practice your back pivot, ALTERNATING using your left and right hand four times. That would count as 1 repetition. Complete this pattern 9 more times. If you are ambitious and you really want to master this move, complete 20 repetitions. That will only make you better!
Drill #3 Spin and Drop Step (10 reps)
So now you are going to COMBINE your between the legs dribble with the spin and drop step move. You will complete many repetitions, so you will build muscle memory.
To start, dribble the ball with your left hand. JAB step to the right and complete a through the legs dribble. Immediately go into your spin move exchanging the ball from your right to your left hand.
On your drop step, check your FOOT PLACEMNENT. You want to make sure you spin far enough so that your foot is directed towards the basket. If you do not spin far enough, the defender will be able to recover and stop your attack. You want your drop step foot to point to the basket with your shoulders squaring to the basket as well.
You also want to check where the ball is when you are drop stepping. Do not have the ball out in front of you. The ball should be PROTECTED by your body because you have switched your dribble hands using a drop dribble.
When you are finishing with the spin move and drop step, spin back to your starting spot and execute the move again going in the opposite direction. You will complete the move 10 times going in each direction. At first, make sure you are going slower to ENSURE you are completing the move correctly. As soon as you know your technique is sound and you feel more comfortable, begin to move faster. Be strong with the ball and quick with your footwork.
Drill #4 On the Move Spin (10 reps)
Now you are going to start this drill by being on the move.
1st Progression
You are going to dribble up and use a crossover dribble to being your spin move. Place a chair at the top of the key. Dribble towards the chair with your right hand, execute a crossover dribble to your left hand, and immediately go into your spin move. You do not need to completely attack.
Once you complete your dropstep, you dribble back to your starting position. You will repeat this move, but you will begin with the ball in your left hand. You will complete 10 repetitions to your left side and 10 repetitions to your right side. It works well to alternate which hand you use when you are starting the drill.
2nd Progression
Instead of using the crossover dribble, you will use a between the legs dribble. It sis the same pattern as the first progression. Make sure you use the proper technique, quick footwork, and strong ball handling.
You will complete 10 repetitions going to your left side and right side. Alternate the hand you begin with after each repetition.
3rd Progression
The next progression will having you using a behind the back dribble. This is a little more challenging and complicated, but it can become very effective once you become comfortable using it.
Once again, you will complete 10 repetitions going to your left side and right side. Alternate the hand you begin with after each repetition.
Drill #5 Spin Move Down and Back (10 reps)
In this drill, you will play with different VARIATIONS before getting into your spin move. Begin by using a crossover dribble to start the spin move. On your next repetition, use the between the leg dribble. You could always use a behind the back dribble. Mix it up. Be versatile with which move you use as you transition to your spin move.
You can carry this move all the way to the baseline like you are attacking the basket. As soon as you get to the baseline, TURN around and execute the move going in the opposite direction.
When you are completing all of these drills, always remember to stay LOW. You want to master how to protect the basketball at all times. Be quick and explosive. You want to use this move to blow by the defender.
Keep practicing this move to become more than just a shooter. You want to be able to get to the rim, and this move will HELP you get there. It just takes 5 minutes a day. 5 minutes a day that can IMPACT your basketball career for a LIFETIME.
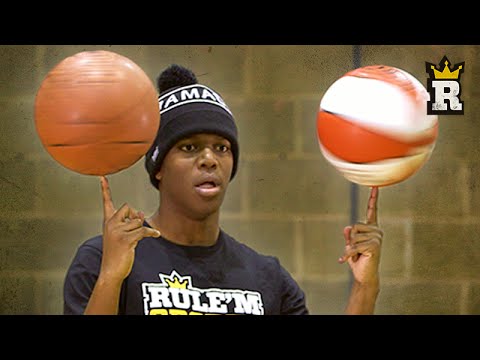
How to learn how to spin a basketball on your finger
To skillfully spin a basketball on your finger, you need to learn a few simple techniques, find the ball and set aside 10 minutes of training per day. After a week of practicing your skills, you will master the technique of this trick and show it to your friends. In the step-by-step instructions below, we will show you how to learn how to spin a basketball on your finger.
Tossing the ball correctly
You can train on the sports ground, near the house or even in the apartment, but in any place you need to take into account the environment. For example, when practicing a trick in a room, the ball can bounce and break fragile objects. When a place is found and inventory is prepared, you can begin training. Initially, you need to learn how to properly hold and throw the ball in the air:
Hold the ball with the stripes vertical. Horizontal scrolling looks ineffective and it is very difficult to catch a projectile from this position.
Select throw method:
Two hands. You need to keep the ball not on the sides, but so that 1 hand “looks” at you, and the second from you. Having fixed the object, sharply spread your arms and slightly “throw” the ball up.
With one hand. To throw with one hand, place your fingers along the lines of the ball. It is important that there is free space between the palm and the inventory. Lightly squeeze the ball. Turn the brush outward until it stops, and then gently turn it back. At the last moment, you need to give additional rotation to the ball with your fingertips. But we do not recommend using a large one, because. this will upset the balance and the ball will fly away.
Throw the ball parallel to the floor, do not allow the ball to wobble. It is important that when thrown, the projectile rises above eye level. When its bottom surface is visible, the ball is easier to catch.
These steps must be repeated until fully automatic. Usually it takes two days. When the throws are confident, you can move on to the second level.
Learning to catch the ball
Once you have learned how to throw correctly, try catching the ball with your finger. To do this, remember the following nuances:
You need to catch the projectile on the nail, not the finger itself. In this case, it is important that the brush is turned with the palm towards you.
The finger must be placed strictly in the center, at the junction of the vertical lines, otherwise the ball will slide off.
When your finger touches the ball, gently and smoothly lower your hand down. So you will improve the cushioning, the inventory will not bounce, and you will not damage your finger.
This stage is one of the most difficult and requires patience on the part of the freestyler, athlete and just wanting to master the skill. When you learn how to catch the ball, at first it can control you: jump off and make you “run” after it to keep your balance. Be patient and keep practicing.
Once you are comfortable with a spinning ball, try to keep it spinning and spin it further. To do this, with light flapping movements, move your free hand along a tangent. But remember that strong twists can shift the center of gravity and the projectile will lose balance.
Tips
Here are some helpful tips from the pros:
practice throwing a few times a day before moving on to other stages;
workouts can be quite tiring, so take breaks between sets to give your hands a rest;
use only a well-inflated ball;
when accelerating the rotational movements, do not apply much force, otherwise the ball will slip off the finger;
Trim your nails before practicing, this will increase rotation control;
do not throw the ball very high: you can damage or break the phalanges;
You can reduce the risk of wrist injury by warming up before practicing the exercise.
Knowing how to spin a basketball on your finger and approaching the matter responsibly, in a week you will be able to show a cool trick to friends or sports colleagues.
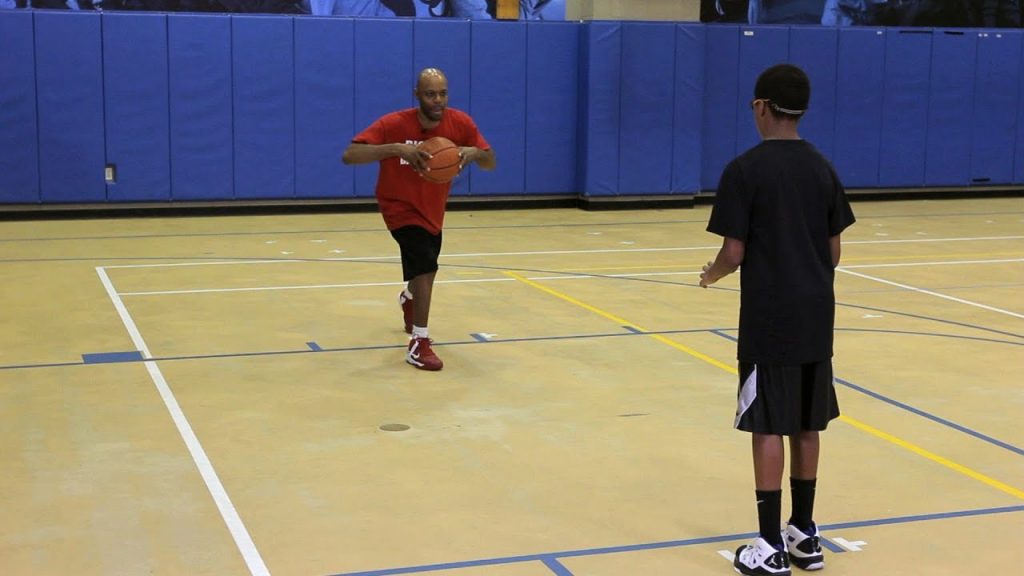
Shooting exercises
replica swiss watches
Basketball is a great team game, the team consists of players whose skill is achieved with great effort. The only person who can understand that you are working hard is yourself. Remember, you only get out of the game what you put into it. Give yourself to her without a trace.
Jump shot
In basketball, an outstanding sniper is a piece item. If you want to be a great sniper, all you need to do is just want to be one.
First, you must improve your craft.
This includes having a good coach and years of training. Secondly, you must improve in game mode.
This means that you must perform throwing drills at the same intensity as in the game. It's far better to hit 100 shots in play than 500 sloppy shots that a good defender would never let you make in a game. Finally, you must understand that working on a roll is like investing in a bank. If you don't deposit anything into your account, you won't receive dividends when you need them.
The sniper must have "throw school". When throwing after a dribble, one of the main features is the last hit of the ball on the court, which must be fast and strong so that it bounces higher, right into your hands - this will help you not waste time handling the ball.
Individual Shooting Exercises
Exercise 1 Attention Concentration
Start from a distance close to the ring.
Throw with one hand. Follow correct technique.
Make five from each position. Take a step back and repeat (Fig. 1).
Exercise 2 7 throwing positions and rebound (4 meters)
Jump shot from position 1.
Pick up the ball, dribble quickly to position 7, shoot.
Pick-up, fast with guiding back to position 1.
Make 10 rolls.
Repeat the same steps using positions 6 and 2, 5 and 3, 4 (fig.2).
Exercise 3 7 shooting positions and a rebound (from behind the three-point line)
1. Repeat the same steps as in exercise 2 (fig. 3).
Exercise 4 Throw after stop
Start from position 1, toss the ball to position
Pick it up, while you have to run around the ball so that you are facing the ring.
Make 10 rolls, then advance to the next position.
Ex.5 Shooting from five positions after a fake move (from four meters or from behind the three-point line)
Start from any position.
On bent knees and with your head up, you do a throwing feint, hit the ball one or two with your right hand, stop and jump.
Return to position, throw feint, one or two hits with the ball with the left hand, stop, throw.
At each position, 5 attempts (Fig. 5).
Exercise 6 Jump shots after dribbling
Start the exercise from the center of the field, move towards the dribbling ring at game speed, after stopping quickly shoot.
The shot must be taken from a middle distance or from behind a three-point arc. Perform the exercise, both on the right and on the left and in the middle of the site.
Use different types of dribbles: fast dribbles, broken tempos, pivots, etc.
Make 5 attempts in each direction (Fig. 6).
Exercise 7 Playing with a virtual opponent
Make a free throw. If you have implemented it, you get one point. If not, then your "opponent" is three.
You make subsequent throws from any position except the three-second zone, imitating the rhythm of the game. Work on different moves and throws. Each of your successful attempts is estimated at the bottom of the point, unsuccessful at two for the "opponent". The game goes to 11 points.
This is a very good exercise to reinforce what you have learned. Try! Improve! (Fig. 7).
Double shots
Dr. 8 2 players, shot and rebound (4 meters or from behind the three-point line)
Drill starts with a good, clear pass. The player who made the pass from under the basket goes to the place of the thrower.
The player in position 1 catches the ball and shoots.
After the shot, the player runs to the rebound and then passes the ball 1 position and so on.
Each player must make five throws. The exercise is performed at a fast pace, but the throws should not be sloppy.
Then move to another position and everything is the same (Fig. 8).
Exercise 9 Two players, throw and rebound (per result)
The exercise is performed as described above.
The player who made the pass tries to interfere with the shot, but does not block.
Game up to 5 hits.
Then we move to another position, and so on. (Fig. 9).
Exercise 10 Two players, throw and rebound, throw feint
The exercise is performed in the same way as the previous one.
The defender who made the pass tries to interfere with the player in position 1, but does not block the shot.
The attacker makes a throw feint and beats the defender.
Performs a short dribble, stops and throws.
Do 5 times each and change position (Fig. 10).
Ex. 11 2 players, shot after a stoppage (from four meters or from behind the three-point line)
The forward is in position 1, ready to receive the pass.
The player under the basket passes.
After the throw, the attacker waits for the rebound to be made.
The player receives a pass by making a stop, but already in position 2. Then back.
Make 7 throws, two free throws and switch (fig. 11).
Ex. 12 Shooting with movement (from four meters or from behind a three-point arc)
The attacker moves around the perimeter at game speed.
A player passes to the hand farthest from the ring.
The attacker must stop, catch the ball and throw.
Make seven throws, two free throws and change (fig. 12).
Note: The previous exercise has three options.
A) Receive the ball and throw it.
B) After receiving, throwing feint, dribbling in the same direction, throwing.
B) Receives a pass, throw feint, dribbling to the ring in the other direction, stop, throw.
Ex. 13 Various dribbling options and a jump shot
The attacker starts from the center of the field and, dribbling at game speed, moves towards the ring, stops and takes a jump shot.
The player under the basket picks up the ball, the attacker runs to the center of the field, and receives the ball on the opposite flank. Moves with dribbling to the ring, stop, jump shot.
Right side dribble with right hand, left dribble with left hand (Fig.13)
Note: Use speed dribbling, change of pace, transitions, pivots.
Three players, two balls
Exercise 14 Warm-up exercise
One player throws, another passes, a third rebounds.
Thrower becomes rebounder after seven tries.
Passer - thrower. Picking up - passing (Fig. 14).
Note: different options are possible
1) From seven positions (four meters)
2) From seven positions (from behind the three-point arc)
3) From five points with feints to shoot
4) Throw after stoppage
5) Throw and rebound (constant rotation around the circle)
Double shots: using screens
To use the screen effectively, you must read the defender correctly. You must always see the player with the ball and how the defender defends against you. A player who moves well off the ball and knows how to use screens correctly is very useful offensively. When you watch a match that has good players, notice how well they move off the ball. The hardest thing to defend against is a well-moving attacker.
Exercise 15 Back screen and snatch
The player imitates opening and screening behind his back, makes a dash to the corner of the court.
Throw to near hand.
Attacker catches the ball and shoots.
The attacker picks up his shot, passes to a partner and returns to his original position.
Make seven attempts and change (Fig. 15)
Note: do not back away when dashing, turn around and run, but do not lose sight of the ball.
Exercise 16 Screening behind the back, "false" screening
1. Attacker starts on the base of the trapezoid and moves up to imitate the screening.
2. After the imaginary breakout runs, the screening attacker rises to the ball and prepares to receive the pass.
3. Having caught the pass, he immediately makes a throw.
4. Make seven attempts and change (Fig. 16).
0003
An attacker imitates a defender on the screen and rises sharply towards the ball.
The player must be ready to receive the ball.
The attacker catches the ball and makes a quick throw.
Make seven attempts and change (Fig. 17)
Exercise 18 Screening the ball carrier, moving away from the ring
The attacker screens the ball carrier.
The ball carrier passes through the screen aggressively.
Instead of pulling back to the hoop (deuce), the screening attacker moves away from the hoop and prepares to receive the pass.
Having caught the ball, he immediately makes a throw.
Make seven attempts, then switch.
Exercise 19 Barrier at the base of the trapezoid - opening to the flank
The attacker takes the player under the ring, breaks shoulder to shoulder through the barrier and makes a dash to the flank.
When catching the ball, the player must turn to the ring.
Use different throw options: just throw, and dribbling to the right or left after a throw feint. Change after five attempts (Fig. 19).
Exercise 20 Barrier at the base of the trapezoid - opening into the corner of the court
The attacker takes the player into the three-second zone, pretends that he will break through to the flank through the barrier, the defender starts running around the shielder through the three-second zone.
An attacker rushes into the corner of the court and the defender hits the screen.
Next, the same as in the previous exercise (Fig. 20).
Ex. 21 Screen at the base of the trapezoid - dash inward
The defender is chasing you, not falling behind until the very screen.
Then you run through the screen as close to the screener as possible and break into the 3-second zone or foul line area.
Receive the ball by turning towards the hoop and throw it.
Also work out various options for continuing after receiving the ball. After five attempts, change (Fig. 21).
Throws in pairs: pass and discount
Exercise 22 Pass and discount - starting from the center of the field flank.
The receiving player is opened for transmission.
Player receives a pass and shoots.
The player who made the pass picks up the ball and gives it to the thrower.


 Finally, the offensive player pushes off his right leg and blows by the defender.
 This can mean beating the offensive player’s initial defender near the basket or against help defenders who are scrambling to help their teammate.
 As long as the player shoots the ball, or at least gets rid of it, by the time he takes two steps, this is not a traveling violation.
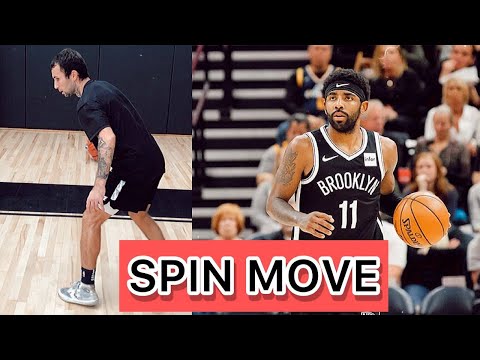 He puts defenders on a spin cycle with this move. He has them at his mercy.
 You MUST go in either direction. A spin move does not work when you drive straight into your defender. You need to create space for your spin move.
 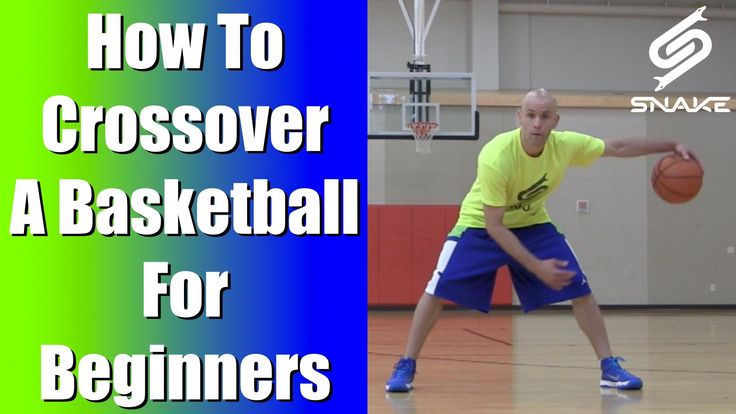 By crossing over, you are establishing the direction you want to go. The defender will think you want to go to the right because of your INITIAL move. When the defender jumps in front of you to stop the move, you IMMEDIATELY plant, pivot, and spin away from the defender going to the left.
  You also don’t want to change hands too early in your spin. If you change hands too early, the ball is left unprotected from the defender. The defender may be able to swipe it away from you.
  You don’t need a gym. You can also do this basketball drill alone, all you need is a hard surface and a line. If you don’t have a line, you could use tape. You could even use a string.
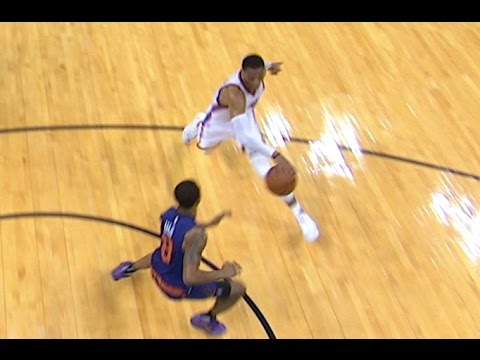 As you get more comfortable, spread your legs wider and wider. Your body will sway with the ball it goes over to each foot.
  Again upon completing the back pivot exchange your dribbling hand by using a lateral dribble. Continue this pattern four times, or until you run out of space. You can continue this drill going in the opposite direction.
  That will only make you better!
 You will complete 10 repetitions to your left side and 10 repetitions to your right side. It works well to alternate which hand you use when you are starting the drill.
 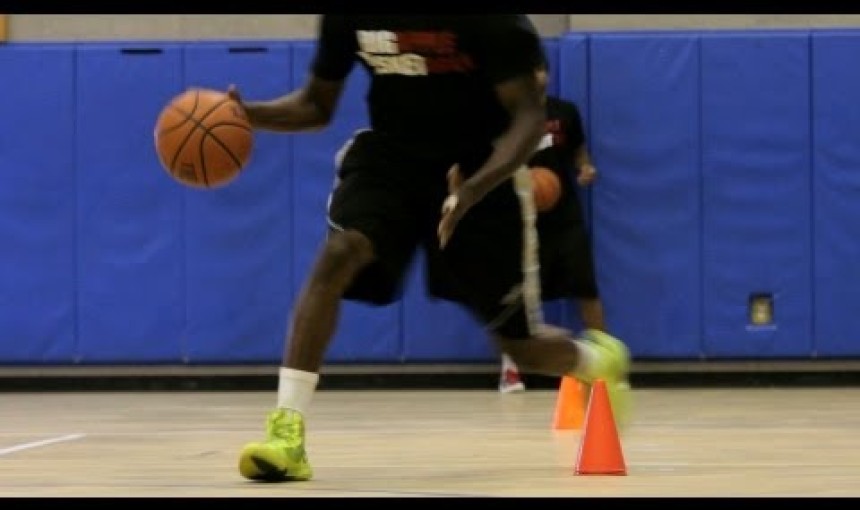 Begin by using a crossover dribble to start the spin move. On your next repetition, use the between the leg dribble. You could always use a behind the back dribble. Mix it up. Be versatile with which move you use as you transition to your spin move.
  After a week of practicing your skills, you will master the technique of this trick and show it to your friends. In the step-by-step instructions below, we will show you how to learn how to spin a basketball on your finger.
  Having fixed the object, sharply spread your arms and slightly “throw” the ball up.
  To do this, remember the following nuances:
  But remember that strong twists can shift the center of gravity and the projectile will lose balance.
 Repeat the same steps as in exercise 2 (fig. 3).
 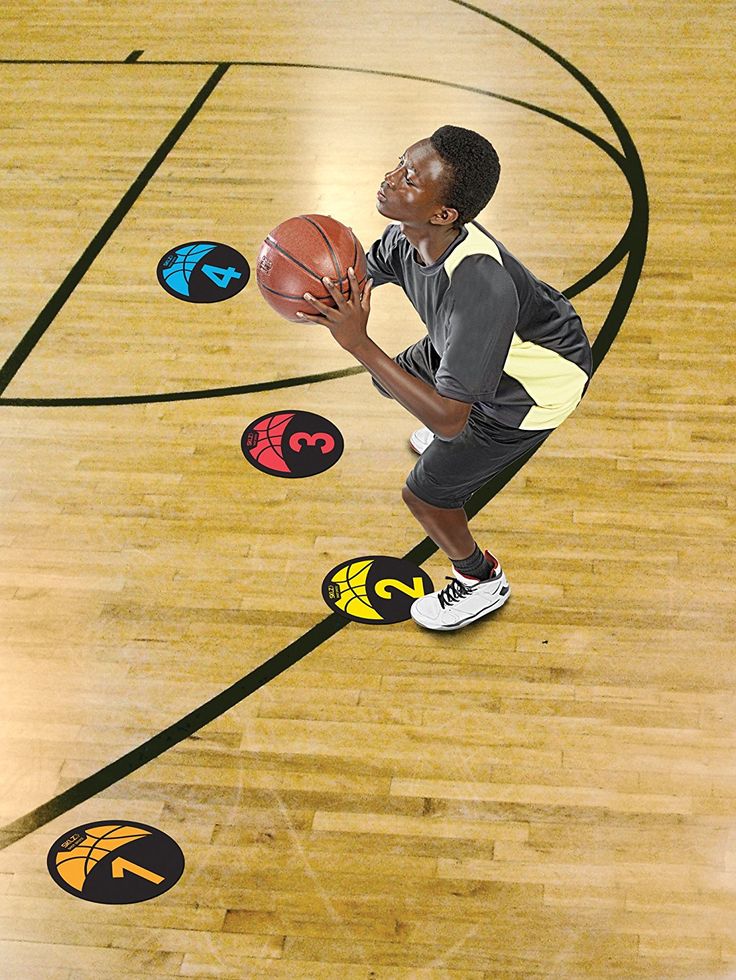 Perform the exercise, both on the right and on the left and in the middle of the site.
  The player who made the pass from under the basket goes to the place of the thrower.
 12).
12). 
:no_upscale()/cdn.vox-cdn.com/uploads/chorus_asset/file/13128999/KELDON_JOHNSON_MBB2018_01_CW_600x900.jpg)