Home »
Misc »
How to perfect your shooting form in basketball
How to perfect your shooting form in basketball
Proper Basketball Shooting Technique, Fundamentals, Form, Mechanics
By Jeff Haefner
Home > Player > Basketball Skills > Shooting > Proper Basketball Shooting Technique, Fundamentals, and Form
It's often said that great shooters have a place on any team.
Even if you aren't blessed with tremendous speed, strength or athleticism, great shooting is one of the surest ways you can stand out on the basketball court.
If you spend the time developing and practicing your shot, it will pay off in:
- Making the team
- Getting more playing time
- Scoring consistently
- Feeling confident and having fun every time you step on the floor
Now, let me start with some good news!
Yes, you do need very good shooting form and technique to shoot consistently well.
But it does NOT need to be "perfect".
If you watch enough great shooters, you'll see that their form varies quite a bit based on what's comfortable (and what works) for them.![]()
But almost all great shooters follow the principles I'll explain in this article. So keep reading for (all the good stuff)!
In this section, we give you the raw form and mechanics of stationary shooting.
In other words, this section does NOT address the fundamentals of shooting on the move and more advanced footwork you'll need for game situations.
Here's a quick roadmap of the stationary shooting fundamentals that we'll be covering:
- Eyes on Target
- Stance and Balance
- Shot Pocket
- Grip
- Balance Hand
- Delivery
- Upforce and Landing
- Follow Through
- Correct Shot
EYES ON TARGET- To improve accuracy, locate the target (rim) as early as possible.
- Keep your eyes on the target and do not follow the flight of the ball.
 - Keeping your target focus is very important!
|
STANCE AND BALANCE- Feet are shoulder width apart for good balance.
- Feet should be in a slightly staggered stance that is consistent and comfortable for you. Your shooting foot is slightly ahead of the non-shooting foot in a comfortable position.
- Point your feet in the general direction of the basket, but not necessarily directly at it. We prefer an open stance, but you can also use the closed (squared) stance if that's more comfortable for you. With an open stance, your feet point towards one side of the basket. For example, a right handed shooter will point his or her feet just to the left of the rim for a more natural position and shooting motion.
- Once you develop a comfortable stance, line up your feet the exact same way on every shot. Whatever stance you use, consistency is critical.
- Flex/bend your knees on every shot.
|
SHOT POCKET- As you catch the ball, move it quickly into the shot pocket.
- Line everything up so the ball and your shooting eye form a straight line to the basket. This is VERY important.
- Position the ball several inches above your waist.
- Grip the ball properly and be ready to shoot.
- Position the ball in your shot pocket the SAME way every time you catch it.
|
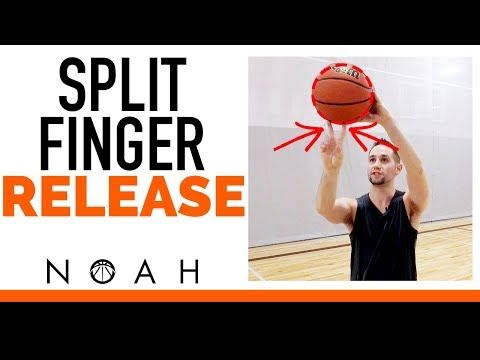
GRIP- Place the air hole between the middle and index fingers.
- Line up your fingertip pads parallel to the long seams of the ball, so you can monitor the back spin.
- Leave space between the ball and the middle of your palm. You should be able to insert a pencil between the ball and your palm area.
|
|
- Spread your fingers far enough apart to comfortably balance the ball in one hand.
 - The ball should sit on your finger pads.
|
|
BALANCE HAND- Your non-shooting hand should be on the side of the ball.
- Your balance hand should not add force or spin to the shot.
|
|
- Your non-shooting hand should not move on delivery and should ALWAYS come off the ball FIRST.
|
|
DELIVERY- The ball should start motion directly upwards from the shot pocket.
- Your elbow should be positioned comfortably under the ball.
- The ball stays in front of you and should not go behind your head.
|
|
- Uncoil your body with your legs, core, and arm power all coordinated.

- Your elbow and wrist should extend in a straight line to the basket.
|
|
- Your shooting hand should extend in a straight line to the rim.
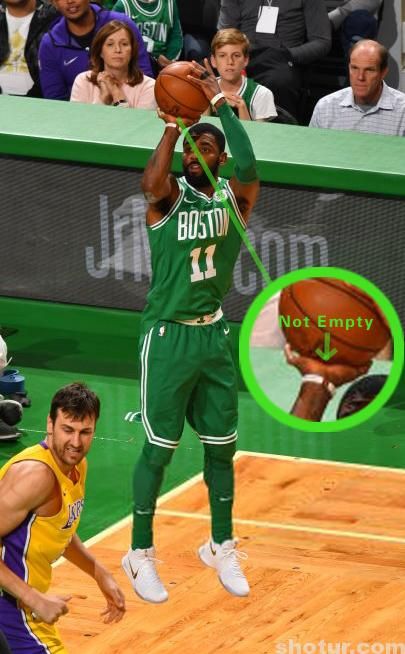
- Hand position on delivery is very important. The ball should come off the hand with perfect symmetrical backspin.
- As shown in the picture to the right, your guide hand stays to the side and does not influence the flight of the ball.
|
|
UPFORCE AND LANDING- Release the ball on the way up, just before the top of your jump.
- Use your legs to generate upforce.
- You should land in the same spot that you jumped, which shows that you have good balance on your shot.
|
|
FOLLOW-THROUGH- Your wrists should be floppy (relaxed).

- Fingers should be pointed at the target (rim).
- Finish high. You should see your fingers at the top square of the back board.
- Hold your follow through position until the ball hits the rim.
|
NOTE: If youd like specially-designed workouts for shooting and scoring, download our FREE Breakthrough Shooting Workout. It includes over 30 drills you can do by yourself or with a partner all you need is a ball and a hoop!
Click here to get your FREE Shooting Workout.
Related Products & Helpful Resources
Basketball Shooting Camps
Free Basketball Shooting Workouts
Basketball Workout App - Shooting Workouts, Guard Play Workouts, Post Workouts, etc.
USA Basketball - 3 Cues for Better Basketball Shooting
If you're a good basketball shooter, the coach will find a spot for you on the floor, especially at the high school level.-Step-5.jpg/aid43486-v4-728px-Play-21-(Basketball)-Step-5.jpg) Thus, it becomes extremely important to learn the correct basketball shooting technique, and to practice various shooting drills over and over and over again. Larry Bird didn't become one of the greatest shooters of all-time just because he had a pretty shot. He practiced relentlessly too.
Thus, it becomes extremely important to learn the correct basketball shooting technique, and to practice various shooting drills over and over and over again. Larry Bird didn't become one of the greatest shooters of all-time just because he had a pretty shot. He practiced relentlessly too.
It's amazing how many kids don't know how to shoot a basketball correctly. They can't even explain the correct shooting technique, let alone demonstrate it. So we use a couple of cues to correct even the most horrid shooter's shots.
Once again, we use the Wooden approach to improving a basketball player's shot: quick, short cues not long explanations, as well as showing the player how to do it correctly, showing them how they are doing it, and then showing them how to do it correctly one more time.
Here are three cues for better basketball shooting:
Start Small End Tall
We actually stole this one from Ganon Baker. Very few kids actually explode into their shot. They start way too tall and never get their legs involved. They may shoot fine 8-10 feet from the basket in stationary drills, but once we move them to the 3-point line or it comes to the 4th quarter, every shot becomes short. And if it isn't short, it's on a line drive with little hope of going in. Plus, a tall shooter coming off the screen is a slow, poor shooter.
So we use the cue "start small, end tall." Originally, we would use cues like "bend the knees", "push the hips back", "sit back", or "hip hinge." We like "start small, end tall" better because it not only reminds the shooter to explode into their shot by pushing their hips back, but it also reminds them to end in an extended position with a great follow-through. Essentially, it gives us the best bang for our buck in the fewest words possible. We quickly found out that the fewer words we use, the more likely the athletes will remember it.
Snap the Elbow
This is one of the biggest basketball shooting mistakes we see with players: not extending their follow through. They will continually short-arm their shot. That almost always results in a line drive.
Once again, we used to use "snap the wrist", "hand in the rim", "up and out", and "shoot out of the telephone booth." However, we like "snap the elbow" better because it solves multiple problems with one cue. It reminds the athlete to extend the follow through. It also reminds them to shoot up and then out as it's almost impossible to really snap your elbow without extending your arm up first. And it indirectly reminds the athlete to snap their wrist on the follow through because once you snap your elbow, your wrist will automatically snap.
The result: a beautiful arching shot that touches nothing but the net.
Middle to Middle
This is another wrist/elbow problem we see often with basketball shooters. Either the shooter will snap their wrist to the inside/outside of the rim, or they will have their elbow sticking out and not lined up towards the basket. Although the shooter can make adjustments for these and still be a good shooter, he/she will never be a great shooter without thousands of hours of practice to compensate for the error in technique.
We used to use cues like "center of the rim", "back of the room", or "grab the rim", but we like "Middle to the Middle" better. Once again, it attacks two problems with as few words as possible. Players are reminded to take their middle finger to the middle of the rim (where the middle finger goes, the hand will follow), as we as line up the middle of their elbow to the middle of the rim. Thus, their accuracy should be improved tremendously. If they miss shots, they should always be missing long or short, never right or left.
All three of these cues are absolutely useless unless you explain the meanings behind them. You always have to speak the same language as the athlete. What you say may not always be what they hear. Thus, we usually make the athletes repeat it back to us in their own words just to see if they are hearing what we're saying. Plus, it also gives us the opportunity to find a cue that may be a better fit. Once we're both on the same page as far as cues are concerned, shooting drills become a lot more efficient and effective with as a little talking as possible.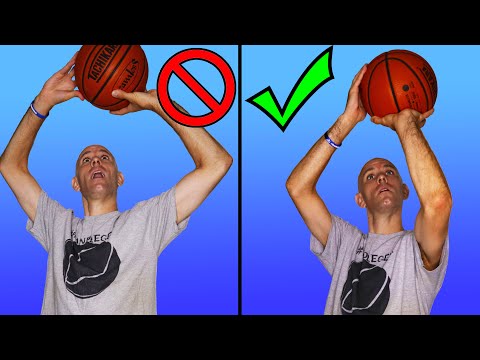
Shooting exercises
replica swiss watches
Basketball is a great team game, the team consists of players whose skill is achieved with great effort. The only person who can understand that you are working hard is yourself. Remember, you only get out of the game what you put into it. Give yourself to her without a trace.
Jump shot
In basketball, an outstanding sniper is a piece item. If you want to be a great sniper, all you need to do is just want to be one.
First, you must improve your skills.
This includes having a good coach and years of training. Secondly, you must improve in game mode.
This means that you must perform throwing drills at the same intensity as in the game. It's far better to hit 100 shots in play than 500 sloppy shots that a good defender would never let you make in a game. Finally, you must understand that working on a roll is like investing in a bank. If you don't deposit anything into your account, you won't receive dividends when you need them.
The sniper must have "throw school". When throwing after a dribble, one of the main features is the last hit of the ball on the court, which must be fast and strong so that it bounces higher, right into your hands - this will help you not waste time handling the ball.
Individual Shooting Exercises
Exercise 1 Attention Concentration
- Start from a distance close to the ring.
- Throw with one hand. Follow correct technique.
- Make five from each position. Take a step back and repeat (Fig. 1).
Exercise 2 7 throwing positions and rebound (4 meters)
- Jump shot from position 1.
- Pick up the ball, dribble quickly to position 7, shoot.
- Pick-up, fast with guiding back to position 1.
- Make 10 rolls.
- Repeat the same steps using positions 6 and 2, 5 and 3, 4 (Fig. 2).
Exercise 3 7 shooting positions and a rebound (from behind the three-point line)
1. Repeat the same steps as in exercise 2 (fig. 3).
Exercise 4 Throw after stop
- Start from position 1, toss the ball to position
- Pick it up, while you have to run around the ball so that you are facing the ring.
- Make 10 rolls, then advance to the next position.
Ex.5 Shooting from five positions after a fake move (from four meters or from behind the three-point line)
- Start from any position.
- On bent knees and with your head up, you do a throw feint, hit the ball one or two with your right hand, stop and jump.
- Return to position, throw feint, one or two hits with the ball with the left hand, stop, throw.
- At each position, 5 attempts (Fig. 5).
Exercise 6 Jump shots after dribbling
- Start the exercise from the center of the field, move towards the hoop with dribbling at game speed, after stopping quickly shoot.
- The shot must be taken from a middle distance or from behind a three-point arc.
 Perform the exercise, both on the right and on the left and in the middle of the site.
 - Use different types of dribbles: fast dribbles, broken tempos, pivots, etc.
- Make 5 attempts in each direction (Fig. 6).
Exercise 7 Playing with a virtual opponent
- Perform a free throw. If you have implemented it, you get one point. If not, then your "opponent" is three.
- You make subsequent throws from any position except the three-second zone, imitating the rhythm of the game. Work on different moves and throws. Each of your successful attempts is estimated at the bottom of the point, unsuccessful at two for the "opponent". The game goes to 11 points.
- This is a very good exercise to consolidate what you have learned. Try! Improve! (Fig. 7).
Double shots
Dr. 8 2 players, shot and rebound (4 meters or from behind the three-point line)
- The drill starts with a good, clear pass.
 The player who made the pass from under the basket goes to the place of the thrower.
 - The player in position 1 catches the ball and shoots.
- After the shot, the player runs to the rebound and then passes the ball 1 position and so on.
- Each player must make five throws. The exercise is performed at a fast pace, but the throws should not be sloppy.
- Then move to another position and everything is the same (Fig. 8).
Exercise 9 Two players, throw and rebound (per result)
- The exercise is performed as described above.
- The player who made the pass tries to interfere with the shot, but does not block.
- Game up to 5 hits.
- Then we move to another position, and so on. (Fig. 9).
Exercise 10 Two players, throw and rebound, throw feint
- The exercise is performed in the same way as the previous one.
- The defender who made the pass tries to interfere with the player in position 1, but does not block the shot.
- The attacker makes a throw feint and beats the defender.
- Performs a short dribble, stops and throws.
- Do 5 times each and change position (Fig. 10).
Ex. 11 2 players, shot after a stoppage (from four meters or from behind the three-point line)
- The attacker is in position 1, ready to receive the pass.
- The player under the basket passes.
- After the throw, the attacker waits for the rebound to be made.
- The player receives a pass by making a stop, but already in position 2. Then back.
- Make 7 throws, two free throws and switch (fig. 11).
Ex. 12 Shooting with movement (from four meters or from behind a three-point arc)
- The attacker moves around the perimeter at game speed.
- A player passes to the hand farthest from the ring.
- The attacker must stop, catch the ball and throw.
- Make seven throws, two free throws and change (fig.
 12).
12).
Note: The previous exercise has three options.
A) Receive the ball and throw it.
B) After receiving, throwing feint, dribbling in the same direction, throwing.
B) Receives a pass, throw feint, dribbling to the ring in the other direction, stop, throw.
Ex.13 Various dribbling options and a jump shot
- The attacker starts from the center of the field and, dribbling at game speed, moves towards the ring, stops and takes a jump shot.
- The player under the basket picks up the ball, the attacker runs to the center of the field, and receives the ball on the opposite flank. Moves with dribbling to the ring, stop, jump shot.
- On the right side, dribble with the right hand, on the left - with the left (Fig. 13)
Note: Use speed dribbling, change of pace, transitions, pivots.
Three players, two balls
Exercise 14 Warm-up exercise
- One player throws, another passes, a third rebounds.

- Thrower becomes rebounder after seven tries.
- Passer - thrower. Picking up - passing (Fig. 14).
Note: different options are possible
1) From seven positions (four meters)
2) From seven positions (from behind the three-point arc)
3) From five points with feints to shoot
4) Throw after stoppage
5) Throw and rebound (constant rotation around the circle)
Double shots: using screens
To use the screen effectively, you must read the defender correctly. You must always see the player with the ball and how the defender defends against you. A player who moves well off the ball and knows how to use screens correctly is very useful offensively. When you watch a match that has good players, notice how well they move off the ball. The hardest thing to defend against is a well-moving attacker.
Exercise 15 Back screen and snatch
- The player imitates opening and screening behind his back, makes a dash to the corner of the court.

- Throw to the nearest hand.
- Attacker catches the ball and shoots.
- The attacker picks up his shot, passes to a partner and returns to his original position.
- Make seven attempts and change (Fig. 15)
Note: do not back away when dashing, turn around and run, but do not lose sight of the ball.
Exercise 16 Screening behind the back, "false" screening
- 1. Attacker starts on the base of the trapezoid and moves up to imitate the screening.
- 2. After the imaginary breakout runs, the screening attacker rises to the ball and prepares to receive the pass.
- 3. Having caught the pass, he immediately makes a throw.
- 4. Make seven attempts and change (Fig. 16).
0003
- An attacker imitates a defender aiming for a screen and rises sharply towards the ball.
- The player must be ready to receive the ball.
- The attacker catches the ball and makes a quick throw.

- Make seven attempts and change (Fig. 17)
Exercise 18 Screening the ball carrier, moving away from the ring
- The attacker screens the ball carrier.
- The ball carrier passes through the screen aggressively.
- Instead of pulling back to the basket (deuce), the screening attacker moves away from the basket and prepares to receive the pass.
- Having caught the ball, he immediately makes a throw.
- Make seven attempts, then change.
Exercise 19 Barrier at the base of the trapezoid - opening to the flank
- The attacker takes the player under the ring, breaks shoulder to shoulder through the barrier and makes a dash to the flank.
- When catching the ball, the player must turn to the ring.
- Use different throw options: just throw, and dribbling to the right or left after a throw feint. Change after five attempts (Fig. 19).
Exercise 20 Screening at the base of the trapezoid - opening into the corner of the court
- The attacker takes the player into the three-second zone, pretends that he will break through to the flank through the screen, the defender starts running around the screener through the three-second zone.
- The attacker makes a dash to the corner of the court, and the defender hits the screen.
- Further, the same as in the previous exercise (Fig. 20).
Ex. 21 Screen at the base of the trapezoid - dash inward
- The defender is chasing you, not falling behind until the very screen.
- Then you run through the screen as close to the screener as possible and break into the three-second zone or foul line area.
- Receive the ball by turning towards the hoop and throw it.
- Also work out various options for continuing after receiving the ball. After five attempts, change (Fig. 21).
Throws in pairs: pass and discount
Exercise 22 Pass and discount - starting from the center of the field flank.
The receiving player is opened for transmission. Player receives a pass and shoots. The player who made the pass picks up the ball and gives it to the thrower. Players switch roles. Everyone makes ten throws (Fig. 22).
Exercise 23 Pass and discount - start from the flank
Variation of exercise 22 (Fig. 23)
Exercise 24 Pass and discount - start from the corner of the site one more
exercise 2
more variation 3 .24).
9 ways to increase the effectiveness of shots without changing their structure - All about basketball
9 ways to increase the effectiveness of shots without changing their structure.
Jay Wolf
(Basketball Shot Specialist)
To be honest, it's not a good idea to change the mechanics of shooting during the season, if only because it entails a decrease in performance. What can be done to prevent this from happening? Here are a few tried and tested recommendations.
Improving short distance and basket shots
1. Require all short distance shots to the right and left of the basket to have a bounce and point of aim.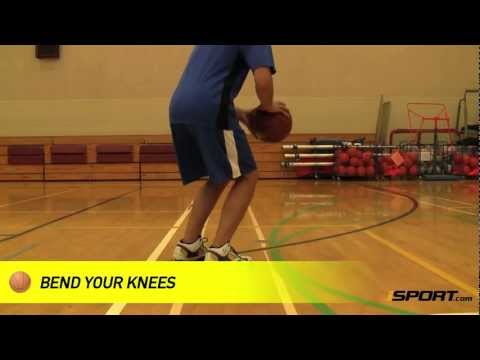
This forces the striker into position to use the shield when throwing. The upper half of the vertical line to the right and left of the basket is the aiming point for these types of shots. The ball should touch the line softly and bounce straight into the basket. Misses that occur when throwing from these positions are the result of insufficient concentration. To increase attention to the aiming point during training, draw a dollar sign - $, or some other sign, on a piece of adhesive tape, and attach it to the line.
2. Practice CLEAN basket shots and CLEAN bounce shots from the second mustache.
CLEAR throws require the ball to drop into the basket without touching the metal hoop. To achieve this, the ball must touch the backboard very gently. This requires a much greater concentration of attention and calculation of the trajectory. To achieve consistency, make 5 throws from under the hoop (or rebound jump) in a row, 3 of which must be CLEAR. Make it harder if you feel the need to.
NOTE: It is important to match the mission to the abilities of each player. The mission should challenge the player's sense of pride, requiring greater focus, but should not be unattainable.
Perfecting Medium Range and 3-Point Shots
3. Practice CLEAN throws - make 5 shots in a row from the same spot.
This task develops stable accuracy as it requires great concentration and persistence. Five throws in a row from the same point improve accuracy, since all the components of the throw - form, effort, trajectory - must be the same each time and repeated over and over again, over and over again from the same distance. CLEAN throws automatically force the player to choose a high trajectory. High trajectory shots are harder for a defender to block, and the ball is more likely to go into the basket if it hits the metal hoop. In the game, due to the excess of adrenaline, there is a tendency to apply a little more effort when throwing. If CLEAN throws are habitually improved in practice, in play the ball may lightly touch the back of the hoop BUT the higher trajectory increases the chances of hitting the basket.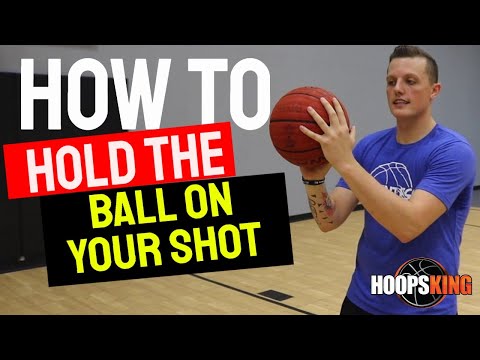 In addition, on a miss, a higher trajectory generates a shorter bounce, which increases the chances of hitting the ball into the basket.
IMPORTANT: If 5 NET rolls in a row is too difficult, lower this requirement.
Coach's note: Players who consistently hit the back of the basket when shooting are overexcited. To correct this error, explain it, and start practicing CLEAN throws right away, encouraging them to be used throughout the season.
4. Make several free throws in a row before leaving the court after practice.
This requires repetition of all throw elements and builds confidence. Each batter must pick up the ball himself after his throw. Emphasize the importance of repeating the same set-up routine before each throw. Taking a deep breath and exhaling before the throw relieves excess tension. Modify this exercise by adding more playful tension due to time constraints. Those who do not fit in the given time must make jerks, etc.
5. Make 200 free throws per day for 5 days, or 500 free throws on one day, and 200 on the next four days.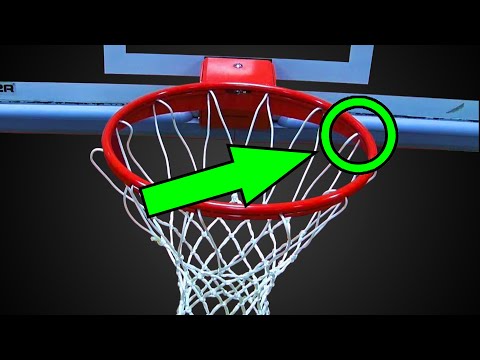 Target: 25/25 of which 15 rolls are CLEAR.
This develops confidence and exceptional consistency in shot form, ball release and trajectory. In addition, it improves the accuracy of 3-point shots. Reward the player for: 25/25, the most hits in a row, and the most CLEAR hits in a row. NOTE: 100 throws require approximately 15 minutes of time.
6. Determine the spots from which you regularly shoot in the game, and practice shooting at least 5 consecutive shots from each of these spots.
This develops confidence and coordination in throwing. When a player shoots from one of these positions in a game, they feel comfortable and confident because they have been successful shooting from these positions so often in practice.
7. Perform all throws on a correctly marked area using a correctly marked backboard. The court must have a line for 3-point shots.
Court markings are an important factor in reducing misses as it is easier for the player to judge the distance to the basket.