How to Aim for Better Basketball Photography (10 Hot Tips)
Basketball photography is an exciting and dynamic sport to shoot. But it can also be challenging due to the need to freeze motion.
If you’ve been wanting to take razor-sharp action photos like those that you see in the sports section of the newspaper, read on.
Here are ten tips to help you focus your camera and get sharp basketball photos.
10. Set Your Camera to Shutter Priority
To freeze action, your minimum shutter speed should be 1/500th of a second. Go even higher if the lighting situation and particular combination of your camera and lens allow for it.
Manual Mode is usually the best mode for professional-looking and properly exposed shots. But it’s not always the best choice for every situation.
When it comes to shooting sports, try setting your camera to Shutter Priority Mode instead of Manual Mode. This will ensure that your camera stays at the minimum shutter speed while it calculates the right F-stop and ISO required to properly expose your photos.
It will also prevent you from having to worry about your settings.
Take a few shots and check them for any unwanted blurring. If they are not sharp enough, go higher with your shutter speed, say to 1/1000th of a second.
9. Increase Your ISO
The way to get more light into your camera when shooting a basketball game is to increase your ISO.
Ordinarily, playing with the shutter speed is the best way to increase the amount of light hitting your sensor. Increasing ISO can introduce grain, or “noise” into the image.
In sports photography, this is not the best option. The shutter speed must be high to get sharp images.
If you don’t have enough light coming into your camera, you have no choice but to increase your ISO.
You can fix noise in post-production. Lightroom has a good option for repairing noise.
You can also use a dedicated noise repair plug-in with either Lightroom or Photoshop, such as DFine from the Nik Collection.
This selectively repairs the noise in an image and is tailored to whichever camera you’re using.
8. Shoot at a Wide Aperture
To shoot at a high shutter speed, you’ll need to use a wide aperture, ideally from F/2.8 to F/4,
This will allow more light into your camera.
The lens you’re using will determine how wide you set your aperture. A good quality lens with a maximum aperture of f/2.8 or f/4 will give you the best results.
In all likelihood, you’ll also be using a zoom lens. If you crop in as close as possible, your lens will not let as much light in. This is where the aperture is the narrowest. In this case, shoot wider and crop in post.
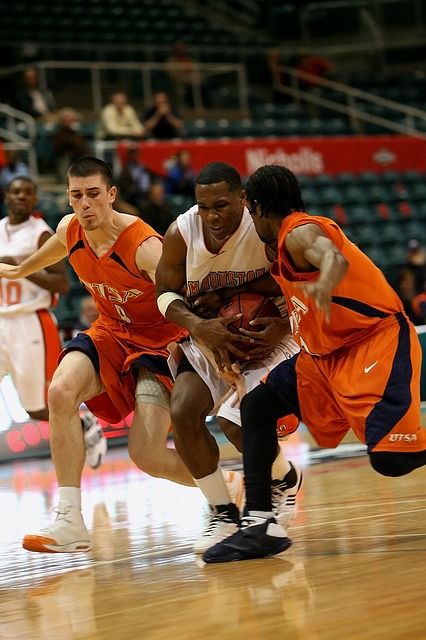
One bonus of shooting at a wide aperture is that it can give you blurred out background. This can look great in basketball photography. It can give the image a sense of urgency and speed.
It can also help isolate the player acting as the main subject in the composition. It will draw the viewer’s eye to the most important part of the image.
7. Shoot In JPEG
It may surprise you to hear me say that you should consider shooting your sports photography in JPEG format. After all, you are repeatedly told that for professional-looking photos, you should always shoot in Raw.
This may be true for several genres in photography. When photographing sports, capturing the action of the game is more important than having really high-quality photos that can withstand a lot of post-processing.
Shooting in JPEG will allow you to shoot more images in burst mode. You’ll also be able to fit more images on your memory card.
You can miss a crucial part in the game in the few minutes it can take you to swap out memory cards. The less often you need to change them out, the better.
6. Use Autofocus
When photographing a basketball game or any other sport, it makes sense to choose autofocus over manual focus. You just don’t have the time to be fiddling with your lens that way.
Not to mention that you need to have excellent eyesight. Being just a millimeter off can mean that you miss focus and lose those killer shots.
For your camera’s autofocus system to function properly, there needs to be contrast in the area where you want to focus.
This can be a problem in the low light situations that are common indoors.
When there is not much contrast, the camera doesn’t know where to focus. If there is not enough light hitting the sensor, the lens motor will keep moving. It’ll hunt for focus without locking onto the subject.
This can cause you to lose precious seconds when you need to be getting crucial shots. Be sure to focus on an area of contrast within your subject.
5. Use Multiple AF Points
The accuracy of the autofocus system is in part influenced by the number of autofocus points your camera has.
It can be hard to nail focus if you have only nine AF point on your camera. One of the biggest differences between cameras and their price points is the number of points the AF system offers.
The costly, more professional systems always have a lot of AF points. Some of the new mirrorless cameras even have focus points in every part of the screen.
Use multiple AF points to take control of your camera’s autofocus system and take sharper images.
4. Set Your Camera to Continuous AF
Continuous Autofocus is when the AF system focuses continuously on the area covered by selected autofocus points.
Most cameras have four focusing modes: manual, auto, single, or continuous.
On a Canon, continuous focus in called AF or Al Servo. On Nikon or Sony, it’s AF-C.
In this mode, as soon as the autofocus system detects a moving subject it activates predictive tracking. It continuously monitors the focus distance. And it adjusts the focus when the distance from the camera to subject changes.
The autofocus system will adjust the point of focus. If you want to focus on a subject that is not covered by any of the AF points, you’ll need to lock the focus distance by pressing the AF lock button.
3. Use Burst Mode
Set your camera to Burst Mode. This will allow you to shoot several frames with one press of the shutter. This will increase your chances of getting a perfectly composed action shot. Note that it will also fill up your memory card more quickly.
Be sure to bring extra memory cards with a high storage capacity. This means that you won’t have to lose precious minutes in the game by having to repeatedly swap them out.
Your best bet is to use Burst Mode for crucial parts of the game. Revert to single shooting most of the time.
2. Switch to Back Button Focus
Back Button Focus is a boon to every type of photographer, even the portrait shooter.
Back Button Focus is the transfer of the focusing function from the shutter button to one of the buttons on the back of your camera.
When used in basketball and other types of sports photography, back button focus will increase your shooting efficiency. You’ll be able to shoot faster.
Instead of pressing the shutter button halfway down to focus, you press a button on the back of your camera with your thumb and use a finger to press the shutter.
This makes focusing and shooting a lot quicker. You don’t have to constantly refocus. And you can keep adjusting your composition without worrying about focusing every time. Your focus will hold, even if you release the shutter button.
Together with continuous focusing, it will increase the likelihood of achieving perfect focus even with difficult shots.
Check your camera manual to figure out how to set Back Button Focus for your particular camera brand and model.
It may feel a bit awkward at first. But you will quickly get used to it. You might even end up keeping your camera on Back Button Focus all of the time.
1. How to Find the Best Vantage Points
Last but not least, think about your vantage point throughout the basketball game. Situating yourself for the biggest impact may mean moving around a lot if there is room for you to do so.
Sports photography also means getting down to the ground or contorting yourself into awkward positions to get dynamic shots.
Don’t be afraid to move with the action. Have a plan beforehand of how you’re going to move around the court for the most advantageous point of view.
One tip for shooting a basketball game outside on a sunny day, make sure that the sun is behind you. This will help get more light into the lens and assist in getting up to those fast shutter speeds with less noise.
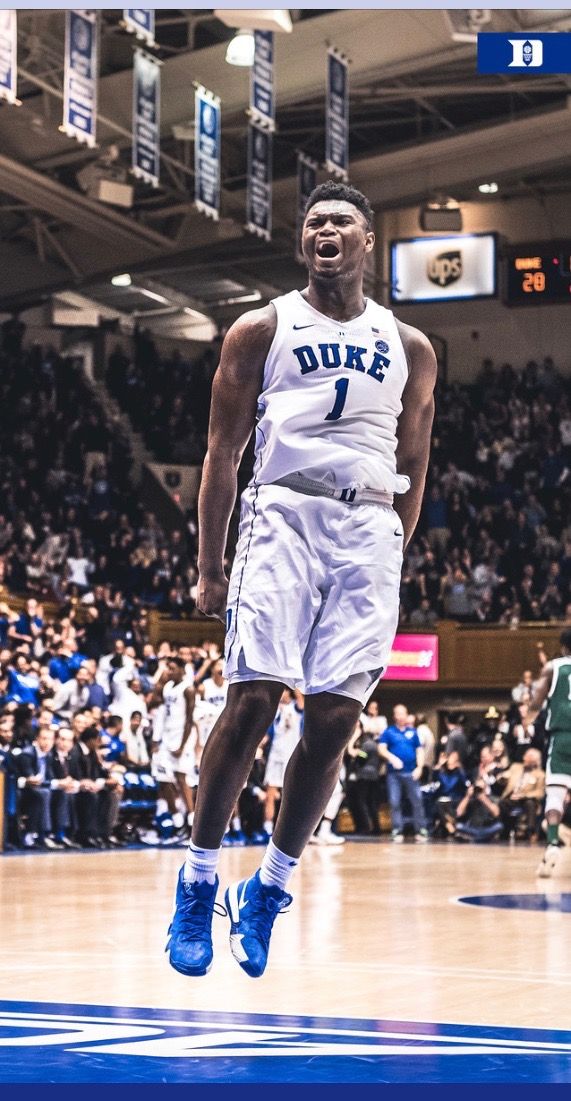
When you’re shooting basketball photography, be sure to fill the frame with the players. Capture their facial expressions. Documenting the emotions in a game is a crucial aspect of sports photography.
Conclusion
Be sure to take a few test shots before the game starts. You can check how sharp your images are beforehand and make any necessary adjustments to your camera settings.
Basketball photography is one of the most exciting games to shoot in the realm of sports photography.
With these ten tips, you’ll be sure to get dynamic and sharp action photos the next time you shoot a basketball game.
7 Tips You Need to Get Great Basketball Photography
Sports photography is far from easy. Use these basketball photography tips, and you’ll be capturing incredible, fast-action images in no time!
Get Action-Packed Images with These 7 Basketball Photography Tips
Kim Fetrow’s primary focus is commercial photography, but she began photographing basketball when the coach at her daughters’ high school invited her to document the games. Kim’s husband was already running the scoreboard at basketball games, so the decision was easy. “At first, I didn’t realize how hard it would be,” admits Kim, “but I quickly learned to nail great shots at every game. Now I love sports photography!”
Read on to learn Kim’s tips and techniques…
Photographer Kim Fetrow stands beside 7’4″ varsity player Riley Sorn
#1: Gear
You can’t shoot sports without the right gear! I use two professional Nikon bodies (the D3s and D4s). The 50mm f/1.4 lens sits on my D3s and the 70-200mm f/2.8 lens is on my D4s. I use a Spider Dual SpiderPro holster to quickly switch between cameras—depending on where the action is on the basketball court.
The 70-200mm f/2.8 is my preferred lens, but it really isn’t long enough to get great photos of players on the other end of the basketball court. However, anything longer, and you risk some serious camera shake—not to mention the wear and tear on your body, as it is HEAVY!
Kim Fetrow
Camera Settings
I prefer manual mode. First, I use the lowest possible ISO to get both a fast-enough shutter speed to stop any motion blur and an f-stop that will still provide a sharp image. For me, this usually looks like ISO 4000-6400, 1/500th shutter speed, and an f-stop no smaller than f/3.2. (Wide open apertures make it hard to nail your focus.)
Next, I set my camera’s custom white balance using a white wall or piece of paper in the gym. This white balance setting changes from gym to gym. I prefer RAW so that I can easily adjust the images in Lightroom.
Kim Fetrow
Light & Shutter Speed
Due to recycle times of gym lights and influences from other light sources such as big TV displays, the frame-to-frame color temperature may not be consistent, even with a custom white balance. Watch for other things at play, like the yellow tones from the court and reflections off-colored jerseys and walls that may affect the skin tones and facial expressions in your basketball photography.
I also use a shutter speed that’s fast and allows me to shoot in burst mode. Burst mode lets me capture things like a player making a breakaway dunk. You don’t want to miss those shots!
Kim Fetrow
#2: Establish the Setting
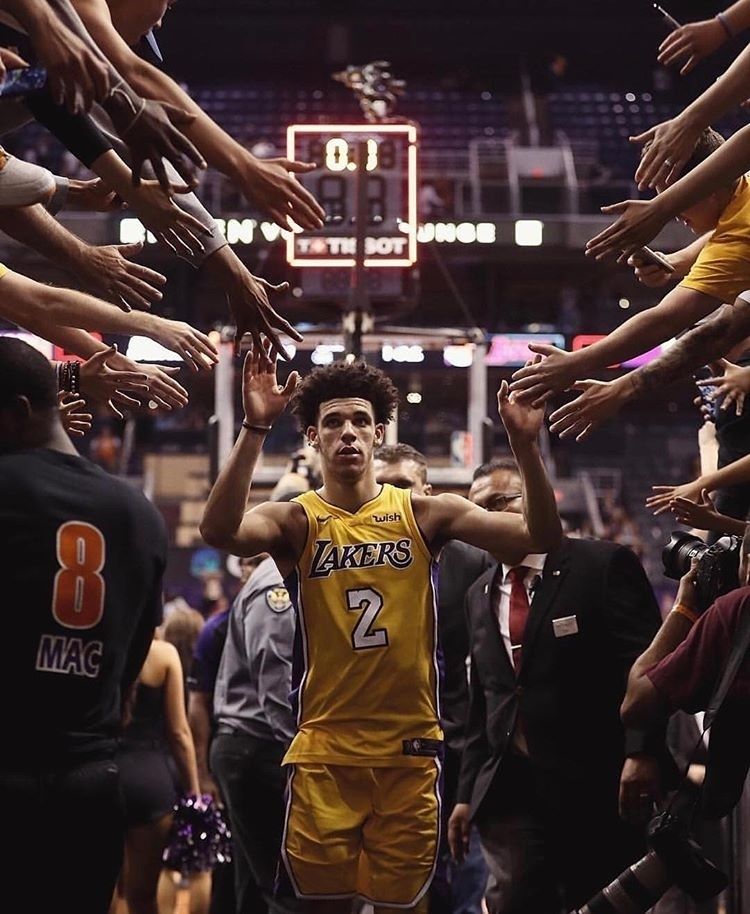
Part of telling the story of basketball for sports photographers is capturing the fans, fanfare, and traditions of the event. Capture what is going on in the gym before the basketball game. This is a great way to take test shots to make sure your camera and photography settings are where they should be.
#3: Find the Best Camera Angles
For the tip-off I make sure I find a spot that sets center court in the center of my camera viewfinder. Depending on whether I am capturing the basketball game for one team or both determines where I’d be generally doing the rest of the basketball game.
If I’m working for one team, I place myself right outside of the key to try and capture the team on offense. (The refs don’t like you to stand right under the basket, plus it’s a great way to get pummeled). Thus, I change positions at every half.
If I’m capturing BOTH teams, I change every quarter in order to capture both teams on offense and defense equally.
Kim Fetrow
Shoot from Above
If there is a deck or a place for shooting the game from above, I’ll move around and capture the entire scene with a fisheye, or I’ll use a long lens to focus on a play from a new angle. But truthfully, my favorite place for photographing basketball is right under the basket!
Identify which is the player’s preferred hand for layups, and that will also help you to know where to be. It is very common to get a player’s arm covering their own facial expressions if you aren’t on the correct side of the basket.
Kim Fetrow
Body Position
I shoot two ways:
Standing, with my feet firmly planted, while I keep my arms close to support my camera lens and avoid camera shake. (A fast shutter speed helps, too!)
Sitting on the ground (with my back braced against a wall, when possible) or kneeling.
In both cases, I do whatever I can to keep my camera body and camera lens stable as I press the shutter button. Some professional sports photographers use a special chair that supports them while sitting. Just be aware and stay ready to jump out of the way at a moment’s notice—especially when using a longer camera lens for your photography. The basketball players in your camera lens are closer than they appear!
Kim Fetrow
#3: Shooting
Stay alert and follow the game! I equate shooting basketball with shooting ballet photography. Anticipation and timing are key!
I basically watch the entire basketball game through my camera viewfinder and focus on every shot. In other words, I don’t just set my camera on auto-focus then “spray and pray.” I actually hold the shutter button down half-way for every shot.
#ShootProofPRO Tip: Fear Not!
Don’t be surprised if half of your basketball photos are garbage. Mine still are—even after photographing high school basketball for years! Capturing players at the peak of the action, while still in-focus, with the ball, isn’t easy. A little motion blur is okay; but out-of-focus shots just aren’t. Don’t be afraid to liberally hit the delete key while culling!
Kim Fetrow
What makes a good shot? Should I shoot vertical or horizontal?
I think it’s easier to go vertical, as you are more likely to get the ball in your pictures as your hold the shutter button and more likely to get your shot in focus as you are less zoomed-in. However, coaches and sports agencies like balls in photos. I’ve found that horizontal images are preferred, as they like to share these images on T.V. screens, on social media, and in their news feeds—most of which require a horizontal or square image.Shoot both.
Get close and zoom in. A bunch of pictures showing the entire court aren’t very interesting. Try to freeze the action of one or two players up-close.
Kim Fetrow
Know the Game
One of the best ways to be successful photographing basketball is to know the game. Anticipate what is going to happen next. Keep your camera focused on the player all the way through shooting the ball. Some of the best defensive shots occur after the ball has left a player’s hands when they are getting mauled by the opposing team!
In my opinion, the more fast-paced and physical the basketball game, the better the action photos—but it also takes more skill to shoot.
Kim Fetrow
#4: Rules are Meant to be Broken
Move the subject around in your frame. Don’t center every shot!
Follow a player as they run past you down the court, and use a slow shutter speed. A slow shutter speed will help you create a little motion blur.
Use super-wide open angles and closeups to capture the details of the event. These detailed action shots help to tell a story.
After a while, every basketball game does start to feel the same, so get creative and mix it up!
Kim Fetrow
Be Respectful
Talk with the athletic director or head basketball coach before the game. You may need a press pass or permission from the high school to be down on the court shooting.
There are often other people photographing in the same areas you are, so be mindful not to walk in front of other people’s camera lens. They are there to do a job, too.
Ensure that you aren’t blocking the view of the fans in the stands.
Be respectful, but don’t be a wallflower. Don’t be afraid to get in the mix and get the action shots you need!
Kim Fetrow
#5: Plan Ahead
Be prepared for other photography requests while at the basketball games. Often, I’m asked for a quick team photo, a senior night with parents, or the younger kids’ team to share on social media.
Sometimes this requires additional photography gear or technique changes, such as:
a flash on your camera to compensate for horrid gym low light
higher f-stops to get more in focus
Use a wide-angle lens to get everyone in the frame
Kim Fetrow
These are some areas where you may be able to gain added revenue!
If the team has had a good season, it’s common to shoot events like “cutting down the nets” and team portraits with trophies. Be ready! Parents, players and coaches will want these celebratory shots.
Make sure you have a very wide, fast lens on one of your cameras for the action at these important end-of-season games. As soon as that buzzer goes off, I guarantee: the players (and sometimes the fans) will rush the court. Be prepared to rush out there with them to capture the excitement! (You might want to set the auto-focus and hold down the shutter!)
Kim Fetrow
#6: Share the Pictures
There are many platforms out there that allow you to successfully share pictures. I prefer ShootProof, as it allows me to set up different permissions for different uses.
Coaches get unlimited access to download and use the images throughout the season.
I allow parents and players to purchase both digital files and prints.
At the beginning of the season I set up a ShootProof online gallery for each team, and I continue to add optimized images as the season progresses. The players and their families automatically know where to go to find images after each game.
Kim Fetrow
#ShootProofPRO Tip: Maximize Your Web Traffic
Rather than send out the direct gallery link, however, I send players and families through my website to access their online gallery. Sports photography offers the potential for hundreds of new people to see my work. Perhaps they’ll even spend a few minutes browsing my portfolio and choose to hire me for commercial photography, senior portraits, or family photos.
Kim Fetrow
#7: Have Fun!
Sports photography is fun! I love being down on the floor as close as possible to the action. I get excited when I capture an amazing play—especially when shooting a basketball team I care about. You are right there celebrating their victories and defeats while preserving some very special memories that you just can’t get with a cell phone. So get out there and have a blast!
Written and Photographed by KIM FETROW
Kimberly Teske Fetrow is an award-winning, internationally published, commercial and portrait photographer with over 20 years of experience. To follow her adventures as a photographer and to see her most recent work, follow her on Instagram.
You May Also Enjoy...
Best Senior Picture Posing Ideas for Guys
How to Build a Business for Senior Girls with Spirit
Sports photography under the roof
In winter, many sports competitions and trainings are held indoors. Basketball. Volleyball. Gymnastics. Of course, indoor sports are fun for both participants and spectators. But let's face it: shooting such sporting events is not the easiest task for a photographer. Quite often, you may even end up in a gym with such low light that even 1600 ISO won't produce good results.
Let's look at some of the things to keep in mind when photographing indoor sports.
The first thing a photographer should remember when shooting in a gym is to pay close attention to action and movement. The plot of such outdoor games as basketball or volleyball is constantly and rapidly developing, they are extremely dynamic. Your task is not just to capture the event itself, but rather to capture the connection between the players. This requires special skill and even flair.
Set the ISO to high. The most modern models of SLR cameras allow you to shoot with an ISO of about 1000-1250 units without noticeable image graininess. Shoot at a fast shutter speed - at least 1/200 if you can. You need to capture the action, a fast shutter speed will freeze the movement of the athletes, thus giving you a clear photo. And, if it comes down to it, it's best to underexpose the image. You can tweak the settings in post-processing.
Shoot at the smallest aperture, say f/4.0 to f/2.8. Since you have little light available and you're working at a faster shutter speed, a wide open aperture is your best friend in this situation.
Look for expressions of living emotions. Anger. Aggression. Rivalry. Teamwork. Excitement. Victory. Successful sports photography is simply impossible without observation, without waiting and capturing moments of emotion and expression of relationships in the process of playing. You win at the end of the day if you have an emotional shot that is not sharp across the entire image field.
Shoot in RAW. Shooting in RAW will allow you to correct colors in post-processing, this has been written and said many times.
How to use the sport mode
Most DSLRs and even half of all compact cameras have a variety of preset modes to help beginner and intermediate (and sometimes even professional) photographers. What is sport mode?
First, the sport mode is represented by the well-known little running figure. While the exact settings vary by camera manufacturer, much of this description remains the same no matter what particular camera you are using.
Secondly, sport mode is a quick setting for adapting the camera to the conditions.
Raises ISO to a higher value
Decreases f-stop for shallower depth of field
Increases shutter speed to help stop fast action per second)
ISO is normally set to 400 or higher, but depending on lighting conditions and lens choice, it may be lower. Most cameras will set this value as a variable so the user doesn't have to constantly change it.
Reducing the f-stop will help isolate the action in the picture. Most of the time, the action itself is one person, a car, a horse in the background, and it's best if this background is blurred to isolate the movement.
As the shutter speed increases, the chances of "stopping" the main action increase. This setting, like all others, depends on the amount of light available and the specific lens used. Most of the time the shutter is set to 1/200 or more.
Frame advance is also increased to the highest value, typically 3-6 fps or more. Further activation of the shutter release will result in a series of shots that will help capture the “right” moment of the action.
Finally, the auto focus mode is set to predictive (may be called differently on different cameras). This setting often uses a complex system to predict the direction, speed, and proximity of the main subject in order to calculate accurate focus at the time the shutter is activated. Although not commonly used during average shooting, this type of focusing system can be very useful in high speed action.
Benefits of sport mode
Sport mode works best with a telephoto lens. This is because a reduced depth of field will have a sharper contrast between your main subject and the background, as stated above. The faster the speed (lower f-stop), the better the separation you get from the background, and the less light you need to get a sharp image. Sport mode usually forces the camera to use the lowest f-stop.
Sports Mode is an easy way to instantly change all your creative camera settings to motion capture. This helps to guess the workings of high-speed action, increasing your chances of bringing home an image of what initially seemed like a super-short-term moment.
Tags:sports photography
How to photograph sports events: recommendations and settings
Hello again, dear blog visitor. I'm in touch with you, Timur Mustaev. Have you ever wondered why you can't shoot sports? What am I doing wrong, maybe my camera is not capable of this? Maybe I'm just setting my camera settings wrong? You will find comprehensive answers to these and other questions that interest you in this article.
I remember my first shooting of a sporting event. My close friend is into basketball and at the final game he asked me to take some good shots of the game. Well, of course, there is nothing to brag about, since there were no standing pictures. Almost all of the photographs were blurry. After that game, I began to study this subject of photography. And so I want to share with you all the secrets of photographing sports events.
Earlier in the articles, we have already talked about many technical aspects that every self-respecting photographer should know. Now it's time to talk about shooting techniques, about the very technique of working with the camera and the object. Specifically, in this article, I will tell you how to photograph sports events.
First, you need to find out where this very event will take place: outdoors, water or indoors. You should also understand what the lighting conditions will be. Based on this, a set of strictly necessary tools is formed.
I will try to describe the minimal and most versatile set that I used to use myself. First of all, it's a pair of lenses. The main one, in our case, will be long-focus, and the additional one will be wide-angle, which is taken “just in case”.
Equally important is having several replacement batteries for your camera so you don't accidentally miss the best shot. Two batteries are quite enough for me, speaking subjectively.
If you are filming outdoor sports during the day in sunny weather, you can use an ultraviolet filter, and then, depending on the brightness of the sun and the time of year. If the shooting time is late in the evening or it is cloudy outside, not to mention shooting indoors, there can be no talk of any filters.
Do you know what the shutter speed should be for sports photography? Not less than 1/1000 s. Why, you ask, exactly this number? Sports events are held in active mode, and in order to freeze an object, it is precisely this minimum shutter speed that is necessary.
If events are held outdoors, in good sunny weather, then set the shutter speed to 1/1000 s. will be real. But if the weather is cloudy or even worse, you need to photograph sports indoors, then even with the widest aperture (f / 2.8 or f / 3.5), it is almost impossible to get the desired shutter speed.
This is where light sensitivity (ISO) comes in. But do you know how much you need to set the ISO value to 200, 400, 800, or maybe 3200?
For these cases, I always use a very necessary function in the camera - automatic ISO setting. For example, you can set the following settings:
Initial light sensitivity 100;
Maximum light sensitivity 1600, can be increased to 3200;
Shutter speed 1/1000.
Now your camera itself will set the desired amount of ISO. And the big plus here is that it will not jump right away, from a value of 200 to 400, for example. If he has enough light, he can set the ISO value to 290. Agree, no matter how much we want, we cannot manually set such a value on our own.
Sometimes a polarizing filter can come in handy if you are shooting on the water. More on this below. But you should not use it all the time: it can do harm in certain situations that we considered earlier. Very rarely you may need a tripod, so you should not take a full-sized accessory with you. But it’s worth thinking about a monopod, especially if you use a telephoto lens. I bought one for myself here.
Sometimes, there are times when you want to record a short video, which necessitates the use of a tripod. In this case, I always have a compact accessory in my bag, originally purchased for mobile shooting.
When photographing sports, a telephoto lens should be used so as not to approach or interfere with the athletes. The most important rule is not to use flash. Firstly, it can “drive crazy” an athlete or a viewer, and secondly, it will be of little use in the bright sun, and it will not help in any way indoors, the subjects are too far away.
Shooting on the water
In general, the requirements here will be similar to ordinary shooting outdoors: telephoto lenses, no flash and automatic ISO settings are possible.
If we talk about the specifics, then I have identified for myself one of the most necessary accessories for such a case - a polarizing filter. As you may have read earlier in the articles, a polarizer can reduce glare on water, which can play an important role in improving the quality of a shot.
If you have to shoot on the water quite often, then you should take care of the moisture protection of your device. We are not always able to predict the development of events, sometimes we can also get carried away with work and just fall into the pond, which once happened to my friend.
After that moment, he began to advise all his friends to use moisture protection devices.
General guidelines
There are also some general guidelines for sports photography in addition to the above. First of all, this is the use of exposure. Of course, the very first and correct solution would be to reduce it to the shortest possible value, as mentioned above.
However, slow shutter speeds are sometimes allowed. What is it for? First of all, to get a beautiful blurred background or create high-quality wiring.
For motor racing photography at 1/1000 s. you'll just end up with a frozen object that doesn't always look good. We will get a photo as if the car is just standing on the track and not moving. The same can be said about the wheels of a motorcycle, a bicycle.
The problem can be solved by lowering the shutter speed to 1/250 or 1/360 s. But here it is important to lead the object. This method is called panning.
Always turn off the beeps on your camera. Especially if you shoot, for example, tennis, chess and others, when you are as close as possible to the athlete, and where silence is very important. Otherwise, you may get rude remarks from the players.
Best of all, for the moving moments of sports, use the focus mode - tracking focus or it is also called constant tracking.
When shooting at night, you will have to increase the value of ISO even more, up to 6400, to get the shutter speed we need. And which one, you already know! That is 1/1000 of a second.
But here, when using cameras with a crop factor, a lot of noise appears. Therefore, professional photographers use full-frame cameras, such as Canon's 5D Mark III or 1DS or Nikon's D700, D800, D810, D3. They generate so little noise that you can easily shoot at ISO 6400 as well. Of course, not everyone can afford lenses with a focus of 300-400 millimeters, so even professionals often shoot at 70-200 mm. This is usually sufficient, but larger numbers will allow you to move less to get a frame. Also, with a longer focusing distance, it will be easier to get a macro, if necessary.
There is really no limit to the choice of carcasses here if you plan to photograph sports events outdoors during the day, indoors. Of course, if the price issue arises point-blank, then it is better to purchase a mid-budget device with a crop matrix with a crop factor of 1.5-1.6.
Lenses for it will cost much less than for full frame. Another plus of the crop factor is its zoom effect. In other words, a lens with a focal length of 200mm turns into a 300mm. for Nikon and 320 for Canon. More details about crop factor matrices can be found in earlier articles.
It's not worth talking about the compositional features of sports, the search for new solutions when photographing events, since this should be done by default by every photographer for any type of shooting. If a simple rule that is fair for all genres is not observed, then such photographs will simply be lost in the crowd.
This solution can be called the use of a wide-angle lens, which, as it seems at first glance, has no place in working with sports.
Some photographers specialize in capturing close-ups of athletes, equipment, conveying the atmosphere of an event, creating panoramas, getting an overall view of an entire sports location, and much more.


 After all, you are repeatedly told that for professional-looking photos, you should always shoot in Raw.
 Note that it will also fill up your memory card more quickly.
 You don’t have to constantly refocus. And you can keep adjusting your composition without worrying about focusing every time. Your focus will hold, even if you release the shutter button.
 Have a plan beforehand of how you’re going to move around the court for the most advantageous point of view.
 Use these basketball photography tips, and you’ll be capturing incredible, fast-action images in no time!
 Watch for other things at play, like the yellow tones from the court and reflections off-colored jerseys and walls that may affect the skin tones and facial expressions in your basketball photography.
 (A fast shutter speed helps, too!)
 Shoot both.
 I prefer ShootProof, as it allows me to set up different permissions for different uses.
 Basketball. Volleyball. Gymnastics. Of course, indoor sports are fun for both participants and spectators. But let's face it: shooting such sporting events is not the easiest task for a photographer. Quite often, you may even end up in a gym with such low light that even 1600 ISO won't produce good results.
  You need to capture the action, a fast shutter speed will freeze the movement of the athletes, thus giving you a clear photo. And, if it comes down to it, it's best to underexpose the image. You can tweak the settings in post-processing.
  What is sport mode?
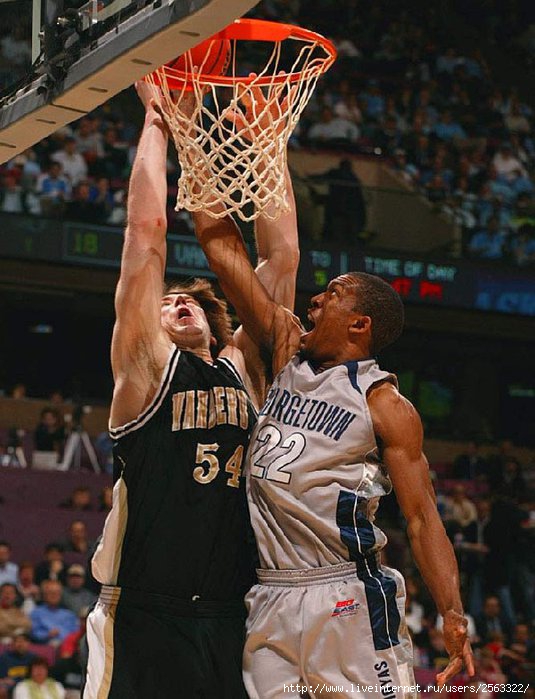
 Agree, no matter how much we want, we cannot manually set such a value on our own.
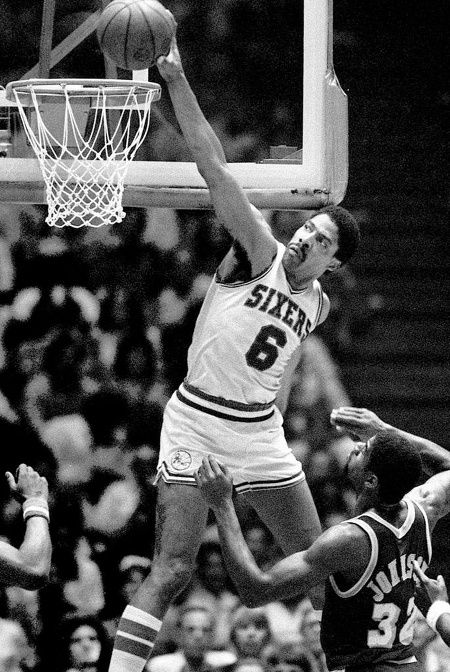
 First of all, this is the use of exposure. Of course, the very first and correct solution would be to reduce it to the shortest possible value, as mentioned above.
 Of course, if the price issue arises point-blank, then it is better to purchase a mid-budget device with a crop matrix with a crop factor of 1.5-1.6.