USA Basketball - Coach's Guide: Teaching the Fundamentals of the Game
The first fundamental to instill in young players is that basketball is a team game. If there’s one lesson you want to leave with them, it is this — no team is going to win unless each player contributes. Everybody has to learn how to dribble, pass, defend, rebound, and hustle if the team is to play well and succeed. Make it clear that unless everybody does their part, the team has very little chance of winning consistently.
This is the first step in building a team mentality. Let your players know the team always comes ahead of the individual. Stress the idea every player is important, and that everyone must contribute to the team’s effort. Most importantly, you have to mean those words. Don’t fall into the trap of playing the same five players and then pushing the others off to the side. Let every player know that he or she is going to be called upon to play and perform during every game.
And remember, if you show confidence in your team, they will rise to the challenge. Praise not only makes a player feel good, but it also results in bringing their game to a higher level.
DRIBBLING
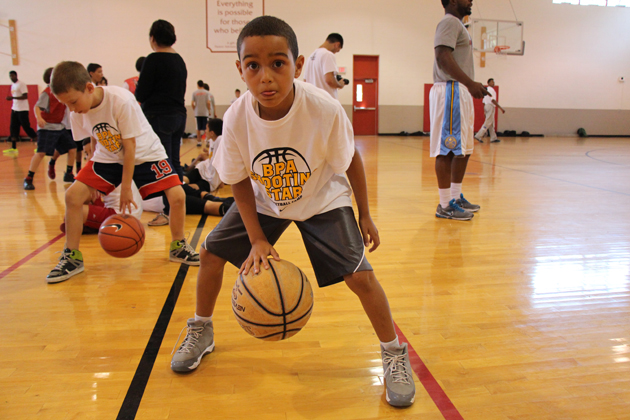
As with all basketball skills, the only way to get better at dribbling is by practicing. Practice dribbling so players become equally adept with either hand. With younger players the earlier you encourage them to use both hands, the better off they'll be.
Let the kids know that practicing dribbling only during practice is not enough. If they really want to become proficient at this basic basketball skill, they will have to practice on their own. They can learn to dribble while standing around with their friends at home, in the backyard, at the playground, or even while watching television.
The more they become accustomed to the feel of the ball the better they will become dribbling without looking down at the ball. Remind players that this takes time — and not to be discouraged with the initial frustrations of dribbling a basketball.
COACHING TIP
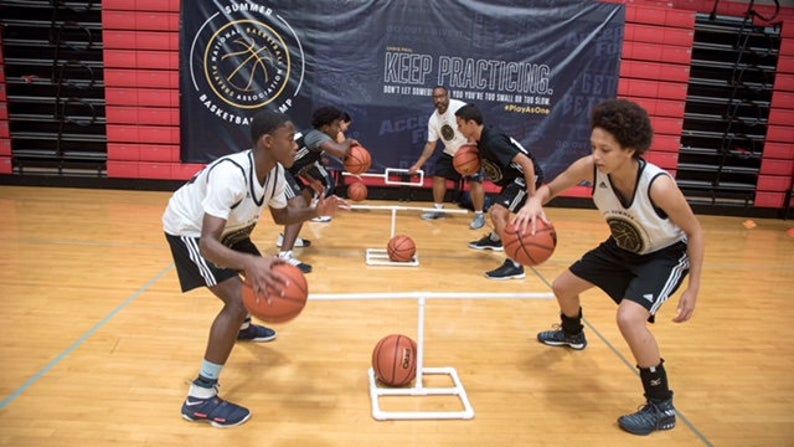
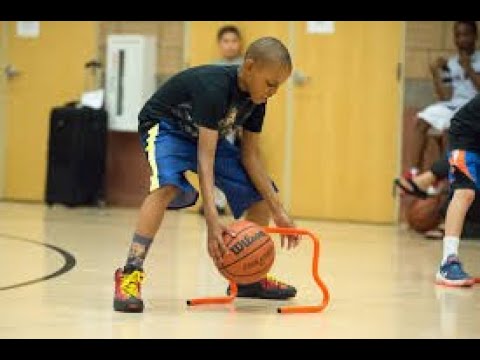
Set up four or five chairs or cones down the middle of the court. One player at a time attempts to dribble as fast as possible up court while weaving around the chairs. This drill forces players to use both hands while keeping their head up and eyes off the ball.
REBOUNDING
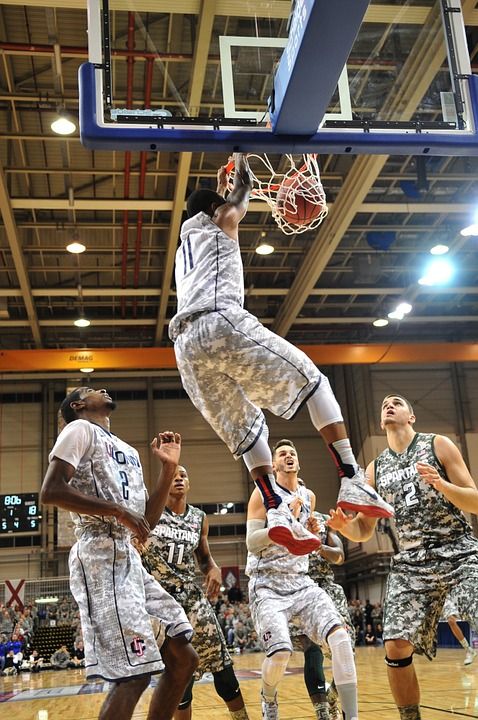
Rebounding is all about positioning. The defensive player’s job is to immediately turn around and “box out” the opposing player as soon as a shot goes up. After all, if the defensive player is positioned between the basket and the opponent, logic suggests that player will have a better chance of collecting the rebound.
As soon as a shot goes up, the defensive player turns his or her entire body around facing the basket. At the same time, the player should “feel” where the shooter is so the defender can keep the offensive player away from the ball. Rebounding position should be reinforced in every scrimmage. After all, the top coaches will tell you defense and rebounding win games.
PRACTICE TIP
Three players — one on the left corner of the free-throw line, one in the middle of the free-throw line and the other at the right corner — assume a defensive position. Three other players take a position opposite the defenders. The coach shoots the ball and the defensive players practice boxing out the offensive players while all six go for the rebound.
SHOOTING
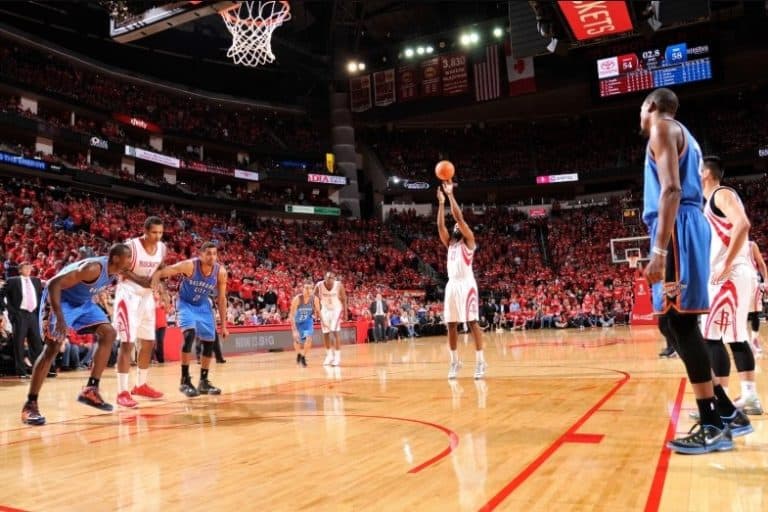
Like dribbling, shooting a basketball takes practice, practice, and more practice. For young players, trying to hoist a standard size basketball into a 10-foot high hoop can be daunting.
You might want to consider having your younger players learn the proper shooting techniques by using a smaller-sized ball. Also, consider letting them practice shooting at an adjustable hoop that is only 7 or 8 feet high.
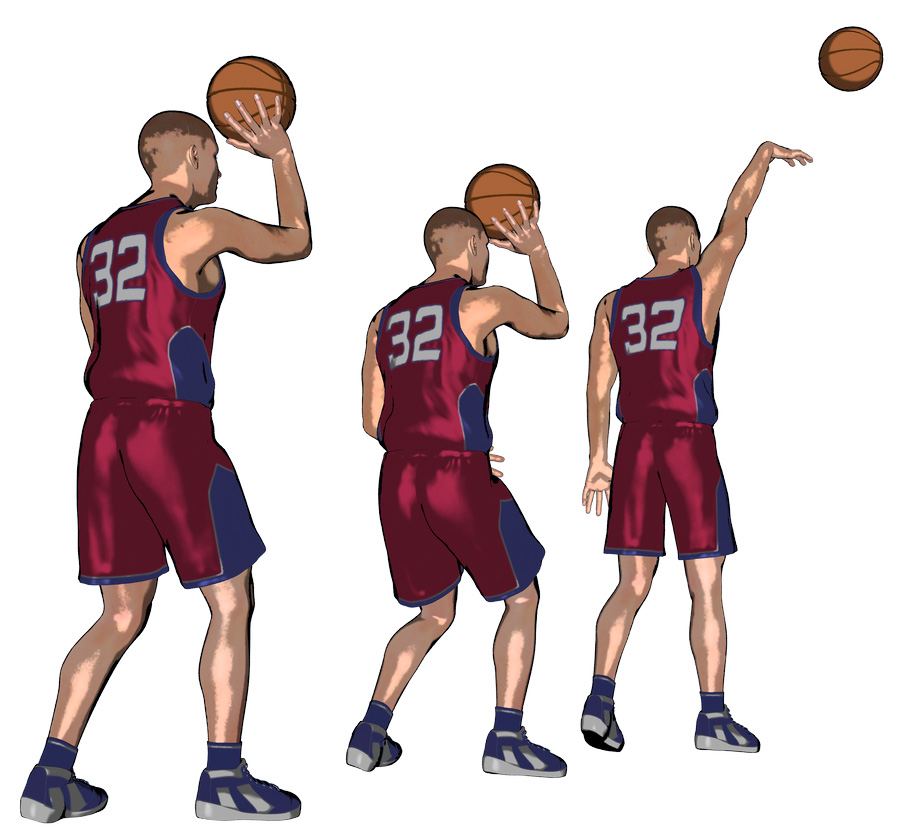
In terms of technique, emphasize resting the ball on the fingers, and not in the palm. The ball should roll off the fingertips when released. The ball should be loaded into the shooting position by the dominant hand. The other hand should be used to balance the ball.
there, the shooter should focus on the basket, and aim at the back of the rim. The ball should be hoisted in a soft trajectory at the basket, not in a straight line. The shooter should follow through by flicking the fingers and wrist toward the basket. If the ball doesn’t go in, remind players to break for the basket for the rebound. Players should always “follow the shot” in case the ball does not go in. This way they can be in a position to contend for a rebound.
PRACTICE TIP
Divide the team into two groups at either end of the court. Similar to H-O-R-S-E, in this drill one player takes a shot from anywhere on the court. If he makes the shot, then every other player must take the same shot. A free-throw counts as one point, all other baskets count as two. The idea is to get to 21 points as fast as possible. As players reach 21, they leave the game. The drill is over when one player remains.
PASSING
There are two kinds of passes — the chest pass and the bounce pass — that every player has to master. But before players can advance to that stage, they have to master the basics.
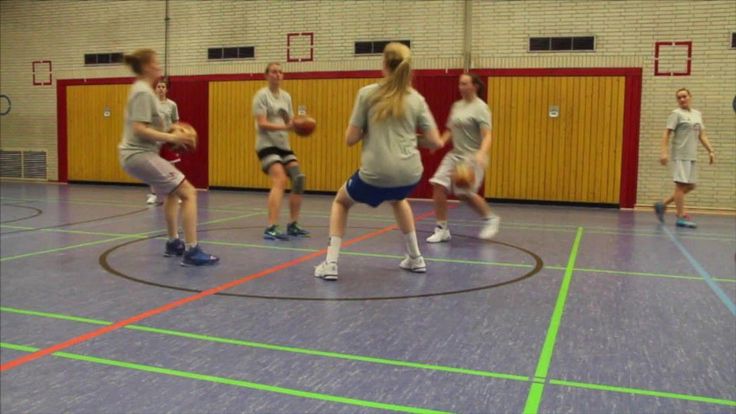
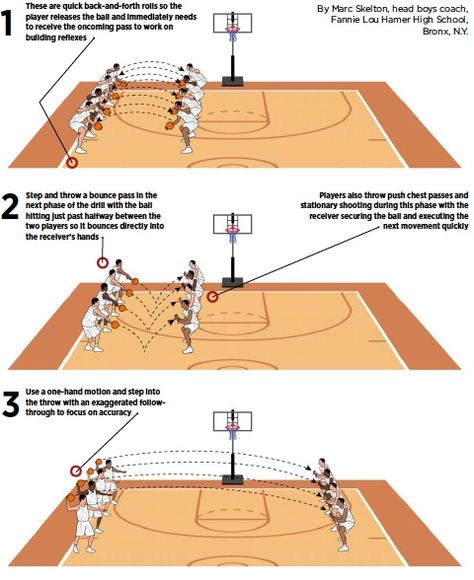
The chest pass should be a practice staple. Teach players to hold the ball in both hands, and to direct the ball towards their teammate by pushing the ball from the chest with both hands. The teammate should catch the ball in the air with both hands.
The bounce pass is fundamentally similar to the chest pass. The ball is still thrown with both hands, and it is directed at a teammate. This time, however, the ball is bounced once before being received. What makes this pass a little tricky is that the bounce pass usually is thrown to a player who is on the move. Hence, the player making the pass has to accurately anticipate how quickly his or her teammate is moving.
COACHING TIP (NELL’s FAVORITE)
Have two lines of players set up at one end of the court. On your whistle, they both start running down the court, parallel to each other, while passing the ball back and forth. It’s important that they mix up their passes (chest and bounce) and they move quickly. As they get close to the other end of the court, the last one with the ball should put up a lay-up. The key is quick passing.
DEFENSE
There are two basic defensive strategies in basketball: man-to-man, and zone. Each has a different advantage that is easily explained to young players. For example, in the man-to-man defense each of player is assigned to guard a player on the other team. This assignment usually occurs spontaneously at the start of the game where each player matches up with the player closest to him or her. If a mismatch is obvious, change up the assignments at your first opportunity.
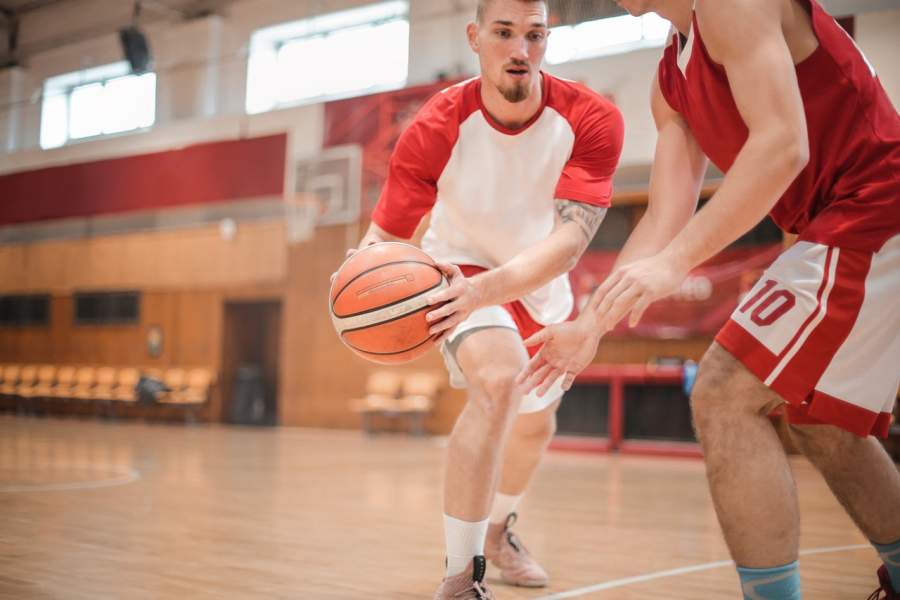
The best way to teach younger players to keep track of who they are guarding is by memorizing the opposing player’s jersey number. When substitutions begin, the player leaving the floor should tell the incoming teammate “I’m guarding number 20” so there is no confusion as to who’s guarding whom on the ensuing play.
In man-to-man defense, the defensive player simply roams wherever his or her offensive player goes. That means a lot of movement. The real key for the defender is to stay between the offensive player and the basket. Otherwise, the offensive player will have a relatively easy time shooting, rebounding and passing.
COACHING TIP
Denying the Ball
Form a single line at the top of the key (the circle above the free-throw line). The first player in line is the defensive player. The next player becomes the offensive player. The coach holds the ball as the offensive player tries to break free and get open. The defensive player is practicing proper defensive positioning while keeping one hand up to deny a pass from the coach.
Teach your players that man-to-man defense demands maximum effort. In addition to staying with the offensive player, the defender needs to be in the proper defensive position — knees slightly bent, hands in the air, ready to swipe at, or steal the ball. To move properly, the defender must learn how to slide from side to side as well as backwards and forwards.
For younger players, this slide step maneuver could take a little time to learn. Make working on the slide step a regular part of practice sessions. Players should take the ready defensive position with their hands and arms up, and then move right, left, backward and forward. Take a moment to demonstrate the drill properly, and remind them to stay in the ready position. After awhile, it will become a regular habit.
Coaches usually employ a zone defense when they want to force the opposing team to shoot the ball from the outside, or away from the basket. In effect, the coach is saying, “Here, try shooting the ball over our defending players. Because if you miss your shot, we’ll be in an excellent position to grab the rebound.”
In a zone, each defender is assigned to defend a certain portion, or zone as opposed to following an individual player. Against a zone defense, the offensive players are forced to pass the ball around the perimeter of the defense. Teach your players to have their hands up at all times, so they can block and intercept passes thrown by the offensive team.
When the ball comes into a defender’s particular zone, the defender immediately steps up and tries to make it difficult for the offensive player to shoot or pass the ball. Sometimes, depending on the kind of zone being used, two defensive players can actually surround, or trap, the opposing player with the ball. With two sets of arms and hands swirling in the offensive player’s face, making a good pass, or to taking a shot can become virtually impossible.
Zones emphasize solid rebounding skills, and force the opposing team to take lower percentage shots from the perimeter.
Keep in mind that in many youth leagues zone defenses are not allowed because so few players have developed an outside shot. They do, however, become very popular by the time kids reach middle school age. (By the way, sometimes coaches will have their team alternate between playing a man-to-man with a zone defense during the course of a game. This is done in an attempt to momentarily confuse and stall the opposing team.)
Zones
1-3-1 One player, usually the team’s quickest player, is at the top of the key. Three others are across the foul line extended with a quick, but taller player in the lane. The player out front tries to force the ball handler to the right or left where another defensive player comes over to create a trap.
2-1-2 Two players — usually guards — are above the free-throw line, one in the middle of the lane, usually the center, and two players are down low on either side of the lane, these players are usually the forwards. The goal, as with all zones, is to double team the player with the ball by driving him into a zone where two defensive players converge.
2-3 Two players — usually guards — are out front above the free-throw line with the other three players spread out across the middle of the lane.
OFFENSE
With younger players, you are better off teaching the two basic approaches: the fast break and the patterned, half-court offense. Each system has its advantages as well as its drawbacks.
The Fast Break Offense
To put an effective fast break offense in place, you need a team that has great foot speed, is in tremendous shape, and is very good at gathering defensive rebounds and throwing outlet passes to your guards. In this traditional “run-and-gun” offense, the idea is to be so quick off the boards that your team literally out races the opponent down the floor for easy baskets.
Of course, all this is predicated on your team’s ability to run, pass, and get rebounds. In practice, you must work on these fundamentals as well as outlet passing and stamina. Unfortunately, a fast break offense falls apart very quickly if the other team hustles back on defense, and forces your team into a half-court offense. Teams that train exclusively for the fast-break game often have a hard time setting up a patterned, slow down offense, and that can cause problems.
The Patterned Half-Court Offense If you decide to work on set plays, then you can devote a good chunk of practice to explaining how each play works. Let them walk through the plays at first, and then practice those plays over and over again until they become automatic. Your point guard controls the offense. He or she should call out a play designed to get one of your players an open shot or keep the ball moving from player to player until a high percentage shot is available.
Of course, smart coaches teach their kids the fast break and the half-court offenses. They’ll let their kids run a fast break offense if they get the chance, but they’ll also be schooled in setting up a play if the fast break doesn’t materialize.
Knowing When To Call a Time-Out Here’s a little tip. The best time to call a time-out is before the opposing team has gained momentum and scored a bunch of points to either tie the score or move ahead. Too many coaches wait until the damage has already been done and then they call time-out.
If your coaching instincts tell you the other team is beginning to catch fire, don’t wait! That’s the precise moment to call a time-out — to let your kids rest, to slow down the other team, and to let your team regain its poise. Remember that a time-out is a coaching device designed to allow your team to catch its breath, maintain its own momentum, and give you a chance to keep them pumped up.
If you’re in a situation where the game is coming down to a last shot and a time-out must be called, explain what kind of play you want to run, and let them execute. Be sure your instructions are clear, to the point, and well understood by the players. Hopefully, you’ve had a chance to practice some last-second plays in practice.
Creating Your Line-Up
If you are going to coach basketball, you must position your players appropriately. Here’s a quick overview of the five positions on the court:
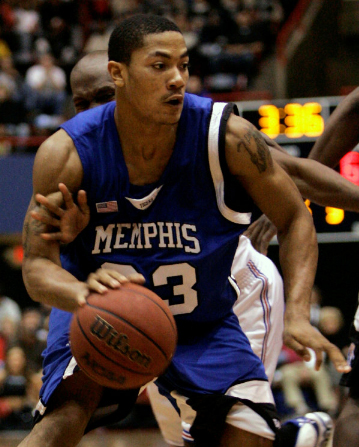
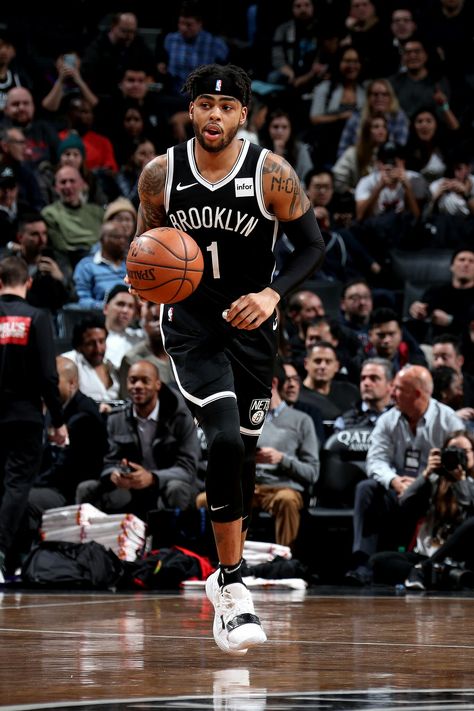
1 The Point Guard: This player handles the ball as the team moves up the court and into its offensive plays. The point guard is much like the quarterback of a football team. Point guards must be excellent ball handlers who are able to see the whole court — that means being able to dribble without looking at the ball. A talented point guard who can also make a jump shot and drive to the basket is essential to a team’s success.
2 The Shooting Guard: While this player has solid ball handling skills, he or she is usually the team’s best shooter and top scorer. This player is also referred to at times as the “off guard.” The shooting guard is normally the team’s most athletic player on the floor.
3 The Small Forward: The small forward is usually the most versatile player on the court. This person plays both an “inside” and “outside” game. He or she must have the skills to shoot and dribble the ball well, while using his or her size and strength to battle near the basket for rebounds. Don’t be fooled by the name, small forwards need to be big.
4 The Power Forward: This player is known as the team’s primary rebounder at both ends of the court. On defense, power forwards can start a fast break by grabbing a rebound and making a quick outlet pass to one of the guards. Big and strong, the power forward may not be the most graceful player on the team, but his or her presence is always felt.
5 The Center: To be successful at any level, a team usually needs a talented big man in the middle. Traditionally, the center is the tallest player on the team. The center’s job is to anchor the team’s defense and rebound the ball at both ends of the court. Additionally, the center is the team’s primary low post scorer on offense.
In addition to working on basketball fundamentals always try to teach a few basic plays during practice. Bring the players around the clipboard and diagram specific offensive plays. For example, the traditional “give-and-go” play can be explained with a diagram and then with you and your assistant coaches demonstrating. Then let the kids practice the play.
Show them how a screen works. First, with a diagram, then with your assistants demonstrating. Once the kids have mastered these basic plays, you can introduce a play or two in succeeding practice sessions. Block out time in each practice so players can walk through the play before executing the play at full speed. Make sure every player learns how to run the plays. You can even have some fun by letting your players decide what they want to call the plays.
The BACK DOOR
The Back Door is particularly effective against aggressive man-to-man defenses. It is specifically designed to exploit the aggressive tactics of defenders guarding players without the ball.
The Back Door can be executed by any two offensive players just about anywhere on the court and is even effective against a full-court press.
1. As the point guard 1 crosses the center line and attempts to set up the offense, a teammate 2 takes two quick steps to the left. (Diagram 1)
2. The teammate 2 takes these two quick steps knowing the aggressive defender trying to deny the ball will go with him. (Diagram 1)
3. As soon as the defender catches up, the offensive player 2 breaks for the basket. (Diagram 2)
4. A split second after the offensive player 2 breaks, the point guard 1 fires a pass to him. Since the play can unfold quickly, use a bounce or a chest pass, whichever gets the ball to the breaking man 2 quicker. (Diagram 2)
The PICK AND ROLL
John Stockton and Karl Malone, teammates on the Utah Jazz, are famous for executing the pick-and-roll to near perfection. The play can be so effective that even when defenders know it’s coming, the pick-and-roll can still be difficult to stop.
Keep in mind that the pick-and-roll is used almost exclusively against aggressive man-to-man defenses. The play can be executed by any two offensive players. There are three options off the pick-and-roll and each are designed to create a high percentage shot for the offense by “picking” one of the two defensive players.
Pick and Roll to Jump Shot
1. The point guard 1 dribbles the ball to the side of the court where another offensive player 4 is isolated, or alone with his or her defender. In each of these options the player isolated on the left side of the court is the power forward 4 .
2. The guard 1 drives his man to the left. As he does so, his teammate 4 heads in the same direction to set the pick.
3. As the pick is set, the guard 1 dribbles close to and around his teammate 4 in an attempt to drive the defensive player into the pick.
4. As soon as the offensive player 4 feels the guard’s defender run into him, the offensive player 4 rolls to the corner. The guard 1 , who appears headed to have either a clear lane to the basket or an open jump shot, attracts the attention of both defenders x1 x4and quickly passes to his teammate 4 for an open jump shot.
Pick and Roll to Man
Steps 1 + 2+ 3 (Same as above)
4. Instead of rolling into the corner for a jump shot, the offensive player 4 setting the pick rolls to the basket. Defenders are usually caught watching the player with the ball, in this case the point guard 1 .
5. The point guard passes through the defenders — usually a bounce pass — to his teammate 4 for an easy basket.
Pick and Roll to Drive
1. The guard 1 and his teammate 4 head to the same spot on the floor.
2. The guard 1 waits for the pick to be set, then drives his defender into the pick. The guard 1 simply needs his defender x1 slowed down by the pick. Even the briefest hesitation by the defender can open a lane to the basket for the guard 1 .
3. The guard keeps his dribble and moves as close as possible to his teammate 4 setting the pick. If the guard’s defender x1 gets caught by the pick, the guard 1 heads straight to the basket.
Coaching Youth Basketball: Focusing on the Fundamentals
By Jeff Haefner
Home > Coaching > Coaching Youth Basketball > Coaching Youth Basketball: Focusing on the Fundamentals
The fundamentals of basketball are the foundation for every individual play, offensive or defensive strategy, and every move that your players make. The best players have perfected the basics of the game. Learning and mastering these basics make the rest of the game much easier!
My number one recommendation when coaching youth basketball is to focus on the fundamentals!
Spend at least 75% of each practice on them.
Do NOT teach your youth team how to do a full court press!
First teach them how execute offense and defense in the half court. Even if you think they know how to execute in the half court, I guarantee they don't. ..
Do all your players know how to read screens? Do they slip the screen when the defense hedges on the pick and roll? Do they set screens shoulder to shoulder? Do they block out after every shot? Do they always see their man and the ball when they're on defense?
If they don't know how to do these things, why in the world would you teach them how to do a full court press?
In 20 years of watching basketball, I've NEVER seen a youth team that was ready to press and had all the fundamentals down pact!
If you make teaching your players the fundamentals your number one goal, your players will enjoy practice, they will appreciate their improvement, and they will be grateful down the road.
Like any sport, no matter what your age -- whether you're a professional athlete or a youth player just getting started -- you need strong fundamentals to be successful!
Unfortunately, most people don't really understand what that means.
So what are the fundamentals?
The fundamentals include working on the little things that will make you better -- no matter what team or coach you play for -- or what offense or defense you are running.
For example, by working on the fundamentals of shooting, you will get better no matter what offense you run. The fundamentals of shooting include proper foot alignment, leg bend, hand position, arm angle, follow through, and so on. These are some of the little things that make a difference. Learn them!
The same goes for lays ups, foot work, post play, passing, jab steps, jump stops, pivoting, blocking out, and so on.
For youth players, we suggest that you focus on teaching the proper technique and fundamentals for:
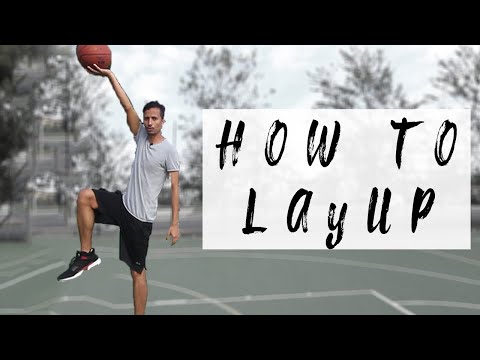
Lay ups
Shooting
Foul Shooting
Passing
Dribbling and ballhandling
Jump stops
Triple threat position and pivoting
Jab steps
Basic screening and cutting
Defense
Rebounding
Basic post moves
These are all critical fundamentals to master because they'll make you and your team better, no matter what age level or situation you might be in.
If you'd like some drills to work on those fundamental skills, you can start with these kids basketball drills.
Recommended DVD's & eBook:
The Attack & Counter Skill Development System
This eBook & DVD's will improve your shooting, ballhandling, footwork, perimeter moves, post moves, finishing, aggressiveness, quickness, confidence, mentality, and your all-around game!
Designed by NBA skills coach Don Kelbick, this unique and comprehensive system is incredibly simple when compared to other skill development programs. Yet it works with NBA and pro players at the highest level... (more info)
Rules of Basketball
How the rules have changed in your favorite game
How the rules have changed in your favorite game
WE ALL LOVE TO PLAY BASKETBALL, BUT DO YOU KNOW THE RULES EXACTLY?
Basketball was invented by James Naismith in 1891. Then everything was different: playgrounds, baskets, balls…
!!! Read about the evolution of balls in the article:
Basketball was invented by James Naismith in 1891. Then everything was different: playgrounds, baskets, balls…
!!! Read about the evolution of balls in the article:
The history of basketballs
The history of basketballs
What balls are played now and how it happened
The beginning
The rules have also changed a lot during this time. Initially, there were only 13 of them in basketball:
The ball can be thrown in any direction with one or two hands.
The ball may be hit with one or both hands in any direction, but never with the fist.
The player cannot run with the ball. The player must throw the ball from the point at which he caught it, except for a player running at high speed.
The ball must be held with the hands. You can not use the forearms and body to hold the ball.
In any case, hitting, grabbing, holding and pushing the opponent is not allowed. The first violation of this rule by any player shall be called a foul; the second foul disqualifies him until the next ball is scored, and if there was an obvious intention to injure the player, then a disqualification for the entire game. It is not allowed to replace a disqualified player.
Punching the ball is a violation of points 2 and 4, the penalty is described in point 5.
commit no foul).
A point is scored if a ball thrown or bouncing off the floor hits the basket and stays there. Defending players are not allowed to touch the ball or basket while shooting. If the ball touches the edge and the opponents move the basket, then a point is scored.
If the ball goes out of bounds, it must be dropped into the field by the first player to touch it. In the event of a dispute, the referee must throw the ball into the field. The thrower is allowed to hold the ball for five seconds. If he holds it longer, then the ball is given to the opponent. If either side tries to play for time, the referee must give them a foul.
The referee must monitor the actions of the players and fouls, and notify the referee of three consecutive fouls. He shall have the power to disqualify players under rule 5.
The referee must watch the ball and determine when the ball is in play (inbounds) and when it goes out of bounds (out of bounds), which side should be in possession of the ball, and any other action that the referee would normally take .
The game consists of two halves of 15 minutes each with a break of 5 minutes between them.
The side with the most goals during this time period is the winner.
The most important rule change in the history of basketball is the introduction of dribbling. In the original version of the game, this was prohibited by paragraph 3 of the rules.
One of the first changes in the game and the rules was the replacement of the basket with a ring with a net. It seemed to be very inconvenient to climb after the ball every time after a hit. Around the same time, free throws, dribbling appeared, and the composition of the teams was fixed for 5 players on the court at the same time. Before that, in some matches, up to 50 people could be on the court at the same time. All this happened back in 1896-1897.
The emergence of FIBA (International Basketball Federation)
Basketball in the early 20th century became more popular and the rules in each country could be different. This was one of the reasons why FIBA appeared in 1932 year. At the first FIBA Congress, the teams were approved (5 people and 2 substitutes), and it was decided that after each goal there would be a throw-in in the center. This rule was removed after 4 years to reduce the advantage of tall players.
Over the next few years, the main changes were related to the number of personal fouls, the number of players on the bench and the introduction of a time limit for getting the ball into the opponent's half of the court.
More changes came in 1952 after the Olympics. The game became very boring, because the teams held the ball, having received a minimal lead in the score. Everyone understood this and searched for solutions for several years in order to save the life of basketball. At 1954 Danny Biason proposed to the NBA to limit the time for the shot to 24 seconds. At the 1956 Olympics, there was a similar rule: it was necessary to make a throw in 30 seconds. At the same time, to add equality between defense and attack, another rule familiar to us appeared: you need to start dribbling the ball before the supporting leg comes off.
Then the game became similar to the modern one from a technical point of view: dribbling, shots, a three-second zone appeared. In 1979, the NBA added a three-point line, and in 19In 1984, FIBA also added an arc.
!!! An article about the evolution of the three-point shot and interesting facts:
10 interesting facts about the three-point shot.
10 interesting facts about the three-point shot.
Three-pointer evolution and insane records.
Changes in the rules and basketball since 1956 have included the number of free kicks, the situations in which these free kicks are given, and individual and team penalties. Some rules were introduced, and a few years later they were canceled. For example, the "3 for 2" rule: if a player was fouled in the shooting phase, then if one of the first two shots was missed, he could make another free throw. This rule was later removed.
Since the 1990s there have been constant changes: the emergence of alley-oops, changes in the timing and rewriting of the rules of running, which continue to this day.
From the most interesting: if the team has 0.3 seconds or less to throw the ball from behind, then it must be a one-touch throw. It takes at least 0.4 seconds to perform a full throw.
Derrick Fisher made similar throws:
And here is a small selection of videos of how they throw in 0. 2 seconds:
Do you want to take your first steps in basketball or improve your basic skills? We have a Basic Basketball Skills workout for you. See the schedule and sign up:
SIGN UP
Coach: Yuriy Bespalov
- Professional player of the INANOMO 3x3 team; - Champion of Russia 3x3 2019, 2021; - Winner and medalist of the MOFB championship; - MLBL Summer League MVP 2017; - Multiple participant of Moscow Open; - Champion of Moscow 3x3 2017; - MVP GrunisCup 2017.
IF YOU LIKE THIS ARTICLE, DON'T FORGET TO SHARE IT WITH YOUR FRIENDS.
MORE ARTICLES FROM
BLOG
We write useful articles about basketball training, basketball shoes and everything related to this beautiful game.
Basketball in Moscow in winter
Free throw in basketball: technique and secrets of execution
Passes in basketball: basic types and technique of execution
Basketball terms everyone should know
How to increase the jump? 5 tips
9 definitions that every basketball player should know
#THIS YOUR PLACE in social networks:
How to learn to play basketball from scratch
“School 2. 0” is the best educational project in the history of Russian basketball, collected all the basics in one material skills that are needed for those who want to jump like Michael Jordan and shoot a three-pointer like Steph Curry. We literally chew on you how to play basketball and become cool. Lots of videos are included.
Passion for basketball usually begins with the ball hitting the basket. Do not deprive yourself of this pleasure, learn to score from under the basket, then from two steps ... But after that, you should think about what elements to master in order to become a “correct” basketball player. We won't let you get bored - we won't fill all basketball practice with boring stops and turns. But in general, you can’t do without it, because the correct work of the legs, the habit of standing firmly, not mincing, not taking extra steps, quickly and correctly changing the direction of movement is an absolute must for a basketball player. Plus, of course, dribbling and passing.
In general, to start the basketball path, School 2.0 recommends exercises to develop the following skills during basketball training:
Shooting
Footwork
Transmission
Maintenance
Do two or three dozen workouts, combining the exercises from the following list, and you will notice real progress. Start each workout with 2-4 minutes of quiet running and such a joint warm-up:
Exercises are performed one after the other without stopping.
Shoulder warm-up. Stand up straight and extend your arms to the sides. Make circular movements with straight arms 10 times forward, then 10 times back.
Pelvic warm-up. Put your hands on your belt, feet shoulder-width apart. Perform rotations in the hip joint, as if twisting a hoop, 10 times in each direction.
Back workout. Bend your elbows and press to your chest, feet shoulder-width apart. Do rotations in the lower back 5-10 times in each direction.
Knee warm-up. Stand up straight, feet together. Squat down a bit and put your hands on your knees. Then perform rotational movements with your knees, helping yourself with your hands. Do 10 times in each direction.
Ankle warm-up. Put your hands on your belt. Place one foot on the toe slightly behind you. Resting on your toes, do 10 rotations in the ankle joint in each direction, then change legs.
Squats. At the end, do 5 deep squats, keeping your heels on the floor and extending your arms in front of you.
Throwing
Get used to throwing correctly right away - with one hand (the other can only hold the ball), with reverse spin. The forearm is perpendicular to the floor, the arm straightens completely, the hand “closes”. Listen to how the ball blows up the net - it's a thrill.
1. Shooting stand
Stand straight, feet shoulder-width apart, ball in hand.
At the signal, take a throwing stance, and at the next signal, return to the starting position.
Ready to throw: legs bent, back straight, slightly tilted forward. Throwing hand behind the ball (not sideways!), the second hand holds the ball in front-side.
Raise the ball to shoulder level.
Repeat 10 times with right and left hand.
2. Single-handed throw on the spot
Get into the throwing position. The ball lies in one hand at the level of the head, the elbow is directed forward, the second hand does not help.
Sit down a little and with simultaneous extension of the legs and elbow, throw the ball up in front of you. Stay in the final position until the ball hits the floor.
Repeat 10 times with right and left hand.
3. Throw with one hand into the hoop from one meter
Stand under the hoop with the ball in your hand at shoulder height. The other hand does not help!
Squat down and at the same time extend your legs and arms, make a throw around the ring. Keep the final position of the straightened arm and closed hand until the ball hits the floor.
Try to hit the ball in the corner of the rectangle drawn on the shield, then the ball will be in the ring.
Throw from different positions. 10 times with the right and left hand.
4. Medium throw
Stand at a distance of 3-4 meters from the ring and take a throwing stance. Sit down and with the simultaneous extension of the legs and arms, make a throw around the ring. Keep the final position of the straightened arm and closed hand until the ball hits the floor.
Throw from different positions.
Stand a few meters from the ring. Make yourself an autopass, take a small jump forward, catch the ball, take a shooting stance, and hit the basket.
Perform the exercise 10 times with your stronger arm.
5. Two steps - throw
Stand three meters from the ring. Take two steps from the spot and throw the ring.
Get on the three-point line. Take a couple of hits with the ball, then two steps and throw the ring.
From the three-point line, make yourself an autopass. Then catch the ball, take two steps and shoot the ring.
Try to hit the ball in the corner of the rectangle drawn on the shield.
Repeat 10 times with right and left hand.
6. Two steps - low shot
Get on the three-point line. Take a couple of hits with the ball, then two steps and throw from the bottom of the ring.
Stand three meters from the ring. Take two steps from the spot and throw the ring from below.
From the three-point line, make yourself an autopass. Then catch the ball, take two steps and shoot the ring.
Try to hit the ball in the corner of the rectangle drawn on the shield.
Repeat 10 times with right and left hand.
Footwork
Glue your feet to the floor. No extra steps! Otherwise - "jog", whistle, give the ball to the opponents.
1. Jump stop
The exercise is performed on the spot. Make yourself an autopass, catch the ball with two hands and at the same time do a two-foot jump into a basketball stance.
Determine the axial (supporting) leg and perform turns on this leg forward and backward.
Then imitate the following sequence of actions: take the ball in your hands, being completely in the air; land on both (!) feet at the same time; do turns around the same (!) leg.
Repeat the exercise 10 times: 5 times turning on the right leg and 5 times on the left.
2. Walking stop
The exercise is performed on the spot. Make yourself an autopass, catch the ball with both hands and stop at the same time with two steps into the basketball stance.
The axial (supporting) leg will be the one with which you took the first step - on this leg, perform turns forward and backward.
Repeat the exercise 10 times: 5 times turning on the right foot and 5 times on the left.
3. Zigzag without a ball with a jump stop
All changes in the direction of movement are made by a clear turn around the near leg - even through the “face”, even through the “back”. This is very important in basketball!
4. Zigzag without a ball with a stop in steps
It is performed in the same way as the previous exercise, but the stop at the cone is one-two, not a jump.
Transmission
Mastering the culture of passing will not only earn you the respect of your playmates, but it will also give you a lot of fun. Maybe even more than hitting the ring.
1. Passing with two hands into the wall
Stand 3-5 meters from the wall. Pass the ball into the wall with both hands from the chest.
Hold the ball with both hands from the sides and direct it to the wall with a wrist movement. As a result, the arms at the elbows should straighten, and the hands should “close”.
Move further back to make longer passes. At the moment of such a transfer, one leg takes a step forward. Catch such a transmission from the floor.
Repeat the exercise 15-20 times.
2. Passing with one hand into the wall
Stand 3-5 meters from the wall. Pass the ball into the wall with one hand from the shoulder.
Hand behind the ball, thumbs up. Carpal movement.
Repeat the exercise 15-20 times for each hand.
3. Lying One-Hand Pass
Lying on your back, pass with one hand up.
Repeat the exercise 15-20 times for each hand.
Dribbling
Great basketball dribbling is the key to all doors. Not to mention how effective it is.
1. Palms on the ball
Take the ball in your hands and shift it from hand to hand, hitting it with your palms.
Start slowly and then speed up. 15 seconds slow, 15 fast.
Repeat 1-2 times.
2. Ball on fingers
Quickly toss the ball with your fingertips from one hand to the other: raise and lower in front of you; sit down and get up; raise and lower in motion.
Perform each exercise 2-3 times for 15 seconds.
3. Ball around the body
Pass the ball from one hand to the other as quickly as possible: around the body; around the head; in a basketball stance around the leg; in a basketball stance figure eight around the legs.
Do 5 repetitions in each direction.
4. Low dribbling on the spot
Low ball dribbling in different positions:
Basketball stance, feet parallel. Dribble to the side of your foot. Free hand in defense position.
Sit on the floor and dribble the ball from your side, bringing the ball closer or further away.
Repeat 15 times with each hand. Do 2-3 sets.
5. Medium dribbling on the move
Average dribbling of the ball (height to the waist) on the move. Do it at speed.
Make a turn, leaving the ball in place and picking it up with your other hand.
Dribble two courts with each hand.
6. V-dribbling in front of you
Stand in a basketball stance.
Dribble with one hand in front of you in a V, with your right and left hands in turn.
Repeat 15 times with each hand. Do 2-3 sets.
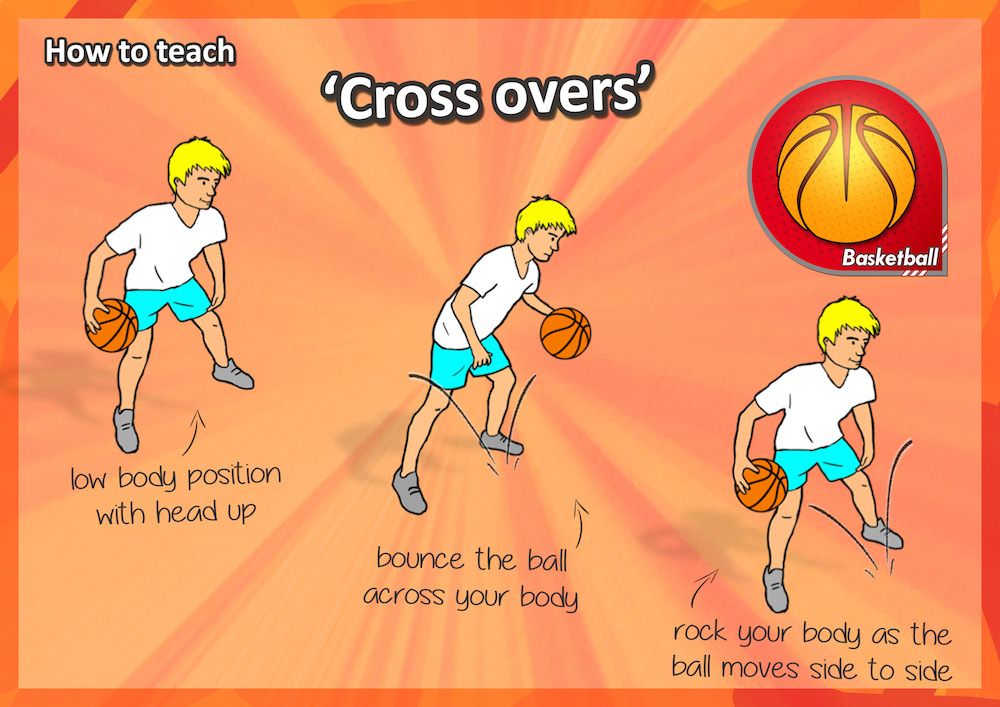
7. Crossover
Move the ball in place in front of you from one hand to the other.
First do the exercise for each stroke.
Then - for every third hit.
After translation, touch the floor with your free hand.
Repeat 15 times with each hand. Do 2-3 sets.
8. Underfoot transfers
Transfer the ball between the legs from one hand to the other.
Translate every third hit with the ball.
After translation, touch the floor with your free hand.
Repeat 15 times with each hand. Do 2-3 sets.
That's it for starters. Of course, it would be nice to learn how to fly - in the sense of jumping high without a trampoline. But that's another story. If you only jump, you are a jumper. And if you have mastered these exercises, you are almost a basketball player. Then you can already learn to play in a team, in real contact conditions.
Why Andrey Kirilenko created School 2.0:
And remember,
"School 2.0"
will introduce you to people who you want to follow an example from: winners in whom at first no one believed; music and movie stars going crazy about basketball; heroes who, thanks to sports, managed to overcome themselves.
School 2.0 will recommend movies and books, and they will help you move mountains. With us you will be in trend and understand that success breeds success.
School 2.0 has no entrance exams. Do you want to be beautiful, healthy and smart?
You are already accepted.
BTW, WE ARE DOING FREE OPEN TRAININGS TOGETHER WITH THE GREATEST GROUND #HARDCOURT. ON THIS WEDNESDAY, FOR EXAMPLE, VICTOR CHEIRU WILL TEACH EVERYBODY TO THROW THE BALL.
FOLLOW ALL OUR TRAINING HERE
If you liked this material, you can subscribe to our Facebook page or "


 One player at a time attempts to dribble as fast as possible up court while weaving around the chairs. This drill forces players to use both hands while keeping their head up and eyes off the ball.
  Three other players take a position opposite the defenders. The coach shoots the ball and the defensive players practice boxing out the offensive players while all six go for the rebound.
 The shooter should follow through by flicking the fingers and wrist toward the basket. If the ball doesn’t go in, remind players to break for the basket for the rebound. Players should always “follow the shot” in case the ball does not go in. This way they can be in a position to contend for a rebound.
 Teach players to hold the ball in both hands, and to direct the ball towards their teammate by pushing the ball from the chest with both hands. The teammate should catch the ball in the air with both hands.
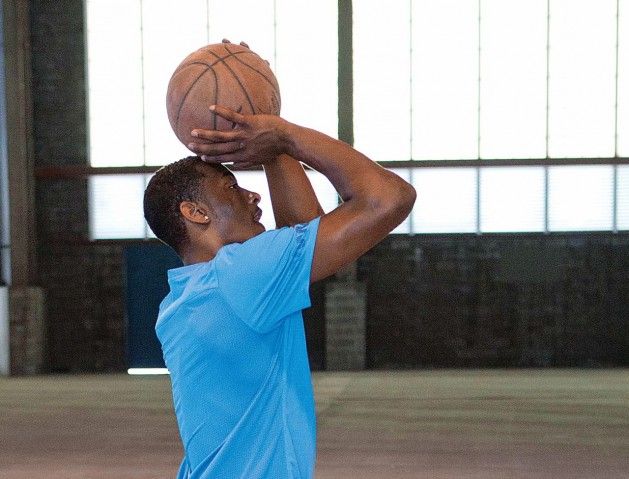 The key is quick passing.
 Otherwise, the offensive player will have a relatively easy time shooting, rebounding and passing.
  Players should take the ready defensive position with their hands and arms up, and then move right, left, backward and forward. Take a moment to demonstrate the drill properly, and remind them to stay in the ready position. After awhile, it will become a regular habit.
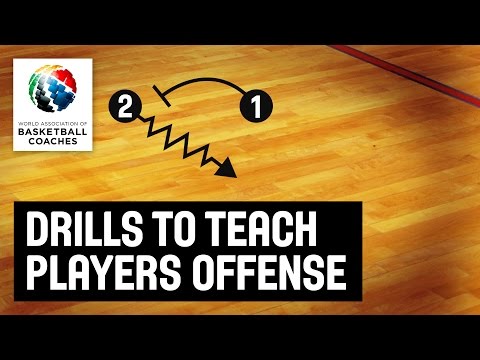 Sometimes, depending on the kind of zone being used, two defensive players can actually surround, or trap, the opposing player with the ball. With two sets of arms and hands swirling in the offensive player’s face, making a good pass, or to taking a shot can become virtually impossible.
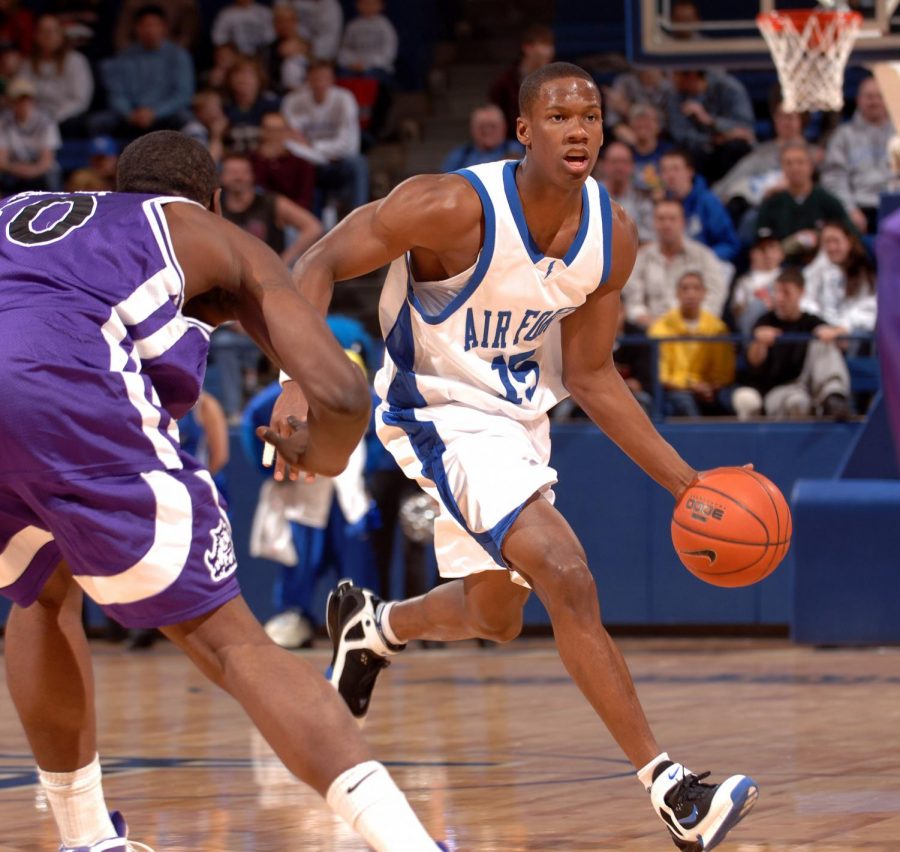 The player out front tries to force the ball handler to the right or left where another defensive player comes over to create a trap.
 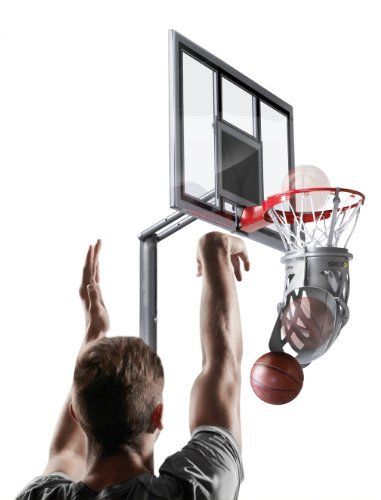 In this traditional “run-and-gun” offense, the idea is to be so quick off the boards that your team literally out races the opponent down the floor for easy baskets.
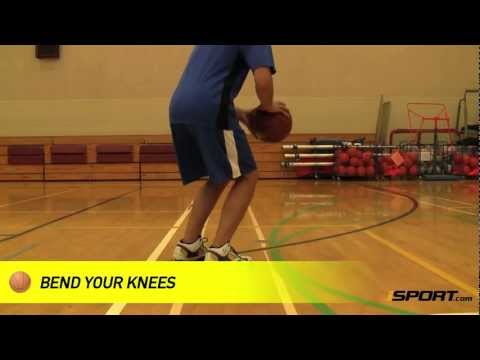
 Be sure your instructions are clear, to the point, and well understood by the players. Hopefully, you’ve had a chance to practice some last-second plays in practice.
 The guard 1 , who appears headed to have either a clear lane to the basket or an open jump shot, attracts the attention of both defenders x1 x4and quickly passes to his teammate 4 for an open jump shot.
 If the guard’s defender x1 gets caught by the pick, the guard 1 heads straight to the basket.
  ..
..
 Then everything was different: playgrounds, baskets, balls…
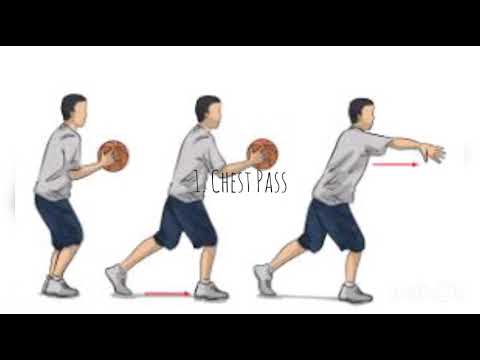
 If he holds it longer, then the ball is given to the opponent. If either side tries to play for time, the referee must give them a foul.
  It seemed to be very inconvenient to climb after the ball every time after a hit. Around the same time, free throws, dribbling appeared, and the composition of the teams was fixed for 5 players on the court at the same time. Before that, in some matches, up to 50 people could be on the court at the same time. All this happened back in 1896-1897.

 2 seconds:
 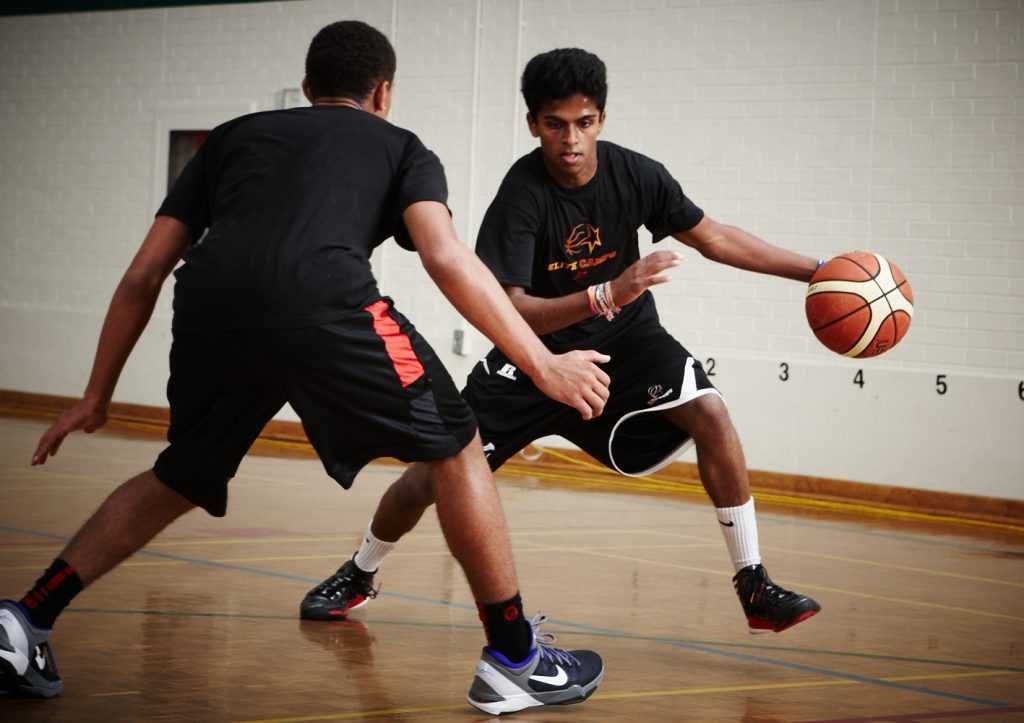 0” is the best educational project in the history of Russian basketball, collected all the basics in one material skills that are needed for those who want to jump like Michael Jordan and shoot a three-pointer like Steph Curry. We literally chew on you how to play basketball and become cool. Lots of videos are included.
 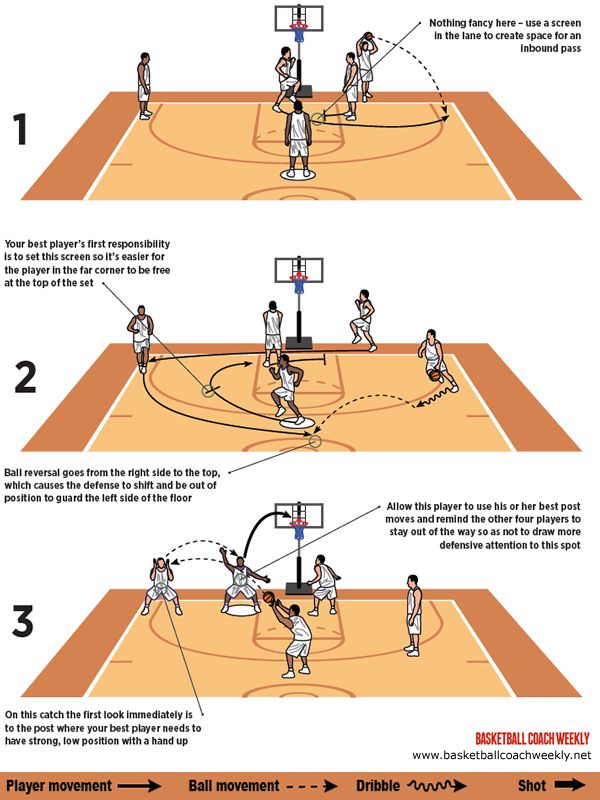 Plus, of course, dribbling and passing.
  Perform rotations in the hip joint, as if twisting a hoop, 10 times in each direction.
 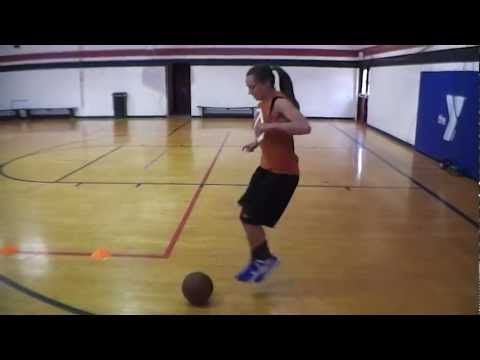 The forearm is perpendicular to the floor, the arm straightens completely, the hand “closes”. Listen to how the ball blows up the net - it's a thrill.
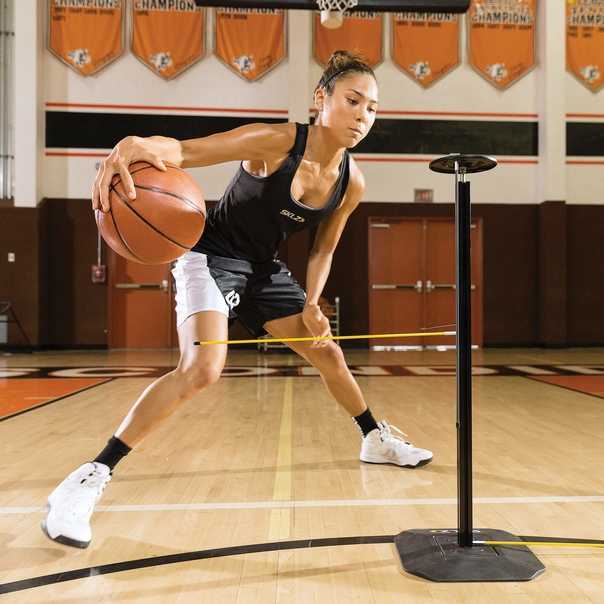
 Take two steps from the spot and throw the ring from below.
 Carpal movement.