How to Inflate a Basketball (What You Need + 5 Steps)
Inflating a basketball is not something you really need to do all that often. When you buy a brand new basketball, it is usually already inflated so you really don’t think too much about it. After a while, basketballs tend to lose a little air and if you let one sit around for a long time, it will definitely end up flat.
Even an often used basketball will eventually need air. You may go out to play a game and notice that your ball is not bouncing quite as it should. Cold weather may also lower the pressure in a basketball making it seem unresponsive when you dribble and shoot. In either case, you can always add a little air to solve the problem.
Why should you care if your basketball is properly inflated? How do you know when your basketball is properly inflated? What is the best way to properly inflate your basketball? These are all common questions with fairly simple answers. Let’s take a look at each question one at a time.
Quick Navigation
Why Should I Properly Inflate My Basketball?
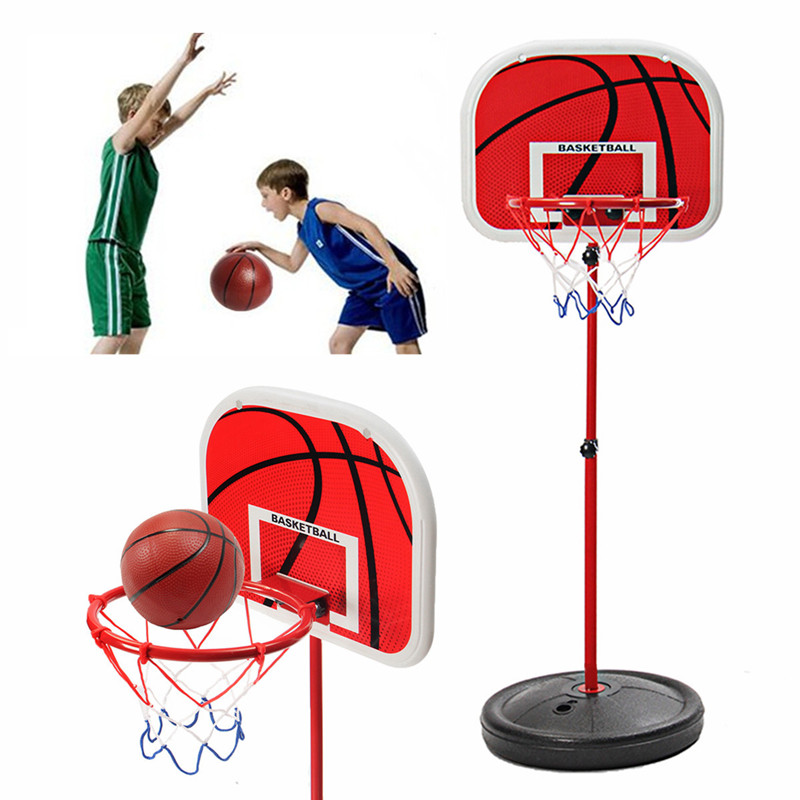
A properly inflated basketball will ensure that your practice, one-on-one game, full-court five-on-five game or even your game of HORSE is the best experience that it can be. An underinflated ball will not have any “action”, meaning it will not bounce very well, which will make it more difficult to dribble. Also, it will not bank off the backboard as well and bounce passes will not go as far as you intend them to go.
An overinflated ball can be bad as well. It will bounce too high when you dribble, bank too hard off the backboard and bounce passes will go farther than you intend them to go. This is why it is important to have your basketball inflated to the specified pressure or at least near the specified pressure.
How Do I know If My Basketball is Properly Inflated?
The standard pressure recommended for a basketball is 7 – 9 PSI (48.26 – 62.05 kPa). Unless you have a pressure gauge, and many air pumps do (we’ll talk about that in the next section), then you will not know what the air pressure in your basketball is. Not to worry, there is a simple method that you can use to check the inflation of your ball. It won’t give you the PSI (or kPa), but it will be good enough to get you back out on the court.
Hold the basketball at about the level of your face.
Drop the basketball.
Let the ball bounce.
If the ball is properly inflated, it should bounce back up to around your waist level.
Another great way to tell is just by playing with the ball and dribbling it. You can often tell if it is under or over-inflated. Different players prefer various levels of inflation, so an ideal inflation level to one player may be too much or not enough to others. An interesting thing to do next time you watch a game or attend one live is to watch which players walk over to the referee before tip-off and test the ball by grabbing it and dribbling.
What’s the Best Way to Properly Inflate a Basketball
I have seen many videos and instructions out there on the internet that explain how to inflate a ball without the proper equipment. While these methods may or may not work, it is always best to use the proper equipment because you can ensure that you are inflating the basketball to the correct pressure. Using the proper equipment will also help prevent you from damaging your basketball.
Let’s take a look at what you will need to properly inflate your basketball.
What You Will Need
Inflation Needle
These are relatively cheap and can be found at almost any store that carries any type of athletic equipment. They can also be found easily online.
See the picture below if you are not familiar with what they look like.
Inflation Needle. Photo by Melissa Medina.
Air Pump
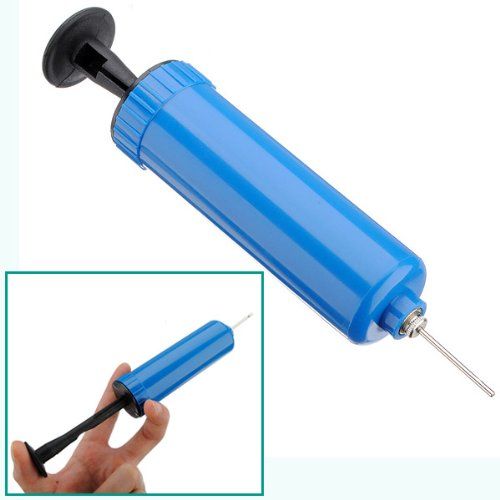
There are many different types of air pumps. Below are a few types that can be used such as a hand pump, a bicycle pump or an electric pump. Basically, you need a basketball pump that can connect to the needle. Some air pumps come with built-in pressure gauges which can show you the air pressure as you are inflating the ball. You can also use an air compressor but that can be a little more complicated depending on the type of compressor and the connectors available.
Three types of air pumps.
Air Pressure Gauge (optional)
If your air pump does not have an air pressure gauge, you may want to get a separate air pressure gauge to check the pressure in your ball. Air pressure gauges can be found online or in stores, but as we mentioned above they are optional and not necessary to inflate your basketball.
Don’t have a needle? Also read this article: how to pump a basketball without needle
Steps to Inflate Your Basketball
Step 1: Attach the inflation needle to the air pump.
How to attach the needle will depend on the type of air pump you are using. Most hand pumps made for a basketball will be threaded and you can screw needle onto the pump. If you are using a bicycle pump, it will probably have a connector with a latch (see below). You must put the needle into the connector and tighten the latch to hold the needle in place.
Attach the needle to the pump.
Attach the needle to the pump.
Electric air pumps may have the same type of latch, but a big industrial compressor may need some type of adapter and I wouldn’t recommend using an industrial compressor unless you really know what you are doing.
Step 2: Moisten the inflation needle.
Get a wet paper towel and wipe the needle to moisten it. If you don’t have a wet paper towel, you can run it underwater or even spit on it. The moisture allows the needle to slide into the valve easier and prevents damage to the valve. If the valve is damaged it can cause your basketball to leak air.
Step 3: Insert the needle into the valve.
Once the needle has been moistened, slowly insert it into the valve of the basketball until the needle is all the way in the valve.
Insert the needle into the valve of the basketball.
Step 4: Begin inflating.
If you are using a hand pump or a bicycle pump you will need to manually pump the air in. If you are using an electric pump or a compressor you can turn it on. WARNING! When using an electric pump or a compressor, monitor the inflation at all times. The ball will fill very quickly and if overfilled it can pop and destroy the ball.
Step 5: Check the air pressure.
Monitor the air pressure as you are inflating. Use one hand on the ball as you are inflating it to feel the pressure rise. If your pump has an air pressure gauge, check it regularly. If it does not use a separate gauge or check it using the bounce method described above.
Once the air pressure seems good, get out there on the court and start having fun!
Additional Resources
There are many types of air pumps on the market. Take a look at some of the following if you are interested.
Basic Hand Pump with needles and gauge
Bicycle Pump
Electric Pump
If you would like to see how to inflate a basketball using an air compressor, check out this video.
Final Words
Eventually, all basketballs will need to be inflated because they will lose air over time. Fortunately, the process is fairly simple as we have shown above and the equipment needed is relatively cheap. So, if you want to have an enjoyable game of basketball, make sure your basketball is always properly inflated, then get out there and have some fun!
Have you ever tried to play basketball with an under-inflated or over-inflated basketball? We’d love to hear from you, so please leave your comments.
How to Pump a Basketball Without a Needle (3 Methods)
When shooting hoops by yourself or playing basketball with your friends, there are few things worse than your ball going flat. While it would be great if everyone had a needle and basketball pump at all times, that isn’t always the case.
I can think of several times where my friends and I had to cut a game short due to no one having a needle to inflate the ball. It’s annoying and also incredibly frustrating. Thankfully, there are a number of different ways you can pump up a basketball (whether indoor or outdoor) without needing to have a needle at all. This guide is going to look at a few of them.
Quick Navigation
Method 1: Use a Can of Compressed Air
Best to use for: If you are without a needle and pump, a can of compressed air is probably the quickest and easiest way to fill up your ball. It offers you something very similar to the needle, so getting the air in the ball will be simple. Of course, you likely need to be at home for this to work as very few people take compressed air out with them. Even then, however, it is easy enough to go to a store near where you are and get a can of compressed air for a very affordable price.
Things to prepare:
The ball
Can of compressed air (make sure it isn’t empty)
Potentially a second can if your ball is incredibly flat
How to do:
Put the end of the straw of the can into the basketball. It should fit quite easily.
Slowly start to press the trigger to allow the air to go inside the ball. Do it slowly and carefully for the best results. Once the ball is inflated to the desired amount, take out the straw and hit the courts!
Method 2: Utilize a Balloon
Best to use for: This is great for people who are at home, as most of us have some balloons lying around. It is quite easy and quick but does require the use of a few other items like a thin straw, and a paper clip or clamp. It’s not great for those who are out at a public court, as you likely don’t have balloons with you.
Things to prepare:
The ball itself
The balloon (likely more than one to be safe)
A paper clip or clamp
A thin straw or a coffee stirrer
How to do:
The first thing to do is to blow up the balloon with an ample amount of air.
Once the balloon is blown up, don’t tie it like you normally would, but use the clamp or paper clip to close it up temporarily.
Next, you need to connect the thin straw or stirrer to the balloon, and put the other into or at the air hole of the ball.
Once the clip is taken off, the air should begin to flow through the straw into the opening of the ball, inflating it.
Do this as many times as it takes to get your ball to an air level that you are comfortable with. It might take a couple of balloons.
Method 3: Go to a Bike Shop or Gas Station
Best to use for: This is a great option for you if you are out and about, and don’t have a pump, needle or anything like that at home. If you don’t have the materials for the other two methods, this could work. Going to a bike shop or gas station is a good idea as they have air pumps and might even have the attachment you need. This method is very easy and simple but could take a while to find a gas station or bike shop nearby. Also, they might not have the needle attachment so it couldn’t hurt to call ahead.
Things to prepare:
The ball
Find a safe way to get to the shop or station
Potentially pick up a basketball needle if they don’t have them
How to do:
Get to the bike shop or gas station, after calling ahead to ensure they can help you.
Use the correct attachment to inflate the ball to your liking.
Be sure to thank them if they don’t charge you. Also, consider buying something small for their kindness.
Final Words
We hope that this guide has been able to help you learn how to pump up a basketball without a needle. When trying any of the aforementioned, be sure to do it safely to protect yourself and your basketball.
Have a method that wasn’t mentioned here? If so, let us know in the comments below.
👆 How to properly inflate the ball: instructions
Football, basketball, volleyball and children's rubber balls are filled with air, giving the necessary volume and hardness. Any ball gradually deflates, becoming unsuitable for a comfortable game, and many do not understand how to pump it up correctly, so we will tell you. The service life of the product and the convenience of the players depend on the correct pumping. It is recommended to use a pump and a special needle, which can be bought in sports stores and hypermarkets.
How many atmospheres to inflate the balls
Many people determine how much to inflate the ball empirically, but it is better to be guided by the manufacturer's recommendations. This information is usually located near the nipple and is indicated in the Bar indicators. The average values for how many atmospheres to inflate balls are as follows:
for playing on hard surfaces up to 0.8 bar;
in the gym - about 0.6 bar;
on loose ground or lawn - 0.6-0.8 bar.
This applies to football, basketball and volleyball, but a gymnastics ball or children's rubber ball requires less pressure - they are pumped up by eye. Professional soccer balls, which teams play on the field, are pumped up to a pressure of 0.8-1 bar.
But how can you inflate a soccer ball at home if the pump does not have a pressure gauge? A properly inflated product should be moderately firm and elastic. A loose structure is a sign of insufficient pressure.
Checking the pump is very simple: raise the ball to head level and release. If it bounces off the hard floor to waist level (basketball is higher), the pump is good.
Instructions for inflating the ball
There are videos on the net on how to inflate the ball, and recommendations for inflating with a syringe, plastic bottle and other non-standard devices are published. Most of them are useless in real life, so let's see how you can inflate the ball with a pump and a needle:
Check the quality of the purchased needle. On its surface there should be no roughness and points that could damage the rubber nipple.
We recommend that you buy silicone oil for balls, which is applied to the needle before inserting it into a tight hole. So you protect the valve from damage and increase the elasticity of the nipple, extending its service life.
Use a pump with a built-in pressure gauge and refer to it.
If the pump does not have a pressure sensor, determine how the soccer ball should be inflated by eye.
To prolong the life of the ball, experts advise to release the pressure a little after the game. So the product will retain elasticity, and the seams will last longer.
How to inflate the ball without a needle
Immediately note such instructions as how to inflate the ball with a syringe or a plastic bottle. In real conditions, this is impossible to do or the process will take an unreasonably long time. If there is no special needle, try the method with a medical needle.
See also
How to determine the size of shoes by the insole
How high should the chair be?
You will need a needle purchased from a pharmacy. The thicker it is, the better, so you can look for a needle from a blood transfusion system. Grind the sharp end on asphalt or a knife sharpening stone. The blunt tip will not damage the rubber nipple.
Wrap tape around the base of the needle to secure it tightly to the pump. Try to create a tight connection so that it can withstand the necessary pressure. Inflating a rubber, jumper ball or gymnastic fitball will not be difficult, but inflating a basketball or soccer ball will be more difficult due to higher pressure.
The main thing is to insert a homemade needle into the hole of the nipple smoothly and carefully so as not to damage the inner walls or pierce the rubber. Careless actions can damage the valve, causing it to stop holding air.
Is it possible to inflate the ball with a compressor
How else to inflate the ball without a needle and without a pump? Use a car compressor, the tip of the tube of which must be firmly attached to the nipple and turn on the device. The method is effective, but there is another one.
You can use the compressor in a tire shop or car service, but in this case there is a risk of pumping the ball or damaging the nipple. It is necessary to act carefully, gradually applying pressure. It is better not to trust the process to service workers, but ask them to do everything on their own. It is necessary to pump air from the gun smoothly and in small portions so as not to exceed the number of atmospheres when pumping, or so that the nipple does not fall inside.
Useful tips for inflating the ball
How to inflate a fitness, football or basketball ball with a pump with or without a needle should be clear to you, but we also recommend that you follow these tips: Exceeding the recommended pressure will affect the geometry of the ball and result in excessive tension at the seams.
By inserting a dry needle into a nipple without silicone lubricant, you can rub over dried rubber, causing the valve to become unusable over time.
Do not store the ball in the sun or in frost. If you store it in the trunk of a car, the air inside will compress and the ball will shrink a little. When you come to the hall and pump up the ball, it will soon warm up and may burst from a strong blow. Also, the sun's rays and frost have a negative effect on the rubber from which the nipple is made.
We are sure that our tips on how to pump up a big ball for gymnastics or a regular football, basketball or volleyball will come in handy many times in the future, so try to remember and use this information.
Video
How to learn to spin a basketball on your finger
To skillfully spin a basketball on your finger, you need to learn a few simple techniques, find the ball and set aside 10 minutes of training per day. After a week of practicing your skills, you will master the technique of this trick and show it to your friends. In the step-by-step instructions below, we will show you how to learn how to spin a basketball on your finger.
Tossing the ball correctly
You can train on the sports ground, near the house or even in the apartment, but in any place you need to take into account the environment. For example, when practicing a trick in a room, the ball can bounce and break fragile objects. When a place is found and inventory is prepared, you can begin training. Initially, you need to learn how to properly hold and throw the ball in the air:
Hold the ball with the stripes vertical. Horizontal scrolling looks ineffective and it is very difficult to catch a projectile from this position.
Select throw method:
Two hands. You need to keep the ball not on the sides, but so that 1 hand “looks” at you, and the second from you. Having fixed the object, sharply spread your arms and slightly “throw” the ball up.
With one hand. To throw with one hand, place your fingers along the lines of the ball. It is important that there is free space between the palm and the inventory. Lightly squeeze the ball. Turn the brush outward until it stops, and then gently turn it back. At the last moment, you need to give additional rotation to the ball with your fingertips. But we do not recommend using a large one, because. this will upset the balance and the ball will fly away.
Throw the ball parallel to the floor, do not allow the projectile to “wobble”. It is important that when thrown, the projectile rises above eye level. When its bottom surface is visible, the ball is easier to catch.
These steps must be repeated until fully automatic. Usually it takes two days. When the throws are confident, you can move on to the second level.
Learning to catch the ball
Once you have learned how to throw correctly, try catching the ball with your finger. To do this, remember the following nuances:
You need to catch the projectile on the nail, not the finger itself. In this case, it is important that the brush is turned with the palm towards you.
The finger must be placed strictly in the center, at the junction of the vertical lines, otherwise the ball will slide off.
When your finger touches the ball, gently and smoothly lower your hand down. So you will improve the cushioning, the inventory will not bounce, and you will not damage your finger.
This stage is one of the most difficult and requires patience on the part of the freestyler, athlete and just wanting to master the skill. When you learn how to catch the ball, at first it can control you: jump off and make you “run” after it to keep your balance. Be patient and keep practicing.
Once you are comfortable with a spinning ball, try to keep it spinning and spin it further. To do this, with light flapping movements, move your free hand along a tangent.


 Not to worry, there is a simple method that you can use to check the inflation of your ball. It won’t give you the PSI (or kPa), but it will be good enough to get you back out on the court.
 While these methods may or may not work, it is always best to use the proper equipment because you can ensure that you are inflating the basketball to the correct pressure. Using the proper equipment will also help prevent you from damaging your basketball.
 You can also use an air compressor but that can be a little more complicated depending on the type of compressor and the connectors available.
 You must put the needle into the connector and tighten the latch to hold the needle in place.

 Even then, however, it is easy enough to go to a store near where you are and get a can of compressed air for a very affordable price.
 If you don’t have the materials for the other two methods, this could work. Going to a bike shop or gas station is a good idea as they have air pumps and might even have the attachment you need. This method is very easy and simple but could take a while to find a gas station or bike shop nearby. Also, they might not have the needle attachment so it couldn’t hurt to call ahead.
 When trying any of the aforementioned, be sure to do it safely to protect yourself and your basketball.
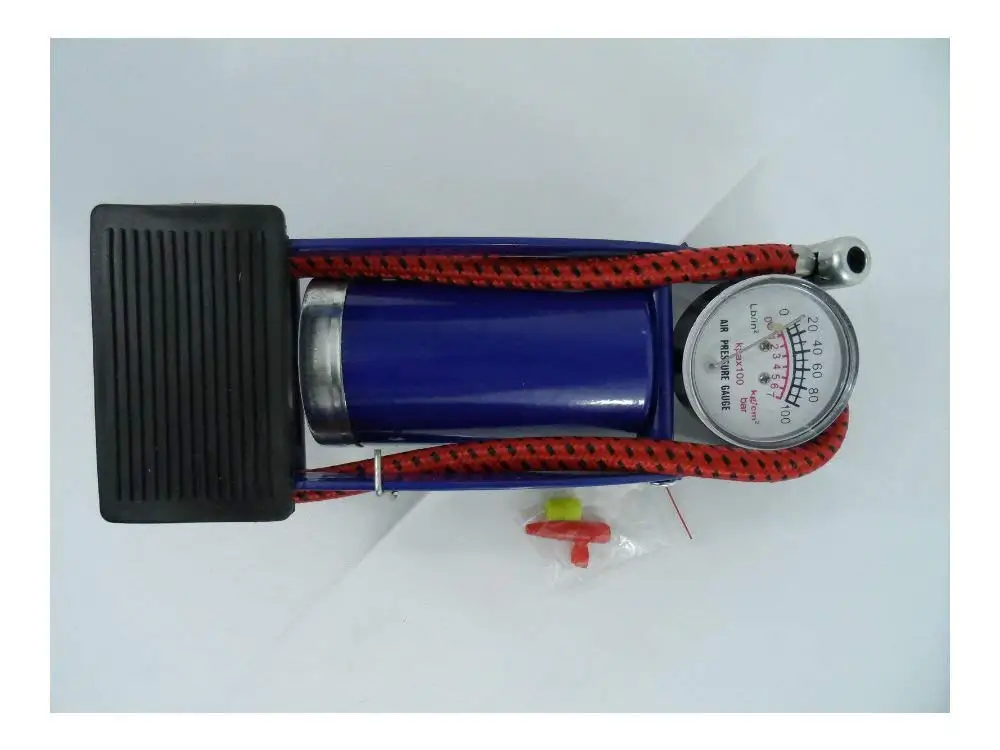 The average values for how many atmospheres to inflate balls are as follows:
  Most of them are useless in real life, so let's see how you can inflate the ball with a pump and a needle:
  In real conditions, this is impossible to do or the process will take an unreasonably long time. If there is no special needle, try the method with a medical needle.
  Careless actions can damage the valve, causing it to stop holding air.
 After a week of practicing your skills, you will master the technique of this trick and show it to your friends. In the step-by-step instructions below, we will show you how to learn how to spin a basketball on your finger.
  Having fixed the object, sharply spread your arms and slightly “throw” the ball up.
  To do this, remember the following nuances: