Home »
Misc »
How to put together a portable basketball hoop
How to put together a portable basketball hoop
What NOT to Do When Assembling a Lifetime Basketball Hoop
A few months ago I forewarned you of the top three things to know before assembling a Lifetime Basketball Hoop. Today, I'm going to share with you some of the specific hurdles I alluded to in that post that we crossed along the way when assembling our own Lifetime Basketball Hoop (model 90228). To be honest, I'm kind of embarrassed to share my story with you given some of the pretty major "oopsies" we had. After all, since I work for Lifetime, you'd think I'd know how to assemble the products. Not necessarily true. This was my first time assembling a Lifetime Basketball Hoop. Let's just say, I can definitely empathize with our customers now!
Before we started assembling, we laid out all of our parts and pieces to make sure we could easily find everything. Thankfully, all the parts and bags of hardware are labeled well. Simply read what part you need in the directions, look at the parts list in the front of the instruction manual to see what bag the part is in, and find the matching hardware bag.![]()
The first few steps seemed pretty easy. Then, we came to the step of putting the poles together (section 1.5). Since I work for Lifetime and hear from a lot of customers, I knew this is one of steps that is most often done incorrectly. If you jam the poles together too soon, they will be stuck together incorrectly and you are unable to separate them. (If this happens to you, please call the Lifetime Customer Care department!) But, if you follow the instructions, there are little warning signs in the corner of the pages that try to highlight areas that may be challenging and require attention to detail. So, we took our time and - ta-da - poles were assembled with no problems.
Oops #1
But then we got to section 2.2 - inserting the axle through the wheel, through the pole, and through the other wheel. Directions say, "Then have one adult position the Bottom Pole (ALE) within the Base as shown with the lip at the bottom of the pole facing outward." Key word: Lip.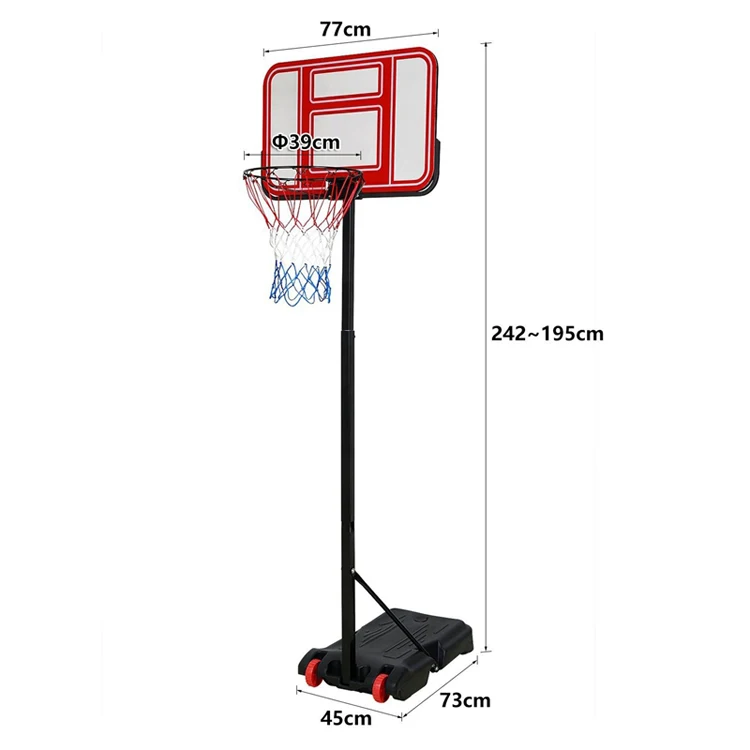 For some reason, we thought lip simply meant "edge" of the pole. But, look carefully at the bottom of the pole! One side has a curved edge that almost looks like it's dented - this is the lip! Make sure that lip faces away from the base! (You'll find out why that's important really soon, I promise. Read on…)
Oops #2
During section 2.3 we attached the pole braces to the base - backwards. Sigh. Not a huge deal, because we quickly noticed when we tried to attach the braces to the pole and the hardware wouldn't fit through the holes. Tip: Look at the picture closely to really figure out which end of the pole brace goes where.
We made it to section 3 in exactly one hour. Yay!
Oops #3
So, it turns out section 5.2 was our nemesis in more ways than one. First, we were supposed to bend the end of the Cotter Pin after we inserted it into the Clevis Pin. (Sounds more like medical surgery than basketball assembly, huh?) The diagram is a little confusing to really understand what it should look like finished, so I took a picture to hopefully make it a little easier for you. But, that was minor compared to the next hiccup…if you can even call it that. A round pole is round…it has no front or back. Right? Wrong! Unfortunately, we didn't notice that we put the pole on the base backwards (like I mentioned in Oops #2) until this section 5.2. when it was time to attach the adjustment mechanism to the pole. Hmmm, that's odd... our adjustment mechanism is on the front of the pole instead of the back of the pole like it should be. (Insert several big screams, throwing of tools etc.) Yes, we painstakingly took off the backboard, removed the wheels and pole, and reassembled it all correctly. It took every ounce of muscle and patience we had, but it was possible. Not easy, not quick, but possible.
Fast forward one hour… now we were back on track.
The rest of the assembly was easy to understand, just awkward to accomplish at times. Awkward because once you have the backboard on the pole, you lay the system forward and have one adult hold it while you finish attaching the adjustment mechanism arms. We were hesitant to put any weight on the rim until the system was assembled but my arms were getting tired from holding the heavy system! So, we ended up using a sawhorse to help me support the weight of the system. It's not in the manual, but it worked nonetheless. The next morning, we let our kiddos climb up on the step ladder and help with the last final step... hanging the net!
We really did try to make a video to document our assembly and help you. However, because we ended up having to reassemble so many steps, I fear it would just be more confusing than helpful. We'll see, maybe I'll get motivated to edit it someday. In the meantime, hopefully these few words of wisdom, er caution, will help. In all, with our one hour redo, it took us four hours to assemble. So, hopefully, you'll have less do-overs than us and finish in about three hours.
Now that's it's been several months since we assembled our basketball hoop, the assembly headaches are long gone. They've since been replaced with fun family memories of playing H-O-R-S-E and Around the World with our kids and neighbor kids.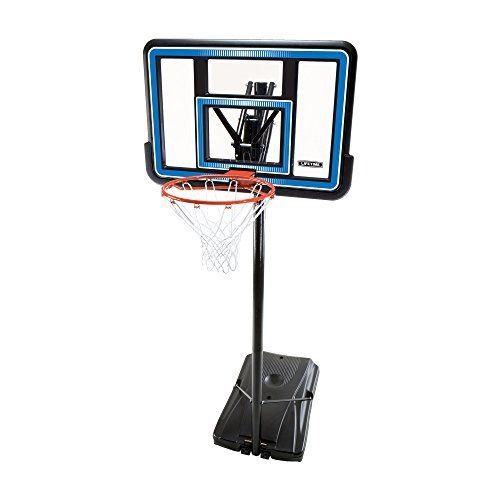
Basketball Goal Assembly and Installation
Basketball Hoop Experts
We assemble, install, and repair all makes and models of in-ground, on-wall, and portable basketball goals. In-ground basketball goal installation is a labor intensive project which requires digging the footer, mixing and pouring the concrete, and final assembly and installation of the goal. It is important that the footer is dug to the proper depth and diameter to ensure safe operation of the goal. In-ground basketball goal installations require two separate trips, with a minimum of 72 hours between them.
Our Pros have successfully completed thousands of installations, which means you can count on quality workmanship, prompt service, and a minimum one year guarantee. You should spend your time playing on your new hoop, not trying to figure out how to put it together.
Experience with All Brands
With thousands of assemblies completed, we are experts with all types and brands of basketball hoops and accessories. Some common brands we work with include:
Goalrilla, Goaliath, Goalsetter, Ryval, MegaSlam, ProDunk, ProFormance, Spalding, First Team, Silverback, Lifetime, Dominator, Ironclad, Bison, American Eagle, Porter Athletics, and many more!
Satisfaction Guarantee
It’s pretty simple: we want every customer to be blown away with our service. If for any reason you’re not pleased, we’ll do everything we can to make it right. Additionally, every project is backed by a minimum one year guarantee.
Schedule your basketball hoop installation in three easy steps!
Schedule Now
Select the brand of basketball goal you need assembled to quickly see pricing and schedule your appointment. Instant up-front pricing!
Instant Price and Availability
Basic Service Includes:
- Assembly as specified by the manufacturer at a location chosen by the customer.
- Consolidation of packaging materials to an area specified by customer.
- Explanation of product features, safety considerations, and answering of any questions.
Optional Services:
- Removal and disposal of an existing basketball goal.
- Removal of an existing concrete footer.
- Removal and disposal of packaging materials.
- Installing an in-ground goal inside of an existing slab.
- Assembly and installation of accessories such as a court light or yard net.
Frequently Asked Questions
What brands do you assemble?
We work with all brands of residential and commercial basketball hoops and accessories.
What do I need to do before my technician arrives?
For a smooth assembly process, please ensure that all box(es) for your basketball goal have arrived undamaged, that you have an installation location chosen, and that your driveway is free of any vehicles or obstacles on the day(s) of installation.
If you are having an in-ground basketball goal installed, you must call 811 to have all underground utilities located and marked prior to your installation date.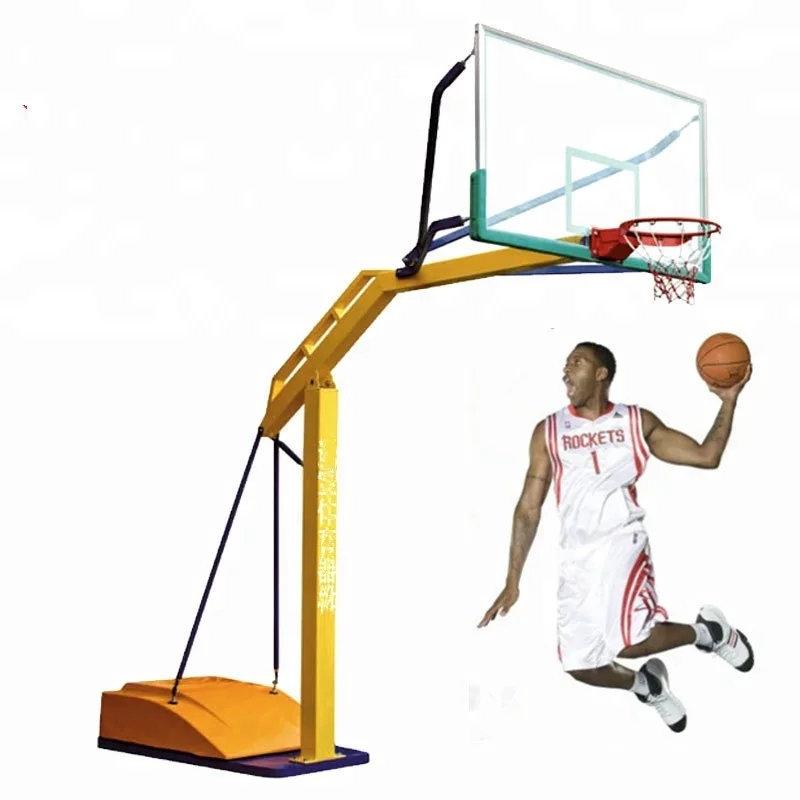
What if I need to reschedule my appointment?
When your appointment is scheduled, you’ll receive a confirmation email that includes a link to reschedule or cancel your appointment. You can also call us at 800-989-3089.
What if there's bad weather?
As with all outdoor installations, adverse weather conditions may delay your appointment. If on the day of your installation the weather conditions prevent us from safely working outdoors, we’ll give you a call to reschedule.
What payment methods are accepted?
In order to provide an easy, contact-free payment process, a valid credit card is required to schedule an appointment. Your card will not be charged until the service is complete. If you require alternate payment methods, we’ll do our best to accommodate – call us at 800-989-3089.
Our Work
Some of our basketball goal installation projects:
Assembly Pros offers a booking and payment platform that connects customers with independent service providers. Services booked through the Assembly Pros platform are not performed by Assembly Pros or its employees.
Copyright 2021 Assembly Pros. All Rights Reserved. Registered trademarks are property of their respective owners.
Basketball stand with a hoop in Ukraine in the category "Sports and Recreation"
Basketball stand with a hoop Superbasketball Little Tikes (folding, adjustable height up to 210 cm) 433910060
Specify the delivery date
" Online store
Dnipro
Basketball stand SP PLUS mobile mobile with backboard Diameter of the ring 38 cm (PE003)
Sending within 1 day
11 884 UAH
9 269.52 UAH
Buy
Sepmarket
Children's mobile basketball stand sp Plus with a shield and ring size of the ball 5 (S881A)
Sending within 1 day
654 UAH
5 323.20 GRN
Buy
Buy
ZEPMARKET
Basketball stand Exit Toys Galaxy Black/Transparent portable on wheels with backboard + ring with cushioning
Ships within 1 day
39 636 UAH
Buy
Goodszon
Basketball stand EXIT TOYS GALAXY Black Black on wheels with a shield + shock -absorbing
Sending for 1 day
9000 39 636 UAH
Buy
Good Bastebolly Station Black Station EXIT TOYS GALARA ring with cushioning 365 cm
Ships within 1 day
29 700 UAH
Buy now
GOODSZON
Basketball stand Exit Toys Galaxy Transparent/Green stationary for concreting + ring with
Sending within 1 day
29 700 UAH
Buy
Goodszon
Basketball mobile EXIT Galaxy + Ring with depreciation
Clarify the delivery date
to 36 700 UAH
9000 from 5 sellers 9000 36 700 GRN
Buy
TRAMPOLINE PROM - a supermarket of toys for children!
Mobile basketball stand EXIT Galaxy black + cushioned ring
Specify delivery date
at 36 700 UAH
from 5 sellers
36 700 UAH
Buy
TRAMPOLINE PROM - a supermarket of toys for children!
Basketball stand EXIT Galaxy + ring with cushioning
Specify delivery date
Basketball stand EXIT Galaxy black + cushioned ring
Specify delivery date
for 27 500 UAH
from 5 sellers
27 500 UAH
Buy
TRAMPOLINE PROM - a supermarket of toys for children!
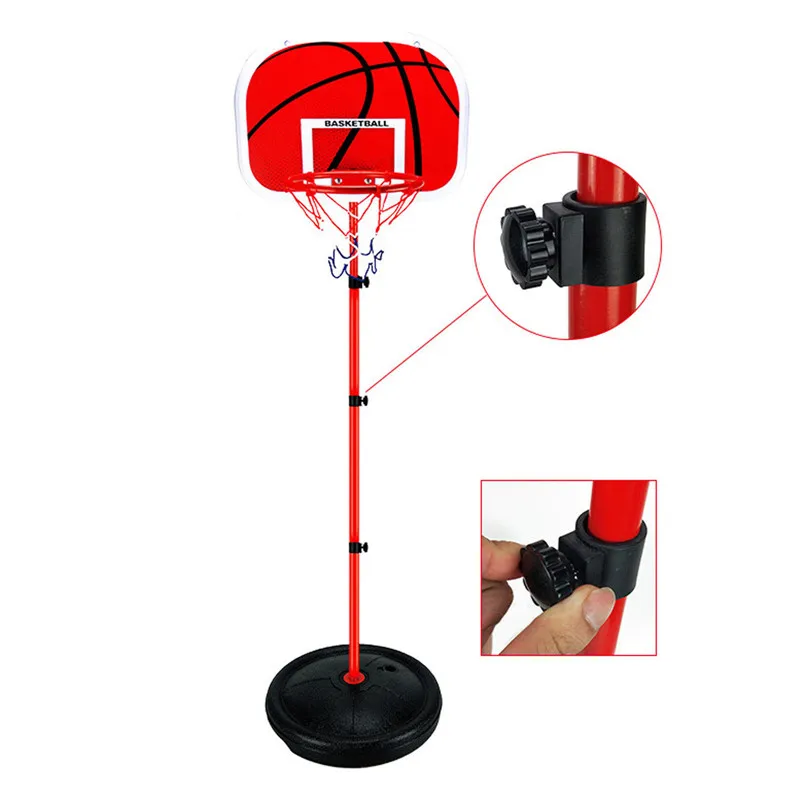
Children's basketball ring on the rack Home basketball with a ball set for children
Clarify the delivery date
to 1 099 UAH
from 2 sellers
9000 2 198 UAH
1 099 UAH
Odessa
Little Tikes Basketball stand with ring Superbasketball up to 210 cm 4339
Easy Store Basketball Set
Specify delivery date
Basketball stand for children with backboard 160-200cm JUNIOR SP-Sport / Basketball stand for children with hoop
Specify delivery date0003
Basketball stand for a nursery with a ball NF704 Basketball Ring
Clear Delivery
680 UAH
Buy
Deodatus
Lviv
Basketball ring with persistent and dorts WT666 9000 9000 at the WT666 9000 9000
1 385 UAH
1 204. 95 UAH
Buy
Deodatus
Lviv
Children's basketball hoop on the stand Home basketball with ball Set for children 9Ol000 699.46 UAH
Buy
Manufacture of sports and outdoor equipment
Basketball stand Polestar EXIT + ring with cushioning on wheels
Specify delivery date
to 27 200 UAH
from 3 sellers
27 200 UAH
buy
online store Eskimo
Basketball stand EXIT GALAXY with a ring (46.05.11
Buy
Online store for babies, preschoolers, teenagers and parents "Motik"
Portable basketball stand EXIT Comet with ring, (46.65.10.00)
Specify delivery date
19 460 UAH
Buy
Online store for babies, preschoolers, teenagers and parents "Motik"
Basketball hoop MR 0826 children's play set with a shield ring on the stand basketball pump
Sending within 1 day 9000 709 hryvnia
Buy
Rosumashki - toy and children's goods store
Mobile basketball stand with backboard KID SP-Sport S881R
Specify delivery date
3 950 uah
Buy
Big-Monkey
Basketball hoop with electronic scoring scale art. 3548
3548
Clarify the delivery date
1 341-1 504 UAH
from 5 sellers
1 341 UAH
Buy
Lovely Tonys online store
Basketball ring 869 on the rack with the ball and pump
Clarify delivery date
722 UAH
Buy
Deodatus
Lviv
EODS-LQ1906 Basketball Ring with a counter and ball "Mickey Mouse"
Refine the delivery date
654 UAH
Buy
Deodatus 9000 UAH
Buy
Deodatus
Lviv
Children's basketball hoop on the rack Home basketball with ball Set for children
Specify delivery date
2 198 UAH
1 099 UAH
Buy
Interflow
Odessa
Basketball Ring with Salex Salex Basketball M'yachi
Sending within 1 day 9000 711 GRN 539.99 UAH
Buy
✅ Basketball ring at home. DIY Portable Basketball Hoop
Article Rating
Loading. ..
..
Contents
- 1 Basketball ring at home. Portable basketball hoop with your own hands
- 1.1 Master class on making a basketball hoop and net at home
- 1.2 It's easy to please family and friends: how to make a basketball hoop with your own hands at home
- 1.3 How to make a basketball backboard with your own hands
- 1.3 .1 Tools and materials
- 1.3.2 Dimensions
- 1.3.3 Making the basketball hoop
- 1.3.4 Mounting at home
- 1.4 Useful video
- 1.5 Summary
- 1.6 What is the diameter of the basketball hoop?
- 1.7 Features of rings
- 1.8 Shield height
- 1.9 Basketball ring, made by yourself
- 1.10 Advantages of a home-made ring for basketball
02
Master class on making a basketball hoop and net at home
First, I took a piece of metal-plastic pipe left after the repair.
By drilling holes on both sides. Wired it all up!
She asked her husband for a corner what he found from that and made .
The tied ends were insulated with electrical tape.
Putting the whole structure together.
We take nylon threads and make blanks, approximately 2 meters each (taking into account that we will fold in half there will be 1 metor)
We fasten the ring so that it is convenient to weave, the fan helped me. And now the hardest part. We connect the threads so that we get a network.
And happy ending! Ring and mesh ready . My kids appreciated it. Now we can't wait for spring. We will attach it to the group site. And we will please all the children in the garden.
Workshop "Sports equipment" for a kindergarten from a wood-slab Take a wood-slab. Break it down into four parts. On each, draw a picture: a blade of grass, a flower, a house. The remaining fourth.
Graduation veil ceiling Graduation party in kindergarten has passed! Farewell songs, excellent dances, words of gratitude, tears of parting - everything was there! Flew.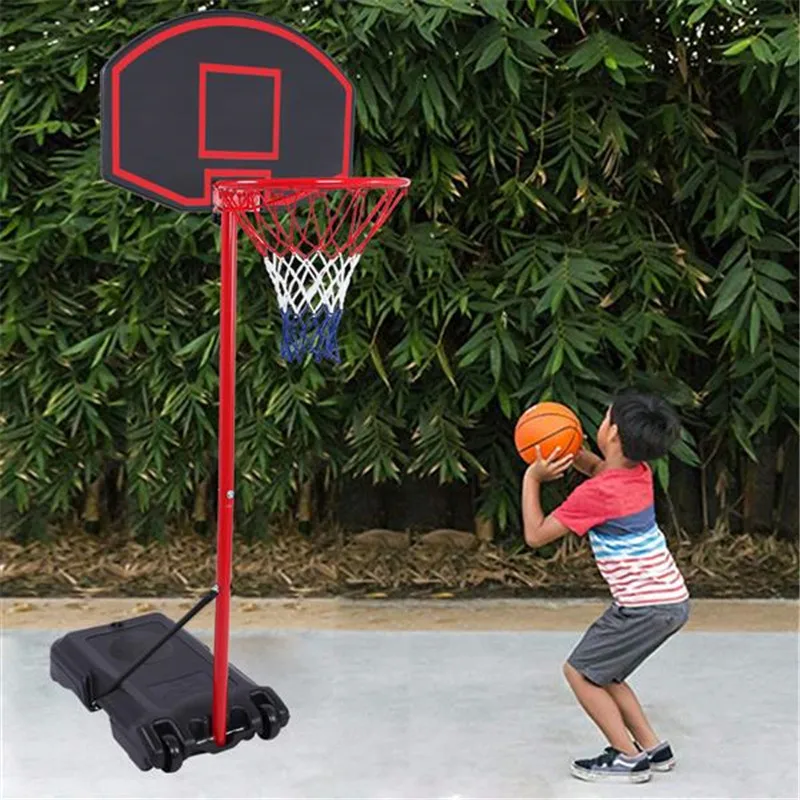
It's easy to please your family and friends: how to make a basketball hoop with your own hands at home
Basketball is a great game, and the yard version is the most democratic kind of sport. It can be played by a team of 6-8 people or by yourself to train throws.
A basketball hoop installed on a plot of land or in a yard is sure to gather fans of this sport around it. Moreover, often homemade product is better than purchased options , since the age, height, and preferences of the players are taken into account.
It can be much stronger and more durable than store-bought . And a person receives much more moral satisfaction from a hand-made ring.
How to make a basketball backboard with your own hands
First, you need to decide which ring you want to get in the end. Just a basket with a wall or tree mount, or a complete shield complete with everything you need. Then - choose a place to install the shield and prepare the site.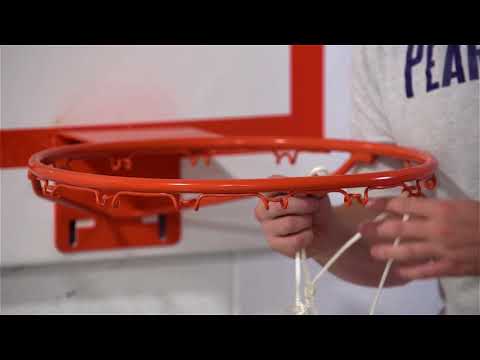 Next - break down the work into stages.
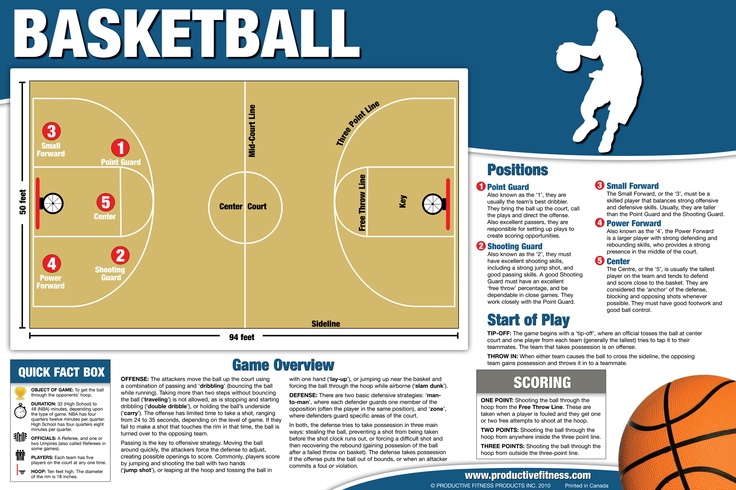
Photo 1. Schematic of a standard basketball backboard with required measurements. To play in the yard, it is not necessary to consider all of them.
Tools and materials
- jigsaw for metal;
- hacksaw for wood;
- drill or hammer drill;
- adjustable wrenches;
- paint and brush.
To make the ring, you can use thick steel wire , with a diameter of at least 5 mm , iron strip or the old hula hoop . It will have to be shortened a little in the future. For the manufacture of the shield will go plywood, at least 5 mm thick . If the shield is to be installed in the yard, then a strong pole is provided for support.
Dimensions
Ring size should be 45 cm in diameter (slightly larger than a basketball).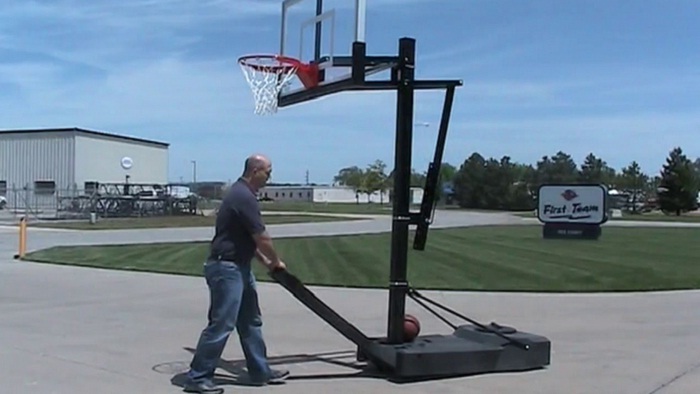 The shield size is 180x105 cm. So, from the ring to the top of the shield, should be exactly 1 meter.
The shield can be hung at any height depending on the average height and age of the players. But you can also on the standard - 3 m 5 cm.
This will allow players to feel comfortable on any standard court in the future.
If the ring is attached not just to a tree, wall or post, but has its own shield , then it must have an appropriate appearance. The shield is usually white with black perimeter stripes and a painted square directly above the net. The size of the square is 45 cm high and 56 cm wide. This standard will make the game correct and help to put the ball directly into the basket, because if it hits the square, it will bounce right on the target.
Making a basketball hoop
If the hoop is made of wire or steel strip, then it must be wound around a cylindrical object and fasten both ends.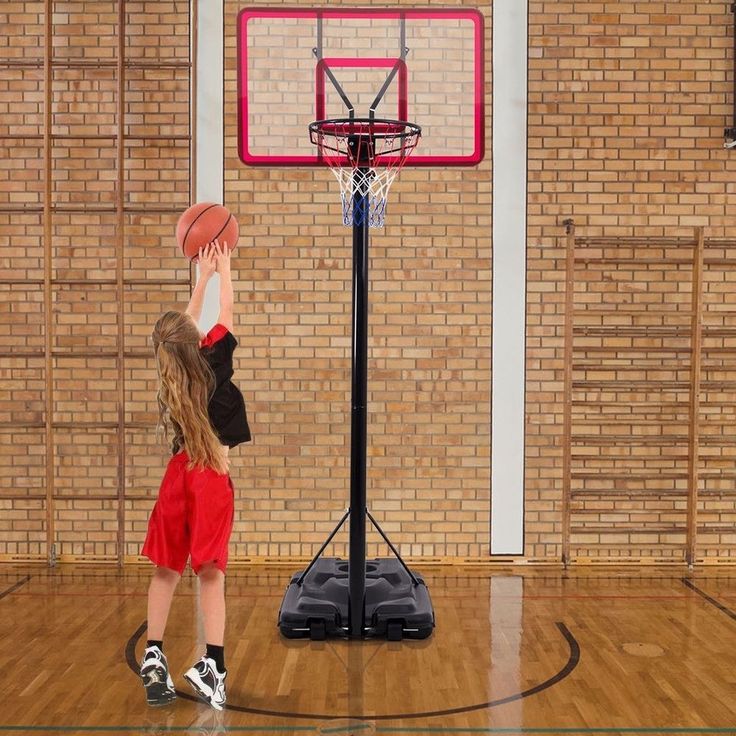 If from the hula-hoop tube, cut out the unnecessary part of the hoop with a hacksaw and reconnect the ends. When making a ring, you need to remember to make fasteners, for example, bend the ends of the wire in one direction, so that they can then be attached to the shield.
Ring must have mesh : after the ball hits the target, she will send it straight down, and not to any corner of the court. To make it, you need long cord.
Pieces of cord approx.
Then with another piece in a circle, tie all the ropes, and so several times with an interval of 5-6 cm. Net is ready.
Shield cut with a jigsaw or hacksaw , after marking with a pencil. After that, the product can be painted.
Important! The black stripes and the square above the basket on the shield must be 5 cm wide otherwise they will simply not be visible.
After the paint has dried, you can attach a ring to the shield, and fix the shield itself to a pole or wall. The rate and type of fasteners depends on what the ring was made of and how the shield will be attached. The main thing is to calculate so that construction withstood at least 40-50 kg of load.
Fixing at home
If the ring is made of round wire , and its ends are bent down, then they can be pulled to the shield with 2 bolts connected by a metal plate in the area of the caps.
If the ring is made from a wide iron strip , then you must first bend the ends so that the strip fits snugly against the shield.
Such a product is also fastened with bolts threaded through pre-drilled holes in the strip and plywood.
If the shield is not available and the ring is to be attached directly to the wall, anchors can be used instead of the bolts . In this case, you will need a puncher to make holes in the wall.
To a tree or wooden post , ring can be nailed with 100 mm nails or screwed with long screws.
Attention! Whatever type of fastening is used, one thing unites them - it is necessary to put the ring on a horizontal level. If it hangs crooked, the ball will slide off the edges past the basket.
After the shield and ring are fixed, the site is prepared. It should not have stones, puddles, and protruding stumps. Basketball is a very traumatic sport and players do not need any extra risk at all, they will stumble over a bush, stump or stone sticking out on the court. If the ring is installed indoors, then before playing , you need to make sure that everything that breaks easily is hidden, and the glass on the windows is securely protected.
Helpful video
Check out this video showing how to make a basketball hoop from a metal bar.
Results
Which ring is better, homemade or purchased. There is no definite answer here. Homemade product performs sporting functions and is more aesthetically pleasing than for family members and friends of the manufacturer.
Even if outwardly it is a little more unsightly than store bought. In addition, homemade is calculated for certain loads . Whereas a store product, it is not known how much it will sag in conditions of harsh operation.
On the other hand, high-quality, expensive , a ring with a shield, produced at the factory in compliance with all sizes and GOST , handmade, unique. So it's up to the players to choose.
What is the diameter of the basketball hoop?
Basketball is a ball game that originated in Massachusetts. The weather here is very unstable, so a game that could be played indoors was needed. A feature of the game is that players need to show their dexterity by throwing the ball into a net ring located at a height of three meters.
Features of the rings
Each playing court must have two rings of the same size. The thickness of the hoop cannot exceed two centimeters. The traditional diameter of a basketball hoop is 45 cm, which is enough for the ball to pass through. Also, the basket is equipped with a mesh that is securely fixed. The mesh ring is placed on a special shield, three meters away from the ground. It is very important that the basket is well attached to the pad, as players often jump and hang on it during the game, which can cause it to break. Due to this, it is able to withstand loads up to 82 kg.
The maximum diameter of the basketball hoop is 45.7 mm. But this is not its only feature. It is painted bright red so that the player can clearly see it when making a throw. All basketball players must be tall. Otherwise, they would not be able to hit the target, since the ring is usually located at a height of three meters from the ground.
Backboard height
The height of the basketball hoop is 3.05 meters from the ground. A person of average height is unlikely to be able to hit him with a ball. Therefore, special racks are installed in schools, thanks to which you can adjust the height at which the basket is located.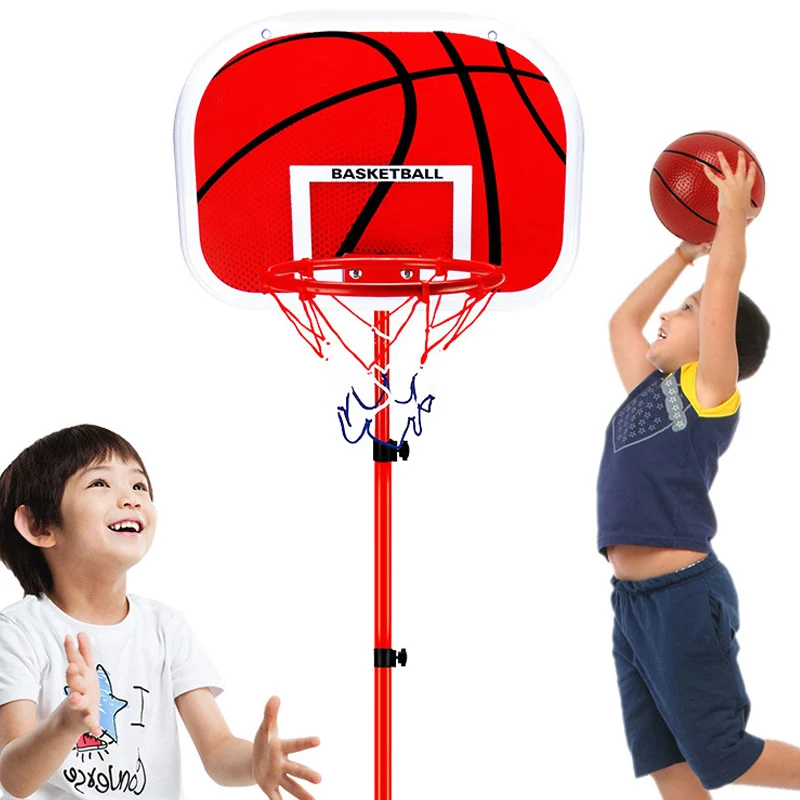 The shield itself is installed at a height of three meters. The ring is attached a little higher - from here another 5 cm of height appear. The shield is necessary in order for the ball to bounce off it and hit the playing court again.
DIY basketball hoop
Most people make their own basketball hoops, which are installed in the country or even at home. After all, the game captivates everyone, regardless of age. To make a basket at home, you need to consider the size of the basketball hoop. In addition, all materials should be purchased. This is a thick wire and rope. If there is no wire, then you can use the old halahup. It needs to be cut, shortened to the required size (the diameter of the basketball hoop should be only 45 cm), and then reconnected. When making a ring out of wire, you should use something instead of a template (some kind of cylindrical vessel), around which you need to wind the wire.
The diameter of a homemade basketball hoop should be only a few cm larger than the diameter of the ball.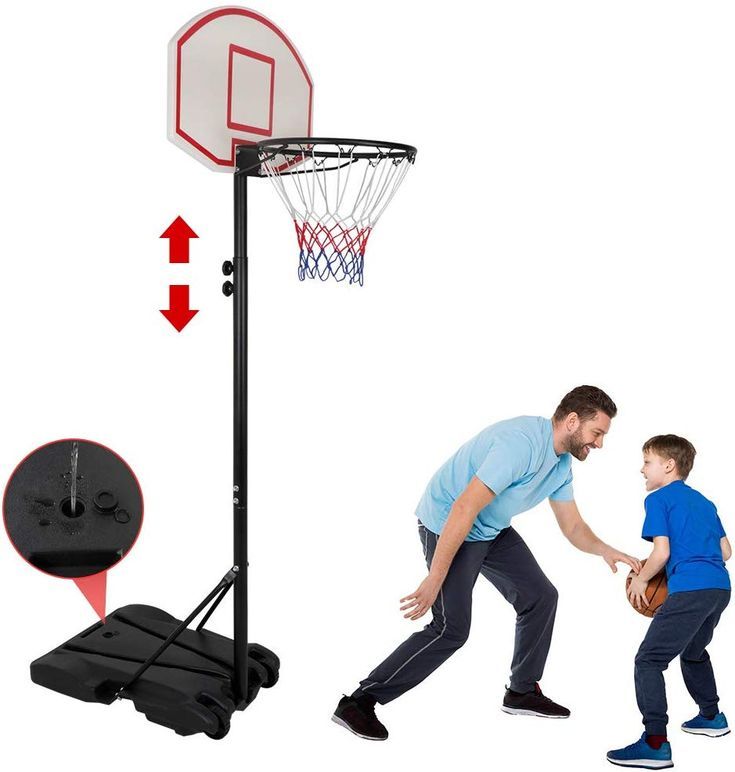 After that, you need to take the rope and cut it into 20 segments of the same length. They must be attached to a metal ring. Then you need to tie the two ends of the adjacent ropes along the circumference of the ring. You need to secure the basket well so that it does not fall off after being hit by the ball.
Benefits of a DIY Basketball Hoop
Making your own basketball hoop is easy. However, many people wonder which is better: bought or created on their own? Of course, making something with your own hands is always nice. However, this requires materials, free time. Anyway, you need to learn how to work with welding in order to connect the ring. If this is difficult for you, then it is better to purchase a basket from trusted manufacturers.
It is important that the basketball hoop is of good quality so that it will last more than one game. After all, a special feature of basketball is the basket for the ball located above the court, so special attention should be paid to its choice or manufacture.