Home »
Misc »
How to run a basketball game clock
How to run a basketball game clock
Basketball Game Clock
Home>Sports>Basketball>Basketball Rules
PreviousNext
Table of Contents
- Game Clock
- NBA Game Clock
- College Basketball Game Clock
- Buzzer Beaters
- Game Clock Stops
- Game Clock in Overtime
- FAQ
Game Clock
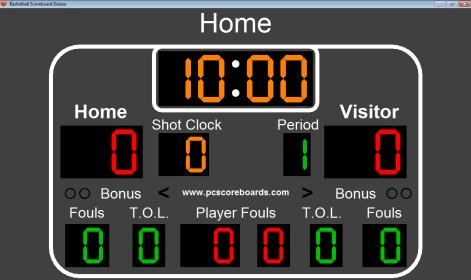
The game clock in basketball keeps track of the amount of time left in the current half or quarter during a game. The game clock differs between the NBA, NCAA, and other leagues. The NCAA plays two 20-minute halves while the NBA plays four 12-minute quarters. The game clock is the official clock used for all games and is displayed on the scoreboard. The game clock is mainly stopped for fouls, timeouts, and injuries.
NBA Game Clock
In an NBA game, there are four quarters that each last 12 minutes. This makes the total duration of an NBA game 48 minutes long. The game clock will start with 12 minutes on the clock and tick until it reaches zero.![]() Once the clock reaches zero, the quarter ends. It will reset to 12 minutes for the next quarter.
Once the clock reaches zero, the quarter ends. It will reset to 12 minutes for the next quarter.
College Basketball Game Clock
In college basketball, there are two halves, each lasting 20 minutes. With only 40 minutes of total game time, this differs from the game clock in the NBA. However, the rules surrounding the game clock and stoppages remain the same. The game clock starts and ticks until it reaches zero. Once the clock reaches zero, the half ends. An NCAA game clock starts at 20 minutes and ends at zero for each half.
Buzzer Beaters
A buzzer-beater is when a player makes a basket while the game clock hits zero. Usually, the term buzzer-beater is in reference to a game-winning shot, but you can also hit a buzzer-beater at the end of a half or quarter. As long as the ball leaves a player's hands before the game clock reaches zero, the basket will count if it is made. Buzzer beaters are rare, but when they happen in a game, they are exciting for fans and players.
Game Clock Stops
As mentioned above, the game clock always ticks, but it will temporarily stop when the ball is declared dead by a referee. Here are some of the reasons the game clock stops:
- A foul or violation is assessed
- A player is injured
- The ball is carried or thrown out of bounds
- A timeout is called
- During free throws
- A referee stops play for video review or to fix the game clock
- After a made basket in the last minute of the second half or overtime (NCAA) or the last two minutes of the fourth quarter or overtime (NBA)
Once the ball is put back into play with a jump ball or throw-in, the game clock starts ticking again. The game clock starts once a player touches the basketball. It does not stop unless there is another stoppage of play. The game clock in the stadium is the same as the clock on television broadcasts. This can often lead to technical difficulties between the clock on tv and in the stadium.
Game Clock in Overtime
In basketball, the time put on the game clock for overtime differs from regulation time. In both the NBA and NCAA, the game clock is set for a single five-minute overtime period. In high school basketball, overtime is usually four minutes. However, if the score is still tied after the first overtime period, additional overtime periods will be added until a winner is decided. This can significantly increase the length of a basketball game. The rules for stopping the game clock in overtime are the same as in the fourth quarter of NBA games or the second half of NCAA basketball games.
FAQ
When does the game clock stop in basketball?
The game clock stops whenever a foul is called, an injury occurs, the ball goes out of bounds, during free throws, and for timeouts. In the NCAA and the NBA, the game clock also stops after a basket is made during the last two minutes of the fourth quarter, the last minute of the second half, or during any overtime periods. In each of these instances, the referee stops the clock and gameplay by blowing their whistle.
Does the game clock stop after a made basket in basketball?
In NCAA basketball, the game clock only stops after a made basket during the last minute of the second half or during an overtime period. In an NBA game, the game clock only stops after a basket is made during the last two minutes of the fourth quarter or during any overtime periods. In high school basketball, there are no similar rules regarding made baskets and stoppage of the game clock.
How long is the game clock in basketball?
The length of a game clock depends on which basketball league the current teams are playing in. For an NCAA basketball game, the game clock has two halves, each consisting of 20 minutes. For an NBA game, the game clock has four quarters, each consisting of 12 minutes. In high school basketball, the length of the game clock can vary by league and location, but each quarter is typically 8 minutes long. The length of a game will be longer than the time on a game clock due to stoppages and breaks between play periods.
PreviousNext
Pages Related to Basketball Game Clock
- Basketball Game Structure
- Basketball Double Bonus
- Basketball Halftime
- Basketball Dribbling
- Basketball Field Goals
- Basketball Illegal Use Of Hands
PreviousNext
Shot Clock in High School Basketball, Coach's Clipboard
Home >
Coaching >
Shot Clock in High School Basketball - Yes or No?
By Dr. James Gels, from the Coach’s Clipboard Basketball Playbook
A controversial subject...
should there be a shot clock in high school basketball? I'll try to present the background and pros and cons without inserting my own opinion.
Shot Clock Rule Definition
So what is the shot clock rule? It's a rule used to increase the pace of play. The shot clock is a defined number of seconds (24 for NBA, 30 for college) that the offense may possess the ball, once it is in their control or caught on an inbounds pass. The clock is reset when the ball touches the rim or goes into the basket, and when possession of the ball switches to the other team, such as on a rebound, steal, or violation. A shot that leaves the shooter's hand prior to the clock buzzer counts if made.
Why have a shot clock?
The main reason is to prevent teams from stalling, holding the ball for long periods of time to slow the pace of play and reduce the number of possessions. There are many examples of teams stalling the entire game, even in the first half, and even in state championship games.
Also, very common is for two teams to play hard and fast the entire game, but the winning team stalling out the last 4 or 5 minutes, resulting in fouling to stop the clock and many late game free throws. As coaching legend Al McGuire once said about these situations: "the clock is your enemy" - meaning nobody shoots except for uncontested layups. This type of basketball is not popular with many fans, resulting in fans yelling "play the game!" or "shoot the ball" or actual booing.
So why do some coaches use stalling? - because they can... it's within the rules and may help their team win.
The shot clock first came into the NBA in 1954, the 24-second clock. Former Celtic great Bob Cousy once commented that the game before the shot clock was good hard play for three quarters and then stalling the remainder of the game, with fouling and free-throws at the end. Fans didn't like it and attendance fell. Putting in the shot clock improved fan enjoyment, interest and attendance.
Women's college basketball put in the shot clock in the 1970-71 season, as did men's college basketball (1985-86 a 45 second clock, changed to 35 seconds in 1993-94, and 30 seconds in 2015).
NFHS (National Federation of State High School Associations) Rulings
The NFHS has always ruled against the shot clock. .. but the vote for approval is getting closer. If your state high school association votes in favor of the shot clock, it will be in violation of the NFHS rules. As a consequence, your state's association will not be permitted to serve on the national rules committee.
Regardless, eight states have approved using the shot clock - Massachusetts, New York, Maryland, Rhode Island, North and South Dakota, Washington and California.
Arguments Opposing the Shot Clock
Cost
Initial costs are somewhere between $2000 and $5000 for a shot clock to be mounted near the scoreboard or above the backboards, or as part of the main scoreboard itself. This can be a significant cost for athletic programs on a tight budget, especially small rural schools... but the small schools in the Dakotas have done it.
Shot Clock Operator
And then there is the shot clock operator. Will this be another paid position, a volunteer, or an additional official? And what about junior varsity and freshmen games. .. more strain on resources to have clock operators for all these games.
There can be disagreements with how the shot clock operator has reset the clock. Some training will be required. This article, "Duties of Shot Clock Operator" is worth reading.
It's not College or Pro Basketball
Some believe that high school basketball is unique from college and pro basketball. They believe that since only a very small percentage of high school players go on to play in college, the pressure to make it more like the college game is not valid. They feel the added expense is not necessary.
Fans
Some believe that whether fans like it or not is not relevant to the discussion... it's for the players.
Coaching Strategy
Coaches that like to control tempo and slow the game down state that using a shot clock takes away from coaching strategy. Slowing the game down helps teams with less talent pull off the upset win. .. so fewer upsets with a shot clock. Having a shot clock hurts the underdog, and scores could be more lop-sided (need for a "mercy" rule?).
They also claim that with a shot clock, there will be more teams sitting back inside and playing zone defenses. To counter stalling, the losing team should abandon their zone defense and apply pressure man-to-man to force turnovers to turn the tide.
Fundamentals
Some coaches believe that when forced to play fast there will be an erosion of player fundamentals, more turnovers and rushed, bad shots.
Arguments for Using the Shot Clock
Stalling
The shot clock will prevent stalling and the entire game, as well as the end of the game, will be more exciting.
Fans
Fans will enjoy it more and attendance will increase, which will help negate the costs.
Costs
There are additional costs, especially at first, but increased fan attendance and clock sponsors will help. And if small schools in North and South Dakota can do it, why can't everyone?
Player Development
Players that learn to play uptempo will become better overall players and will be more ready for the college game.
It's for the Players
Many coaches point out that the majority of the players themselves would prefer to play uptempo with a shot clock.
Regarding More Zone Defenses
Yes, there will probably be more teams playing zone defense. But teams that can play good defense for 35 seconds will be rewarded.
Demographics
One study indicated that the argument is also somewhat generational. Many older coaches are opposed to the shot clock rule, as they have coached that way for years. Most younger coaches have grown up and played the game with the shot clock rule and thus many are in favor of it. So if this is true, it might just be a matter of time that the rule will be instituted, once the younger coaches are in the majority.
How Long to Make the Shot Clock
30 seconds, 35 seconds, 45 seconds? The states that currently use the shot clock are at 30 or 35 seconds. Some think that a 45 second clock would be good enough to stop prolonged stalling.
Alternatives to the Shot Clock?
Since the main reason for having a shot clock is to prevent stalling, is there anything else that could be done instead? Some have advocated using the shot clock rule just in the last four minutes of the game... but the initial costs of having a shot clock and an operator are still there.
Should we somehow empower officials to prevent stalling??? If an official sees a team back the ball out to half-court and just hold it there for a period of time, could the official circle his arm around signaling that the offense must begin to play, and failure to do so would result in a turnover? We already have a 5-second closely-guarded rule, but it's seldom called. Could we enforce and perhaps modify that rule?
The shot clock rule is a controversy. I hope I got you thinking about how you stand on it!
Also see:
- Duties of Shot Clock Operator
- Shot Clock in High School Basketball – the Debate Continues
- Time to Implement a Shot Clock in High School Basketball?
How to properly set up your Garmin watch after purchasing
Since 2014, I have been constantly training, living, hiking and traveling with Garmin devices.
6 years ago I bought my first Fenix 2 and fell in love with this model and brand.
A large number of different sports and touring watches have passed through my hands.
Among them are the entire Fenix series (from Fenix 2, 3, 3HR, 5X, 5X Plus, 6S, 6, 6X), Epix, Vivoactive HR, 3, 5, Venu, Forerunner, Instinct.
Video instruction for setting up a Garmin watch
In this article, I would like to share with you my tips and tricks to make it easier and better to use your watch.
This information will be useful, first of all, for new owners.
But I hope that experienced Garmin watch owners will be able to find something useful for themselves in my article.
My advice and recommendations will be for watches with button control - these are Garmin Fenix, Forerunner, Instinct, MARQ models.
Although the approaches I have voiced can be applied to other Garmin models. The platform and interface of the clock is almost the same.
So, here is the joyful moment!
Finally a new watch has arrived, we open the box and……
And I remember my first reaction: “Wow, there are so many buttons and different menu items! And what should I do with them?"
Large and thick instructions for the watch. Where do you need to start?
I try to study the model using the electronic instructions in PDF format.
In this case, I can quickly find the words I need using the search, and I always have the instructions at hand - on my PC, on my phone.
Catalog of instructions for popular models of watches and devices Garmin is on my website.
Garmin watch setup First of all, let's start with the initial setup.
Starting the clock, initial setting
To start the clock, hold down the Light button and start the initial setting by starting the clock.
The same important button, if held for about 30 seconds, is used to force the clock to turn off if your device suddenly freezes.
During clock initialization, you need to specify the following parameters:
- Language selection.
- Pair with your phone and install Garmin Connect on your smartphone.
- Distance units (miles or km) - for us = km.
- Time format (12 hours or 24 hour format) - for us = 24 hours.
- Sex - male or female - depends on the owner.

- Year of birth - 4 digits.
- Rost.
- Your weight.
Why is this needed?
All this information is needed so that the device can automatically calculate the loads for your profile.
These are heart rate zones with this information and other calculated parameters.
Setting the time To set the time in hours, there are 2 options: automatically determine your position using GPS or enter the time manually.
I recommend using the GPS time setting.
In this case, the clock will set your local time based on the time zone where you are.
The watch will take longer to start and search for GPS satellites for the first time.
In general, satellite search time is longer when GPS is used infrequently or after traveling long distances.
Initial setup usually takes between 3 and 10 minutes, depending on external conditions.
It is advisable to do this outside, in extreme cases near the window, but definitely not indoors.
Also, the satellite search time depends on your distance from high objects that impair GPS signal reception.
So if you are at home, try to get out into the open.
From my own experience, going to the balcony from the room will speed up the search for satellites for the first connection, but not as fast as you would like.
Language setting Initially, the watch comes with support for European languages.
If you suddenly bought a watch in Asian countries (the so-called APAC version), then initially it is IMPOSSIBLE to set the Cyrillic alphabet in them.
The maximum you can choose is English.
“Upgrading new Garmin models will not work. 🙁
As of the summer of 2020, the languages of the countries of the former Soviet Union in Garmin watches are Russian, Ukrainian, Latvian, Lithuanian, Estonian.
A total of 28 languages are available:
Arabic, Bulgarian, Czech, Danish, German, Estonian, Greek, English, Spanish, French, Hebrew, Croatian, Italian, Latvian , Lithuanian,
, Dutch, Norwegian, Polish, Portuguese, Romanian,
Russian, Slovak, Slovenian, Finnish, Swedish, Turkish,
Ukrainian .
I have collected files of cracks for Garmin watches in one section on the site - you can download the crack on this page.
Pairing your Garmin watch with your phone When setting up your watch for the first time, the device menu will prompt you to connect to your smartphone.
Why is this needed?
Connecting the watch to your phone allows you to display notifications on your watch about new messages, e-mail, calls and other events that are displayed on your phone.
By the way, it can be not only a phone, but also another device that allows you to work via the Bluetooth protocol: Tablet, Laptop, GPS-navigator.
How to connect your Garmin watch to your mobile phone (step by step): Your Garmin watch can work with Android and iOS (Apple) phones.
I'll tell you about the pairing process using the Android OS as an example.
First of all, you need to pair your watch with your phone.
The main mistake of all new users is connecting the watch directly via Bluetooth. This option will not work well!
If you choose this method, you will constantly "fall off" connecting the watch to the phone via Bluetooth!
To pair your Garmin watch, you need to do all the operations in the installed program on your phone - Garmin Connect (download for Android OS, download for iOS)!
The Garmin watch is connected (paired) to the phone as follows:
Step 1 - Install the Carmin Connect mobile app. Turn on Bluetooth on your phone. And open the program.
Step 2 - On your Garmin watch, go to Menu - Settings - Phone - Status = enable and select "Pair Phone". In the Garmin Connect app, click the Add Device button.
Step 3 — The Garmin Connect software will display a prompt to connect via Bluetooth to your watch model.
Step 4 — Use the PIN on your watch to confirm pairing in Garmin Connect.
Step 5 - Set your device as the primary activity tracking and data syncing device in Garmin Connect.
Step 6 - Go to the step of setting the clock options.
and synchronization of data from all devices in one account (if you have several devices) - TrueUp option.
Start syncing your watch settings data with Garmin Connect.
Synchronization is in progress…..
everything is ready, you can work.
Similarly, it can also be done for Tablet or PC. In this case, you do not need wires to sync data from your watch to the Garmin Web Service.
I'll talk about the Garmin Web Service a little further.
I would like to recommend that you install another convenient option in your phone for your safety - SmartLock .
What is SmartLock and how does this option work? Your smartphone activates auto-lock on the screen after a set period of time.
In this case, the phone owner constantly needs to unlock the phone to see new information.
If you add your connected Garmin watch as a trusted device, the phone will know that if there is a Bluetooth connection and the phone "sees" the watch, the screen lock will not start.![]()
As soon as there is a break in the Bluetooth connection between the watch and the phone, for example, you move far away from the phone, the phone's screen lock is activated automatically.
By the way, controlling the Bluetooth connection between the watch and the phone saved me more than once from losing the phone.
As soon as I forgot my phone and moved away from it, a notification appeared in the watch that the Bluetooth connection was broken.
Thus, one Bluetooth connection gives us two positive advantages: SmartLock and disconnect control.
User registration in the Garmin Connect Web Service Garmin Connect - connect.garmin.com is a Web service that will store all your completed, planned workouts, routes, hikes, tracks for the entire history from the moment of registration .
Moreover, even if you change your Garmin watch, your entire history of activities and status will be saved in the Web Service.
Separate sections collect and analyze changes in your health status (sleep, weight, calories, blood oxygen saturation, respiration, pulse rate, stress experience, BodyBattery integral parameter).![]()
A separate item in the system is your achievements and friends that you have connected to your account.
By the way, if you've been exercising all the time on other services, such as Strava, you can give permission to sync your activities and send new data collected by Garmin devices to this service.
This setting can be accessed from the web version of connect.garmin.com via—Settings—Account Information.
So, for example, I added Strava , Cardiogram, Relive to the allowed services.
Now all my activities are automatically sent to the appropriate service.
Strava - to share my workouts with friends in the same system.
Relive - automatically builds 3D routes of my travels or training on a 3D map.
Cardiogram - for a deeper analysis of cardiac activity.
Don't forget that you can export your tracks to other services manually, for example: Google Earth, Google Maps. How to do this, I told in my article.![]()
The Garmin Connect Web Service provides simple features for comparing training data.
For those who want to compare their workouts, runs, I recommend using this way to overlay multiple tracks or heart rate charts onto one layer.
Connecting watch to PC: Garmin Express. In addition to connecting to your phone, you can connect your watch with a USB cable to a PC.
Garmin Express is used for this.
The program can be installed on Windows PCs and Apple computers.
Why do I need to connect the watch to a PC via a USB cable?
The fact is that by connecting the watch to a computer you can speed up the work with loading maps (and they are quite large, the file size is measured in GB).
By the way, if you want to throw additional free OpenStreetMap maps into your watch, you need to use a USB cable.
How to add free maps to Fenix 6.5, Forerunner 9 watch45 I told in my video review and article.
To use the USB cable on MacOS and access the watch's file system, you need to install additional software AndroidFileTransfer into the system.
Moreover, before launching this application, you must completely unload it from the Garmin Express system through the top tray.
Another question asked by new Garmin watch owners is: “How do I know which maps I have in my watch?”
There are 3 answers to this question.
Option 1 - Via Garmin Express. Connect your watch to your PC with a USB cable.
In the main window of the program you will immediately see the cards that are already in the watch.
Please note that only native Garmin cards are shown here.
Option 2 - Install the Garmin BaseCamp software. It is used to operate Garmin watches and navigators with maps, routes, and waypoints.
This program will show all the cards it finds in your watch.
As soon as you connect your watch to your PC using the USB cable, BaseCamp will try to download all the maps from the watch.
In this case, the name of the map will be displayed in the left panel of the program.
By double clicking on the map name, you can find out the file name and map borders. Map borders are shown in turquoise in the program.
Option 3 - select any tourist activity like Hiking or even walking or even running. That is, where there is the use of GPS.
How to get to the map list on your Garmin Fenix 6 watch: Settings - select the activity you want, for example Hiking - Hiking Settings - Map - Map Settings.
In this menu, scroll through the cards that are installed in your watch. Here you can enable or disable maps right in the clock.
Once again, I want to immediately note the following points:
1. The .IMG file is the card, not the CD image, as your computer tells you.
Don't be scared! This problem occurs for those who have already installed programs for working with disk images: UltraISO, IZArc.
2. The IMG file (that is, the map) must be uploaded exactly to the root of the Garmin watch. It's a file, not a ZIP archive!
By the way, in the Fenix 5 Plus, 6 series models, a music player was added, so you can get to the Garmin watch root using the following path:
on the Fenix 6 example: Forerunner 9 example45: “This PC\Forerunner 945\Primary\GARMIN”
Old Fenix 5 models did not have a Primary folder.
Using the USB cable, you can add audio files through the Garmin Express software.
The only disadvantage of this option is that the cable does not support USB 3 - so you have to wait a bit while the information is being loaded.
But on the other hand, you will do it so often.
The following formats are supported: wav, mp3, aac, adts, mp4, m4a, m3u, m3u8, wpl, zpl, pls.
Adding music to the clock goes through several steps:
- At the first step, the program scans the PC hard disk to offer files to add.

- You need to select the files you want to upload to the watch.
- Send them to the device.
That's it, now all the files are "on your hand".
And here another question arises - how to listen to music?
The fact is that the Garmin watch itself only transmits music via Bluetooth.
Now don't forget to connect your Bluetooth headphones to your watch.
By the way, these can be not only headphones, but also other devices that can play music via Bluetooth.
For example JBL external music speaker.
This is done through the menu Settings - Sensors and accessories - Add new - Headphones.
Be sure to connect your headphones or speaker to device pairing mode.
If the headphones do not connect?
Check if the active earphones are picking up your phone? Disconnect the headphones from your phone and re-pair or add the wireless headphones.
Watch beta firmware Also, by connecting via USB cable, you can install the latest Beta firmware before the release of official versions.
This is important for those who are waiting for new fixes or updates to the system.
How to work with beta-firmware I told in my article and video review.
The operation logic is the same for all Garmin watch models.
Find out the firmware version of your watch through the menu: Settings -> System -> About the device.
Connecting external sensors If you just bought the watch, I would recommend buying the following external sensors right away.
It all depends on what kind of sport or activity you do.
Running is a gentleman's set:
- Garmin HRM-Run chest heart rate monitor ($100) - link to review.
- Garmin FootPod for running ($70) - review link.
As an option for triathletes, you can take a Garmin HRM-Tri chest heart rate monitor (measures additional running metrics and heart rate in the water, $ 130) + Garmin FootPod running pedometer.
In September 2020, a new model of the Garmin HRM PRO chest heart rate monitor ($130) was released - this is an improved model of the Garmin HRM-Tri strap.
HRM-PRO does exactly the same, plus the extra strap can store sports metrics without a watch.
Useful if you want to track your heart rate during a team game (football, basketball) where you can't wear a metal watch on your wrist so as not to hurt your opponent.
The FootPod is needed so that you can control your pace when GPS reception is poor or without satellites at all.
This sensor will give you a more accurate picture of your running pace than if you run and track your pace only via GPS.
For dynamic, intense workouts in the gym, I would recommend: chest heart rate monitor Garmin HRM-Dual (works on two protocols - ANT, Bluetooth) or Garmin HRM-Premium.
These are soft and elastic straps that do not interfere with training and exercise.
Information for new Garmin watch owners: Chest straps can only be connected to the watch when you put the strap on your body! 🙂
I have several cardio belts (for running - HRM-Run, for the gym - HRM-Dual).
When a belt or other sensor is connected, Garmin displays its number in the sensor list.
To avoid confusion, I manually renamed the name of the sensors so that you can see which belt I am connecting to. For example HRM Run or HRM Dual.
For hikes: I would take an external Garmin Tempe temperature sensor (price $30) to monitor the temperature throughout the hike (lows and highs), even when you turn off the hike recording.
HRM chest strap or HR optical sensor - which is better? You will have a counter question: Why do I need external sensors at all, if the watch already has an optical HR pulse sensor, a temperature sensor.
My numerous tests and the experience of members of the Prostobzor group have shown that the optical HR sensor in the watch is better to use for those workouts when you train in low heart rate zones without sudden load jumps or to track your heart rate throughout the day.
In this case, the optical HR heart rate sensor works one to one in the chest heart rate monitor.
But if you start to sharply increase or decrease the intensity of loads, then only a chest cardio heart rate monitor will be able to quickly catch and record these changes, since it actually monitors the electrocardiogram.
And the data of the optical heart rate monitor can be significantly delayed, this is not related to the quality of the sensor itself, but only to physiology.
Moreover, this applies to all watch models, not only Garmin but also other manufacturers.
Link to my article and tests - What is the difference between an HR optical sensor and an HRM cardio chest strap?
I already hear the following comments: “But what about measuring the pulse in water? For the new models of 2019: Fenix 6, Forerunner 945, Swim 2 added the ability to measure heart rate in the water right in the watch!”
But even here, after my tests, I saw the same picture: the heart rate from the chest cardio-pulsometer was recorded better than from the built-in optical sensor.
More water tests in Garmin Swim 2 watch review - see article and video review.
I'm talking about those Garmin belts that can record and store heart rate data in water: Garmin HRM-Swim ($100), Garmin HRM-Tri ($130).
By the way, one more problem, if you swim dynamically in the pool with sharp repulsions from the side, turns - the chest straps will slip off your body.
Alternatively, wear the chest straps under a swim shirt or suit or neoprene tank top to secure the strap to your chest.
I know that some girls who swim professionally just sew cardi straps into their swimsuit.
However, if you do not have high-intensity workouts, then the built-in optical HR heart rate sensor is more than enough.
In addition, we must not forget that the HR optical sensor in the watch can measure the pulse continuously at rest when you sleep.
This is an important indicator that indicates your physical condition.
Resting heart rate (RHR) is an indicator of your health and fitness.
By the way, if you start to get sick, then a change in the resting heart rate will clearly signal a problem in your body.
Garmin's heart rate watch can also measure your breathing and heart rate variability. Pulse, stress level are reduced to one integral indicator, which is called "BodyBattery".
This is a summary metric that shows your energy charge over time.
So, the built-in optical heart rate sensor is the right tool for monitoring your health. Don't discount him.
Why take an external temperature sensor?
The temperature sensor in the watch will always overestimate the actual temperature due to the heat of the hand where you wear the watch.
The Garmin Tempe temperature sensor can be attached to a backpack while hiking or on clothing to record the temperature around you and not your hand, without errors.
In addition, Garmin Tempe will record the minimum and maximum temperature for the entire day, even if you do not connect the sensor to the watch.
Watch version update How to get the latest firmware?
Initially, the watch comes with factory firmware.
To find out which official Garmin watch firmware is the latest, go to the Garmin forum — https://forums.garmin.com/
Select the watch model you need. In the model branch, the latest public firmware will be fixed at the very beginning of topics.
From the moment the watch is released to the receipt of the coveted box with the device, a rather long time period may pass.
Therefore, I recommend immediately connecting the watch with a USB cable to a PC and updating the watch firmware using the Garmin Express program.
Alternatively, you can update the firmware via a WiFi connection or Bluetooth.
But in my opinion, the Garmin Express version is faster and more convenient.
How to manually install beta firmware for Garmin Fenix watches - I told in my article.
Fine tuning your Garmin watch
Longer battery life Garmin has a free Connect IQ catalog.
Here you can find watch faces, programs, widgets, date fields and set to your new watch.
Dial - you can install them yourself from the catalog. The watch face author can change the design and options for their watch face. Rating of watch faces at the bottom of the article.
Widgets are small programs. Their task is to show the necessary information and close after a short time. Widgets on Garmin watches do not work all the time.
The simplest widgets you have in your watch are pulse control, sunrise-sunset, compass. weather.
Applications are programs that can run continuously in hours and perform their functions. They don't automatically close until you close them.
Sample apps are Deezer or Spotify music services when running on your Garmin watch.
There are pluses and minuses here.
Catalog Plus - that you don't have to pay anything to install a catalog item in hours, although I note that there are paid options.
The disadvantages of this setting is that any third-party watch face, program or widget is a program that was written by enthusiastic authors.
And this is an additional power consumption that takes charge from the battery of your watch and, as a result, reduces the autonomy of the watch.
Not all authors immediately pay attention to the stage of optimizing the work of their application or watch face.
I would recommend putting the proven items of the Connect IQ Catalog into your watch!
They consume less power and are stable in operation.
First, before installing, check the reviews of people who have already tried to install this item.
You see a lot of negative reviews about the battery drain - this is a reason to think about whether you should install this application or watch face.
Also on the adjacent tabs you can find out the compatibility of this Watch face, Application or Widget.
Garmin watch battery low - why? What are the factors that cause the battery to drain initially in the Garmin watch itself?
This can be:
- Enable/disable the optical heart rate sensor.
- Enable/disable Bluetooth connection to phone or WIFI connection
- Enable/disable the pulse oximeter (a sensor that measures oxygen saturation in the blood). Enabling this sensor to measure around the clock will significantly reduce the watch's autonomy.
- Clock operation in GPS mode.
The (PulseOx) pulse oximeter is the most power hungry sensor. Not without reason, Garmin warns the owner about this if he wants to turn on the sensor for the whole day.
And since the owner of the watch must be in a stationary state during the measurement, I recommend turning on the PulseOx measurement at night when you sleep.
This sensor is the most optimal for determining the adaptation of the body when climbing mountains.
The watch shows the average estimated run time depending on the settings on the standard dials of the Fenix 6 series models.
There are many factors that will affect the time your watch will run on a single charge.
- Watch size - the larger the watch, the more powerful the battery. Accordingly, Fenix 6X → 6 - 6S will be able to work out the most from one charge.
- Screen backlight - the longer the backlight time and the brighter the backlight, the faster the battery will drain. By reducing the backlight time and brightness, you can increase the operating time of the watch on a single charge.
- The larger the moving parts on the dial (second hands, pulse, plotting), the greater the battery consumption.
- Listening time of music in watch with Bluetooth streaming.
- Do not use every second GPS recording, turn on smart economical track recording.
I ask you to make these settings without fanaticism.
How to reduce the charge and check the battery life in Garmin watches, I told in my article and video review.
For example, when I go on a long hike where there is no connection, I turn off Bluetooth, WiFi, reduce backlight time and brightness.
And in the city I increase all these parameters back.
Quickly You can change the clock mode using the menu carousel.
By the way, the new version of the Fenix 6 watch already has the ability to manage power consumption for each parameter.
Hot buttons - quick call. Garmin watches have the ability to add the desired event to a specific combination of button presses.
This can be a long press on one button or a simultaneous press of two buttons.
From my personal experience:
I added the following options to the hot buttons that help me during training.
Stopwatch call — set to long press the Start button.
Timer call - on the Back-Lap button.
But such buttons as:
A long press on the Menu-Up button is already used to call up the menu.
A long press on the Light button brings up the menu carousel.
By the way, if your watch really freezes and does not respond to buttons - just hold the Backlight - Light button for a long time (5-15 seconds) to force the watch to turn off and again to turn the watch on.
This helps in problem situations with clock freezing.
The most popular question from my readers and viewers:
“How can I exit the running activity in the watch without stopping the workout?”
On the Down button, I added an output to the "Dial" (by default, this is a long press of the back button).
What is it and what is it for?
Exactly for this purpose, the exit to the Clock face by long pressing during the training process allows you to switch to the watch with its usual interface.
Moreover, the launched activity continues to run in the background.
Video example: How to exit a running workout on a Garmin watch without interrupting the activity.
Added hot button Light = Dial.
Oh, and by the way, if you have already added other hot buttons, they will also work when the activity is running: stopwatch, timer.
If the Backlight, Menu buttons are already occupied, I additionally added button combinations:
Start + Down - control of the music player.
Start + Up - Call Garmin Pay Wallet for payment at the checkout.
Back + Light - Save location while hiking.
Back + Up - Flashlight (handy if you need to somehow highlight).
This is not a complete list. You can get to the settings yourself and add another option that is convenient for you.
Menu Settings - System - Hotkeys.
From my personal experience:
On diagonal button presses (bottom left - top right) or (top left - bottom right) I put the most necessary options.
These combinations are easy to use with two fingers.
Don't forget that by long pressing the Light button you can call up and customize the menu carousel.
For myself, I sorted the elements into groups.
Phone group:
- Do not disturb
- Where is my phone
- Connect device
- Synchronization
Hiking, navigation group
- Sunrise-sunset
- Altimeter
- Barometer
- Compass
- Save location
Time group
All other options are listed here separately.
You can easily create your own list based on your needs.
How to create new sports activities? Some of my viewers of my YouTube channel , looking at my reviews, asked: “Where did I get new activities, for example, Autodrive, CrossFit?
In fact, they are not in the watch, so I just created them specifically for myself.
For example, I created the "Autodrive" activity for car trips when I use my Garmin watch as my trip tracker.
How to use the watch as a tracker when traveling by car, I told in my review here -prostobzor.com/garmin-fenix3-avto-navigation.
The "CrossFit" activity I made specifically for CrossFit based Cardio training.
In fact, creating a new watch activity is copying and modifying one of the existing ones using additional data fields.
What are data fields?
These are special values that can be seen on the watch face and show your data when you start any activity.
This could be speed, distance, navigation, owner's status.
Some data fields, applications and watch faces allow you to manage your settings - this is the Configurable option.
ActiFace watch face settings example.
The list is quite large.
For specific workouts, I extended the activity with new data fields that I downloaded from the free Connect IQ catalog.
For example for CrossFit I added a very nice data field for the heart rate chart "Heart Rate Zone Chart" . In the process of training, I can watch the changes in the graph as well as the transition between the pulse zones.
The date field is customizable. This means that I can customize the data display behavior for myself.
For hiking, I added a date field for to track the rate of ascent and descent of with a color display of changes.
Increased the number of data fields by one screen in order to simultaneously see the information that is critical for me.
For Fenix 6X Pro, this will be 8 fields.
For Fenix 6, 6S - 6 fields.
What else has not been added to this article? I think it's reasonable to add here proven and useful watch faces, data fields, widgets from experienced watch owners.
Please add your experience to this article - just fill out the survey form so I know what Garmin watch owners are more interested in! Thanks in advance for your time, let's create a people's ranking together!
FILL OUT THE FORM FOR OWNERS OF GARMIN WATCHES
Useful and most popular watch faces:
How to install a watch face in your Garmin watch - see step-by-step instructions.
Selected the watch face - pressed the "Download" button - by pressing the button, the Garmin Express program will open and synchronize the watch face with those connected via USB cable.
Rating of Garmin digital watch faces by my readers: Part 1 of Garmin watch faces list
Part 2 of Garmin watch faces list
- ActiFace is the most popular watch face among Garmin watches.

- Gearmin - A similar dial that matches the design of the ActiFace.
- DataLover - Same design as ActiFace.
- Faceit - This is software that is installed on your phone and allows you to create your own dials in your watch. The FaceIt feature is now adding to the Connect IQ app. Before that, it was a separate program. How it worked - see my article and video.
- Infocal - Replica of the original Garmin dial. Repeats almost exactly the same as the native dial, with the exception of some data fields that can be added.
- NoFrills - Big and big time numbers gradually fill up with the completion of your goal - for example, steps per day. Clear and understandable.
- Fusion - Expanded information dial with many indicators.
- Crystal - A similar dial in a different design for placing information fields.
- Wf4Cool - Large, easy to read numbers on the dial.
- Infinite Geometry The is a simple and clear watch face from Garmin.
- Garmin Original Watch Faces - Many respondents reported that they simply use the standard watch faces that come with the watch.
Not rated, would like to recommend analog dials.
Analog watch faces: TactixD - Pro Graphics is an analog replica of the Garmin Tactix watch face. The dial with large hands can be installed on other models.
UTC Titanium is a replica of the standard dial with the ability to display two types of time simultaneously.
Analog dial + digital dial.
Didn't find a great watch face? Your suggestions, dear reader! 🙂
Field date: Used to display running watch activities on screens.
How to work with data fields I told a long time ago using the Fenix 3 watch as an example. so feel free to use this information.
Running Power is a running power developed by Garmin.
Heart Rate Zone Chart — heart rate graph broken down by the color of the graph, taking into account the heart rate zone.
Elevation and Gradient Graph [hElevGrade] — Elevation and Gradient Graph with velocity overlay (highlighted).
RunningDF4 2 - improved running fields on one screen.
Dozen Run , Dozen Cycle , Dozen Walk , Dozen Swim , Dozen Cycle is a series of multi-data fields by one author for all types of activities.
RUN.monitor Select is a ready-made all-in-one data field for runners.
Zone Runner is an all-in-one integrated data field that shows the necessary information on pace, heart rate, time with a color filter depending on the data change. Unfortunately, the developer has not added support for Fenix 6, Forerunner 9 models45 - I'm waiting for an update. 🙁
Applications: is a program that can run for a long time in hours.
The most popular and well-known for users are:
Deezer - work with the music service, create and download playlists.
Spotyify is another app for the popular music service.
And of course don't forget 2 important apps for city life:
Wallet - Garmin Pay contactless payment. I talked about how to set up a contactless payment system in my article.
Music player - Allows you to control music on your Garmin watch. Of course, provided that your model supports Bluetooth music player.
Widgets Widgets are small programs that run for a short time and close automatically. Their task is only to quickly show the data.
Garmin watch has Widgets pre-installed. All you need is just to add them to the watch menu.
Standard pre-installed widgets from Garmin in the watch: Standard widgets from Garmin - they are already in the watch, they can be added to the watch menu directly through the interface.
It is done like this - see step-by-step instructions:0012 - allows you to save the placement of 3 widgets on one screen.
Switching between the screens of the UP - DOWN button, manual calibration of the Barometer or Altimeter and entering the settings are available by pressing the START button.
Sunset/Sunrise - Visually and numerically helps to know the onset of sunset and sunrise, as well as the time of dusk.
It is possible to scroll through dates with the calculation of the time for the desired date forward and backward (UP - DOWN buttons).
Time zones - you can add the necessary cities from the list to quickly find out the current time in the selected city from anywhere in the world (there is a list of only large metropolitan areas).
For my friends in Washington and Yekaterinburg, I can get their current time so I don't call too late at night. 🙂
Health status - in this widget you can see your heart rate for 4 hours and a graph of heart rate changes for 7 days at rest.
Your resting heart rate is a real indicator of your condition. See comparison table.
Given the situation with COVID 19, it makes sense to pay attention to additional parameters of your body using widgets:
Breathing at rest - widget - "Breathing" from Garmin
Widget "Pulse meter" - allows you to display the oxygen saturation of the wearer's blood. Attention is the most energy-intensive sensor.
I recommend turning it on only at night in order to correctly measure the condition of the owner when he is motionless, that is, in a dream.
In another section there is a measurement of heart rate variability - "Experiencing stress" as well as a metric for the accumulation of your internal energy - "Body Battery".
"Body battery" shows how you managed to recover overnight (pros) and your energy consumption per day (cons) in the form of a graph.
Sleep Widget - allows you to control the quality of your sleep and gives a summary analysis of the previous night.
There are other native Garmin widgets that you might want to consider:
For Solar watches, this is the solar charge control widget - Solar charge intensity.
For those who want to see the weather forecast - the "Weather" widget. Requires a phone connection and Internet access to get the latest forecast in hours. The Connect IQ catalog has many variations of widgets with information about the weather. Garmin even made a separate section on this topic - see the link here.
Third party widgets from the Garmin Connect IQ catalog: Additional Third Party Widgets can be downloaded from the free Garmin Connect IQ catalog.
I give step-by-step instructions on how to do this:
Battery Gauge - analysis of watch battery consumption. My article is about battery consumption analysis and diagnostic methods.
Battery Info - extended battery information in hours. Advanced options open after a donation (donation) to the author.
My Day Advanced - all native Garmin widgets in one bottle. Works similarly with Garmin's My Day widget.
COVID-19 - Information on the epidemic (3 conditions: died, infected, cured) around the world, broken down by country and your country where you are.
A particularly noteworthy fact is that the author of the widget (Vlad Ershov) is from Russia and the only one from the CIS whose widget, date field and dial were included in the review.
Today, October 3, a new version with country breakdowns has already been released.
For information about your country, enter the country code. Help code table.
vVo2Max working zones and more - Speed widget for VO2max. Useful for advanced runners.
Allows you to display vVo2Max, min and max HR. Me your vVo2Max can find out changes in tempo and heart zones. What is vVo2Max - read on Wikipedia here (English).
I perfectly understand that the new owners will have a lot of questions and I could not answer them in one review and article.
I'm working on a new updated FAQ section for beginners. For now….
For your questions, there are also social groups Prostobzor , where experienced watch owners are always ready to help with advice and recommendations. 🙂
I recommend subscribing to these groups to keep up to date with all the news and tricks of working with Garmin equipment.
- YouTube - https://www.youtube.com/c/ProstObzor
- Facebook — https://www.facebook.com/groups/prostObzor/
- VK - https://vk.com/prostobzor_ru
- Instagram - https://www.instagram.com/prostobzorcom/
Apple Watch Workout Types - Apple Support (UK)
This article explains the types of workouts you can track in the Workout app on your Apple Watch.
-
Walking
-
Running
-
Cycling
-
Ellipsoid
- Mixed
-
Other
-
Walking
To walk on a treadmill or indoors (such as an indoor arena or mall), select the Walking (Gym) option. To improve the accuracy of indoor walking pace and distance, you need to calibrate your watch beforehand. Take a walk of at least 20 minutes by launching the Workout app. Bring your iPhone with you to calibrate your Apple Watch Series 1 or earlier.
For activities such as walking on a stadium track or walking in a park, select Walking. Depending on your Apple Watch model, you may need to bring your iPhone with you to track certain metrics.
- Pace and distance: Apple Watch Series 2 and later has a built-in GPS that allows you to track these metrics and display your walking route in your iPhone workout summary report. If you take your iPhone with you, the watch uses its GPS signal to extend its battery life.
 For the most accurate location using GPS navigation, hold your iPhone in your hand or attach it to a wristband or belt. For GPS on Apple Watch Series 1 or earlier, bring your iPhone. Apple Watch Series 1 and earlier let you track the pace and distance of your workout without an iPhone using the watch's built-in accelerometer. To improve the accuracy of these measurements, you must first calibrate the watch. Take your iPhone with you and go for a walk of at least 20 minutes by launching the Workout app.
 - Height: Apple Watch Series 3 and later models have a built-in altimeter. For height tracking on Apple Watch Series 2 or earlier, bring your iPhone.
Learn how to calibrate your Apple Watch here.
Running
For running on the treadmill or indoors, select Running (Gym). To improve the accuracy of pace and distance tracking when running indoors, you need to calibrate your watch beforehand. Go for an outdoor run of at least 20 minutes by launching the Workout app. Bring your iPhone with you to calibrate your Apple Watch Series 1 or earlier.
For activities such as stadium running, trail running, or trail running, select the Running option. Depending on your Apple Watch model, you may need to bring your iPhone with you to track certain metrics.
- Pace and Distance: Apple Watch Series 2 and later have built-in GPS to track these metrics and display your run route in your iPhone workout summary report. If you take your iPhone with you, the watch uses its GPS signal to extend its battery life. For the most accurate location using GPS navigation, hold your iPhone in your hand or attach it to a wristband or belt. For GPS on Apple Watch Series 1 or earlier, bring your iPhone. Apple Watch Series 1 and earlier let you track the pace and distance of your workout without an iPhone using the watch's built-in accelerometer. To improve the accuracy of these measurements, you must first calibrate the watch. Go for an outdoor run of at least 20 minutes by launching the Workout app and bringing your iPhone with you.

- Height: Apple Watch Series 3 and later models have a built-in altimeter. For height tracking on Apple Watch Series 2 or earlier, bring your iPhone.
On your Apple Watch, you can choose how you prepare for a long distance run, such as a marathon. See the list of options below.
- Power saving mode turns off the Always On screen during walking and running workouts and data transmission over the cellular network is limited. Learn more about Power Saving Mode.
- You can sync music and podcasts directly to your Apple Watch in advance and listen to content even without an iPhone. For information about syncing content with your Apple Watch, see this article.
- Take your iPhone with you. If you take your iPhone with you, you can use the watch's Bluetooth function for resource-intensive tasks such as connecting to networks, streaming music or podcasts, accessing Siri, and more.
- If you're planning a long distance run in the evening, you can extend battery life by turning off cellular and the Always On screen feature.
 a few hours before the race. Learn how to turn cellular on or off and set the Always On feature.
 - For more information about battery specifications, see this article.
Cycling
For activities such as exercise bikes, select the Exercise Bike option. For cycling in open areas, select the Bicycle option.
Depending on your Apple Watch model, you may need to bring your iPhone with you to track certain metrics.
- Speed and distance: Apple Watch Series 2 and later have built-in GPS to track these metrics and display your ride on your iPhone workout summary report. For speed and distance tracking on Apple Watch Series 1 or earlier, bring your iPhone with you.
- Height: Apple Watch Series 3 and later models have a built-in altimeter. For height tracking on Apple Watch Series 2 or earlier, bring your iPhone.
Ellipsoid
For elliptical training or similar activities, select Ellipsoid.
Ergometer
If using a rowing machine or similar, select Ergometer.
Stepper
If you are using a stepper, select the Stepper option.
High Intensity Interval Training (HIIT)
For intense exercise cycles followed by shorter periods of rest or recovery, choose the HIIT option. For example, you can jump rope for 45 seconds, rest for 30 seconds, and then repeat the exercises.
Some unusual movements during high-intensity workouts can prevent accurate heart rate measurement. Calorie tracking is done using the built-in accelerometer, even if the heart rate is unknown. If you can't get a stable heart rate during high-intensity interval training (HIIT), you can connect your Apple Watch to a Bluetooth-enabled chest strap.
Hiking
To track your pace, distance, climb, and calories burned, select Hiking. During the workout, you will be able to track how high you climbed in real time, and at the end of it, you will find out the total climb.
Apple Watch Series 3 and later have a built-in altimeter to calculate and display altitude, so you don't have to take your iPhone to workouts. For height tracking on Apple Watch Series 2 or earlier, bring your iPhone.
Yoga
To track any yoga activity, from recovery practices to power vinyasa flow, select the Yoga option.
Functional Strength Training
Select the Functional Strength Training option when performing a series of dynamic strength exercises for the upper body, lower body, or full body as well as using compact equipment such as dumbbells, resistance bands and medicine balls and without equipment.
Dance
The Dance option is suitable for fitness dance classes, whether it be cardio, cardiolatin, hip-hop or Bollywood.
Recovery
Select the Recovery option after completing another workout if you want to continue light movement and stretching as you recover.
Core Workout
The Core Workout option is suitable for exercises aimed at strengthening the abdominal and back muscles.
Pilates
For machine or mat exercises that strengthen your core and improve overall flexibility, choose Pilates.
Tai Chi
For training based on this Chinese martial art, consisting of slow, meditative full body movements, select Tai Chi.
Swimming
On Apple Watch Series 2 and later, you can select either Pool or Water.* At the start of a workout, the screen automatically locks to prevent accidental taps of water droplets. Learn how to swim with your Apple Watch and view your workout history, including autosets and intervals.
Apple Watch rates each workout as follows.
- Pool: When you start your workout, be sure to enter the exact length of the treadmill so your Apple Watch can correctly calculate laps and distance. While swimming in the pool, GPS is not used. In addition, water can interfere with heart rate measurement, but thanks to the built-in accelerometer, the watch will still be able to determine the number of calories burned, laps and the total distance that you swim during your workout.
- Body of Water: The GPS module will only measure distance when freestyle swimming. Water can interfere with heart rate measurement, but the watch will still be able to determine the number of calories burned thanks to the built-in accelerometer.
Seat
If you ride in a manual wheelchair, you can choose to ride in the street in a chair at walking pace or the ride in the street in a chair at a run pace. It is recommended that you choose a workout that best matches your activity, but maintaining a constant speed is not necessary. The speed can be changed during any workout. Selecting one option for workouts close to walking and the other option for workouts close to running allows you to track your workouts in the Activity app.
The Apple Watch measures activity as follows.
- Apple Watch Series 2 and later optimizes tracking of wheelchair workouts with pushes (outdoors) at walking and running pace. In addition, these models are equipped with built-in GPS, so there is no need to take your iPhone with you.

- Apple Watch Series 1 and earlier optimizes tracking of wheelchair pushing (outdoor) walking and running pace workouts. To view speed and distance, you need to take your iPhone with you.
- Both wheelchair workouts measure time, pace, distance, calories burned and heart rate. To measure time, calories, and heart rate for activities such as hand-biking and wheelchair basketball, select Other.
- During both wheelchair workouts, the Activity app tracks shocks.
If these workout parameters are not displayed, you may need to update the specified data.
- Open the Watch app on iPhone.
- Go to the My Watch tab and select Health.
- Click Health Profile.
- Click Edit, then select Chair and click Yes.
- Click Finish.
Blended Workout
Blended workouts designed to prepare for duathlon or triathlon, Apple Watch motion sensors automatically detect the type of workout and switch between swimming, cycling and running in any sequence.