Home »
Misc »
How to run a basketball practice
How to run a basketball practice
3 Basketball Practice Plans for All Age Groups (7
“Players win games. Coaches win practices”.
Practices are the time coaches have the biggest opportunity to impact the basketball skills of a player…
However, I constantly attend practices that are inefficiently run.
The coach spends half of practice trying to work out what drill to run next.
All coaches should be spending the majority of their time encouraging and providing feedback to their players… not working out what the next drill is going to be.
How do coaches fix this and make practices more efficient?
Create a basketball practice plan.
Two of the greatest coaches of all time knew how important a practice plan was…
“I always designed my practice plans the night before and then made tweaks a few hours before practice began” – Bobby Knight
“I would spend almost as much time planning a practice as conducting it. Everything was planned out each day” – John Wooden
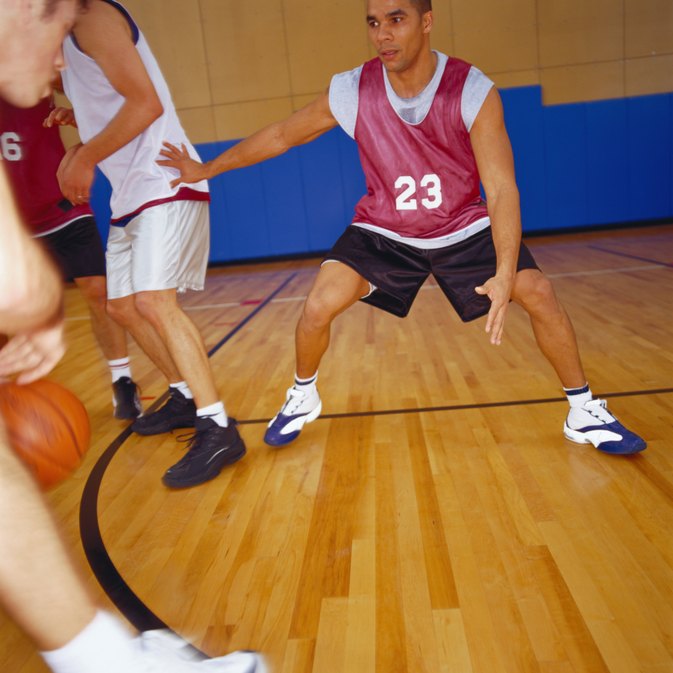
Having a plan for each practice is absolutely essential.![]()
Here is how to do it:
Basketball Practice Plan StructureAt Basketball For Coaches, we break down a typical practice into 5 sections…
1. Dynamic Warm-Up/Body Movement
2. Skill Work
3. Team Strategies
4. Scrimmage/Small Sided Games
5. Cool Down
First, let’s discuss each section in more detail.
Later on we’ll break down how long you should spend on each of the sections.
And then I’ll share 3 complete practice plans that you can print off and use with your team.
1. Dynamic Warm-Up/Body MovementThis section of practice cannot be skipped.
Most youth teams perform a 2-minute warm-up before moving immediately on to other sections of practice.
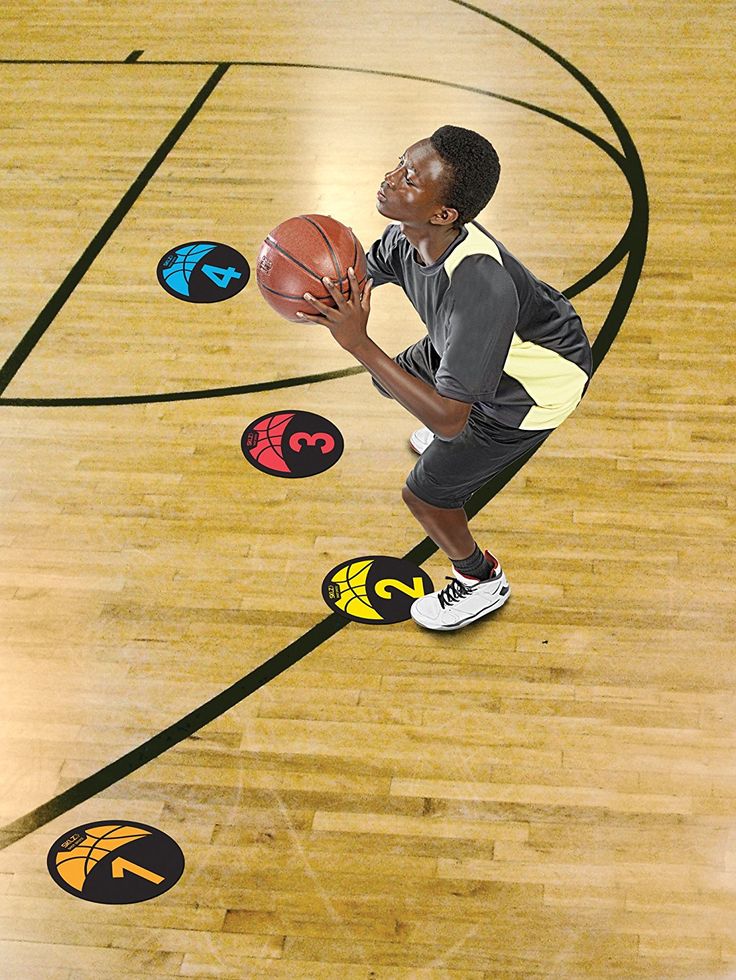
When I watch youth basketball games, it becomes quickly apparent that the best players have fantastic:
- Balance
- Coordination
- Change of Speed
- Change of Direction
The players who struggle haven’t learned how to control their bodies yet.
It’s extremely important to help players establish an athletic foundation. With this foundation in place, it becomes much easier to learn new basketball skills as they progress.
This section of practice will help your players with much more than their basketball skills. It will help prevent injuries and will help them in all sports and movements of life, because as we all know, players shouldn’t be specializing solely in basketball at a young age.
Here are a few examples of body movement and coordination movements you need to incorporate into your dynamic warm-up.
- Jogging
- Sprinting
- Backpedaling
- Sliding
- Change of Direction
- Change of Pace
- Jumping
- Landing
- Lunging
- Skipping
2. Skill WorkThe bulk of a youth basketball practice should be skill work. The drills should be fun and interesting while still improving the skill of your players.
This includes drills that teach players how to perform the skill movement correctly, along with drills that assist them to learn when to use the skill.
Drills that allow the player to learn when to use the skill are commonly skipped over.
Referring to shooting, this is a great quote by Jeff Van Gundy…
“Shooting percentage is just as much about decision making as it is about technique” – Jeff Van Gundy
This rule goes for all skills, not just shooting…
We need to put players in positions that require them to make decisions and gain game-like experience.
A lot of coaches will show players exactly what they need to do… they’ll give fantastic instructions, and the players will eventually look brilliant at training.
Then, the players will get
into the game and it’ll look like they’ve forgotten everything!
Why does this happen?
Because they haven’t learned to play against competition.
We need to include drills that will teach players the technique, and drills that will teach them when to do it in the game.
I recommend splitting these two types of drills up 50/50…
Dribbling Example:
5 minutes of stationary ball handling and then a game of 1v1 in the full-court.
Shooting Example:
5 minutes of shooting form and then 1-on-1 partner close-outs with the offensive player deciding whether to shoot the ball or drive.
Passing Example:
5 minutes of form passing and then a 10 minute game of 5 vs 4 keep-away.
While I list small-sided games at the end of practice, I still use them in this section to improve individual skills while making decisions.
“Perform drills that force your players to think” – Bobby Knight
BFC TIP: At the youth level, drills should be no more than 10 minutes long. The players will start to become disinterested after that time. Keep them short and fun!
3. Team StrategiesTeam strategies are the least important component of a youth basketball practice.
And in my opinion, they are not necessary for players under the age of 10.
The team strategies section of training includes:
- Offense
- Defense
- Set Plays
- Special Situations
If you decide to use this section of practice with your team, dedicate only a small amount of time to it.
Too many coaches steal practice time from skill development and spend half of practice helping athletes memorize set plays.
Remember that we want to teach our players how to play basketball, not give them a couple of spots on the floor they have to run to each possession.
So, I’m not opposed to teaching team strategies… I’m just opposed to spending half of your valuable practice time on it.
Only practice team strategy for the recommended amount of time, or less.
4. Scrimmages / Small Sided GamesScrimmages and small-sided games are very important to include in every basketball practice plan.
What’s the point in your players learning how to do a crossover with great technique if they don’t understand when to use it in a game?
Technique is important, of course… but allowing kids to practice when to use it is just as important.
This doesn’t mean letting them loose in a 5-on-5 game every practice…
Most of the game-play in a youth practice should be “small-sided”.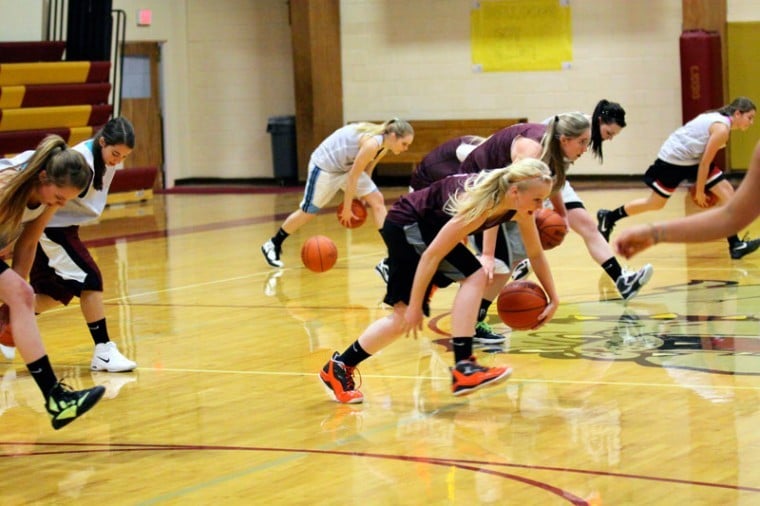
Small-Sided Games (SSG’s) have fewer participants on each team than a normal game. (1v1, 2v1, 3v3, etc.)
There are many benefits to using small-sided games with your players:
- More Touches
- More Space to Practice Moves
- More Opportunities to Score Points
- and many more
Small-sided games result in the players developing quicker and having a lot more fun!
If you have more than one ring and basketball available, play multiple small-sided games!
Another thing I love to do in scrimmages or small-sided games is incorporate rules to work on different skills.
For example, one of my favorite rules is the “no dribble” rule, which forces kids to read the play and make cuts to get open.
Without this rule, you’ll find it’s common for a youth player to take 5 or 6 dribbles with their head down before throwing a wild hook shot at the ring while 3 of their teammates stand around wide open.
5. Cool DownThe cool down section of your training should consist of a couple of minutes of slow jogging and walking up and down the court and then a few minutes of static stretching.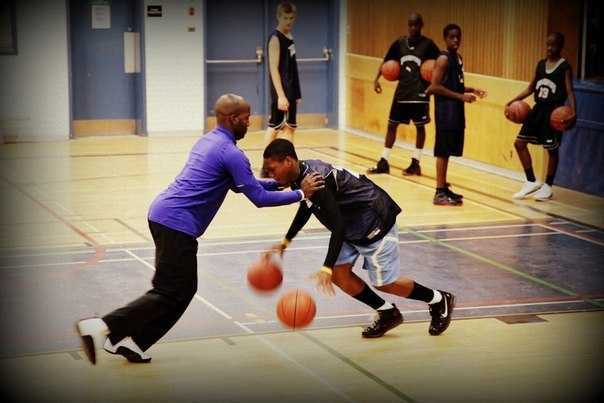
This allows the body to decrease in temperature and begin to flush out the waste products (lactic acid), amongst other things.
The stretching part of the cool down is a great time to talk to the players. We might talk about an upcoming game/tournament or how we felt practice went.
Recommended Practice Plan StructureNow that you understand each section of practice, let’s work out how much time during practice should be dedicated to each section.
The first thing you’ll need to decide is if you’ll be implementing any team concepts like offenses, defenses, or set plays. If so, I still recommend only spending the listed amount of time on it.
If not, I recommend adding the extra minutes to skill work.
The following is how I generally divide up the minutes depending on the length of practice time you have.
60 Minutes
Dynamic Warm-Up/Body Movement – 10 minutes
Skill Work – 25 minutes
Team Strategy – 10 minutes
Scrimmage/SSG – 10 minutes
Cool Down – 5 minutes
90 Minutes
Dynamic Warm-Up/Body Movement – 10 minutes
Skill Work – 45 minutes
Team Strategy – 15 minutes
Scrimmage/SSG – 15 minutes
Cool Down – 5 minutes
120 Minutes
Dynamic Warm-Up/Body Movement – 10 minutes
Skill Work – 60 minutes
Team Strategy – 20 minutes
Scrimmage/SSG – 20 minutes
Cool Down – 5 minutes
This structure combines the technical learning of the skill with the practical application of the skill.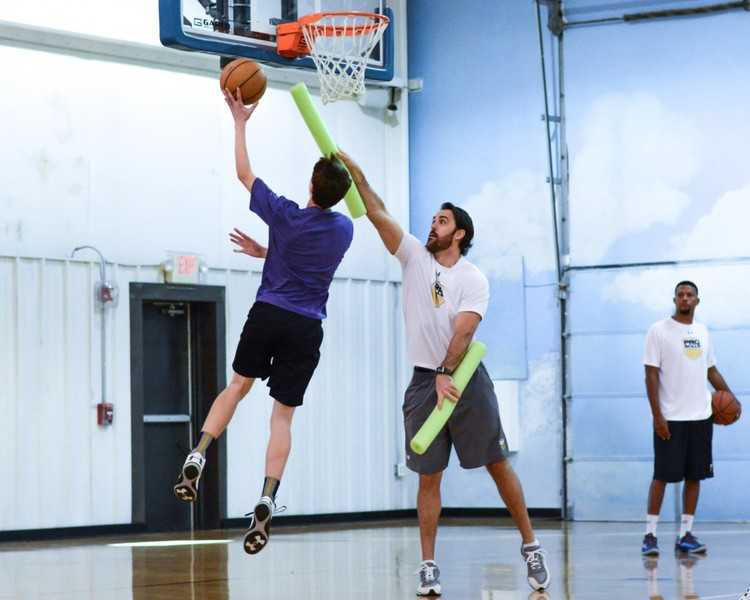
Too many practices overlook teaching players when to use skills.
3 Sample Basketball Practice Plans
7 – 10 Years Old (60 Minute Practice)
Disclaimer: This training session has been designed for a half-court, as most teams this young only have access to half the court to train on.
Practice Goal: Bringing the ball up the court against pressure.
Warm-Up (0-10 Minutes)Dynamic Warm-UpRun each of the following to half-court and back:
1. High Knees – Bring knees to waist height while running.
2. Butt Flicks – Flick the rear with your heels as you run.
3. Grape Vine – Face side-on, step with the front leg, alternate stepping in front and behind with the rear leg.
4. High Jumps, Quiet Landing – Run forward, plant with two feet, jump as high as you can, land as quietly and softly as possible.
5. Zig Zag – Run to the right diagonal for a few steps, plant your outside foot, push off and cut to the left diagonal.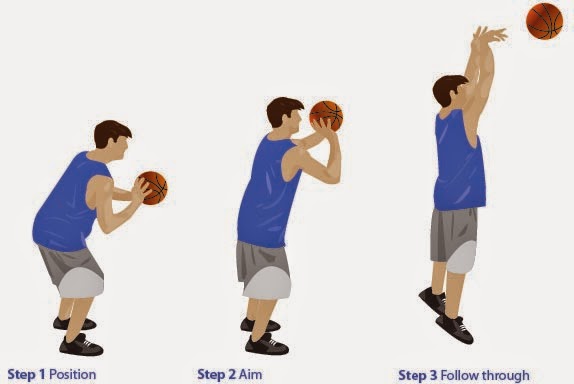 Repeat.
Dynamic StretchingPerform through to half-court, jog back to the baseline.
1. Lunges – Take a large step forward, keep the back upright and the hips straight, slowly drop down until your rear knee is just above the floor.
2. Squats – Take a few steps, stop with feet wider than shoulder-width apart. Keep the back straight, stick out the rear end, and squat down until the thighs are parallel with the ground.
3. In to Out – Take a few steps, lift right knee to waist height. Keep the hips pointing forward, and bring the knee from pointing forwards, to pointing sideways. Drop the foot back down, take a few steps, and repeat with the left knee.
4. Toe Grab – Take a few steps, put your right heel on the ground out in front of you, keeping your right leg straight. Bend down and grab onto your toe. Hold for two seconds, stand up, and repeat after a few steps with your left foot.
Run ThroughsRun each to half court and back.
1. 50% Speed
2. 70% Speed
3. 80% Speed
4. 90% Speed
5. 95% Speed
Skill Work (10 to 35 minutes)
Retreat Dribble Drill (10 to 20 Minutes)Setup:
Pair the players up (similar skill level). One basketball between two players. Spread out around the court.
Instructions:
- Have the player with the ball jog and dribble in any direction. The other player acts as the defender.
- At any moment, have the defensive player sprint and stand directly in front of the offensive player.
- Upon this cue, the offensive player shall plant their front foot, push off it hard, and hop back to create space!
- Have the offensive player change the direction they’re dribbling in.
- The defensive player chases the offensive player, and steps in front of them again.
- After 30-45 seconds, have the players switch jobs.
Coaching Points:
The defensive player isn’t trying to steal the ball, or truly pressure the offensive player! They are only there to help show the offensive player when they should be making this move. They are helping the offensive player learn.
1v1 Dribbling Drill (20 to 35 minutes)Setup:
Pair each player with a similarly skilled teammate. Split the court into two playing with an imaginary line between the baskets (otherwise known as the split line, use cones to mark if you wish).
Instructions:
- Starting on the baseline, the offensive player must dribble the ball across the half-court line.
- If the defensive player steals the ball, they must give it back to the offensive player.
- If the offensive player loses control of the ball or goes out of bounds, they must retrieve it and start again where they last had control of the ball.
Team Strategy (35 to 45 minutes)
Three Options:
- 1-4 Press Break
- Man-to-Man Defense
- 5-Out Motion
Scrimmage/SSG (45 to 55 minutes)
3-on-3 “Touchdown”
Setup:
The offense starts with the ball, out-of-bounds on the baseline. They must inbound the ball, and dribble and pass it to half court.
Instructions:
- If the defense gets the ball, the game stops, and they become the offense.
- The game begins again out-of-bounds on the baseline.
- Once the offense get the ball to half court, they must place it on the ground, on the half-court line.
- Another offensive player (who didn’t place the ball on the ground) must sprint to retrieve the ball. They then turn around and look to score on the basket.
- Once the ball has been placed, the defensive team must all turn around and touch the baseline with their hand.
Coaching Points:
As coach, give limited feedback during the game! If you see a certain mistake three times in a row, give advice quickly, but spend most of your time observing. How they perform in this small-sided game should inform how you design your next training session!
Cool Down (55 to 60 minutes)
- Jog to the other end of the court and back.
- Walk to the other end of the court and back.
- Sit down, and do some static stretches.
The cooldown stretching gives the coach some time to have a conversation with the players about training, and potentially some quick information about the next opponent.
11 – 14 Years Old (90-Minute Practice)
Disclaimer: This training session has been designed for a full-court.
Pre-Training Talk (-15 to -10 minutes)
Before your time on the court begins, share a very clear goal for training with the players. Each training session should have a purpose. For a 90-minute training session, there is enough time to practice two “goals for training”.
Example goals:
- Passing Decision-Making
- Transition Defence
Foam Rolling (-10 to 0 minutes)
Once kids are 11 or older, I highly recommend that each player owns a foam roller for use before training.
Teenage years are renowned for growing pains, and as coaches, we can help our players by dedicating the last 10 minutes before entering the court to foam rolling.
They’re very cheap, and if a player forgets theirs, they can use their own basketball.
Roll each area for 20 seconds each:
- Glutes
- Between the back and the outside of the upper leg.
- Outside of the upper leg.
- Between the front and the outside of the upper leg.
- Front of the upper leg.
- Inside of the upper leg.
- Calf (lower leg)
Warm-Up (0 to 10 minutes)
Dynamic Warm-UpRun each of the following to half-court and back:
1. High Knees – Bring knees to waist height while running.
2. Butt Flicks – Flick the rear with your heels as you run.
3. Grape Vine – Face side-on, step with the front leg, alternate stepping in front and behind with the rear leg.
4. High Jumps, Quiet Landing – Run forward, plant with two feet, jump as high as you can, land as quietly and softly as possible.
5. Zig Zag – Run to the right diagonal for a few steps, plant your outside foot, push off and cut to the left diagonal. Repeat.
Dynamic StretchingPerform through to half-court, jog back to the baseline.
1. Lunges – Take a large step forward, keep the back upright and the hips straight, slowly drop down until your rear knee is just above the floor.
2. Squats – Take a few steps, stop with feet wider than shoulder-width apart. Keep the back straight, stick out the rear end, and squat down until the thighs are parallel with the ground.
3. In to Out – Take a few steps, lift right knee to waist height. Keep the hips pointing forward, and bring the knee from pointing forwards, to pointing sideways. Drop the foot back down, take a few steps, and repeat with the left knee.
4. Toe Grab – Take a few steps, put your right heel on the ground out in front of you, keeping your right leg straight. Bend down and grab onto your toe. Hold for two seconds, stand up, and repeat after a few steps with your left foot.
Run ThroughsRun each to half court and back.
1. 50% Speed
2. 70% Speed
3. 80% Speed
4. 90% Speed
5. 95% Speed
Skill Work (10 to 55 minutes)
3v2 Around the Key (10 to 20 minutes)
Setup:
One offensive player on each block (side of the keyway), one starts behind the FT line. One defensive player starts under the front of the basket, and the other starts two steps directly in front of him.
Instructions:
- Coach passes the ball to any of the offensive players.
- A game is played until the offense scores or the defense has the ball (or the ball goes out of bounds)
- Everybody chooses a new place to start, and the game begins again when the coach passes the ball.
Coaching Points:
When you’re coaching this drill, make sure to focus upon the decision making of their passing. We have clearly told the players what the goals of training are, and we must coach to that. If you give all kinds of different advice to the players, it’ll be difficult for them to take it all in.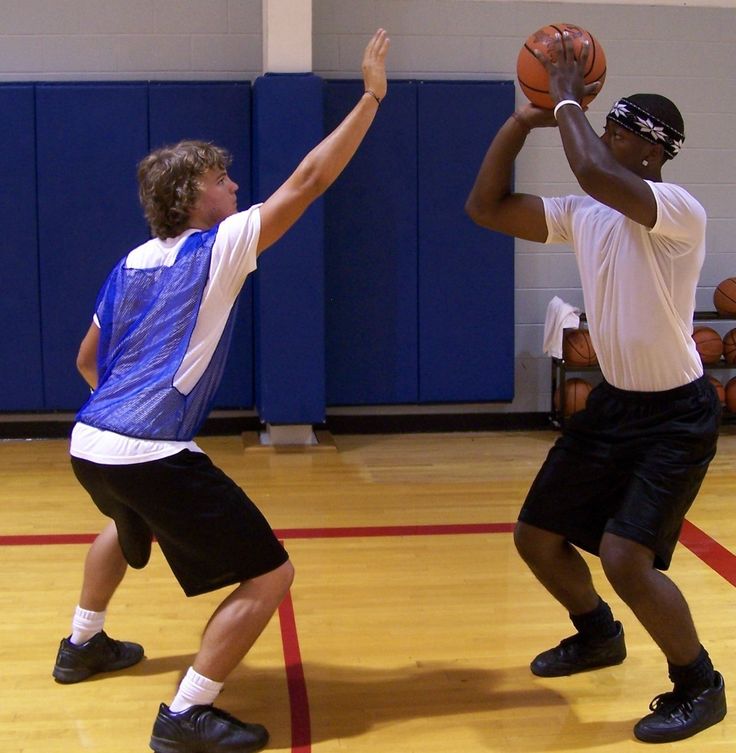
‘Call Names’ 3v3 (20 to 35 minutes)
Setup:
Depending on numbers and space, play a 3v3 game in the full court, or two 3v3 games in each half-court.
This is a normal 3v3 game, with an extra rule to force the players to make passing decisions while they’re dribbling, not after they’ve finished dribbling.
Rule:
The ball-handler must call the name of the teammate they’re passing the ball to either (a) before passing the ball, or (b) before they pick up their dribble.
If a player passes the ball or picks up their dribble before calling the name of a teammate to pass to, it is a turnover!
1v1 Chase Down (35 to 45 minutes)
Setup:
Pair the players up into similar speed levels. The offense starts a few steps onto the court, either on the left or right side of the court. The defense starts a step or two behind.
Depending on the speed of the defensive player and the speed dribbling ability of the offensive player, you’ll need to adjust where they begin.
Instructions:
- The coach blows his whistle, and the offense begins speed dribbling towards the basket at the opposite end.
- The defense has to sprint and get in front of the offensive player.
- Play until either the offense scores or the defense has the ball (or the ball goes about of bounds).
Balance the Floor 3v3 (45 to 55 minutes)
Rules:
If you’re below the free-throw line when a shot is attempted, go for the rebound!
If you’re above the free-throw line when a shot is attempted, sprint back onto safety!
When either team has the ball, it is a normal game of 3v3.
Instructions:
Once a shot is taken, the offensive players must either:
(b) Sprint back towards the half-court line if they’re above the FT line
(a) Sprint to the basket and attempt to make a rebound if they’re below the FT line.
If the defense gets the ball, the drill stops, and everybody freezes. If the offense gets the ball, they may shoot it again and continue to play.
Once the defense gets the ball (and everybody freezes), the coach can observe how the offense (who have just become defense) have ‘balanced the floor’.
Team Strategy (55 to 70 minutes)
Three Options:
- 4-Out 1-In Motion
- Run and Jump Defense
- Princeton Offense
Scrimmage/SSG (70 to 85 minutes)
Play a full-court game, with as many players as you have!
Ideally 5v5, but 4v4 or 3v3 would work too.
To help the game express the goals of training that we have been working on (passing decision-making, transition defense), we will add an extra rule.
Rule: If you shoot the ball, you must touch the baseline before rejoining the play!
This rule puts more pressure on defensive transition than a normal game, and therefore they’ll have to do a better job to be able to prevent an easy fast-break basket for the opponent.
The momentary 5v4 advantage for the offense also allows more opportunities to display their passing decision-making.
Cool Down (85-90 minutes)
- Jog to the other end of the court and back.
- Walk to the other end of the court and back.
- Sit down, and do some static stretches.
The cooldown stretching gives the coach some time to have a conversation with the players about training, and potentially some quick information about the next opponent.
15 – 18 Years Old (120-Minute Practice)
Disclaimer: This training session has been designed for a full-court.
Pre-Training Talk (-15 to -10 minutes)
Before your time on the court begins, share a very clear goal for practice with the players. Each basketball practice should have a purpose. For a 120-minute session, there is enough time to practice three ‘goals for training’.
Example Goals:
- 1v1 Finishing
- Full Court Man to Man
- Defensive Rebounding
Foam Rolling (-10 to 0 minutes)
Once kids are 11 or older, I highly recommend that each player owns a foam roller for use before training.
Teenage years are renowned for growing pains, and as coaches, we can help our players by dedicating the last 10 minutes before entering the court to foam rolling.
They’re very cheap, and if a player forgets theirs, they can use their own basketball.
Roll each area for 20 seconds each:
- Glutes
- Between the back and the outside of the upper leg.
- Outside of the upper leg.
- Between the front and the outside of the upper leg.
- Front of the upper leg.
- Inside of the upper leg.
- Calf (lower leg)
Warm-Up (0 to 10 minutes)
Dynamic Warm-UpRun each of the following to half-court and back:
1. High Knees – Bring knees to waist height while running.
2. Butt Flicks – Flick the rear with your heels as you run.
3. Grape Vine – Face side-on, step with the front leg, alternate stepping in front and behind with the rear leg.
4. High Jumps, Quiet Landing – Run forward, plant with two feet, jump as high as you can, land as quietly and softly as possible.
5. Zig Zag – Run to the right diagonal for a few steps, plant your outside foot, push off and cut to the left diagonal. Repeat.
Dynamic StretchingPerform through to half-court, jog back to the baseline.
1. Lunges – Take a large step forward, keep the back upright and the hips straight, slowly drop down until your rear knee is just above the floor.
2. Squats – Take a few steps, stop with feet wider than shoulder-width apart. Keep the back straight, stick out the rear end, and squat down until the thighs are parallel with the ground.
3. In to Out – Take a few steps, lift right knee to waist height. Keep the hips pointing forward, and bring the knee from pointing forwards, to pointing sideways. Drop the foot back down, take a few steps, and repeat with the left knee.
4. Toe Grab – Take a few steps, put your right heel on the ground out in front of you, keeping your right leg straight. Bend down and grab onto your toe. Hold for two seconds, stand up, and repeat after a few steps with your left foot.![]()
Run ThroughsRun each to half court and back.
1. 50% Speed
2. 70% Speed
3. 80% Speed
4. 90% Speed
5. 95% Speed
Skill Work (10 to 70 minutes)
‘Read the Help’ (10 to 20 minutes)
Setup:
Spread the offensive players out to both ends of the court. Each player should have a basketball. To work on right-handed finishing, line the offensive players up, outside the 3pt line, in line with the right-hand side of the key-way. One player begins on the left block.
Instructions:
- The first player in line should stand in triple threat position. To quickly begin their dribble, they throw the ball down towards their right-hand side, and drive to the basket.
- The extra player on the left block will give one of three different signals, to inform the driving player which finish they should attempt.
- If the player on the left block runs and stands directly underneath the basket, the offensive player should make a powerful move, directly to the basket, and finish as high as possible.
![]()
- If the player on the left block runs and stands between the driver and the basket, outside of the charge circle), the driver should shoot a short ‘floater’ over the top of the defender’s head, without running into them (if your court has no charge circle, have them stand a 4-5 feet in front of the basket).
- If the player on the left block runs across the keyway to the right block, the driver should make a ‘change of direction’ move with their footwork, and finish on the left-hand side of the basket. An example of this type of move would be a ‘euro-step’ or a ‘pro-hop’.
1v1 ‘Ball on Back’ (20 to 30 minutes)
Setup:
The defender starts by standing on the 3pt line, facing the basket. The offensive player stands behind the defender and places the ball upon the defenders back.
Instructions:
- The drill begins when the offensive player takes the ball off the defensive player’s back.
- Play until either the offensive player scores or the defensive player gets the ball.
- The defender facing away provides the offensive player an advantage, which they can take with a fast, decisive move to the basket!
2v2 ‘Rugby’ (30 to 45 minutes)
Setup:
The ball starts out of bounds on the baseline.
Instructions:
- The offensive inbounder must pass the ball into the court to his teammate.
- After this first pass, the offensive team may only pass backwards.
- The goal is to get the ball into the key-way at the other end of the court.
- The defensive team must work on having a player closely guarding the ball. His teammate should be behind the line of the ball, narrowing the space that the offensive player has to dribble.
3v3 ‘Hockey’ (45 to 60 minutes)
Setup:
This is a game of 3v3 in the full court, with one extra rule which allows the defense to apply more full-court pressure.
Rule:
Borrowing from Ice Hockey’s ‘off-side’ rule, the offensive ball-handler must be the first offensive player to cross the half-court line.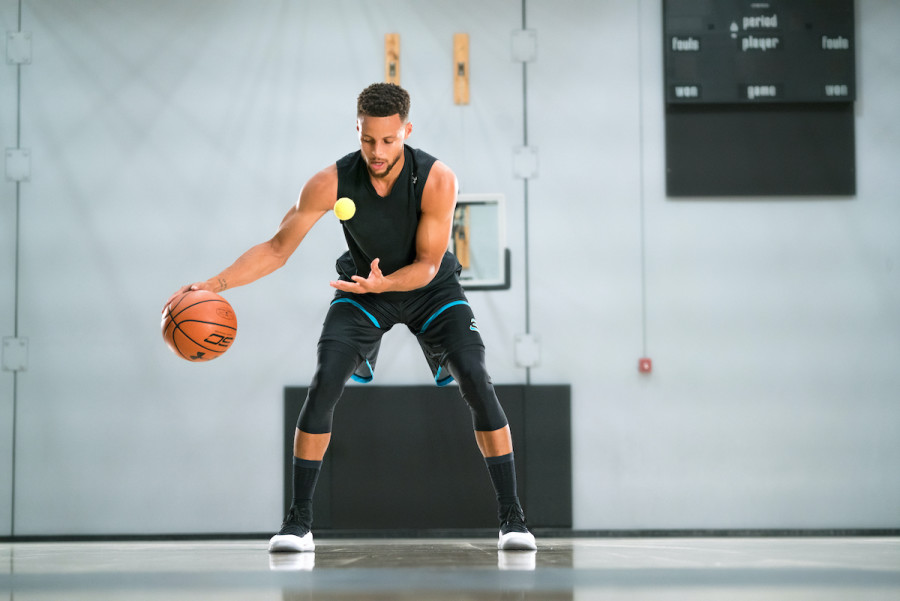 Before the ball is dribbled across the half-court line, no other offensive player may be in the front half of the court.
This prevents offensive players from sprinting ahead for easy long passes, and allows the defense to practice their full-court defense more effectively.
Find, Hit, Get (60 to 70 minutes)
Setup:
Two players start on the top corners of the keyway (offence), and another two players start on the blocks (defence).
Instructions:
- Coach shoots the ball from the foul-line.
- Once the ball is shot, all 4 players can move to rebound.
- Upon the shot, the two defensive players yell:
“FIND!”, and run towards the offensive players.
“HIT!”, and make contact with the offensive players.
“GET!”, and attempt to rebound the ball. - Whichever team gets the ball becomes offence, and attempt to score on the basket the ball was just shot upon.
- Players rotate positions after either team has scored.

Team Strategy (70 to 90 minutes)
By the time your players are 15 or older, they’ll need a couple of set plays to score with.
If you do not already have a few plays up your sleeve, check out this link below.
28 Basketball Plays to Dominate Any Defense
When practicing set plays, make sure to use all the players you have available!
5v0 might make your plays look great, but they won’t look great once you get to the game!
Practice your plays with defenders.
To begin with, have them not steal the ball or try and blow up your play, but make sure you build towards practicing your plays against a live defence!
If you only have 8 players at training, 3 defenders is better than 0 defenders!
Scrimmage/SSG (90 to 115 minutes)
With 3 different focuses for this training session, we can use small-sided games or 5v5 scrimmages to apply what we have learned to a game!
3v3 Small-Sided Game (90 to 100 minutes)
To emphasize finishing on the basket, we will change the scoring system!
Play either until a certain score, or for an amount of time.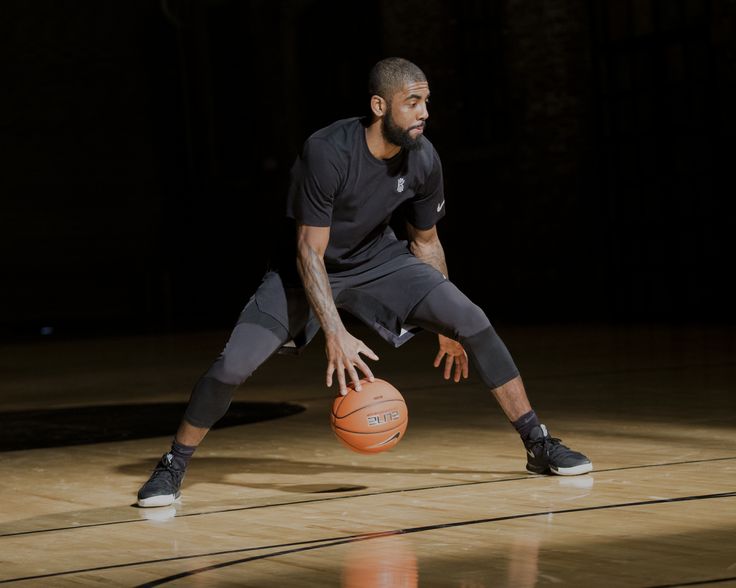
Scoring System:
- Score inside the bottom half of the keyway= 3 points.
- Score inside the top half of the keyway= 2 points.
- Score inside the 3pt line, but outside of the keyway= 1 point.
- 3pt Basket = 0 points, but the opponent’s score goes back to 0.
Making mid-range baskets only worth 1 point will encourage players to keep driving, and not settle for pull-up jump-shots.
Creating a large consequence for the defense giving up a made 3pt shot will cause them to close out harder, creating more driving opportunities for the offense.
5v5 Scrimmage (100 to 115 minutes)
To focus on full-court defense and rebounding, we introduce two simple rules to influence how the game is played.
Rule 1:
Once the defense first gets the ball (on a made basket, a rebound, or a steal), the player who has the ball must place it upon the ground. Another teammate shall run across and pick up the ball, and the game shall resume. The new defense cannot defend the ball until it has been picked up by the other team. This gives the defense a chance to set up their full-court defense, on every change of possession.
Rule 2:
If the offensive team gets an offensive rebound, they get a “power-play”. They have a free chance to score, without any threat of losing the ball. Once the defense has the ball (on a rebound or a steal), the game stops, and the offense get the ball back.
Coaching Points:
We recommend that you play mini-games, and coach in between each game. Play until either team has scored two baskets. After the mini-game, bring the teams in, and coach them for 30-45 seconds. Make substitutions, and send them back out onto the court!
Coach in dot-points, not paragraphs.
Cool Down (115 – 120 Minutes)
- Jog to the other end of the court and back.
- Walk to the other end of the court and back.
- Sit down, and do some static stretches.
The cooldown stretching gives the coach some time to have a conversation with the players about training, and potentially some quick information about the next opponent.
Conclusion:The biggest thing I want you to take away from this article is that you need a basketball practice plan for every practice.
A planned practice is more efficient, your players will improve quicker, and you’ll be a far better coach.
USA Basketball - Coach's Guide: Running an Efficient Practice
All the best coaches, from youth leagues to the NBA, will tell you the best way to run a practice is to make sure it is well organized. Keep it moving so the players are engaged and on the go.
Let’s say your typical practice session lasts one hour. Take a few moments to break down the hour into 5 or 10 minutes blocks. You might spend the first 5 minutes with a run around the gym. Then the next 5 minutes might be devoted to calisthenics so players are loosened up properly.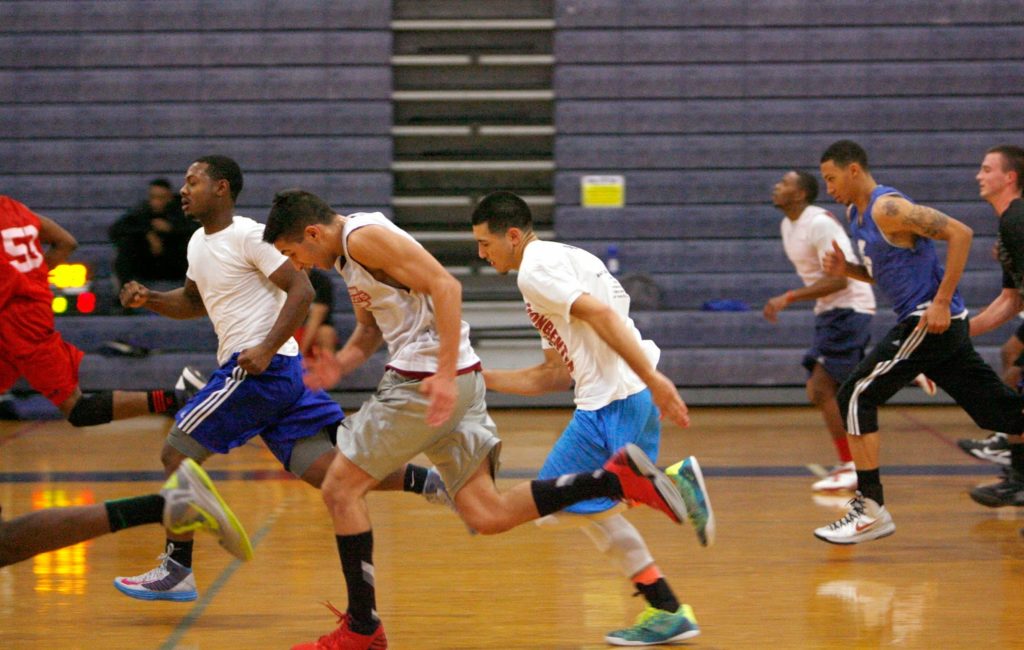 The next 10 minutes might be a two-line lay up drill and so forth.
Start and stop each block of time with a quick whistle. Young players will like it because they’ll be constantly moving. If you organize your practice well, you can accomplish a lot more than you could ever imagine.
If you do have to stop practice to teach a fundamental or demonstrate a play, that’s fine. But again, put yourself on the clock. Make your point, keep it short, and keep the action moving! As a reward, if you want to let the team scrimmage, do that at the end of practice — and be sure everyone gets equal playing time.
The ideal time to reinforce your rapport with your players is during drills. Build their self-confidence with lots of praise. Let them know you see them working hard. Especially with those youngsters who may be struggling. It’s up to you to build them up, to let them know that they’re making progress. Remember — you’re not just the coach for the better players — you’re the coach for the entire team.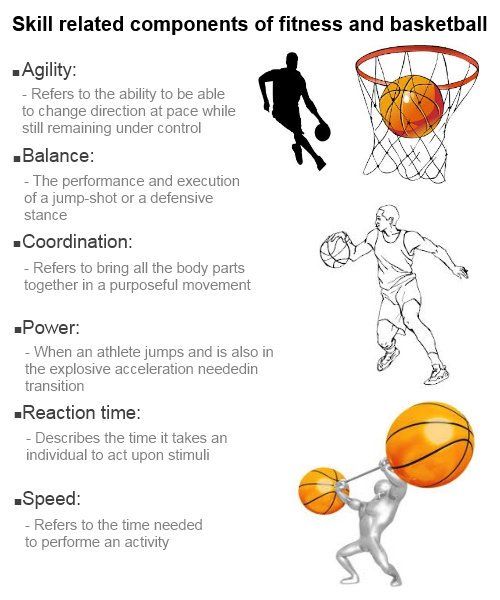 Who knows? One of those players struggling at the beginning might just grow into a star.
DRILLS
REMINDER: One way to keep practice interesting and fun
is to limit each drill to no more than 10 minutes.SINGLE LINE PASSING
Set up two single file lines facing one another. A player from the front of one line passes the ball to the player at the front of the other line and runs to the back of that line.
KING OF THE CIRCLE (DOC’s FAVORITE)
Place two players who are both dribbling basketballs in the center circle at mid court. Both players have to keep dribbling the ball while attempting to steal their opponent's ball. To make it even more interesting, blow a whistle every 10 or 15 seconds and have the players change the hand they are dribbling with.
SIDE TO SIDE SLIDE
Set up two single file lines, one to the right of the free-throw line, the other to the left. The first player in line assumes the defensive position. The next player dribbles down the court in a zig-zag — three dribbles to the right using the right hand, three dribbles to the left using the crossover to go from the right hand to the left hand and so on down the court. The defensive player slides from side to side staying in front of the dribbler.
TEAM SHOOTING GAME
Divide the team into two groups, one at either end of the court. Both teams start 10 to 15 feet from the right or left side of the basket. The first player in line takes a shot. If he misses, the next player shoots from the same spot. The entire group moves to the next spot as soon as somebody makes a shot from the first position. The winning team is the group that can hit all 10 shots — corner, between the corner and free-throw line, free-throw, opposite space between the free-throw line and corner and opposite corner — and back before the other team.
10 exercises for developing attacking skills of basketball players
Hello, dear visitors of basketball-training.org.ua! Today I want to tell you about a few basic exercises, by regularly performing which you can reach the next level, becoming a really good attacking player.
Yes, many articles have already been written about this and many videos have been shot. Yes, we all know a few dozen exercises that promise to make you at least the next Michael Jordan. I will not reinvent the wheel, but will tell you about a series of exercises that just a year ago helped me a lot to improve in the attacking aspects of the game. Let's start the story.
Basketball drills
Mikan Drill
This drill gets its name from the first really big guy in the NBA, George Mikan. Begin to perform the exercise, located on the right side of the basketball basket (a meter and a half from the ring). Take two steps to the left, parallel to the endline, and throw a half hook on the other side of the hoop using your left hand. Without letting the ball fall to the ground, pick it up and take 2 steps to the right (again parallel to the base line) and again throw the ball into the ring with a half hook using your right hand. Try to get into the rhythm and hit 10-20 in a row.
[youtube]CmFOj0nhUN8[/youtube]
This exercise will teach you how to attack with a weak hand and turn it into a formidable weapon. Personally, while doing this exercise, already on the second day I began to complete the passages with my left hand. And after a couple of weeks, the effectiveness of the attacks doubled: now the defender had to hold both sides, and I could always attack with the hand farthest from him.
Superman Drill
This exercise is very similar to the previous one. Position yourself almost on the border of the three-second zone (you always want to call it a “trapeze”, but with the change in the rules of basketball, it has lost its usual shape). We perform a throw on the ring with one single difference: do not try to hit the ring! On the contrary, raise the trajectory higher so that the ball, bouncing off the backboard, falls on the other side of the ring. This is where you need to catch him, not allowing him to fall to the floor. Important: try to take no more than three steps to overcome the distance from one side of the ring to the other. Follow the rhythm: let the entire exercise be performed in the same rhythm. Do 10 to 20 repetitions of this exercise.
[youtube]T2Jo-2ME-z4[/youtube]
Beat the Pro
Imagine that you are playing 1 on 1 against your favorite player. You just need to beat him by being the first to score 21 points. Perform game throws (with deviation, after strides, after crossovers and sudden stops). Be clear about your opponent, how he defends against you, how he tries to cover your every throw, how he waits for the slightest mistake in order to intercept. For each roll you make, you get 1 point. For each miss, the opponent receives 2 points. When you reach 20 points (if you haven't lost before) - you need to make a "buzzer beater" and it needs to be scored. How will you do it: with an incredible deflection after a fabulous dribbling or just hitting the ball with 9meters. Try to beat the best players in your imagination. Important: be realistic when playing against Shaquille, it is foolish to push him with your back or try to shoot the ball while in close contact. Also, it would be wrong to try to overtake Rose or Jordan. In general: adequately evaluate the opponent and try to complicate your life as much as possible.
Shoot the Shot
Do you remember the good old game "Around the World"? Sometimes it is called "Points", but that's not the point. Now we will try to add a hit percentage to this game. Also, we will add a couple of new points to it, the so-called "elbow spot".
In order to advance to the next point, you must make at least 3 out of 5 rolls. Naturally, if the level of your game (and especially your sniping skills) allows you to regularly shoot with a percentage higher than 60%, then increase the number of goals scored to 4 out of 5 from each point. Or up to 5 out of 5 from medium and 4 out of 5 from long range. Total: you have 18 points, 90 throws of which at least 54 must reach the goal. Challenge accepted?
Ball slaps and squeeze
Throw the ball up as if it had bounced off the ring after a bad throw. Jump up, grab the rebound and squeeze the ball as hard as you can with your hands. Imagine that you had difficulty getting this rebound and now they are trying to knock it out from you. Immediately after the rebound, rotate the ball around the body (at different heights): around the head, back, knees and calves. Repeat this exercise 10-20 times.
Figure 8's - with dribble and without dribble
Eight, the famous eight is back, now with dribbling. Do you remember how Petya Maravich taught us how to handle the ball? So, now we are doing the same thing, but using dribbling. For those who find it difficult to perform such dribbling - try to perform the exercise without it.
[youtube]DYAQoOxuskg[/youtube]
Quick hands
This is a cool exercise that is sure to be performed at every training session for young basketball players. Starting position: one hand in front, the second - behind, the ball is between the legs. After releasing the ball, you need to change the location of the hands: if the right one was in front and the left one was behind, then now the ball needs to be grabbed with the right one from behind, and the left one in front. Diversify the exercise: both hands in front, the ball between the legs. We release the ball and catch it with our hands, but from behind. Important: regular performance of this exercise will allow you to develop hand speed, which is very important for performing high-quality and fast feints.
How to do it: 30 seconds first option, 30 seconds second option. Write down how many times you managed to do the first time, and then compare with the results after a week.
[youtube]TGh81tj6zbU[/youtube]
Tom-Tom dribble
This movement is also familiar to many of us. Stand with your legs slightly apart so that you can easily transfer the ball between them. We start with the right hand. We transfer the ball in front of us from the right hand to the left; then from the left hand, transfer under the foot to the right hand. Now with the right hand we transfer the ball behind the back - it turns out to be in the left hand and we send it back (also behind the back) to the right. This is 1 repetition. Repeat 10 times and change hands (i.e. mirror).
Drum dribble
The point is to learn how to quickly and comfortably change the pace of dribbling and its pitch. For example, right after a screen or a run, you may find yourself kicking the ball out from behind (even though you already think your opponent is offside). The most elementary countermeasure is to sharply reduce the height of the dribbling. So, the exercise is that you need to knock the ball on the floor alternately with your right and left hand. Start from a normal static position (legs and back straight) and go down, increasing the intensity of the knocks on the floor. As soon as there is a space between your hands and the floor, a little more than a ball, begin to rise up. Make several series (for example, 5). For advanced players, try this exercise without looking at the ball, or by hitting it with 1 finger of your right hand and 1 finger of your left hand.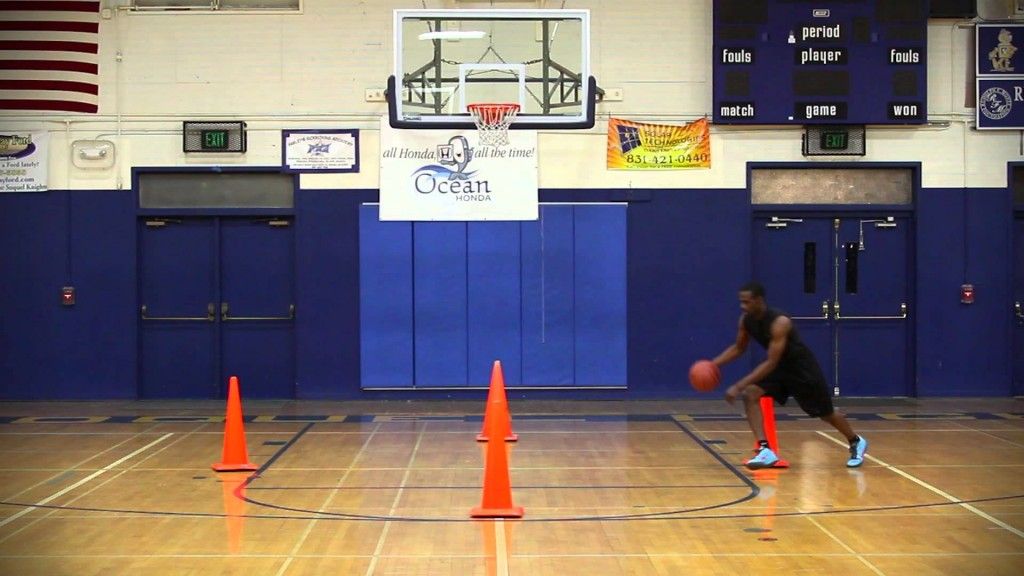
Summary
Here is a set of exercises I suggest you do every time you enter the court. Believe me, the results will shock you! Of course, if you are a professional player, then these exercises will be familiar to you and will be given easily. However, who, if not you, should know about their usefulness. Join our VKontakte group: https://vk.com/uroki_basketbola - there are a lot of useful and interesting things.
And this is the end of the article, I wish you successful training and look forward to visiting this site!
Exercises for basketball players, basketball trainings in the gym and on the court
Every year we have the brightest event in the basketball world - the playoffs of the United Basketball League. We invite you to familiarize yourself with the training of the world's top basketball players!
Athletes are already actively preparing for the upcoming matches and getting into better shape. What do you need to know, how exactly the basketball players of the International United League train?
To do this, we turned to Evgeny Burin, who previously worked with the Russian men's basketball team, and now is responsible for the general physical training of athletes of the Nizhny Novgorod basketball club.
ADIDAS cycle - Self-improvement. Basketball
The program of the video cycle consists of 10 lessons to improve the various qualities of basketball players. As part of the project, Evgeny Burin reveals his professional secrets.
Lesson 1. Back Exercises
This is the first workout in the adidas Self Improvement Basketball cycle. As part of the project, Evgeny Burin, physical training coach of the Nizhny Novgorod basketball club, reveals his professional secrets.
Without a strong back one cannot imagine a healthy person, let alone an athlete. This is all the more important for a basketball player who has to jump and land many times in the game, push and push through the defense. In this video, Evgeny Burin gives exercises that help professional basketball players to have a strong back.
Lesson 2. Legs
This is the second workout in the adidas Self Improvement Basketball cycle.
Basketball players need strong legs not only to score balls or just jump above everyone else. Legs - this is the main thing due to which the player defends himself and is on the court at the right time and in the right place. Therefore, professionals never work only on the jump and are not limited to squats with a barbell. Evgeny Burin shows how to properly swing the legs of a basketball player.
Lesson 3. Chest muscles
There are a great many exercises for developing chest muscles. Which of them can be used so as not to get the opposite effect, enslavement and loss of mobility, you will find in this lesson. Evgeny Burin gives special exercises that professional basketball players use.
Find the right chest workout for you, just like Euroleague basketball players do.
According to Evgeny Burin, push-ups are one of the most effective exercises for chest muscles. To complicate the exercise, Eugene suggests using weights (dumbbells) and performing various types of push-ups with them: with lifting and with rotation.
To activate different muscle groups, you can take a different position relative to the fitball - it can be under the lumbar part of the back or in the area of the shoulder blades.
Lesson 4. Shoulders, arms. Balance cushion
It may seem to some that it is very important for a basketball player to have inflated arms and wide shoulders. But even here you can not concentrate on one thing. Trainer Evgeny Burin tells how, while working on these muscles, at the same time develop the whole body.
Lesson 5. Complex exercises
What can a basketball player take from weightlifting? Yes, at least the classic exercises - a jerk and a push. Evgeny Burin tells how to use them to the maximum benefit for the player.
Lesson 6. Balance and coordination exercises
A basketball player must certainly have a strong and enduring body. But coordination of movements, the ability to land and correctly distribute forces during contact are also absolutely necessary qualities for a player. The trainer offers some simple but very effective exercises.
Exercises for VTB United League basketball players offered by Evgeny Burin seem familiar to you only at first glance:
I add the principle of unstable balance to my workouts. This helps to work out the muscles better. To create such conditions when performing exercises, we will use a fitball.
Lesson 7. Tricky Rubber Bands
Balance exercises are much more effective when you use resistance. Ordinary rubber expanders are a great help in the work of a fitness trainer.
Lesson 8. Ball out of play
Basketball players may use the ball for other than its intended purpose. With the help of the coach's advice, the most ordinary balls turn into effective simulators.
Lesson 9. Speed endurance. Running exercises
In preparation for the 2007 European Championship, the Russian national basketball team did not run a single cross. Why would an athlete performing on a 28-meter long track run 5 or 10 kilometers in training? Evgeny Burin tells how to make running work really effective.
Lesson 10. Training principles
In the 10th final video Evgeny Burin gives the most important tips. How is work organized in the pre-season? How to distribute loads during the season? How to make sure that the work with the bar does not interfere with the game? How to use the exercises that you have learned from previous editions? You will find all the answers in this lesson.