7 Tips You Need to Get Great Basketball Photography
Sports photography is far from easy. Use these basketball photography tips, and you’ll be capturing incredible, fast-action images in no time!
Get Action-Packed Images with These 7 Basketball Photography Tips
Kim Fetrow’s primary focus is commercial photography, but she began photographing basketball when the coach at her daughters’ high school invited her to document the games. Kim’s husband was already running the scoreboard at basketball games, so the decision was easy. “At first, I didn’t realize how hard it would be,” admits Kim, “but I quickly learned to nail great shots at every game. Now I love sports photography!”
Read on to learn Kim’s tips and techniques…
Photographer Kim Fetrow stands beside 7’4″ varsity player Riley Sorn
#1: Gear
You can’t shoot sports without the right gear! I use two professional Nikon bodies (the D3s and D4s). The 50mm f/1.4 lens sits on my D3s and the 70-200mm f/2.8 lens is on my D4s. I use a Spider Dual SpiderPro holster to quickly switch between cameras—depending on where the action is on the basketball court.
The 70-200mm f/2.8 is my preferred lens, but it really isn’t long enough to get great photos of players on the other end of the basketball court. However, anything longer, and you risk some serious camera shake—not to mention the wear and tear on your body, as it is HEAVY!
Kim Fetrow
Camera Settings
I prefer manual mode. First, I use the lowest possible ISO to get both a fast-enough shutter speed to stop any motion blur and an f-stop that will still provide a sharp image. For me, this usually looks like ISO 4000-6400, 1/500th shutter speed, and an f-stop no smaller than f/3.2. (Wide open apertures make it hard to nail your focus.)
Next, I set my camera’s custom white balance using a white wall or piece of paper in the gym. This white balance setting changes from gym to gym. I prefer RAW so that I can easily adjust the images in Lightroom.
Kim Fetrow
Light & Shutter Speed
Due to recycle times of gym lights and influences from other light sources such as big TV displays, the frame-to-frame color temperature may not be consistent, even with a custom white balance. Watch for other things at play, like the yellow tones from the court and reflections off-colored jerseys and walls that may affect the skin tones and facial expressions in your basketball photography.
I also use a shutter speed that’s fast and allows me to shoot in burst mode. Burst mode lets me capture things like a player making a breakaway dunk. You don’t want to miss those shots!
Kim Fetrow
#2: Establish the Setting
Part of telling the story of basketball for sports photographers is capturing the fans, fanfare, and traditions of the event. Capture what is going on in the gym before the basketball game. This is a great way to take test shots to make sure your camera and photography settings are where they should be.
#3: Find the Best Camera Angles
For the tip-off I make sure I find a spot that sets center court in the center of my camera viewfinder. Depending on whether I am capturing the basketball game for one team or both determines where I’d be generally doing the rest of the basketball game.
If I’m working for one team, I place myself right outside of the key to try and capture the team on offense. (The refs don’t like you to stand right under the basket, plus it’s a great way to get pummeled). Thus, I change positions at every half.
If I’m capturing BOTH teams, I change every quarter in order to capture both teams on offense and defense equally.
Kim Fetrow
Shoot from Above
If there is a deck or a place for shooting the game from above, I’ll move around and capture the entire scene with a fisheye, or I’ll use a long lens to focus on a play from a new angle. But truthfully, my favorite place for photographing basketball is right under the basket!
Identify which is the player’s preferred hand for layups, and that will also help you to know where to be. It is very common to get a player’s arm covering their own facial expressions if you aren’t on the correct side of the basket.
Kim Fetrow
Body Position
I shoot two ways:
Standing, with my feet firmly planted, while I keep my arms close to support my camera lens and avoid camera shake. (A fast shutter speed helps, too!)
Sitting on the ground (with my back braced against a wall, when possible) or kneeling.
In both cases, I do whatever I can to keep my camera body and camera lens stable as I press the shutter button. Some professional sports photographers use a special chair that supports them while sitting. Just be aware and stay ready to jump out of the way at a moment’s notice—especially when using a longer camera lens for your photography. The basketball players in your camera lens are closer than they appear!
Kim Fetrow
#3: Shooting
Stay alert and follow the game! I equate shooting basketball with shooting ballet photography. Anticipation and timing are key!
I basically watch the entire basketball game through my camera viewfinder and focus on every shot. In other words, I don’t just set my camera on auto-focus then “spray and pray.” I actually hold the shutter button down half-way for every shot.
#ShootProofPRO Tip: Fear Not!
Don’t be surprised if half of your basketball photos are garbage. Mine still are—even after photographing high school basketball for years! Capturing players at the peak of the action, while still in-focus, with the ball, isn’t easy. A little motion blur is okay; but out-of-focus shots just aren’t. Don’t be afraid to liberally hit the delete key while culling!
Kim Fetrow
What makes a good shot? Should I shoot vertical or horizontal?
I think it’s easier to go vertical, as you are more likely to get the ball in your pictures as your hold the shutter button and more likely to get your shot in focus as you are less zoomed-in. However, coaches and sports agencies like balls in photos. I’ve found that horizontal images are preferred, as they like to share these images on T.V. screens, on social media, and in their news feeds—most of which require a horizontal or square image. Shoot both.
Get close and zoom in. A bunch of pictures showing the entire court aren’t very interesting. Try to freeze the action of one or two players up-close.
Kim Fetrow
Know the Game
One of the best ways to be successful photographing basketball is to know the game. Anticipate what is going to happen next. Keep your camera focused on the player all the way through shooting the ball. Some of the best defensive shots occur after the ball has left a player’s hands when they are getting mauled by the opposing team!
In my opinion, the more fast-paced and physical the basketball game, the better the action photos—but it also takes more skill to shoot.
Kim Fetrow
#4: Rules are Meant to be Broken
Move the subject around in your frame. Don’t center every shot!
Follow a player as they run past you down the court, and use a slow shutter speed. A slow shutter speed will help you create a little motion blur.
Use super-wide open angles and closeups to capture the details of the event. These detailed action shots help to tell a story.
After a while, every basketball game does start to feel the same, so get creative and mix it up!
Kim Fetrow
Be Respectful
Talk with the athletic director or head basketball coach before the game. You may need a press pass or permission from the high school to be down on the court shooting.
There are often other people photographing in the same areas you are, so be mindful not to walk in front of other people’s camera lens. They are there to do a job, too.
Ensure that you aren’t blocking the view of the fans in the stands.
Be respectful, but don’t be a wallflower. Don’t be afraid to get in the mix and get the action shots you need!
Kim Fetrow
#5: Plan Ahead
Be prepared for other photography requests while at the basketball games. Often, I’m asked for a quick team photo, a senior night with parents, or the younger kids’ team to share on social media.
Sometimes this requires additional photography gear or technique changes, such as:
a flash on your camera to compensate for horrid gym low light
higher f-stops to get more in focus
Use a wide-angle lens to get everyone in the frame
Kim Fetrow
These are some areas where you may be able to gain added revenue!
If the team has had a good season, it’s common to shoot events like “cutting down the nets” and team portraits with trophies. Be ready! Parents, players and coaches will want these celebratory shots.
Make sure you have a very wide, fast lens on one of your cameras for the action at these important end-of-season games. As soon as that buzzer goes off, I guarantee: the players (and sometimes the fans) will rush the court. Be prepared to rush out there with them to capture the excitement! (You might want to set the auto-focus and hold down the shutter!)
Kim Fetrow
#6: Share the Pictures
There are many platforms out there that allow you to successfully share pictures. I prefer ShootProof, as it allows me to set up different permissions for different uses.
Coaches get unlimited access to download and use the images throughout the season.
I allow parents and players to purchase both digital files and prints.
At the beginning of the season I set up a ShootProof online gallery for each team, and I continue to add optimized images as the season progresses. The players and their families automatically know where to go to find images after each game.
Kim Fetrow
#ShootProofPRO Tip: Maximize Your Web Traffic
Rather than send out the direct gallery link, however, I send players and families through my website to access their online gallery. Sports photography offers the potential for hundreds of new people to see my work. Perhaps they’ll even spend a few minutes browsing my portfolio and choose to hire me for commercial photography, senior portraits, or family photos.
Kim Fetrow
#7: Have Fun!
Sports photography is fun! I love being down on the floor as close as possible to the action. I get excited when I capture an amazing play—especially when shooting a basketball team I care about. You are right there celebrating their victories and defeats while preserving some very special memories that you just can’t get with a cell phone. So get out there and have a blast!
Written and Photographed by KIM FETROW
Kimberly Teske Fetrow is an award-winning, internationally published, commercial and portrait photographer with over 20 years of experience. To follow her adventures as a photographer and to see her most recent work, follow her on Instagram.
You May Also Enjoy...
Best Senior Picture Posing Ideas for Guys
How to Build a Business for Senior Girls with Spirit
How to Aim for Better Basketball Photography (10 Hot Tips)
Basketball photography is an exciting and dynamic sport to shoot. But it can also be challenging due to the need to freeze motion.
If you’ve been wanting to take razor-sharp action photos like those that you see in the sports section of the newspaper, read on.
Here are ten tips to help you focus your camera and get sharp basketball photos.
10. Set Your Camera to Shutter Priority
To freeze action, your minimum shutter speed should be 1/500th of a second. Go even higher if the lighting situation and particular combination of your camera and lens allow for it.
Manual Mode is usually the best mode for professional-looking and properly exposed shots. But it’s not always the best choice for every situation.
When it comes to shooting sports, try setting your camera to Shutter Priority Mode instead of Manual Mode. This will ensure that your camera stays at the minimum shutter speed while it calculates the right F-stop and ISO required to properly expose your photos.
It will also prevent you from having to worry about your settings.
Take a few shots and check them for any unwanted blurring. If they are not sharp enough, go higher with your shutter speed, say to 1/1000th of a second.
9. Increase Your ISO
The way to get more light into your camera when shooting a basketball game is to increase your ISO.
Ordinarily, playing with the shutter speed is the best way to increase the amount of light hitting your sensor. Increasing ISO can introduce grain, or “noise” into the image.
In sports photography, this is not the best option. The shutter speed must be high to get sharp images.
If you don’t have enough light coming into your camera, you have no choice but to increase your ISO.
You can fix noise in post-production. Lightroom has a good option for repairing noise.
You can also use a dedicated noise repair plug-in with either Lightroom or Photoshop, such as DFine from the Nik Collection.
This selectively repairs the noise in an image and is tailored to whichever camera you’re using.
8. Shoot at a Wide Aperture
To shoot at a high shutter speed, you’ll need to use a wide aperture, ideally from F/2.8 to F/4,
This will allow more light into your camera.
The lens you’re using will determine how wide you set your aperture. A good quality lens with a maximum aperture of f/2.8 or f/4 will give you the best results.
In all likelihood, you’ll also be using a zoom lens. If you crop in as close as possible, your lens will not let as much light in. This is where the aperture is the narrowest. In this case, shoot wider and crop in post.
One bonus of shooting at a wide aperture is that it can give you blurred out background. This can look great in basketball photography. It can give the image a sense of urgency and speed.
It can also help isolate the player acting as the main subject in the composition. It will draw the viewer’s eye to the most important part of the image.
7. Shoot In JPEG
It may surprise you to hear me say that you should consider shooting your sports photography in JPEG format. After all, you are repeatedly told that for professional-looking photos, you should always shoot in Raw.
This may be true for several genres in photography. When photographing sports, capturing the action of the game is more important than having really high-quality photos that can withstand a lot of post-processing.
Shooting in JPEG will allow you to shoot more images in burst mode. You’ll also be able to fit more images on your memory card.
You can miss a crucial part in the game in the few minutes it can take you to swap out memory cards. The less often you need to change them out, the better.
6. Use Autofocus
When photographing a basketball game or any other sport, it makes sense to choose autofocus over manual focus. You just don’t have the time to be fiddling with your lens that way.
Not to mention that you need to have excellent eyesight. Being just a millimeter off can mean that you miss focus and lose those killer shots.
For your camera’s autofocus system to function properly, there needs to be contrast in the area where you want to focus.
This can be a problem in the low light situations that are common indoors.
When there is not much contrast, the camera doesn’t know where to focus. If there is not enough light hitting the sensor, the lens motor will keep moving. It’ll hunt for focus without locking onto the subject.
This can cause you to lose precious seconds when you need to be getting crucial shots. Be sure to focus on an area of contrast within your subject.
5. Use Multiple AF Points
The accuracy of the autofocus system is in part influenced by the number of autofocus points your camera has.
It can be hard to nail focus if you have only nine AF point on your camera. One of the biggest differences between cameras and their price points is the number of points the AF system offers.
The costly, more professional systems always have a lot of AF points. Some of the new mirrorless cameras even have focus points in every part of the screen.
Use multiple AF points to take control of your camera’s autofocus system and take sharper images.
4. Set Your Camera to Continuous AF
Continuous Autofocus is when the AF system focuses continuously on the area covered by selected autofocus points.
Most cameras have four focusing modes: manual, auto, single, or continuous.
On a Canon, continuous focus in called AF or Al Servo. On Nikon or Sony, it’s AF-C.
In this mode, as soon as the autofocus system detects a moving subject it activates predictive tracking. It continuously monitors the focus distance. And it adjusts the focus when the distance from the camera to subject changes.
The autofocus system will adjust the point of focus. If you want to focus on a subject that is not covered by any of the AF points, you’ll need to lock the focus distance by pressing the AF lock button.
3. Use Burst Mode
Set your camera to Burst Mode. This will allow you to shoot several frames with one press of the shutter. This will increase your chances of getting a perfectly composed action shot. Note that it will also fill up your memory card more quickly.
Be sure to bring extra memory cards with a high storage capacity. This means that you won’t have to lose precious minutes in the game by having to repeatedly swap them out.
Your best bet is to use Burst Mode for crucial parts of the game. Revert to single shooting most of the time.
2. Switch to Back Button Focus
Back Button Focus is a boon to every type of photographer, even the portrait shooter.
Back Button Focus is the transfer of the focusing function from the shutter button to one of the buttons on the back of your camera.
When used in basketball and other types of sports photography, back button focus will increase your shooting efficiency. You’ll be able to shoot faster.
Instead of pressing the shutter button halfway down to focus, you press a button on the back of your camera with your thumb and use a finger to press the shutter.
This makes focusing and shooting a lot quicker. You don’t have to constantly refocus. And you can keep adjusting your composition without worrying about focusing every time. Your focus will hold, even if you release the shutter button.
Together with continuous focusing, it will increase the likelihood of achieving perfect focus even with difficult shots.
Check your camera manual to figure out how to set Back Button Focus for your particular camera brand and model.
It may feel a bit awkward at first. But you will quickly get used to it. You might even end up keeping your camera on Back Button Focus all of the time.
1. How to Find the Best Vantage Points
Last but not least, think about your vantage point throughout the basketball game. Situating yourself for the biggest impact may mean moving around a lot if there is room for you to do so.
Sports photography also means getting down to the ground or contorting yourself into awkward positions to get dynamic shots.
Don’t be afraid to move with the action. Have a plan beforehand of how you’re going to move around the court for the most advantageous point of view.
One tip for shooting a basketball game outside on a sunny day, make sure that the sun is behind you. This will help get more light into the lens and assist in getting up to those fast shutter speeds with less noise.
When you’re shooting basketball photography, be sure to fill the frame with the players. Capture their facial expressions. Documenting the emotions in a game is a crucial aspect of sports photography.
Conclusion
Be sure to take a few test shots before the game starts. You can check how sharp your images are beforehand and make any necessary adjustments to your camera settings.
Basketball photography is one of the most exciting games to shoot in the realm of sports photography.
With these ten tips, you’ll be sure to get dynamic and sharp action photos the next time you shoot a basketball game.
10 rules of sports photography for beginners | Articles | Photo, video, optics
Sports photography is a hobby or a profession for the most notorious fans. Capturing the movement, dynamics and highlights of a sporting event, whether it's a football or hockey match, rugby, running or tennis, is not as easy as it might seem at first. If you've ever paid attention to football stadium photographers - their equipment can be both envious and surprising - huge lenses that require their own tripod, many accessories and continuous tracking of every movement.
But before advancing to the premier league of photographers, you need to learn and the best way is small matches and events where you can practice shooting.
We've rounded up the top 10 tips and tricks to help any photographer take their first step into sports photography, and maybe someone will be interested enough to make a career out of it. Well, let's get started!
What do you need?
In order to film sports events, of course, you need a camera. A DSLR is, of course, good, but modern mirrorless cameras are sometimes faster in continuous shooting. This, of course, comes from not having to constantly raise the mirror. Therefore, the fps value of mirrorless cameras is always higher. The main need, however, is the ability to manually set the shutter speed. Because you will need to shoot fast and get crisp, sharp shots.
When you arrive at the competition site, don't forget to ask if you can film. It's best to always stock up on resolution, and then move on to filming.
Lens must have a focal length of at least 200mm
The focal length of your lens is critical. Since you can't shoot directly in the middle of the action, right on the field, you'll need a telephoto lens. Yes, yes, that is why professional photographers have such huge lenses around the perimeter of stadiums. In this case, the more, the better. But the optimal length is exactly 200mm. You can zoom in enough, isolate the subject from the environment and, of course, if necessary, shoot anything - from a portrait to a group composition.
Best options for Nikon cameras are Nikon 18-200mm f/3.5-5.6G ED AF-S VR II DX or Nikon 28-300mm f/3. 5-5.6G ED VR AF-S Nikkor.
For Canon cameras, the Canon EF 100-400mm f/4.5-5.6L IS II USM or the cheaper option Canon EF 70-300mm f/4.5-5.6 DO IS USM will do.
Forget about the auto mode
More or less professional photographers are not usually reminded of this, but it's always worth noting that in photography the automatic mode rarely comes to the rescue, and for good reason we are offered a lot of manual settings. To understand how and what works, the first thing to do is to read the instructions for the camera. Then you will be able to deal with each indicator separately, and will not be afraid of the concepts of ISO, aperture (or aperture), white balance, etc. at all. So forget about automatic modes, even if they are named Sports or Action. We need manual mode.
Use a fast shutter speed
This is a mandatory rule that you should not forget at all. You're shooting fast paced action, so it makes perfect sense that we need a fast shutter speed to get sharpness and avoid shadows and blurry shots. Minimum 1/500 sec. will be enough to fix a moving object, if you set the shutter speed longer, all the associated risks will just appear.
Use aperture priority
First, let's look at the classic shooting modes that the average DSLR or mirrorless offers us. In addition to automatic and manual, there are modes such as shutter priority (Shutter Priority), and aperture priority (Aperture Priority).
Aperture is a value referred to as A or AV, measured in f/, or steps, which means how much light passes through the aperture directly to the matrix. If you set the settings to aperture priority, the camera will automatically set the shutter speed. This is the ideal mode for shooting on a sunny day and is used by many professional sports photographers. But what exactly needs to be done in order to properly set the aperture? We need to set a high value, that is, the figure should be vice versa, lower. For example, f/2.8 or f/4. So the maximum light will hit the matrix, and for the correct exposure, the camera will independently set a short shutter speed.
Don't forget ISO
Understandably, shutter speed and aperture are important, but the third important exposure value is ISO or ISO. When we shoot in semi-automatic modes, whether it's aperture or shutter priority, we have to set the ISO manually. To do this, we take into account the place and weather conditions, and even time. For example, ISO 400 is sufficient in daytime solar time, but if the sky is overcast, ISO should be set within 800-1200. You can learn more about this value, of course, from the instructions.
If aperture priority mode is not available, select shutter priority mode
If you are shooting not with a DSLR, but with a camera that allows you to operate only with shutter speed settings, you will have to work with this mode. Even travel cameras tend to do this, although modern cameras tend to be more capable. Let's take a look at a few details though.
Instead of telling the camera how much light to let in, we will immediately indicate what shutter speed to set - 1/500 second will be enough. But don't forget to take a few test shots to see if the value is set correctly, given the environment.
Use fast autofocus and burst mode
In order for the camera to track the fast movements of athletes, it is best to focus continuously on the subject or subjects rather than focusing on a single point. In addition, be sure to set the burst mode. How many frames per second you can shoot - will show the Burst value measured in fps (literally frame per second). The higher the fps value, the better. So if you want to start out as a hobbyist but plan to continue into sports photography, the best choice is a mirrorless camera. Mirrorless cameras, as we have already noted, allow you to shoot a large number of frames per second and DSLRs are far behind them in this regard.
Choose a good vantage point
The best vantage point is usually where the sun is behind you. Thus, the shooting area will be well lit. Of course, it doesn't hurt to have a good understanding of the sport you're shooting for. This way you can predict both the action and the game, so you will know exactly where to point the lens so as not to miss an important shot. Everyone sees what is happening in the general frame of the field anyway, and your task is to get closer to the players and take those shots that cannot be seen from the stands.
Shoot as many pictures as you can
This rule is practically golden. You will of course need a large memory card and a good camera battery, but the trick is to shoot first and then choose. The very essence of the competition, whether it be a football tournament or a tennis match, lies in the dynamics and speed. So, it is these qualities that the photographer will have to adopt. The results can be viewed later, just like choosing the best shots. Shooting in RAW format, you can correct some of them in post-processing, the main thing is to have time to capture the most spectacular moments.
That's why it's not uncommon for a sports photographer to go home with over 2000 raw shots, and publish at most 50 of them.
Shoot from a low angle (knee height) and use a tripod
It gives the shot more drama, creates an additional mood, in addition, you can not only shoot a player against the grass, you can shoot a podium, sky or spotlights, which also allows you to get interesting angles. This technique is often used by professionals, and this is exactly what you need to learn from them right away.
A tripod is needed to stabilize and balance the camera when shooting from different angles and angles, especially from low altitudes. Therefore, make sure that the minimum height of the tripod is comfortable.
The Cullmann Concept One 628M OT38 tripod is convenient because its minimum working height is only 27 cm, the maximum is 189 cm. The combination of price and quality leaves no doubt that it is ideal for shooting sports events.
The Fujifilm X-T20 is a great sports camera with all the settings available and an impressive 14fps, making it the perfect companion for sports events. In addition, the camera is equipped with long focus, shoots in RAW format and 4K video shooting capabilities.
Rules of the game of basketball - Internet portal Sportmaster Media
3 min.
Ball in the basket - victory is yours
Basketball
This is a material about the basic rules of playing basketball. We also have a text about the risks of injury in sports.
Basketball is a team game with a ball. The goal of each team is to attack the opponent's ring and score the most points during the match. We tell you how not to break the rules in a tough fight for the ball and become a winner.
Basketballs
1,199 RUB
Demix | Basketball ball Demix DSB Streetball
Buy
Demix | Basketball ball Demix Skywalk
Buy
Final price
Demix | Basketball ball Demix Hoops
Buy
3 499 ₽
Demix | Basketball ball Demix DB4000 Composite
Buy
1 399 ₽
Demix | Basketball ball Demix Triple Double 7
Buy
1 399 ₽
Demix | Basketball ball Demix Triple Double 5
Buy
3 499 ₽
Demix | Basketball ball Demix DB4000 Composite
Buy
Final price
Demix | Basketball ball Demix Buzzer 5
Buy
2 399 ₽
Demix | Basketball ball Demix Fast Break
Buy
Final price
Demix | Basketball ball Demix Buzzer 7
Buy
2 999 ₽
Demix | Basketball ball Demix DB3000 Microfiber
Buy
Final price
Demix | Basketball ball Demix Buzzer 3
Buy Now
Each basketball team consists of 12 players who substitute for each other during the match. At the same time, five people from each team are on the site.
According to the rules of basketball, the whole team must have the same uniform and even socks of the same color. Jerseys of team members must be numbered.
For safety, remove jewelry and any accessories that could injure other players.
The game consists of four periods of 10 minutes. Breaks between the first and second quarters, as well as between the third and fourth, are 2 minutes. The longest break is 15 minutes, it is taken in the middle of the game, after the second quarter. At this moment, the teams change rings.
If the score is tied by the end of the match, the referee adds 5 minutes of overtime. Overtime is appointed as many times as necessary until the winner is revealed.
During the game, the team coach may take a time-out. This break lasts for a minute. Most often, a time-out is taken to adjust tactics.
Basketball accessories
Demix | Needle for inflating balls (3 pcs.) Demix
Buy
Demix | Whistle Demix
Buy
Demix | Demix Basketball Hoop Net
Buy
Demix | Demix ball inflation needle, 3 pcs.
Buy
Demix | Demix ball pump
Buy
Demix | Whistle Demix
Buy
Demix | Demix Double Action Pump
Buy
Demix | Demix Basketball Hoop Net
Buy
Demix | Demix Double Action Pump
Buy
Demix | Demix ball pump
Buy
Demix | Demix ball pump
Buy
Demix | Whistle Demix
Buy now
Basketball court measures 28 meters long and 15 meters wide. Each site should have markings. It is applied around the perimeter and zones are designated: 9Restricted area It is suspended at a height of 3.05 m.
In basketball, the ball is played only with the hands, it can be dribbled, passed, thrown and hit. You can’t run without a lead or kick the ball with him.
With the ball in hand, you can take two steps, but only to stop, pass or shoot into the ring.
Basketball shoes
New collection
7999 ₽
361° | Sneakers for men 361° Pull up 1.5
Buy
3 499 ₽
Demix | Sneakers for boys Demix Backyard Rld
Buy
5 199 ₽
Demix | Sneakers for men Demix Argon 2
Buy
4 599 ₽
Demix | Sneakers for men Demix Beast 2
Buy
3 499 ₽
Demix | Sneakers for boys Demix Backyard Rld Mesh
Buy
3 289 ₽
4 699 ₽
Demix | Sneakers for boys Demix Backyard Rld Mesh
Buy
5 799 ₽
Demix | Sneakers for men Demix Joker
Buy
1,899 RUB
3,799 RUB
Demix | Sneakers for boys Demix Buzzer
Buy
1 point - counts for the penalty throw
2 points - for a ball abandoned from the zone of biases
3 points - for the ball abandoned from the three -point hits
violations in the basketballs, let's go for the car basic.
A run is the movement of a player with the ball in his hands without dribbling. For this, the referee appoints a throw-in by the opposing team.
Three second rule - A player of the attacking team cannot stay in the allocated area under the hoop for more than three seconds. For such a violation, the ball is transferred to the opponent.
Foul is a touch on the opponent that limits his freedom of movement. In some cases, a free throw is awarded for a foul - this is decided by the referee. A throw from the penalty line is performed by a member of the opposing team, for a professional this is an almost guaranteed hit.
You can also get a foul without contact - technical. It is given for unsportsmanlike behavior, disrespect for the referee or other participants in the game. Two technical fouls are followed by disqualification.


 This white balance setting changes from gym to gym. I prefer RAW so that I can easily adjust the images in Lightroom.
 This is a great way to take test shots to make sure your camera and photography settings are where they should be.
 But truthfully, my favorite place for photographing basketball is right under the basket!
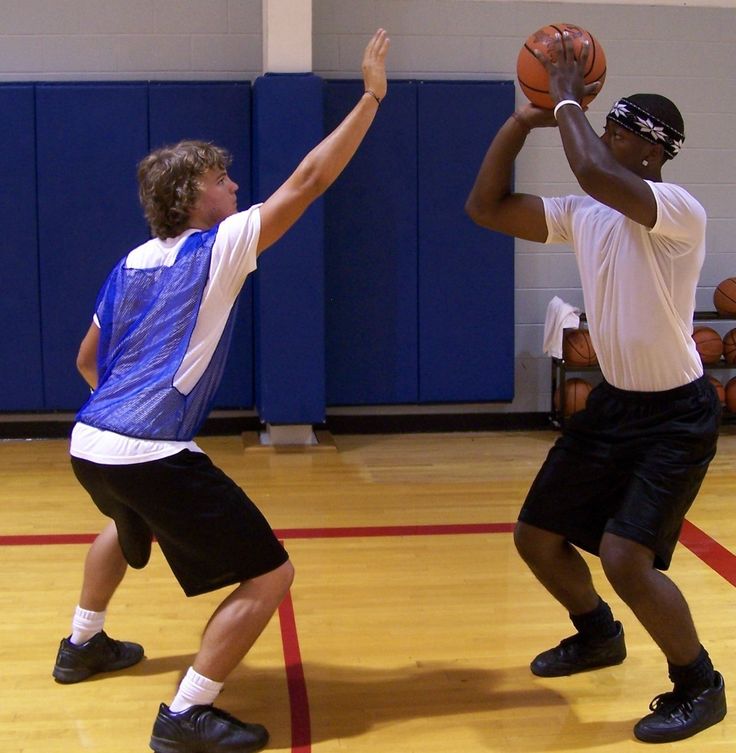 The basketball players in your camera lens are closer than they appear!
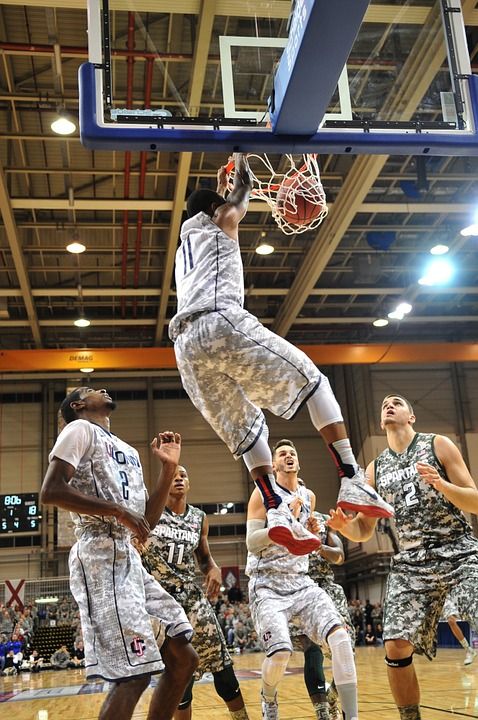 However, coaches and sports agencies like balls in photos. I’ve found that horizontal images are preferred, as they like to share these images on T.V. screens, on social media, and in their news feeds—most of which require a horizontal or square image. Shoot both.
 Don’t center every shot!
 Often, I’m asked for a quick team photo, a senior night with parents, or the younger kids’ team to share on social media.
 I prefer ShootProof, as it allows me to set up different permissions for different uses.
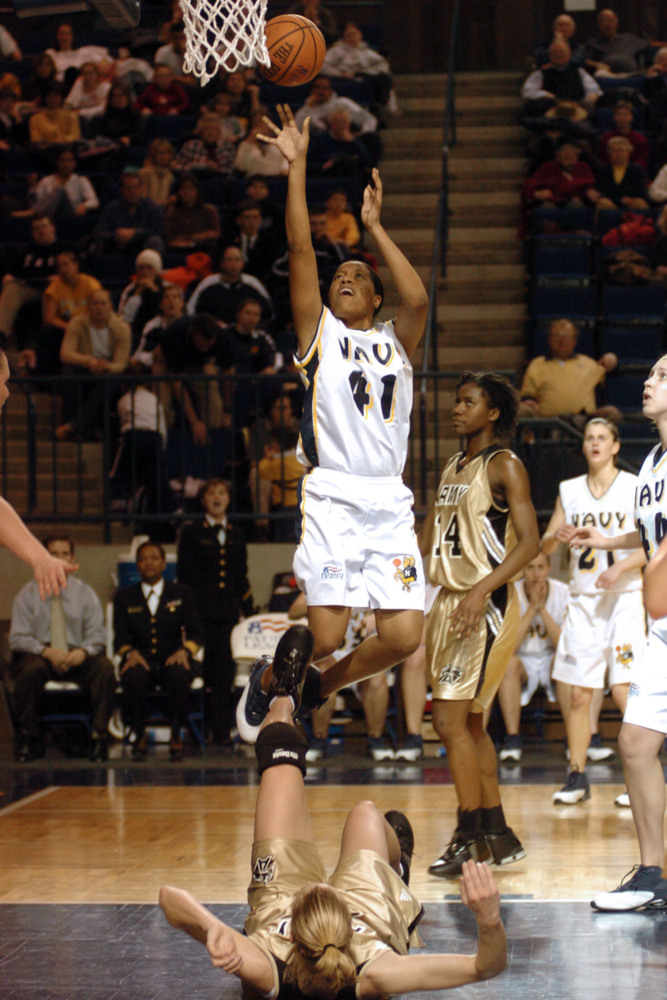
 But it can also be challenging due to the need to freeze motion.
 After all, you are repeatedly told that for professional-looking photos, you should always shoot in Raw.
 Note that it will also fill up your memory card more quickly.
 You don’t have to constantly refocus. And you can keep adjusting your composition without worrying about focusing every time. Your focus will hold, even if you release the shutter button.
 Have a plan beforehand of how you’re going to move around the court for the most advantageous point of view.
 Capturing the movement, dynamics and highlights of a sporting event, whether it's a football or hockey match, rugby, running or tennis, is not as easy as it might seem at first. If you've ever paid attention to football stadium photographers - their equipment can be both envious and surprising - huge lenses that require their own tripod, many accessories and continuous tracking of every movement.
  Therefore, the fps value of mirrorless cameras is always higher. The main need, however, is the ability to manually set the shutter speed. Because you will need to shoot fast and get crisp, sharp shots.
  5-5.6G ED VR AF-S Nikkor.
  Minimum 1/500 sec. will be enough to fix a moving object, if you set the shutter speed longer, all the associated risks will just appear.
 But don't forget to take a few test shots to see if the value is set correctly, given the environment.
  This way you can predict both the action and the game, so you will know exactly where to point the lens so as not to miss an important shot. Everyone sees what is happening in the general frame of the field anyway, and your task is to get closer to the players and take those shots that cannot be seen from the stands.
 In addition, the camera is equipped with long focus, shoots in RAW format and 4K video shooting capabilities.
  At the same time, five people from each team are on the site.
  Most often, a time-out is taken to adjust tactics.
  Each site should have markings. It is applied around the perimeter and zones are designated: 9Restricted area It is suspended at a height of 3.05 m.