Home »
Misc »
How to teach a jump shot in basketball
How to teach a jump shot in basketball
Basketball jump shot: Technique, drills & tips
What is the basketball jump shot?
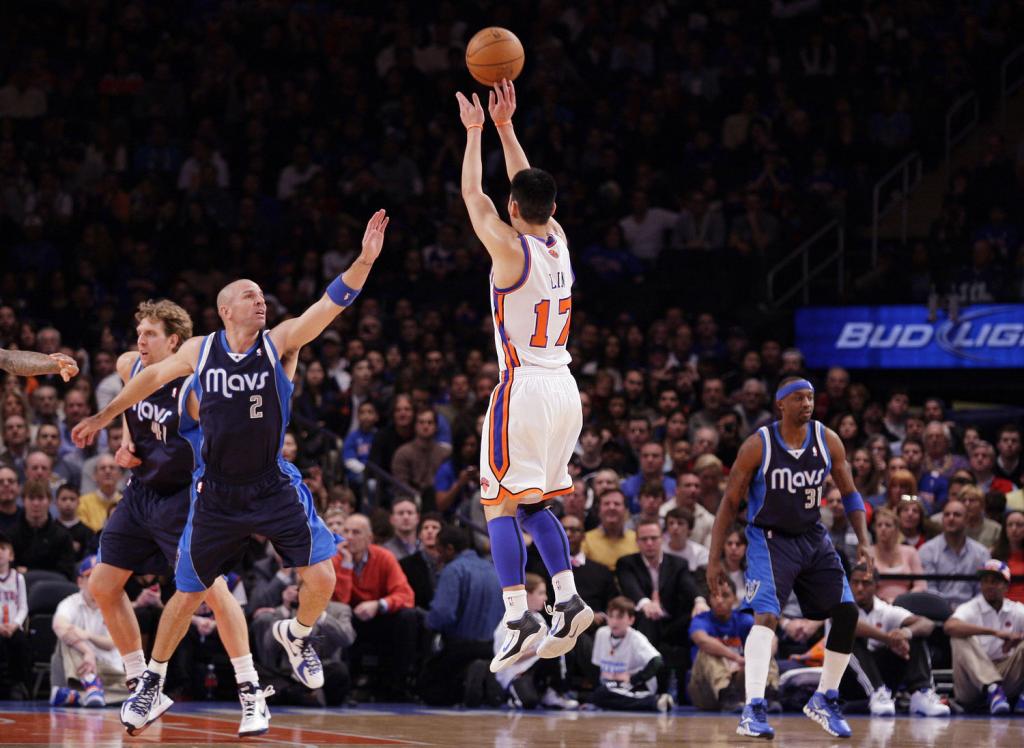
The jump shot is one of the most important shots in basketball. It is a basic shooting technique in which a player throws the ball towards the basket from a straight vertical jump. The jump shot is done with one hand, where the second hand holds the ball in place until the shot is taken. The jump can be made from movement, for example while dribbling, as well as from a standing position.
Fun Fact: John Miller Cooper, an american teacher, is considered to be the inventor of the jump shop. He is said to have used the jump shot as an offensive technique for the first time in history while playing basketball for the University of Missouri.
Ad
Advantages of the jump shot compared to a standing shot
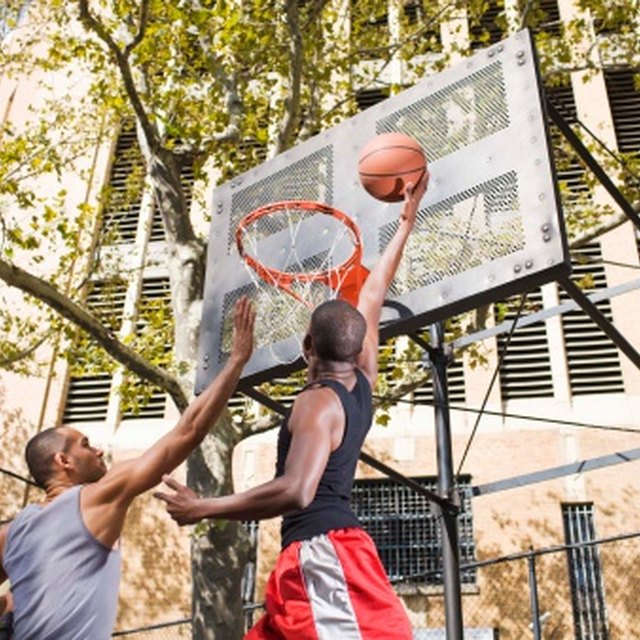
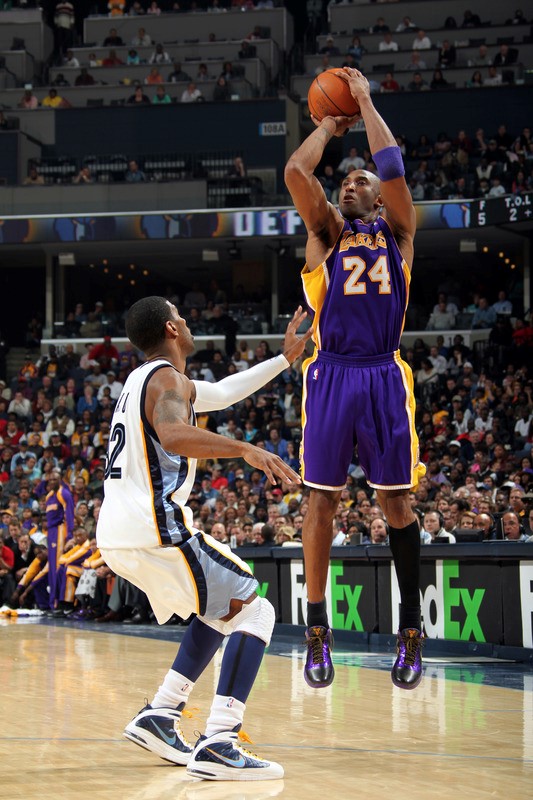
- Higher chances of success: The ball is much more difficult for opponents to block than with a standing shot, because the players can jump straight into the air and throw the ball from a much higher angle above the head.
![]()
- Less effort and more momentum: If the jump shot is taken from a run, the momentum from the running movement can be transferred directly into the shot. This allows players to throw more powerfully, faster and more dynamically with significantly less effort overall.
- Better throwing angle: With a strong jump the attacker can achieve a better throwing angle to the basket.
Disadvantages of the jump shot compared to the standing shot
- High coordinative demands: The difficulty with the jump shot lies mainly in the coordination of the jumping movement and the relatively fast throwing motion.
- Requires a lot of practice: The technique of jumping requires a lot of practice. For this reason the shooting technique is only suitable for advanced basketball players.
The jump shot is an effective offensive technique over longer distances.
How does the jump shot work?
The straight vertical jump is achieved by the explosive extension of the legs and the simultaneous raising of the arms.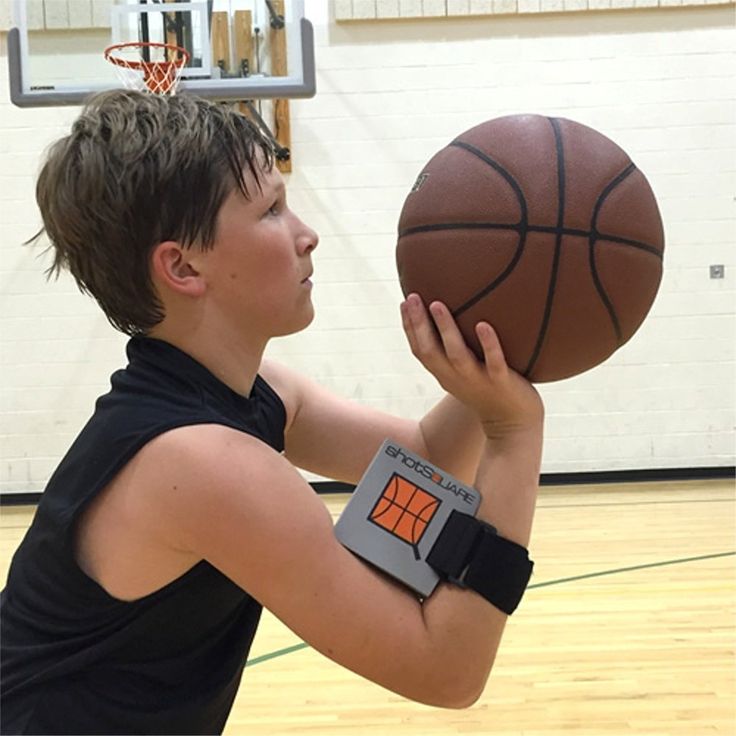 At the highest point of the jump phase, the player then executes the actual throw with his hand.
For the jump shot, players only use one hand or one arm for the throwing movement. The second hand keeps the ball in place in the throwing hand until the time of the throw. The second hand supports the ball from the right or from the left until the time of throwing, depending on whether the ball is played with the left or right hand. The advantage here is that the player has better control over the execution of the throw.
With the jump shot you make it harder for opponents to stop you as a player.
Important training basics
Ideally, you should already have mastered these basics before you begin to train for the jump shot:
- catching and throwing while standing and in motion
- standing shot (position shot)
- offensive strength
- great throwing and jumping power
- good coordination
The correct execution of a jump shot
The following video will show you how to correctly execute the jump shot as a beginner:
The phases of a jump shot
The jump shot generally consists of three phases:
- 1.
 First, a straight vertrical jump is executed.
 - 2. Shortly before reaching the highest point of the jump, the actual throwing motion is initiated (arm-hand-guidance).
- 3. The ball should not leave the throwing hand until the apex - the highest point of the jump - is reached.
All the phases mentioned seamlessly transition into each other . The descending phase of the jump ends in the landing. The jump shot can be executed either from a standing position or from movement (jump shot after receiving a pass or jump shot out of a dribble).
Tips for the execution of the jump shot
For a technically clean throwing technique a number of points need to be considered: For example, how you receive the ball, foot position, but also body and hand position as well as elbow position are important. In the following we will explain how to do the jump shot correctly step by step.
Note: The following manual is designed for right-handed players. Left-handed players can simply reverse the information given here.
Ad
The Starting Position
The shot begins with the correct reception of the ball. The goal should always be to accept the ball the same way the player wants to throw it afterwards. In other words: After catching the ball, hold it loosely in front of the body in your throwing hand. The middle finger is pointed forward and the left hand supports the ball to the side (T-shape). The legs areshoulder width apart and the toes point towards the basket. The feet are parallel to each other or are in a slight stepping position. This means that the right foot (for right-handed people) can also be slightly in front of the left foot. The knees are bent slightly and also the upper body tilts forward a little. Jumping
- The player now swiftly and dynamically moves the ball upwards over their head.
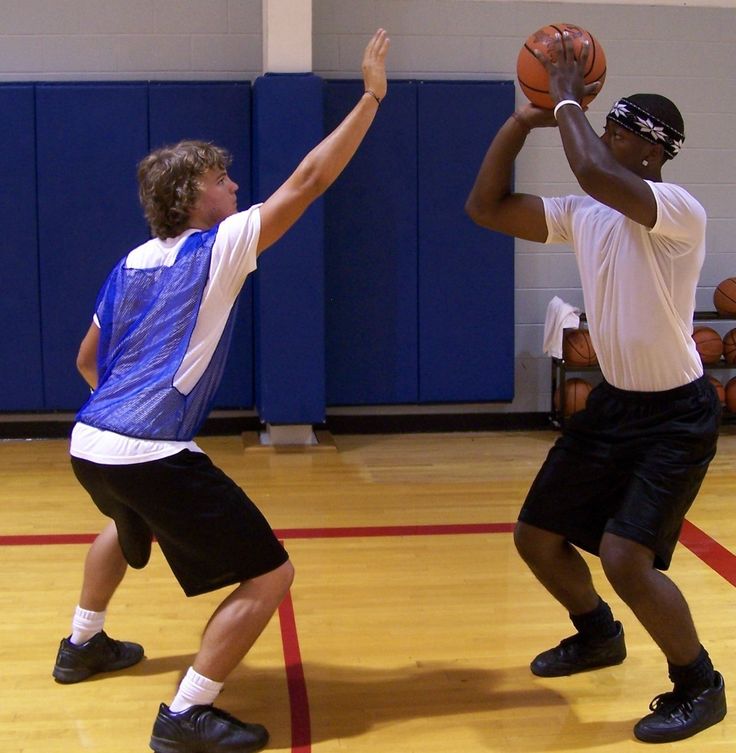 The movement should be fluid. The swinging motion of the arms provides a stronger jump.
 - The elbows are kept loose and in a natural position: They should neither point too far outwards nor lie too close to the body.
- By extending the arms, the vertical upward jump has already begun. It finally ends at the highest point of the jump (apex).
The throwing motion for the jump shot is the same as during a standing throw.
Shooting
- The actual throwing phase begins shortly before reaching the apex.
- In the actual throw the elbows should be at least at shoulder height. This is the only way to accurately and effectively perform the throwing motion. The ball lies only on the fingers, not on the palms.
- Once both shoulders and elbows are at a 90 degree angle, the player flicks the wrist forward. It is important that the movement is primarily upwards and that the wrist does not bend too far downwards.
 This allows a good throwing angle onto the basket. You can also see tips on hand positioning when throwing a basketball in the following video.
 - The movement pattern of the actual throw is therefore identical to the arm-hand and ball-hand-motion of the standing throw (position throw): Here the player does not take the throw from the jump but from the standing position.
The Landing
- After the throw, the player lands firmly on both legs, bends their knees slightly and moves their center of gravity forward to regain composure immediately.
- His feet, but also the index and middle finger of the flicked wrist are pointed towards the basket.
Common Mistakes
- The right timing: It is very difficult to coordinate throw and jump correctly. To achieve the optimal timing, a lot of practice is necessary. Therefore, it is most important that you have patience and intensify the training progressively.
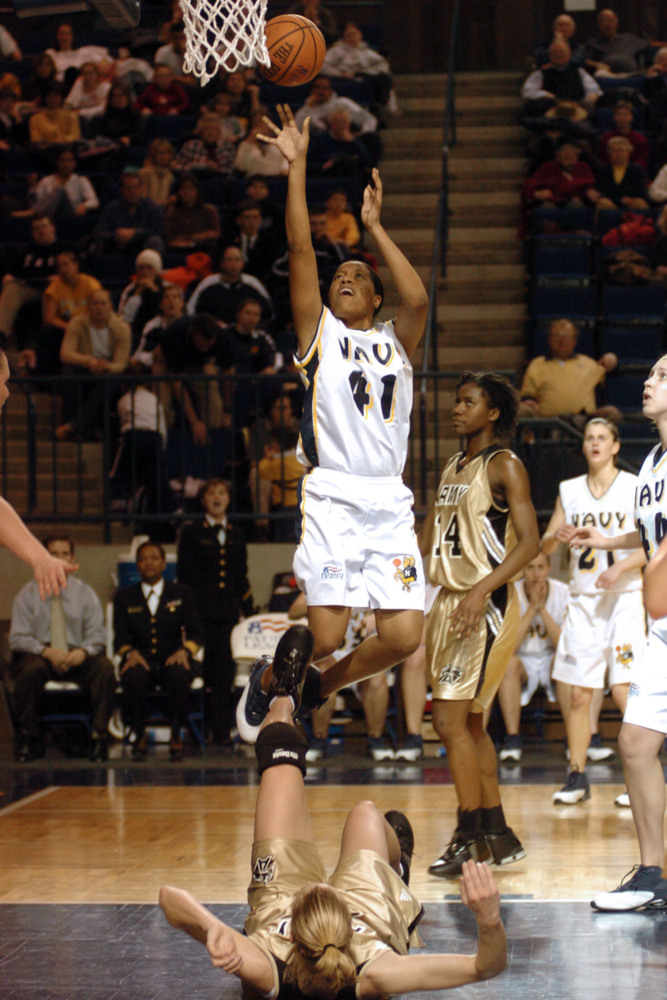
- Leg position during the jump: In order to generate enough power for the jump and retain your balance at the same time, it is important that the feet are shoulder width before the jump. If the stance is too wide, the player's reaction time is slowed down, if the feet are too close together, this is to the detriment of balance. In order to optimize leg position, you can first practice jumping without throwing.
The jump shot is great for scoring points from a distance.
Jump Shot Variations
There are a number of different variations on the jump shot. In the following we present the most popular ones.
Fadeaway Jump Shot
A variation of the jump shot is the "fade away jump shot". The player does not jump forward as usual, but lets themselves fall backwards during the jump.
The advantage: The intentional backward movement increases the distance to the defenders, who are normally close to the player.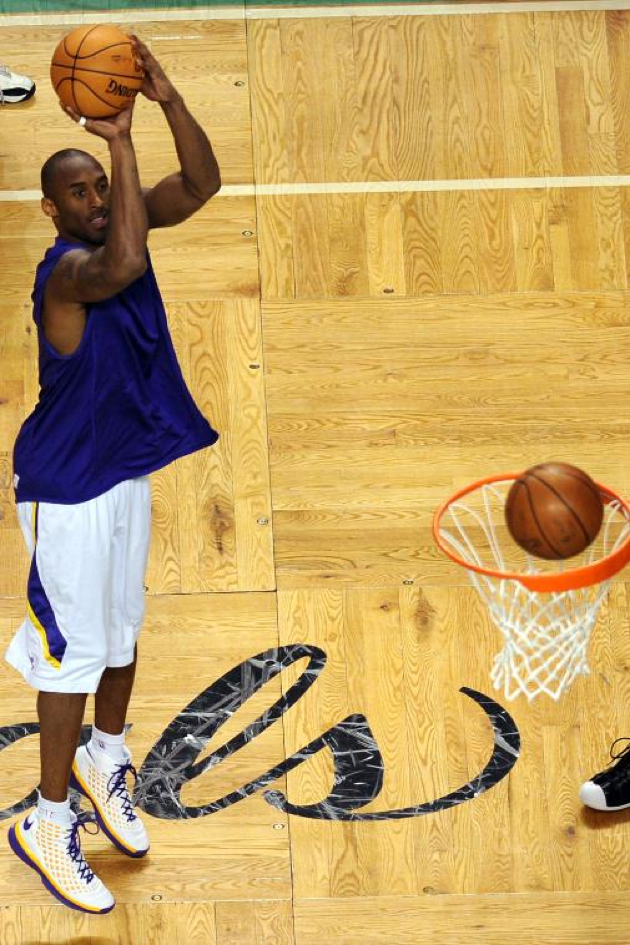 By increasing the distance, the shot becomes a lot harder to defend. The NBA players Michael Jordan, Kobe Bryant and Dirk Nowitzki are known for their fadeaway.
Leaning Jump Shot
The counterpart to the fadeaway jump shot is the "Leaning Jump Shot" (also "Leaner"). The player does not move backwards during the jump but moves forward.
The advantage: The variation helps the attacker to jump past or over the defender. The forward movement usually surprises the opponent, so blocking is more difficult for him. Defensive players who follow the attacker can also be easily defeated.
Because the jump can be executed directly out of a run, the player can also take advantage of the existing momentum and transfer it directly into the throw. Most often the "Leaner" is thrown from a short distance close to the basket.
Ad
Turnaround Jump Shot
For the "Turnaround Jump Shot", the attacker has his back turned towards to the defender, jumps off and then spins around in mid air.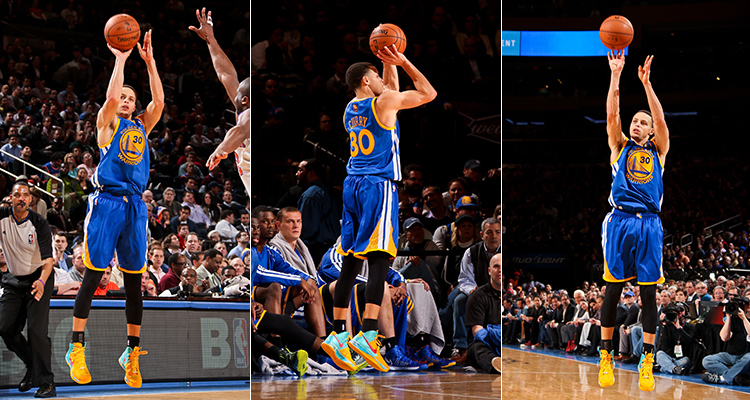
By jumping, they push themselves away from their defender in a turning motion and throw the ball after they have turned 180 degrees. This variation was made famous by Michael Jordan.
Step Back Jump Shot
The "Step Back Jump Shot" is initiated by a step forward. The attacker then steps back to their previous position and executes a regular jump shot. This increases the distance to the defending player, similar to the "Fadeaway Jump Shot".
The advantage: By stepping back, the attacker creates enough distance between himself and the defender to execute the jump shot unhindered.
The jump shot allows you to throw over the defenders.
Basketball jump shot: Exercises & tips
Here we will show you the best exercises with which you can train the jump shot with your team.
For beginners: position throws (standing throws)
Before jumping right into training for the jump shot, players should get comfortable with standing throws first. Start by practicing a few free throws or close and medium range throws.
You can use this exercise as a warm-up to develop a feel for throwing the ball. This video will show you how to properly execute a standing throw:
Jump shot from a standing position
You can take it one step further by training the jump shot from a standing position. The following video by FC Bayern (German basketball team playing in the BBL, Germany's premier basketball league) will teach you the technique for this as well as show you a few exercises you can incorporate into your training:
Jump shot while moving
The next level of difficulty is the jump shot while moving. Once you have the technique for a standing throw as well as the jump shot from a standing position down, you can start practicing this technique. The following video will teach you, proper execution as well as exercises and a few tips on how to get better:
Tip: In order to strengthen the jumping ability of your team, you should vary the different jumping techniques and exercises during training again and again.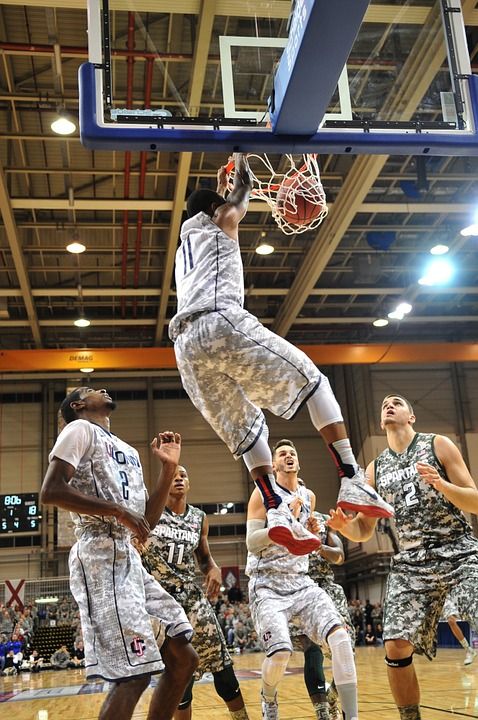 For advanced basketball players it is advisable to, for example, employ obstacles or to make the jumps more difficult by increasing the load (e.g. weights).
Practice makes perfect...
To further your team's chances of success, we recommend training your mental strength or finding strategies on how to strengthen your team spirit.
If you want to read more about basketball, you can also learn how to plan and structure your basketball training.
Are you also looking for the right jerseys for your team? You will find a variety of completely customizable basketball jerseys in our online shop. We look forward to hearing from you!
Ad
Photo credits: Title picture: © gettyimages/miodrag ignjatovic, Picture 1: © gettyimages/South_agency, Picture 2: © gettyimages/Svetikd, Picture 3: © gettyimages/Deimagine, Picture 4: © gettyimages/bymuratdeniz, Oicture 5: © gettyimages/oneinchpunch
5 Drills to Perfect Your Jump Shot
Skip to content
Great basketball shooters are made, not born.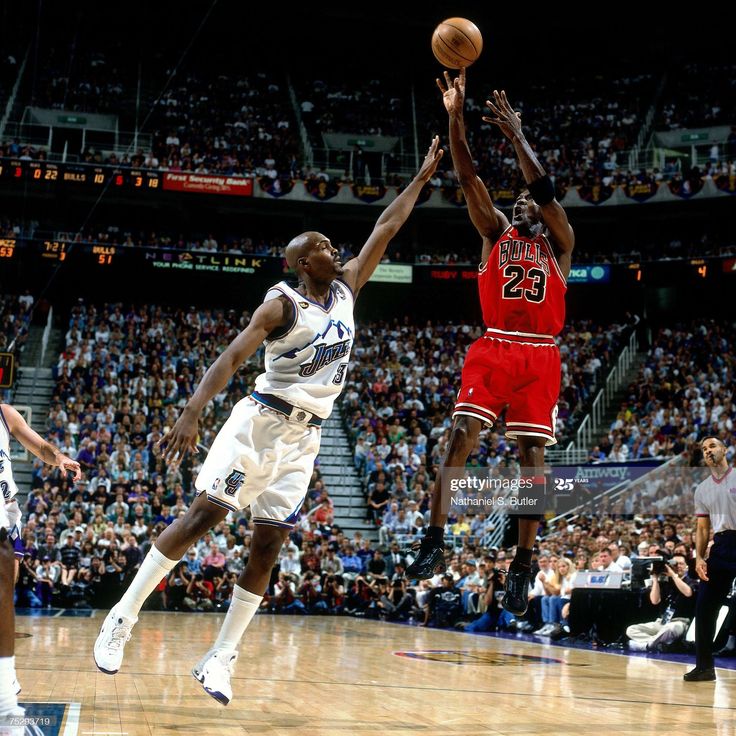 Besides talent, a good shooter requires excellent coaching and many hours of practice—at game speed. Practice at the same level of intensity with which you play games.
A good shooter can shoot following a pass or off the dribble. When shooting off the dribble, make the last dribble hard and high to help you move directly into your shot. When receiving a pass, run the ball into your hands and bend your knees when you catch the ball.
To be a great shooter, you must repeat the correct form thousands of times and have complete confidence in your shot. If you second guess yourself, you will miss shots.
Jump Shot DrillsWarm UpGroove Shooting. Work from the short corner at mid-range. This is a warm-up, so don’t worry about speed. Concentrate on your footwork and follow through. (2-3 minutes).
Drop Steps. From the right and left block, perform a drop step using any move you want. (2-3 minutes).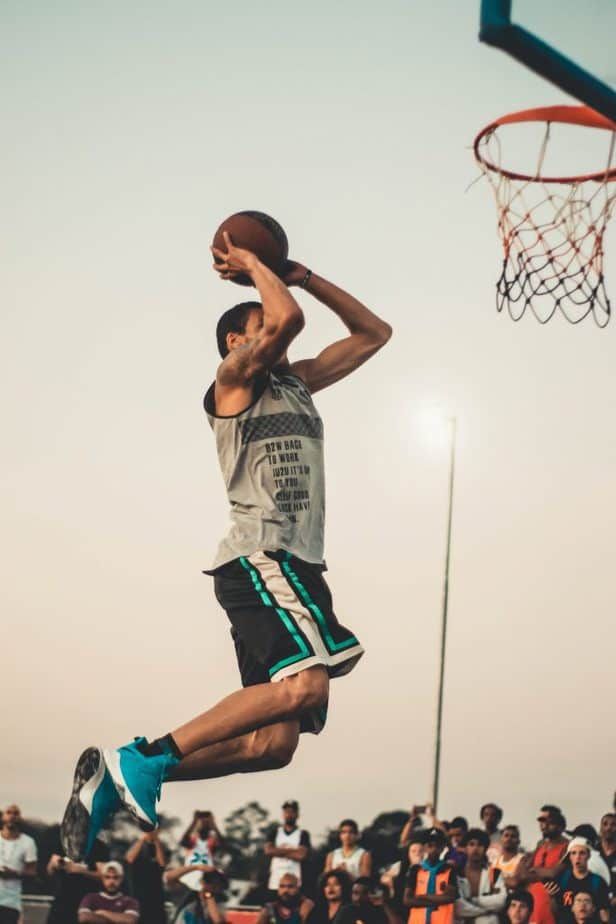
Turn-Around Jumpers. From mid-range, catch and face the basket with no dribble and shoot a jumper. (2-3 minutes).
For privacy reasons YouTube needs your permission to be loaded. For more details, please see our Privacy Policy.
I Accept
Chair Pull-Ups. Place chairs at the left and right elbows. Place a ball in each chair. Stay low as you take the ball out of the chair, dribble once and shoot. Cut to the second chair, staying low as you go into your shot. Have a rebounder replace the balls on the chairs. Run this drill at game speed for a set time or until you make a certain number of shots.
For privacy reasons YouTube needs your permission to be loaded. For more details, please see our Privacy Policy.
I Accept
Chair 3’s. Place three chairs in a row behind the 3-point line. Sprint from half court and have a teammate pass you the ball as you get to the chairs.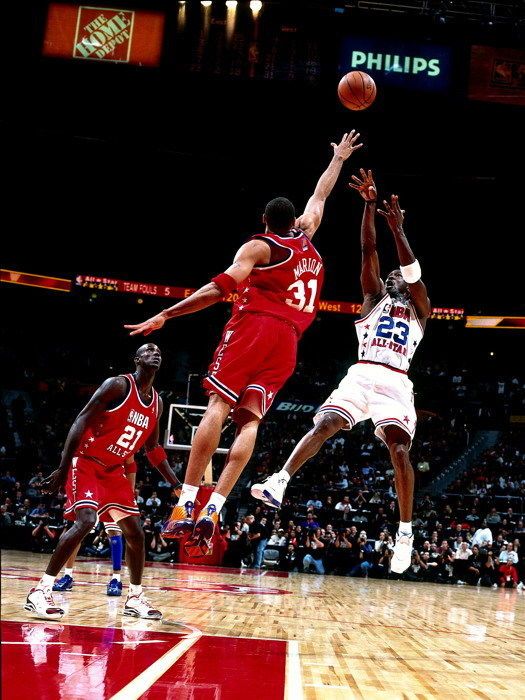 Do not make contact with the chairs. On your shot, go straight up and straight back down. Backpedal to half court, then sprint back to the chairs. Perform on the left and right wings and in the middle. Run this drill at game speed for a set time, or until you sink a predetermined number of shots.
For privacy reasons YouTube needs your permission to be loaded. For more details, please see our Privacy Policy.
I Accept
Do’s and Don‘ts for ShootersPractice correct form by focusing on these tips during your shots.
Do:
- Know your range
- Know a good shot when you see one
- Step into the ball to get the shot off more quickly when receiving a pass
- Make yourself a good target for passers
- Use shot fakes to get by the defense
- Lift your elbow, follow through and reach for the cookie jar
- Practice at game speed
Don’t:
- Take giant steps
- Pass up an open 12-footer to get a contested 8-footer
- Leave your off hand on the ball too long; it could adversely affect your shot
- Fade on the shot
- Follow the flight of the ball; keep your eyes on the target
- Dip or hitch; catch the ball, get it to the shot area and shoot
Read more:
Share This Story!
MOST POPULAR
Great basketball shooters are made, not born.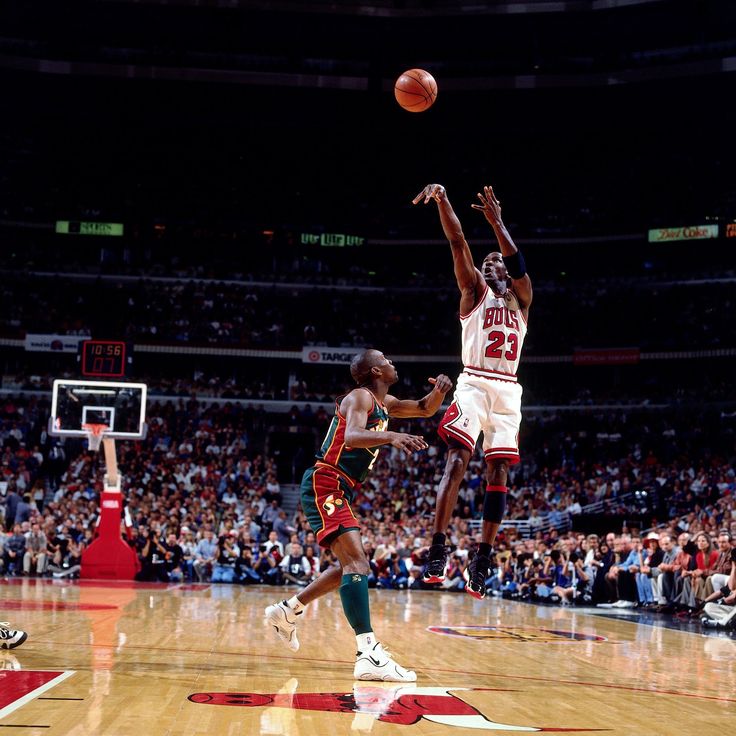 Besides talent, a good shooter requires excellent coaching and many hours of practice—at game speed. Practice at the same level of intensity with which you play games.
A good shooter can shoot following a pass or off the dribble. When shooting off the dribble, make the last dribble hard and high to help you move directly into your shot. When receiving a pass, run the ball into your hands and bend your knees when you catch the ball.
To be a great shooter, you must repeat the correct form thousands of times and have complete confidence in your shot. If you second guess yourself, you will miss shots.
Jump Shot DrillsWarm UpGroove Shooting. Work from the short corner at mid-range. This is a warm-up, so don’t worry about speed. Concentrate on your footwork and follow through. (2-3 minutes).
Drop Steps. From the right and left block, perform a drop step using any move you want. (2-3 minutes).
Turn-Around Jumpers. From mid-range, catch and face the basket with no dribble and shoot a jumper. (2-3 minutes).
For privacy reasons YouTube needs your permission to be loaded. For more details, please see our Privacy Policy.
I Accept
Chair Pull-Ups. Place chairs at the left and right elbows. Place a ball in each chair. Stay low as you take the ball out of the chair, dribble once and shoot. Cut to the second chair, staying low as you go into your shot. Have a rebounder replace the balls on the chairs. Run this drill at game speed for a set time or until you make a certain number of shots.
For privacy reasons YouTube needs your permission to be loaded. For more details, please see our Privacy Policy.
I Accept
Chair 3’s. Place three chairs in a row behind the 3-point line. Sprint from half court and have a teammate pass you the ball as you get to the chairs. Do not make contact with the chairs. On your shot, go straight up and straight back down. Backpedal to half court, then sprint back to the chairs. Perform on the left and right wings and in the middle. Run this drill at game speed for a set time, or until you sink a predetermined number of shots.
For privacy reasons YouTube needs your permission to be loaded. For more details, please see our Privacy Policy.
I Accept
Do’s and Don‘ts for ShootersPractice correct form by focusing on these tips during your shots.
Do:
- Know your range
- Know a good shot when you see one
- Step into the ball to get the shot off more quickly when receiving a pass
- Make yourself a good target for passers
- Use shot fakes to get by the defense
- Lift your elbow, follow through and reach for the cookie jar
- Practice at game speed
Don’t:
- Take giant steps
- Pass up an open 12-footer to get a contested 8-footer
- Leave your off hand on the ball too long; it could adversely affect your shot
- Fade on the shot
- Follow the flight of the ball; keep your eyes on the target
- Dip or hitch; catch the ball, get it to the shot area and shoot
Read more:
Share This Story!
Page load link
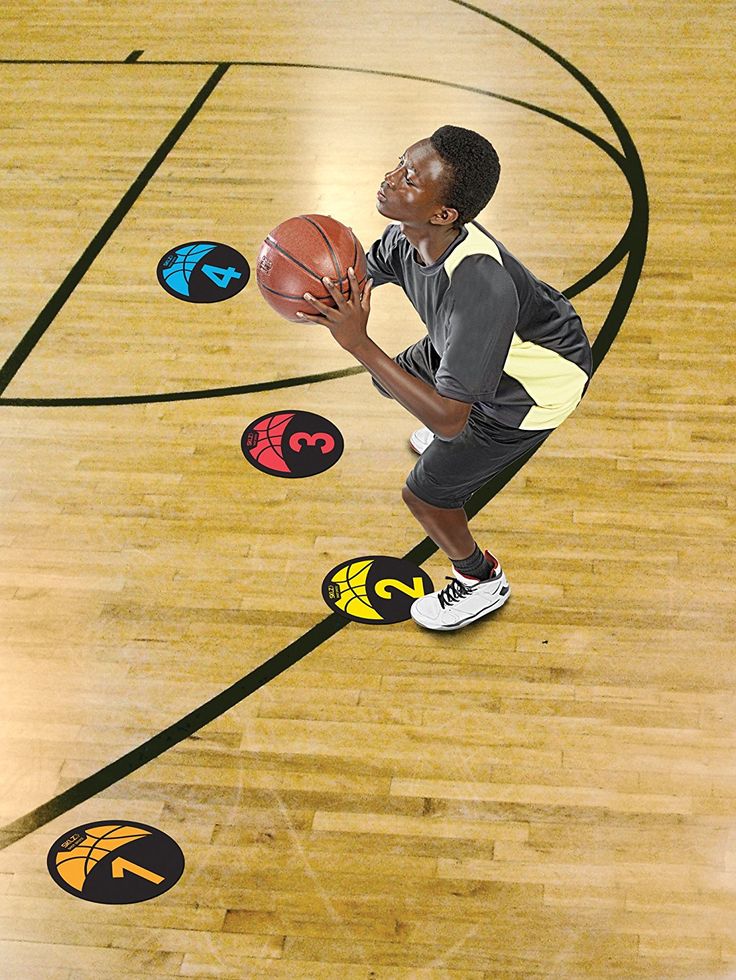
Shooting exercises
replica swiss watches
Basketball is a great team game, the team consists of players whose skill is achieved with great effort. The only person who can understand that you are working hard is yourself. Remember, you only get out of the game what you put into it. Give yourself to her without a trace.
Jump shot
In basketball, an outstanding sniper is a piece item. If you want to be a great sniper, all you need to do is just want to be one.
First, you must improve your skills.
This includes having a good coach and years of training. Secondly, you must improve in game mode.
This means that you must perform throwing drills at the same intensity as in the game. It's far better to hit 100 shots in play than 500 sloppy shots that a good defender would never let you make in a game. Finally, you must understand that working on a roll is like investing in a bank. If you don't deposit anything into your account, you won't receive dividends when you need them.
The sniper must have "throw school". When throwing after a dribble, one of the main features is the last hit of the ball on the court, which must be fast and strong so that it bounces higher, right into your hands - this will help you not waste time handling the ball.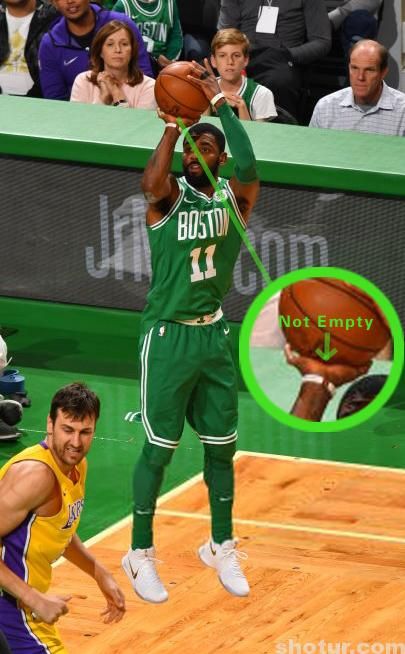
Individual Shooting Exercises
Exercise 1 Attention Concentration
- Start from a distance close to the ring.
- Throw with one hand. Follow correct technique.
- Make five from each position. Take a step back and repeat (Fig. 1).
Exercise 2 7 throwing positions and rebound (4 meters)
- Jump shot from position 1.
- Pick up the ball, dribble quickly to position 7, shoot.
- Pick-up, fast with guiding back to position 1.
- Make 10 rolls.
- Repeat the same steps using positions 6 and 2, 5 and 3, 4 (Fig. 2).
Exercise 3 7 shooting positions and a rebound (from behind the three-point line)
1. Repeat the same steps as in exercise 2 (fig. 3).
Exercise 4 Throw after stop
- Start from position 1, toss the ball to position
- Pick it up, while you have to run around the ball so that you are facing the ring.

- Make 10 rolls, then advance to the next position.
Ex.5 Shooting from five positions after a fake move (from four meters or from behind the three-point line)
- Start from any position.
- On bent knees and with your head up, you do a throw feint, hit the ball one or two with your right hand, stop and jump.
- Return to position, throw feint, one or two hits with the ball with the left hand, stop, throw.
- At each position, 5 attempts (Fig. 5).
Exercise 6 Jump shots after dribbling
- Start the exercise from the center of the field, move towards the hoop with dribbling at game speed, after stopping quickly shoot.
- The shot must be taken from a middle distance or from behind a three-point arc. Perform the exercise, both on the right and on the left and in the middle of the site.
- Use different types of dribbles: fast dribbles, broken tempos, pivots, etc.
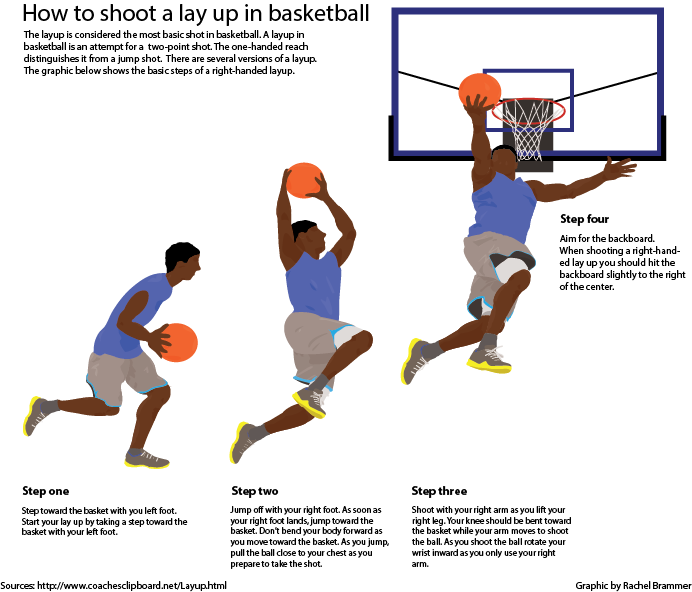
- Make 5 attempts in each direction (Fig. 6).
Exercise 7 Playing with a virtual opponent
- Perform a free throw. If you have implemented it, you get one point. If not, then your "opponent" is three.
- You make subsequent throws from any position except the three-second zone, imitating the rhythm of the game. Work on different moves and throws. Each of your successful attempts is estimated at the bottom of the point, unsuccessful at two for the "opponent". The game goes to 11 points.
- This is a very good exercise to consolidate what you have learned. Try! Improve! (Fig. 7).
Double shots
Dr. 8 2 players, shot and rebound (4 meters or from behind the three-point line)
- The drill starts with a good, clear pass. The player who made the pass from under the basket goes to the place of the thrower.
- The player in position 1 catches the ball and shoots.

- After the shot, the player runs to the rebound and then passes the ball 1 position and so on.
- Each player must make five throws. The exercise is performed at a fast pace, but the throws should not be sloppy.
- Then move to another position and everything is the same (Fig. 8).
Exercise 9 Two players, throw and rebound (per result)
- The exercise is performed as described above.
- The player who made the pass tries to interfere with the shot, but does not block.
- Game up to 5 hits.
- Then we move to another position, and so on. (Fig. 9).
Exercise 10 Two players, throw and rebound, throw feint
- The exercise is performed in the same way as the previous one.
- The defender who made the pass tries to interfere with the player in position 1, but does not block the shot.
- The attacker makes a throw feint and beats the defender.

- Performs a short dribble, stops and throws.
- Do 5 times each and change position (Fig. 10).
Ex. 11 2 players, shot after a stoppage (from four meters or from behind the three-point line)
- The attacker is in position 1, ready to receive the pass.
- The player under the basket passes.
- After the throw, the attacker waits for the rebound to be made.
- The player receives a pass by making a stop, but already in position 2. Then back.
- Make 7 throws, two free throws and switch (fig. 11).
Ex. 12 Shooting with movement (from four meters or from behind a three-point arc)
- The attacker moves around the perimeter at game speed.
- A player passes to the hand farthest from the ring.
- The attacker must stop, catch the ball and throw.
- Make seven throws, two free throws and change (fig. 12).
Note: The previous exercise has three options.
A) Receive the ball and throw it.
B) After receiving, throwing feint, dribbling in the same direction, throwing.
B) Receives a pass, throw feint, dribbling to the ring in the other direction, stop, throw.
Ex.13 Various dribbling options and a jump shot
- The attacker starts from the center of the field and, dribbling at game speed, moves towards the ring, stops and takes a jump shot.
- The player under the basket picks up the ball, the attacker runs to the center of the field, and receives the ball on the opposite flank. Moves with dribbling to the ring, stop, jump shot.
- On the right side, dribble with the right hand, on the left - with the left (Fig. 13)
Note: Use speed dribbling, change of pace, transitions, pivots.
Three players, two balls
Exercise 14 Warm-up exercise
- One player throws, another passes, a third rebounds.
- Thrower becomes rebounder after seven tries.
- Passer - thrower. Picking up - passing (Fig. 14).
Note: different options are possible
1) From seven positions (four meters)
2) From seven positions (from behind the three-point arc)
3) From five points with feints to shoot
4) Throw after stoppage
5) Throw and rebound (constant rotation around the circle)
Double shots: using screens
To use the screen effectively, you must read the defender correctly. You must always see the player with the ball and how the defender defends against you. A player who moves well off the ball and knows how to use screens correctly is very useful offensively. When you watch a match that has good players, notice how well they move off the ball. The hardest thing to defend against is a well-moving attacker.
Exercise 15 Back screen and snatch
- The player imitates opening and screening behind his back, makes a dash to the corner of the court.

- Throw to the nearest hand.
- Attacker catches the ball and shoots.
- The attacker picks up his shot, passes to a partner and returns to his original position.
- Make seven attempts and change (Fig. 15)
Note: do not back away when dashing, turn around and run, but do not lose sight of the ball.
Exercise 16 Screening behind the back, "false" screening
- 1. Attacker starts on the base of the trapezoid and moves up to imitate the screening.
- 2. After the imaginary breakout runs, the screening attacker rises to the ball and prepares to receive the pass.
- 3. Having caught the pass, he immediately makes a throw.
- 4. Make seven attempts and change (Fig. 16).
0003
- An attacker imitates a defender aiming for a screen and rises sharply towards the ball.
- The player must be ready to receive the ball.
- The attacker catches the ball and makes a quick throw.
- Make seven attempts and change (Fig. 17)
Exercise 18 Screening the ball carrier, moving away from the ring
- The attacker screens the ball carrier.
- The ball carrier passes through the screen aggressively.
- Instead of pulling back to the basket (deuce), the screening attacker moves away from the basket and prepares to receive the pass.
- Having caught the ball, he immediately makes a throw.
- Make seven attempts, then change.
Exercise 19 Barrier at the base of the trapezoid - opening to the flank
- The attacker takes the player under the ring, breaks shoulder to shoulder through the barrier and makes a dash to the flank.
- When catching the ball, the player must turn to the ring.
- Use different throw options: just throw, and dribbling to the right or left after a throw feint. Change after five attempts (Fig. 19).
Exercise 20 Screening at the base of the trapezoid - opening into the corner of the court
- The attacker takes the player into the three-second zone, pretends that he will break through to the flank through the screen, the defender starts running around the screener through the three-second zone.

- The attacker makes a dash to the corner of the court, and the defender hits the screen.
- Further, the same as in the previous exercise (Fig. 20).
Ex. 21 Screen at the base of the trapezoid - dash inward
- The defender is chasing you, not falling behind until the very screen.
- Then you run through the screen as close to the screener as possible and break into the three-second zone or foul line area.
- Receive the ball by turning towards the hoop and throw it.
- Also work out various options for continuing after receiving the ball. After five attempts, change (Fig. 21).
Throws in pairs: pass and discount
Exercise 22 Pass and discount - starting from the center of the field flank.
The receiving player is opened for transmission. Player receives a pass and shoots. The player who made the pass picks up the ball and gives it to the thrower. Players switch roles. Everyone makes ten throws (Fig. 22).
Exercise 23 Pass and discount - start from the flank
Variation of exercise 22 (Fig. 23)
Exercise 24 Pass and discount - start from the corner of the site one more
exercise 2
more variation 3 .24).
Methodology for teaching high school jump throw with one hand | Methodological development in physical education (Grade 11) on the topic:
CONTENTS
Introduction………………………………………………………….. p.2
Objective and tasks of the work…………………………………………….p.3
I. Characteristics of performing a jump throw
with one hand……………… …………………………………………p.4-6
2. Fundamentals of the methodology of training and improvement of
jump throw with one hand…………………………………… .p.7-910-11 ……………………………….p.12
5. Outputs……………………………………………………….p.13
6. Literature…………………………………………………p.14
INTRODUCTION
Basketball, as a sports and athletic game, has reached a very high level of development. Modern basketball is in a stage aimed at activating actions both in attack and in defense. Victory is achieved through struggle. This makes athletes and coaches look for new
means of combat and continuously improve the effectiveness of
training process. One of the main tasks of training is technical training, the role of which increases with the improvement of sports qualifications. As a rule, the final throws are in the center of attention: they bring the coveted points.
The main means of attack in modern basketball is
one-handed jump shot. In the competition of the strongest teams in the world up to 90% of all throws are performed in this way from various distances. Successful basket shots require the greatest accuracy. Recently, the fact that the percentage of shots hit by basketball players in the game is much lower than the results achieved when implementing shots in training conditions attracts attention.
In modern basketball, the problem of achieving high hitting accuracy due to the six-meter line is becoming increasingly acute.
This is all the more important because, while previously only the back row players needed this skill, it is now required by almost all players.
At the same time, insufficient attention has been paid to the method of initial training of young basketball players in jump shots. Throw in a jump from a distance begin to study the last or one of the last. Almost by this time, the individual elements of the throw have already been mastered. The main methods of improvement should also include the complication of the external environment, exercises in various states of the body and the method of conjugated influences (A.Ya. Gomelsky, 1965).
Despite the close attention of basketball experts to the development of methods for improving the technique of throws, at present, due to the full intensification of the game, this issue has received a new, broader meaning and urgently requires effective recommendations. The need to rationalize the methods of studying and improving technology also follows from the fact that most of the lows are associated with maximum physical and psychological stress in terms of volume and intensity (V. F. Lunichkin, 1968). The player performs a throw based on the developed dynamic stereotype, i.e. a predetermined program of action (S.V. Golomazov, 1968).
THE PURPOSE OF THE WORK is to identify methodological methods of teaching, improve the technical training of high school students by developing means of teaching basketball jump shots.
OBJECTIVES:
- Based on the analysis of literature data, characterize the technique of jumping with one hand.
- Describe the main means of improving the jump shot with one hand.
- Provide some guidelines for using the exercises.
I. CHARACTERISTICS OF THE TECHNIQUE FOR PERFORMING A JUMP THROW
WITH ONE HAND.
Modern ideas about the technique of performing a jump shot provide three important points that should be taken into account when teaching and improving jump shots. These three positions are quite general and should be followed by every player, regardless of the individual characteristics of the throwing technique.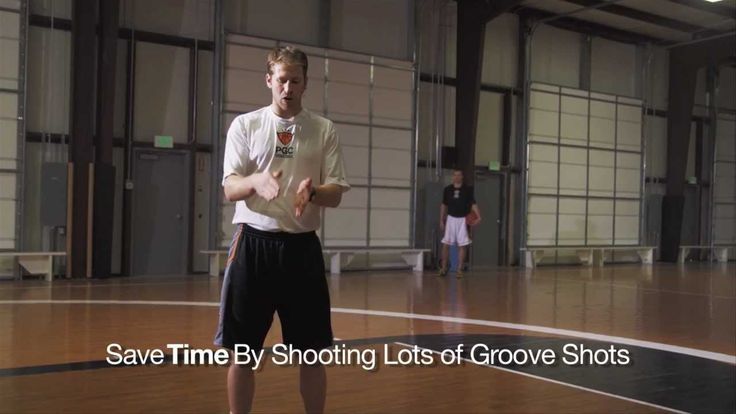
1. FOOTWORK
A jump shot may be taken from a standing position or after a dribble. On the move, the player can approach the basket from the right and left. Considering that the vast majority of players cannot use both hands when performing jump shots, the footwork technique in all three cases will be different, since it is necessary to ensure a comfortable body position for throwing with the right hand. What position of the body when throwing with one hand in a jump should be considered convenient? First of all, in the air, the player must be in a state of balance, which will provide the necessary concentration when performing the throwing movement. Secondly, in order to eliminate unnecessary muscle tension, the player's body should be slightly turned sideways from the side of the throwing arm towards the basket.
To comply with these provisions, when performing a jump throw with the right hand from a place, it is enough to push the right foot forward a little before taking off.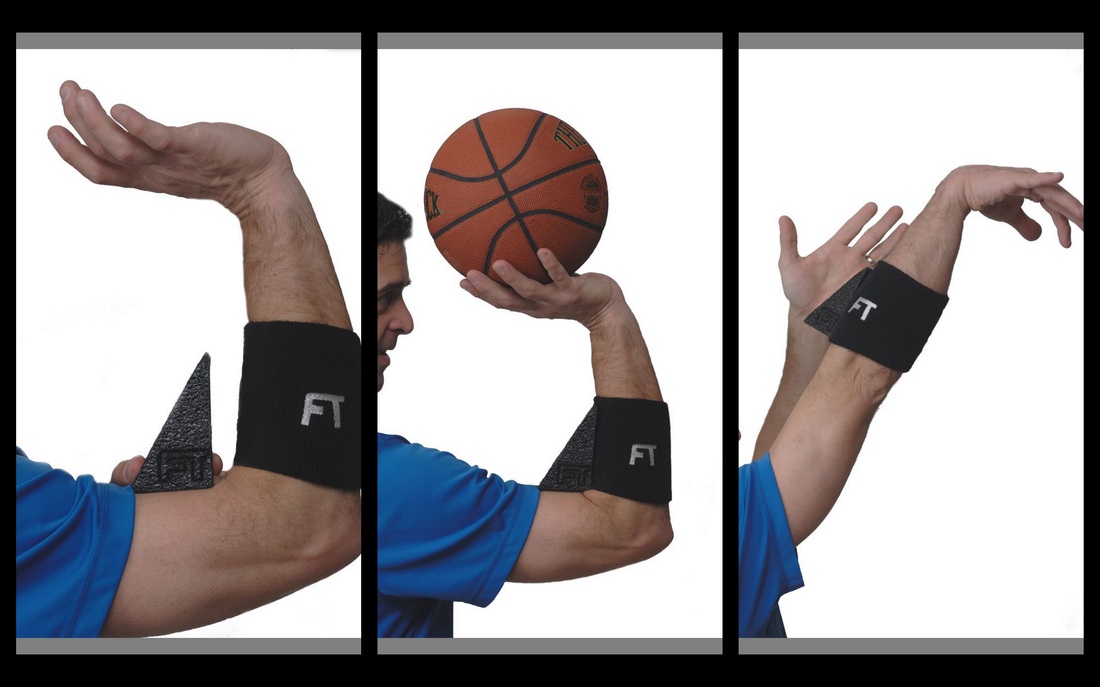 This position of the legs during vertical repulsion gives the body the necessary turn, providing comfortable conditions for the throw.
When throwing at the moment of stop after movement, the correct starting position is largely determined by the work of the legs. First of all, the inertia of the translational motion must be extinguished. For this, the so-called "stopping" step is used. When moving along the left edge, the player is already turned with his right side towards the basket. At the moment of stopping, he takes a stop step with his right foot, turning the toe of the foot in the direction of the basket. Putting the left foot parallel to the right, the player performs a repulsion up. When moving very fast, the repulsion is performed slightly backwards so that the action of multidirectional forces allows the player to take off vertically. When moving on the right side, the player performs a stop step with his left foot, the toe of which is directed towards the basket, and then brings his right foot forward, which allows him to turn his right side to the basket.
Thus, the footwork is reduced to the following: after receiving the ball in motion, a stop step is taken with one foot, the other leg is attached, bending the elbows, the ball is taken out on the right hand above the head, supporting it with the left hand in front from above. In the main phase: the player jumps with a push with two legs, while the body is turned directly towards the basket, the legs are slightly bent. After reaching the highest point of the jump, the player directs the ball into the basket. After the end of the throw, he lands very softly on bent legs. This position of the body is beneficial, because. allows the player to continue active actions without delay. A player, for example, can immediately join the fight for a ball that has bounced off the ring, or, preventing the birth of a counterattack, take a defender under close guardianship.
2. WORK OF THE ARM
The main force when throwing the ball into the basket should come from the forearm while extending the arm at the elbow joint. Sometimes players try to send the ball into the basket with the hand of a pre-straightened arm. Due to the forearm, you can apply longer, more powerful efforts to the ball. It should not be forgotten that the hand is a tool for fine adjustment of the accuracy of movement, and therefore it is hardly advisable, especially when throwing from medium and long distances, to overload it with excessive tension. The work of the hand is reduced to the following: after a stop step and placing a foot, the elbows are bent, the ball is carried on the right hand above the head, supporting it with the left hand from the front from above. After reaching the highest point of the jump, the player directs the ball into the basket by straightening the right arm forward and upward and with an energetic, but smooth movement of the hand and fingers. The ball is spinning backwards. The left hand is removed from the ball at the moment the right hand begins to move. If a player begins to perform a jump shot in the absence of a tight guard of the defender, then it is possible to carry the ball overhead not before the jump, but simultaneously with the jump.
 Then the swinging movement of the hands helps the player to jump higher.
3. WORK OF THE HAND
In the final phase of the throw, the hand performs flexion at the wrist joint. When performing a jump throw from a relatively close distance, there is no need for a large amplitude of the extensor movement of the arm with the ball. The main throwing movement is the movement of the hand and fingers, thanks to which the player raises the level of the initial position of the ball immediately before the throw and the point of release of the ball in order to successfully overcome the resistance of the opponent. A throw from a long distance is characterized by a large amplitude of swing and extensor movement of the arm with the ball. The required flight range of the ball is provided by coordinated extensor movements of the arms, hands and partly of the body.
From the beginning to the end of the movement, the eye must be directed to the basket. Players make the mistake of watching the ball fly instead of looking at the target. When aiming, the player keeps the whole basket in sight. Be that as it may, the player must look at the target, and not follow the movement of the ball with his eyes.
The power of a basket shot is determined primarily by rational technique, stability and control of movements, the correct alternation of muscle tension and relaxation, the strength and mobility of the hand, its final effort, as well as the optimal trajectory of the flight and rotation of the ball.
II. BASICS OF THE METHODOLOGY FOR TEACHING AND IMPROVING THE JUMP THROTTLE WITH ONE HAND
Throwing into the basket with one hand while jumping is a complex technique. The learning process is more successful as long as beginners do not yet have the wrong skills. Based on the characteristics of the described throw technique, the sequence of learning to throw in a jump can be represented as follows.
- Training in the correct way to hold the ball - the ball rests freely on the fingertips, the index finger determines the central axis.

- Teaching the throwing position – elbow pointing towards the basket, wrist turning under the ball while the ball is being carried up.
- Learning to release the ball - the final movement of the hand, eliminating the push. A piece of tape glued to the ball will allow you to follow the axis and direction of rotation of the ball. Exercises are carried out first against the wall, then in games.
- Connection of learned parts with jumps. When making a throw, the player must land on the take-off point.
- Mastering the finishing move after releasing the ball.
To teach the player how to shoot at the highest point of the jump, the following methods can be used:
a) throw from behind the screen - the player sees the basket only at the highest point of the jump;
b) after jumping up, the player must say the word “pause” aloud, and then perform the throw.
The novice player must shoot from a distance so that his level of fitness allows him to observe the correct throwing movement.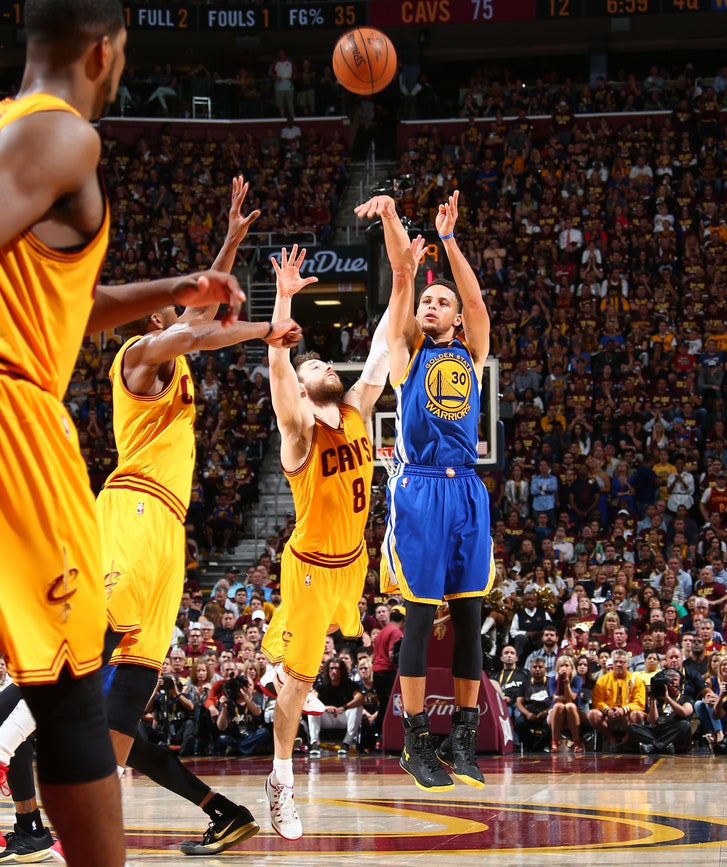 In conclusion, we present a number of exercises that contribute to the development of physical fitness.
1. Take off to jump with the front of the feet. To jump higher, you need to strengthen the muscles of the lower leg. This is where shoulder weight exercises come in handy. Standing with the front part of the feet on the bar (5 - 10 cm), rise on toes.
2. Long distance jump shot is easier with strong abdominals. There are many exercises to strengthen the abdominal muscles, and they are well known.
3. A strong and agile hand is needed for a well-aimed throw. You can strengthen it by squeezing a tennis ball with your fingers, pushing up from the floor, exercising with a rubber band. This exercise is very useful: stand in the middle of the tourniquet with your feet, and take it with brushes at the ends. In this position, raise your arms to the sides and up, forward and up.
DRIVING EXERCISES WITHOUT A BALL
Exercise 1. Students should take the correct position of the legs, body, and arms before the throw, straightening the legs (without jumping) to imitate a hand throw into an imaginary basket.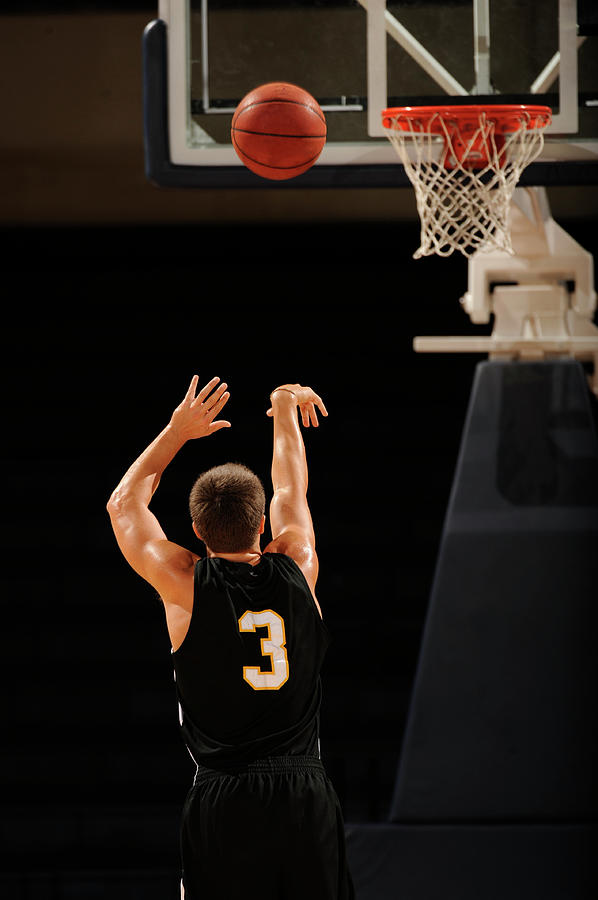
Exercise 2. The same, after turning in place by 90 - 360o.
Exercise 3. The same, stopping after walking, running and accelerating, simulating dribbling.
Exercise 4. The same, stopping and turning 90 - 3600, after walking, running, accelerating, simulating dribbling.
Ex.5. Students take the correct position of the legs, simulating a throw with one hand on the right.
Exercise 6. Students take the correct position of the legs, simulating a throw with one hand on the left.
Stop before throwing with the right hand, i.e. on the right, perform, making a stop step with the left foot, then the right foot is attached to the left at a distance (from the foot to a half step). Both legs are slightly bent before jumping (left throw changes footwork).
Turn 90 - 360o is performed around the stationary left leg, on the toe by rearranging the right leg with the right shoulder - turn forward.
Ex.7. From a position before the throw, perform a jump with a push of two legs, with simultaneous imitation of a throw with one hand into an imaginary basket.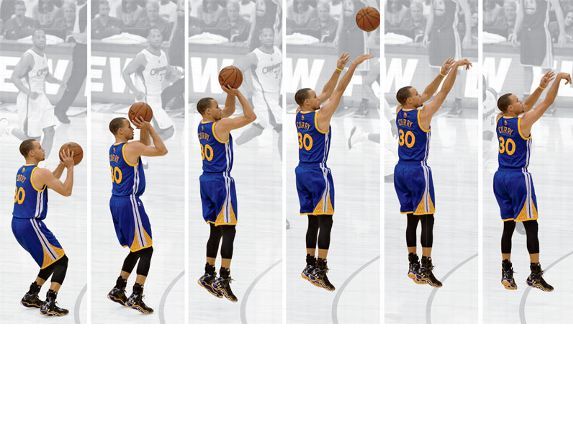
Exercise 8. The same, repeat the jump throw after landing (up to 10-15 times).
Exercise 9. The same, to make a throw, stopping after walking, running, accelerating, imitating dribbling.
Exercise 10. The same, to make a throw, stopping and turning 90 - 360 degrees, after walking, running, accelerating, imitating dribbling.
LEADING EXERCISES WITH A BALL
Exercise 1. Standing on straight legs, the ball is on the wrist of a straightened arm, passing the ball due to the movements of the hand and fingers (make sure that the fingers do not clench into a fist after the transfer), the index finger was the leader in the work of the hand.
Exercise 2. Take the correct position before the throw, straightening the legs (without jumping), throw the ball to the partner by extending the arm in the elbow joint (make sure that the forearm is in a plane parallel to the floor).
Ex.3. In a kneeling position, sitting on a chair, gymnastic bench, on the floor - passing the ball with one hand to a partner (observe the trajectory of the ball, like throwing into a basket).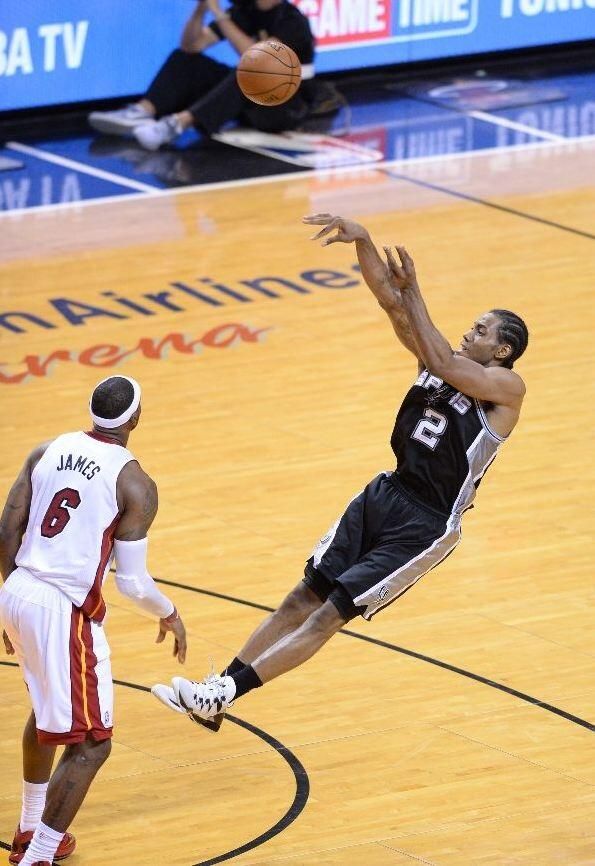
Exercise 4. Same, jump shot.
Exercise 5. Throw to a partner in a jump, stopping to receive the ball in a straight line after walking, running, accelerating.
Exercise 6. Throw to a partner in a jump on the right (focus on the correct work of the legs).
Exercise 7. The same, on the left.
Ex.8. The same, with a rotation of 90 - 360o.
Exercise 9. Throw to a partner in a jump after hitting the floor, stopping after slow dribble, dribble with acceleration, changing the height of the rebound and direction of movement.
Exercise 10. The same, with a rotation of 90 - 360o.
It is necessary to control the correct movement of the arm, hand and fingers, to achieve mandatory relaxation (fingers, hands) after the throw. Make sure that the chest, face, palm at the time of the release of the ball would be in the same plane and directed towards the partner. Pay attention to the correct work of the legs when throwing to the right, to the left and in a straight line.
Introductory exercises can be included both in the preparatory and in the main part of the lesson.
III. METHODOLOGY FOR TEACHING AND IMPROVING THE ONE-HAND JUMP THROTTLE
I. EXERCISES IN THE THROWS WITHOUT RESISTANCE OF THE DEFENDER
At the first stage, the guys perform the throws at a low pace and without resistance. The teacher focuses on the correct technical execution of the throws.
Throwing exercises are usually carried out in the following formations:
- in 2-3 columns for each shield. The first one throws the ball in the way indicated by the teacher, picks up the ball and gives it to the next partner, and he himself stands at the end of the column;
- in a semicircle: the students take turns throwing the ball at the basket. One player stands under the ring, catches the ball and passes it to the partners;
- in two columns on the sidelines, facing the backboard. Some throw from the right side, others pick up the ball and throw from the left.
 From one column, players constantly move to another.
Good results in improving the jump shot without the resistance of the defender are given by competitions in pairs, triples.
Ex.1. The group is divided into pairs. The player, having made a throw into the basket, (when hit, a point is counted) picks up the ball and gives it to his partner, returns (without the ball) to the place where the throw was made. Competitions are held up to a certain number of hits.
Exercise 2. Same. After one or two hits in a certain basket, a pair that quickly moved in the opposite direction performs the same number of throws into another basket, and so on.
Ex.3. Two pairs compete in hitting the ball into a certain basket. Each pair has one ball. On a signal, the players with the ball throw the ball into the basket, the players without the ball pick them up and give them to their partners, they throw again and so on up to 5 - 20 hits. Players scoring 5 - 20 hits change places with their partners. The pair that completes 5-20 hits twice faster wins.
Exercise 4. The group in pairs is lined up behind the end line. On a signal, the first pair, passing the ball between themselves, rapidly moves towards the opposite shield. The player, having reached a certain zone, stops and makes a jump shot, another player picks up the ball, throws it again into the basket, and then returns to its original positions, etc.
In exercises 2-4 pay attention to the speed of the throw. It is especially important to be able to perform jump shots after accelerations and other movements.
2. BASKET SHOT WITH DEFENDER'S RESISTANCE
Throw into the basket worked out to perfection from certain positions gives the player the basis to make it through the defender's hands.
Unwarranted timidity, loss of initiative and slowing down the pace of play in advantageous shooting situations should not occur in players who shoot well. For example:
- The player received the ball, faced the defender, who was at a distance of 1 - 1.
 5 meters, and did not use the dribble. Make a false movement to leave, instantly take the starting position for the throw and perform it in a jump.
 - The defender managed to approach and there are fears that he will block the path of the ball in a jump. Make a false movement to throw, without taking your feet off the floor, start a jump throw, after the defender, having reacted to the false movement, jumped up and starts to land.
- The defender does not react to false movements, is nearby and interferes with the throw. The attacker, having made a false movement to the left, with a sharp lunge to the right - with his left foot - bypasses the defender, stops and performs a throw without approaching the backing defender.
- The player received the ball with his back to the attacking basket and did not use the dribble. The attacker instantly turns 180° and performs the actions above, or starts a jump with his back to the attacked basket and turns in the air, performs a throw.
In addition to the listed means and methods of training and improvement for the development of accuracy of throws, it is necessary to use all their diversity: this is 1) the use of special equipment; 2) emotional stress; 3) against the background of fatigue; 4) changes in the nature of work; 5) noise interference, etc.
IV. SOME METHODOLOGICAL RECOMMENDATIONS FOR THE USE OF THE ABOVE EXERCISES
in such links in which students compete.
Necessary recommendations for performing a particular exercise are given immediately after its description.
Description of all exercises is made for throwing with the right hand. What to pay attention to when performing exercises in throws:
- Perform throws quickly.
- In the starting position, hold the ball close to the body.
- Accompany the throw with the arm and hand.
- Constantly keep your eyes on the target.
- Monitor the ease and ease of throwing.

- Control the ball while throwing with your fingertips.
- Fully concentrate on the throw.
- To maintain balance, keep your shoulders parallel.
CONCLUSIONS
- It seems that when mastering the technique of throwing in a jump with one hand, the trainees' attention should be focused sequentially on the following elements of the technique: 1) footwork; 2) hand work; 3) brush work; 4) a combination of movements in a diverse environment.
- The methodology for teaching the one-handed jump throw should include perfecting the technique of the arm and hand, and then connecting the various parts of all movements in light conditions, with protection, etc.
- To develop the accuracy of throws, it is necessary to use a variety of methods and training tools: 1) the use of special equipment; 2) emotional stress; 3) against the background of fatigue; 4) change in the nature of work; 5) noise interference, etc.
L I T E R A T U R A
V.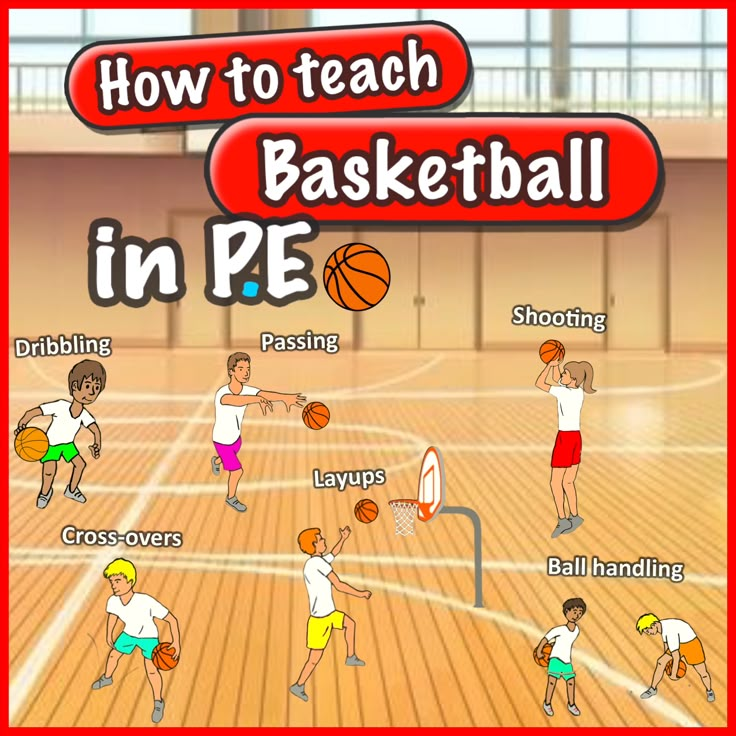 V. Kuzin, S.A. Polievsky "Basketball. The initial stage of training”, Moscow, FIS, 1999
T.Ya. Peterson Mini Basketball. M., FIS, 1973
Yu.F. Builin, Yu.I. Tailors "Mini-basketball at school", M., Prosveshchenie, 1976
G. Pilhoster "Encyclopedia of basketball exercises", M., FIS, 1973
K. Bee, K. Norton "Exercises in basketball", M., FIS, 1972
A. Zinin "Children's basketball", M., FIS, 1969
A. Zinin "The first steps in basketball", M., FIS, 1972
T. Zeldovich, S. Keraminas "Training of young basketball players", M., FIS, 1964
"F. Basketberg" ., FIS, 1971
A.Ya. Gomel "Special exercises in basketball", M., FIS, 1967
E.R. Yakhontov "Young basketball player" Manual for coaches, M., FIS, 1987
Yu.M. Portnov, V.P. Savin, A.V. Alekseev "Sports games: technique, teaching methods. Textbook for students of higher pedagogical educational institutions, M., "Academy", 2004
D.I. Nesterovsky "Basketball: theory and teaching methods.