Home »
Misc »
How to wrap an ankle for basketball
How to wrap an ankle for basketball
How To Wrap An Ankle For Basketball
When it comes to working out, finding a workable method is key so you don’t lose focus or end up injured. To stay balanced and avoid injuries, practice often and keep your core muscles strong.
If you find yourself struggling to maintain balance, use your body’s natural reflexes to help regain control. Achieving balance can be challenging but with practice, the techniques will become easier to master over time.
Maintaining stability while exercising requires concentration and patience – remember these tips and you’ll be on your way to success.
How To Wrap An Ankle For Basketball?
There are many methods that you can use to keep your balance when working out, but the most important thing is finding a workable method for you. If you want to stay balanced during workouts, it’s important to have a strong core; practice often and don’t overdo it.
When practicing flexibility exercises, be sure not to push yourself too hard or take on too much at once; start with smaller goals and gradually increase the difficulty as needed.![]() Be patient while working towards your fitness goals. Remember: practice makes perfect.
Be patient while working towards your fitness goals. Remember: practice makes perfect.
Find A Workable Method
There are a few ways to wrap an ankle for basketball, but the most effective depends on your comfort level and injury. Wrist wraps can be used as well if you have some strength in that area of your arm.
Ankle straps should fit snugly around your ankles without being too tight or restrictive, and they should also provide support when jumping onto or off the ground. You may find success using a method known as “the tourniquet” which involves wrapping the ankle with Ace bandages then securing them with quick-release buttons or ties at both ends ).
Some people prefer to use Support Shoes while playing basketball because they help distribute weight more evenly across the foot, providing additional stability during play
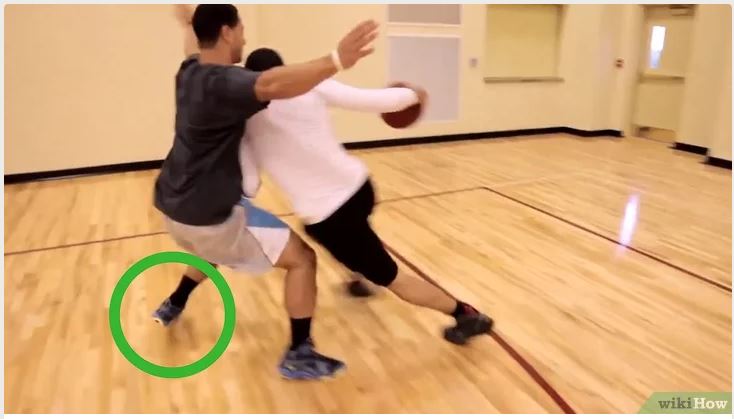
Stay Balanced
Ball handling can be tricky, but following these simple tips will help you stay balanced and in control on the court. Use your body to block shots and keep them from going in, as well as contest rebounds with aggression.
Remember to always stay low when driving to the basket so that defenders cannot lift or bump you off balance. Stay aware of your surroundings at all times by scanning for potential danger spots before diving into action Try using a wrap like this one designed specifically for basketball players
Use Your Core To Keep Your Body Steady
A strong core is essential for basketball, just like it is for any other sport. When you are guarding your opponent, keep your body in a straight line by using your core to stabilize yourself Keep the ball low so that you can deflect shots and maintain control of the game Use quick footwork to get around defenders and score points Practice balance and agility drills regularly to improve your skills on court
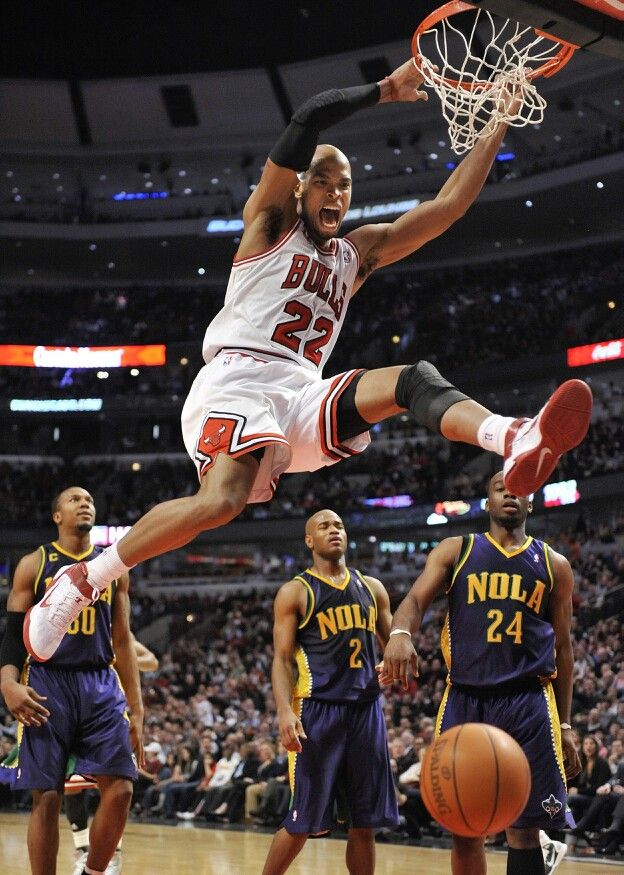
Practice Often
Ankle injuries happen when you twist your ankle in a fall or when you do too much running with the ball.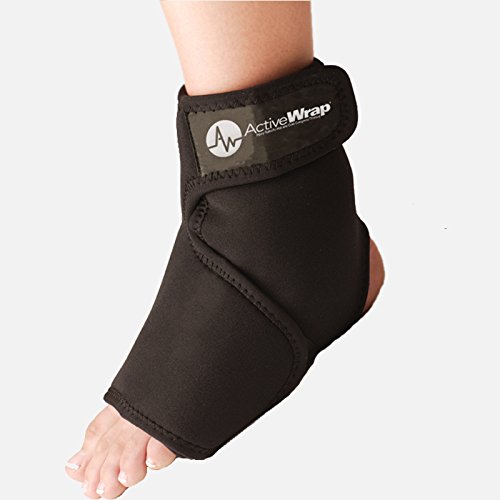 To practice frequently and help prevent an ankle injury, wrap it well after each basketball game or practice session.
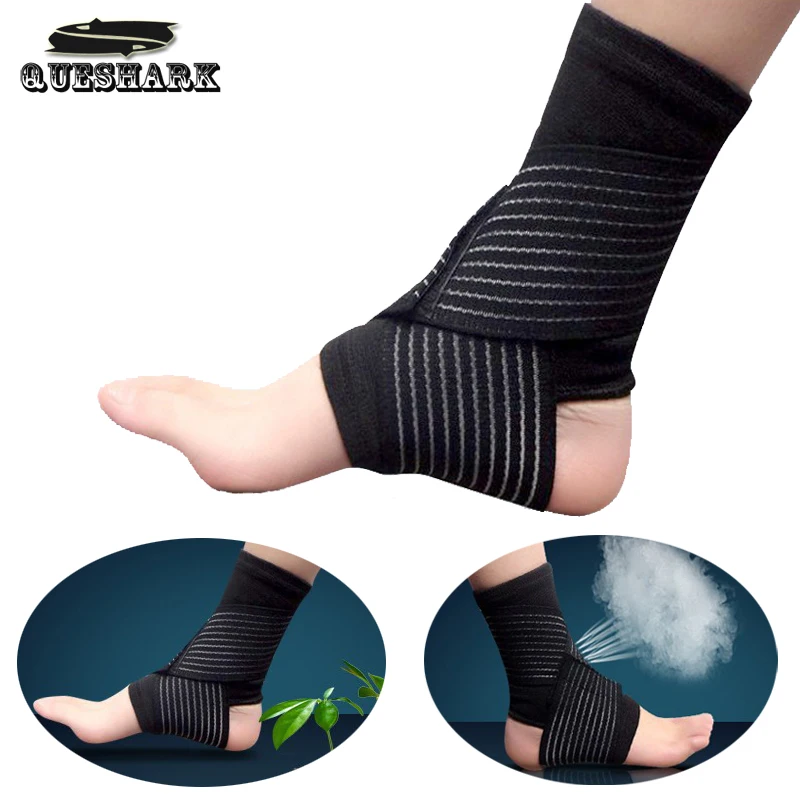
There are many different types of athletic wraps to choose from, so find one that is comfortable for both you and your ankle joint. Try not to use excessive strapping as this can cause more damage than good. Nearly everyone who practices basketball should make some form of preparation for their ankles before playing by wrapping them often
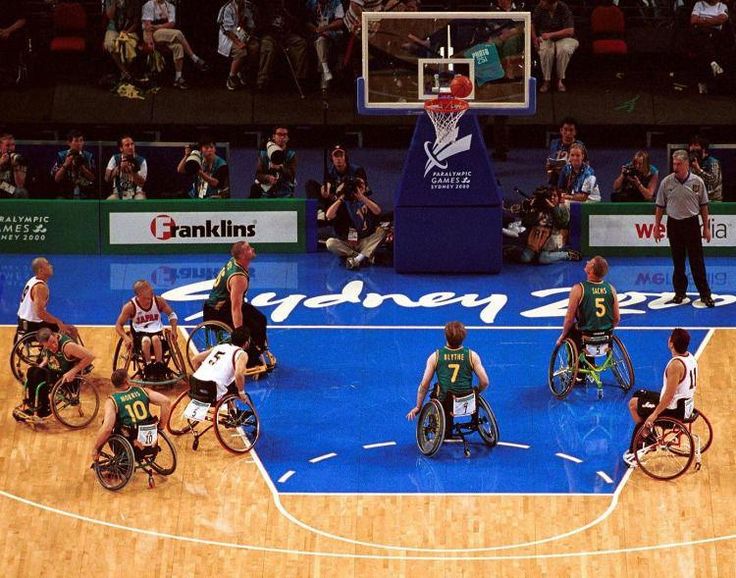
Do basketball players wrap their ankles?
Yes, basketball players wrap their ankles to help prevent ankle injuries. This is especially important for younger players who are still growing and developing their bones.
Wrapping the ankle helps distribute shock throughout the entire foot, preventing any major damage from occurring.
- To prevent injuries while playing basketball, many players wrap their ankles with tape. This support device helps to keep the ankle in place and can help to reduce the chances of sprains or other serious injuries.
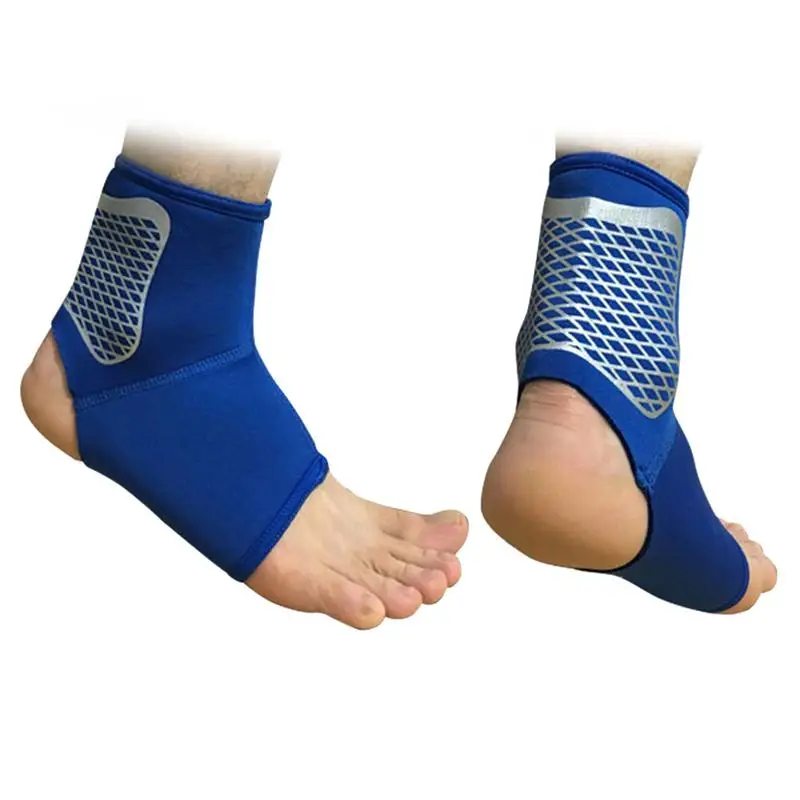
- Professional basketball players often wear bracelets around their ankles to help them stay stable on court and prevent further damage from occurring. Bracelets are also worn by recreational players as a way to protect themselves from injury.
- Many shoes don’t provide enough support for recreational players, who may be wearing them for hours at a time without taking them off properly. When this happens, the feet can become overheated and swollen which can lead to tendonitis or other foot issues later on in life.
- Ankles need adequate rest after extended periods of activity like playing basketball in order to avoid overuse injuries such as Achilles tendinitis or plantar fasciitis (a heel sprain). Wearing sneakers that fit properly will also give your feet some much-needed relief between games.
- Taping your ankles is an effective way of protecting yourself from injury when playing sports – make sure you know how to do it correctly so you don’t end up hobbling around instead.

How do you wrap a sprained ankle for a game?
If you sprained your ankle in a game, the first thing to do is find a comfortable spot and elevate it. This will help reduce swelling and pain. After that, you’ll want to wrap it as tightly as possible using bandages or tape.
Make sure to change the dressing every two hours until it’s completely healed.
- When you have a sprained ankle, the first step is to apply pressure to the area and keep it tight with bandages.
- Make sure you wrap it twice around your ankle – once on top of the other – then make sure the tape is tightly secured in place.
- You should also try wrapping it three or four times if possible for extra support.
- Finally, be sure to keep the wrapped ankle as still as possible so that any swelling can dissipate properly.
How do you wrap an ankle for athletic training?
There are a few different ways to wrap an ankle for athletic training. The most common is to use a bandage or sock.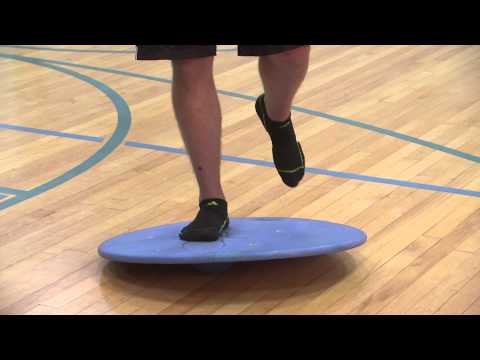 You can also use a tape measure andwrap it tightly enough so that the ankle doesn’t move but isn’t too tight.
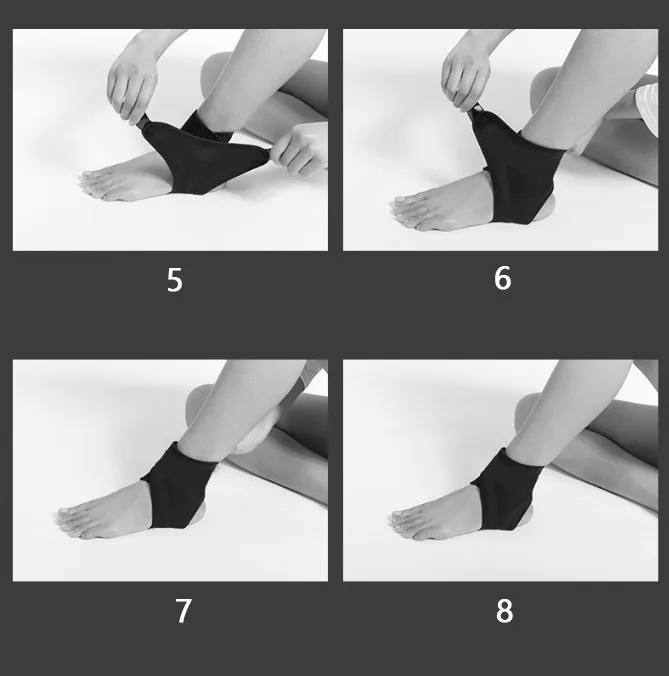
Apply Heel-Locks
Heel-locks are a type of bandage which can be used to immobilize an ankle during athletic training. They work by applying pressure to the Achilles tendon, preventing the foot from moving and causing less pain.
Progress Over The Front Of Ankle Joint
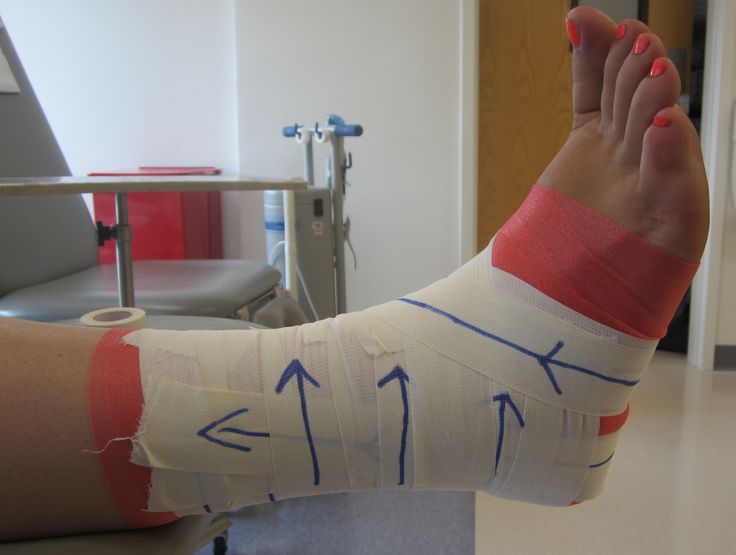
The front of the ankle joint is more susceptible to injury than the back, so it is important that you start wrapping at this location first. By wrapping over the front of the joint and then progressing backwards, you will help protect this area from further damage.
Wrap Under Arch At A Downward, Backward Angle
Wrap your ankle in a downward (backwards) and backward angle in order to support it while it heals. This position will also help keep swelling down and minimize inflammation around your wound site.
Repeat From Opposite Side
Once you have wrapped your ankle up properly, make sure to do it again on the other side. Wearing socks on both feet makes it easier for you to stay consistent with these steps and ensure that your wrap is tight enough without being too restrictive or painful
Why do basketball players not wear ankle braces?
A basketball player’s ankle is constantly moving in different directions. This can cause the ankle to wear down quickly, and if it does not have support it may buckle or pop-out of its socket.
To prevent this from happening, many NBA players now use ankle braces during games.
Abrasions
Ankle braces protect the ankle by providing support and protection during falls or injuries.
They also help to prevent abrasions, which can lead to serious skin tears.
Injuries from Falling to the Ground
Basketball players often fall down while playing, which can cause sprains and fractures in their ankles.
Lack of ankle brace supports can cause these injuries to worsen as bones and joints are put under constant strain.
Weight Bearing on Ankles Causes Flexion and Tearing of ligaments in Ankles
The weight that is borne on an ankle every time a player takes a step puts immense stress on the ligaments supporting it – this is why wearing ankle braces helps keep your ankles healthy and injury-free.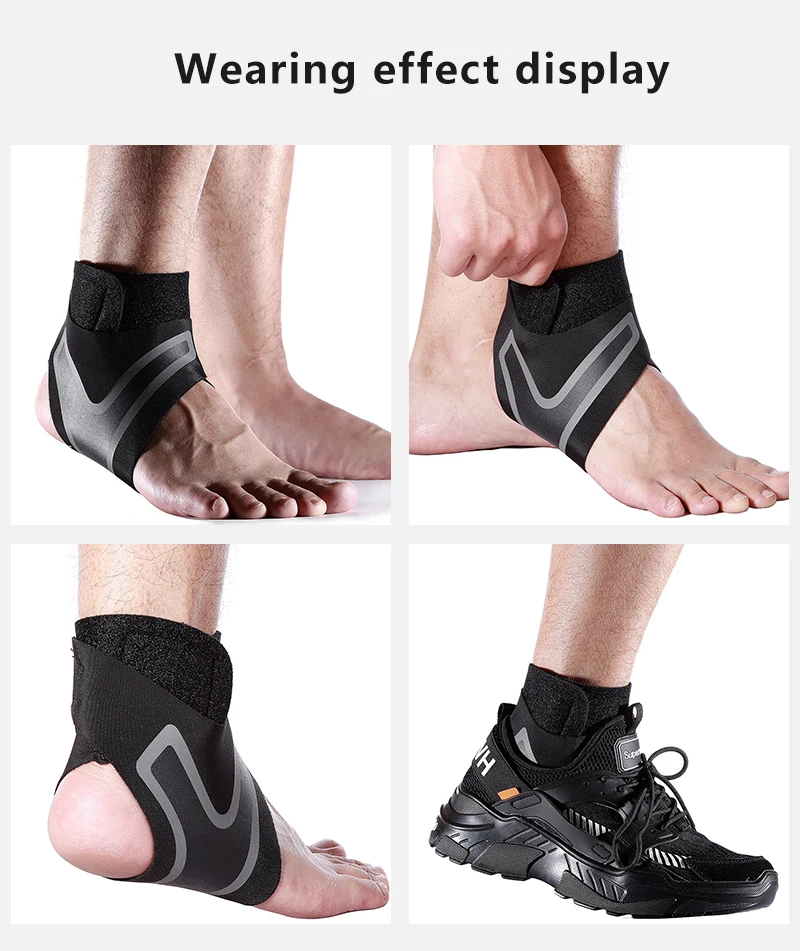
Muscles Get Tired Quickly From Continuous Use
Muscles get tired quickly when they’re constantly being used – this is especially true for muscles that are responsible for movement such as those in the ankles and feet. This leads to them becoming less stable, more likely to tear, or become inflamed due to excessive use over time…which all adds up to bad news for basketball players’ ankles.
Should I tape a sprained ankle?
If you have a sprained ankle, make sure the area is clean and dry before applying adhesive tape. Apply a thin layer of adhesive to the bottom of your ankle, above the shoe.
Allow enough time for the adhesive to become firmly attached before moving on
To Recap
Wrap the ankle tightly with a bandage, making sure it is snug but not too tight. The goal is to keep swelling down and protect the area from further injury.
Similar Posts:
Why Do Guys Wear Rubber Bands On Their Wrist
Looking for a way to show your love and appreciation to your significant other? Well, you can do just that by giving them rubber bands as a token of affection! There are many reasons why guys might prefer rubber bands over other types of gifts, such as: -They’re comfortable to wear.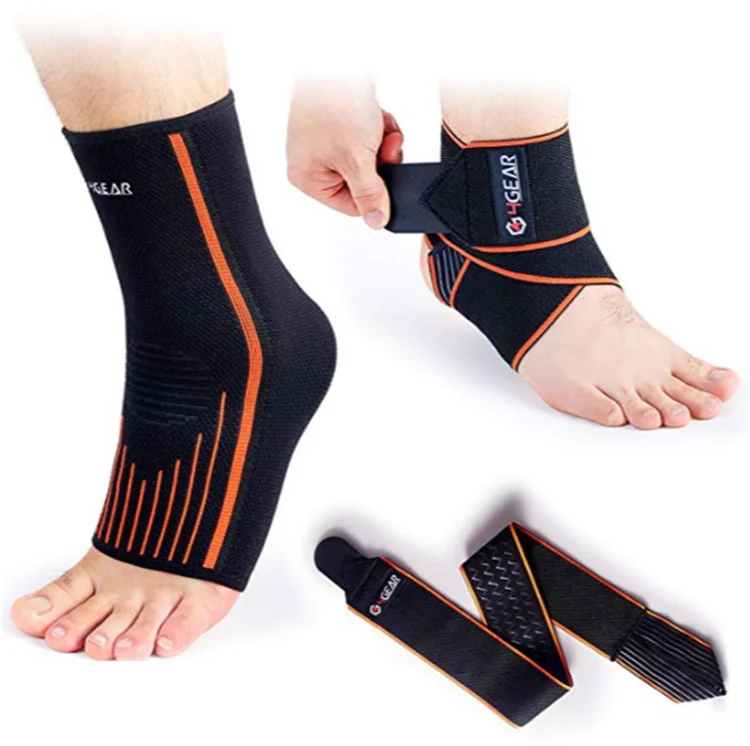 -They’re easy to store.
Is It Ok To Wear Skechers?
There is no right or wrong answer when it comes to Skechers. People can wear them for different reasons and styles.
Are Golf Shoes Good For Hiking?
Hiking is a great way to get some fresh air and take in the natural beauty of your surroundings. However, it can be dangerous if you are not properly equipped.
What Muscles Are Used In Bowling?
Bowling is a physical activity that uses many different muscles, including the quadriceps, hamstrings, glutes, lower back, and shoulders. Source: bowlatrabs What Muscles Are Used In Bowling When it comes to bowling, you will use a variety of muscles and joints in order to execute the perfect strike.
How To Make An At Home Golf Net?
Making an at home golf net is easy. All you need is a piece of sturdy cardboard, some tape, and a hole saw.
How To Hang A Golf Net?
Hanging a golf net is an easy way to improve your game by Practice hitting the ball into the net.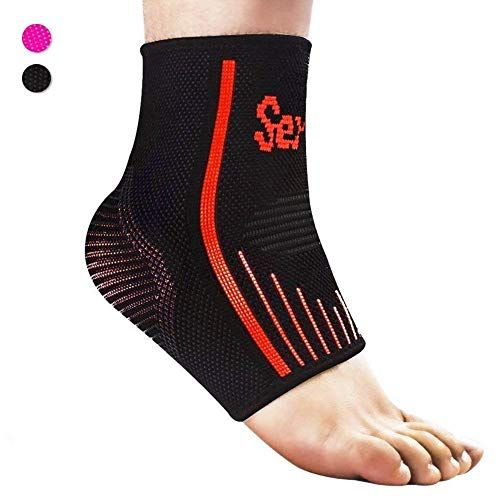 Source: youtube How To Hang A Golf Net When it comes to golf, everyone loves getting a hole in one.
How to Tape an Ankle with Medical Tape or Kinesio Tape
Share on Pinterest
We include products we think are useful for our readers. If you buy through links on this page, we may earn a small commission. Here’s our process.
Ankle tape can provide stability, support, and compression for the ankle joint. It can help reduce swelling after an ankle injury and prevent reinjury.
But there’s a fine line between a well-taped ankle, and one that’s taped too tight or doesn’t provide the needed support.
Keep reading for our step-by-step guide on how to effectively tape an ankle.
Tape
You have two main options for taping your ankle: They are athletic tape, which an athletic trainer may also call strapping or rigid tape, and kinesio tape.
Athletic tape
Athletic tape is designed to restrict movement. The tape doesn’t stretch, so it’s usually best-suited for stabilizing an injured ankle, providing significant support to prevent injury, or otherwise restricting movement.
You should only wear athletic tape for a short period of time — roughly less than a day unless a doctor suggests otherwise — as it can affect circulation.
Shop for athletic tape online.
Kinesio tape
Kinesio tape is a stretchy, moveable tape. The tape is best-suited for when you need range of motion in the ankle, but want additional support. You may want to wear kinesio tape if:
- you’re back to physical activity after an injury
- you’re back on the playing field
- you have unstable ankles
Kinesio tape can stay on much longer than athletic tape — usually up to 5 days. The stretchy nature of the tape doesn’t usually restrict blood flow and is waterproof, so you can still shower or bathe with the tape on.
Shop for kinesio tape online.
Support accessories
Some people may also use special accessories to increase the tape’s effectiveness and reduce blistering or discomfort that it can sometimes cause. Examples include:
- heel and lace pads, which are applied on the top of the foot and over the heel
- taping base spray, which helps reduce friction while also allowing the tape to better adhere to the skin
- prewrap, which is a soft, stretchy wrap that’s applied before athletic tape and makes the tape easier to remove
Shop for heel and lace pads, taping base spray, and prewrap online.
Since using athletic tape involves a different approach than kinesio tape, there are a few separate steps for each approach. Both approaches will start with clean, dry skin. Be sure to avoid taping over open wounds or sores.
Desired, but not required, first steps
- Apply a base spray to the ankle, spraying on top of the foot and on the ankle.
- Then, apply a heel pad to the back of the foot, starting just behind the ankle (where shoes often rub), and a lace wrap on the front of the foot (where shoelaces often rub) if desired.
- Apply prewrap to the foot, starting just underneath the ball of the foot and wrapping upward until the ankle (and about 3 inches above the ankle) is covered.
- Take the athletic tape and apply two anchor strips at the top-most part of the prewrap. This involves starting at the front of the leg and wrapping until the strips of tape overlap by 1 to 2 inches. Apply an additional strip halfway past where the first strip is located.
![]()
- Create a stirrup piece by applying the tape against the top of one anchor strip, advancing it over the ankle, going over the heel, and ending at the same place on the opposite side of the leg. This should look like a stirrup.
- Repeat and place an additional stirrup piece slightly more in the center of the top part of the foot, going around the ankle, and having the tape adhere to the anchor strip.
- Place another anchor strip over the stirrup tape, wrapping about halfway from the start of the last anchor strip. This helps hold the stirrup piece in place. Continue wrapping in this fashion until you reach the top of the foot.
- Wrap the heel using a figure-eight technique. Starting on the inner aspect of the arch, bring the tape across the foot, angling down toward the heel. Cross over the foot and ankle, continuing the figure-eight for two complete wraps.
- Finish by placing pieces of tape from the front of the lower leg, around the arch or heel to the other side.
 You may also need additional anchor strips. You shouldn’t have any open areas of skin.
Kinesio tape doesn’t cover most of the foot and ankle as athletic tape does. While different methods exist, here’s an example of a common kinesio ankle taping approach:
- Take a piece of kinesio tape, and start on the outside of the ankle, about 4 to 6 inches above the ankle. Create a stirrup-like effect as you take the piece of tape over the heel, pulling the tape to the opposite side, over the inner aspect of the ankle, and stopping at the same level as the first piece of tape.
- Put another piece of tape on the back of the foot, centering it with your Achilles (heel) tendon. Wrap the tape around the ankle to circle it around the foot. The tape should be tight enough so the foot bends, yet still feels supported.
- Some people don’t circle the tape around the ankle, but instead cross it like an X. This involves centering a piece of tape under the arch and bringing the two ends across the front of the lower leg to create an X.
 The ends of the tape are secured behind the leg.
Be sure to remove any tape you may have applied if at any time your toes appear discolored or swollen. This could indicate the tape is too tight and may be affecting your circulation.
According to an article in the journal Best Practice and Research: Clinical Rheumatology, 28 percent of people treated with tape report the most common adverse effects are discomfort from too-tight tape or an allergic reaction or sensitivity to the tape.
Steps for removing athletic tape
- Use a pair of bandage scissors (scissors with blunt ends and an extra blunt edge on the side) to slide the scissors under the tape.
- Cut the tape gently until you have made a large cut over most of the tape.
- Slowly peel the tape away from the skin.
- If the tape is especially persistent, consider using an adhesive remover wipe. These can dissolve the adhesive and are usually safe for skin as long as they’re labeled as such.

Shop for adhesive remover wipes online.
Steps for removing kinesio tape
Kinesio tape is intended to stay on for several days — therefore, it takes some extra effort to remove sometimes. Steps include the following:
- Apply an oil-based product, such as baby oil or cooking oil, to the tape.
- Allow this to sit for several minutes.
- Gently roll the edge of the tape downward, pulling the tape away in the direction of the hair growth.
- If you have residual glue from the tape after removal, you can apply the oil to further dissolve it.
Ankle taping can help prevent injuries and reduce discomfort following an injury. The approaches to taping depend on the type of tape you use.
If you’re having trouble taping your ankle, talk to your doctor or a sports medicine professional. They can recommend injury- or body-specific taping approaches that may help.
Ankle taping for joint injuries, sprains
Ankle injury occurs most often in athletes as a result of excessive loads or careless movements, jerks.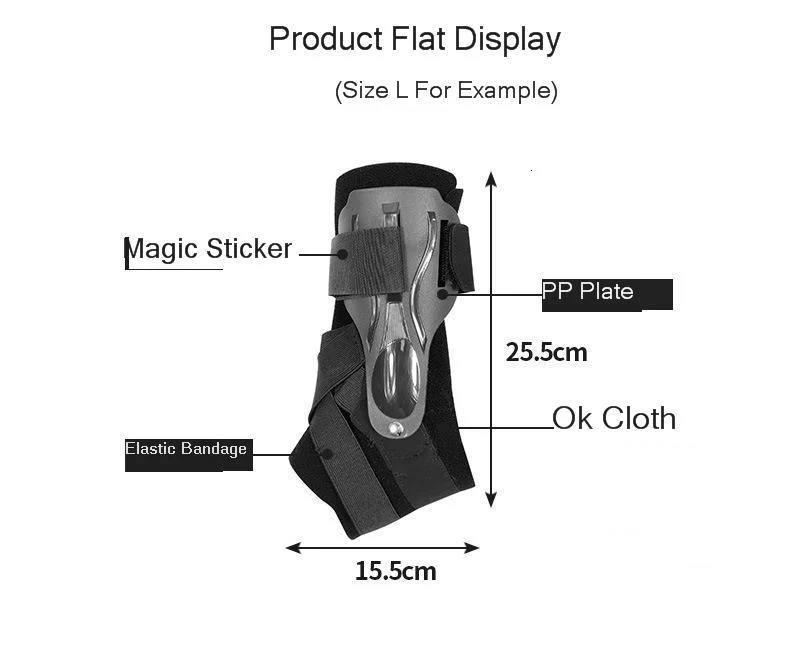 Ankle taping is a modern approach to anesthetizing an injured joint, relieving muscle tension and rehabilitation. Being an excellent alternative to elastic bandages and bandages, tapes provide the correct movement of muscles, while the athlete does not need to worry about an untimely untied or dropped bandage.
What injuries require ankle taping? Most often, the cause of such injuries is dislocations and twisting of the leg when performing various exercises, running. As a result of unfavorable movement, the joint capsule and adjacent muscles and ligaments are stretched. A sign of a broken fiber in a bundle is cotton. Injuries can affect the top or bottom of the foot.
Ankle taping with tape is the most popular type of immobilization in athletics, football, basketball, hockey and other running and playing sports. Applying teips allows you to anesthetize the injured joint, avoid the impact of excessive load, microtraumas and, as a result, chronic inflammation of the muscle.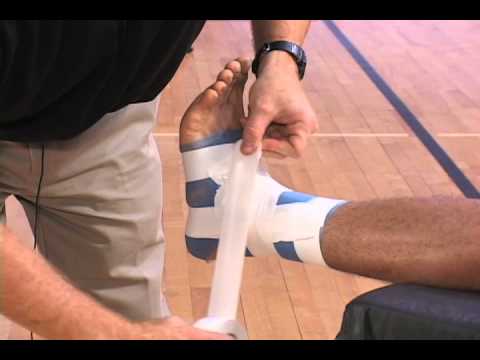 The ligaments are securely fixed with cotton tapes with an adhesive base, provided that the necessary mobility of the limb is maintained.
Ankle sports taping - actively used for bruises and swelling. The patch lifts the skin, thereby restoring microcirculation, removing inflammatory mediators as a result of normal blood circulation. In addition, there is a decrease in irritation of pain receptors and the associated discomfort in the athlete is eliminated. Tapes applied taking into account the structure of ligaments, the location of lymph nodes and tendons, contribute to the formation of correct muscle movements, eliminating the risk of muscle spasm.
Contraindications and side effects
by direct indications for the ankle taping are:
- Invoice,
- increased load,
- bruises,
- damage to connective tissues,
- MIOs, arthros, arthros, arthros, arthros, arthros , tendovaginitis of the Achilles tendon, hemarthrosis,
- swelling,
- consequences of a stroke,
- convulsions,
- injury prevention.

Ankle ligament taping allows you to maintain motor activity, which has a positive effect on the course of rehabilitation. Provides fast and efficient recovery. It also provides high-quality prevention of contractures in the joints.
Kinesio taping is prescribed for people with joint diseases accompanied by complications with the ankle joint.
This modern technique is actively used in therapy:
- injuries of the musculoskeletal system;
- traumatic hemiplegia, paresis;
Despite such a positive effect, the technique has some contraindications:
- skin diseases,
- hypersensitivity of the skin,
- excessive stimulation of nociceptors, causing pain and itching,
- hematomas.
Incorrectly fixed tapes can cause discomfort. If you experience tingling, blanching of the skin, a decrease in the temperature of the toes, pain, you should remove the application and re-tape the ankle.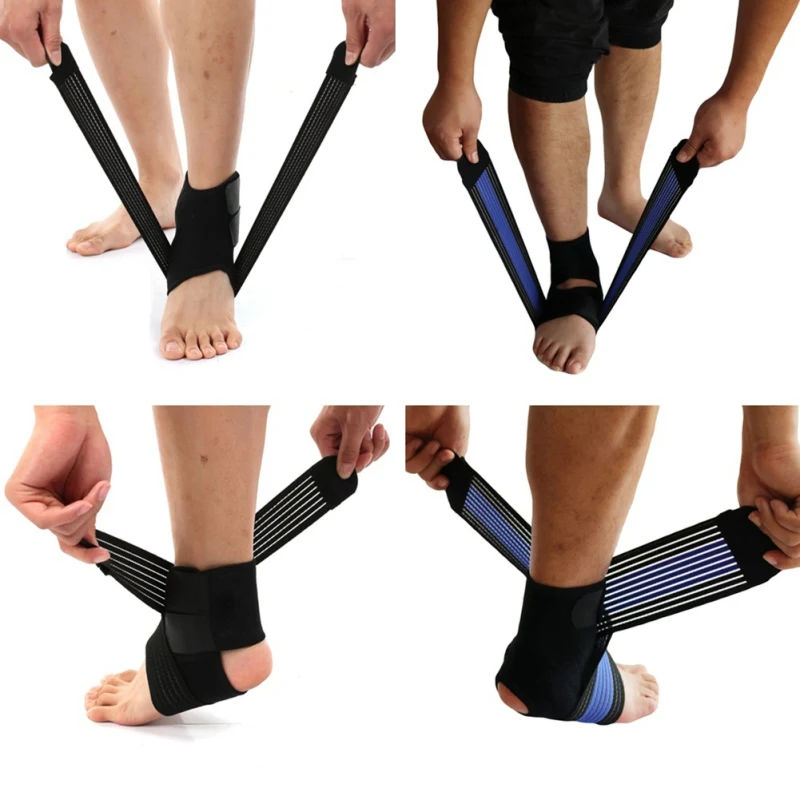 For preventive purposes, it is recommended to wear applications for no longer than 5-10 days.
Foot taping in case of injury or impact
Using a special plaster will help relieve pain and eliminate inflammation. The method and place of applying the application is selected depending on the location of the pain.
But for all types of ankle injuries, the following rules apply: The patch is fixed in a position that ensures dorsiflexion of the foot. The toes should be stretched as far as possible; to ensure a lymphatic drainage effect, the patches are placed towards the nearest lymph nodes. Taping the foot in case of a bruise improves blood circulation, eliminates swelling and bruising. The duration of wearing the application should not exceed 5-7 days. In the presence of concomitant pathology (for example, bursitis or sprain), immobilization with tape can be extended until complete recovery.
Ankle bruising
Stabilization of the ankle joint after a bruise or injury can be achieved in the following ways:
- Method I.
 One tape 5 cm wide is applied to the ankle in such a way that one end of it completely covers the heel, and the other end is at the top of the lower third of the leg. A slight tension should be provided in the heel area, the second end of the tape should be fixed above the bone. The second tape is laid around the ankle so that its end is in the center of the arch of the foot. The band is glued to the outer part of the foot and then around the heel with a stretch of 50%. The edge is laid under the heel and fixed without tension on the beginning of the patch. The third tape is fixed on the outside of the foot, around the heel and below with a stretch of 50%;
 - II method. Applying a lymph-tape in case of a bruise is carried out in accordance with the structure of the ligaments. The tape is fixed when the foot is at a right angle. To determine the length of the patch, you need to pass the first strip of 5 cm wide through the heel and cut off at the level of the upper line of the lower third of the lower leg.
![]() The length of the second tape should correspond to the length of the foot from the inner to the outer part of the calcaneus. The protective film is torn in the middle and in the area of \u200b\u200bthe "anchors". Tape locks in from heel to ball of foot. Then it is led out and then to the inside. Anchors are fixed last. The second strip is applied with significant tension to the flexion area at the top of the foot. It is necessary to ensure that the "anchors" are on the calcaneus.
The length of the second tape should correspond to the length of the foot from the inner to the outer part of the calcaneus. The protective film is torn in the middle and in the area of \u200b\u200bthe "anchors". Tape locks in from heel to ball of foot. Then it is led out and then to the inside. Anchors are fixed last. The second strip is applied with significant tension to the flexion area at the top of the foot. It is necessary to ensure that the "anchors" are on the calcaneus.
Kinesio taping for ankle bursitis
Bursitis is accompanied by inflammation, swelling and pain. The main reasons for its development are injuries, infectious processes in the tissues, running in inappropriate sneakers. Applying tapes for bursitis can reduce pressure on the joint and reduce the manifestation of pain.
Taping can be done in the following ways:
- Method I. You will need a tape 15 cm long. Use scissors to round the edges. Next, the patch is folded in half and cut into 4 identical strips along.
 3 cm are left uncut on each side. Anchors are fixed below and above the heel. In a sitting position, the toes are pulled towards themselves as much as possible, and the heel is moved away. Tape beams are glued in the affected area and to the side of it;
 - II method. Tape 5 cm wide is applied to the lower part of the heel without tension, then through the damaged area to the middle of the lower leg. The second patch is fixed in the fold area on the first one. The third tape is located in the heel area below the second patch.
Taping for ankle and foot sprains
This type of injury entails the development of acute pain, inflammation and gait disturbance.
Torn ligaments are taped as follows:
- wide tape with high strength and elasticity is applied from the beginning of the toes along the instep to the middle of the shin;
- a similar tape is fixed on the plantar side of the foot - it is possible to glue the heel and ankles separately.
 To do this, the middle is fixed on the heel from the side of the sole perpendicular to the length of the foot. The tails of the patch lead up and are glued just above the ankles.
This method is most effective with little stretch. With strong tension, the following scheme is used:
- immobility of the joint in the front-back direction is ensured. The length of the patch is measured along the front part from the lower and middle third of the lower leg to the metacarpophalangeal joints. The length of the tape will be equal to the length of the hypotenuse of the right triangle formed by the lower leg and foot;
- remove the paper layer from the middle of the strip and fix the "anchors" on the lower leg and foot. Next, you need to unbend the foot and completely fix the tape. With the patient lying on his stomach, we measure the distance from the calcaneus (its front part) to the middle and lower border of the third of the lower leg (the foot is held at an angle of 90°).
 The tape is applied in the area of the heel and Achilles tendon with a slight tension;
 - The external ligaments are stabilized with a patch applied from the lateral malleolus through the foot to the mid and lower borders of the tibia third. The tape is fixed from the inner part at the level of the ankle to the outer surface of the ankle. The rays are slightly parted and stretched, after which they are fixed along the back outer and front outer parts of the ankle.
Ankle joint taping in case of dislocation is carried out similarly to applying a patch in case of dislocation, but with more pronounced immobilization of the articular surfaces. To provide enhanced fixation allows stretching the tape.
Ankle and ankle taping
The ankle and ankle are usually injured at the same time, because they are located in the same anatomical region and are almost a single structure.
Ankle sprain can be taped in the following ways:
- I option.
 The first tape, 5 cm wide, is applied in the direction from the ankle to the middle of the lower leg. The anchor is fixed at the top of the foot with the utmost care. Stretching the tape to the ankle, it is necessary to ensure a minimum tension. The second tape, 12-15 cm long, is glued with a slight stretch perpendicular to the first one in the focus of soreness;
 - II variant. Using one tape 5 cm wide, the outer side of the ankle is worked out to the upper border of the middle third of the lower leg. The tape is led through the foot with a twist through the upper fold and is fixed perpendicular to the first part. In the areas of intersection of two lanes, they should be pulled. The rest of the tape is fixed on the inside of the foot.
In case of serious injury, such as a broken ankle, be sure to consult a specialist before taping.
Taping for osteoarthritis of the ankle
If left untreated, arthrosis can lead to destruction of the cartilage of the joint. The causes of the disease in athletes, most often, is the frequent injury of the ankle and chronic vascular disease. Taping for arthrosis is performed with a 5 cm wide tape with a stretch. The “anchor” of the first patch is fixed from the outer part of the lower leg, then it is carried around the heel and glued in the area of the bone from the inside. The second tape is applied on the back of the foot, from the middle of the inner part and ending under the heel. The third tape is fixed similarly to the second patch, but from the outside of the foot.
Big toe sprain
To prevent overstretching of the metatarsophalangeal joint, taping with the following method: ; from the thumb to the tape on the foot, overlapping plasters 2.5 cm wide are fixed; The overlap should be about 50%; At the final stage, a fixation patch is applied around the toe and around the foot in the form of a figure eight. Ankle taping in various sports
Sports people often injure the lateral ligaments of the ankle. To prevent injuries, it is recommended to strengthen these areas before the game. In jumping sports such as volleyball and basketball, the Achilles tendon and calf muscles undergo fixation. In wrestling, correction of the ankle joint with tape is also relevant. In hockey, despite the tight protection, all structures of the ankle and foot are taped - the Achilles tendon, lateral ligaments, and the sole area. Applications applied for the purpose of prevention are performed with wide tapes with minimal tension.
You can buy high-quality tapes from us and undergo distance learning methods of therapeutic, segmental and orthodynamic taping, magnetic taping. Upon completion of the course, a certificate is issued.
If you already know how to tap and want to improve your skills and become a highly effective and multifunctional specialist, we offer you training in our online courses.
Our training complies with the European and National Standards, the Academy has been training since 2013 and has trained more than 17,000 people, more than 10,000 people have been trained in online courses.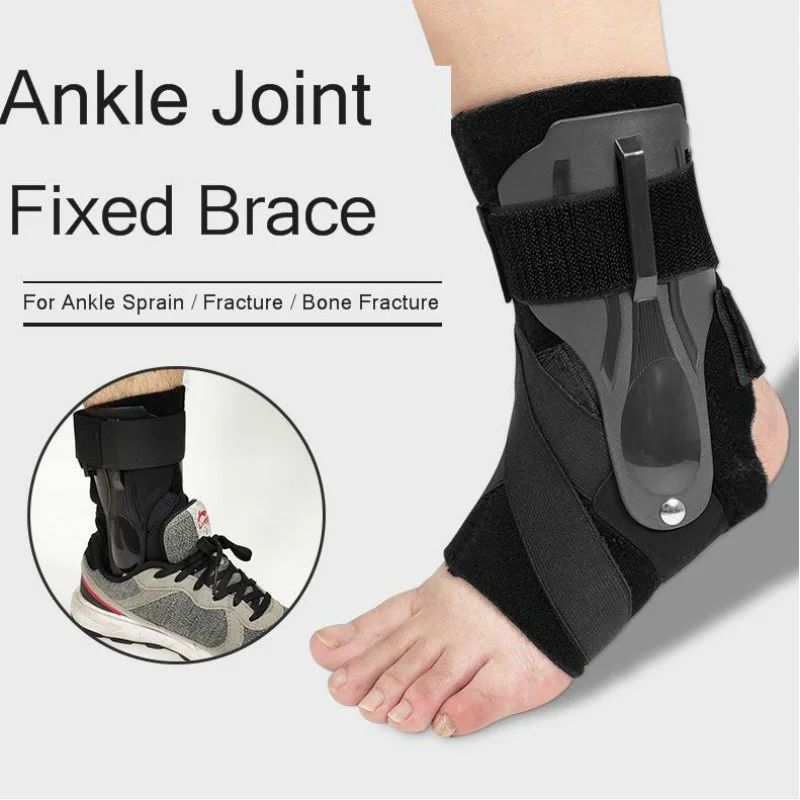
Click on the banner and choose the course of your choice.
We wish you success and grateful patients.
Ankle Injury - All About Basketball
Ankle Injury
Day One
Apply ice to the ankle (for 15 minutes every 4 hours) to relieve both pain and swelling. At the same time, a heating pad, bubble or other container with ice should be wrapped with a cloth so as not to overcool the joint. Keep the injured ankle higher: the outflow of blood from the joint will prevent swelling from developing. Of the medicines, you can recommend the gel "Troxevasin" - for rubbing into the ankle joint (once a day is enough).
Second day
It can be started with the same gel. It is advisable not to disturb the leg with long walking. And if an urgent matter calls you on the road, fix your ankle with an elastic (necessarily elastic, not simple) bandage: there is less danger of twisting your leg again, and stepping on it is not so painful. It is better to bandage in the morning, right in bed: slightly raise the toe of the foot and wind the bandage from the base of the fingers to the ankle joint; the next layer of bandage overlaps the previous one by 2-3 centimeters; cutting the end of the bandage along, fix the bandage around the leg. You need to bandage for the whole day, that is, not tight - otherwise the blood will not flow into the fingers (a sign of this is their blueness). Be sure to remove the bandage at night so that the leg rests.
Day three
Bandage the ankle again. (Keep doing this if walking still hurts.)
Day Four
It's time to start massaging the ankle and foot to increase blood flow to the sprained ligaments. By supplying damaged tissues with nutrients, you will speed up their recovery. At the beginning of the massage, lubricate your hands with oil or cream, which contains camphor.
Day five - fifteen
You have already understood: massage should be done daily during the entire recovery period.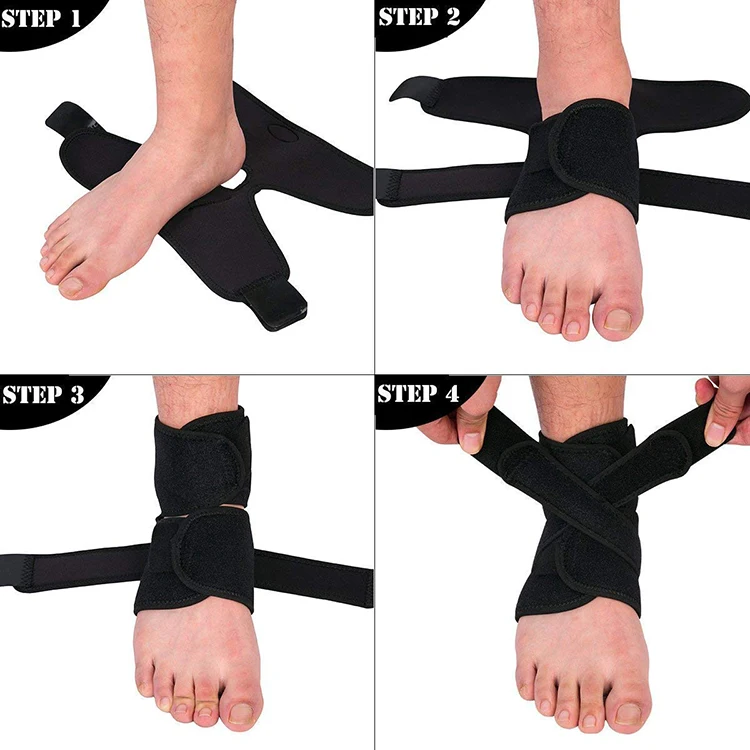 And it’s great if it becomes a habit for you - it will benefit not only the ankle, but the whole body. After all, there are multiple nerve endings in the foot, and by reflexively influencing the spine, we can simultaneously influence the internal organs. Therefore, it is recommended to massage not only the injured, but also the healthy leg. You just need to master a few simple tricks:
1. Gently massage the area of the ankle joint of the injured leg (with both hands) from the bottom up.
2. Grasp the foot so that the thumbs are on the sole and the other fingers and palm are on the instep of the foot. Thoroughly knead and rub the sole with your thumbs. (The same on the other foot.)
3. Grab the heel by placing the fingers of the hand (excluding the big one) along the sole. Move them up and down, knead-rub the soles of one foot, then the other.
4. Applaud! 50 hand claps on one sole, then on the other will improve your mood. Fold your palm in a boat to make the clap louder.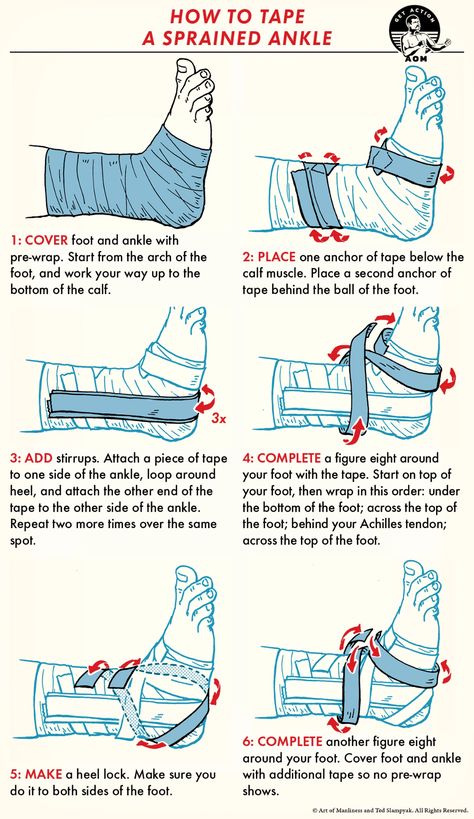
5. Warm up the feet by rubbing and kneading the soles, then place the palm of the hand on the back of the foot so that the fingers and toes are parallel. Rub the upper surface of the fingers (from the ends to the base), then with bent fingers and a sharp movement of the wrist joint and palm, stretch and bend inward the toes (excluding the big one). Repeat the same with the other foot.
6. Sit on a chair, put your foot on the thigh of the other leg, without bending at the waist as much as possible. Putting 4 fingers together, put them between the big and other toes, inhale and with increasing effort “tear off” the big toe, twisting and bending it. Relax, exhale. Repeat the exercise with the big toe of the other foot.
7. Place four fingers of the hand on the sole, the thumb on the back of the foot, and with the thumb of the hand bend the toes towards you in turn (starting with the little finger). In conclusion, rub the surfaces of the toes adjacent to each other with the index finger of the hand.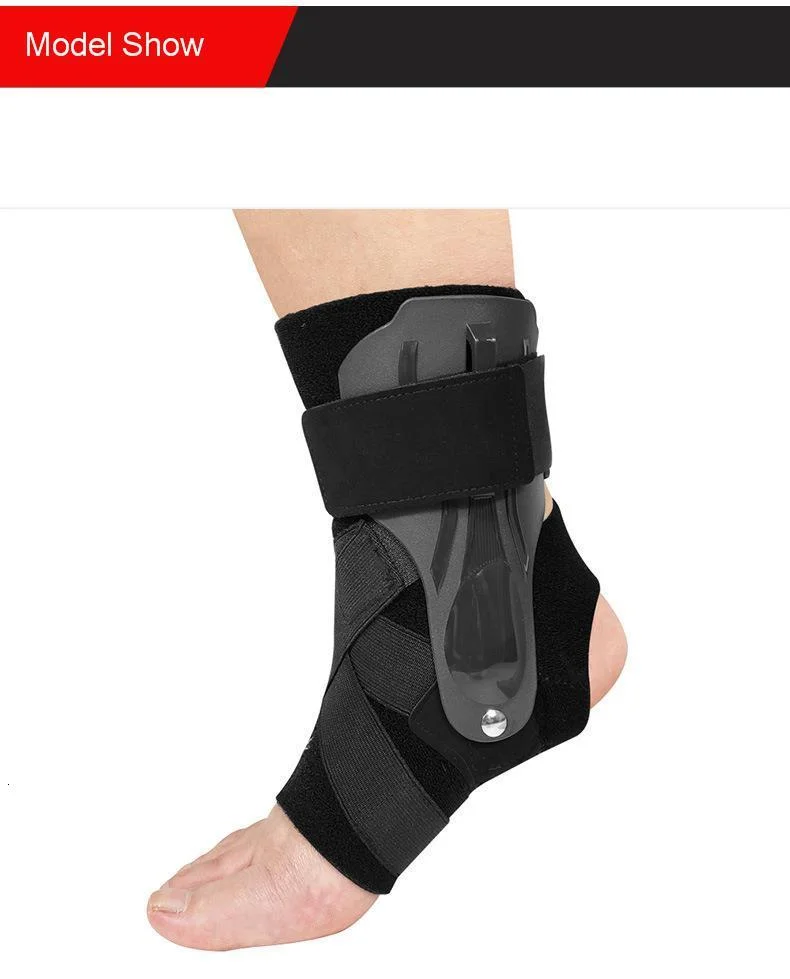 First on one leg, then on the other.
Sixth day and beyond…
Now thermal procedures can be added to the treatment. Every day, immerse the recovering ankle for 10-15 minutes in not too hot water, or even better - in water with horse chestnut extract, horsetail, phytosols (there are a lot of them in modern pharmacies, for every taste), sea or table salt (1 tbsp. l per 1 liter of water). But still ...
... stretched, much less torn ligaments should be shown to the doctor. Maybe he will prescribe you an additional course of physiotherapy. And most importantly, he will control the healing process. An untreated sprain is fraught with weakening of the ligaments - the leg will tuck at the slightest unevenness in the relief (do you need it?).
Strengthen your ankle!
A great way is walking on a log, more precisely, on a tree trunk. It is desirable that the tree is not too thin, that it lies on the ground, and that you move along it in sports shoes or, even better, barefoot.