How to build a basketball
How to DIY Build a Basketball Court (8 Step Guide)
Inspired to build your own backyard basketball court?
If you're interested in DIY'ing a basketball court or having a local contractor install a court for you then you've come to the right place.
Last Updated 2nd of April, 2020.
1. Choose the Size and Location of Your Court
Ideally you’ll choose a location that is reasonably flat, to keep excavation needs to a minimum.
Recommended subsurface base: Concrete (100mm thick, 25MPA, Reinforced, Helictoper/smooth finish, Standard slope to allow water to drain off the slab)
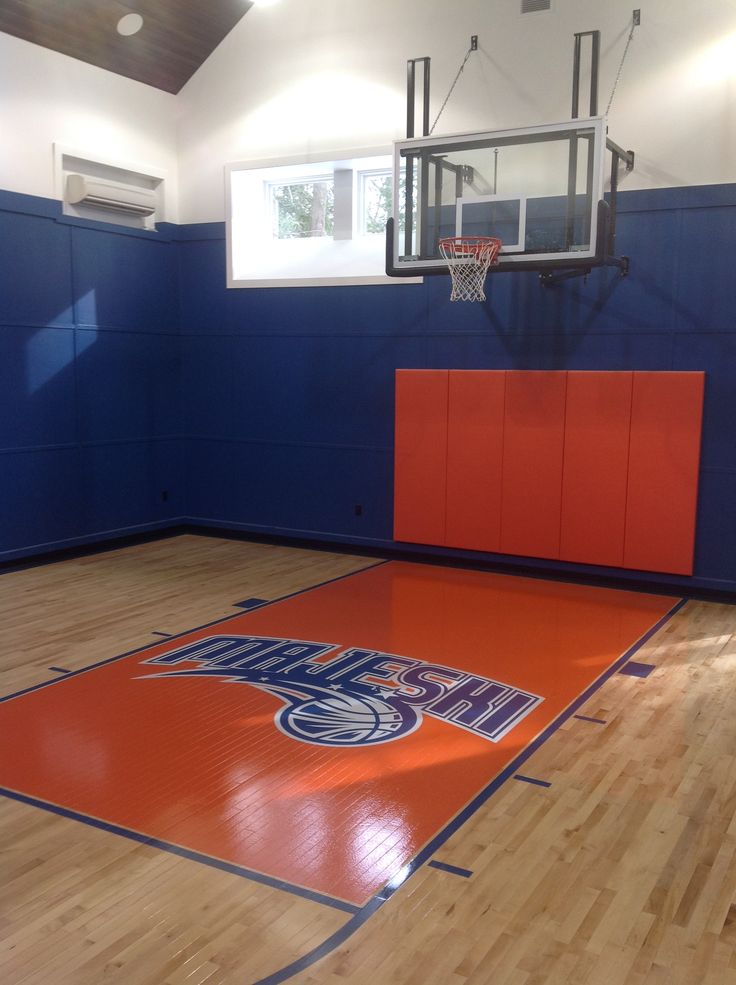
We strongly recommend a concrete base for any new base being built for a MSF PRO sports court. Concrete provides by far the best longevity, performance and value over the long run and requires virtually no ongoing maintenance or repairs for many years. Other suitable bases include Pavers, Asphalt or Decking.![]()
- Option 1: Have an elevated concrete slab & then fit your landscaping requirements around it.
- Option 2: Level the slab with the rest of your backyard. This option involves more excavation work/costs.
The size of a full size NBL court is identical to the FIBA regulation sized basketball court of 28m x 15m (420sqm), which is usually too large to fit into the average backyard. We recommend considering a half court, which can be customised to suit your space. Sizing can range from very small approx 4m x 6m (24sqm), 9m x 5m (45sqm), 10m x 7m (70sqm) to a 3X3 regulation half court of 15m x 11m (165sqm).
Precise measurements and planning are crucial in order to end up with the best result.
2. Purchase the Hoop & Sports Court Surface Tiles
The in-ground Hoop anchor kit should be installed during the concrete pour, so ensure you’ve ordered your Hoop in time to arrive before you schedule the concrete. Take note of the hoop's overhang in centimetres so you can plan accurate placement of the hoop anchor, free throw and three point lines.
Surfacing your court with a specially designed synthetic sports surface such as Australia's #1 selling, top rated MSF Pro™ will not only produce an amazing looking result, but will also provide more accurate ball bounce, sound reduction and minimises joints strain/injuries.
3. Level the Ground
Prior to concreting, the space must be dug up and levelled. If you require the concrete to be flush with the surrounding ground then you must excavate 115mm below surface level to allow for the concrete slab (100mm) and sports surface tile (15mm). If you are opting for the elevated slab then you may not need to excavate but you do need to remove any grass and level the ground.
IMPORTANT SAFETY PRECAUTION: Before you dig, call 1100 (Australia) or your local utilities to rule out the presence of buried cables including power, water, gas and phone lines. Failure to do so could result in serious or fatal injury. Dial Before You Dig is a FREE national referral service designed to assist in preventing damage and disruption to Australia’s vast infrastructure networks which provide essential services we use every day.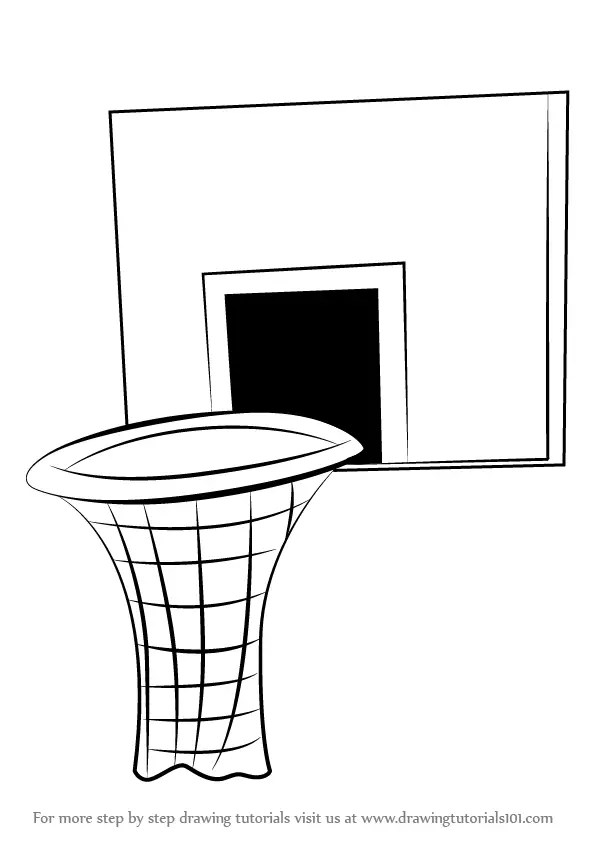
4. Pour a 100mm Concrete Slab
Prepare and pour a 100mm thick slab of concrete (25MPA, reinforced, standard slope, helicopter/smooth finish) matching your exact MSF PRO™ Court Design measurements. Ensure you have someone experienced with concrete slabs on hand for this step. Plan the concreting for when the weather is dry and allow for 72 hours to let the concrete set.
It's recommended to install the hoop anchor at the same time as pouring the slab to save on expenses. The recommended hole size for a hoop anchor system is approx 500mm x 500 mm and 1.2m deep. Please note: Always remember to closely follow the installation & safety instructions that come with your in-ground hoop.
Always be sure to follow the official basketball hoop installation instructions. Goalrilla in-ground hoops generally require 3-5 strong labourers with multiple ladders and power tools. Hoop installation can take up to a few hours for those inexperienced with installing.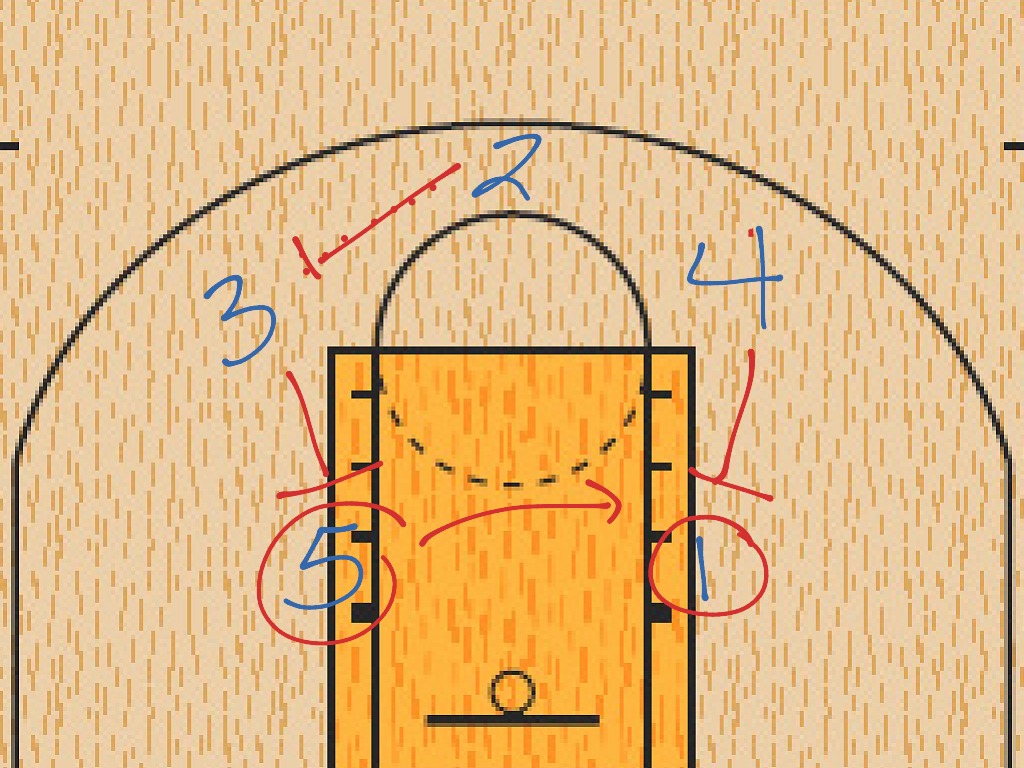 The below videos provide an example of the procedure involved for installing a popular Goalrilla in-ground basketball hoop system yourself...
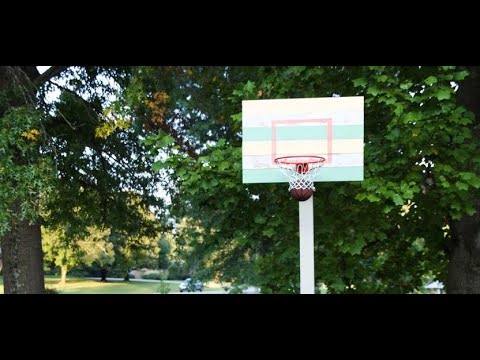
How to Build a Backyard Basketball Court
March Madness may be over, but if you love basketball like I do, I bet you often wonder how to build a backyard basketball court. Well, guess what? You can build a backyard basketball court over the span of just a couple of weekends.
Having your own home backyard basketball court can ensure your family stays active. As an added bonus, you’re also all-but-guaranteed to perfect your free-throws with a bit of practice.
Sure, it’s not the easiest of all the backyard upgrades to take on, but if you live and breathe NBA or NCAA basketball, then there’s no better way to showcase your love of the sport than with your own home basketball court.
Photo by pololia on Adobe Stock
Follow these five steps to build your own home basketball court.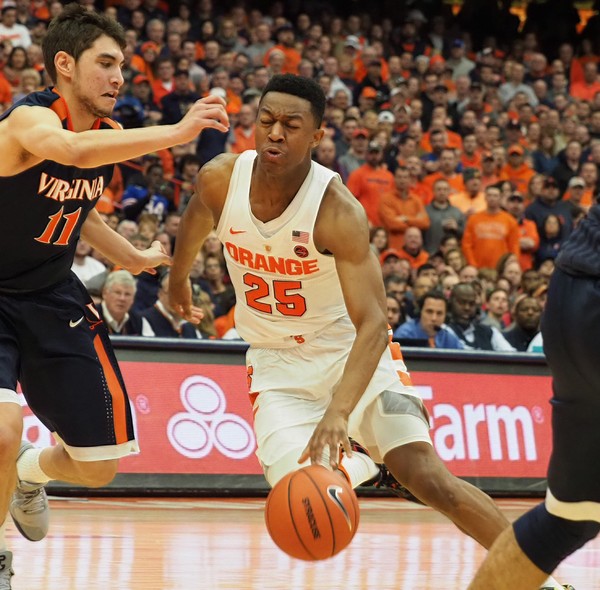
1. Size Your SpaceStep one is figuring out your backyard basketball court dimensions. Full courts measure 94-by-50 feet and high school courts are 84-by-50 feet. Truth be told, a full court definitely requires a substantial amount of space. If you don’t have a backyard big enough to fit an entire court, don’t worry! You can always build a half court that’s either 47-by-50 feet or 42-by-50 feet.
Photo by auremar on Adobe Stock
Aside from overall space, DIY basketball courts must be installed on level ground. If you don't have a flat area that's large enough, rent a small excavator to dig up your ground and level the playing field (pun intended).
2. With or Without ConcreteWhen it comes to backyard basketball courts, you can either choose to use a premade court floor made of rubber sports tiles or a plastic polymer mix over a concrete slab or without a slab. If you plan on spending a lot of time in your court and want a strong, solid, long-lasting product, concrete is essential.
Photo by Pressmaster on Shutterstock
Your best bet is to call a local concrete company that can come out and do all the heavy lifting. Most of the time, they’ll even install the hoops for you!
If you want to do it yourself, consider renting a concrete mixer to cut down on the backbreaking work of mixing concrete yourself. Keep in mind that you’ll also be responsible for creating a wooden frame and laying all the rebar to support the slab. It’s a big project, so recruit some able-bodied friends to help out.
3. Gather MaterialsCollect the following materials and tools to complete your backyard basketball court project:
- Hoops
- Concrete (if applicable)
- Stencil
- Tape measure
- Tamper
- Twine or stakes to mark your court
4. Set Your Floor & HoopsMeasure out your court and mark it with stakes and twine. Then, use a string level to ensure you’re working with a level surface. Using an excavator, shovel, and tamper, move the soil as needed.
Next, work with your concrete contractor to frame and pour your slab. If you’re doing it yourself, create a frame out of supported 1-by-4-inch or 2-by 4-inch plywood and lay your rebar across the plane. Pour your concrete so the slab is, at minimum, 4 inches thick.
Photo by Bogdan Hoda on Dreamstime
While the concrete is still wet, lay your hoop/s and secure in the cement.
Then, allow the concrete to completely cure for 28 days.
5. Resurface and Mark for Optimal PerformanceOnce the concrete has dried, add a surface such as the rubber or polymer tiles mentioned above. Consider how much use your court will get, your weather conditions, and the “give” of the floor itself to find the best product for your court.
If the surface doesn’t already come pre-marked, use a court stencil to create accurate markings.
There you have it: a DIY backyard basketball court to be enjoyed by family, friends, and neighbors for years and years to come. In no time at all, you’ll be working on those alley-oops!
Photo by Jason Smith on Dreamstime
Popular Articles
-
Thinking about selling your home? Did you buy a property and it isn’t in the condition you expected it to be? There are many plans and designs that you need to draw up before you decide to remodel any kind of property. All the other projects that are detailed on this site will give you an idea of the size and costs your budget will need to be able to handle.
-
Why replace your microwave when you can always repair the one you have lying around in your kitchen or kitchenette? When the microwave first came to be, the homeowners of yesteryear found it such a convenient appliance that it became one of the many major appliances that we use today.
-
The average cost to remodel a bathroom is $5,000, however, bathroom renovation costs can range from $328 to $12,900. Here at House Tipster, we like to inform you of how much an average bathroom remodel can cost. Learn all about the refurbishment of your bathroom and the costs of a project of thise size with our bathroom remodel cost guide.
-
Childhood memories mostly consist of all the times you’d gleefully play with carefree living. You’d bike around the block as your parents watched you and your neighborhood friends play with each other. They’d sit on their seats from a close distance on their porch to make sure that you were safe.
-
Was this article helpful?
Yes
No
How has it helped you?
This article helped me immensely
I'm now more informed one this subject
I would like to contact House Tipster team
Please select a Answer.
Next
What can we do to improve?
This article was not accurate at all
This article was not accurate at all
I would like to contact House Tipster team
Please select a Answer.
Next
Basketball coaching hacks: how to score goals for beginners
Even if you are a novice basketball player, we will not give you a training plan, but we will tell you why the ball flies anywhere but into the ring and into your hands.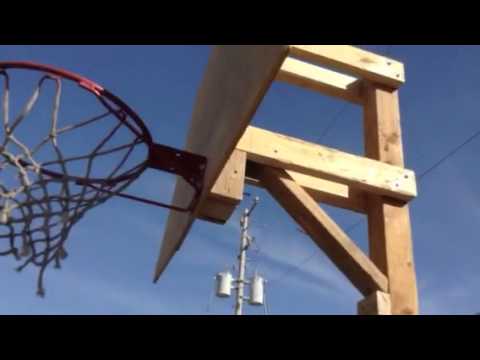 It's all about technique: even with regular training and perseverance, novice adults and children often make simple mistakes. It's a shame, let's fix it. Below are 11 life hacks on how to hone your technique to increase the likelihood of a goal for your team.
Basketball Shot Rules for Beginners
1. Hands up
In pursuit of the attacker, raise your hands, even if you are standing with your back to the pass, and even more so if the ring is in front of you. Your raised hands will increase the chance of intercepting the ball from the opponent by 2 times. Don't overlook this little thing!
2. Make shield rolls
Even Tim Duncan did not neglect them! A square is drawn on the basketball backboard. If you are standing opposite the ring, then aim at the middle of the upper part of the square, if you are standing on the side, then at the corner. If you hit this square, then the ball is at 90% of cases will fall into the ring. The law of physics and no cheating!
3.
Look at the ring, not at the ball
Practice driving the ball with your hand, not your eyes, develop tactile control. Your eyes should be on the hoop while dribbling and be aware of the position of your body in relation to the hoop. Then you will be able to take the correct posture, and the throw will be effective.
4. Dribble with the balls of your fingers only
The palm should not touch the ball, only the pads of the fingers. Dribbling should become familiar to you, like an extension of your hand. Then you can change its trajectory at any time and you will have more chances to score goals. Practice with the ball constantly.
5. Throw with one hand
If you throw the ball with two hands, you reduce the chance of hitting the basket. All the efforts of the throw are in one hand (in the right for right-handers, in the left for left-handers). The other hand only holds the ball, the leading one holds it with the fingers, not the palm.
6.
Do not jump when protecting the ring
Jumping is the main mistake of rookie defenders. To intercept the ball and block the shot, simply stick out your hands. When you are in a jump, the attacker will easily bypass you.
7. Don't look back
When you dribble, don't look back, but dribble and aim for the ring, focus on shooting (or passing to another player on your team).
8. Bring the throw to automatism
Incorporate the most basic basketball techniques into your training plan and bring the shot to automatism. Throw first from a distance of half a meter from the ring, gradually increasing it. Learn to throw the ball so that it hits the hoop without touching the edge.
Throw the ball with all fives and jump
Throwing Rules:
- Head in the center of the body - if tilted, accuracy is lost.
- Look at the ring: mentally build a trajectory. If you are far away, the ball flies in a curved curve with a maximum height of 2 meters above the hoop.
- A strong hand is in front and throws, a weak hand is on the side and directs, only holding the ball. The elbow of the throwing hand must be in line with the ring.
- The ball must rest on the fingers without touching the palm. The fingers are as far apart as possible and grab the ball.
- Throwing arm bent 90 degrees, forearm perpendicular to the floor. If you bend less, then you get not a throw, but a throwing of the ball horizontally.
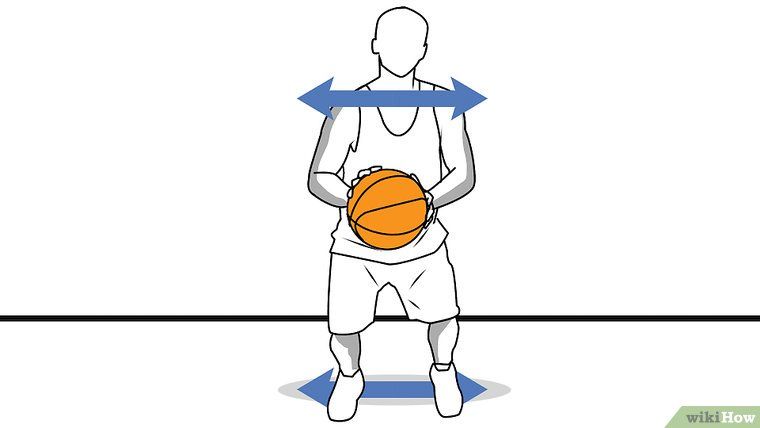
The main thing in the throw is the position of the body and its balance. Place your feet apart and parallel to each other: it is important to orient them in the middle of the basket. Then the direction of the body during the jump will coincide with the direction of the throw, and the ball will fly straight into the ring. When the feet are uneven, the ball flies in the wrong direction or does not reach (although the throw was normal).
Take a deep breath and release as you exhale.
How to hold the ball and shoot in basketball
How to throw correctly: straighten your arm, point your wrist up, and with your hand set the ball to rotate in the opposite direction from the flight. The ball should seem to "roll" off your fingers.
9. Copy masters and play as a team
Watch professional basketball games and try to copy the movements of your favorite players in training. And be sure to conduct game sparring - this will allow you to develop more techniques.
10. Do not throw in a straight line
The higher the arc of the ball, the greater the chance of a goal and the less chance of blocking by the opponent.
11. Do not throw the ball from a full height stand
This is the biggest newbie mistake!
Before the throw, bend your knees slightly and at the moment of the throw, straighten your body, making a jump. You need to straighten up and push off the ground at the same time. When squatting, keep the elbow of the throwing arm close to the body and towards the ring.
The jump will give momentum to the ball and will allow you not to make sudden movements with the brush.
***
And to be a long-term player, do not forget about your health: take care of your joints and muscles, use tapes, do a warm-up. And be sure to strengthen your arms, legs and shoulder girdle, develop coordination. Regular exercises on uneven bars and horizontal bars will help you with this.
universal, indoor or outdoor
How to choose a good basketball and not be disappointed in your purchase.
How to choose a good basketball and not be disappointed in your purchase.
What types of basketballs are there.
First you need to decide where you will play: do you need a ball for the hall, for the street, or is a universal ball best for you? This is one of the most important selection criteria.
Indoor basketball differs markedly from outdoor basketball. It properly "sticks" to the athlete's hand and has good adhesion to the smooth surface of the parquet. Such balls are made of genuine leather or synthetic materials, additionally covered with composite compounds and microfiber inserts, which provides a comfortable grip. They are forbidden to play on the asphalt surface: on the street they quickly lose their qualities and become unusable.
How do you choose a good basketball for street play? For open areas, models made of synthetic materials or ordinary rubber are suitable. The first option is more expensive, but will last longer and will be better in the hand. Outdoor balls are much more durable, and additional surface treatment improves traction.
The third type is universal. Picking it up is the most difficult, since such a ball must combine the characteristics of both “parquet” and “street” - for hard surfaces like asphalt. In order to make the material wear-resistant, special synthetic additives are added to the composite leather, but only top manufacturers do this. Most of the universal models that you can buy at an average and low price are made from cheap PVC, which is called “synthetic leather” in the composition. Such balls quickly deteriorate, crack and lose their playing qualities.
When choosing, pay attention to the raw materials used in production. The most durable balls are made from artificial materials, while professional indoor balls with parquet, on the contrary, are made from genuine leather. If it has the mark "Supreme Leather" on it, then premium leather was used in the production. Not a single serious basketball tournament can do without such balls.
How to check the quality of the ball.
Having decided on the type and material, you should pay attention to the properties and quality. The first indicator of evaluation is the rebound. A good and properly inflated ball bounces to a height of about 130 centimeters. There is a more practical way to test this characteristic: raise the ball to the level of the head, and then release it. He must bounce to the height of the belt.
Flexibility is another important quality indicator. A good ball retains its shape and does not become soft during a short game or practice.
An important point: the initial characteristics matter a lot, but no less important is how you use the ball. You can’t sit on it, you can’t kick it with your foot and the ball must be periodically pumped up, but this must be done using a special nozzle, and not a football needle. Proper operation will help maintain its original playing qualities for as long as possible.
How to choose the right size for a basketball?
We have decided on the purpose, material and quality. It remains to choose the size: weight and circumference. Everything here, as in the previous paragraphs, depends on the players.
- #7. Diameter - 749-780 millimeters, weight - 567-650 grams. The largest size is suitable for adult men's competitions.
- #6. Diameter - 724-737 millimeters, weight - 510-567 grams. Balls of this size are used in women's basketball.
- #5. Diameter - 690-710 millimeters. Weight - 470-500 grams. These balls are used in mini basketball.
- #3. Diameter - 560-580 millimeters. Weight - 300-330 grams. Balls of this size and weight are intended for children's basketball.
As you can see, the main defining characteristics for different categories of balls are weight and size. They directly affect the dynamics of the game, the accuracy of the shots and the results.
Children's basketballs are lighter and smaller than adults so young athletes can grab the ball and hold it in their hand, and the reduced weight allows them to make accurate basket shots even from outside the 3-second zone. For children under 7 years old, balls at number 3 are suitable, and for children from 7 to 12, the best choice would be the option for minibasketball at number 5.
Why are all basketballs orange?
We are used to all basketballs being orange, although this is not a requirement. Until the middle of the 20th century, balls were made from natural leather without much post-processing, which is why they had a natural brown color. But the problem was that such balls merged with the parquet, and this created some inconvenience for the players. In the 50s of the last century, it was decided to play only with brighter orange balls, but today this rule is conditional. Top manufacturers try different shades and it is not uncommon to find basketballs in blue, purple, black and other colors in stores.
A basketball is one of the main elements of the game along with sneakers and sportswear. Its parameters, materials, quality characteristics and even color affect the outcome of the game, so professional players, teams and leagues do not save on balls, choosing the best options for their game.
As a summary, let's briefly recap the main questions to consider when choosing the right basketball:
- What kind of venue is it intended for: indoor or outdoor? For parquet surfaces indoors - one option, for rough paved surfaces on the street - another, or a universal ball suitable for all types of surfaces.