Coaching Youth Basketball – What We Did With Our 3rd Grade Team and Ideas that Might Help You
I wanted to share the results from our 3rd grade basketball season and some ideas that might help you and your team.
I hope in some way this gives you ideas and helps you with your youth teams and making a positive impact on them.
Our First 5 on 5 Tournament Experience
I’ll start with a story about our first tournament experience….
We decided to have our 3rd grade girl’s team participate in a few 5on5 tournaments to end the season. I was not planning to play in any 5on5 tournaments this year for several reasons…
1) I think small sided games like 3on3 are much better for them (more touches on the ball).
2) I’m not excited about 3rd graders shooting at 10 ft baskets and using women’s 28.5 inch basketballs.
3) 3rd graders have so much to learn and improve regarding basketball skills like individual defense, dribbling, passing, shooting, and footwork… let alone learning a team offense and the nuances of 5on5. So to me it just doesn’t make sense to play 5on5 yet.
However, I had trouble scheduling 3on3 games during the second half of our season. So we decided to join two 5on5 tournaments and one 3on3 tournament to wrap up the season.
I thought the tournaments would be fun and be good for team bonding. I think we would have been fine to skip the tournaments — but the kids do like playing games so we went for it…
It’s not a surprise that we struggled in our first 5on5 tournament. We won one game and lost two.
All of the other teams had already played in dozens of 5on5 games. We were confused, scared, and intimidated… especially at first.
One of our players even asked… “what is a foul?” And a couple others were intimidated when the ref called a foul on them and wanted to know their jersey number. Scary stuff!
But we eventually started to calm down and managed to compete a little bit.
Things Changed Quickly
One week later, in our second tournament. Things changed quite a bit!!
We played MUCH better and the skills we practiced all season started to show.
Not that winning is all that important to me. But we won all of our games and won the tournament.
We had pizza during the day and the girls had a blast.
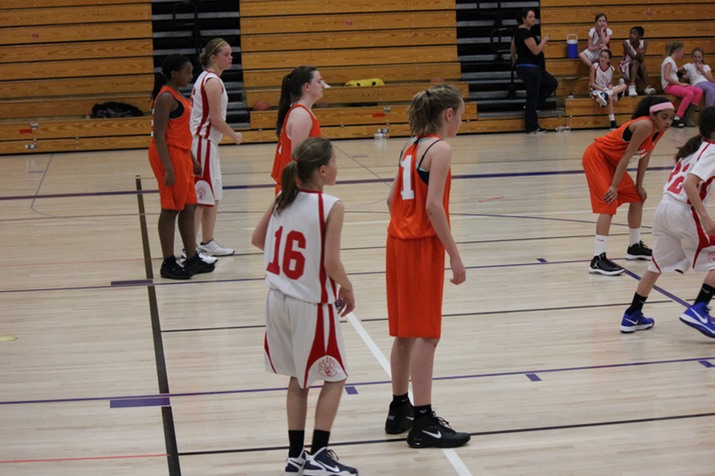
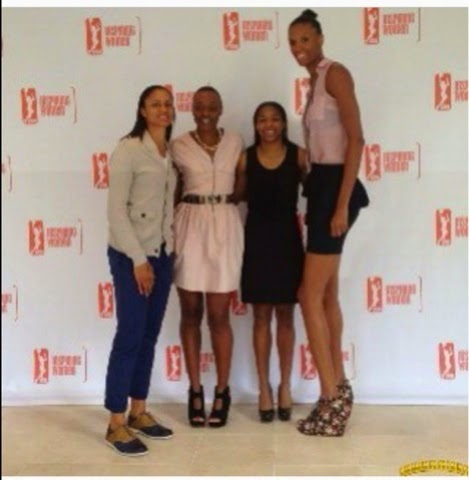
In the picture you can see we’re kinda like the Bad News Bears. All the other teams had fancy jerseys. We had $10 tshirts and mismatching shorts.
We were by far the shortest team. Most of the opponents towered over us.
During one of the games, a fan from the opposing team blurted… “I can’t believe we’re losing to a bunch of pip squeaks!!!”
I took that as a compliment.
Now I think there are much more important things than winning games and winning tournaments. But the truth is that everyone prefers to win.
And the purpose of this blog post is to share with you… what we did this season, what worked, what didn’t work, and why you should follow your gut.
I also want to point out that you don’t need plays, full court presses, height, or even the most talent to win.
All Half Court Man to Man Defense
We exclusively played half court man to man defense.
We were pressed by a couple teams during the tournament. We never practiced against a press. We learned on the fly. It caused us some problems and made things more challenging. But we spent enough time on ballhandling skills all season long so our players were able to overcome the full court press.
We probably spent 15 minutes each week on our team defense. Mostly in shell drill and then we played a lot of full court 1on1 to improve ball handling and defensive fundamentals/agility.
Even though we didn’t spend a lot of time on defense, that was probably our biggest strength. In the last 4 games, nobody scored more than 6 points against us. In other games those same teams were scoring 15-30 points. And our games were uptempo with a lot of transition offense.
How did we do it?
To start, we emphasized defense and talked about it a lot during small sided games, scrimmages, practices, and every opportunity. All the players knew it was important to me and all the coaches.
Second, we gave them a simple goal and rule to follow…
“Keep the Ball Out of the Lane and as Far From the Basket as Possible”
That is the basis of our defense. We constantly referred to that rule during games and practices. We were consistently teaching during the context of competitive games and asking questions.
Here’s one example. A player was on the wrong side when defending the post. I blew the whistle and very calmly asked…. “what’s our number one rule on defense?” The player responded by reciting the rule.
Then I asked, “where do you think you should be so the ball doesn’t get passed or dribbled into the lane area?”
After a few second of thinking, the player self corrected and came up with a solution (better defensive position). Lesson learned and more importantly retained because they came up with their own solution (instead of the coach just telling them what to do).
Basically we tried to make sure the ball never got within 12 feet of the basket. Sometimes in practice we used cones and tape to create an image of this area for reference.
We also emphasized our core values (hustling, being selfless, and helping each other) consistently. As a result our help defense was quite good and we were very scrappy!
Couple other points that we emphasized…
If the ball is in front of you or on the ground, GRAB IT WITH TWO HANDS.
At this age, being aggressive and taking advantage of opportunities in front of you is half the battle.
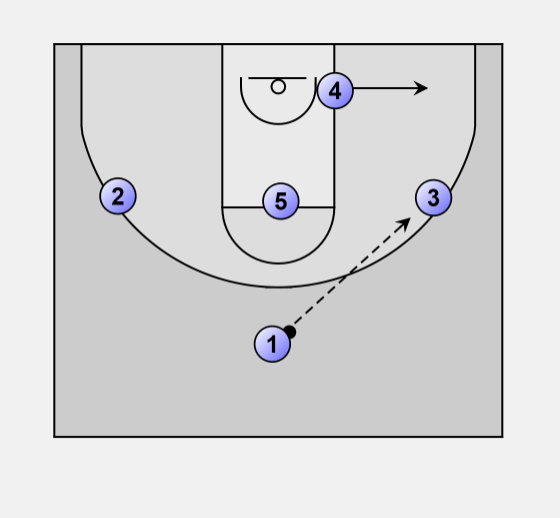
NO Plays – Simple Motion Offense Only
With the exception of our box inbounds play, which we taught during a scrimmage… we have zero plays.
We spent about 4 minutes during one practice teaching our inbounds box play. Then it was just reinforced and re-taught during games and scrimmages.
Simple. You get in a box formation. Players on the ball side screen across. The other two players blast over. Seemed to work every time.
If at some point we had trouble, I was going to add an up screen during the game. But it wasn’t necessary.
For team offense, we didn’t spend a lot of time on it. We mostly focused on dribbling skills, passing skills, decision making, and basic footwork (pivots).
All we were looking for was spacing, cutting, and driving. By far the biggest emphasis was spacing. We drove when there were openings. And we passed when a team mate was open. That’s about it.
Now I should point out that our skill development practice drills allowed players to develop some of the decision making and conceptual skills for them to run their motion offense. For example, we had different keep away passing drills and no dribble passing games that helped them develop skills and naturally taught them to pass to the open player.
We also worked on very simple transition offense too. I think that’s important because youth basketball has lots of turnovers with constant up and down.
Most of our offensive practice was done in the context of scrimmaging or playing small sided games.
Another emphasis for me was developing basketball IQ. And trying to take opportunities to teach players. Real simple stuff. In the context of a scrimmage we might point out things like…
– If you are within 10 feet of teammate… cut to an open area for better spacing.
– If the ball is dribbled towards you… cut to an open spot for better spacing.
– If your teammate is driving or cutting to the basket, try not to cut into them and draw the defense to them. Keep spacing.
– If someone is cutting toward you, cut to a new area to improve spacing (get out of their way).
– If your dribble drive gets cut off and the defense is in position, look to retreat dribble and reverse the ball.
– Look to attack the defense and make them play you.
– If you attack and draw a help defender, pass to the open player.
Now we did drill and tell the players to backdoor cut when you pass, when you are covered, and when the ball is dribbled at you. The player did that sometimes. But of course they forget a lot and I didn’t want to make them robotic. So I was not a drill sergeant when it came to this.
To me the spacing and decision making was more important!
One of my mentors, Don Kelbick, recently told me that when building motion offense he shows players different cuts, screens, and situations. But he does not govern cuts or try to control that. He lets them play. Hearing that from Don gave me reassurance that emphasizing spacing and decision making without controlling the players was the right thing to do.
For the most part I let them run a true free form motion offense and let them play. It’s a little rough at first. But they are improving fast.
It was amazing to see them solving problems on their own and just learning “how to play”. Show them a few cuts they can do and work on good spacing. That’s it. It was up to them to figure out the rest.
Little Time Spent on Shooting
We spent a little time on shooting. We do a fair number of lay up drills.. mostly through multi-purpose drills while we work on ballhandling.
For example, we might set up 4 chairs and do full court lay ups while making dribble moves at each chair. The moves we used were:
– cross and accelerate – in/out and accelerate – hesitation and accelerate (stop and go)
But we shoot very little. To me it makes more sense to focus on dribbling, passing, and footwork at this age.
As long as they are developing coordination and not developing bad shooting habits, I’m happy at this point. Once the players get bigger, we’ll spend more time on shooting.
90% Fundamental Skills
Little time is spent on “team” offense or defense. Most of our time is spent on fundamental skills.
We use lots of competitive skill development games because they are fun and much more effective when it comes to developing skills that translate into actual games.
The skills we focused on included dribbling, passing, individual defense, footwork (pivots), and agility.
I should also throw in decision making and basketball IQ. In other words, we played various 1on1, 2on2, and 3on3 types of games so players learned when to pass, dribble, retreat dribble, move, create space, get open, pivot, etc.
The development of our skills was clearly one of our keys to success.
Maybe in another post I can go into more detail about the skills we focused on. Skill development is a lot more than just dribbling the ball in a figure 8 and doing a bunch of Maravich drills (although we did do that at times).
Mostly Small Sided Games
As 2nd and 3rd graders, we played almost exclusively small sided games like 1on1, 2on2, 3on3, and a little bit of 4on4.
Players get more touches on the ball this way and our whole team is able to develop point guard like skills.
While everyone else is playing 5on5 we have been playing small sided games.
As a result, we as a team, seem to have better ballhandling skills than the other teams we played in the tournaments. I also think we’re developing better decision making skills and higher basketball IQ by playing the small sided games.
Emphasize Core Values
We really focused on hustling, effort, listening skills, and helping each other.
Listening was a must. I don’t want to say we were mean about it. But we were fairly strict and if we ever disciplined, it was because of poor listening skills and/or focus.
There were multiple occasions where we disciplined players. We told them we’re going to have a lot of fun — but part of the deal we made at the beginning of the season is that when a coach is talking… your eyes are on the coach and you listen carefully.
In addition to harping on the listening skills… we spent a lot of time emphasizing hustle, great effort, and helping each other.
There are many opportunities within practice and games to teach these lessons.
I was ecstatic to see this carry over into our tournament games. I saw high fives, they were encouraging each other, and they kept their composure at all times.
I think I’m more proud of that than winning the tournament.
Tracked Hustle Stats
Another way that we emphasized hustle was to track stats. I think it made a difference.
We tracked rebounds, steals, blocks, and forced jump balls. We then added up those stats to come up with their total “hustle stats”.
It didn’t take long and after each game, players were asking if they could see their stats. So we pulled out the iPad and showed them using the Breakthrough Stats app.
At practice following our first tournament, I gave the 4 players with the most hustle stats a Gatorade.
We also made a conscious effort to verbally praise good defensive effort and passing (teamwork). Since that requires hustle too and you can’t really measure defense on the stat sheet.
Accepted All Players (No Cutting)
I accepted all players that wanted to participate at the beginning of the season. As second graders it started out with my daughter’s close friends from school. Then it spread a little bit in third grade and we ended up with 12 players. We had to get a little creative to split them up and schedule multiple games so everyone got plenty of playing time.
At the tournaments and games we limited it to 8 or 9 players on the roster. That way everyone got plenty of playing time and they didn’t have to sit on the bench very long.
12 was a lot to handle. But I didn’t have the heart to cut anyone. Three dads volunteered to help this season (couldn’t have done it without them). Ended up working out great!
Follow Your Gut
This just shows that you don’t need zones, plays, presses, or any of that to win. You don’t even need to play 5on5 games. After working on skills all season, we just needed three games under our belt and we took off from there.
All in all, I think we improved a ton and the players had a lot of fun. So I feel that it has been a successful season and very positive.
I hope in some way this blog post helps you and your team succeed.
If you have any questions, let me know.
368 Shares
Facebook
Pinterest
Twitter
More
Coaching Youth Basketball - What Should You Teach?
By Joe Haefner
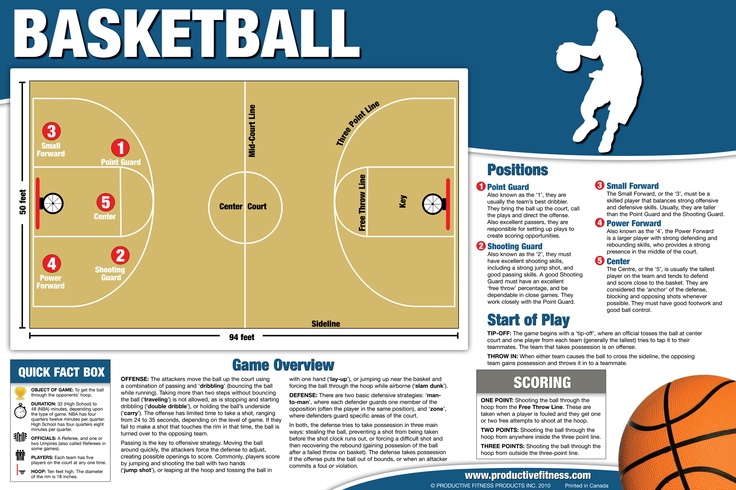
Home > Coaching > Coaching Youth Basketball > Coaching Youth Basketball - What Should You Teach?
Many youth basketball coaches don't know where to start or what to teach. Well, we hope to help you out in this area. Below, we provide some advice on what to teach youth basketball players. We break it down between 3 levels. As you perfect each level, you can advance to the next level to teach more skills & concepts.
All beginner players should start with Level 1 no matter the age. We put ages next to the level as a general guideline. Depending on the
age and skill level, you'll progress through the levels at different rates. You may notice that you'll spend 4 years working on Level 1 with 7 to 10 year olds.
At the same time, you may be able to progress to Level 2 after two weeks working with a group of 13 year olds who are playing basketball for the first time.
I would advise to go back and start at Level 1 every year. A lot of high school and college coaches start at Level 1 every year. They just progress through the levels more quickly than a youth team. It's a great way to ingrain
the fundamentals into your players year in and year out.
We advise to take a couple of hours and write up a master practice schedule
for the season, so you can progressively teach them the skills mentioned below. It may take a few years to teach all of these skills at one level and THAT'S OKAY! For youth players, we want to focus on the long-term development, not how many games they win when they're 11 years old.
If you try to progress them too quickly, it will hurt them in the long-run. You want to have a solid foundation first. You shouldn't try to teach
them every dribble move in one year or every option in the motion offense. The same way in which you couldn't teach a person calculus if they did not
know how to do simple addition and subtraction.
Important Note: Throughout this article, you'll find many links to other articles on the website to explain concepts that we advise to teach. My
recommendation would be to read the entire article first, then go back and click on the links to read the other articles.
You may also want to add this article to
your "Favorites" or "Bookmark" it, because there may not be enough time to read all of the links in one sitting.
Level 1 (7 to 10 Year Olds)
Here's what to teach, ordered by priority:
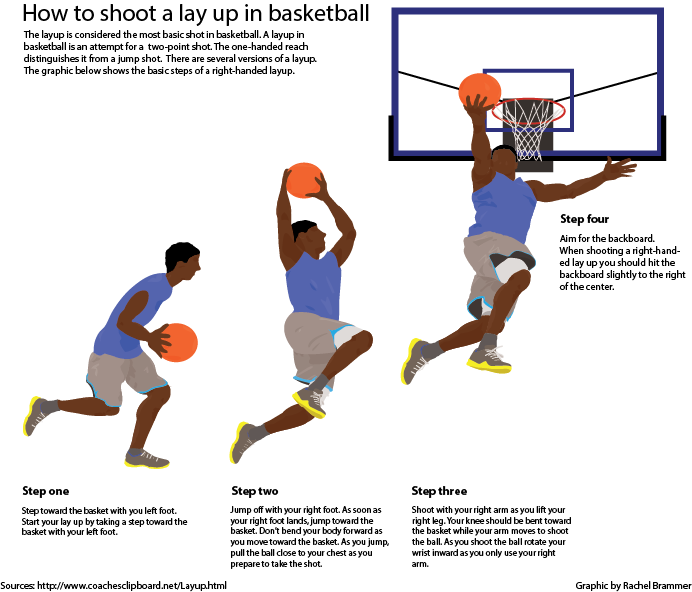
Lay ups - You should practice lots of lay ups with both hands. Your goal should be to get all players to make lay ups with their left and right hands equally well!! Teach them to jump off the proper foot. They should jump off the left leg when shooting a right hand lay up. They should shoot off their right leg when shooting a left hand lay up. It will be difficult but work on it. You'll probably need to start really close to the basket, with no dribble, and take just one step to practice the footwork. Once you add the dribble, they should dribble with their left hand when shooting left hand lay ups. And vice versa.
Footwork - Teach them triple threat positioning, pivoting on their left and right foot without traveling, jump stops, and to square to the basket as soon as they catch the ball in a triple threat position. You should spend a lot of time on footwork!
Shooting form - For this age group, we highly recommend using smaller balls and lower baskets. If that is not possible, allow the players to dip their elbows which will give them more strength. To learn more on shooting, we also have the Breakthrough Basketball Shooting Guide.
Ball handling - You should teach your players to dribble with left and right hands equally. Basic dribble moves such as the speed dribble, crossover, protect-the-ball dribble, and back-up dribble.
Resource: Progressive Youth Ball Handling & Footwork Workouts App - Players can do the workouts from anywhere. The coaching dashboard also allows you to monitor multiple players or your whole team.
Athletic & movement skills - Teach them how to run, jump and land, skip, stop, move laterally, squat, lunge and any other basic movements. If you don't know how to teach these movements, ask a professional or PE teacher to show you how. 99% of the time they would be more than willing to help, and they may even come and show the kids themselves.
Should We Teach Basketball Skills To Players Under the Age of 10? - Useful information for all levels of coaches, not just coaches who work with players under the age of 10.
Basic passes - Teach and practice the basic chest, bounce, and overhead passes.
Play plenty of 2 on 2 and 3 on 3 games to teach concepts (no dribble keep away). It gets the players more experience and allows them enough space to operate and use the new skills they have learned. Make sure to use plenty of age-appropriate drills & games.
For more on this, read Could 3 on 3 Basketball Be the Best for Youth Players?
Offense - Do NOT use any structured or patterned offenses. First, get them comfortable on the court. They will start to figure things out on their own. Your main concern should be to have them move & not stand still.
If you use a few basic cuts and maybe screens in your shooting drills at the beginning of practice, then your players will already know how to move in a motion offense. Then you don't have to waste time teaching offense. Just let them play.
Once players feel comfortable on the court, show them proper spacing.
As they progress, you can start to introduce them to motion offense situations.
Basic cuts & how to get open - If time permits, you can introduce the basket cut and straight cut. I would suggest that you just work these cuts into your shooting drills at the beginning of practice. This will save loads of time.
Defense - Teach the basic stance, defensive slide, and basic off-ball principles. Don't worry about spending as much time on defense. As they get older, you'll gradually spend more time on defense. Focusing on it 5 to 10 minutes per practice would be more than sufficient.
Basic Off Ball Principles:
- Stay between man and the ball
- Always stop the ball if it is in front of you!
For this age group, we are against zone defenses for development purposes.
For anyone coaching this age group, we HIGHLY recommend the DVD The Youth Coaching System (By Jim Huber). You'll gets lots of drills and learn exactly how to teach the most important fundamentals the to kids "right way". We truly believe this DVD should be required viewing for ALL youth coaches.
Level 2 (10 to 12 Year Olds)
You should expand onto more advanced skills for everything mentioned above. But remember, if your 10 to 12 year olds are inexperienced, you should start in Level 1. And at the beginning of each season, you should start at level 1 until those skills are perfected. Then you can progress into the more advanced stuff below.
Lay ups - jumping off one foot and jump-stop lay ups.
Teach more cuts: back cut, curl cut, etc.
Continue to focus on shooting form and introduce some movement for shooting drills (shooting off the dribble and off the catch). To learn more on shooting, we also have the Breakthrough Basketball Shooting Guide.
Ball handling & dribbling - teach more dribble moves such as the inside-out dribble (fake crossover), hesitation move, and between-the-legs.
Resource: Progressive Youth Ball Handling & Footwork Workouts App - Players can do the workouts from anywhere. The coaching dashboard also allows you to monitor multiple players or your whole team.
Passing - continue to teach basic passes and introduce some advanced passes (baseball pass and wrap around pass). Use other drill such as machine gun passing and pass and switch.
Passing under pressure - you can use pair passing with a defensive player in the middle running back and forth to pressure the passer. You can use this drill to practice breaking pressure: full court press breaker drill.
Teach basic screens.
Footwork - introduce jab steps and ball fakes (pass fakes and shot fakes).
Rebounding - introduce rebounding technique.
Basic post moves. drop step and jump hook.
Spacing - introduce more basic spacing concepts.
Offense - keep playing 2 on 2 and 3 on 3 to teach concepts. You can also start to introduce more motion offense situations and play some 5 on 5.
Defense - keep emphasizing and spend a little more time on the defensive stance,
defensive slide, and off-ball principles mentioned in Level 1. If you feel that your players are ready, work on more
off-ball defense principles.
In our Man to Man Defense System, we provide step-by-step how to build and teach your defense.
For this age group, we are against zone defenses for development purposes.
For anyone coaching this age group, we HIGHLY recommend the DVD The Youth Coaching System (By Jim Huber). You'll gets lots of drills and learn exactly how to teach the most important fundamentals the to kids "right way". We truly believe this DVD should be required viewing for ALL youth coaches.
Level 3 (12 to 14 Year Olds)
You should expand onto more advanced skills for everything mentioned above.
Lay ups - practice contested lay ups. Also, you could start to teach players, same-leg same-shooting hand lay ups. I know that is against conventional wisdom, but think about it for a second.Your player just blew by a defender or is on a fast break. Do you want them stutter-stepping to give the defense time to recover and contest the shot? So if that means jumping on your right-leg and shooting right-handed on the same side, so be it.
Continue to teach basic cuts and add more cuts.
Continue to emphasize shooting form (move to big baskets and bigger balls).
Practice shooting on the move off of the pass and the dribble. To learn more on shooting, we also have the Breakthrough Basketball Shooting Guide.
Ball Handling & Dribbling - teach more dribble moves such as the spin move, behind-the-back. Incorporate some double-moves (crossover followed with a behind-the-back).
Resource: Progressive Youth Ball Handling & Footwork Workouts App - Players can do the workouts from anywhere. The coaching dashboard also allows you to monitor multiple players or your whole team.
Passing - introduce some other advanced passes (dribble pass, behind-the-back pass, pick and roll pass).
Passing Under Pressure - You use Pair Passing with a defensive player in the middle running back and forth to pressure the passer. You can use this drill to practice breaking pressure: Full Court Press Breaker Drill.
Teach Basic Screens.
Footwork - continue to work on jab steps, pivots, and ball fakes (pass fakes and shot fakes).
Rebounding - put more emphasis on rebounding technique and spend more time on rebounding drills.
Post moves - keep practicing post moves mentioned above while introducing a few more when the players are ready drop step
counter and up-and-under move.
Spacing - advance to higher levels of spacing drills.
Offense - introduce more motion offense situations. You should start to notice that your players are becoming much better at reading the defense.
Defense - Emphasize basics from previous levels and move on to rotations and situations.
In our Man to
Man Defense System, we go into great detail about rotations and situations.
For this age group, we are against zone defenses for development purposes.
Sample Practice Plan for 7 to 10 year olds.
Sample Practice Plan for 11 to 14 year olds.
Do you have any questions or suggestions? Let us know by leaving your comments...
Basketball training in elementary grades.
Prepared by the teacher of physical culture Rylkov G.V.
Since the 2002-2003 academic year, along with the current comprehensive program, several alternative physical education programs have been introduced for students of general education schools. And so, working on a complex program, I decided to use one of these alternative programs,
which is based on one of the most massive and popular sports among schoolchildren - basketball, but can only be used in elementary school starting from the 2nd grade, since the comprehensive curriculum for teaching this sport does not provide for elementary school, although passing the section "Outdoor games" schoolchildren master some skills in possession of the ball. A certain role in my decision was also played by the fact that our elementary school works according to experiment 1-4, and therefore I, as I work and in grades 2-3, have to look for and solve something different, new. Their program material of the alternative program, I used in my work two educational sections "basic knowledge" and "Special training", and included them in the section "Outdoor games" for grades 2-3. And now in my work in this direction began to include three stages in teaching this sport: Stage 1 - 2-3 classes Stage 2 - 5-8 grades Stage 3 - 9-11 grades Why this sport and not another I chose in my work. Firstly, basketball has become a traditional sport at school for a number of years. Secondly, I myself used to be engaged in game types and basketball is more familiar to me. And thirdly, the technical and tactical actions inherent in basketball are fraught with great opportunities for the formation of vital motor skills and the development of children's physical abilities. But I will dwell in more detail on teaching basketball in elementary grades. Starting from the 2nd grade, students master throws, catching, passing small rubber balls to a partner, stopping in motion on a sound signal and various exercises that develop motor qualities. We study all these elements in different ways, but the most acceptable one is through games, for example, “Ball to a Neighbor”, “Passing the Ball in Columns”, “Ball to a Neighbor”, etc. Also in the lessons I use small sports equipment, mostly for personal use, these are small rubber balls , cubes, weighted bags. Performed exercises with these objects in walking and running, on the spot, in the lid, throws and catching in pairs, students develop the skills that they need later when handling a basketball. Starting to study some techniques, I introduce the guys to the markings of the basketball court and give them various tasks “Walking along the indicated lines”. To do this, I prepare for them the pace of movement "Hourglass", "Reel", "Snake", etc. In the class II program, I included the player’s stance, the player’s movement in the stance, stop on a sound signal and various sets of exercises with small and large balls. For the harmonious development of the body and coordination of movements, we perform exercises with both the right and left hands, perform jumps on both the right and left legs, and then we complicate the exercises. I start training from the player’s stance, explain why a stance is needed in the game and show what position should be in the stance: legs half-bent, arms in front of the chest, and I give exercises for training. 1. Line up. Crouching to jump out and land on half-bent legs, legs shoulder-width apart, one set forward. 2. Sit down in a line, jump out and land in a standing position. Immediately after landing on bent legs, run to the opposite sideline. Use the rack in outdoor games "Sparrows and Crows", "Day and Night", etc. Movement. There are many varieties of movements, but first we learn running facing forward in a straight line, then we master running with a change in direction and speed. After that, we learn running sideways, backwards and their varieties. The basic element is the position on half-bent legs and balance, which is ensured by the half-bent legs of the arms in front of the chest.
Training exercises: 1. Running around the hall on half-bent legs with a sliding touch of one, then with both hands of the floor along the whistle. 2. Oncoming relay races with touching lines and objects on the floor. 3. Running circles with hand touching the line of the circle. Relay races with running circles. When conducting games and exercises of a technical nature, I use lighter balls, and heavier balls in general educational exercises. While walking at an average pace, and then when running, we execute the “Stop” command after which the students stop in a wide step position. With the help of various general developmental exercises with small and large balls, we study movements with balls. The same exercises are for the children a means of developing motor qualities.
To master the techniques of the game I use lead-up exercises: 1. Large ball in both hands at chest level. Throwing the ball up and catching it, you can clap your hands behind your back. 2. The same as exercise 1 but with catching after the ball bounces off the floor at different heights6 at the level of the knee, waist, head. 3. Ball on the floor in front of the student. Bend over and put your hands on the ball. Repeat several times. 4. Same as exercise 3, but put your hands on the ball, grab it with your fingers and press it to your chest, straighten up, bend over again, put the ball on the floor, straighten up. 5. Exercises in pairs with the ball. 6. Throw the ball over your head, straighten your arms and catch the ball, pulling your arms to your chest.
In the third grade, students learn to stand, stop by jumping, catch and pass the ball with both hands from the chest from a place, with a reflection from the floor and backboard. The main task of teaching basketball in grade III is to study the basics of the game technique and consolidate the acquired skills in outdoor games and special exercises. In the course of basketball lessons, I use various types of walking in a squat and half-squat position on the entire foot, on the toes and lateral arches of the foot, jumping with a push of both legs (in a squat and half-squat), changing the direction of movement (straight, back, left, right), alternating them with walking. Then I give a run from various starting positions, sitting, kneeling, alternating slow running with accelerations and stops in the position of a wide ball. After that, we perform various exercises for the muscles of the arms and legs.
Jump stop. By stopping, the student must cancel the forces of inertia and take a position from which he can start in any direction. The basic element is the position on bent legs with a variable body weight on the back standing leg. Exercises for learning. 1. Building in 1 line. Alternately in the line, jump in place with a stand with the leg extended forward, squat on the standing leg behind with the hand touching the floor next to it, also on the other leg. 2. In a column, one by one, moving around the hall, make stops on sound signals. 3. The game "Tag" (in pairs, or in groups) performing stops with the arrival. The driver catches up with them and tries to overpower them. Catching and passing the ball with both hands from the chest while standing still. The main element during catching is the position of the hands, reproducing the shape of the ball. Exercises with passing and catching the ball are performed in the player's stance. Exercises for learning. 1. In ranks of 4-5 people. In front of each line is a driver. The players take a stand. Hands at face level, brushes reproduce the shape of the ball. The driver alternately puts the ball into the hands of the players, having received the ball, the player lowers his hands to his chest and holds in the position from which the transfer is made. 2. Standing in line. The driver alternately throws the ball to the players, doing this from 2-3 m with one hand from below so that the ball flies at face level. The player extends his arms and catches the ball with a step towards.
Dribbling with the right and left hand in a straight line. The main element is the position of the forearm and elbow of the hand leading the ball, which, as if trying to take a position below the hand, are ahead of the hand. This makes it possible to follow the ball far down and meet it early with a brush, as well as control the ball.
Exercises for learning. 1. Formation in 2 lines. From a stand on strongly bent on strongly bent legs, imitation of dribbling. Start moving down with the elbow and forearm and end with the hand. The leg is extended forward, the same-named hand performing the lead. 2. Building in a line. Dribbling the ball in place with a change in the height of the ball bounce. The stance is of the same name, the fingers of the hand performing the lead are directed forward. 3. Leading in place with the right and left hand in the right-handed and left-handed stance. During the lessons, I give students various preparatory exercises with the ball, which develop certain motor qualities, such as speed, agility, and also use various outdoor games "Sniper", etc. Teaching basketball from primary school has a positive result, after all. At this age, a certain base of skills and abilities is laid, and already in the further study of the game, it is easier for students to master tactical and technical elements and techniques. From my own experience, I can say that by carrying out this form of work, we have achieved good results in regional basketball competitions, where we win prizes.
Outline. Grade 3 Topic: Basketball. Improving ball handling. | Outline of the lesson in physical education (Grade 3):
Appendix to criterion 3.3.2
MBOU “Secondary School” PST MADMAM
Ust-Vyovsky district
Summary
Physical Culture Lesson
Topic: “Sports games-basketball”
Work completed:
Timofeev Zoya Zoya Zoya Zoya Zoya Zoy Mikhailovna
Physical Culture Teacher
MBOU “Secondary School” PST MADMAM
p. Madmas
2019
Plan - Summary
Physical Culture Lesson
on the section “Sports Games” (basketball)
for students of grade III
Lesson topic: Sports games - Basketball
Educational tasks
Improve the technique of catching the ball with two hands.
Improve the technique of passing the ball from the chest with two hands.
To improve the technique of dribbling on the spot, on the move.
Improving tasks
Develop speed-strength qualities
Develop strength endurance
Develop speed endurance
Educational tasks
Develop respect for sports equipment
Develop the ability to perform collective actions.
Date: _____ _____________ 2019
Time: 12.25 - 13.10
Place of lesson: Sports hall 18 x 9000
Necessary inventory: basketballs, cones, signal cubes
Summer amounted to: Timofeeva Zoya Mikhailovna,
Physical Culture teacher
MBOU PST Madmas
9000 9000
9000 9000
DOSISE 9000
DOSE
Organize and get students to work in class
Promote development
correct posture
Develop cardiovascular system and breathing. system.
Develop attention and speed of movement. reactions.
Repeat the technique of movements in the basketball player's stance
Develop speed-strength qualities
Develop the strength of the muscles of the legs and arms
Restore the cardiovascular system and respiratory system. systems
To improve the technique of drill techniques and commands
I. Preparatory part.
1. Construction. Report Message of lesson tasks. About basketball. Check pulse. Turns. Right, right, around. Jump to the right.
2. Walking around the hall with
performing tasks:
a) on toes, hands on the belt
b) on the heels, hands on the belt
c) on the inner arch of the foot
d) on the outer arch feet
e) rolling from heel to toe
3. Running
4. Running with the task
a) straddling the right (left) side
b) right (left) side cross step
c) forward cross run
d) run with hops
e) jumps with change of legs sideways
f) jumps on one alternately
g) movement in support behind, turn 360 and continue
6. Walk
7. Change from column
, one at a time into a column
, two with a turn at
1
9015
1 min.
½ circle
½ circle
½ circle
½ circle
½ circle
3 circles
times
6-8 times
2 circles
2 circle 1 time
2 times
1 time
1 time
1 time
2 circles
1 time
Briefing for TB
Pay special attention to the form and ability to find a place in the system.
Pay attention to the precise execution of exercises
When performing exercises “a” - “e”, monitor your posture
Rise on your toes with a maximum height
Monitor your breathing
Pay special attention to the clear and quick execution of commands
Exercise performed in the basketball player's stance
Hands clearly to the sides
Exercises "c" - "z" are performed along the length of the hall
Exercises "e" are performed at the fastest pace
2) Develop the mobility of the cervical
3) Develop the mobility of the elbow joints
4) Develop the mobility of the shoulder joint
5) Develop the mobility of the spinal column
6) Develop the mobility of the vertebrae. column in the front-back plane
7-8) Develop the muscles of the trunk in the lateral plane
9-10) Develop coordination and balance
11) Develop leg strength
8. Exercises with balls
1) I.P. - legs apart with a jump.
1 - 4 - squats with a ball;
5-6- ball up left
7-8- ball up right
2) I.P. - the ball in front of the chest.
1 - 4 circular movements of the ball up, down,
5-8 - forward, backward.
I.P. - basketball stance, 1-4
press the ball with your palms, squats, 5-8 - lift the ball up to the left, to the right.
I.P. – standing, legs apart
1 – 4 circles of the ball around the neck
I.P. - leg stand apart, 1-2 - we transfer the ball behind the back on the right, 3-4 we transfer the ball behind the back on the left
I.P. – stand legs apart, lower the ball down to the floor
1 –8- roll around the legs in a figure eight
I. P. sit down, ball in front of you
1-4 - raise your legs together, pass the ball under your feet, behind your back, 5-8 in the other direction.
10) I.P. – leg together stance,
1 – 4 circular movements in a circle around the legs.
1-2 right lunge, 3-4 left lunge.
11. I.P. the ball in front of you, jumping, putting one foot to the other left and right.
Jumping hands with hands, jumping with cotton over the head
4 times
4 times
6 - 8 times
6 - 8 times
4 times
6 times
9000 4 times
4 times
10 - 12 times
6 - 8 times
Disassemble cooked balls on stands
Monitor posture
Perform exercises with maximum amplitude
Perform exercises at max fast pace
Legs at the knee joints are not bent.
Amplitude of movements to gradually and constantly increase
Put the balls on cones
Exercise on the abdominal muscles
Tilments perform non -bending legs in knees
at a pace
Private tasks
003
Lesson content
Dosage
Organizational and Methodical instructions
C; Main part
11. Shifting the ball
1) Shifting the ball from hand to hand around the head
2) Circular movements of the ball around the body (belt)
3) Circular movements of the ball around the legs (knees)
4) ) Transferring the ball from hand to hand between the legs "eight"
Rebuilding 1 to the left, 2 to the right. #2 steps back. Take the balls and hide behind the first ones
12. Dribbling in place,
in motion
1) Dribbling the ball in place with the right (left) hand
2) Dribbling the ball in place with a change in the height of the rebound from the floor
3) Dribbling the ball in place with the right hand, performing for every two hits with the ball a step with the right foot forward - backward
4) The same with the other hand, foot
5) The same, but the step is performed for each hit of the ball on the floor
6) Dribbling the ball in place with the right hand 2 slowly, 3 quickly Approach
8) The ball in motion by signals
25min
20 times
8 - 10 times
15 times
2 min
1 min
2 min
2 min
1 min 1 min.
Restore breathing
Perform as fast as possible
Monitor posture.
Clear execution under the account. Feet do not tear off the floor and do not move.
Clear execution under the account. Gradually increase the pace of performance.
Do not hit the ball with the palm of your hand, but use hand and forearm motions. The ball must always be on the side - in front.
When dribbling, the legs are bent, the body is straight, the shoulders are slightly forward.
Do not look down at the ball: the entire court must be seen.
The ball bounces off the floor no higher than the waist.
Perform steps with springy movements
Perform accurately on the count.
Clap the beat rhythm of the ball.
Touch with a hand with reduced dribbling of the right, left hand
Red stop, cover the ball, blue go, yellow on the spot dribbling
Pay attention to the precise execution of commands
Private tasks
Lesson content
Dosage
Organizational and Methodical instructions
To improve the technique of the ball transmission from the pursuit of pounds. Develop speed qualities
13. Catching and passing the ball from the chest with 2 hands, with a rebound from the floor
1) Catching and passing the ball from the chest with both hands
3) Catching and passing the ball from the chest with two hands with a rebound from the floor
4) Dribbling and passing the ball.
25 min.
30 sec
30 sec
30 sec
30 sec
2 min
1 min
2 min
Ball hit is closer to the standing
after the release of the ball from the hands of the finger should look at side of the partner. When catching the ball, the legs bend, while passing, they straighten. Passes from the chest - parallel to the floor


 Things changed quite a bit!!
 All the players knew it was important to me and all the coaches.
 Sometimes in practice we used cones and tape to create an image of this area for reference.
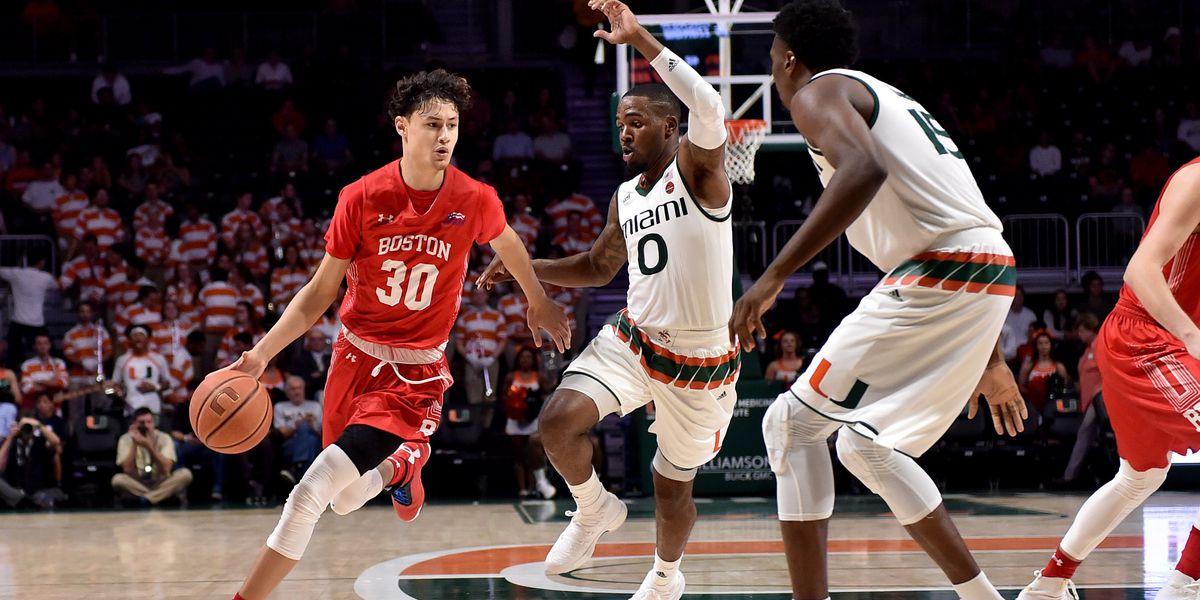 But it wasn’t necessary.
 But of course they forget a lot and I didn’t want to make them robotic. So I was not a drill sergeant when it came to this.
-Step-5.jpg/aid43486-v4-728px-Play-21-(Basketball)-Step-5.jpg) We do a fair number of lay up drills.. mostly through multi-purpose drills while we work on ballhandling.
We do a fair number of lay up drills.. mostly through multi-purpose drills while we work on ballhandling.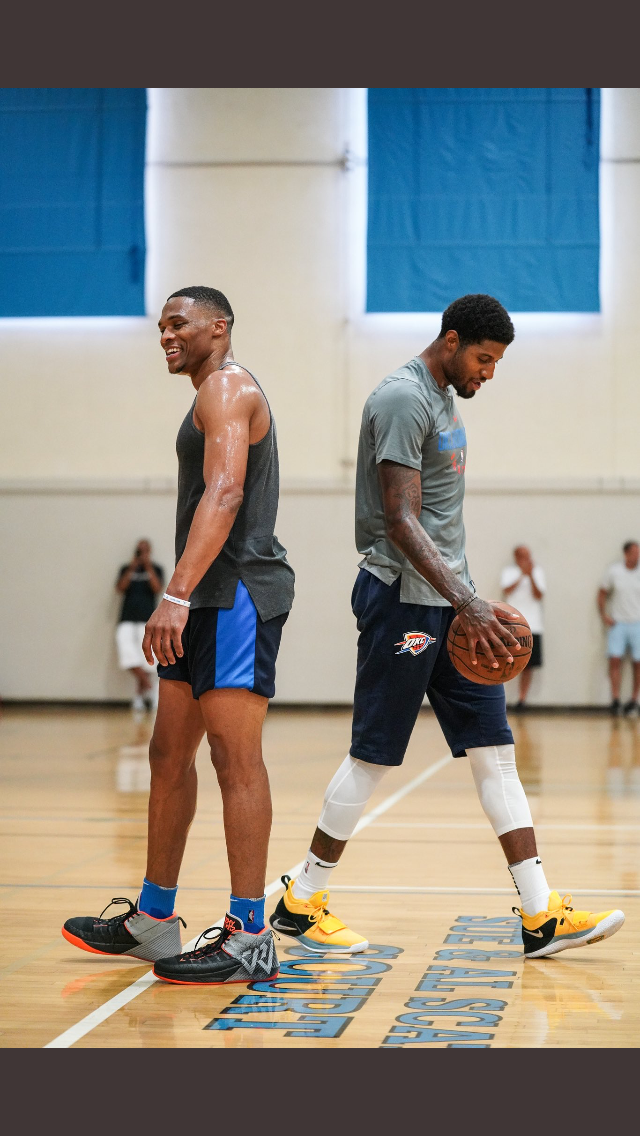
 I also think we’re developing better decision making skills and higher basketball IQ by playing the small sided games.
 Then it spread a little bit in third grade and we ended up with 12 players. We had to get a little creative to split them up and schedule multiple games so everyone got plenty of playing time.
 Well, we hope to help you out in this area. Below, we provide some advice on what to teach youth basketball players. We break it down between 3 levels. As you perfect each level, you can advance to the next level to teach more skills & concepts.
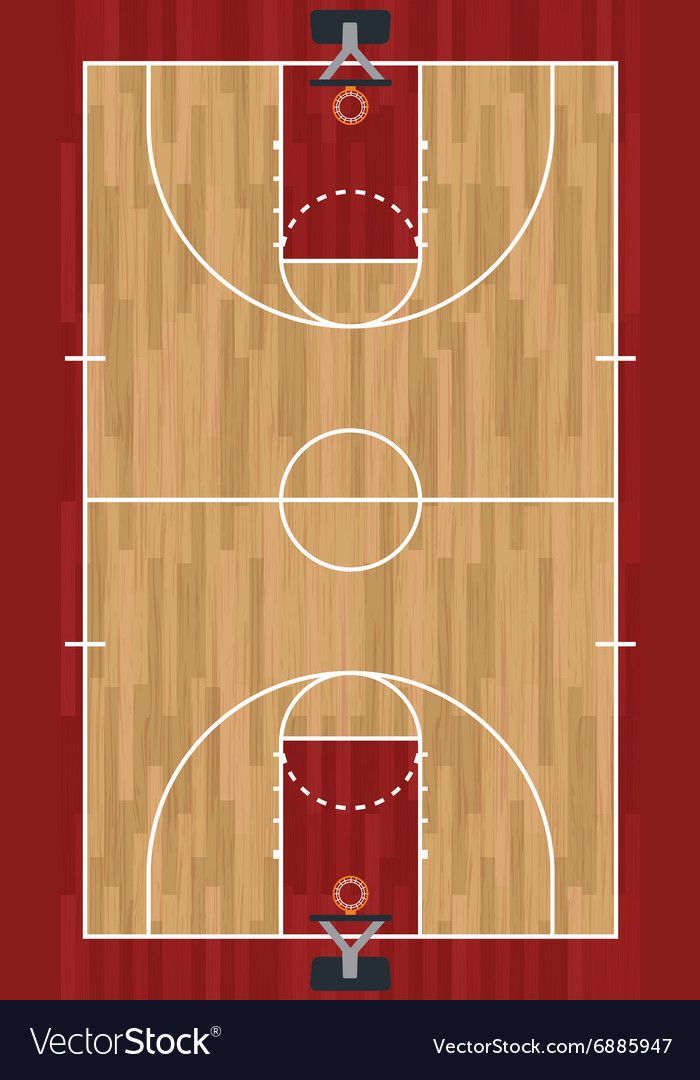
 You should spend a lot of time on footwork!
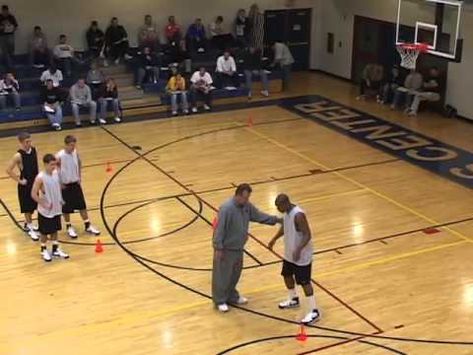 99% of the time they would be more than willing to help, and they may even come and show the kids themselves.
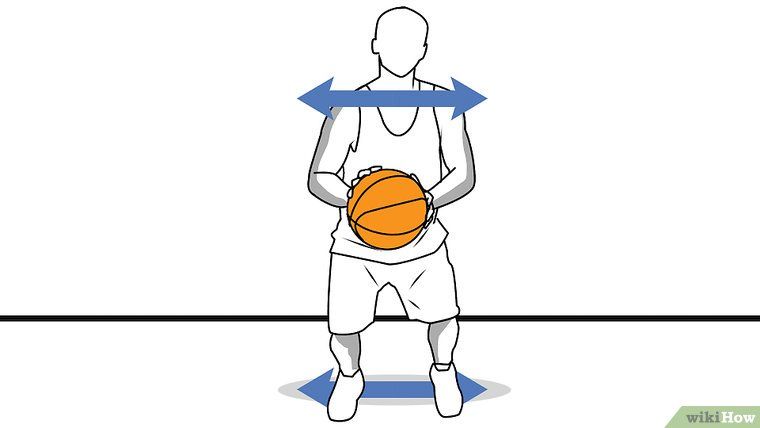 Then you don't have to waste time teaching offense. Just let them play.
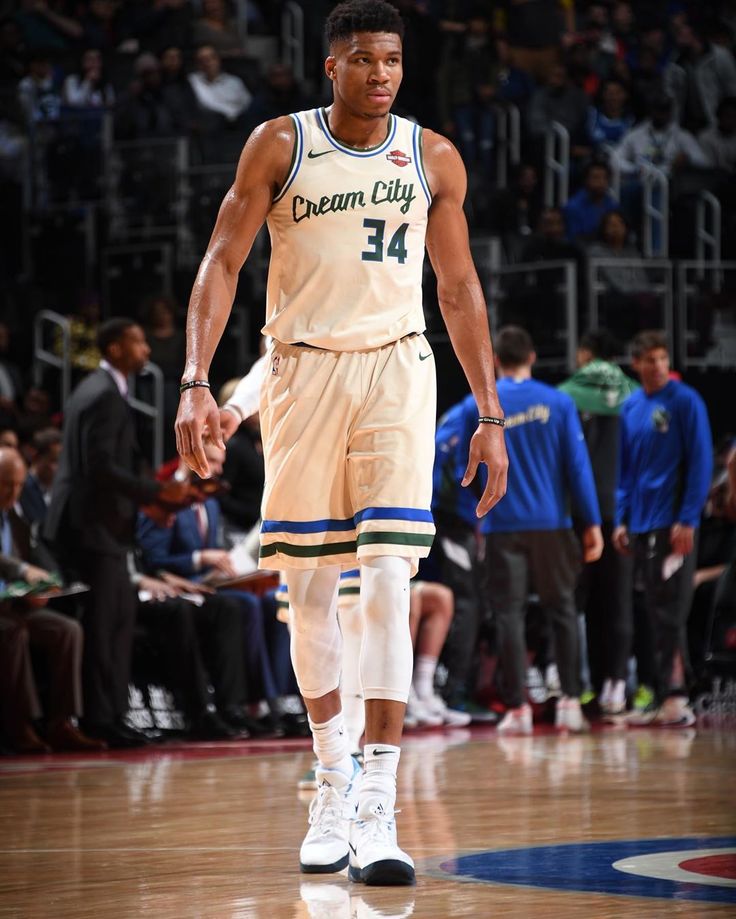 You'll gets lots of drills and learn exactly how to teach the most important fundamentals the to kids "right way". We truly believe this DVD should be required viewing for ALL youth coaches.
 You can also start to introduce more motion offense situations and play some 5 on 5.
 The coaching dashboard also allows you to monitor multiple players or your whole team.
 You should start to notice that your players are becoming much better at reading the defense.


 After that, we learn running sideways, backwards and their varieties. The basic element is the position on half-bent legs and balance, which is ensured by the half-bent legs of the arms in front of the chest.


 Madmas
  system.
  Walk
Walk  column in the front-back plane
 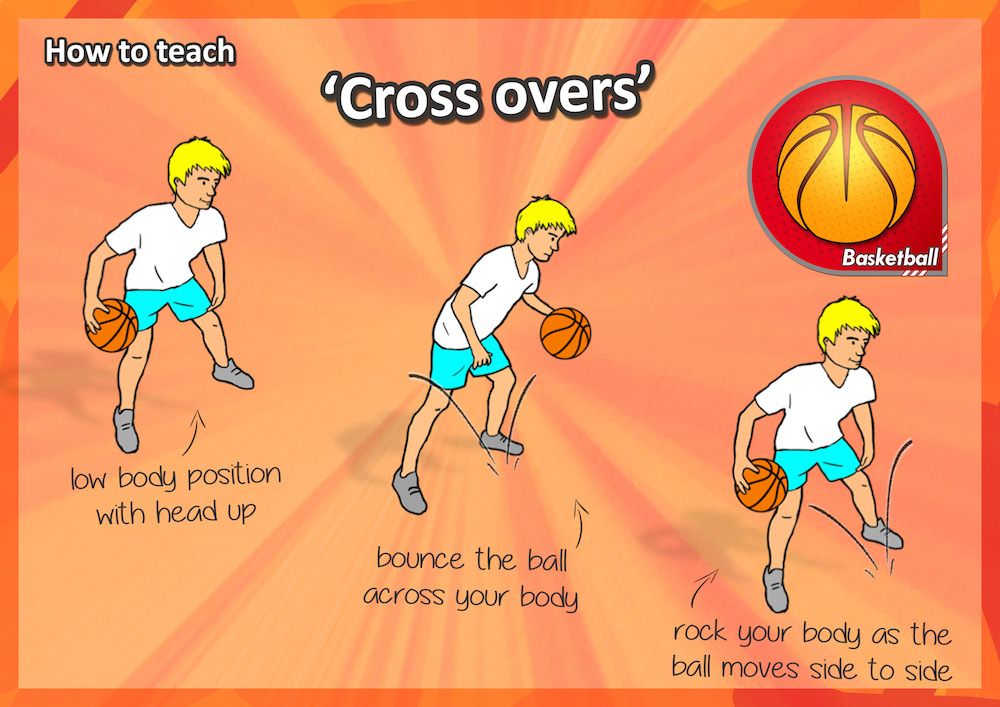 P. sit down, ball in front of you
  Shifting the ball
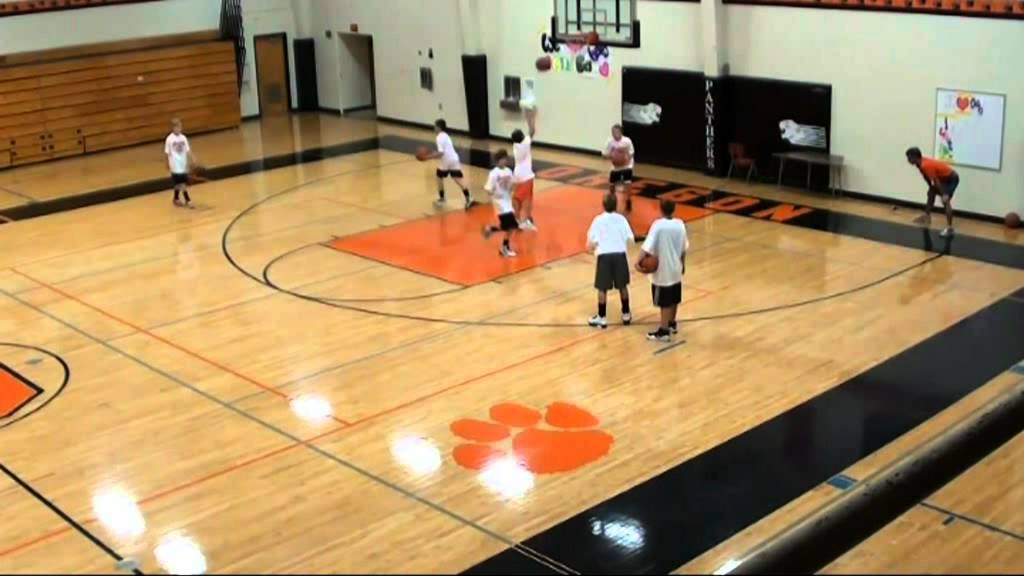
 Develop speed qualities