Home »
Misc »
How to do ankle breakers in basketball
How to do ankle breakers in basketball
How to break ankles and destroy defenders in basketball
by Mofe Owolabi | Oct 21, 2020
The defender is LOST… the crowd lets out a collective gasp… and it feels like time itself freezes for a split second. But, being able to break ankles is much more than a gimmick.
It grants you the ability to create shots for you AND your teammates.
That’s priceless.
Let’s get into three ways you can get to snapping ankles and shifting defenders.
Change of direction
When trying to create space from your defender, a change of direction is lethal, when done right.
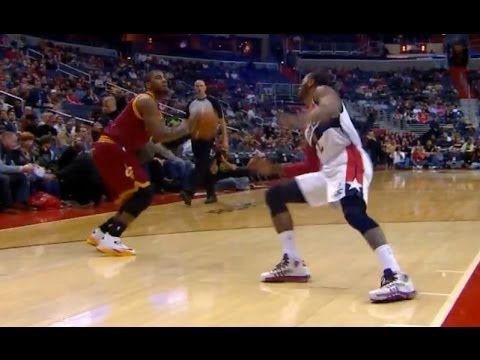
I’m sure that those who play/watch a lot of basketball can agree that lots of ankle breakers come from a crossover, or some sort of stepback/dragback dribble.
This is no surprise.
These two dribbles are so effective because they involve a violent change in direction.
With the crossover, it’s from side-to-side, and with a stepback/dragback dribble, it’s from forwards to backwards.![]()
The reason these changes of direction are so deadly, is because they convince your defender you’re going one way…
Then, BOOM.
You’ve gone in the opposite direction, with your defender in the lost and found.
Here are two keys to making sure your change of direction is effective:
- Make it quick – If it’s too slow, it’s easier for defenders to recover. Consistent dribbling workouts will help you speed up hour dribble
- Make the change of direction DRASTIC – Often, players will fail to shift their defenders because – even though they perform the dribble move – they barely change the direction they dribble in.
This leads on to the next point…
Use your eyes and body to deceive the defender
So, let’s assume you’ve been training your handles and can do all your moves well, with control of the ball.
But, maybe your dribbles still aren’t working on actual defenders.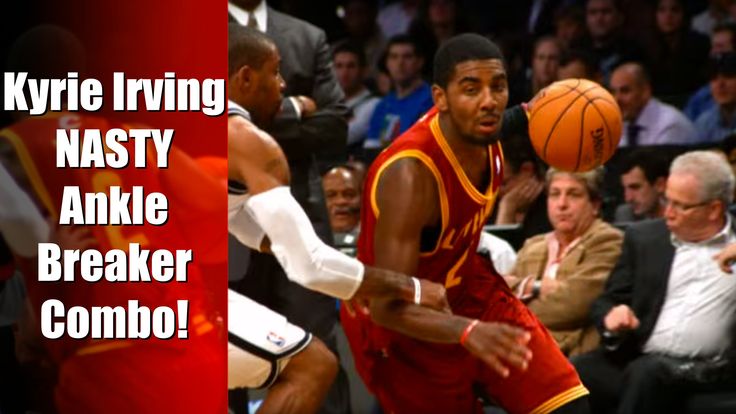
This could be because your moves aren’t convincing enough.
When using moves that fake from one side to the other, your eyes are a weapon.
Stare in the direction you are faking towards, before exploding towards the opposite direction.
You can also use your body to trick defenders.
Face your chest and shoulders, again, in the direction you’re faking towards. Then, take the dribble quickly in the other direction.
Even on a stepback/dragback dribble, leaning forwards with your upper body at first can help to deceive your defender.
It will look as if you’re driving to the basket. Then, when you dribble backwards they are less likely to expect it.
Change of pace
As you probably know, dribbling slowly in front of your defender the whole time won’t be too effective.
However, dribbling fast the whole time can also actually make it harder for you to break ankles.
Although an ankle-breaker is definitely not impossible, dribbling fast will often alert your defender.
This can ruin the element of surprise, making it easier for them to react to your moves.
(Not only that, but it will probably tire you out too!)
Varying between slow and fast dribbles is MUCH more effective.
This is because the slow dribbles will often “lull your defender to sleep”.
Then, you can catch them on their heels with a quick dribble or fake.
This concept is what makes a hesitation dribble so effective. The ball hangs in the air and under/by the side of your hand as you dribble.
This gives you time to assess your defender, and make a decision.
Once they get too relaxed, often all it takes is one quick move to burn your defender.
As well as the hesitation, here are some more dribbling moves to help you blow by defenders and break ankles.
3 WEIRD basketball moves that are ANKLE BREAKERS! – ILB Elite Basketball
https://www.youtube.com/watch?v=5AoJ9A6gAKQ&t=340s
Hey team! It’s Coach Rock! In this video, I share with you 3 different basketball moves that are going to help DESTROY your defender! All of these moves are considered non-traditional.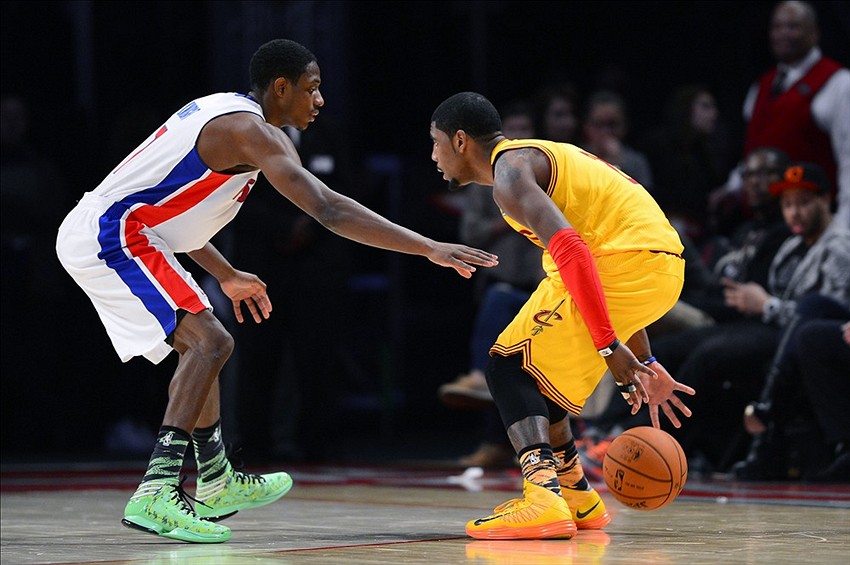 They are my personal remix on some classic moves. Unique & simple to do, they extremely effective once you master them.
After the video, make sure to stay tuned on how to get my free ball handling and footwork mastery guide. The tips that you see in this video combined with the video you’ll find in the link will make your ball handling and footwork the best on the court.
The first of my 3 basketball moves is a variation of the bounce crossover:
- The original bounce crossover is a move when you rapidly switch the ball from one hand to another. The key to this trick is to simultaneously transferring your weight to the opposite side of your body than the hand that the ball began in as you pass the ball over to that side.
- Once you’ve mastered the crossover, add in the quick machine gun dribble as you switch hands with the ball. This maneuver really throws off your opponent’s focus on the ball, but mainly distracts him from your handling & footwork.
 That one split second when you add in the machine gun dribble makes all the difference. It literally changes your entire game. It buys you some precious time, causing your defender to FREEZE. Once he freezes, there are several different basketball moves that you can do, such as choosing which side to go. Take advantage of those of the time you’ve bought yourself.
 - For those of you who aren’t familiar with the machine gun dribble, it’s two dribbles before the ball is passed over to your other hand. If the crossover is already in your arsenal of moves, the bounce crossover with the machine gun dribble is a good way to switch it up. It throws your defender off what they think is your ball handling style. It spices up your move, confusing your opponent.
- SWITCH IT UP! BECOME UNPREDICTABLE! DOUBLE TAP!
Next is the Fake Shammgod mixed with an Isaiah Thomas Hesitation:
- The original shammgod is a move where you drop the ball in front of you, away from your body, but still within your reach & control.
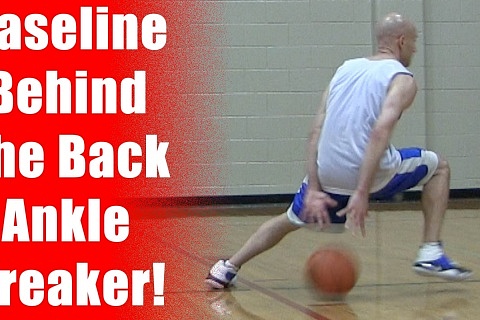 You then with the same hand bring the ball back, and switch to the free hand, pulling the ball back towards your body.
 - Adding in the hesitation, you then give the ball back to the hand (and side) in which you first dropped the ball, allowing you to keep your body and back towards the defender & the ball far out of his reach. Notice my footwork, you want to make sure you are shuffling the ball & your feet AWAY from the defender, putting your back between him and the ball.
- This move is only effective if you can mix in the hesitation. drop, boom, tap, & GO. Crab dribble, tap the ball, & then shift your body back QUICKLY. Speed and agility are VITAL to mastering this move. Mixing quick body movement with that small hesitation, will make all the difference when it comes to your ball handling & footwork.
Want to make yourself Unguardable? This last move, a pull up variation with scissor footwork, is a personal favorite of mine.

- More often than not, you’ll see a player shoot a hesitation pull up with their left hand while having their left foot forward. This move is a variation of that, but with a bit of change in the footwork. Basically the same move, but instead of having the corresponding foot of the hand that is holding the ball forward, you have the opposite. So if the ball is in your right hand, your left foot is forward. On the bounce, you then shift from your left foot being forward to now your right foot is leading.
- You will have completely shifted your hips into scissors maneuver. I refer to the scissors movement in many of my other videos such as Scissors Dribble & Stationary Scissor Shift.
- This move stuns your defender. It opens up options for you to throw in another one of your favorite basketball moves. Gives you the ability to throw in a hesitation or a crossover & go. Quick shift & tap of the feet stuns your defender. Buying you extra time. Take advantage of it.

Here is a link to my free Ball Handling & Footwork video that is going to allow you to be a bigger threat off of the dribble against your opponent. In this video, you’ll see even more basketball moves to help greatly improve your game. I STRONGLY recommend you take advantage of this. Most of these techniques I have NEVER released to the public before. I saved them for my most dedicated & self motivated players. If you consider yourself among their ranks, watch it. Study it. Apply it.
If you have any questions, comments, or suggestions on what you’d like to see from myself or any of the other coaches, send us a message or comment. You’re a part of our team, we need your guidance & direction as much as you need ours.
See you on the court,
Coach Rock
Tagged AgilityAnkle BreakersBall HandlingCoach RockCrossoverFootworkIsaiah ThomasMachine Gun DribbleScissor MoveSpeed
Ankle Injury - All About Basketball
Ankle Injury
Day One
Apply ice to the ankle (for 15 minutes every 4 hours) to relieve both pain and swelling. At the same time, a heating pad, bubble or other container with ice should be wrapped with a cloth so as not to overcool the joint. Keep the injured ankle higher: the outflow of blood from the joint will prevent swelling from developing. Of the medicines, you can recommend the gel "Troxevasin" - for rubbing into the ankle joint (once a day is enough).
Second day
It can be started with the same gel. It is advisable not to disturb the leg with long walking. And if an urgent matter calls you on the road, fix your ankle with an elastic (necessarily elastic, not simple) bandage: there is less danger of twisting your leg again, and stepping on it is not so painful. It is better to bandage in the morning, right in bed: slightly raise the toe of the foot and wind the bandage from the base of the fingers to the ankle joint; the next layer of bandage overlaps the previous one by 2-3 centimeters; cutting the end of the bandage along, fix the bandage around the leg. You need to bandage for the whole day, that is, not tight - otherwise the blood will not flow into the fingers (a sign of this is their blueness). Be sure to remove the bandage at night so that the leg rests.
Day Three
Bandage the ankle again. (Keep doing this if the pain doesn't go away when walking.)
Day Four
It's time to start massaging the ankle and foot to increase blood flow to the sprained ligaments. By supplying damaged tissues with nutrients, you will speed up their recovery. At the beginning of the massage, lubricate your hands with oil or cream, which contains camphor.
Day Five - Fifteenth
You have already understood: massage should be done daily during the entire recovery period. And it’s great if it becomes a habit for you - it will benefit not only the ankle, but the whole body. After all, there are multiple nerve endings in the foot, and by reflexively influencing the spine, we can simultaneously influence the internal organs. Therefore, it is recommended to massage not only the injured, but also the healthy leg. You just need to master a few simple tricks:
1. Gently massage the area of the ankle joint of the injured leg (with both hands) from the bottom up.
2. Grasp the foot so that the thumbs are on the sole and the other fingers and palm are on the instep of the foot. Thoroughly knead and rub the sole with your thumbs. (The same on the other foot.)
3. Grasp the heel by placing the fingers of the hand (excluding the big one) along the sole. Move them up and down, knead-rub the soles of one foot, then the other.
4. Applaud! 50 hand claps on one sole, then on the other will improve your mood. Fold your palm in a boat to make the clap louder.
5. Warm up the feet by rubbing and kneading the soles, then place the palm of the hand on the back of the foot so that the fingers and toes are parallel. Rub the upper surface of the fingers (from the ends to the base), then with bent fingers and a sharp movement of the wrist joint and palm, stretch and bend inward the toes (excluding the big one). Repeat the same with the other foot.
6. Sit on a chair, put your foot on the thigh of the other leg, without bending at the waist as much as possible. Putting 4 fingers together, put them between the big and other toes, inhale and with increasing effort “tear off” the big toe, twisting and bending it. Relax, exhale. Repeat the exercise with the big toe of the other foot.
7. Place four fingers on the sole, thumb on the back of the foot, and with your thumb, turn your toes toward you in turn (starting with the little finger). In conclusion, rub the surfaces of the toes adjacent to each other with the index finger of the hand. First on one leg, then on the other.
Sixth day and beyond…
Now thermal procedures can be added to the treatment. Every day, immerse the recovering ankle for 10-15 minutes in not too hot water, or even better - in water with horse chestnut extract, horsetail, phytosols (there are a lot of them in modern pharmacies, for every taste), sea or table salt (1 tbsp. l per 1 liter of water).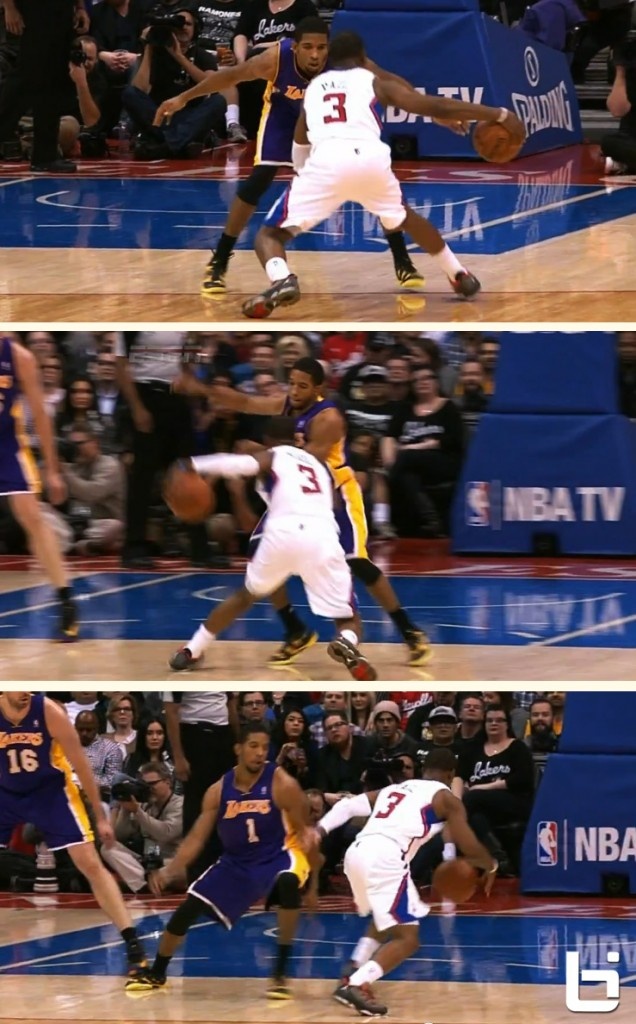 But still ...
... stretched, much less torn ligaments should be shown to the doctor. Maybe he will prescribe you an additional course of physiotherapy. And most importantly, he will control the healing process. An untreated sprain is fraught with weakening of the ligaments - the leg will tuck at the slightest unevenness in the relief (do you need it?).
Strengthen your ankle!
A great way is walking on a log, more precisely, on a tree trunk. It is desirable that the tree is not too thin, that it lies on the ground, and that you move along it in sports shoes or, even better, barefoot. Trying to maintain balance, you will tense the muscles of the ankle - and this is the perfect way to strengthen it. It is useful to run barefoot on water or sand, walk on the ground, on grass, on pebbles.
Source: www.slamdunk.ru/forum
bchance.ru
Basketball practice hacks: how to score goals for beginners
Even if you are a novice basketball player, we will not give you a training plan, but we will tell you why the ball flies anywhere but into the ring and into your hands. It's all about technique: even with regular training and perseverance, novice adults and children often make simple mistakes. It's a shame, let's fix it. Below are 11 life hacks on how to hone your technique to increase the likelihood of a goal for your team.
Basketball Shot Rules for Beginners
1. Hands up
In pursuit of the attacker, raise your hands, even if you are standing with your back to the pass, and even more so if the ring is in front of you. Your raised hands will increase the chance of intercepting the ball from the opponent by 2 times. Don't overlook this little thing!
2. Throw from the shield
Even Tim Duncan did not neglect them! A square is drawn on the basketball backboard. If you are standing opposite the ring, then aim at the middle of the upper part of the square, if you are standing on the side, then at the corner. If you hit this square, then the ball is at 90% of cases will fall into the ring. The law of physics and no cheating!
3.
Look at the ring, not the ball
Practice driving the ball with your hand, not your eyes, develop tactile control. Your eyes should be on the hoop while dribbling and on the perception of your body position in relation to the hoop. Then you will be able to take the correct posture, and the throw will be effective.
4. Dribble with the balls of your fingers only
The palm should not touch the ball, only the pads of the fingers. Dribbling should become familiar to you, like an extension of your hand. Then you can change its trajectory at any time and you will have more chances to score goals. Practice with the ball constantly.
5. Throw with one hand
If you throw the ball with two hands, you reduce the chance of hitting the basket. All the efforts of the throw are in one hand (in the right for right-handers, in the left for left-handers). The other hand only holds the ball, the leading one holds it with the fingers, not the palm.
6.
Do not jump when protecting the ring
Jumping is the main mistake of rookie defenders. To intercept the ball and block the shot, simply stick out your hands. When you are in a jump, the attacker will easily bypass you.
7. Don't look back
When you dribble, don't look back, but dribble and aim for the ring, focus on shooting (or passing to another player on your team).
8. Bring the throw to automatism
Incorporate the most basic basketball techniques into your training plan and bring the shot to automatism. Throw first from a distance of half a meter from the ring, gradually increasing it. Learn to throw the ball so that it hits the hoop without touching the edge.
Throw the ball with all fives and jump
Throwing Rules:
- Head in the center of the body - if tilted, accuracy is lost.
- Look at the ring: mentally build a trajectory. If you are far away, the ball flies in a curved curve with a maximum height of 2 meters above the hoop.
- A strong hand is in front and throws, a weak hand is on the side and directs, only holding the ball. The elbow of the throwing hand must be in line with the ring.
- The ball must rest on the fingers without touching the palm. The fingers are as far apart as possible and grab the ball.
- Throwing arm bent 90 degrees, forearm perpendicular to the floor. If you bend less, then you get not a throw, but a throwing of the ball horizontally.
The main thing in the throw is the position of the body and its balance. Place your feet apart and parallel to each other: it is important to orient them in the middle of the basket. Then the direction of the body during the jump will coincide with the direction of the throw, and the ball will fly straight into the ring. When the feet are uneven, the ball flies in the wrong direction or does not reach (although the throw was normal).
Take a deep breath and release as you exhale.
How to hold the ball and shoot in basketball
How to throw correctly: straighten your arm, point your wrist up, and with your hand set the ball to rotate in the opposite direction from the flight. The ball should seem to "roll" off your fingers.
9. Copy masters and play as a team
Watch professional basketball games and try to copy the movements of your favorite players in training. And be sure to conduct game sparring - this will allow you to develop more techniques.
10. Do not throw in a straight line
The higher the arc of the ball, the greater the chance of a goal and the less chance of blocking by the opponent.
11. Do not throw the ball from a full height stand
This is the biggest newbie mistake!
Before the throw, bend your knees slightly and at the moment of the throw, straighten your body, making a jump. You need to straighten up and push off the ground at the same time. When squatting, keep the elbow of the throwing arm close to the body and towards the ring.