If you want to win basketball games, your players must be able to finish at the rim consistently.
While knowing “how to do a layup” will sound easy to most players, it’s actually much more difficult than most people realize.
Think about it:
Players attack the hoop at varying speeds...
Players attack the hoop from many different angles...
And when they do get to the hoop, there’s usually a second defender waiting who will attempt to swat their layup into the 5th row.
Despite these challenges, players must learn how to score layups in a variety of situations if they want to experience individual and team success.
In this article, I’ll show you how.
I’ll start by teaching you (1) exactly what a layup is, (2) the six steps for how to do a layup, (3) the process for teaching layups to young kids, (4) the seven layup variations all players must master, before finishing with (5) some important layup tips.
Let’s get started…
What is a Layup?
Here’s the general definition most coaches would use:
“A layup is the action of a player dribbling towards the hoop, taking two steps, and then laying the basketball into the hoop off the backboard.”
For a traditional layup — this is correct.
With that said…
There are MANY variations of a layup (I’ll share 7 of them with you later in this article) and no two in-game layups are identical.
There’s an endless number of situations a player will face when they attack the hoop in a 5-on-5 game.
The two things all layups do have in common:
(1) All layups are shots close to the basket
(2) All layups are worth two points
How to Do a Layup (6-Steps)
Now, let’s talk about how to do a layup correctly.
Learning correct footwork and layup technique is crucial for young players.
We don’t want players to develop poor habits that will be difficult to break out of as they get older and advance to higher levels of basketball.
For the purposes of this beginner’s guide, I’ll assume players are executing a regular right-handed layup.
Here we go:
1.
Eyes Up
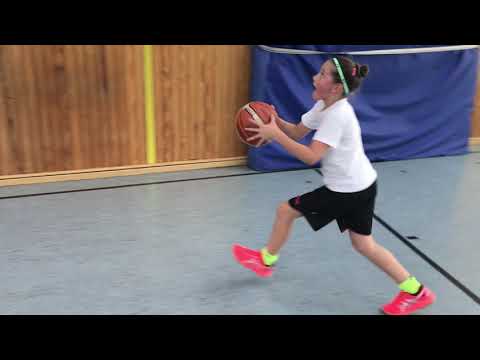
The very first thing a player must do when they decide to attack the defense and finish with a layup is get their eyes up.
This is important for two main reasons:
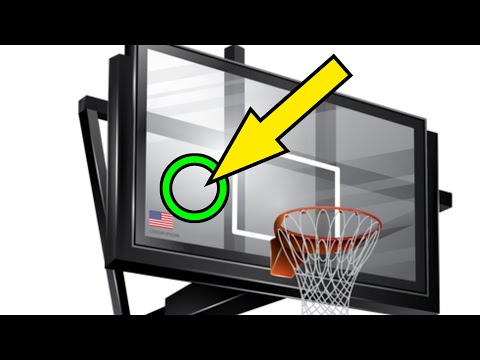
a. To Lock onto the Target
The target they aim for will be either the hoop or the backboard depending on the player’s angle and speed.
Knowing which target to choose as the ball is released from the shooter’s hand is something players will get used to as they gain more experience.
b. To Read the Defense
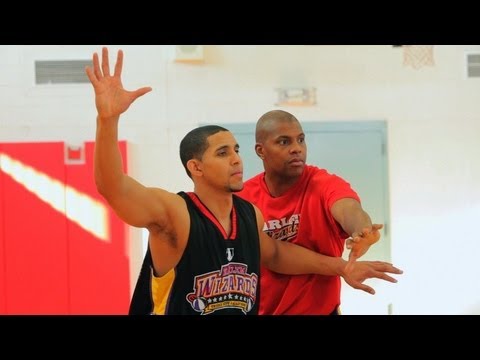
Every time a player attacks the hoop, multiple defenders will step across to provide help and challenge the layup.
Players need to get their eyes up and use their peripheral vision to read these defenders.
This will help the player decide which layup variation will give them the best chance of scoring (or which teammate is now open to receive a pass).
2.
Outside Foot Step (Long)
Remembering that we’re using a traditional, unguarded layup as the example for this blog post…
The first step a player makes as they pick up the basketball should be with their “outside” foot (closest to the sideline).
For right-handed layups, this is the right foot.
For left-handed layups, this is the left foot.
There are two important coaching points you should emphasize to players when you’re teaching them this step:
(1) Long Step
We want players to gain distance with the first step, and a long step also helps with the second point…
(2) Controlled
Players MUST be in control of their body as they perform their layup.
Too often we see young players sprint towards the hoop out of control and then launch the ball hard off the backboard.
Encourage them to slow down to increase their chances of scoring.
3.
Inside Foot Step (High)
The second step of a traditional layup should be with the inside foot (closest to the middle of the court).
For right-handed layups, this is the left foot.
For left-handed layups, this is the right foot.
The key coaching point for the second step is the following:
“High Jump”
Along with ensuring players slow down and are in control of their layup, the emphasis to jump high will give young players the upward momentum they need to complete the layup.
This is done by driving the shooting-side knee up into the air as they jump off their opposite foot.
(Right knee on right-handed layups. Left knee on left-handed layups)
4.
Protect the Ball
It’s crucial that a player protects the ball while attempting their layup.
Two things to watch out for:
a. Getting Stripped
Smart defenders will look to strip (steal) the ball from the offensive player during their two steps.
To prevent this from happening, the offensive player needs to (1) have strong hands and (2) keep the ball close to their body.
b. Getting Blocked
Tall defenders will attempt to block the shot during the upward shooting motion or as the ball leaves the offensive player’s hands.
To prevent this, the offensive players must use their non-shooting hands to protect the ball and increase the likelihood of getting fouled.
5.
Follow Through
The fifth step when learning how to do a layup…
Teach your players to bring the ball up above their head, extend their arm, and then flick their wrist to guide the basketball into the hoop.
The traditional overhand layup is very similar to a regular jump shot when it comes to this part of the layup technique.
Important Note:
If you’re coaching very young players, you might find they push the basketball up from their chest instead of bringing the ball above their head before shooting… this is due to a lack of strength.
This isn’t a big issue while they’re young, but make sure they’re growing out of this habit as they get older and stronger.
6.
Practice!
Now that your players understand correct layup technique, it’s time they start doing some serious layup practice!
A few important things for coaches to think about:
a. Different Angles and Speeds
Run layup drills that involve players attacking the hoop from different angles and at different speeds.
Left / right side
Front of the rim
Along the baseline
It’s important that they’re comfortable and confident driving to the hoop from anywhere on the court.
b. Right Hand and Left Hand
Allow players to mainly use with their dominant hand when they’re first learning how to perform a layup…
But make sure they start practicing with both hands once they understand correct technique and develop the strength to do so.
This is important to help them protect the ball and finish around good defenders as they get older and play against tougher competition.
c. Competition!
Almost immediately you should start running drills where players are required to attack the defense and finish with a layup against live defense.
Add both layup technique and layup competition drills to every practice.
For example:
Spend 10 minutes using a layup technique drill and then spend 10 minutes playing half court 2-on-1.
Your players might struggle against competition at first — they might commit a travelling violation, jump off the wrong foot, or rush their two steps — but they’ll benefit from the struggle in the long run.
Teaching Layups to Kids - The Process
I’m guessing that most people reading this article are youth basketball coaches wanting to know the best way to teach layups.
If so, you’re in the right place.
I’m going to provide you with the step-by-step instructions.
These steps should be used to teach “overhand” and “underhand” layups to all players who have signed up to learn the game of basketball.
One final piece of advice before we get started:
Be patient.
These steps might seem simple to you… but to a young kid who’s trying to understand footwork, ball pickup, where to focus, distance, etc… it’s hard!
Let’s get stated…
1.
One-Step Layup
The first step is to start players on the low block.
Since most players are right-handed, I recommend starting on the right block since this will be most comfortable for them.
Give everyone a basketball, line everyone up behind the low block, and then get them to execute the following:
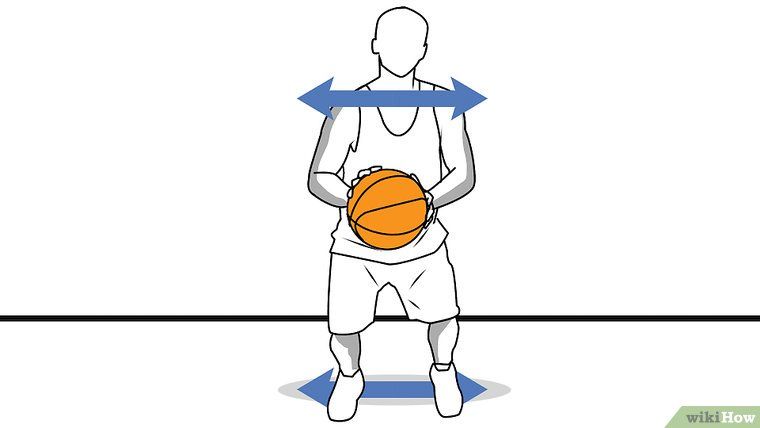
a. Start with feet together
b. Take one step with their left foot (inside foot)
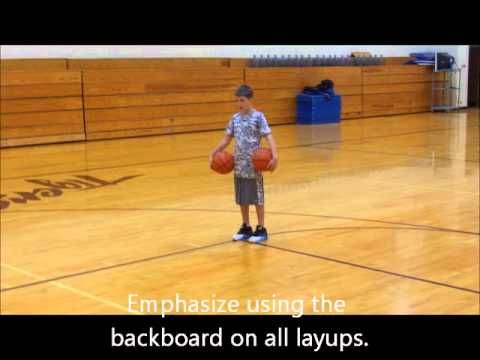
c. Jump off the left foot and shoot a layup off the backboard
2.
Two-Step Layup
Next, let’s add a second step…
Get everyone to start one step back from the low block.
Reminding them that they don’t need to dribble the basketball yet, ask them to do the following:
a. Start with feet together
b. The first step is with their right foot (outside foot)
c. The second step is with their left foot (inside foot)
d. Jump off the left foot and shoot a layup off the backboard
Players grab their own rebound before joining the end of the same line.
3.
One-Dribble Layup
Now let’s take another step back…
For the third step in this process, we ask players to take one dribble before completing their two steps and finishing with a layup.
Here are the instructions:
a. Start with feet together
b. The initial step is with their left foot. As this foot touches the ground, the player should take one dribble with their right hand.
c. As the player catches the ball, they take their first layup step with their right foot (outside foot)
d. The second layup step is with their left foot (inside foot)
e. Jump off the left foot and shoot a layup off the backboard
4.
Multiple Dribble Layup
The final step when learning to shoot off the dribble requires players to retreat back behind the three-point arc.
From here, players will before multiple dribbles before gathering the ball, taking their two steps, and laying the ball in off the glass.
Here’s how it works:
a. Start behind the three-point line with a basketball.
b. Take multiple dribbles towards the hoop (eyes up!)
c. At the low block, take the first step with the right foot (outside foot)
d. The second layup step is with their left foot (inside foot)
e. Jump off the left foot and shoot a layup off the backboard
5.
Catch and Layup
Another thing players must learn to do is receive the basketball while on the move and then finish with a layup without dribbling.
Players are put in this situation often during games…
They might make an off-ball cut to the hoop, receive a pass from a teammate on a fast break, or pass to a player in the post then cut off them.
My recommendation is to set up a quick “give and go” drill.
As follows:
a. Put one player on the free-throw line without a basketball.
b. Line everyone else up behind the three-point line with a basketball.
c. The player with the ball passes to the middle of the floor, sprints towards the hoop, and then receives the ball back for a no-dribble layup.
d. Change the “passer” every minute or two.
Video:
To help you better understand the whole process, check out this brilliant video from FIBA that shows the first four progressions:
Seven Layup Variations
As I spoke about in the step-by-step section, it’s important for players to master more than one type of layup.
When you’re playing a real 5-on-5 game, there will be help defenders trying to block / alter your shot when you get to the hoop.
Being comfortable with a variety of layups will allow players to finish around any kind of defense that’s thrown at them.
Here’s the must-know list:
1.
Overhand Layup
This traditional layup is often the first one we teach young players. It’s similar to a regular jump shot in that a player gets their hand under the ball and “shoots” it off the backboard.
2.
Underhand Layup (Finger Roll)
Also known as the “finger roll”. This involves players putting their shooting hand under the ball with their fingers facing forward, and then rolling the ball off their fingertips as they extend their arm to the hoop.
3.
Floater
The floater is a great way for smaller players to score inside against bigger defenders. It involves a player “pushing” the ball up over the defense.
4.
Off-Foot Layup
If you really want to catch the defense by surprise, an off-foot layup should be in your bag of tricks. This involves jumping off the same foot you’re shooting with. For example, jumping off the right foot for a right-hand layup.
5.
Euro Step Layup
The Euro Step involves taking your first step in one direction, and then changing directions for your second step. This is a great way to step around defenders and change the angle as you complete a layup.
6.
Reverse Layup
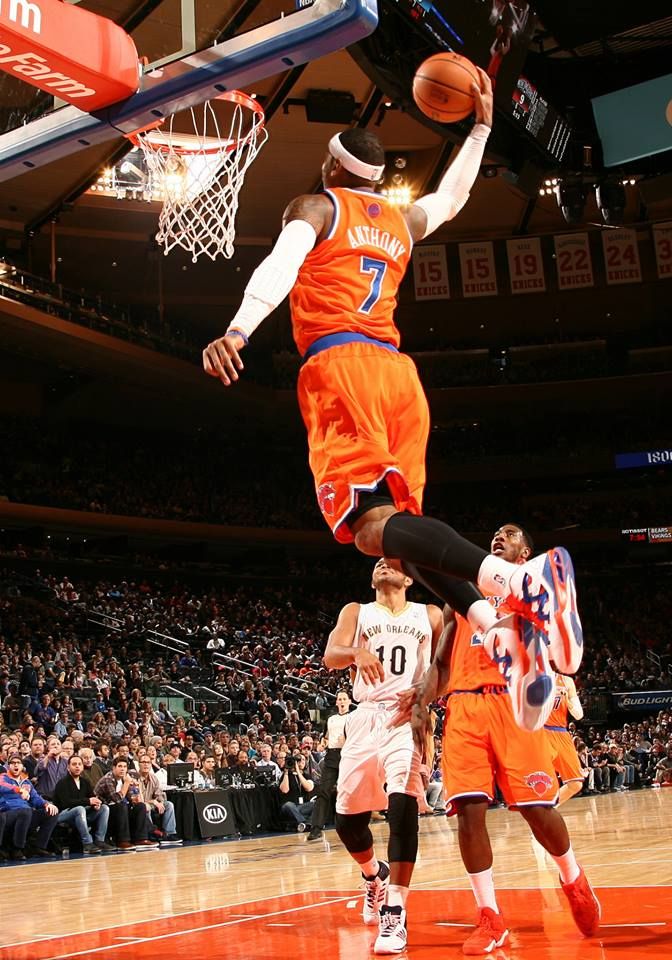
A reverse layup allows the offensive player to attack the hoop and finish on the opposite side of the rim. For players at high levels, the rim acts as protection from shot blockers.
7.
Power Layup
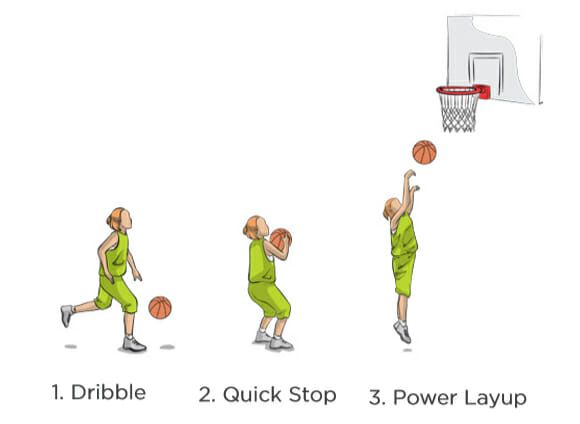
A power layup involves performing a 2-foot jump stop before raising up to shoot. The benefit of this variation is it will give the player a stronger base, which is essential if you’re anticipating contact.
Advanced Layup Tips
Before you go, here are a few extra layup tips that will help players be more successful when attacking the hoop.
Some of the tips I’ve mentioned already throughout the article (but they need repeating), and some of them I’ve saved for this section.
Onward:
a.
Slow Down!
One of the main reasons for missed layups at the youth basketball level is players are going way too fast.
If you were to spend just 2 minutes sitting on the sidelines of an U10’s game, and I guarantee you’ll see a 100mph fast break that results in the shooter slamming the ball off the backboard.
Encourage players to slow down, use a long first step to gain control of their body, and then jump high off the second step to finish.
Control is key.
b.
Create Space to Finish
Once a player gets past their defender off the dribble, teach them to step in front of the defender to “lock them behind”.
This creates space in front to finish with a floater or to draw the defense before dropping the basketball off to a teammate.
c.
Swish or Backboard?
Coaches will often get players asking whether they should aim to swish the ball or use the backboard on their layups…
This is an impossible question to answer as every situation is different.
The best advice you can give players is to practice finishing with a swish and off the backboard from all angles and at all speeds.
The more finishes a player is comfortable with, the more options they’ll have when confronted by a defender during games.
d.
Keep the Ball Tight
This is something I spoke about in the “protect the ball” section above…
When going through the two-step motion of a layup, keep a strong grip on the ball and hold it close to your body.
Smart defenders will attempt to strip the basketball before you go up into the shooting motion of the layup.
e.
Don’t Be Scared of Contact
Getting fouled on a layup will give you a chance at a three-point play (or free throws) and will push your opponent one step close to foul trouble.
But many young players are scared of contact.
To avoid contact or getting blocked, they angle away from the defense giving themselves a much more difficult shot attempt.
Encourage players to embrace contact and attack the defender!
f.
Practice Against Real Defenders
Learning layup technique is important, but all the individual layup practice in the world isn’t going to make you an elite finisher at the rim.
You must practice scoring against live defenders.
Once you’re comfortable with technique, it’s time to add defense take your finishing skills to the next level.
1-on-1
2-on-2
2-on-1
etc
These will all help build the skills you need.
Conclusion
Learning how to do a layup is crucial for all young players.
Because they lack strength to make outside shots consistently, 90% of points scored in youth basketball are from layups.
Start by using the four progressions outlined in this article to teach them the basics, and then progress to teaching them the seven layup variations and also adding defenders.
If you do this well, your team should have no trouble attacking the hoop and scoring against any defense.
The 6 Most Important Basketball Layups
Skip to content
[youtube video=”eMm4nWr7pQI” /]
The layup is arguably the easiest way to score in basketball. However, one of the biggest mistakes players make is practicing only a single variation of the basic layup. If you’ve only got one type of layup, you’re begging to be blocked by defenders who’ll read your game like a book.
There’s no excuse for having just one type of layup, especially since STACK’s series about basketball layups has already taught you the Overhand Layup, Underhand Layup, Power Layup, Backhand Layup, Middle Reverse Layup, and Backhand Reverse Layup.
So stop inviting your opponents to an on-court “block party.” Lets build off the basics to give you some unstoppable basketball layups that will help you score more in games.
RELATED: Build a Better Layup With These Basketball Speed Drills
Start with the Overhand Layup
The overhand layup is the most basic layup. All good coaches teach it, as they should, and by now you’re surely read our article on it. As stated in the video, I’m not going to rehearse the details, as I expect you to know all about it. This article is about layup variations that are not taught and are severely lacking in many players’ games.
Now on to the Finger Roll
If you learn a single layup variation from this article, let it be the finger roll. Compared to the basic underhand layup, the main benefit of the finger roll is that it allows you to reach with the entire length of your arm, giving you a few more feet of additional protection from the swipes of would-be shot-blockers.
Of course, the release is underhanded. This means it’s more difficult to consistently pull off compared to an overhand layup. However, mastering the finger roll will allow you to score in situations when the overhand layup wouldn’t work.
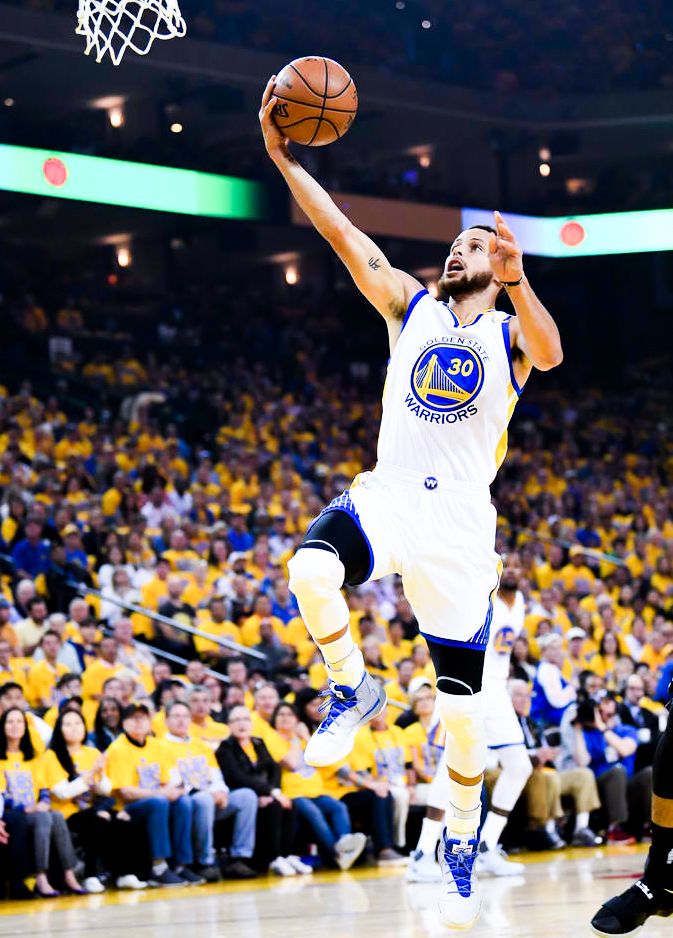
For inspiration, watch Stephen Curry. He is the absolute master of the finger roll. Every one of his games usually has a few finger roll layups.
RELATED: Two Drills to Develop Your Weak-Side Layup
Jump-Stop Layup
The jump-stop layup is more of a footwork variation. You pound the ball, hop with it, gather yourself, and go up strong.
The benefit of this this layup is that you’re controlled throughout the move, and you can put your whole body into finishing the shot. Even with defenders still in front of you, after the hop, chances are you have the strength for a solid jump to the rim. This allows you to shrug off most of the potential contact on the way up and still make the shot. (Make sure your dominance is known by yelling “And One!”)
The Reverse Layup
The reverse layup is a finisher all serious basketball players should know how to do. There are numerous benefits. Not only can you reach with your arm and get distance on the finish, you actually use the basket itself to protect your shot. As stated in the video, make sure to get the ball high on the glass. Too often, reverse layups bounce out due to an insufficient angle on the ball.
Additionally, faking a normal overhand layup and finishing on the other side of the glass with a reverse is a great way to score a few extra buckets per game. This is one of the main finishes I design drills around, since it can be tricky to get your footwork right.
RELATED: 10 Essential Point Guard Drills From Skylar Diggins
The “Goofy” Reverse Layup
This variation is easier to understand in the video than it is to write about. Essentially, you aim to turn your back until you’re performing a reverse layup. Use the exact opposite angle of a normal overhand layup to ensure maximum shooting consistency. You’re looking for a perfect 45 degrees to make as many of these as possible.
The Inside Hand Finish
The inside hand finish is the last layup variation you should add to your arsenal. It’s a much quicker layup than the others, and one you should only do when attacking from the baseline. It’s possible to sneak a couple of these in before your defender catches on.
In general, preventing your defender from reading the timing on your finishes is a great way to protect your shots around the rim. You’ll see fast point guards in the NBA do these layups all the time. For an excellent example, watch Tony Parker.
Having a “Swiss Army” knife of layups means your defenders never know what’s coming. Learning to consistently score with a handful of different layup variations is truly valuable to your game. No matter what your opponents do, scoring opportunities will present themselves.
RELATED: Fun Basketball Drills That Improve Court Skills
My advice to you is to take what you’ve learned in this article and apply it in practice. If you master all 6 of these variations, you’ll have multiple options to score after beating your defender off the dribble. Remember, these are 6 very helpful layups, but there are many other, more advanced variations I teach over at Baller Boot Camp. And of course you should check out the rest of the articles in this series to make sure you’ve mastered all of the basic layups.
Read More
(Part 1) The Overhand Layup
(Part 2) The Underhand Layup
(Part 3) The Power Layup
(Part 4) The Backhand Layup
(Part 5) The Middle Reverse Layup
(Part 6) The Backhand Reverse Layup
[cf]skyword_tracking_tag[/cf]
Share This Story!
MOST POPULAR
[youtube video=”eMm4nWr7pQI” /]
The layup is arguably the easiest way to score in basketball. However, one of the biggest mistakes players make is practicing only a single variation of the basic layup. If you’ve only got one type of layup, you’re begging to be blocked by defenders who’ll read your game like a book.
There’s no excuse for having just one type of layup, especially since STACK’s series about basketball layups has already taught you the Overhand Layup, Underhand Layup, Power Layup, Backhand Layup, Middle Reverse Layup, and Backhand Reverse Layup.
So stop inviting your opponents to an on-court “block party.” Lets build off the basics to give you some unstoppable basketball layups that will help you score more in games.
RELATED: Build a Better Layup With These Basketball Speed Drills
Start with the Overhand Layup
The overhand layup is the most basic layup. All good coaches teach it, as they should, and by now you’re surely read our article on it. As stated in the video, I’m not going to rehearse the details, as I expect you to know all about it. This article is about layup variations that are not taught and are severely lacking in many players’ games.
Now on to the Finger Roll
If you learn a single layup variation from this article, let it be the finger roll. Compared to the basic underhand layup, the main benefit of the finger roll is that it allows you to reach with the entire length of your arm, giving you a few more feet of additional protection from the swipes of would-be shot-blockers.
Of course, the release is underhanded. This means it’s more difficult to consistently pull off compared to an overhand layup. However, mastering the finger roll will allow you to score in situations when the overhand layup wouldn’t work.
For inspiration, watch Stephen Curry. He is the absolute master of the finger roll. Every one of his games usually has a few finger roll layups.
RELATED: Two Drills to Develop Your Weak-Side Layup
Jump-Stop Layup
The jump-stop layup is more of a footwork variation. You pound the ball, hop with it, gather yourself, and go up strong.
The benefit of this this layup is that you’re controlled throughout the move, and you can put your whole body into finishing the shot. Even with defenders still in front of you, after the hop, chances are you have the strength for a solid jump to the rim. This allows you to shrug off most of the potential contact on the way up and still make the shot. (Make sure your dominance is known by yelling “And One!”)
The Reverse Layup
The reverse layup is a finisher all serious basketball players should know how to do. There are numerous benefits. Not only can you reach with your arm and get distance on the finish, you actually use the basket itself to protect your shot. As stated in the video, make sure to get the ball high on the glass. Too often, reverse layups bounce out due to an insufficient angle on the ball.
Additionally, faking a normal overhand layup and finishing on the other side of the glass with a reverse is a great way to score a few extra buckets per game. This is one of the main finishes I design drills around, since it can be tricky to get your footwork right.
RELATED: 10 Essential Point Guard Drills From Skylar Diggins
The “Goofy” Reverse Layup
This variation is easier to understand in the video than it is to write about. Essentially, you aim to turn your back until you’re performing a reverse layup. Use the exact opposite angle of a normal overhand layup to ensure maximum shooting consistency. You’re looking for a perfect 45 degrees to make as many of these as possible.
The Inside Hand Finish
The inside hand finish is the last layup variation you should add to your arsenal. It’s a much quicker layup than the others, and one you should only do when attacking from the baseline. It’s possible to sneak a couple of these in before your defender catches on.
In general, preventing your defender from reading the timing on your finishes is a great way to protect your shots around the rim. You’ll see fast point guards in the NBA do these layups all the time. For an excellent example, watch Tony Parker.
Having a “Swiss Army” knife of layups means your defenders never know what’s coming. Learning to consistently score with a handful of different layup variations is truly valuable to your game. No matter what your opponents do, scoring opportunities will present themselves.
RELATED: Fun Basketball Drills That Improve Court Skills
My advice to you is to take what you’ve learned in this article and apply it in practice. If you master all 6 of these variations, you’ll have multiple options to score after beating your defender off the dribble. Remember, these are 6 very helpful layups, but there are many other, more advanced variations I teach over at Baller Boot Camp. And of course you should check out the rest of the articles in this series to make sure you’ve mastered all of the basic layups.
Read More
(Part 1) The Overhand Layup
(Part 2) The Underhand Layup
(Part 3) The Power Layup
(Part 4) The Backhand Layup
(Part 5) The Middle Reverse Layup
(Part 6) The Backhand Reverse Layup
[cf]skyword_tracking_tag[/cf]
Share This Story!
Page load link
The language of basketball.
Lay-up, Jumpshot, Alley-up
August 19
Our website presents the fourth issue of the heading Language of Basketball . In it, we talk about basketball terms - borrowed words, specific expressions and jargon - the language that all participants and fans of the game speak. Each word is accompanied by a video tutorial with illustrative examples.
We bring to your attention the fourth series of the project The language of basketball , in which we will analyze in detail three terms: lay-up, jumpshot and alley-up.
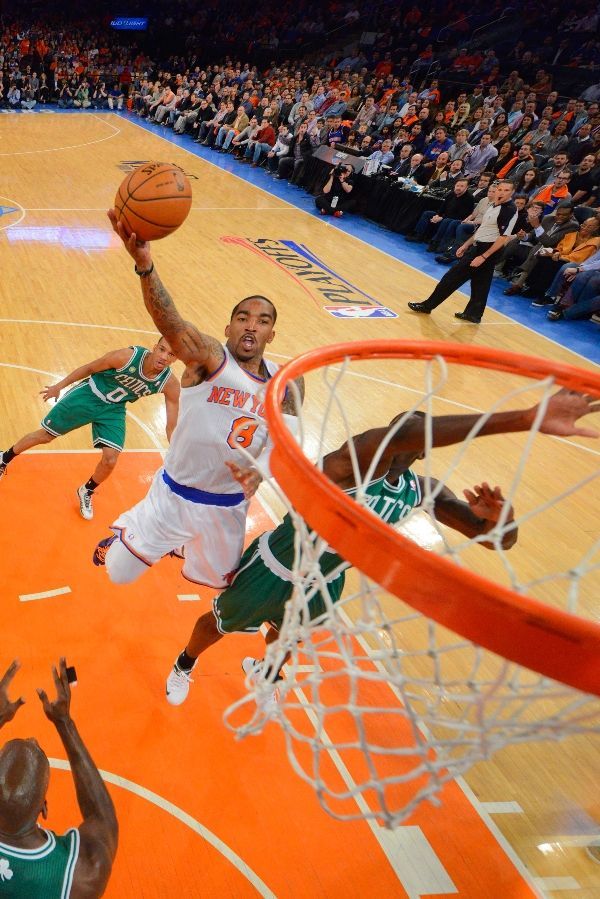
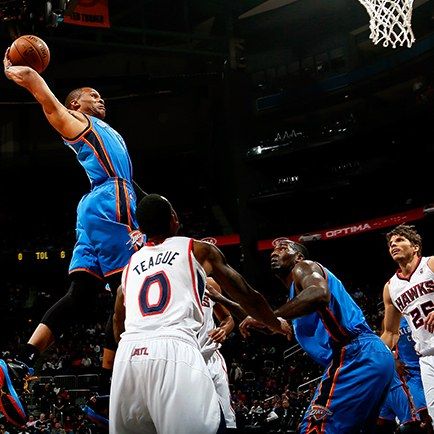
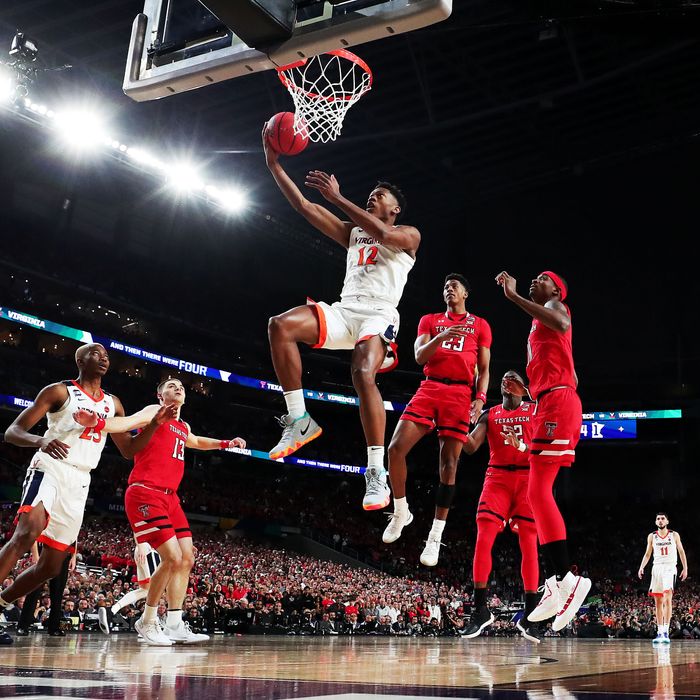
Lay-up Lay-up is one of the most common types of throw in basketball. It must be performed close to the ring in motion with one hand. In the classic version, the ball, when attacking, is carried upwards with one hand, and it enters the ring after rebounding from the shield. Lay-ups are the realm of back-row players. With rare exceptions, it is the defenders who execute this throw. The proximity of the ring makes lay-ups an extremely effective means of hitting someone else's ring. If the player manages to make this throw without impediment, then it is almost certain that the ball ends up in the ring. Despite this, lay-ups are often blocked. Centers of the defending team try to catch the opponent's “kids” rushing to the shield and often succeed in this. Lay-up masters include Nando De Colo, Keith Langford, Tyrese Rice and Walter Hodge. Last season, they repeatedly showed the effectiveness of this shot in action.
Jumpshot It was first performed back in 1934 by Ken Sailors. A little over eighty years later, the jumpshot is the most popular throw in modern basketball. For its execution, the player, holding the ball with both hands, pushes off the floor, flies up vertically, raises his hands with the ball, after which, with the movement of the brush, sends the projectile in the direction of the ring. Jumpshot - throw from a distance. For a long time he remained the path of "small" players. However, over time, under the influence of new basketball trends, forwards and even some centers mastered this throw. Therefore, there is nothing surprising in the fact that Sergei Monya, Valery Likhodey or Andrey Vorontsevich attack in a jump no worse than most defenders.
Alley-oop Alley-oop is one of the most spectacular shots in basketball. It is the result of the interaction of two players on the attacking team. One of them gives a hinged pass towards the ring, and the other catches the ball in one jump and, without landing, sends it to the basket, as a rule, with a throw from above. The first alley-oops date back to the mid-1960s, and Al Tucker and his brother Gerald, who played together for the Oklahoma Baptist University team, are considered to be the inventors of this game element. Every year the players have added in athleticism, and now we can witness spectacular alley-ups in almost every match. It is worth noting that in addition to athleticism, teamwork between two performers is needed to perform this element. Most often, the point guard acts as a passer here, and as a performer, a tall center or jumping forward. In modern realities, almost every team has players of this kind. Milos Teodosic and Sasha Kaun, Malcolm Delaney and Anthony Randolph, Scott Machado and Frank Elegar, and many others delighted fans with spectacular alley-ups last season of the VTB United League.
Share
Like?
eight
Tweets by @VTBUL
Basic basketball terms in simple terms
Captain of the basketball club "Odessa"
Andrey Agafonov
Ukrainian basketball comes to life again: dozens of cities host competitions every day, from men's and women's Super Leagues to youth level matches. And if you want to understand what is happening on the court, just above the level of “Oh, those in blue scored against those in white,” the captain of the Odessa basketball club, a multiple winner of the Ukrainian championships and one of the most experienced players in the country, Andrey Agafonov, in simple words talk about slam dunks, alley ups, buzzer beaters and other popular basketball terms.
slam dunk
Hitting a basketball into a basket with both hands. In this case, you need to jump and literally hit them from above, clinging to the ring. Especially you have to grab at speed, so as not to fly in somewhere and not get injured.
The slam dunk is not only a scoring two-point hit, but also one of the most spectacular elements in basketball. In addition, it is a great way to cheer up the team and the audience.
Dribbling
In the simplest sense - the usual dribbling of a basketball.
Selection
Rebounding the ball by the players after a blurry shot around the ring. My record is 17 rebounds in 17 minutes, this season I made 13 per game. Some people say: "Whoever wins the rebound wins the match." The statement is controversial, but there is certainly some truth in this.
Block shot, jar, pot
Blocking an opponent's throw without breaking. For example, I throw the ball, at this time the player of the other team covers it with his hand, preventing me from scoring.
Double dribble
Violation of the rules: re-start of the dribble after the player has fixed the ball in his hands.
Jogging
Another violation of the rules: a basketball player takes more than two steps with the ball in his hands without dribbling.
Assist
Passing the ball, after which a teammate scores a shot. That is, with my pass I create such a convenient situation that the player can successfully complete the attempt. There is a basketball rule: if you're not sure, don't give it back. The worse you pass, the less the percentage that the partner realizes the moment.
Personal, technical and unsportsmanlike fouls
These are all types of violations on the site. Personal - we fought, I lost the position and somehow hooked the opponent: for example, I pushed or hit my hand. Technical is when I run and shout to the referee: “What the hell are you giving me a foul, are you crazy?”
Unsportsmanlike is when the player did not even try to play the ball, but intentionally grabbed the T-shirt or tripped the opponent. A player who receives 5 personal or 2 unsportsmanlike fouls ends the match.
free throw
The player after violation of the rules by the opponent throws the ball into the ring from the foul line without resistance. One accurate throw brings one point.
And one
A successful throw from any distance during which the rules are violated regarding the player. In this case, he goes to punch an additional (free) throw.
Three, throw from behind the arc
Throw from behind the 6.5-meter line, bringing the team three points.
The most popular combinations: "horns", "head"
In short, "horns" is when two big players go to the 3-point line, set up screens, and the player with the ball chooses a convenient direction of movement. "Head" - the usual interaction between center and point guard. Many players have their own tricks when playing combinations.
For example, my partner and I see each other: I show with my body that I am moving to the left and I hear the opponent shouting: “Left!” - but at the last moment I show my partner with my eyes that I will come up on the right, for example.
These are quite heavy elements that need to be done in a split second. We conduct a complete analysis of the opponent before the game, down to who has what favorite movements and points on the court.
Shot clock
24 seconds is the time for the team to attack. If during this time the team does not score or the ball does not touch the bow of the ring, possession passes to the opponent. If during our attack they fouled, then we will have 14 seconds to attack.
Buzzer beater
Last converted shot with a siren at the end of an attack, quarter or game. My most memorable goal was not a buzzer, but in the 2010/2011 season, in the decisive match for the championship between Budivelnyk and Donetsk, we had +1 point with 30 seconds left in the game. My partner misses, I rebound offensively and shoot the ball into the basket. We get +3, and we understand that we are the winners in the championship.
Time-out
Minute pause in the game at the request of the coaching staff. Used to take a breath and make adjustments to the game.
Dye
An area under the hoop where attacking players cannot stay continuously for more than 3 seconds. If one of the guys is late, the ball goes to the opponents. This zone is called so because its color differs from the main color of the site.
crossover
Transferring the ball from one hand to another with a change in direction of movement.
Overtime
If the score is equal and this is not a cup match, then an additional five-minute period is added to the regular time. There can be several overtimes, if at the end of them none of the opponents took the lead. I played a maximum of 4 overtimes, half the game on top. At the end, everyone walks, of course. So what to do? There is no choice, everyone wants to win.
Pick and roll
We call it "double". For example, the ball is dribbled by a small player, the big one puts a barrier on his defender, and they try to beat the opponents 2x2. This is similar to the "head" combination.
Swingman
A basketball player who can play point guard, shooting guard, sometimes small forward. That's how Toms Leimanis is in our team.
Alley-up
I pass to the hoop from somewhere so my teammate can catch the ball mid-flight and hit the slam dunk.
Lay-up
Effective two-point shot right from under the basket.
Double team, doubling
One of the defense options, in which the defenders together hold back the attacking player. This is often used against me: I get the ball, and the defender cannot defend himself.
At this moment, a second person comes to his aid, and the two of them try to take the ball away from me or force me to pass the ball to my partner.


 Start with feet together

 For players at high levels, the rim acts as protection from shot blockers.

 This allows you to shrug off most of the potential contact on the way up and still make the shot. (Make sure your dominance is known by yelling “And One!”)
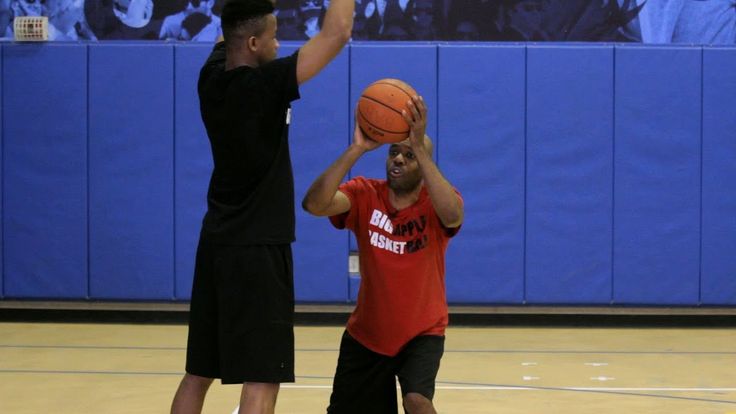 Essentially, you aim to turn your back until you’re performing a reverse layup. Use the exact opposite angle of a normal overhand layup to ensure maximum shooting consistency. You’re looking for a perfect 45 degrees to make as many of these as possible.
 No matter what your opponents do, scoring opportunities will present themselves.
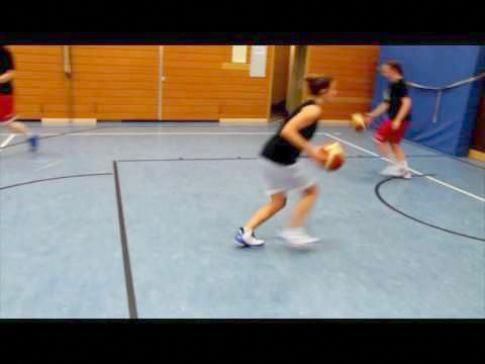 However, one of the biggest mistakes players make is practicing only a single variation of the basic layup. If you’ve only got one type of layup, you’re begging to be blocked by defenders who’ll read your game like a book.
 As stated in the video, I’m not going to rehearse the details, as I expect you to know all about it. This article is about layup variations that are not taught and are severely lacking in many players’ games.
 As stated in the video, make sure to get the ball high on the glass. Too often, reverse layups bounce out due to an insufficient angle on the ball.
 If you master all 6 of these variations, you’ll have multiple options to score after beating your defender off the dribble. Remember, these are 6 very helpful layups, but there are many other, more advanced variations I teach over at Baller Boot Camp. And of course you should check out the rest of the articles in this series to make sure you’ve mastered all of the basic layups.
 Lay-up, Jumpshot, Alley-up
  If the player manages to make this throw without impediment, then it is almost certain that the ball ends up in the ring. Despite this, lay-ups are often blocked. Centers of the defending team try to catch the opponent's “kids” rushing to the shield and often succeed in this.
  For a long time he remained the path of "small" players. However, over time, under the influence of new basketball trends, forwards and even some centers mastered this throw. Therefore, there is nothing surprising in the fact that Sergei Monya, Valery Likhodey or Andrey Vorontsevich attack in a jump no worse than most defenders.
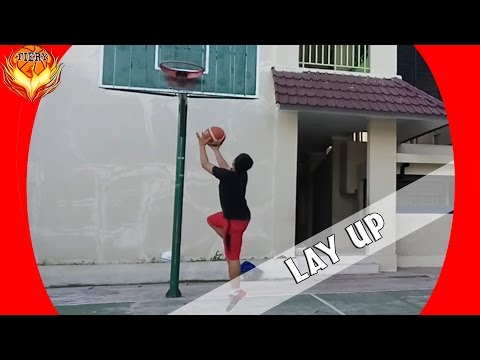
 And if you want to understand what is happening on the court, just above the level of “Oh, those in blue scored against those in white,” the captain of the Odessa basketball club, a multiple winner of the Ukrainian championships and one of the most experienced players in the country, Andrey Agafonov, in simple words talk about slam dunks, alley ups, buzzer beaters and other popular basketball terms.
 Personal - we fought, I lost the position and somehow hooked the opponent: for example, I pushed or hit my hand. Technical is when I run and shout to the referee: “What the hell are you giving me a foul, are you crazy?”
  In this case, he goes to punch an additional (free) throw.
 My partner misses, I rebound offensively and shoot the ball into the basket. We get +3, and we understand that we are the winners in the championship.
 That's how Toms Leimanis is in our team.