Home »
Misc »
How to draw a basketball court on paper
How to draw a basketball court on paper
Step-by-Step How to Draw a Basketball Court
Step-by-Step How to Draw a Basketball Court
There may be a multitude of reasons why you may want to draw a basketball court. Perhaps you would like to practice your drawing skills, or perhaps you would like to show an offensive or defensive scheme, or perhaps you simply love basketball and enjoy all-things related to it.
Whatever it may be, below we’re going to show you, step-by-step, how to draw a basketball court.
Start With a Proper Piece of PaperIdeally, when drawing a basketball court, you will want to do so with a rectangular piece of paper. As a basketball court is rectangular in shape, having a rectangular piece of paper will help you to draw a more accurate representation of the court and basketball rims.
In addition, drawing a basketball court on a vertical sheet of paper will give you less overall width and room to work with. You will also have a lot of white space leftover that will distract you from the picture once it is completed.![]()
Draw Two RectanglesIdeally, you should be using a simple ruler when drawing your basketball court.
Begin by drawing one rectangle approximately 1/4 of an inch away from the edges of the paper. Using a ruler will help you to keep your lines straight and neat.
From there, draw another rectangle within the first. This rectangle should be closer to the first on the top-and-bottom halves of the paper but should provide more room near the right and left-hand sides.
Draw a Half-Court LineAgain, using a ruler, draw a half-court line directly down the middle of the second, smaller rectangle. This should be done exactly at the half-way point of the smaller rectangle, and you can use your ruler to measure the length for accuracy.
Position the Quarter Lines and Hoop PlacementsOnce you have designated and drawn the half-court line, use the ruler to measure a quarter of the way from the half-court line on both sides.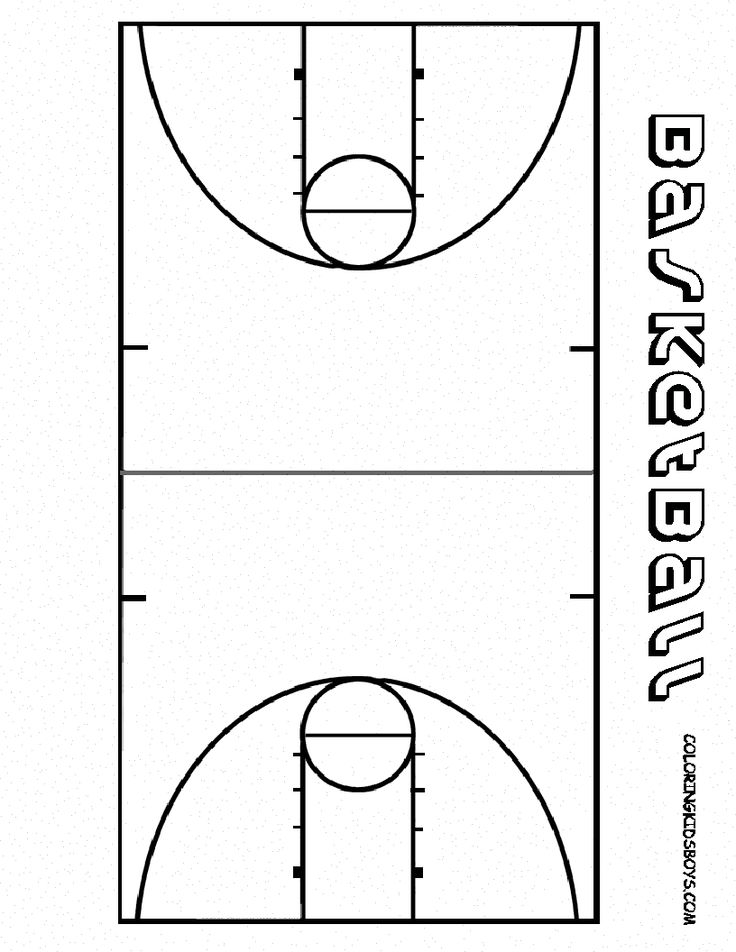 Simply draw a small line from the larger rectangle, slightly past the smaller one, and onto the court.
Do this on both sides of the court and on both halves past the half-court line.
Then, draw another line at the midpoint of the smaller rectangle on both the right and left-hand sides. This line should be vertical and should represent the position of the basketball hoop. Don’t forget, this line should match-up on both sides and should be directly in the middle of the right and left-hand sides.
Draw the Hoop and Tipoff CircleVery simply, draw a triangle coming off the line you previously drew on both the right and left-hand sides. This triangle represents the actual basketball hoop. It should all be coming together now.
Similarly, at the midpoint of the half-court line, draw a small circle, representing the tipoff circle. This is the part of the court where the initial tipoff of the ball occurs between opposing players and teams.
Draw the Free Throw Lane and Outer Tipoff CircleDrawing the free-throw lanes is simple enough.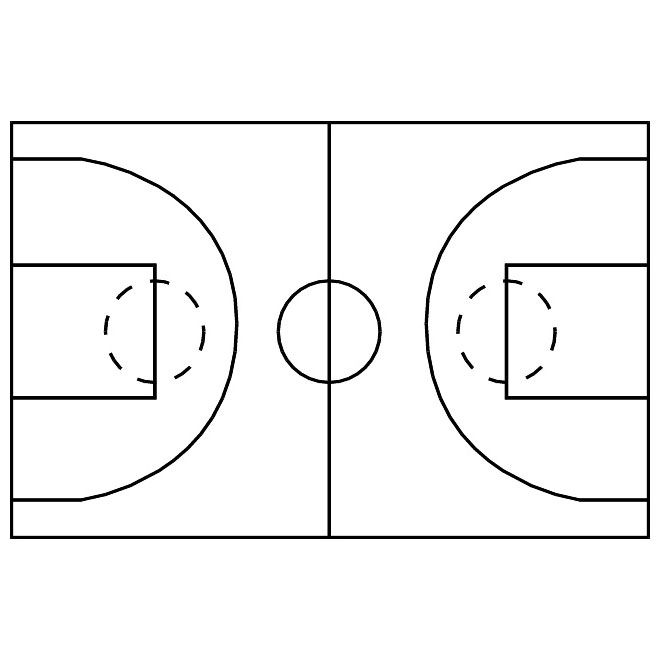 Simply draw a rectangle, of equal length, from the basketball hoops on both sides. The rectangle should come out approximately 1-2 inches from the hoop and should be even and centered on both the right and left-hand sides.
From there, draw a larger circle directly in the middle of the court. This should overtake the original tipoff circle and be larger in size. It should also go out to both halves of the court equally.
Draw the Three-Point LinesNow, from the base of the right and left-hand sides, where the hoop is, make a semi-circle out past the free-throw line. This will represent the three-point line and should come out past the free-throw line by some distance. Make sure to do this for both sides of the court and to keep track of distance so that they are equal on both sides.
Complete the Free Throw Lane and HoopsLastly, complete the free-throw lane by drawing a circle connecting the rectangular free-throw lane to the three-point line and slightly into the free-throw area. This should be done on both sides of the court and should be equal in height on both sides.
Lastly, and perhaps most easily, draw a small circle in the middle of the triangle on the basketball hoops. This circle should be large enough to represent the hoop but not large enough to overtake the entire triangle.
How To Draw A Basketball Court?
Width of the court affects how much space you have to play on. A frontcourt is typically wider, providing more area for players to move around and shoot baskets.
Backcourts are narrower, making them good choices if you have limited space or if your goal is to create a more intimate atmosphere in your home game arena. A center court can be either wide or narrow depending on the size of your home’s flooring – it’s usually the most versatile choice when it comes to accommodating different types of games and playing spaces within your home court setting.”
How To Draw A Basketball Court?
Frontcourt and backcourt are both important areas on the court, but it’s center court that determines which team will win the game. It’s important to consider your own playing style when selecting a front or backcourt because they’ll have different advantages for you depending on where you play.
When choosing between a center court and an off-center one, always make sure the ball is more evenly distributed across all three points of the court in order to give your team an advantage. Finally, be aware of how wide each side of the court is before making a purchase – if it feels too tight or narrow, it might not be ideal for your needs as a player
The Width of the Court
To draw a basketball court, start with a square piece of paper and draw the floor area first. Draw the three-point arc, then add in the backboard, rim, and nets.
Next, sketch out each player’s position on the court using lines that extend from their respective spots on the diagram. Finally, fill in any other necessary details like benches or spectators to make your drawing look realistic.
Frontcourt vs Backcourt
Choosing the right frontcourt player is important for a successful basketball team. The backcourt players are responsible for setting up plays and scoring points on offense.
When choosing your frontcourt, it is important to consider their skills and abilities as well as their size and height. To create a balanced team, you must also choose a good backcourt player who can score in different ways.
Pay attention to the position of each defender when creating your court layout so that all players have an equal opportunity to play their best game.
Center Court
To create a basketball court, start by sketching out your outline on paper or using a virtual tool. Work in the basic shapes of the basket and court boundaries.
Add in any details like player benches and backboards, then make sure everything looks proportional before moving on to color. When you’re happy with your design, print it out or export it into a digital format for easy reference during construction.
As always, be safe while playing–wear proper attire and stay inside the lines.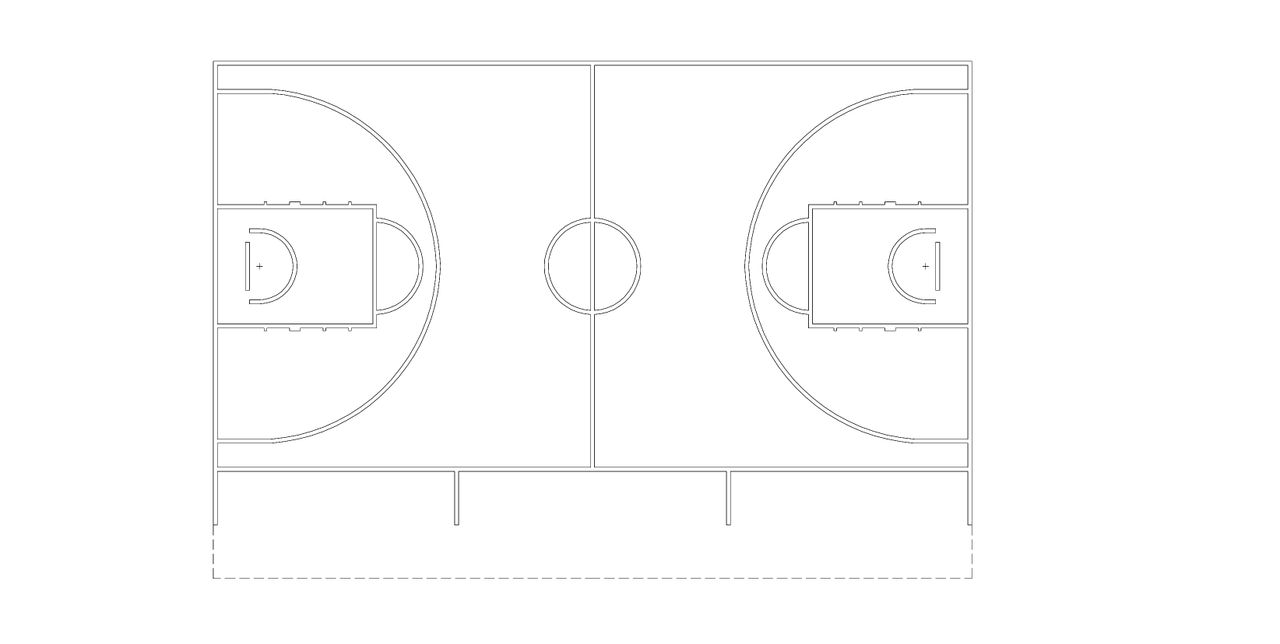
To Recap
To draw a basketball court, start with a large square grid on paper. Draw the lines for the three sidelines and center baseline, then fill in any other necessary details.
Next, sketch out each player’s position on the court by drawing circles around their feet. Finally, add any final details like nets or baskets.
Similar Posts:
How To Make A Shoulder Tube?
A shoulder tube is a type of pipe used in the plumbing industry for transferring water, gas, oil and other fluids. It is made up of two parts – the upper arm and the lower arm.
How To Put A Batting Cage In Your Basement
Batting cages are an exciting addition to any basement and can provide many hours of fun for your family. However, before you buy one, it is important to understand how they work and what the various types entail.
How To Change Lie Angle On Irons?
If you have an iron that has a built-in angle adjustment, there are a few steps you can take to change the angle. First, make sure that the Iron is correctly plugged into an outlet and turned on.
What Is A Dime In Basketball?
A dime in basketball is a small amount of money that is given to players at the beginning of each game. It is usually given to the player who makes the first basket, or the player who has the most assists.
How To Make A Yardage Book?
A yardage book is a great way to keep track of your yardsale items, and it’s also a great resource for sewing patterns. The best part is that you can make one yourself or purchase one already made.
How To Make Lineout Lifting Blocks?
Lineout lifting blocks are a great way to safely move large objects without the need for a crane or other heavy machinery. They can be used in warehouses, factories, and other industrial settings where safety is a top priority.
How to draw a basketball hoop and ball step by step Easy Drawing Tutorials
Basketball is an iconic American sport. Its legendary players such as Michael Jordan and LeBron James are considered heroes. Today it is the only sport whose origin lies exclusively in America.
How did basketball start? It was a rainy day in 1891. James Naismith taught physical education at the YMCA in Massachusetts. Stuck inside, what was his class supposed to do? With a soccer ball and two hemisphere peach baskets, Naismith invented the game we now call basketball.
School football teams helped popularize the sport; when the weather was too cold to practice outside, they would go inside and play basketball.
Did you know? Early basketball baskets had a bottom, so each time a point was scored, the ball had to be retrieved from the basket. The bottom of the basket was later removed, but the balls were too big to fall through. Instead, a long pole was used to push the ball out of the top of the basket.
Actual baskets were used until 1906 when a metal rim and backplate was introduced. The rear shield also prevented fans with balcony seats from getting in the way of shots and allowed for rebound.
From its humble roots, basketball has spread throughout the world. Not only do professional teams exist in many countries, but public parks often have outdoor basketball courts.
Recreational basketballs can be seen outside houses and on the streets. This half-court version of the game is often referred to as "streetball". Other side effects of the game, including a beach version that allows you to carry a ball, have been invented.
Would you like to draw a basketball? Doing so is easier than ever with this easy, step-by-step drawing guide. All you need is a pencil, pen or marker and a sheet of paper. You can also color your finished drawing.
If you liked this tutorial, see also the following drawing guides: Baseball Bat, Baseball Cap, and Basketball Player.
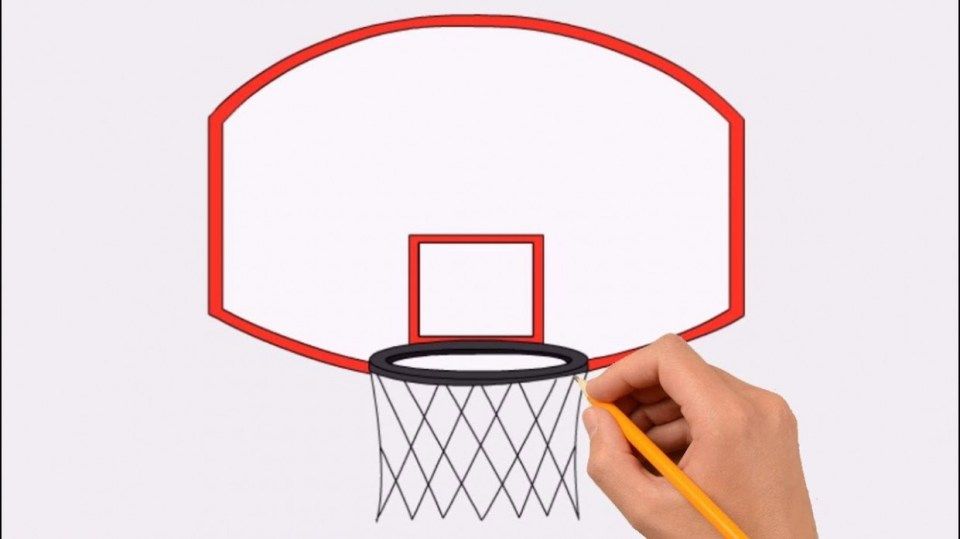
Basketball Hoop Step by Step Instructions
1. Start by drawing a flattened oval. Then draw a smaller oval inside the first one. This forms the rim of the basketball hoop.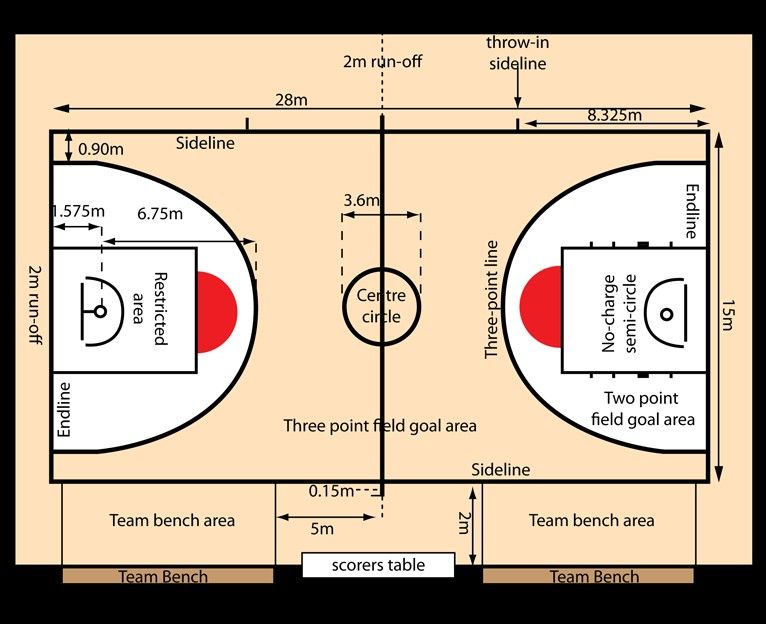
2. Extend two straight lines horizontally from one side of the rim. The top line should be longer than the other. Then extend lines down from the ends of those lines. Connect them at the bottom using a straight line. This connects the rim to the back panel.
3. Draw a curved line down one side of the rim. This starts the outline of the network.
4. Draw a curved line down from the other side of the rim. Connect the lines at the bottom using a wavy, irregular line. Then draw diagonal parallel lines across the net. Follow them in parallel lines on the opposite diagonal. The result will be a hatch or checkerboard pattern that indicates the lines of the network.
OTHER EASY DRAWING GUIDES:
5. Draw perpendicular diagonal lines in the inner oval of the hoop, indicating the opposite side of the mesh.
6. Draw a circle covering the bottom of the net. This will become basketball.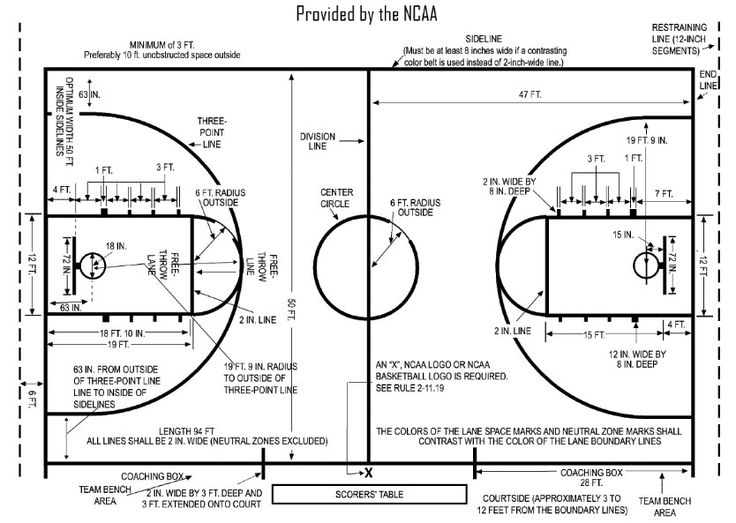
7. Draw a curved line across the basketball. Perpendicular to this line, draw three additional curved lines. These are basketball stitches.
8. Draw a four-sided shape using four straight lines. The extension from the rim should be in the center of this shape. It's a basketball shield.
OTHER EASY DRAWING GUIDES:
9. Draw a smaller four-sided shape inside the first one. Extend a pair of straight lines from the rim to the point where it attaches to the backrest, providing additional support for the rim.
Whoosh! It was nothing but a network. Check out our drawing guides for tips on how to put together your team.
The Complete Basketball Hoop Drawing Tutorial in One Image
Like this Drawing Guide?
Leave a comment below or follow on Pinterest.
Basketball court markings: standards and norms
Author of the article
Khvatkov Dmitry
Consultant in the production of rubber coatings
Basketball field marking requirements approved by FIBA standard.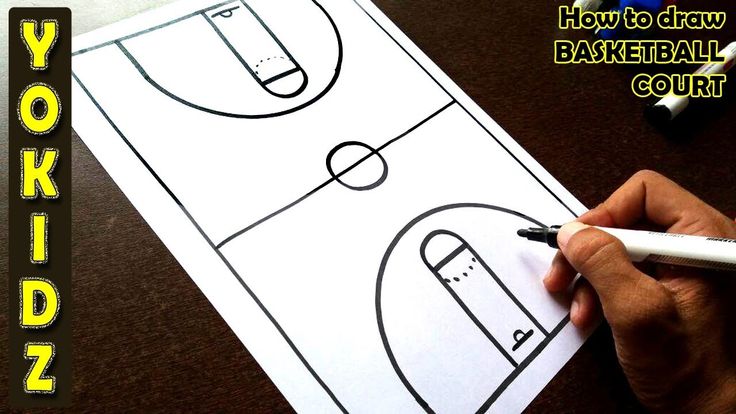 The site must be flat with a hard surface, free of bends, cracks and other obstacles. The accepted dimensions of the field are 28 m long and 16 m wide. By NBA standards, the field is slightly larger: 28.7 m (94' ft) long and 15.3 m (50' ft) wide.
Non-international competition courts may differ from accepted standards (for public use, in schools or universities, etc.) and usually vary from 20 to 28 m in length and from 12 to 16 m in width.
Basketball court marking standards
Basketball court markings are conditionally divided into 5 components:
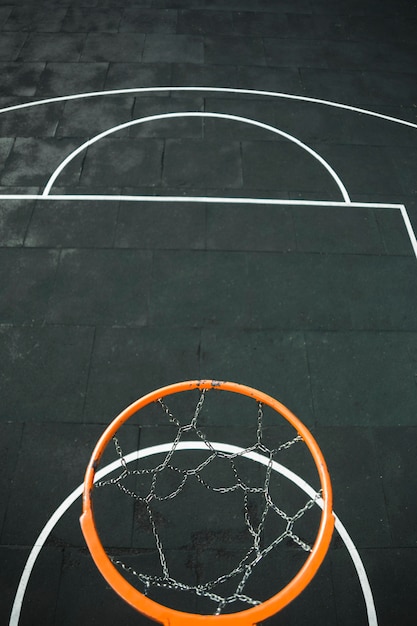
- Boundary lines. They are located along the perimeter of the site and set its size. The lines that run along the field are called side lines, and those that are behind the baskets are called front lines.
- Central line. Divides the court in half parallel to the front lines.
- Central zone. It is a circle and is placed in the middle of the center line, and, accordingly, in the center of the entire field.
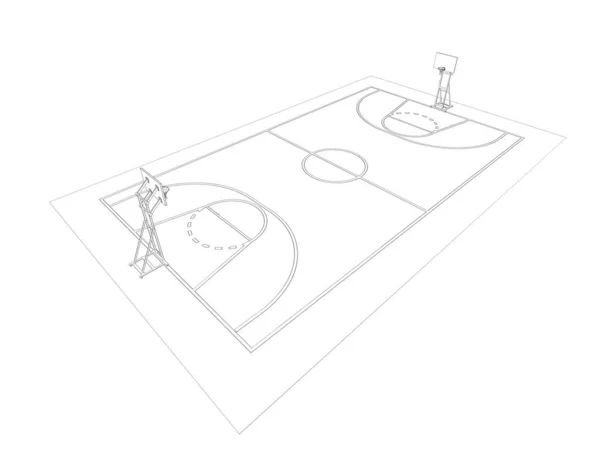
- Three-point line. It is a semi-ellipse and is located around the shields on both sides of the field. It limits the close range.
- Free throw line. It is located in front of the boards parallel to the front line and is limited on the sides by paint lines.
The standard line width is 5 cm. All outlines and lines must be of the same color (usually white) and clearly visible from anywhere on the court.
Common lines
Common lines are used to limit the playing area of the court. The side lines (along the field) according to FIBA standards should be 28 m long, and the front lines - 16 m. For public areas, deviations from the accepted standards are allowed. Typically, basketball courts in schools or gyms are made from 20 m long and 12 m wide.
Central lines
The central line is parallel to the front and divides the field exactly in half. According to the standards - it should extend beyond the side lines by 15 cm on both sides.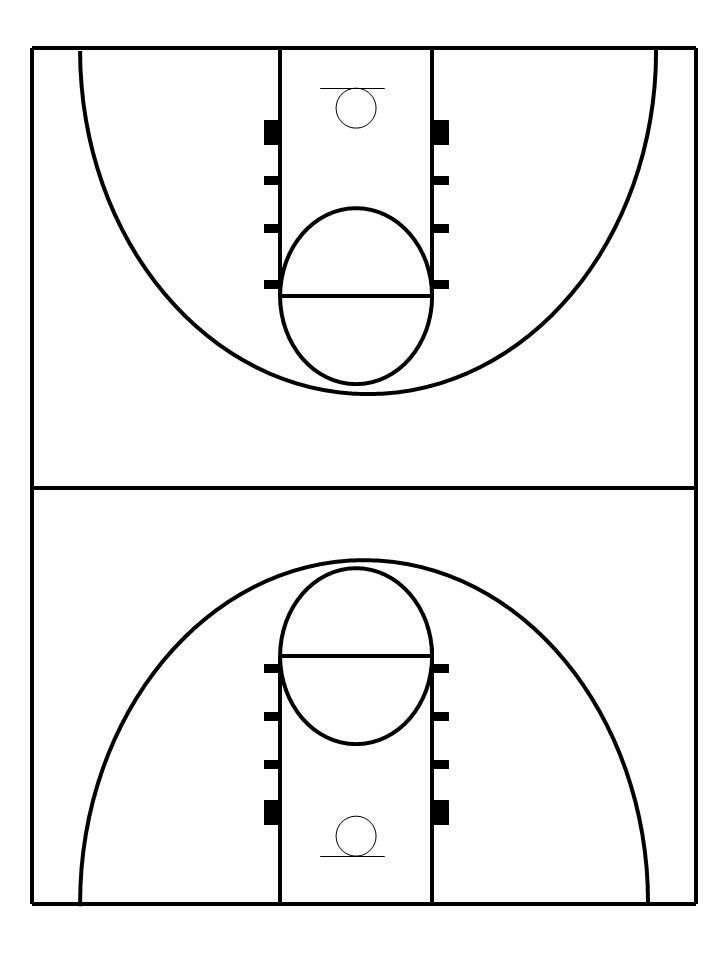
In the middle of the center line there is a circle with a diameter of 3.6 m, which limits the central zone of the field. In this zone, the ball is played at the beginning of the game.
Three-Point Line
Three-Point Lines are located around the backboards on both sides of the field and consist of two straight lines 2.9 long9 m and a semicircle. Straight lines run perpendicular to the front at a distance of 0.9 m from the side lines. Despite the fact that visually the distance from the ring to the side of the three-point line seems to be less than to its central part, the distance from the backboard to any point is 6.75 m.
Penalty lines
Penalty lines limit the nearest area at the backboard. They consist of a trapezoid and a free throw zone.
Despite the name, the "trapezium" is a rectangle (until 2009year it really was a trapezoid), which is located under the shield. Its dimensions are 5.8 meters long and 4.9 meters wide. The shield is located at a distance of 1.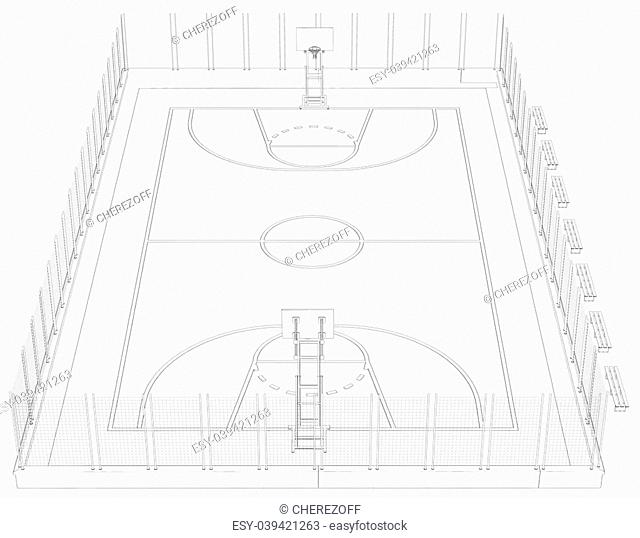 575 m from the end line in the middle of the site. In front of the backboard, at a distance of 1.25 m, there is a semicircle that limits the area for picking up the ball.
At a distance of 4.225 meters from the backboard, the trapeze zone ends and the free throw zone begins. It is a semicircle with a diameter of 3.6 m (like the central circle).
Paint zone lines
These lines are serifs on both sides of the trapezoid (parallel to the side lines). They limit the areas for players who are fighting for the ball during a free throw.
Zones on the basketball field
The basketball court is divided into zones using markings. Each zone has its own specific rules.
Center circle
The center circle is used as a separate kick-off area at the start of the game. One representative from each team stand in a circle from their side and fight for the ball in a jump, after it is dropped by the referee. All players are exclusively on their side of the field, except for one who rebounds on the opponent's side.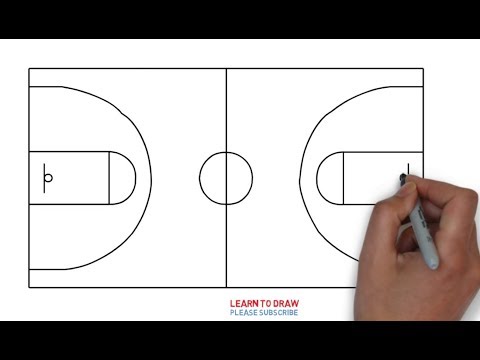
Neutral zone
The peculiarity of this zone is that as soon as the player of the attacking team with the ball crosses the center line and is on the side of the opponent, he cannot pass the ball to the player of his team who is on the other side of the field (i.e. behind center line on your side).
Three-point zone
The three-point line limits the near zone of the shot. Hitting the basket from outside the basket brings the team three points. If the throw was made inside the zone, then it brings two points.
Three-second zone
This is the zone in close proximity to the ring. It is called three-second, since the player of the attacking team cannot be in it for more than three seconds. Most balls are thrown in this zone, so when attacking, it provides maximum protection.
Free throw area
In controversial situations, a free throw is provided from this area. The player of the attacking team must score the ball without stepping over the line of the trapezoid.