Home » Misc » How to get quick hands for basketball
How to get quick hands for basketball
5 Best Basketball Speed Drills and Exercises
Home > Player > Athletic Development > 5 Best Basketball Speed Drills
Speed Kills
You've heard your coaches tell you over the years. Speed kills! A player who is FASTER simply can make something out of nothing.
It is not fun having opponents consistently fly by you down the court for an easy bucket or struggling to close out to shooters before they fire 3's over you. Players with more speed are simply able to make more plays... so maybe it is time to do something about that!
Game Of Inches
People always say how basketball is a game of inches, and it truly is a game of inches. As you continue to play basketball at higher and higher levels, it becomes more evident that most plays either fail or succeed based on a matter of INCHES. So how does this relate to speed? Let's examine the following situations:
If you are faster coming off a screen, you are more likely to hit that 3 over the outstretched hands of a defender.
If you are faster running the floor, you are more likely to get that transition layup or dunk.
If you are faster bringing the ball down the court, you are more likely to turn a secondary break into a primary break and create offense for your team. Or better yet, you create a scoring opportunity for yourself.
If you are faster on defense, you are able to closeout on a skip pass and take away an opponent's jump shot.
If you are faster in transition defense, you can get back in time to block a game winning shot attempt.
What is the difference between failing or succeeding in each of these scenarios? We are not talking about a matter of seconds in these scenarios, rather we are talking about being faster by a few milliseconds.
Seeing The Court
Being one step faster could also be the difference between seeing more playing time on the court. This won't necessarily be because a coach puts a stop watch on you and notices that your 40 yard dash time is faster, but coaches will notice when you begin making more plays on the court. And in the end this is why players work to get faster- it helps you make plays while on the court.
Have A Plan
Cody Roberts Athletic Development Program has specific exercises in it designed to help you become a better athlete. If you want to have the most success at becoming a better athlete, you need to follow a well laid out plan by a professional, this is the first step in guaranteeing success.
Remember, successful athletes have a plan.
Great basketball players don't go into the gym without a shooting routine and they don't go into the weightroom without having a program designed to make them a better athlete.
5 Drills and Exercises To Increase Your Speed
1) Wall Drive
One key to great speed is your body position. The drill teaches proper body positions of acceleration. It also helps develop proper mechanics of driving the feet into the ground, keeping head up, and chest out.
2) A-Skip
Great exercise for helping you develop dynamic control of your body and your posture. It also helps with proper positioning of the torso, hip, knee, and foot when sprinting. Start slow with this exercise and add speed as you get more comfortable with the drill. Maintaining good posture throughout is a key to the A-Skip.
3) Straight Leg Bounds
Straight leg bounds will help you develop an aggressive hip drive and ground contacts. This helps improve your prime movers, which are muscles used to power the body forward. Focus on quick contact with the ground and hangtime in the air while performing Straight Leg Bounds.
4) 5-15 Yard Sprint Starts (Falling and Half Kneeling)
Great drills to work on straight ahead acceleration. There are several variations of sprint starts. Begin by focusing on the falling and half kneeling sprint starts.
5) Flying 10's
This exercise is one of the highest and most intense training stimulus for an athlete. Being able to run at and experience full speed sprinting is awesome for developing a complete athlete. Focus here should be on sprinting tall and upright, while remaining relaxed.
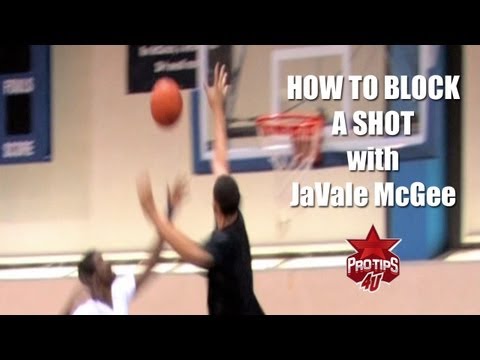
Beyond The Dunk
Take a look at this next video clip. While the announcers and most fans will focus on the dunks these players finish with, please look beyond the dunk. I want you to focus on something else. How did they get open or how did they get to the rim?
The answer to that question is SPEED!
Each player that scores in the video simply outruns their opponents at some point. You probably won't turn Sportscenter on anytime soon and have the hosts talk about how fast a player was on the court. I challenge you though to notice what puts these players in position to make spectacular defensive or highlight reel offensive plays. I think you'll find that speed is a definite factor in their success.
Showcase Your Skills
You have worked very hard on your basketball skills. Better speed will allow you a chance to showcase these skills.
Offensively-speed will create space between you and your opponent.
Defensively- speed will take away space between you and your opponent.
Without that space, showing what you can do on the court is that much more difficult. Give yourself an edge on the court, and increasing your speed will help you do so.
If you'd like a step-by-step program to help you take your athleticism to the next level...
Take a look at Cody Roberts' 12-week Athletic Development Program. This improves your speed, vertical jump, quickness, and much more.
A Hand Speed Drill Every Athlete Can Use
Skip to content
Whether you’re a basketball player defending a point guard or an infielder reacting to a short hop, a set of quick hands can make the difference between a game-winning play and a visit to the bench. If you are looking to increase your overall hand speed, here is a simple drill that can benefit any athlete.
Hand Speed Drill
Requires: A partner and 15 to 20 balls (about golf ball size; wiffle balls work best) You may substitute the number of reps with a prescribed amount of time, usually between 10 and 15 seconds, or until you run out of whiffle balls.
Begin in athletic stance with feet shoulder-width apart and knees slightly bent
Maintain distance of five to seven feet between you and your partner
Partner underhand tosses balls toward various points on your body
Hit all balls with same part of your hand each time; vary which hand you use
Sets/Reps: 2-3×10-15 Coaching Points: Do not try to catch balls, just hit them with hand // Have partner aim for various points (legs, arms, knees) of your body Remember, this is a rapid-fire drill so your partner should not waste time between feeds. Also, since this hand speed drill is for general training, use both of your hands. Want more? Try “3 Drills to Increase Hand Speed.” Photo: omgreds.com
Share This Story!
MOST POPULAR
Whether you’re a basketball player defending a point guard or an infielder reacting to a short hop, a set of quick hands can make the difference between a game-winning play and a visit to the bench. If you are looking to increase your overall hand speed, here is a simple drill that can benefit any athlete.
Hand Speed Drill
Requires: A partner and 15 to 20 balls (about golf ball size; wiffle balls work best) You may substitute the number of reps with a prescribed amount of time, usually between 10 and 15 seconds, or until you run out of whiffle balls.
Begin in athletic stance with feet shoulder-width apart and knees slightly bent
Maintain distance of five to seven feet between you and your partner
Partner underhand tosses balls toward various points on your body
Hit all balls with same part of your hand each time; vary which hand you use
Sets/Reps: 2-3×10-15 Coaching Points: Do not try to catch balls, just hit them with hand // Have partner aim for various points (legs, arms, knees) of your body Remember, this is a rapid-fire drill so your partner should not waste time between feeds. Also, since this hand speed drill is for general training, use both of your hands. Want more? Try “3 Drills to Increase Hand Speed.” Photo: omgreds.com
Share This Story!
Page load link
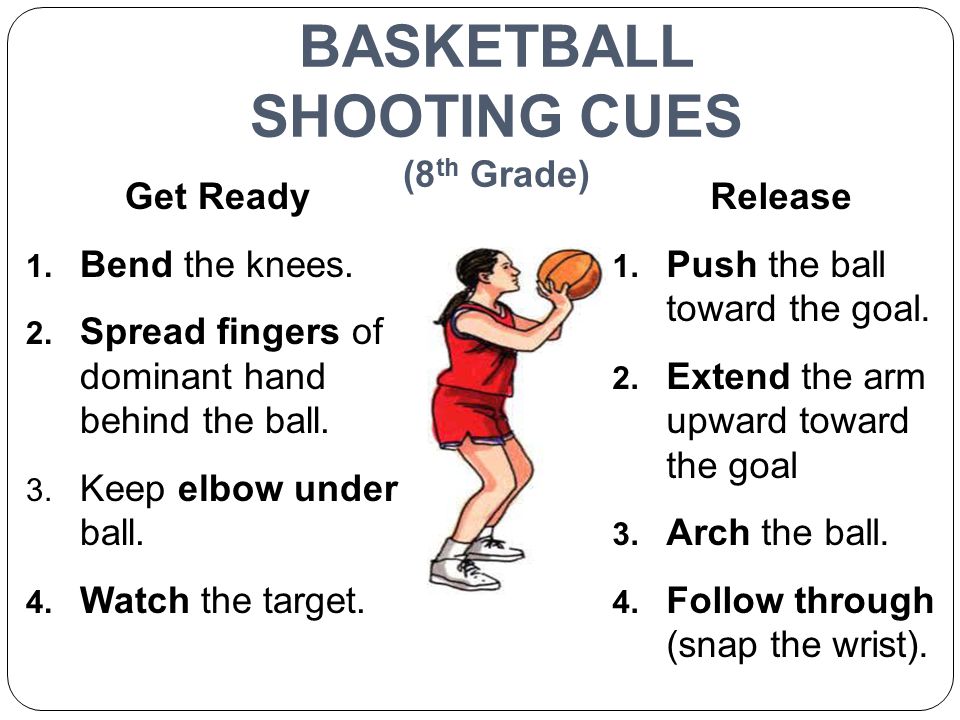
Shooting exercises
replica swiss watches
Basketball is a great team game, the team consists of players whose skill is achieved with great effort. The only person who can understand that you are working hard is yourself. Remember, you only get out of the game what you put into it. Give yourself to her without a trace.
Jump shot
In basketball, an outstanding sniper is a piece item. If you want to be a great sniper, all you need to do is just want to be one.
First, you must improve your skills.
This includes having a good coach and years of training. Secondly, you must improve in game mode.
This means that you must perform throwing drills at the same intensity as in the game. It's far better to hit 100 shots in play than 500 sloppy shots that a good defender would never let you make in a game. Finally, you must understand that working on a roll is like investing in a bank. If you don't deposit anything into your account, you won't receive dividends when you need them.
The sniper must have "throw school". When throwing after a dribble, one of the main features is the last hit of the ball on the court, which must be fast and strong so that it bounces higher, right into your hands - this will help you not waste time handling the ball.
Individual Shooting Exercises
Exercise 1 Attention Concentration
Start from a distance close to the ring.
Throw with one hand. Follow correct technique.
Make five from each position. Take a step back and repeat (Fig. 1).
Exercise 2 7 throwing positions and rebound (4 meters)
Jump shot from position 1.
Pick up the ball, dribble quickly to position 7, shoot.
Pick-up, fast with guiding back to position 1.
Make 10 rolls.
Repeat the same steps using positions 6 and 2, 5 and 3, 4 (Fig. 2).
Exercise 3 7 shooting positions and a rebound (from behind the three-point line)
1. Repeat the same steps as in exercise 2 (fig. 3).
Exercise 4 Throw after stop
Start from position 1, toss the ball to position
Pick it up, while you have to run around the ball so that you are facing the ring.
Make 10 rolls, then advance to the next position.
Ex.5 Shooting from five positions after a fake move (from four meters or from behind the three-point line)
Start from any position.
On bent knees and with your head up, you do a throw feint, hit the ball one or two with your right hand, stop and jump.
Return to position, throw feint, one or two hits with the ball with the left hand, stop, throw.
At each position, 5 attempts (Fig. 5).
Exercise 6 Jump shots after dribbling
Start the exercise from the center of the field, move towards the hoop with dribbling at game speed, after stopping quickly shoot.
The shot must be taken from a middle distance or from behind a three-point arc. Perform the exercise, both on the right and on the left and in the middle of the site.
Use different types of dribbles: fast dribbles, broken tempos, pivots, etc.
Make 5 attempts in each direction (Fig. 6).
Exercise 7 Playing with a virtual opponent
Perform a free throw. If you have implemented it, you get one point. If not, then your "opponent" is three.
You make subsequent throws from any position except the three-second zone, imitating the rhythm of the game. Work on different moves and throws. Each of your successful attempts is estimated at the bottom of the point, unsuccessful at two for the "opponent". The game goes to 11 points.
This is a very good exercise to consolidate what you have learned. Try! Improve! (Fig. 7).
Double shots
Dr. 8 2 players, shot and rebound (4 meters or from behind the three-point line)
The drill starts with a good, clear pass. The player who made the pass from under the basket goes to the place of the thrower.
The player in position 1 catches the ball and shoots.
After the shot, the player runs to the rebound and then passes the ball 1 position and so on.
Each player must make five throws. The exercise is performed at a fast pace, but the throws should not be sloppy.
Then move to another position and everything is the same (Fig. 8).
Exercise 9 Two players, throw and rebound (per result)
The exercise is performed as described above.
The player who made the pass tries to interfere with the shot, but does not block.
Game up to 5 hits.
Then we move to another position, and so on. (Fig. 9).
Exercise 10 Two players, throw and rebound, throw feint
The exercise is performed in the same way as the previous one.
The defender who made the pass tries to interfere with the player in position 1, but does not block the shot.
The attacker makes a throw feint and beats the defender.
Performs a short dribble, stops and throws.
Do 5 times each and change position (Fig. 10).
Ex. 11 2 players, shot after a stoppage (from four meters or from behind the three-point line)
The attacker is in position 1, ready to receive the pass.
The player under the basket passes.
After the throw, the attacker waits for the rebound to be made.
The player receives a pass by making a stop, but already in position 2. Then back.
Make 7 throws, two free throws and switch (fig. 11).
Ex. 12 Shooting with movement (from four meters or from behind a three-point arc)
The attacker moves around the perimeter at game speed.
A player passes to the hand farthest from the ring.
The attacker must stop, catch the ball and throw.
Make seven throws, two free throws and change (fig. 12).
Note: The previous exercise has three options.
A) Receive the ball and throw it.
B) After receiving, throwing feint, dribbling in the same direction, throwing.
B) Receives a pass, throw feint, dribbling to the ring in the other direction, stop, throw.
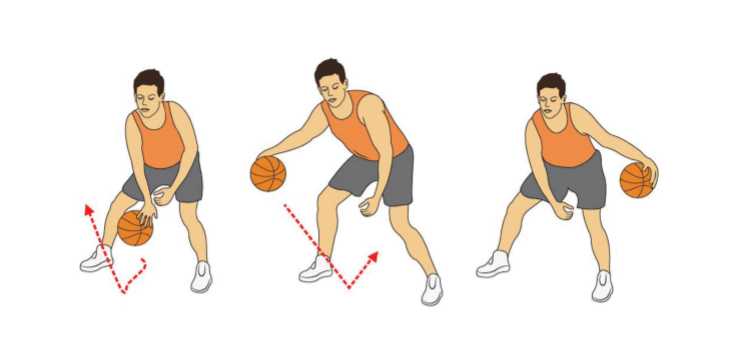
Ex.13 Various dribbling options and a jump shot
The attacker starts from the center of the field and, dribbling at game speed, moves towards the ring, stops and takes a jump shot.
The player under the basket picks up the ball, the attacker runs to the center of the field, and receives the ball on the opposite flank. Moves with dribbling to the ring, stop, jump shot.
On the right side, dribble with the right hand, on the left - with the left (Fig. 13)
Note: Use speed dribbling, change of pace, transitions, pivots.
Three players, two balls
Exercise 14 Warm-up exercise
One player throws, another passes, a third rebounds.
Thrower becomes rebounder after seven tries.
Passer - thrower. Picking up - passing (Fig. 14).
Note: different options are possible
1) From seven positions (four meters)
2) From seven positions (from behind the three-point arc)
3) From five points with feints to shoot
4) Throw after stoppage
5) Throw and rebound (constant rotation around the circle)
Double shots: using screens
To use the screen effectively, you must read the defender correctly. You must always see the player with the ball and how the defender defends against you. A player who moves well off the ball and knows how to use screens correctly is very useful offensively. When you watch a match that has good players, notice how well they move off the ball. The hardest thing to defend against is a well-moving attacker.
Exercise 15 Back screen and snatch
The player imitates opening and screening behind his back, makes a dash to the corner of the court.
Throw to the nearest hand.
Attacker catches the ball and shoots.
The attacker picks up his shot, passes to a partner and returns to his original position.
Make seven attempts and change (Fig. 15)
Note: do not back away when dashing, turn around and run, but do not lose sight of the ball.
Exercise 16 Screening behind the back, "false" screening
1. Attacker starts on the base of the trapezoid and moves up to imitate the screening.
2. After the imaginary breakout runs, the screening attacker rises to the ball and prepares to receive the pass.
3. Having caught the pass, he immediately makes a throw.
4. Make seven attempts and change (Fig. 16).
0003
An attacker imitates a defender aiming for a screen and rises sharply towards the ball.
The player must be ready to receive the ball.
The attacker catches the ball and makes a quick throw.
Make seven attempts and change (Fig. 17)
Exercise 18 Screening the ball carrier, moving away from the ring
The attacker screens the ball carrier.
The ball carrier passes through the screen aggressively.
Instead of pulling back to the basket (deuce), the screening attacker moves away from the basket and prepares to receive the pass.
Having caught the ball, he immediately makes a throw.
Make seven attempts, then change.
Exercise 19 Barrier at the base of the trapezoid - opening to the flank
The attacker takes the player under the ring, breaks shoulder to shoulder through the barrier and makes a dash to the flank.
When catching the ball, the player must turn to the ring.
Use different throw options: just throw, and dribbling to the right or left after a throw feint. Change after five attempts (Fig. 19).
Exercise 20 Screening at the base of the trapezoid - opening into the corner of the court
The attacker takes the player into the three-second zone, pretends that he will break through to the flank through the screen, the defender starts running around the screener through the three-second zone.
The attacker makes a dash to the corner of the court, and the defender hits the screen.
Further, the same as in the previous exercise (Fig. 20).
Ex. 21 Screen at the base of the trapezoid - dash inward
The defender is chasing you, not falling behind until the very screen.
Then you run through the screen as close to the screener as possible and break into the three-second zone or foul line area.
Receive the ball by turning towards the hoop and throw it.
Also work out various options for continuing after receiving the ball. After five attempts, change (Fig. 21).
Throws in pairs: pass and discount
Exercise 22 Pass and discount - starting from the center of the field flank.
The receiving player is opened for transmission.
Player receives a pass and shoots.
The player who made the pass picks up the ball and gives it to the thrower.
Players switch roles.
Everyone makes ten throws (Fig. 22).
Exercise 23 Pass and discount - start from the flank
Variation of exercise 22 (Fig. 23)
Exercise 24 Pass and discount - start from the corner of the site one more
exercise 2
more variation 3 .24).
Updated on 03/18/2014 00:40
5 exercises to run faster
Any runner, amateur or professional, can run faster. This takes time and effort. We need regular running training, as well as exercises that will help increase the level in sports, develop endurance, strength. Further in the article - how to learn to run fast: 5 effective sets of exercises and useful tips from experienced runners.
Top 5 sets of exercises for acceleration
Classes to improve speed performance should be carried out before each run, at least 3 times a week. And very soon they will give their results - you will run much faster. But keep in mind that they need to be done correctly - this is the only way the necessary muscle groups will be worked out and the ligaments and bones will not be damaged. And in productive exercises, sports shoes for running can help you.
So, TOP-5 sets of exercises recommended by sports trainers:
1. Running on the spot. It pumps the iliopsoas, quadriceps, calf muscles, anterior and posterior femoral surfaces, abs. Determine the number of repetitions yourself - focus on your own training:
With knee raise. Keep your heels off the floor while doing this, using only your toes. Raise your knees as high as possible while running. Be sure to alternately speed up and slow down. The back should be as straight as possible, the stomach is drawn in. A variation of this task: while running, lean your hands on a barrier, such as a wall.
Heels to buttocks. While running, stretch your heels to the buttocks, ideally - touch. Keep your posture straight and your abdominal muscles tense. Move your arms like you would during a normal run. This will help you place your foot correctly.
Jumping. Strongly pushing off, jump from foot to foot. Hands at this time move arbitrarily. This method improves repulsion.
Lying. Place your feet perpendicular to the floor, then start running. Slow down and speed up as you go.
With jump. Two options: 1st - each touch of the floor is accompanied by an active repulsion upwards with a swing of a bent leg and a jump. 2nd - rise to the elevation from different legs alternately.
With stop. Put your hands on the wall and vigorously "run". It is important that the supporting leg is at the same level with the body.
Jumping. Jumping strengthens the calf, lumbar, femoral muscles, buttocks. You need to perform them in 3-4 approaches. Determine the number, focusing on your strength and physical fitness:
With a change in the position of the legs. Starting position - one foot forward. Quickly bouncing, change the position of the legs. The exercise should be performed on toes, with a straight posture. In this case, the knee joints tend to rise, but move forward. This type improves the alternation of legs, the technique of adduction / breeding of the hips.
On straight legs. Starting position - legs slightly apart. Jump, pushing hard. Keep your legs and back straight and your stomach tucked in.
From a semi-squat. Half-crouching, jump as high as possible. Land in the same position from which you jumped. Variation of the task: jumping on one leg from a semi-squat, the second leg is tucked in.
Jump rope. Start by jumping on both feet. You don't need to jump too high. Gradually increase the pace. If possible, complicate the task: jumping over the rope, change your foot. This way you will follow the pace set by the rope itself. The exercise works great for endurance, helps to develop the correct running rhythm.
To the dais. Can be on a bench or step. Starting position: lean with a half-bent leg on an elevation, the leg on the floor should be straight. Straighten your bent knee, jump up and, lowering, change the position of the legs.
Down - up. Jump down from an elevation 80-100 cm high and, pushing off, immediately jump to the same height located nearby. And in the opposite direction.
2. Squats.
Helps to strengthen all muscle groups on the legs, buttocks, develop good coordination and balance. From a standing position, slowly squat until you feel tension in all muscles. The knees should be strictly above the feet, do not push them excessively. Repeat as many times as you think necessary - until moderate fatigue. Another effective exercise: lean forward while holding an extra weight with your hands. When bending over, lift and place one leg back. Squat on the base. Lower the load as far as possible below the knee, lift, stand up. Reps for each leg - 10-12.
3. Climbs and rolls.
Work on strengthening the calf, tibial muscles, ankle joints. It must be performed before running, not necessarily sprinting, on an ongoing basis. The starting position of the classic "spring": feet shoulder width apart, hands on the belt. On the exhale - rise to the half-fingers with the creation of tension in the calves, on the inhale - return to the "start". Variation of the "spring": one leg - on the floor, the second - on a dais. The lifts are the same as in the classic exercise. Rolling from toe to heel and back can be done without support or with support on the back of a chair. Torso exercises. They pump the muscles and tendons of the torso, which are activated when running. Plank and pelvic bridge on one leg are most effective. The bar is performed as follows: lie on your stomach on a hard, flat surface, rise on your elbows at an angle of 90° and toes. Keep your body straight, parallel to the floor, without leaning to the side. The longer the better. Bridge execution: lie on your side on a solid base, resting on the elbow and leg that are below, lift the second leg as high as possible, hold for 10-15 seconds and lower. Repeat the same on the other side. All exercises can be performed at home. No special equipment is needed for this: only the desire and time of the athlete, as well as the accuracy of execution. The efficiency of muscle pumping and the result of efforts directly depend on it.
How to increase your running speed further: tips
Experienced athletes know how to run fast and not get tired. Take note of the tips from them: Warm-up before jogging is a must: swinging your arms, rotating your body, lunging with your legs, walking in place. The practice of yoga stretches all the muscles and tendons well, increases the flexibility of the joints, relieves tension, and improves coordination of movements. The most useful asanas are: Goddess Pose improves lung ventilation, Child and Happy Child Pose stretches the back muscles, Side Plank strengthens the back, arms and abs, Mountain Pose forms the correct posture. To recover after running and saturate the body with oxygen, use the Salutation to the Sun complex. Persistent, regular classes are the key to achieving high performance. Don't skip workouts for no good reason. Try to run in a group or at least with two people. Excellent performance running nearby will inspire and motivate. Your diet should include a variety of vegetables, fruits, and lean proteins. Eat less sugar in any form. Before running, you need to eat something from healthy carbohydrates. Whole grains are great. Good sleep is essential for the human body to fully restore all muscle groups. A good rest is the key to good health. Practice brisk walking in a relaxed state in your daily life. This relieves tightness while running. Take care of the shoes: running shoes should be running and fit perfectly on the foot. Don't skimp on a running pair, it's your closest "ally". Feel free to move your arms vigorously and sweepingly during the race.
When thinking about what exercises will help you speed up, don't forget the "spirit" of running.


 And in the end this is why players work to get faster- it helps you make plays while on the court.
 While the announcers and most fans will focus on the dunks these players finish with, please look beyond the dunk. I want you to focus on something else. How did they get open or how did they get to the rim?
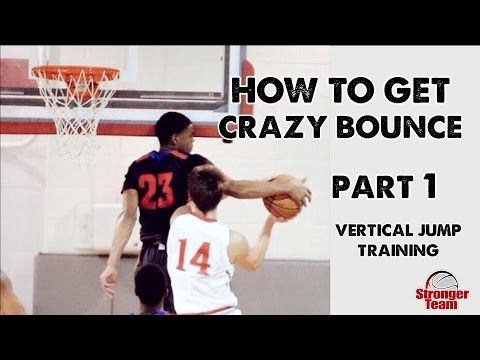


 Also, since this hand speed drill is for general training, use both of your hands.
 It's far better to hit 100 shots in play than 500 sloppy shots that a good defender would never let you make in a game. Finally, you must understand that working on a roll is like investing in a bank. If you don't deposit anything into your account, you won't receive dividends when you need them.
 The game goes to 11 points.
 11).
11).  Moves with dribbling to the ring, stop, jump shot.
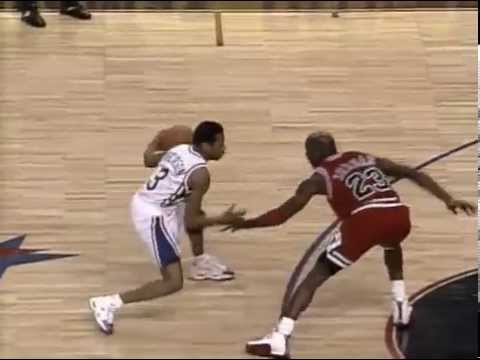
  A player who moves well off the ball and knows how to use screens correctly is very useful offensively. When you watch a match that has good players, notice how well they move off the ball. The hardest thing to defend against is a well-moving attacker.
 This takes time and effort. We need regular running training, as well as exercises that will help increase the level in sports, develop endurance, strength. Further in the article - how to learn to run fast: 5 effective sets of exercises and useful tips from experienced runners.
  Determine the number of repetitions yourself - focus on your own training:
 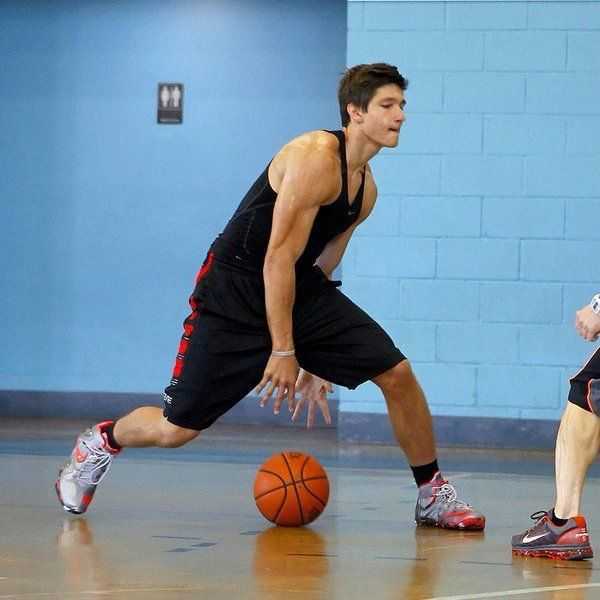 Place your feet perpendicular to the floor, then start running. Slow down and speed up as you go.
  In this case, the knee joints tend to rise, but move forward. This type improves the alternation of legs, the technique of adduction / breeding of the hips.
  Can be on a bench or step. Starting position: lean with a half-bent leg on an elevation, the leg on the floor should be straight. Straighten your bent knee, jump up and, lowering, change the position of the legs.
  The longer the better. Bridge execution: lie on your side on a solid base, resting on the elbow and leg that are below, lift the second leg as high as possible, hold for 10-15 seconds and lower. Repeat the same on the other side. All exercises can be performed at home. No special equipment is needed for this: only the desire and time of the athlete, as well as the accuracy of execution. The efficiency of muscle pumping and the result of efforts directly depend on it.
  To recover after running and saturate the body with oxygen, use the Salutation to the Sun complex. Persistent, regular classes are the key to achieving high performance. Don't skip workouts for no good reason. Try to run in a group or at least with two people. Excellent performance running nearby will inspire and motivate. Your diet should include a variety of vegetables, fruits, and lean proteins. Eat less sugar in any form. Before running, you need to eat something from healthy carbohydrates. Whole grains are great. Good sleep is essential for the human body to fully restore all muscle groups. A good rest is the key to good health. Practice brisk walking in a relaxed state in your daily life. This relieves tightness while running. Take care of the shoes: running shoes should be running and fit perfectly on the foot. Don't skimp on a running pair, it's your closest "ally". Feel free to move your arms vigorously and sweepingly during the race.