Home »
Misc »
How to grip a basketball with small hands
How to grip a basketball with small hands
How To Become Better At Palming A Basketball
Michael Jordan is famous for his big hands (even by NBA standards) and he often used his palming ability to his advantage on the court.
It’s also an essential skill in order to be able to consistently dunk a full-sized basketball.
When I set my goal to be able to dunk a basketball back in 2016, there were two major obstacles.
The main obstacle was being able to jump high enough to get the ball above the rim, and the second was ensuring I could keep a ball under control in order to successfully dunk it without sending it flying off course.
I spent 8-weeks working on my vertical leap. After that, the only thing holding me back from being a good dunker was my ability to consistently palm a basketball.
Big jumps aside, solid palming is essential during the slam dunk
Luckily, I found that training to palm a basketball wasn’t as hard as I expected, despite my smallish sized hands.
I’m first going to discuss two important factors that influence your palming ability, hand size and palming technique, and then cover some methods which will improve your ability to palm a basketball.![]()
Requirement 1: Hand Size
It should be obvious that hand size plays a big role in your ability to palm the ball.
You can have fantastic power and technique but the closer together your fingertips are, a smaller amount of the total pressure will apply an inwards force on the basketball.
Imagine your hand is one inch long – it doesn’t matter how much grip or power you exert, the ball won’t stick. It’s simple physics.
So, is there a ‘bare minimum’ hand size?
Well, technically there isn’t a single measurement that determines whether or not you are capable of palming a basketball.
It’s not just about hand length (measured from the wrist to the top of the middle finger), but also hand span (the distance between your thumb and pinky when you spread your hand out). You could have a relatively short hand length, but have really wide hands, for example.
In addition, finger/grip strength is also part of the equation. You can make up for having smaller hands with greater grip strength.
Your hand size will determine how easy or hard it is to palm a basketball
However, realistically speaking, to be able to comfortably palm a basketball after training technique and strength, here are some ballpark minimum figures.
Hand Length: 7.5″ (this is slightly over the average male hand length of 7.4″)
Hand Span: 8″
With these measurements palming a ball might be a little tricky at first, but if you train your technique and grip strength you’ll ultimately be able to palm the ball fairly comfortably.
People with smaller hands might be able to palm the Basketball, but technique would need to be even better.
For reference, in the NBA draft combine, the smallest hand length you’ll see is typically around 7.75″-8″, although there have been years featuring players with a 7.5″ hand length.
How To Measure Your Hand Length and Span
You will need a standard ruler to find out your own hand measurements.
To measure hand length, measure from the base of your hand (where the wrist begins) to the top of your middle finger.
Fig. 1: Measuring Hand Length
To measure hand span, spread your thump and pinky as far apart as you can across a ruler, as shown below:
Fig 2. Measuring hand span
Requirement 2: Strength and Technique
There is definitely more to palming a basketball than pure hand size. In fact, your palming skill is extremely important and will be an equally important factor as your hand size.
Most players didn’t just pick up ta basketball from day 1 and have the ability to palm it securely – unless they’re Michael Jordan.
Basketball players will often subconsciously be practicing palming the ball when they have the ball in their hands.
Once you are able to palm the ball fairly well, it’s just a matter of spending more and more time palming the ball to maintain your ability and further strengthen the muscles involved in palming.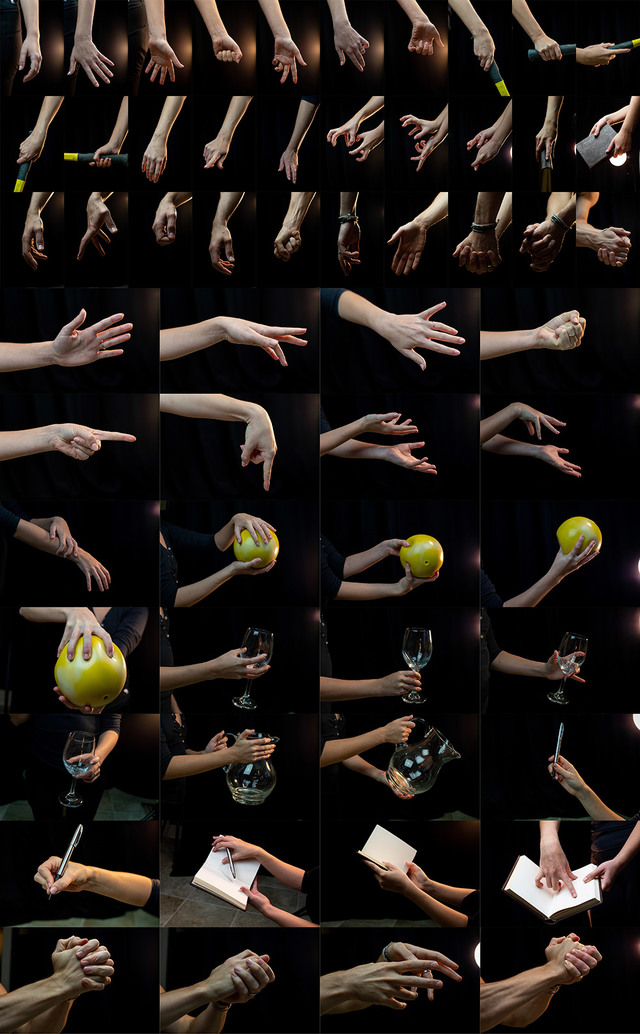
To get to that point, you need to work on your grip strength.
When it comes to grip strength, you need to keep in mind that there are three different types:
- Crush Grip: Grip between fingers and palm that gives you the ability to ‘scrunch’ something – think shaking hands, crushing a beer can.
- Pinch Grip: The grip between fingers and thumb. This is what matters most.
- Support Grip: The grip needed to keep hold onto something – e.g. holding onto a bar during deadlift/pull-ups
For many people, hand grippers spring to mind when they want to improve their hand grip. These things strengthen your hand flexor muscles you use to crush things, but when it comes to palming a basketball, there are more efficient ways of training.
Hand Grippers aren’t very helpful because they don’t reflect the grip used for palming a basketball
The crush grip and support grip are not as important for the purpose of palming a basketball.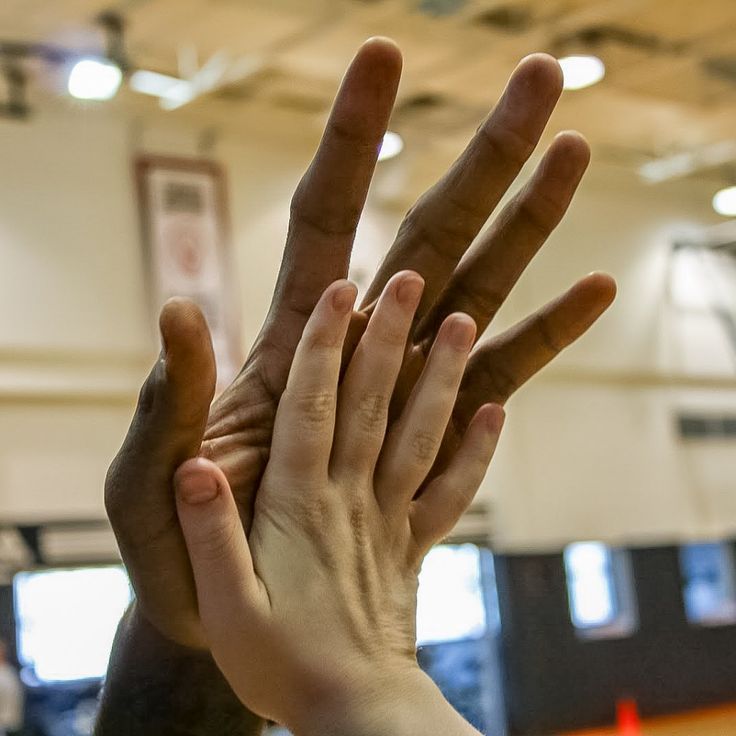 What needs to be your main focus for training is your pinch grip.
Strengthening Your Pinch Grip
Now that we’ve established that you need to strengthen your pinch grip in order to comfortably palm a basketball, let’s go through some exercises you can do to do that.
Fingertip Pushups
These are pretty self-explanatory. Perform a standard pushup but instead of having your palm flat on the ground, lift your palm up so your body is supported by your fingertips.
This is a more challenging variation of the pushup, so if necessary leave your knees on the ground to begin with in order to make the exercise easier.
Fig. 4: Fingertip Pushups
Horizontal Basketball Palming
Since gravity is your enemy, you can start out palming your basketball by palming it horizontally – i.e. parallel to the floor. Since the bottom half of your hand will also be producing an upward force on the ball, it will be easier to palm.
Start palming the ball horizontally to make things easier for yourself
You should feel a burn running down your forearm after doing the exercise for long enough. Don’t overtrain in order to minimize the risk of high muscle tension induced spasm.
Each day, record the maximum number of seconds you can palm the basketball in this manner. You should see continual improvement.
As you improve, gradually start angling the ball towards the floor so that you are less and less reliant on the help you get from the upward forces acting on the ball.
Palming Smaller Balls
When you are trying to strengthen your grip using a basketball, you need to be palming for at least 5 seconds at a time, otherwise your fingers won’t have much opportunity to develop.
If you are unable to do the above exercise for a meaningful amount of time, then instead start off with a smaller leather/rubber ball to practice with.
For this purpose, I’d suggest either getting a womens basketball or a handball (handball is a popular sport in Europe, and the ball is significantly smaller than a Basketball).
Try and become comfortable palming either of these smaller balls for 20+ seconds before moving on to a men’s basketball.
Finger Stretchers
Unlike hand grippers, finger stretchers are a great way of training finger muscles in isolation. They can be purchased for cheap online and will strengthen the same muscle groups involved in the pinch grip.
Finger Stretchers are a good aid for learning to palm a basketball
Training with a Climbing Wall
If you want to see people with insane grip strength, look no further than climbers.
Because a climbing wall or natural climbing rocks have random contouring, climbers end up stressing different muscle groups during the course of a climb. As a result, you end up training all 3 kinds of hand grip without even realizing it.
I’ve done some climbing sessions before, and noticed immediate improvement to my basketball palming ability shortly after. The burning sensation going down your forearms and fingers after a session is unlike any other.
‘True’ Palming vs Pseudo-Palming
You might have read top players like Kobe Bryant or Anthony Davis can’t palm the ball.
Or how about the story that 6’10 Kevin Durant had to tell photographers he wasn’t able to palm the ball when posing for photos?
Yet Kobe, Anthony and Kevin are some of the most efficient dunkers on court. Kevin and Anthony are big guys even by NBA standards.
The point is even these guys have trouble effortlessly palming the ball in the truest sense, and will typically just cradle the ball during a dunk.
When training to palm the ball, your goal therefore isn’t to be able hold a basketball like a tennis ball. Very few people, even in the NBA, actually have that level of control over the ball.
Instead, improve your one-handed control over the ball and get it to a level that allows you to perform the moves you want. In my case, having enough control to dunk the ball was sufficient.
Men Before vs Men Now
Ever notice how your dad’s and his friend’s hands typically look bigger and manlier than yours? It’s not just an age thing – the younger generation are in fact getting weaker.
According to a study by the Journal of Hand Therapy, today’s men have a significantly weaker crush and pinch grip than men 30 years ago.
Lifestyle changes have meant that men’s grip strength has decreased over the years
That’s because men’s lifestyles have changed, with a more relaxed, less active lifestyle.
Be it helping with the shopping, going to the gym and doing deadlifts/kettlebell swinging or just playing basketball on a regular basis, you need to get off the computer and get physical.
Grip strength is a strong indicator of strength in general, and if you are finding it difficult to keep a grip on a basketball, your time might be better spent becoming stronger overall than focusing purely on palming in a band-aid manner.
Does The Basketball Make Much Of A Difference?
Yes! Some basketballs are naturally grippier than others. For example, the Wilson Evolution indoor basketball that is popular in college basketball is known to be very grippy. By contrast, the genuine leather official NBA game ball is slightly smoother and harder to palm.
Hopefully this article will help you become better equipped to start working on your ability to reliably hold a basketball. Let me know in the comment section below if you have any other questions!
How to grip the basketball and use your hands for a perfect release
How you grip the basketball is critical to a consistent release.
There are so many details that go into holding the ball and using each of the hands in order to become a great shooter.
If you can get consistently close to an optimal grip and release, then you stand an excellent chance of developing repeatable form.
Use these details to start to develop your own system of drills to isolate the habits, and layer drills. Or skip to the front of the line and get my my proven system of drills in my SHOT DEVELOPMENT SYSTEM – PURE RELEASE.
THE GOAL OF THE HANDS
As I’ve mentioned in other posts, our goal when we shoot is to create as much Positive Power in the shooting motion as possible. Positive power is any energy that is straight up and in line with the hoop.
Since it is your hands that are actually TOUCHING the basketball, it is going to be critical that we create as much positive power with our hands as we possibly can.
We want to avoid the shooting hand pushing the ball off line in one direction and the guide hand pushing the ball off line in the other direction, and then trying to perfectly synchronize those two motions to create positive power. It is POSSIBLE to do, that but the MORE you have compensate, the harder it will be to be consistent.
Instead, try to build a one-handed release with one hand pushing the ball towards the target.
Need help creating positive power but have no idea how to do it? Want to build a true one-handed release? CLICK HERE TO GET MY SHOT DEVELOPMENT SYSTEM – PURE RELEASE.
START BY MEASURING YOUR HAND
This is one of the key building blocks that so many people miss. They build their shot around assumptions, or theory, but not their actual body.
Start by gripping the ball with your shooting hand wide and your thumb comfortably spread out. Place your index finger (pointer, forefinger) on the air valve of the ball. Then place the ball on your hip so that you have your guide hand free. With your guide hand, measure the distance from the tip of your index finger to the tip of your thumb. Then compare that distance to the tip of the index finger and the tip of the pinkie.
I
‘ve measured over 10,000 players hands over the years at camps, clinics, and my own personal workouts. I’ve found that 90-95% of players, when they grip the ball with a wide thumb, the index finger is the middle of their grip. About 5% of players might find that the center of their grip is in between the index finger and the middle finger.
I’ve never had anyone grip the ball correctly and find that the middle of their grip is the middle finger.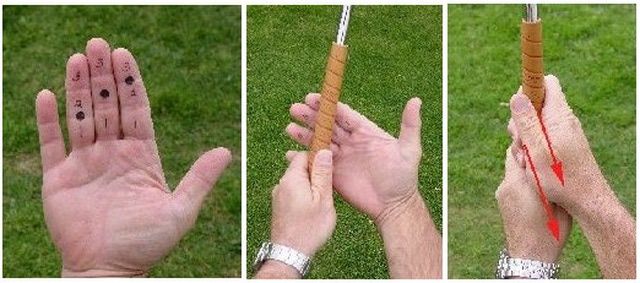 If you do, make sure that the thumb is spread out wide. If the thumb isn’t wide, your hand won’t be as big as it could be, and won’t control the ball as well as it could.
Need help isolating this important skill, then learning to apply it into games? Click here for my SHOT DEVELOPMENT SYSTEM – PURE RELEASE and get all the drills you need to build the habit!!
MIDDLE OF THE HAND UNDER THE CENTER OF THE BALL
Once you know where the middle of your hand is, we need to work to get the middle of the hand under the center of the ball.
Just like in billiards, the ball will go in the opposite direction of where force is applied to it. If your hand applies force to the very bottom of the ball, the ball will go straight up in the air. And if we apply force near the bottom of the ball but slightly to the right side, the ball will go up but slightly to the left – even if we try to lift straight up in the air. Same thing on the other side – if your hand is slightly on the left side of the ball it will push the ball slightly to the right.
Our goal is to get the middle of the shooting hand under the center of the ball at the release of the ball. To make that easier, we want to get the middle of the shooting hand under the center of the ball at the set point. We may not be able to do this perfectly, but the closer we can get, the more accurate we have a chance to be.
Need some drills for getting your shooting hand under the ball? Then need to learn how to layer drills so you can apply the habit at game speed? GET MY SHOT DEVELOPMENT SYSTEM – PURE RELEASE.
SHOOTING HAND FINGER PARALLEL TO THE TARGET LINE
This is one of the most overlooked keys to shooting. The angle of the finger on the middle of the ball.
Coaches tend to refer to getting the “elbow in” without realizing why it matters. But let me say this first – the position of the ELBOW doesn’t really matter, the elbow isn’t touching the basketball. We can, however, use the elbow as a cue to get the finger into correct alignment. So saying “elbow in” isn’t WRONG, it just doesn’t fully cover the issue.
When a player can get the finger of their shooting hand parallel to the target line, it will remain on the very bottom of the ball throughout the wrist snap. If the finger isn’t parallel to the target line, it will eventually come off the middle of the ball as the wrist snaps, and push the ball off line.
Also be aware that you can get your “elbow in” too much. It is most common/natural for a right handed shooter to let their elbow relax outward, and the finger to come out of alignment in one direction, but it is equally bad to get the elbow “too far in” and have the finger be out of alignment in the other position.
Do you have a tendency to push the ball off line on your release? Click here to start building a Pure Release.
GUIDE HAND COMING OFF THE BALL AT THE SET POINT
Once the shooting hand is in the correct position, we can focus on getting the guide hand off the ball.
Players and coaches both need to remember that if the guide hand pushes at all, it will push the ball off line. Even if the motion that the guide hand makes appears to push the ball FORWARD, it will push off line since it is on the side of the basketball. The only way you can truly push the ball on line is from the middle of the ball, and there isn’t enough room for two hands there.
So the role of the guide hand is to simply help hold the ball stable in the shooting hand as the two hands lift the ball. At triple threat position, a player needs the guide hand to play a role in holding the ball, otherwise the ball will fall out of the shooting hand. Same thing as the player lifts the ball – if the guide hand is removed when the ball is at chest height, the ball will fall out of the shooting hand because it isn’t under the ball yet.
The guide hand needs to support the ball until the shooting hand can fully get underneath the ball and support it by itself. That occurs around the set point. And that is when the guide hand should start to come off the basketball, though it might not actually release from the ball until a fraction of a second later.
Does your guide hand push the ball off line? Need a progression of drills to help with this? MY SHOT DEVELOPMENT SYSTEM WILL TEACH YOU ALL THE DRILLS I DO WITH MY PRO PLAYERS
GUIDE HAND ON THE SIDE OF THE BALL
The positioning of the guide hand on the ball will play a large role in how easily or how well it can come off the ball.
Keep this in mind… it is POSSIBLE to get the guide hand off the ball or even make shots from ANY hand position. But our goal is to make the movement as simple as possible, because SIMPLE IS REPEATABLE.
So our goal is to find the most simple position that the hand can assist in the lifting motion, but not interfere in the shooting motion. I encourage players to hold the ball so that the guide hand is on the very side of the basketball with the fingers pointed at the ceiling when the ball is at the set point. From that position, all the guide hand has to do it come off the ball a fraction of an inch, and it is out of the way and passive in the shooting motion.
If a player grips the basketball with the guide hand towards the top or front of the ball, the guide hand will need to make a bigger move to release from the ball. The bigger move means more time, and more room for error.
Now, it may be necessary at times to catch the ball with a larger separation in the hands because a catch was challenging and needed to be more secure. But understand that makes the SHOT slightly more challenging. We can work on the skill of catching the ball better, but there will always be some variability in the hand position on catches just because catching and shooting are two different skills, with two different ideal hand positions. Continue to work on the habit of simplifying your hand position, not intentionally making it more difficult.
Need help getting your guide hand off the ball cleanly? CLICK HERE TO GET THE HELP YOU NEED TO MAKE MORE SHOTS.
WHY DOES IT LOOK LIKE SO MANY PEOPLE SHOOT OFF THEIR MIDDLE FINGER?
This is a common question and requires a deeper understanding of shooting form.
First of all, no one’s shot will be perfect, especially in game situations. And being “perfect” doesn’t mean you’ll make every single shot, just like being “imperfect” doesn’t mean you’ll miss every shot. Being better will simply give the shooter a BETTER chance of making each shot.
In order to simplify the shooting motion as much as possible, I’d like a player to get the middle finger under the middle of the ball at the set point, then lift the ball straight up in the air so that both sides are being lifted evenly, and then releasing off the finger that is the middle of their hand.
But many players appear to release the ball off their middle finger? Why?
The shooting motion is short and violent. The wrist is snapping quickly and there is a lot of variability in how the ball leaves a players hand from shot to shot. Even two swishes can come off a great shooter’s hand differently.
This is why I concern myself far more with the position of a player’s hand at the set point, rather than the release.
Secondly, most players don’t hit a perfect position creating ONLY positive energy. They start off with the shooting hand slightly on the right side of the ball (as a right handed shooter) and start the shooting motion pushing the ball slightly to the left. Then, as they lift the ball, the shooter rotates their hand under the ball so that their middle finger is under the center of the ball, more hand is on the left side of the ball, and finish pushing the ball to the right.
This happens all the time, but that small rotation is something we want to try to either minimize or eliminate from the shooting motion.
Have you struggled to be able to do this in games? It might be because you never layered drills so that you could APPLY what you were learning. Finally break the habit once and for all with my SHOT DEVELOPMENT SYSTEM – PURE RELEASE.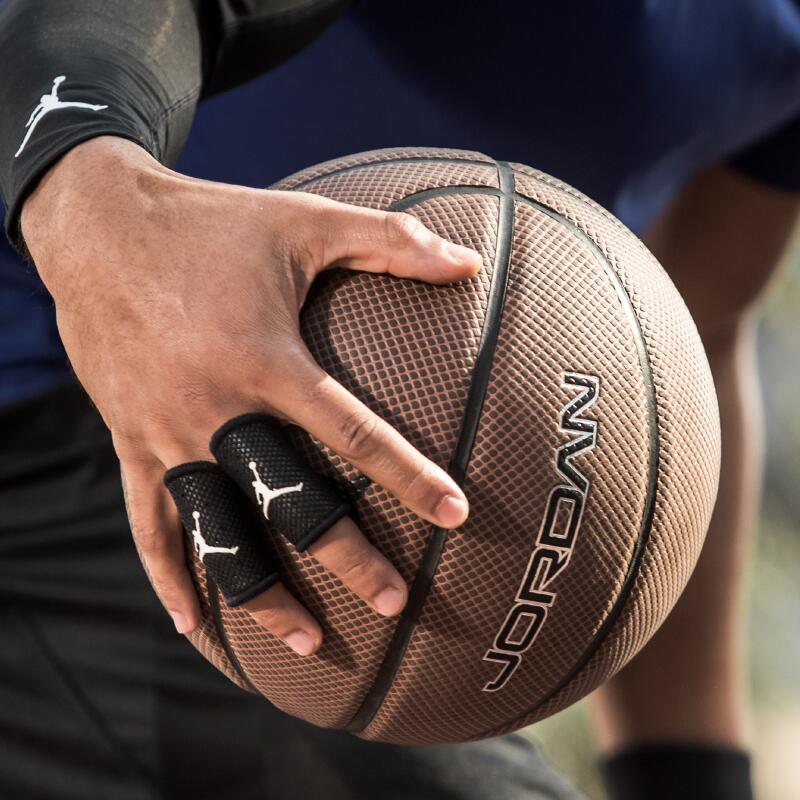
HOW DO I BUILD THESE HABITS WITH MY NBA CLIENTS?
Building habits in the grip and release requires attention to detail and patience.
I focus on isolating the habit that needs work. In many cases, this can look like standing close to the rim, taking as much time as needed on each shot, and holding the correct position for a couple of seconds before shooting.
From there, as a player gets better at the new, isolated skill, I will start to layer in other drills to make the situation more like a game. The more their habits progress, the more layers I add.
It is a process that takes a lot of experience, so it is difficult for me to explain in a single blog post.
That is why I created my Shot Development System “Pure Release”. All the drills that I use with my NBA players, laid out in order in video form. Stop guessing what to work on. Start getting results.
You get:
- 60+ Videos of drills and tips
- 2 hours of video content
- Everything laid out in order to remove the guesswork
- Life-time access
You can get “Pure Release” by CLICKING HERE.:no_upscale()/cdn.vox-cdn.com/uploads/chorus_asset/file/1396862/hands.0.png)
Basketball technique. How to play basketball
In order for the reader, who is not too versed in the game, to imagine what basketball technique is, it is necessary to explain that this concept includes two important components: the execution of the main technical elements with the ball and the correct execution of all movements on the court when playing in attack and when defensive play. The technique of possession of the ball begins with the fact that the basketball player must be able to properly hold it in his hands. The correct position of the fingers on the ball is the first thing that the coach explains to the young basketball player during the first lesson (picture 1) .
Today it is much easier for beginners: small children come to the basketball section and receive balls specially designed for their age in their hands. From 7 to 10 years old, children play basketball with small and light balls and work out all the technical elements on them.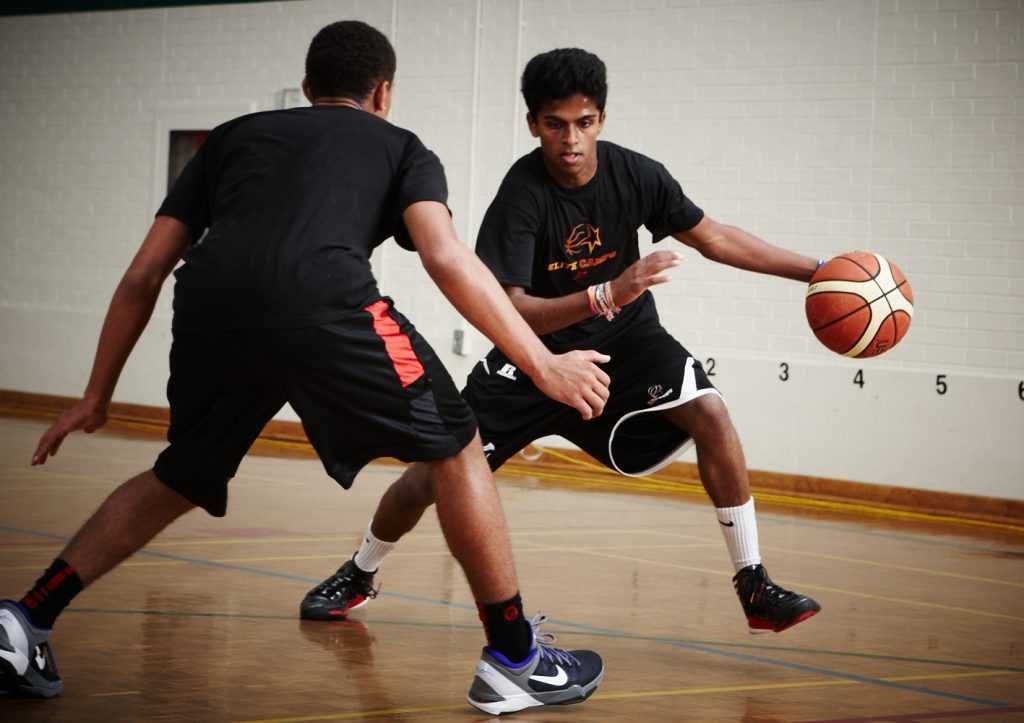 Any training begins with the fact that the coach asks the child to take a basketball lying in front of them on the court in both hands. I have seen a lot of options for how little basketball players take this ball and what they do with it - right up to the fact that they immediately hide it under their armpits. At this point, the coach explains how to properly place the fingers on the ball. (The figure shows how the fingers are located on the ball.) I want to pay attention to one detail: a basketball, whether it is for children or the one played by professionals, has black transverse stripes at regular intervals - the pads of the fingers of both hands must be placed exactly on them. In this position, it is more convenient to give a pass, twisting the ball in one direction or another, and it is more convenient to perform a throw, especially a free throw. The correct grip on the ball must be trained from childhood, so that the hand gets used to automatically being positioned in this way on the ball during the match.
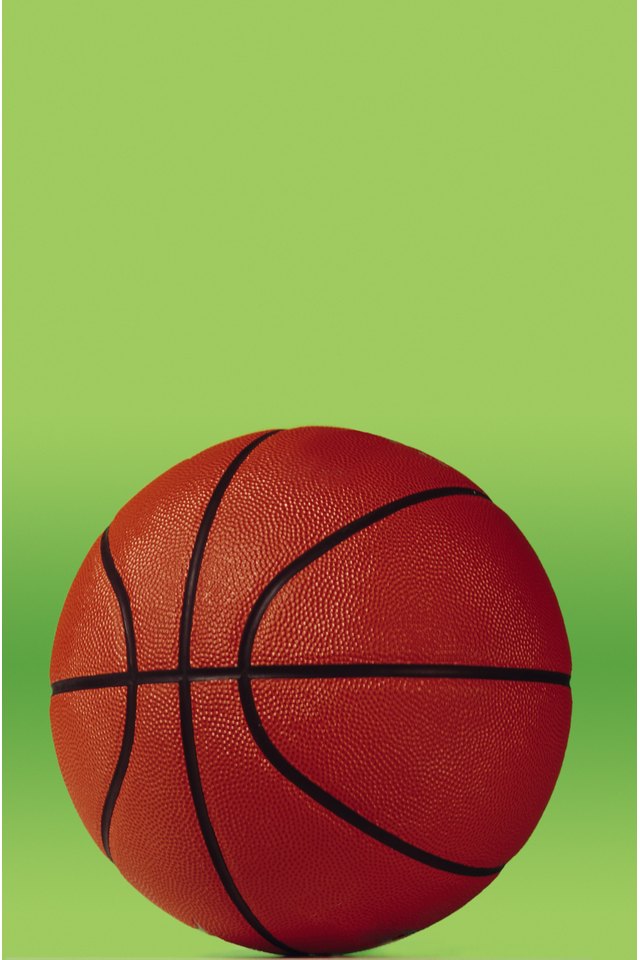
Figure 1
Many people think that after the coach has explained how to hold the ball correctly, the child is taken to the ring and they begin to teach him how to score goals - nothing like that! First you need to learn how to catch and pass the ball - these are the fundamental elements of basketball. If a player cannot catch the ball with both hands - and this is the surest way - he has nothing to do on the basketball court, even if he is at least three meters tall!
Figure 2
My first children's coach - grandmother, Nina Yakovlevna Zhuravleva, explained very intelligibly. “Boys and girls,” she said, “remember if you have a cup without a handle at home, it is called a bowl. And now try, almost connecting the wrists of your palms, spread your fingers in such a way as if you were holding this bowl in your hands! Only she is leaning forward. And we put our palms and fingers in this way (Figure 2) , and the grandmother threw a big ball to each of us.
In order to catch the ball, as soon as it touches the bases of your palms, you need to close your fingers - and you have the ball. At the same time, he flies to your chest, and at the same time you should try to absorb the speed of his flight by bending your arms at the elbow joints. It sounds complicated, but the movement is quite natural, as is the passing of the ball. Basketball is very diverse in terms of types of passes, but the most important of them is passing the ball to a partner from the chest with both hands, which is what children are taught at the first training session. This happens as follows: everyone is divided into pairs, the children stand at a distance of 3.5-4 meters from each other, the adults become further away from each other. First, passes with two hands from the chest begin when the ball flies parallel to the floor; then passes with the use of force, when it is necessary to take a step forward, after which a two-handed pass from the chest is practiced with a trajectory, as if playing “dogs”, that is, throwing the ball over an imaginary defender; and finally, the last pass - the ball is sent with both hands to the partner with a rebound on the floor (Scheme 2) . These are the most common and therefore the most important passes in basketball, in addition to them, there are many other types in the game: one-handed shoulder pass, one-handed pass from behind the head, one-handed pass with a rebound from the floor (pictures 3, 4, 5 , 6, 7 and 8) .
Scheme 2
These passes are more for point guards and attacking defenders who often need to pass immediately from a dribble without wasting time grabbing the ball after a two-handed dribble. Players of these roles must pass directly from the rebound to the floor. This is a technically difficult pass, and the ball usually flies very hard and straight. Such a pass, as well as a one-handed shoulder pass, is used in a fast break. There it is important that the ball arrives at the partner, who has gained speed, as quickly as possible so that the defense does not have time to adjust.
There are also hidden passes, passes from behind the back, passes between the legs, passes back, while we must not forget that for a basketball player of the highest rank, the ability to pass with both a strong right hand if he is right-handed and with his left hand is necessary.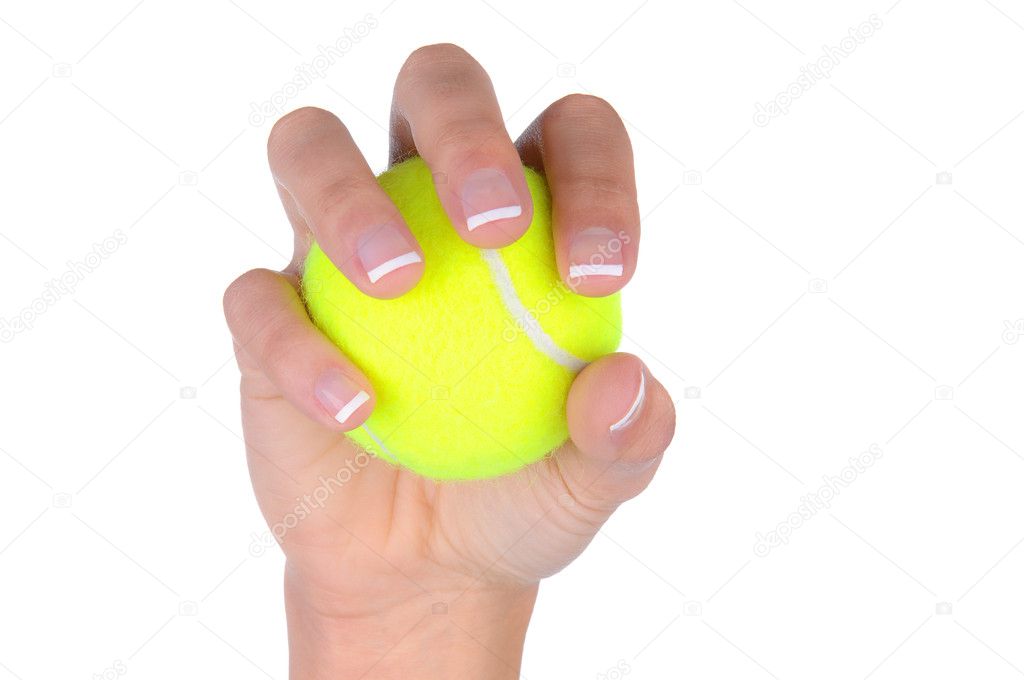 I always remember with delight the point guard of CSKA, the USSR national team and the Russian national team, John Robert Holden - that's who didn't care which hand to pass, but he hit the ring with his right. Holden was right-handed, but passed equally well with both hands, including hidden passes from behind the back or between the legs. Holden was a real professional, he even wrote the book “Blast footsteps” (“Steps into the passage”, the book is not translated into Russian), where he described his entire path from the school team, where he got at the age of 12, and until the last summer before he ended his career with CSKA. Every day he did physical training and work with the ball, “so that the hands do not forget what they feel when they have a ball in their hands,” Holden jokes in the pages of the book. And this is what the athlete says, who in 2007 scored the decisive goal into the basket of the Spanish national team in the final match of the European Championship, and our team, after a huge, 20-year break, again became the champion of Europe.
 This characterizes his professionalism and attitude to business.
Figure 3
Figure 4
Figure 5
Figure 6
Figure 7
Figure 8
It must be understood that independent training is more boring and tiring than teamwork, however, it is possible to work on technical elements, especially on those that turn out poorly, only individually. Sometimes it is possible to involve one of the friends to serve the ball or to represent the defender, but in any case it is a monotonous job, based on many thousands of repetitions of the same movement.
The next important technical element with the ball is dribbling. Basketball is changing rapidly, and the technique of dribbling is also changing. In the NBA in the late 1950s and early 1960s, the best point guard was Bob Cousy, who played for the Boston Celtic. Kuzi was the main point guard, I saw how he dribbles (in my time I watched a lot of games in black and white with him, since Boston won 11 titles in 13 years - 8 of them in a row). The game in the NBA was then much faster than in Europe, and yet Kuzi could afford to dribble the ball in front of him with his right or left hand - he didn’t care. When he ran forward, the ball hit half a centimeter 40-45 in front of the foot with which he took a step - this is very far. In modern basketball, it’s not possible to play like that anymore - the defender will definitely find an opportunity to knock the ball out with such a dribble.
Today, the ball is dribbled not with a strong hand and not with a weak hand, but with the one farthest from the defender, so that it always hits the floor next to the foot, and the foot acts as an additional factor in protecting the ball. If a defender throws his arm forward like a fencer to hit the ball, the leg must protect the ball from the opponent's hand.
Once upon a time in the CSKA children's sports school, my older comrades helped me deal with this technique: Anatoly Blik and Alexander Sidyakin. I learned to dribble the great American defender Oscar Robertson - Olympian 1960 years in Rome. He played for the Cincinnati Royals, now called the Sacramento Kings. I met him when he came to Moscow to train a team of NBA veteran stars that played basketball on Red Square. He is a wonderful, witty and very kind person.
Oscar, playing at the shooting guard position, according to the coach's idea, did not move chest forward or face forward or back forward at all. Oscar moved only with side steps on the court. He rested one shoulder on the defender and dribbled the ball with his farthest hand. And the ball over and over again at each side step fell exactly to a point under the center of gravity, exactly in the middle of the feet. This is the most reliable way to control the ball while dribbling.
An opponent who has the same physical characteristics, and usually people of the same height, with the same length of arms, hold each other in basketball, cannot reach the ball. This allows the player in possession of the ball to have an advantage, allows him to move in the direction he wants, and still look over the shoulders of the guardian with his head up, which is what teammates are doing there. From this position, it is quite difficult to give a variety of passes, only the transfer with the right hand from the shoulder passes successfully if the player dribbled the ball with the right hand, and with the right hand from behind the back. There is nothing a defender can do against such passes.
In my opinion, dribbling is different from speed dribbling - dribbling to dribble an opponent is a certain number of "feints" that are performed at a slow speed. The defender is facing you, and you pretend that you either want to go around him, dribbling the ball with your right hand from the right side, and then go to the left with a sharp “crossover”; or you show with your whole appearance that you are going to slow down, slow down and imitate footwork before the throw in order to get close to your opponent at a distance. As soon as he takes a step towards you, you dive past the foot that took the step and look down. But seasoned defenders don't fall for this maneuver—they tell your intentions from your eyes.
There is a form of dribbling aimed at delivering the ball to a partner. In this case, the ball is driven towards the partner to whom it will be necessary to give the pass, and you are in constant readiness to complete it. As soon as you understand that the opponent cannot intercept the pass, give the ball to your partner - in the exact certainty that neither your guardian nor the guardian of your partner will be able to intercept the pass.
Dribbling is very interesting to train. When I trained as a point guard, I always found moments to knock the ball even in team practice. If I was given any exercise related to special physical training, for which a ball was required, I never drove it just like that, but always performed, for example, a shuttle run. On the speed, but with the ball. I led one length of the court with my right hand, the second with my left, one length with each step I transferred the ball between my legs, the second length with each step I transferred the ball behind my back, that is, I invented additional loads for myself, but they developed confidence.
The main requirement for a basketball player in the field of dribbling technique is to work with him without visual control. The ability to feel the ball, that is, to place the fingertips on the ball at the right distance when dribbling, is similar to the skills of a pianist: the correct distance between the thumb and little finger of the hand with which you dribble allows you to control its rebound. The ball will bounce where you want it to bounce, you don't even have to look at it. At one time, special visors appeared that were worn under the eyes in order to develop the ability to drive the ball without visual control. I didn’t use these, because once my mother and grandmother explained very well why I need eyes: not to watch the ball bounce off the field, but to see what the defender and my partners are doing, to have time to give them a pass while they are open.
This text is an introductory fragment.
5 Basketball Exercises to Move the Ball with Passes
There is nothing better than watching a team move the ball quickly and efficiently around the court without greed.
Overcoming the defense with smart passing the ball to each other, creating situations for open shots and passes is one of the great offensive techniques.
Would you like your team to be able to do this?
Basketball passing exercises in this article will help you with this.
But first let me explain something very important...
There are two types of training exercises:
1. Technique for passing the ball.
2. Decision making during transfers.
Unfortunately, most coaches only focus on the "technical" aspect of training and forget how to train their team's decision-making ability when it comes to sharing the ball.
Your players will not improve their game passing by doing thousands of repetitions of the chest pass.
While technical drills have their place, they are far less important than passing drills with decision making.
We must let the players learn how to read the defense and make the right decisions.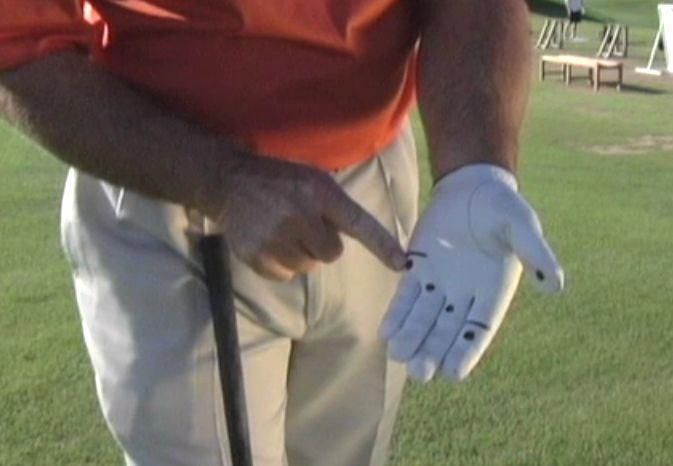
In addition, ball passing exercises are great for starting a workout to warm up your team and get them to communicate and work together.
5 ball passing exercises.
1. Advance
How the drill works:
Players form 3 columns evenly distributed along the end line. The two outside players start with the balls.
3 players advance across the court passing the ball back and forth to the middle player and then finish the exercise with two shots from under the basket.
Purpose:
A fun passing exercise that works on catching and passing without running, with communication, timing, and shooting from under the basket at game speed.
Formation:
Players form 3 columns behind the end line.
Two players on the outside lines have balls.
Instructions:
3 players (1, 2 and 5) begin to move forward on the court. The 1st outside player passes the ball to the 2nd player in the middle line.
Immediately upon receiving the ball, the center line player returns the ball to the same player on the touchline.
The 1st middle player then turns to the other side and receives a pass from the 5th outside player and immediately returns the ball to him.
Outside players may use 1-2 steps to avoid running.
The exercise continues until the players reach the opposite 3-point line. When this happens, the two outside dribblers go to the basket and shoot.
The group then waits at the opposite end for the rest of the groups to complete the exercise before starting the exercise on the other side. On the right scheme at the top, the three players (4, 3 and 2) continue the exercise according to the scheme described above.
Options:
Medium or 3 point shots. Instead of ending with a run to the basket, players may end with mid-range shots or 3-point shots.
Back and forth - instead of waiting at the other end, the troika can complete the exercise to both ends of the court. Only now the threes are placed on both end lines and begin the exercise when the three from the opposite side return to their half of the court.
One Ball - If you are coaching very young players, you can run this exercise with one ball until the players understand how it works.
Coach's notes:
Passes must be passed on the move in front of the player using proper passing technique.
The receiver must keep his hands at goodie level, showing 10 fingers and calling for the ball to be passed to him.
The middle player must catch the ball and quickly pass the ball to a running partner. Don't run!
Shooting technique from under the basket is very important in this lift. Watch your footwork and make sure all players are doing it right.
2. Monkey in the middle
How the exercise works:
Players are divided into groups of three.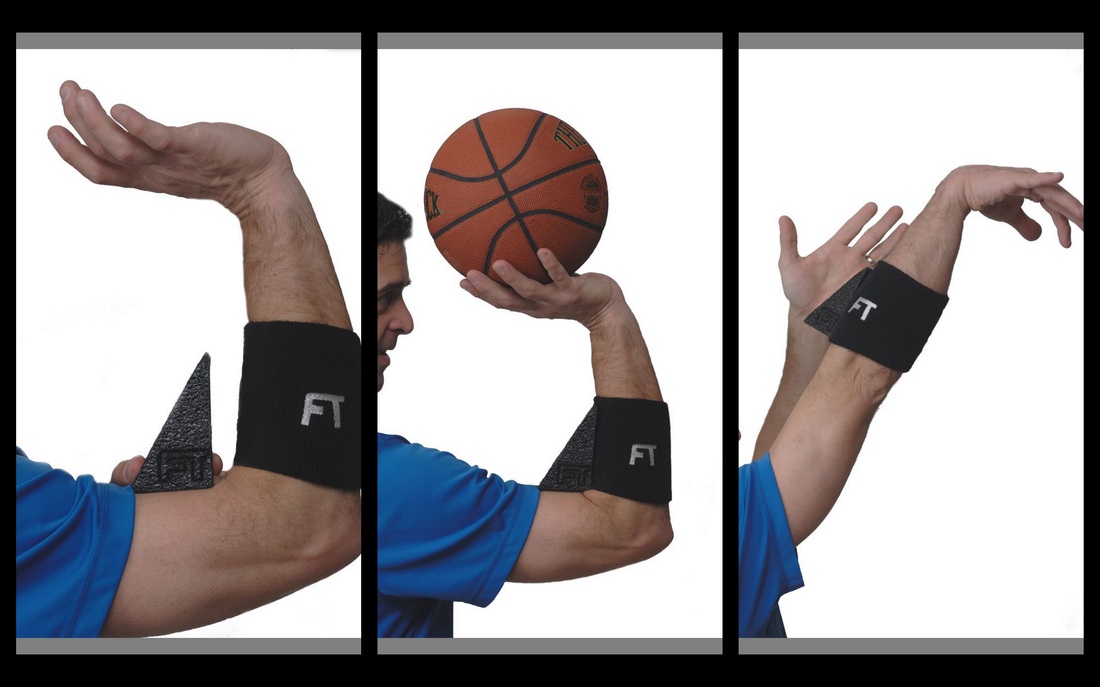 Each group has one ball. The two transmitters lined up 12 to 15 feet apart. The third player in the group is the "monkey in the middle". He tries to hit or steal the ball. The two outside players must pass the ball to each other without using cross passes or dribbling. Simply turning and using feints to open up the passing line and pass the ball past the defender.
Target:
A fun exercise that works on defense at the same time. This exercise will teach players how to use feints and turns to create a passing zone and also to protect the ball.
Formation:
• Groups of 3 players.
• Each group has one ball.
• The passers are lined up 12-15 feet apart with the third player (back) in the middle.
Instructions:
1. The drill begins with the defender attacking the player who starts the drill with the ball.
2. The attacker uses feints and pacing to pass to another attacker while the defender attempts to parry or intercept the pass.
3. After each pass, the defender rushes towards the ball carrier and tries to press the ball again.
4. When the defender recovers the ball or kicks the ball, the players change positions.
Variations:
Change after a certain time - Players can change
positions after a certain period of time (depending on the age of the players, their strength and stamina), and not after each interception and elimination. For example, 30-40 seconds.
One dribbling available. Let the attacking players hit the ball once to the floor to open up the passing corner. It will be tougher for the defender.
Only bounce passes allowed - To make it more difficult for the attackers, allow them to only bounce passes.
Notes:
• It is very important for a defender to have active arms and legs at all times. This is the best way to intercept.
• Passing players must wait for the defender to recover before making the next pass. The purpose of the training is to learn how to pass and create passing angles.
• If there is no set time, the offensive player must not hold the ball for more than 5 seconds without passing the ball.
• No passing in an arc! They make the drill too easy for the attackers and will not lead to improvement.
3. Swing passes
How the exercise works:
The team is divided into 4 groups in the corners on half the court. The players make a pass to the player on the right, who start running along the sideline towards the endline. The sender then joins the end of the column into which he passed the ball.
Purpose:
A drill intended to be used primarily with young players or as a warm-up. This training will improve passing the ball on the move, as well as improve reception and passing without dribbling.
Lineup:
• The team is divided into 4 groups. One group located in each corner.
• The first player in one of the groups has the ball.
Instructions:
1. The ball carrier 02 starts the drill passing the ball 01 to the player on the right.
2. Before passing the ball, the receiver must start running in the direction of the next group, where he will make the next pass of the ball.
3. 01, having received the ball, passes it to player 05, who starts a dash towards 03.
4. After each pass, the passer joins the end of the group where the ball was passed.
5. The exercise continues according to the same scheme with passes and jerks of the players along the square in the same direction.
6. After a certain period of time, the coach changes the direction of the passes.
Options:
Turn on the second ball. If the players perform confidently, then you can enter the second ball in the opposite corner.
Different types of passes - The drill can be performed with one or two hand passes, bouncing, etc. One Dribbling - Players are allowed to make one dribbling before passing to the next player. This can be useful if you are passing with one hand.
TIPS:
• The receiver does not need to slow down or speed up to catch a transmission. Transfers must be accurate, timely and forward.
• The receiver must initiate the snatch in a timely manner with arms outstretched to assist the passing player in making a timely and accurate pass.
• It is very important that you do not interfere in any way while exercising. Don't let them fall into this bad habit.
• Begin the exercise at medium speed at the beginning until the players understand it. Then increase the intensity.
4. Bronze gears.
How the drill works:
Starting at the end line at the edge of the penalty area, pairs of players pass the ball back and forth using different passes as they run across the court to the other end line. When they get there, they move closer to the touchline and come back using various passes over the players in the middle of the court.
Purpose:
An excellent warm-up that provides many passes in a short amount of time. Including passes of various lengths and types for players in training.
Line-up:
• All players find a partner.
• Each pair has one ball.
• Pairs split into two columns behind the endline at the edge of the SR.
Instructions:
• 1. The first pair move to the opposite side at a slow pace in the middle of the court, passing the ball from the chest to each other.
• 2. As soon as the first pair is closer to the 3-point line, the next pair starts.
• 3. When the first pair of players reach the opposing endline, they move to the touchlines and return, passing the ball over the pairs of players moving in the middle of the court.
• 4. When the players return to their starting position, they rejoin the pairs in the middle of the court and continue continuous training.
• 5. Every couple of minutes, change the type of passes players make for middle pairs and outside pairs.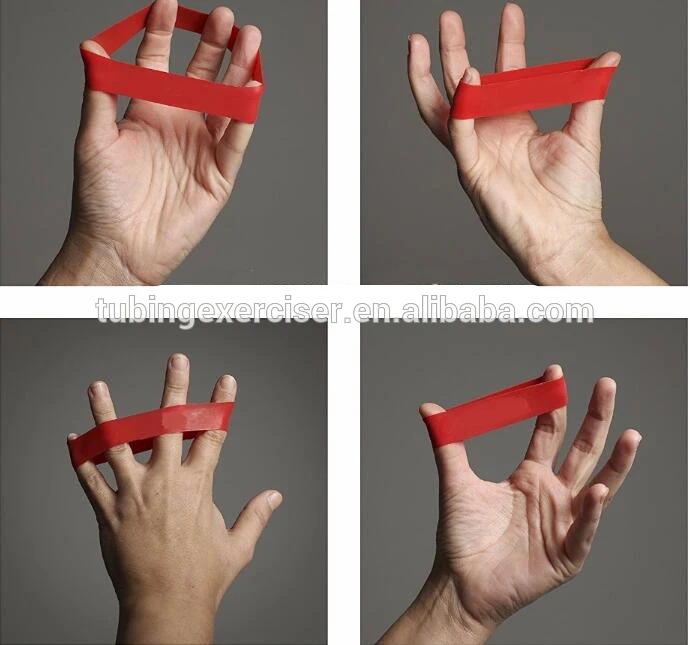
Options:
Gears for pairs in the middle. For the mid lanes, there are several types of passes that I recommend: from the chest, with a rebound, one-handed from the chest, and one-handed with a rebound.
Outline Passes - For outside lines there are several types of passes that I recommend: chest passes, overhead passes, one handed passes.
Remember to consider your team's age, strength and skill level when deciding which passes they should use during practice.
Tips:
• Follow the pace of the exercise; especially if it is used as one of the warm-up exercises. Walking should not be allowed, but too much traffic should also be avoided. Accurate transmission is the main focus of training.
• Players on the outside lines must not make too many passes in an arc and with a very high trajectory on their passes. They should be at a height that is safe enough not to hit the midlines, but straight enough to reach your partner quickly.
• The ability to pass the ball with either hand is an important skill to develop. Expect mistakes when your players first perform a drill, but make sure you train them properly.
• Footwork is very important during this workout. Players must be able to catch the ball and pass back to their partner in two steps. If you are training young children and they cannot pass the ball at speed yet, slow down the pace of the exercise.
• After each run around the court, players must switch to the sides so that they practice passing short and long passes from both sides of their body.
5. Netball
How the exercise works:
Regular battle without dribbling the ball is allowed at any time. Games can be played 3 on 3, 4 on 4, or 5 on 5.
Target:
An excellent exercise that improves not only passing the ball, but also moving without the ball, setting up, jerking, etc. This exercise will lead to less use of dribbling in games and fewer losses.
Lineup:
• Divide the players into two teams based on the number of players available for training.
• Try to make teams of the same height and skill level.
• Only one ball is needed for training.
Instructions:
1. Teams play normal full game - no dribbling!
2. The exercise is performed within the time specified by the trainer.
3. Start with the arrangement shown in the diagram.
Point system:
• The game is played up to either 5 or 11 points.
• Each 2-point roll is worth 1 point.
• Each 3-point roll is worth 2 points.
• Must win by 2 points.
• In the event of a shooting foul, the offensive player throws one free throw for 1 point.
Variations:
One Shot Allowed - Players are allowed 1 dribble when they gain possession of the ball. This is not a requirement, just an option.
Only bounce passes allowed - Restrict your players to using only bounce passes.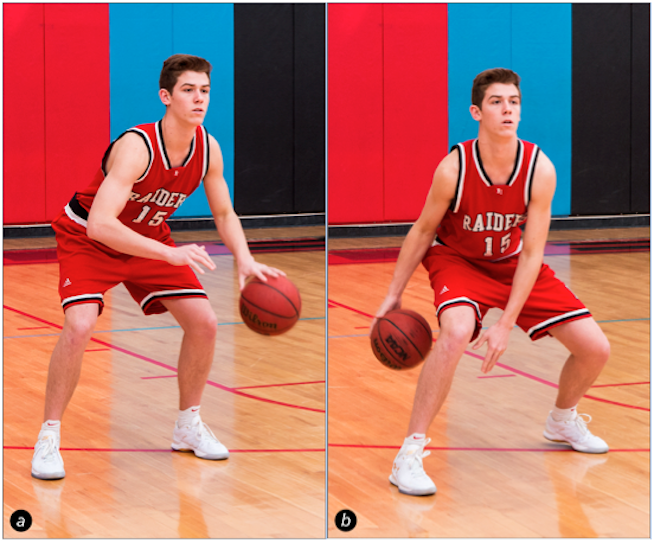
3 teams. The exercise starts by dividing your team into 3 groups of 3 to 5 players. Two teams start defense in each half. The third team is in the middle of the court on offense. The offensive team chooses one side and tries to score the ball without dribbling. Same scoring system as above. After a goal is scored or the possession of the ball is changed, the defensive team receives the ball, attacks in the opposite direction. The previous offensive team may play defense up to the center line of the court. Play until one team reaches 5 or 11 points.
Tips:
• It is very important to give players instructions on how to spread wide and make smart runs to get the ball.
• If you need to step in to make adjustments or re-emphasize the most important points of the exercise (distance, snatches), step in but keep it short.
• All passes must be at least 3 feet long. Don't let the players run up and pass the ball from each other's hands.
• Footwork is important in this exercise.