Home »
Misc »
How to hold the basketball with one hand
How to hold the basketball with one hand
How to grip the basketball and use your hands for a perfect release
How you grip the basketball is critical to a consistent release.
There are so many details that go into holding the ball and using each of the hands in order to become a great shooter.
If you can get consistently close to an optimal grip and release, then you stand an excellent chance of developing repeatable form.
Use these details to start to develop your own system of drills to isolate the habits, and layer drills. Or skip to the front of the line and get my my proven system of drills in my SHOT DEVELOPMENT SYSTEM – PURE RELEASE.
THE GOAL OF THE HANDS
As I’ve mentioned in other posts, our goal when we shoot is to create as much Positive Power in the shooting motion as possible. Positive power is any energy that is straight up and in line with the hoop.
Since it is your hands that are actually TOUCHING the basketball, it is going to be critical that we create as much positive power with our hands as we possibly can.![]()
We want to avoid the shooting hand pushing the ball off line in one direction and the guide hand pushing the ball off line in the other direction, and then trying to perfectly synchronize those two motions to create positive power. It is POSSIBLE to do, that but the MORE you have compensate, the harder it will be to be consistent.
Instead, try to build a one-handed release with one hand pushing the ball towards the target.
Need help creating positive power but have no idea how to do it? Want to build a true one-handed release? CLICK HERE TO GET MY SHOT DEVELOPMENT SYSTEM – PURE RELEASE.
START BY MEASURING YOUR HAND
This is one of the key building blocks that so many people miss. They build their shot around assumptions, or theory, but not their actual body.
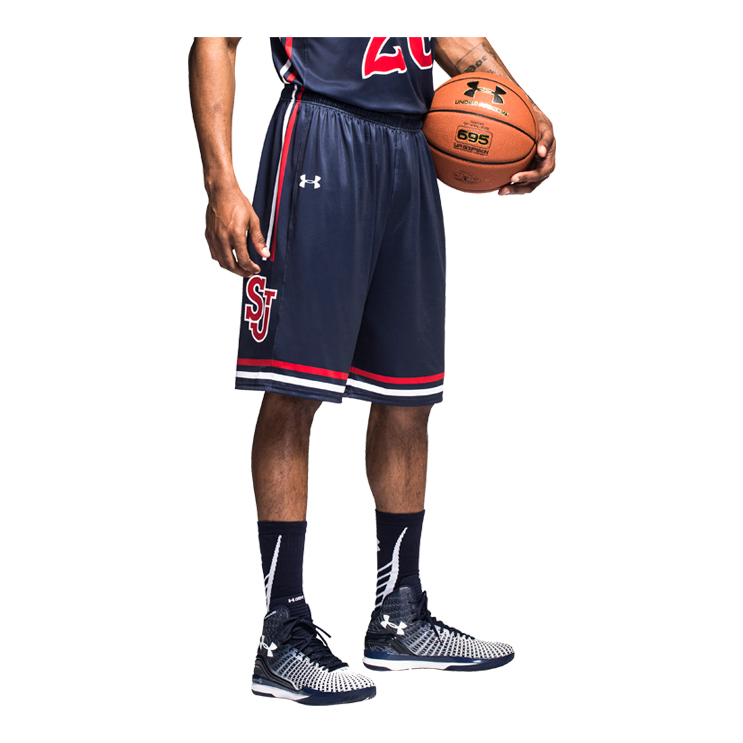
Start by gripping the ball with your shooting hand wide and your thumb comfortably spread out. Place your index finger (pointer, forefinger) on the air valve of the ball.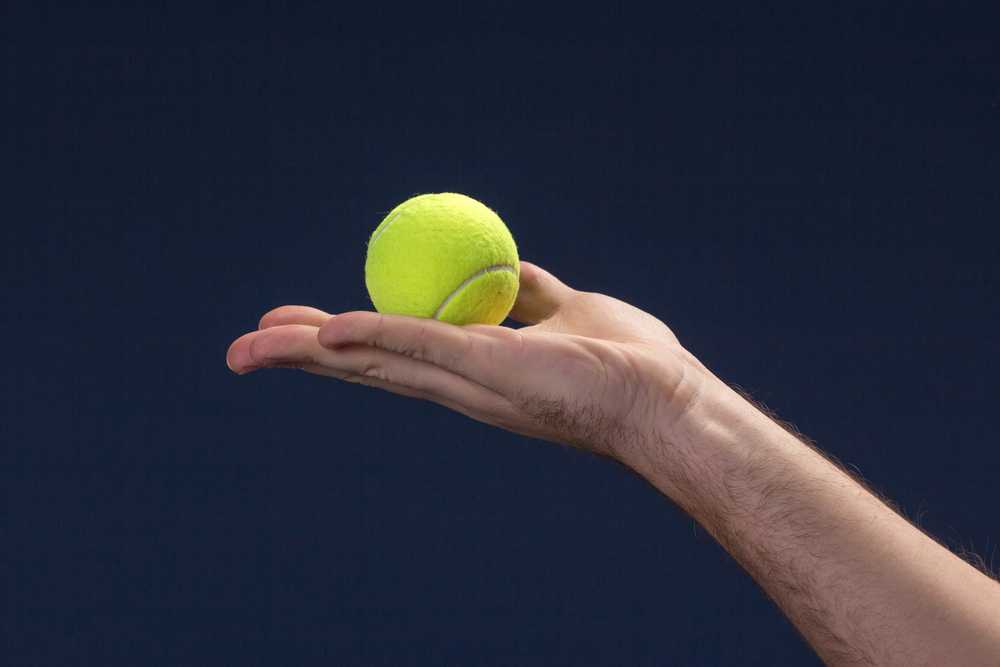 Then place the ball on your hip so that you have your guide hand free. With your guide hand, measure the distance from the tip of your index finger to the tip of your thumb. Then compare that distance to the tip of the index finger and the tip of the pinkie.
I
‘ve measured over 10,000 players hands over the years at camps, clinics, and my own personal workouts. I’ve found that 90-95% of players, when they grip the ball with a wide thumb, the index finger is the middle of their grip. About 5% of players might find that the center of their grip is in between the index finger and the middle finger.
I’ve never had anyone grip the ball correctly and find that the middle of their grip is the middle finger. If you do, make sure that the thumb is spread out wide. If the thumb isn’t wide, your hand won’t be as big as it could be, and won’t control the ball as well as it could.
Need help isolating this important skill, then learning to apply it into games? Click here for my SHOT DEVELOPMENT SYSTEM – PURE RELEASE and get all the drills you need to build the habit!!
MIDDLE OF THE HAND UNDER THE CENTER OF THE BALL
Once you know where the middle of your hand is, we need to work to get the middle of the hand under the center of the ball.
Just like in billiards, the ball will go in the opposite direction of where force is applied to it. If your hand applies force to the very bottom of the ball, the ball will go straight up in the air. And if we apply force near the bottom of the ball but slightly to the right side, the ball will go up but slightly to the left – even if we try to lift straight up in the air. Same thing on the other side – if your hand is slightly on the left side of the ball it will push the ball slightly to the right.
Our goal is to get the middle of the shooting hand under the center of the ball at the release of the ball. To make that easier, we want to get the middle of the shooting hand under the center of the ball at the set point. We may not be able to do this perfectly, but the closer we can get, the more accurate we have a chance to be.
Need some drills for getting your shooting hand under the ball? Then need to learn how to layer drills so you can apply the habit at game speed? GET MY SHOT DEVELOPMENT SYSTEM – PURE RELEASE.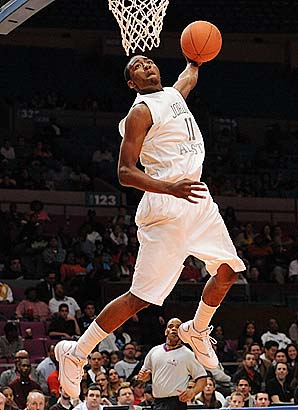
SHOOTING HAND FINGER PARALLEL TO THE TARGET LINE
This is one of the most overlooked keys to shooting. The angle of the finger on the middle of the ball.
Coaches tend to refer to getting the “elbow in” without realizing why it matters. But let me say this first – the position of the ELBOW doesn’t really matter, the elbow isn’t touching the basketball. We can, however, use the elbow as a cue to get the finger into correct alignment. So saying “elbow in” isn’t WRONG, it just doesn’t fully cover the issue.
When a player can get the finger of their shooting hand parallel to the target line, it will remain on the very bottom of the ball throughout the wrist snap. If the finger isn’t parallel to the target line, it will eventually come off the middle of the ball as the wrist snaps, and push the ball off line.
Also be aware that you can get your “elbow in” too much. It is most common/natural for a right handed shooter to let their elbow relax outward, and the finger to come out of alignment in one direction, but it is equally bad to get the elbow “too far in” and have the finger be out of alignment in the other position.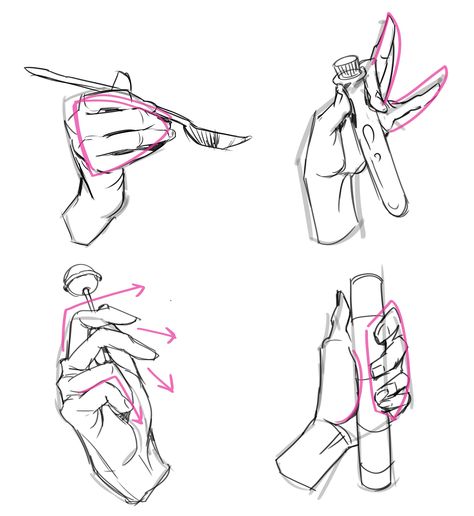
Do you have a tendency to push the ball off line on your release? Click here to start building a Pure Release.
GUIDE HAND COMING OFF THE BALL AT THE SET POINT
Once the shooting hand is in the correct position, we can focus on getting the guide hand off the ball.
Players and coaches both need to remember that if the guide hand pushes at all, it will push the ball off line. Even if the motion that the guide hand makes appears to push the ball FORWARD, it will push off line since it is on the side of the basketball. The only way you can truly push the ball on line is from the middle of the ball, and there isn’t enough room for two hands there.
So the role of the guide hand is to simply help hold the ball stable in the shooting hand as the two hands lift the ball. At triple threat position, a player needs the guide hand to play a role in holding the ball, otherwise the ball will fall out of the shooting hand. Same thing as the player lifts the ball – if the guide hand is removed when the ball is at chest height, the ball will fall out of the shooting hand because it isn’t under the ball yet.:no_upscale()/cdn.vox-cdn.com/uploads/chorus_asset/file/1396862/hands.0.png)
The guide hand needs to support the ball until the shooting hand can fully get underneath the ball and support it by itself. That occurs around the set point. And that is when the guide hand should start to come off the basketball, though it might not actually release from the ball until a fraction of a second later.
Does your guide hand push the ball off line? Need a progression of drills to help with this? MY SHOT DEVELOPMENT SYSTEM WILL TEACH YOU ALL THE DRILLS I DO WITH MY PRO PLAYERS
GUIDE HAND ON THE SIDE OF THE BALL
The positioning of the guide hand on the ball will play a large role in how easily or how well it can come off the ball.
Keep this in mind… it is POSSIBLE to get the guide hand off the ball or even make shots from ANY hand position. But our goal is to make the movement as simple as possible, because SIMPLE IS REPEATABLE.
So our goal is to find the most simple position that the hand can assist in the lifting motion, but not interfere in the shooting motion. I encourage players to hold the ball so that the guide hand is on the very side of the basketball with the fingers pointed at the ceiling when the ball is at the set point. From that position, all the guide hand has to do it come off the ball a fraction of an inch, and it is out of the way and passive in the shooting motion.
If a player grips the basketball with the guide hand towards the top or front of the ball, the guide hand will need to make a bigger move to release from the ball. The bigger move means more time, and more room for error.
Now, it may be necessary at times to catch the ball with a larger separation in the hands because a catch was challenging and needed to be more secure. But understand that makes the SHOT slightly more challenging. We can work on the skill of catching the ball better, but there will always be some variability in the hand position on catches just because catching and shooting are two different skills, with two different ideal hand positions.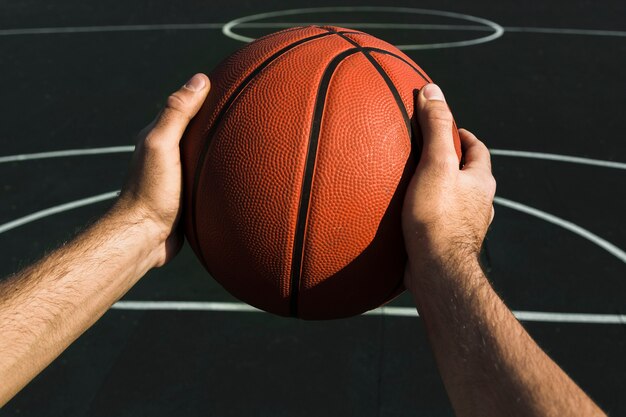 Continue to work on the habit of simplifying your hand position, not intentionally making it more difficult.
Need help getting your guide hand off the ball cleanly? CLICK HERE TO GET THE HELP YOU NEED TO MAKE MORE SHOTS.
WHY DOES IT LOOK LIKE SO MANY PEOPLE SHOOT OFF THEIR MIDDLE FINGER?
This is a common question and requires a deeper understanding of shooting form.
First of all, no one’s shot will be perfect, especially in game situations. And being “perfect” doesn’t mean you’ll make every single shot, just like being “imperfect” doesn’t mean you’ll miss every shot. Being better will simply give the shooter a BETTER chance of making each shot.
In order to simplify the shooting motion as much as possible, I’d like a player to get the middle finger under the middle of the ball at the set point, then lift the ball straight up in the air so that both sides are being lifted evenly, and then releasing off the finger that is the middle of their hand.
But many players appear to release the ball off their middle finger? Why?
The shooting motion is short and violent. The wrist is snapping quickly and there is a lot of variability in how the ball leaves a players hand from shot to shot. Even two swishes can come off a great shooter’s hand differently.
This is why I concern myself far more with the position of a player’s hand at the set point, rather than the release.
Secondly, most players don’t hit a perfect position creating ONLY positive energy. They start off with the shooting hand slightly on the right side of the ball (as a right handed shooter) and start the shooting motion pushing the ball slightly to the left. Then, as they lift the ball, the shooter rotates their hand under the ball so that their middle finger is under the center of the ball, more hand is on the left side of the ball, and finish pushing the ball to the right.
This happens all the time, but that small rotation is something we want to try to either minimize or eliminate from the shooting motion.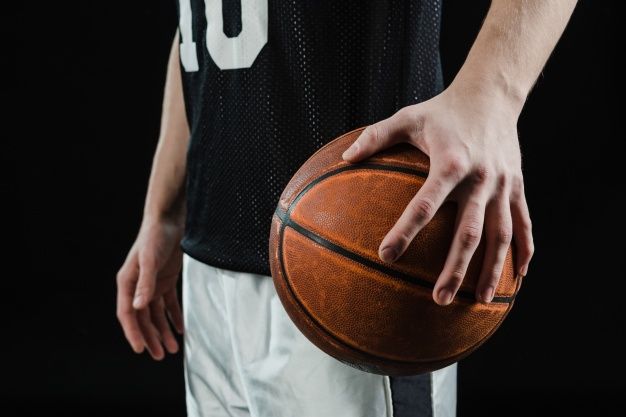
Have you struggled to be able to do this in games? It might be because you never layered drills so that you could APPLY what you were learning. Finally break the habit once and for all with my SHOT DEVELOPMENT SYSTEM – PURE RELEASE.
HOW DO I BUILD THESE HABITS WITH MY NBA CLIENTS?
Building habits in the grip and release requires attention to detail and patience.
I focus on isolating the habit that needs work. In many cases, this can look like standing close to the rim, taking as much time as needed on each shot, and holding the correct position for a couple of seconds before shooting.
From there, as a player gets better at the new, isolated skill, I will start to layer in other drills to make the situation more like a game. The more their habits progress, the more layers I add.
It is a process that takes a lot of experience, so it is difficult for me to explain in a single blog post.
That is why I created my Shot Development System “Pure Release”.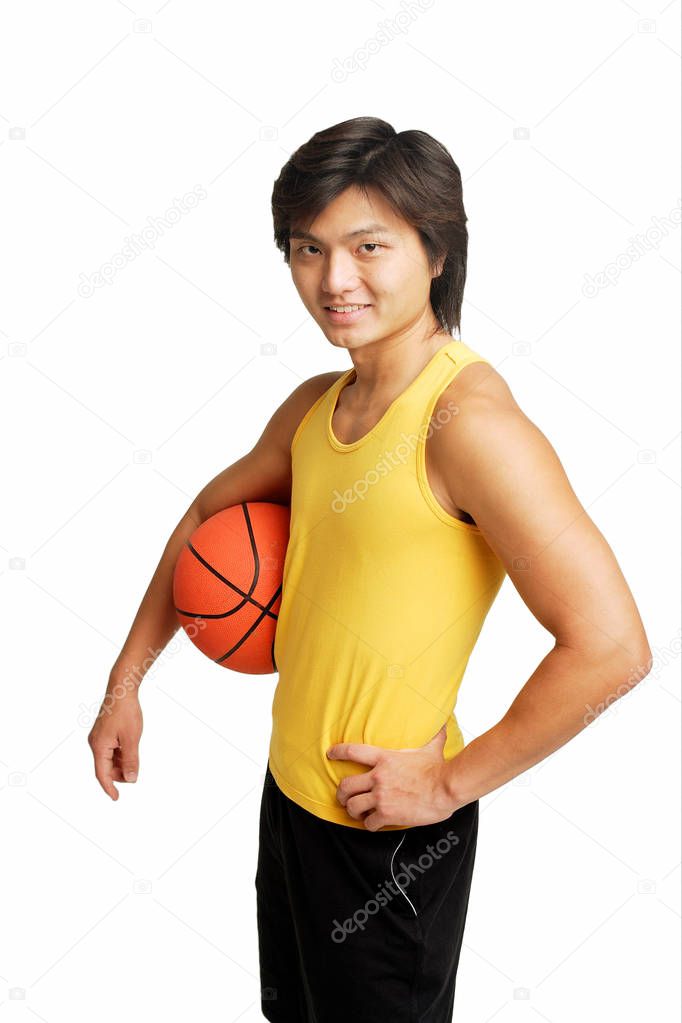 All the drills that I use with my NBA players, laid out in order in video form. Stop guessing what to work on. Start getting results.
You get:
- 60+ Videos of drills and tips
- 2 hours of video content
- Everything laid out in order to remove the guesswork
- Life-time access
You can get “Pure Release” by CLICKING HERE.
How To Become Better At Palming A Basketball
Michael Jordan is famous for his big hands (even by NBA standards) and he often used his palming ability to his advantage on the court.
It’s also an essential skill in order to be able to consistently dunk a full-sized basketball.
When I set my goal to be able to dunk a basketball back in 2016, there were two major obstacles.
The main obstacle was being able to jump high enough to get the ball above the rim, and the second was ensuring I could keep a ball under control in order to successfully dunk it without sending it flying off course.
I spent 8-weeks working on my vertical leap. After that, the only thing holding me back from being a good dunker was my ability to consistently palm a basketball.
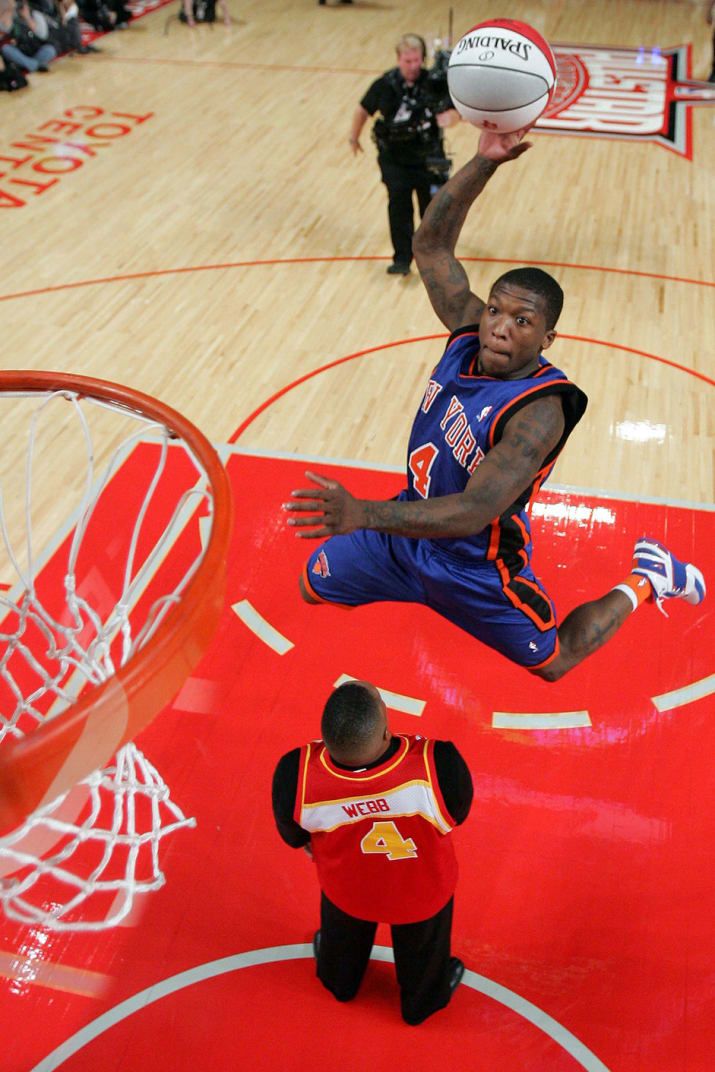
Big jumps aside, solid palming is essential during the slam dunk
Luckily, I found that training to palm a basketball wasn’t as hard as I expected, despite my smallish sized hands.
I’m first going to discuss two important factors that influence your palming ability, hand size and palming technique, and then cover some methods which will improve your ability to palm a basketball.
Requirement 1: Hand Size
It should be obvious that hand size plays a big role in your ability to palm the ball.
You can have fantastic power and technique but the closer together your fingertips are, a smaller amount of the total pressure will apply an inwards force on the basketball.
Imagine your hand is one inch long – it doesn’t matter how much grip or power you exert, the ball won’t stick. It’s simple physics.
So, is there a ‘bare minimum’ hand size?
Well, technically there isn’t a single measurement that determines whether or not you are capable of palming a basketball.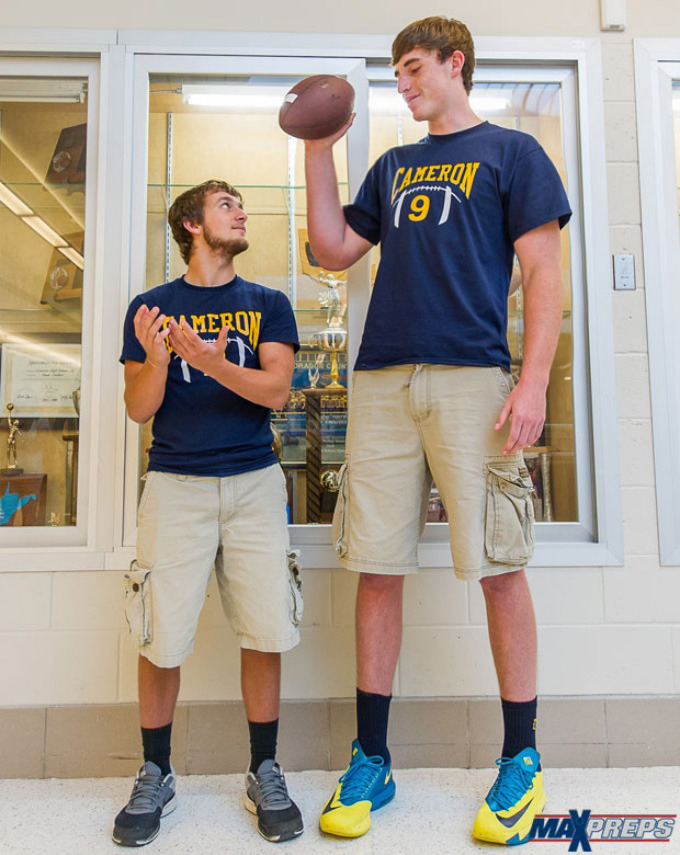
It’s not just about hand length (measured from the wrist to the top of the middle finger), but also hand span (the distance between your thumb and pinky when you spread your hand out). You could have a relatively short hand length, but have really wide hands, for example.
In addition, finger/grip strength is also part of the equation. You can make up for having smaller hands with greater grip strength.
Your hand size will determine how easy or hard it is to palm a basketball
However, realistically speaking, to be able to comfortably palm a basketball after training technique and strength, here are some ballpark minimum figures.
Hand Length: 7.5″ (this is slightly over the average male hand length of 7.4″)
Hand Span: 8″
With these measurements palming a ball might be a little tricky at first, but if you train your technique and grip strength you’ll ultimately be able to palm the ball fairly comfortably.
People with smaller hands might be able to palm the Basketball, but technique would need to be even better.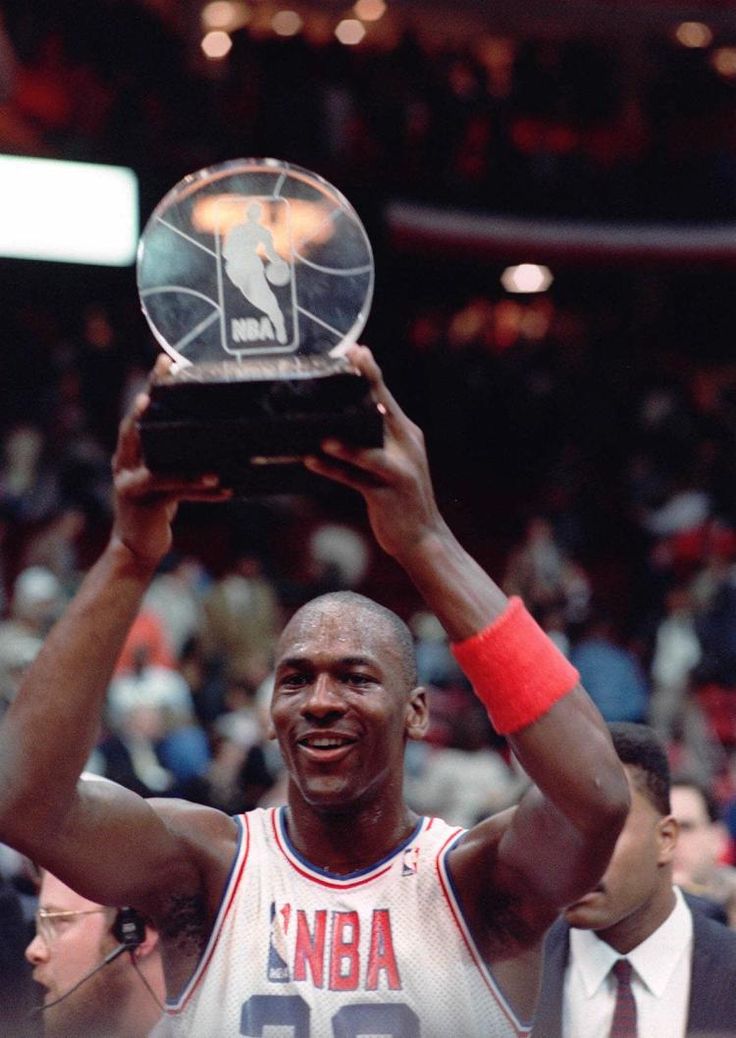
For reference, in the NBA draft combine, the smallest hand length you’ll see is typically around 7.75″-8″, although there have been years featuring players with a 7.5″ hand length.
How To Measure Your Hand Length and Span
You will need a standard ruler to find out your own hand measurements.
To measure hand length, measure from the base of your hand (where the wrist begins) to the top of your middle finger.
Fig. 1: Measuring Hand Length
To measure hand span, spread your thump and pinky as far apart as you can across a ruler, as shown below:
Fig 2. Measuring hand span
Requirement 2: Strength and Technique
There is definitely more to palming a basketball than pure hand size. In fact, your palming skill is extremely important and will be an equally important factor as your hand size.
Most players didn’t just pick up ta basketball from day 1 and have the ability to palm it securely – unless they’re Michael Jordan.
Basketball players will often subconsciously be practicing palming the ball when they have the ball in their hands.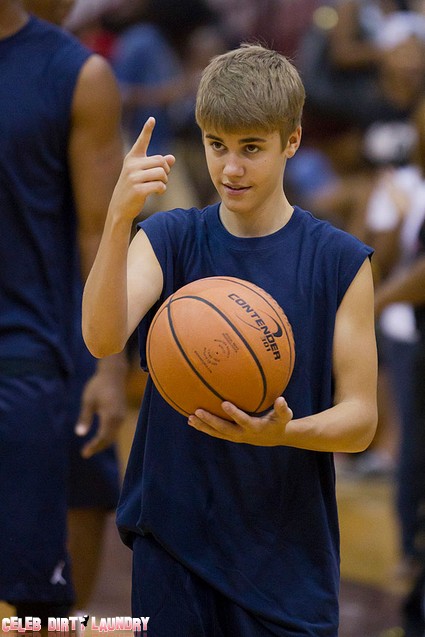
Once you are able to palm the ball fairly well, it’s just a matter of spending more and more time palming the ball to maintain your ability and further strengthen the muscles involved in palming.
To get to that point, you need to work on your grip strength.
When it comes to grip strength, you need to keep in mind that there are three different types:
- Crush Grip: Grip between fingers and palm that gives you the ability to ‘scrunch’ something – think shaking hands, crushing a beer can.
- Pinch Grip: The grip between fingers and thumb. This is what matters most.
- Support Grip: The grip needed to keep hold onto something – e.g. holding onto a bar during deadlift/pull-ups
For many people, hand grippers spring to mind when they want to improve their hand grip. These things strengthen your hand flexor muscles you use to crush things, but when it comes to palming a basketball, there are more efficient ways of training.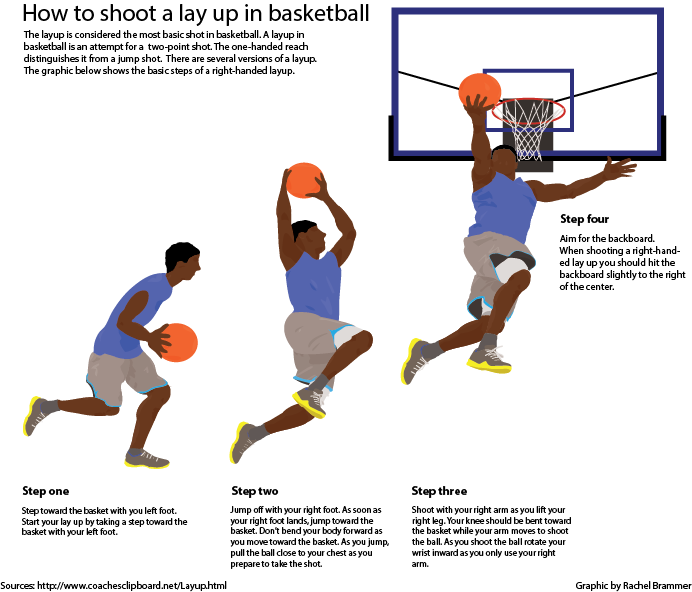
Hand Grippers aren’t very helpful because they don’t reflect the grip used for palming a basketball
The crush grip and support grip are not as important for the purpose of palming a basketball. What needs to be your main focus for training is your pinch grip.
Strengthening Your Pinch Grip
Now that we’ve established that you need to strengthen your pinch grip in order to comfortably palm a basketball, let’s go through some exercises you can do to do that.
Fingertip Pushups
These are pretty self-explanatory. Perform a standard pushup but instead of having your palm flat on the ground, lift your palm up so your body is supported by your fingertips.
This is a more challenging variation of the pushup, so if necessary leave your knees on the ground to begin with in order to make the exercise easier.
Fig. 4: Fingertip Pushups
Horizontal Basketball Palming
Since gravity is your enemy, you can start out palming your basketball by palming it horizontally – i.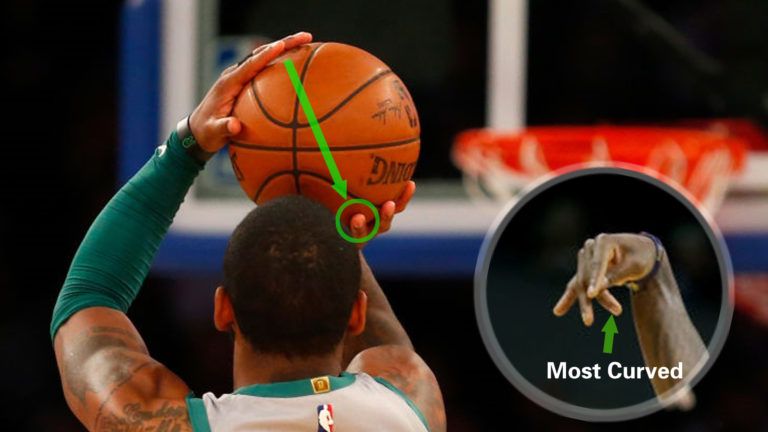 e. parallel to the floor. Since the bottom half of your hand will also be producing an upward force on the ball, it will be easier to palm.
Start palming the ball horizontally to make things easier for yourself
You should feel a burn running down your forearm after doing the exercise for long enough. Don’t overtrain in order to minimize the risk of high muscle tension induced spasm.
Each day, record the maximum number of seconds you can palm the basketball in this manner. You should see continual improvement.
As you improve, gradually start angling the ball towards the floor so that you are less and less reliant on the help you get from the upward forces acting on the ball.
Palming Smaller Balls
When you are trying to strengthen your grip using a basketball, you need to be palming for at least 5 seconds at a time, otherwise your fingers won’t have much opportunity to develop.
If you are unable to do the above exercise for a meaningful amount of time, then instead start off with a smaller leather/rubber ball to practice with.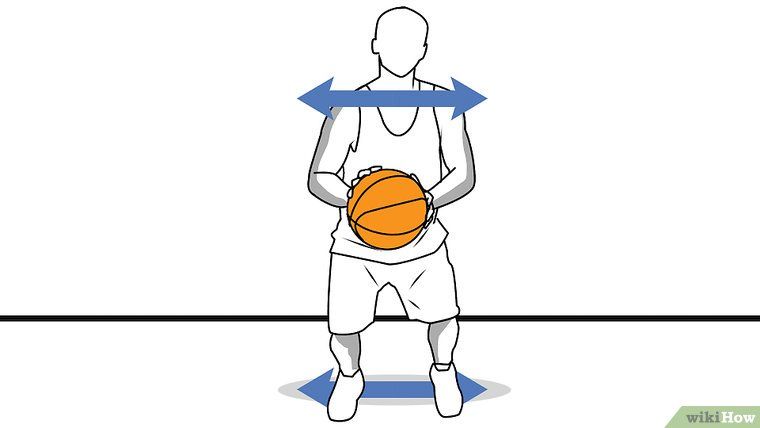
For this purpose, I’d suggest either getting a womens basketball or a handball (handball is a popular sport in Europe, and the ball is significantly smaller than a Basketball).
Try and become comfortable palming either of these smaller balls for 20+ seconds before moving on to a men’s basketball.
Finger Stretchers
Unlike hand grippers, finger stretchers are a great way of training finger muscles in isolation. They can be purchased for cheap online and will strengthen the same muscle groups involved in the pinch grip.
Finger Stretchers are a good aid for learning to palm a basketball
Training with a Climbing Wall
If you want to see people with insane grip strength, look no further than climbers.
Because a climbing wall or natural climbing rocks have random contouring, climbers end up stressing different muscle groups during the course of a climb. As a result, you end up training all 3 kinds of hand grip without even realizing it.![]()
I’ve done some climbing sessions before, and noticed immediate improvement to my basketball palming ability shortly after. The burning sensation going down your forearms and fingers after a session is unlike any other.
‘True’ Palming vs Pseudo-Palming
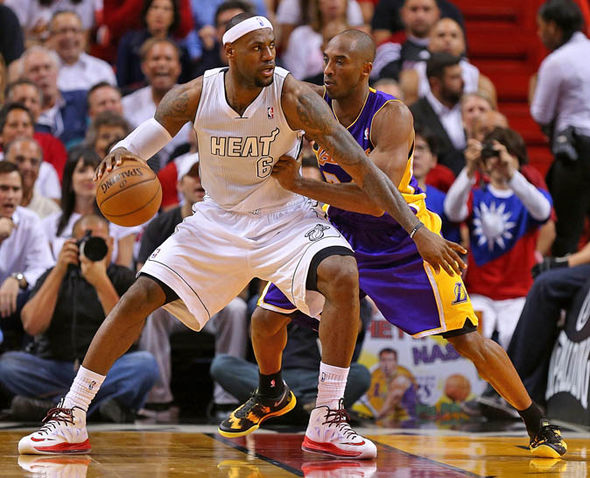
You might have read top players like Kobe Bryant or Anthony Davis can’t palm the ball.
Or how about the story that 6’10 Kevin Durant had to tell photographers he wasn’t able to palm the ball when posing for photos?
Yet Kobe, Anthony and Kevin are some of the most efficient dunkers on court. Kevin and Anthony are big guys even by NBA standards.
The point is even these guys have trouble effortlessly palming the ball in the truest sense, and will typically just cradle the ball during a dunk.
When training to palm the ball, your goal therefore isn’t to be able hold a basketball like a tennis ball. Very few people, even in the NBA, actually have that level of control over the ball.
Instead, improve your one-handed control over the ball and get it to a level that allows you to perform the moves you want.![]() In my case, having enough control to dunk the ball was sufficient.
In my case, having enough control to dunk the ball was sufficient.
Men Before vs Men Now
Ever notice how your dad’s and his friend’s hands typically look bigger and manlier than yours? It’s not just an age thing – the younger generation are in fact getting weaker.
According to a study by the Journal of Hand Therapy, today’s men have a significantly weaker crush and pinch grip than men 30 years ago.
Lifestyle changes have meant that men’s grip strength has decreased over the years
That’s because men’s lifestyles have changed, with a more relaxed, less active lifestyle.
Be it helping with the shopping, going to the gym and doing deadlifts/kettlebell swinging or just playing basketball on a regular basis, you need to get off the computer and get physical.
Grip strength is a strong indicator of strength in general, and if you are finding it difficult to keep a grip on a basketball, your time might be better spent becoming stronger overall than focusing purely on palming in a band-aid manner.![]()
Does The Basketball Make Much Of A Difference?
Yes! Some basketballs are naturally grippier than others. For example, the Wilson Evolution indoor basketball that is popular in college basketball is known to be very grippy. By contrast, the genuine leather official NBA game ball is slightly smoother and harder to palm.
Hopefully this article will help you become better equipped to start working on your ability to reliably hold a basketball. Let me know in the comment section below if you have any other questions!
Basketball coaching hacks: how to score goals for beginners
Even if you are a novice basketball player, we will not give you a training plan, but we will tell you why the ball flies anywhere but into the ring and into your hands. It's all about technique: even with regular training and perseverance, novice adults and children often make simple mistakes. It's a shame, let's fix it. Below are 11 life hacks on how to hone your technique to increase the likelihood of a goal for your team.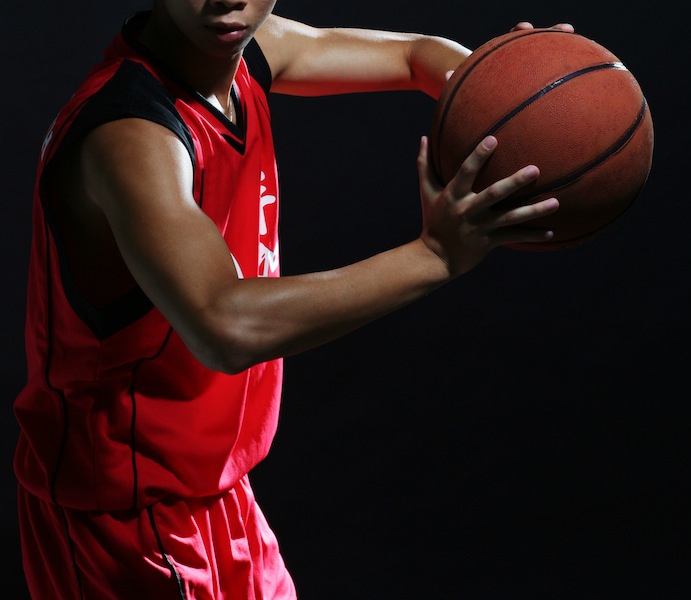
Basketball Shot Rules for Beginners
1. Hands up
In pursuit of the attacker, raise your hands, even if you are standing with your back to the pass, and even more so if the ring is in front of you. Your raised hands will increase the chance of intercepting the ball from the opponent by 2 times. Don't overlook this little thing!
2. Make shield rolls
Even Tim Duncan did not neglect them! A square is drawn on the basketball backboard. If you are standing opposite the ring, then aim at the middle of the upper part of the square, if you are standing on the side, then at the corner. If you hit this square, then the ball is at 90% of cases will fall into the ring. The law of physics and no cheating!
3. Look at the ring, not at the ball
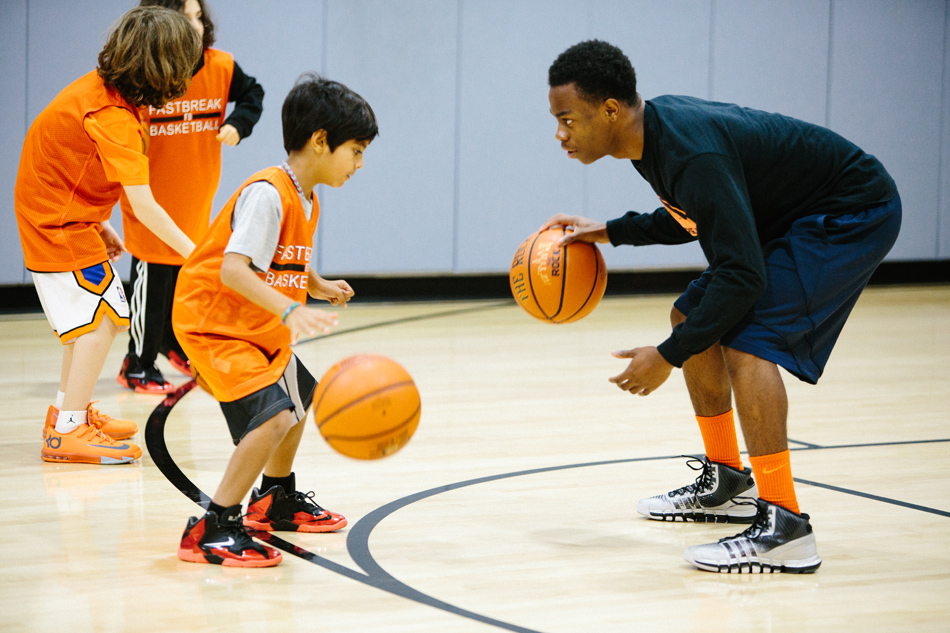
Practice driving the ball with your hand, not your eyes, develop tactile control. Your eyes should be on the hoop while dribbling and be aware of the position of your body in relation to the hoop.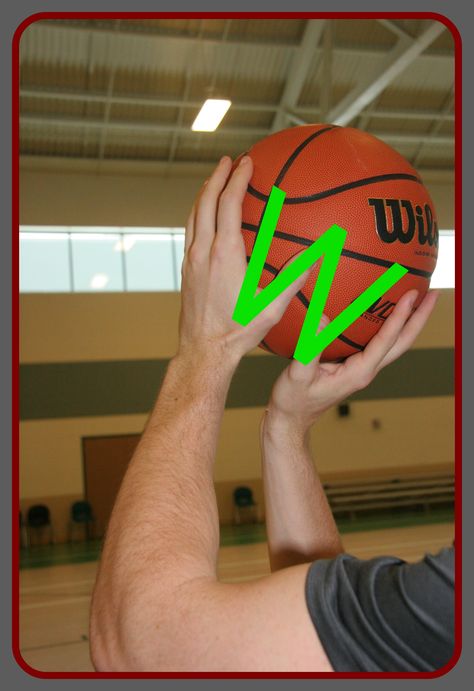 Then you will be able to take the correct posture, and the throw will be effective.
4. Dribble with the balls of your fingers only
The palm should not touch the ball, only the pads of the fingers. Dribbling should become familiar to you, like an extension of your hand. Then you can change its trajectory at any time and you will have more chances to score goals. Practice with the ball constantly.
5. Throw with one hand
If you throw the ball with two hands, you reduce the chance of hitting the basket. All the efforts of the throw are in one hand (in the right for right-handers, in the left for left-handers). The other hand only holds the ball, the leading one holds it with the fingers, not the palm.
6. Do not jump when protecting the ring
Jumping is the main mistake of rookie defenders. To intercept the ball and block the shot, simply stick out your hands. When you are in a jump, the attacker will easily bypass you.
7.

Don't look back
When you dribble, don't look back, but dribble and aim for the ring, focus on shooting (or passing to another player on your team).
8. Bring the throw to automatism
Incorporate the most basic basketball techniques into your training plan and bring the shot to automatism. Throw first from a distance of half a meter from the ring, gradually increasing it. Learn to throw the ball so that it hits the hoop without touching the edge.
Throw the ball with all fives and jump
Throwing Rules:
- Head in the center of the body - if tilted, accuracy is lost.
- Look at the ring: mentally build a trajectory. If you are far away, the ball flies in a curved curve with a maximum height of 2 meters above the hoop.
- A strong hand is in front and throws, a weak hand is on the side and directs, only holding the ball. The elbow of the throwing hand must be in line with the ring.
- The ball must rest on the fingers without touching the palm.
 The fingers are as far apart as possible and grab the ball.
 - Throwing arm bent 90 degrees, forearm perpendicular to the floor. If you bend less, then you get not a throw, but a throwing of the ball horizontally.
The main thing in the throw is the position of the body and its balance. Place your feet apart and parallel to each other: it is important to orient them in the middle of the basket. Then the direction of the body during the jump will coincide with the direction of the throw, and the ball will fly straight into the ring. When the feet are uneven, the ball flies in the wrong direction or does not reach (although the throw was normal).
Take a deep breath and release as you exhale.
How to hold the ball and shoot in basketball
How to throw correctly: straighten your arm, point your wrist up, and with your hand set the ball to rotate in the opposite direction from the flight. The ball should seem to "roll" off your fingers.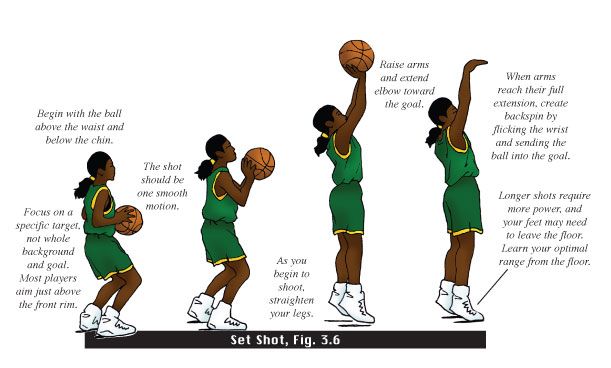
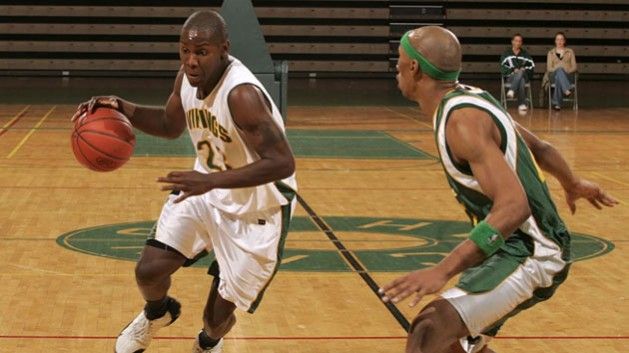
9. Copy masters and play as a team
Watch professional basketball games and try to copy the movements of your favorite players in training. And be sure to conduct game sparring - this will allow you to develop more techniques.
10. Do not throw in a straight line
The higher the arc of the ball, the greater the chance of a goal and the less chance of blocking by the opponent.
11. Do not throw the ball from a full height stand
This is the biggest newbie mistake!
Before the throw, bend your knees slightly and at the moment of the throw, straighten your body, making a jump. You need to straighten up and push off the ground at the same time. When squatting, keep the elbow of the throwing arm close to the body and towards the ring.
The jump will give momentum to the ball and will allow you not to make sudden movements with the brush.
***
And to be a long-term player, do not forget about your health: take care of your joints and muscles, use tapes, do a warm-up. And be sure to strengthen your arms, legs and shoulder girdle, develop coordination. Regular exercises on uneven bars and horizontal bars will help you with this.
10. Technique of throwing with one hand from the shoulder in basketball. Teaching methodology.
B game position legs bent, the same name throwing hand leg in front, feet are parallel. holding a basketball with both hands in front of the right shoulder (if throw with your right hand) somewhere on one level with him.
Hands bent, elbows down, forearms directed upwards forward. unbending arms and legs, basketball player raises the ball above the shoulder above the head, shifting him to the throwing hand. Then, dropping left, continues to straighten his arm with ball up and slightly forward, completing movement with active guiding flexion brushes.
one. Imitation of brush overlap with fixation final position. 2. Holding the ball up on a slightly bent arm, due to dorsiflexion of the hand roll it back and when the ball stays only at the fingertips, sharply bend brush forward, as if hitting the ball (with correct execution of the ball, slightly rotating, flies vertically upwards). 3. Sweeping brush stroke fixing the final position from starting position when the ball is lying on the brush of an almost straightened arm up, and the free hand fixes the forearm of the throwing hand. four. From the initial position of the main phase throw (ball over shoulder, legs half-bent, free hand fixes the correct elbow position) simultaneously straighten legs and arm with the ball, completing the movement active sweeping motion brushes. 5. The same exercise, but performed on accuracy (partner raises his hand up - try to get so that the ball landed on the partner's hand). 6. From the starting position of the main rack carry the ball the shortest distance over the shoulder, bending the legs, and fix this position. 7. Complete execution of a throw to a standing person opposite partner.
11.Technology throwing the ball in motion from under the backboard to basketball. Teaching Methodology .
Preparatory phase: the ball is caught under the right foot (when throwing right hand). The step under which they catch ball, the most stretched. next step should be shortened, locking - the player must push faster and harder almost vertically up. When repulsed from the court the ball is carried over the shoulder and transferred to the rotated part right hand.
Main phase: at the highest point of the jump, the arm is straightened to get as close to the ring as possible, the ball is pushed out with a gentle motion fingers, it is given the opposite rotation.
Method:
1. Throws from under the shield. Players line up in two columns. Each column has two or three ball. After dribbling, head player throws the ball and passes it to his column. Then it goes to the tail of another columns
2. Throws from under the obstacle ring. Player gives the ball to the coach, runs to the ring, receives a return transmission, makes two step, jumping over a chair, and throws along the ring. Objective: jump out when thrown as high as possible, do not touch the chair and be ready to fight on the shield.