Home » Misc » How to improve ball security basketball
How to improve ball security basketball
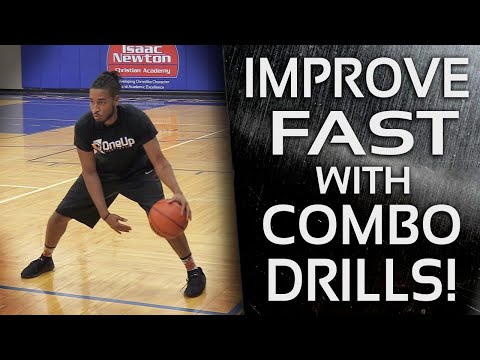
Learn to Keep the Ball Secure with the Dribble Tunnel Basketball Drill
Skip to content
Use this drill to help improve your ability to advance the ball up the court before your next game.
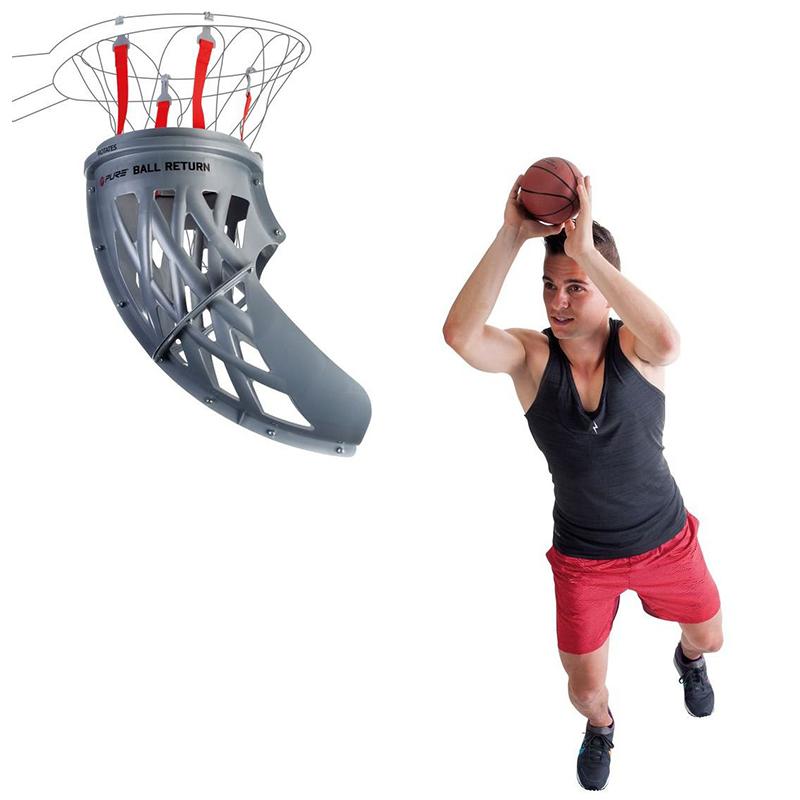
Strong ball handling and ball security on the court puts you in possession of the ball for as long as possible, which means more opportunity to score. To work on those techniques, try the Dribble Tunnel basketball drill.
Basketball camp director and college coach Donnie Arey says that he personally uses this drill to evaluate his players and see if they have the ability to be great ball handlers in a game situation.
To begin, place three cones on the sideline and space them about 4-5 feet apart. Place three more cones on the volleyball line (the closest parallel line from the sideline) and align them with the ones on the sideline. This will be your “tunnel.”
When you’re ready to begin the drill, start at one of the end cones and dribble to the next cone on the opposite line. Once you reach that point, perform a crossover and head toward the cone closest to you diagonally. You’ll basically be attacking the cones in a zig-zag pattern. Get as close as you can to each line without crossing.
At the beginner’s level of the Dribble Tunnel, all you have to do is perform a basic crossover when you reach each cone. Try to create a rhythm by keeping a steady pace as you move diagonally from cone to cone.
To make this drill a bit more challenging, try performing a between-the-legs or behind-the-back crossover at each cone. Try to work on your exchanges so that they’re quick and fluid.
The advanced-level Dribble Tunnel will have you performing three separate moves at each cone: spins, pivots and retreats. During your first go, use all the space you have when you’re performing a spin.
When you perform a pivot, keep the ball tight against your body as you pivot back and forth at each cone. You don’t want a defender stripping the ball from behind during a game.
To start performing retreats, head to the first cone, hit the brakes and bounce back. Make sure these are quick stops and bounces; you’ll lose momentum if you take your time.
“Match the Move,” another advanced-level Drill Tunnel, requires multiple players. It’s just like follow the leader. The starting player will perform a crossover and the player behind them has to follow suit. The faster you’re able to mimic the move, the better.
This drill is great because it replicates the short space you’ll have between you and a defender. If you’re able to keep control of the ball and pick up speed as you move, you’ll be better equipped to get around your opponent and set up a scoring play with ease.
Related Articles
Dribbling – Full Guide to improve ball handling of your players
Dribbling the ball is the action that makes the players drive to the basket. However, are countless players that can not handle the ball. Before presenting a guide of dills to improve ball handling of your players, is important to have some notions about the use of ball handling.
Ball security versus ball tricks
The most important thing on a game is the ball and the security of the ball if we lose consecutively the possession of the ball the odds to win the game are reduced. Unfortunately are countless team cases that lose games because they do not have the capability of handling the ball. It is common to confuse ball security with ball tricks. The simplicity of ball-handling must exist because with the number of tricks with the ball that are created most of the players do not know how to make good decisions with the ball and worse they do not know to secure the ball.
It is our job while coaches to ensure that exist the habit in all practices that we work on ball handling, to not think in tricks with the ball but instead understand if your players know how to handle a ball and make a decision with that.
Dribbling Key Points
To domain the ball handling, I bring four key points:
Before running we need to know how to walk
All players dream to catch the ball and crossover all the defenders, but before it is important to know the fundamentals. Teach them how to handle the ball is determinant so they can then run with her later. Very little time is spent on the basics drills and that results in losing the ball in the key moments (pressure).
Offensive position
Keep a position that allows us to have control of the ball and see the game simultaneously is more important than knowing how to make tricks with the ball. Therefore have a low position, with your legs flexed, straight back, and chin up is a key factor to handle the ball.
Handle the ball next to the body. STRONG
It very uses the referee expressions of the word cylinder. The hand limits each player on the floor it is represented by a cylinder that limits his space, by buttocks and by the outer edge of arms and legs. To have better control of the dribbling, and to do not lose when moving, the player should dribble always with the maximum intensity next to the body exploring the width of the cylinder.
Ball – Body – Defender
The last bullet point is most of the time forget. A lot of the moves that result in losing the ball is the fact of the players do not know to protect the ball. For this is important to keep the principle being always between the ball and the defender. Use the body as a protection shield.
Which drill to improve ball handling?
Keeping in practice all the key points that were previously described, I will present four drills to improve ball handling.
These first two drills are drilling more focused to teach the players how to “walk”.
1st Drill: Dribbling Line
This drill has the goal to teach the players to change directions and keep the dribbling next to the body. For such is need to word on a lower than game speed – “learn how to walk”.
The dynamic of the drill is very simple, put cones forming a line from a free throw line to the other (as in the figure) and with little space between them. Player change direction in each cone and advances to the next one without going over the cone. It is not intended for the players to slalom but “dodge” from the defender (cones). It is important to vary the change directs. In the end, the player finishes with the layup or shooting from mid-range.
2nd Drill: 3 columns
This drill has the aim to teach the ball protection from the defender. For such is necessary to make this drill on lower than game speed, focusing on the following points: offensive position (flexed legs, straight back and chin up), strong dribbling next to the body, and for the last ball-body-defender.
The dynamic is very simple if you have ball enough for your all players put them on the baseline in three columns. Otherwise, you can put three plays with the ball in the baseline and the other three on the opposite baseline without the ball. When the player reaches the opposite baseline, deliver the ball to this colleague and stray in that baseline waiting for his turn. The drill starts with a player dribbling facing the basket and after passing ¼ of the floor makes a protection dribble and change direction. You can vary the changes of the direction (between legs, back, inversion) but avoid changing by front because is easier to kick the ball and lose it.
3rd Drill: Dribble in the open floor after a rebound
It is very common to see players nowadays winning the defensive rebound and go cost to cost at the maximum speed this drill works exactly that.
The drill starts with a player shooting the ball to the backboard and winning in the highest point put it on the ground and changing direction in the two cones and finishing with a layup. It is important to put a limit number of dribbles, I suggest in an initial phase 5 dribbles in the maximum and then reduce to a maximum of 4 dribbles. The changes of directions should be free to seek creativity of the player and not to making tricks – the goal is to run with the ball. It is key to avoid changing direction by front and replacing with simulation inside out.
4th Drill: Dribbling in the open floor after pass
This drill is very similar to the previous one, but this time we seek that player run with the ball after a pass. It is important to keep and the bullet points previous describe, quick-change direction avoiding changing by the front, offensive position, and limit number of dribbles.
This drill can me make in two ways using the two backboards at the same time and the pairs changing roles. It can add another concept of 2×0 as a point guard and rebounder, could be drive and kick, ball screen, hand-off, etc.
Ready to improve your players?
In conclusion, I hope it was understood full the importance of key factors in handling better the ball. More important than the drill itself, or the dynamic, is the application of the key points and the progression. Remind that before teach how to run with the ball is important to teach them how to walk with the ball.
If you already used these key points or even drills or if you any idea that you want to add, please leave a comment here!
Good practices!
Training to improve protection
Training to improve protection
Learning how to move in defense.
1. Move in a defensive stance diagonally backwards. After 3-5 steps, turn around and change direction. Then do the same diagonally forward. 2. Do the same but add hand movements. The far hand works to protect against the transfer, the near hand imitates the capture of the ball. 2-3 sets of 5 diagonals forward and backward.
DETAILS : Increase and decrease your movement speed. Keep your back, don't jump in the move. The back leg drags along the floor.
CHIPS : Emphasis on the first step, it must be fast and taken with the lead foot.
Improving protective actions.
1. Five attackers stand on the perimeter and pass the ball to each other, each of them has a defender. Defenders must change their stance and shift to the correct position depending on the ball. 2. The same, but with active defense, try to intercept or take the ball away. 3. At the signal of the teacher, the player with the ball goes into the aisle. For 30 seconds, then change roles, 3 times.
DETAILS : Defenders must always see the ball, keep their distance, actively use their hands.
CHIPS : The drill will be especially effective if performed without fouls.
Improving protective actions.
1. Stand opposite each other with a partner. The attacker stands still and performs turns, moving the ball to the side. The defender reacts to the attacker's movements and moves accordingly, making defensive movements with both hands in front of the ball. 2. The defender tries to knock out or take the ball away from the attacker. 30 seconds each, 3 sets.
DETAILS : Low stance, keep distance, back straight.
CHIPS : The drill will be especially effective if performed without fouls.
Improving protective actions.
One player (playing) has the ball, two other players - a defender and an attacker. The attacker makes movements (forward / backward, right / left), trying to get a pass from the player with the ball. The defender plays in a closed stance, covering the passing line, making it difficult for the attacker to receive the ball. If the pass is still passed, then the attacker must perform turns (one circle forward or backward) and give a reverse pass to the playing along, and the defender must actively interfere with him, try to knock out or take the ball away. 30 seconds in each role, 3 times (change in a circle).
DETAILS : The defender must always have a view of the ball, keep his distance, actively use his hands. The attacker must perform turns without running.
Learning the basic defensive stance.
From a standing position, take a protective stance at the signal. At the next signal, return to the starting position. 10-15 times.
DETAILS : Feet slightly wider than shoulder width and parallel, arms in line with legs, shoulders relaxed, arms half-bent, palms open towards attacker.
CHIPS : The stand must be very stable. To check this, you can knock a little.
Improving protective actions.
1. Three attackers stand in a triangle and pass the ball to each other, each of them has a defender. The defensive stance varies depending on the ball. If your player has the ball, then a parallel stance with active hand work; if the ball is in the hands of a nearby player (in one pass), then a closed stance with the transmission line overlapping; if the far player has the ball (in two passes), then the stance is open. 2. The same, but with active defense, try to intercept or take the ball away. For 30 seconds, then change roles, 3 times.
DETAILS : Defenders must always see the ball, keep their distance, actively use their hands.
Learning how to move in defense.
Get into a protective stance and move around: 1. Small steps to one side and the other. 2. Small steps to one and the other side with greater speed. 20-30 seconds each exercise.
DETAILS : Leading foot turned slightly in the direction of travel, the "back" foot does not approach the leading, the distance between the legs is maintained.
CHIPS : Emphasis on the first step, it must be fast and taken with the lead foot.
Learning how to move in defense.
1. Move backwards in a defensive stance in a zigzag from the beginning to the middle of the court, quickly, without stopping. Come back with an easy run. 2. Do the same in alternation with acceleration. Start with 2-3 times, and later increase the number of times or distance.
DETAILS : Keep your back, don't jump in the move.
CHIPS : Emphasis on the first step, it must be fast and taken with the lead foot.
Learning how to move in defense.
Move in a protective stance: 1. Back and forth, adding a normal run every three steps. 2. In one direction and in the other, adding the usual run at the command of the coach. 20-30 seconds each exercise.
DETAILS : Leading foot turned slightly in the direction of travel, the "back" foot does not approach the leading, the distance between the legs is maintained.
Improving protective actions.
1. Stand opposite each other with a partner. The attacker dribbles the ball in place with cover, the defender tries to knock out or take the ball away. If he succeeds, then the defender gives the ball back to the attacker. 2. The same, but the attacker moves left and right along the line in 3-5 steps. 3. The same, but the attacker moves diagonally back and forth in 3-5 steps. 30 seconds each, 3 sets.
DETAILS : Keep your distance, back straight.
CHIPS : The drill will be especially effective if performed without fouls.
Learning how to move in defense.
Stand opposite each other in protective stances with a partner. One makes movements, the other repeats after him: 1. The host moves in one direction and the other, makes various movements with his hands (raises and lowers). 2. The leader moves in one direction and the other, sometimes adding a normal run. 30 seconds each, 3 sets.
DETAILS : Increase and decrease your movement speed. Keep your back, don't jump in the move. The back leg drags along the floor.
CHIPS : Turn on your imagination, perform different movements.
Learning how to move in defense.
Accelerating forward 1/4 of the landing, at the end of a step with active work of the hands - moving sideways in a protective stance - again accelerating forward with a step and so on. 3 sites.
DETAILS : Keep your back straight, low stance in defensive movements, active arm work
Improving protective actions.
One player (playing) has the ball, two other players - a defender and an attacker. The attacker makes movements (forward / backward, right / left), trying to get a pass from the player with the ball. The defender plays in a closed stance, covering the passing line, making it difficult for the attacker to receive the ball. If the transfer still went through, then the attacker returns the ball to the play-by-player and opens again. 30 seconds in each role, 3 times (change in a circle).
DETAILS : The defender must always see the ball and keep his distance.
Playing defense in basketball
Hello, dear visitors of the site basketball-training.org.ua ! Today I want to share with you my observations and conclusions, which I received as a result of 's desire to improve his game in defense of .
It so happened that the first few years of playing basketball (mostly on street courts) my defense game consisted of constant attempts to cover the opponent's shot. Sometimes it worked, sometimes it didn’t work very well (I ended up either on the opponent’s back or on his head). It's a hell of a defense. A couple of years ago, I reconsidered my vision of playing defense, which I want to share with you.
Defensive Tips for
Basketball Players The first video that gave any hint of developing a basketball player's defensive skills was 's three-minute performance by Bruce Bowen on the TNT Fundamentals series. Then there was a short article on how to play defense against A. Gomelsky. Well, the last, but probably the most important training video was the company's products Better Basketball - Better 1 on 1 Defense . Even after skipping over half of what was said (some because of the language barrier, something because of banal restlessness) and putting even less into practice, I became much better at defending myself.
By the way, in this article everything will be exclusively about personal protection (and not a word about zone protection, although it is also worth writing about). So, I highlight the following stages of defense in basketball:
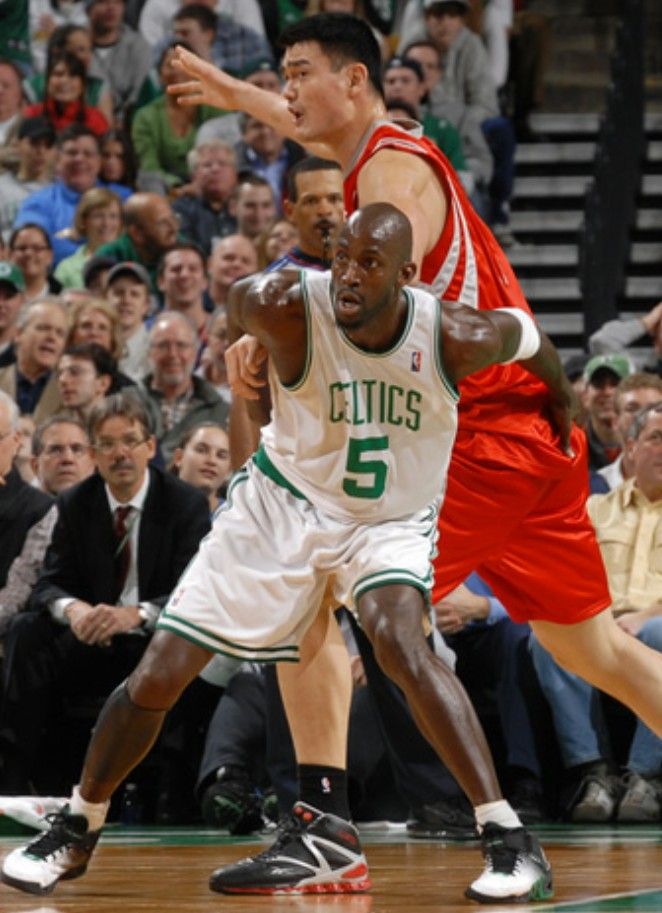
Stage 1: Defense against a player without the ball.
The essence of defense is to prevent the opponent from getting the ball . This is probably one of the most difficult stages, but also one of the most effective. Agree, it is difficult to attack without having the ball. So, this stage of defense is incredibly difficult, because you have to give a lot of strength, not to be fooled by movements of the body, head and legs. A good result of such a defense is that the player does not receive the ball throughout the attack. Also a good result if the ball is received, but: in an awkward position (far from the ring; in the corner of the court) or in the last seconds of the attack. Shitty result - the ball is received quickly and conveniently.
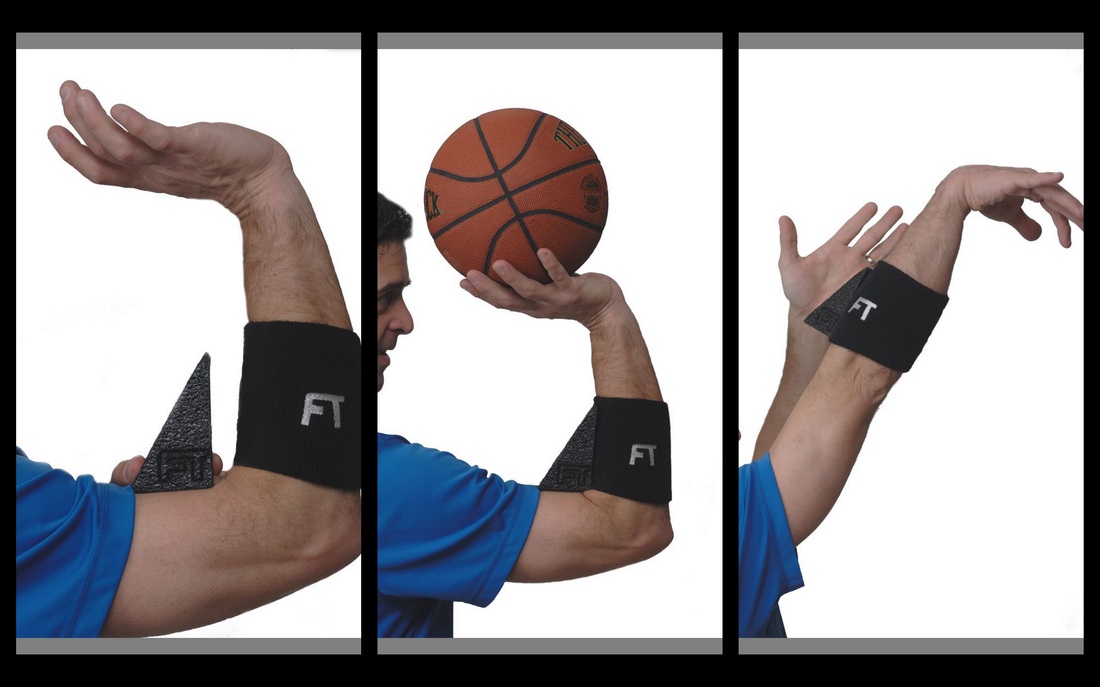
Stage 2: Defense against the player who received the ball.
When a player receives the ball, he is in the classic "triple threat position". This means that he can shoot the ring, pass or start the dribble. This means that we will have to confront all three threats at the same time. So, the best option is to take a position that will minimize the range of movement of the enemy. First of all, close its strong side from the passage by sitting a little to the side of it. As an option - from the side of his supporting leg; those. You will know the direction of his movement (he will not step with his supporting foot).
Let's conditionally divide the opponent's body into 2 levels: the first zone - to the waist; the second zone is above the belt. So, in order to start dribbling, the ball must be in the first zone. Both zones are suitable for a pass, and for a throw, the ball must go from the first zone to the second. I hope it's clear for now. So, one hand is playing with the bottom zone (preventing dribbling and low passing), the second is defending against a shot and a pass from the upper zone. Remember about the legs: with bent legs it is much easier and faster to make a jerk. If the legs are straight, then for a jerk they must first be bent.
And one more piece of advice: pull the player all the time with your movements. Let the probability that these "ritual dances" help to knock out the ball will be small, but you will be able to knock the opponent out of his usual rhythm. And it's worth a lot!
Excellent defense: the ball is knocked out. Good defense - loss on pass, inaccurate pass, throw from an uncomfortable position.
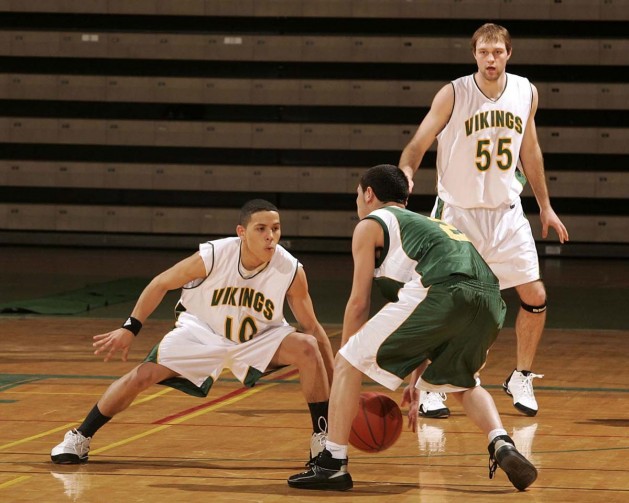
Stage 3: Defending against the dribbler.
Assume that previous attempts to get possession of the ball failed and the opponent began to dribble. How to defend yourself then?
Let's not consider those situations in which the opponent is obviously weaker than you. It's just not interesting. The opponent is stronger, faster and jumpier than you - that's a good situation. Like I said, close his strong side. But if you don't know its strengths and weaknesses; you don’t know how to hold: from a throw or from a pass - that is, a good solution. We are trying to make sure that you are the leader. One side is obviously closed - and the player is deliberately skipped to the other. So you can not lose in the starting jerk and not guess the direction of movement: it can only go in one direction. Try to push the opponent with the ball to the end line, from where he can no longer comfortably attack the basket. Clamp into a corner, press to the line.
Again: close one side tightly. Better - if it will be his forte; if you don’t know which one is strong, close your weak side and let defenses under your strong side. And a safety net: sometimes it's better not to let a player throw from an average distance. Allowing him to get under the ring. After all, there will be a safety net in the form of a “big”, which cannot be thrown so easily.
Stage 4: Maintenance completed.
This can be a double step and a throw, a simple throw after a stop, a jump, a pivot (turn), a series of displays, etc. Let's take a closer look at this.
Double step. Remember: he has 2 steps to complete the attack, and you have 2 steps to hit the ball down, and then another full step to block. I recommend doing this:
A series of small touches to the ball during a double step (as if you were playing a drum). Thus, you will not knock out the ball, but you will disorientate it accurately. Yes, and in order to keep the ball, you have to make more.
Trying to hit the ball from below! When hitting from above, there is a very high chance that you will hit your fingers - this is a foul. But from below: few people expect such a blow, few people close the ball from below. And taking the ball up for a throw, he will receive an additional impulse, the push of the ball - throwing it as it was previously thought would not be so easy.
A little tip: after picking up the ball by the opponent, very often the ball goes down, and this is done strongly and abruptly. Just substitute okay from below at the level of the opponent's lower back: he himself will knock the ball against your hand. This is a very cool and often unexpected trick for the opponent.
If it was a jump stop, or just a stop, then you need to get as close as possible and raise both hands vertically up. Now you can not be afraid of a foul.
Stage 5: Jump Shot.
It's good if you jump high and sharp - then try to block at the moment when the ball leaves the thrower's hand. You can just try to brush it off at the moment when the supporting hand is no longer involved in the throw, and the ball is on the wrist. I will not talk about how to block-shot, this is a topic for a separate article.
Remember that you can block the thrower's view with your hand: just don't poke it in the eyes, just bring it closer to the thrower's face. A good way (if you have not already jumped out for a block shot, and the throw is being made) is to simulate contact with various organs of the opponent (guys, you understand what I mean).


 During your first go, use all the space you have when you’re performing a spin.
 However, are countless players that can not handle the ball. Before presenting a guide of dills to improve ball handling of your players, is important to have some notions about the use of ball handling.
 To have better control of the dribbling, and to do not lose when moving, the player should dribble always with the maximum intensity next to the body exploring the width of the cylinder.
 When the player reaches the opposite baseline, deliver the ball to this colleague and stray in that baseline waiting for his turn. The drill starts with a player dribbling facing the basket and after passing ¼ of the floor makes a protection dribble and change direction. You can vary the changes of the direction (between legs, back, inversion) but avoid changing by front because is easier to kick the ball and lose it.
 It is key to avoid changing direction by front and replacing with simulation inside out.
 The defender reacts to the attacker's movements and moves accordingly, making defensive movements with both hands in front of the ball. 2. The defender tries to knock out or take the ball away from the attacker. 30 seconds each, 3 sets.
 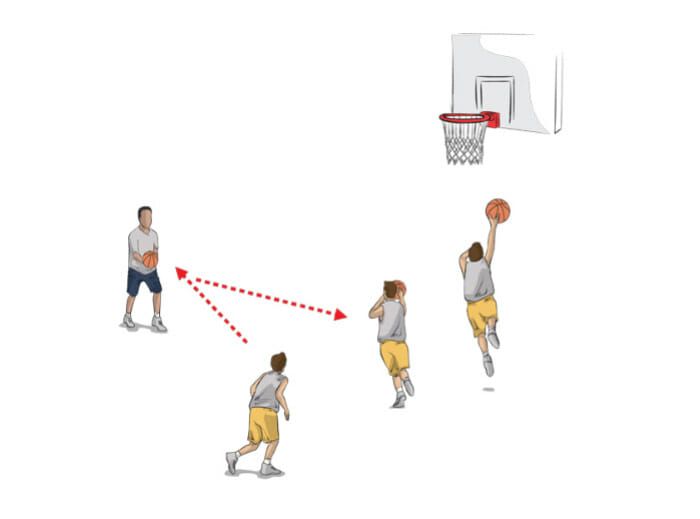 30 seconds in each role, 3 times (change in a circle).
  If your player has the ball, then a parallel stance with active hand work; if the ball is in the hands of a nearby player (in one pass), then a closed stance with the transmission line overlapping; if the far player has the ball (in two passes), then the stance is open. 2. The same, but with active defense, try to intercept or take the ball away. For 30 seconds, then change roles, 3 times.
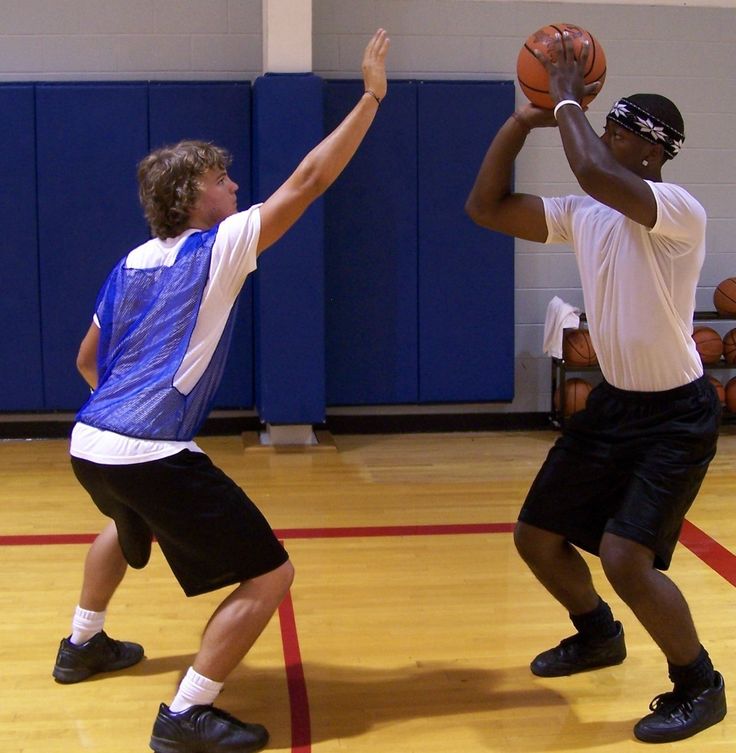
 20-30 seconds each exercise.
 3 sites.
 Remember about the legs: with bent legs it is much easier and faster to make a jerk. If the legs are straight, then for a jerk they must first be bent.
  But if you don't know its strengths and weaknesses; you don’t know how to hold: from a throw or from a pass - that is, a good solution. We are trying to make sure that you are the leader. One side is obviously closed - and the player is deliberately skipped to the other. So you can not lose in the starting jerk and not guess the direction of movement: it can only go in one direction. Try to push the opponent with the ball to the end line, from where he can no longer comfortably attack the basket. Clamp into a corner, press to the line.
  Let's take a closer look at this.
  Just substitute okay from below at the level of the opponent's lower back: he himself will knock the ball against your hand. This is a very cool and often unexpected trick for the opponent.