Home » Misc » How to make a basketball shoe from scratch
How to make a basketball shoe from scratch
DevInnSoft
Desde nuestra fundacion, hemos entregado soliciones de software de alta calidad y escalabilidad para todo tipo de negocios.
Contactanos
Contamos con un equipo de desarrolladores altamente calificados, enfocados en crear herrramientas unicas y poderosas para tu negocio y uso cotidiano.
Contactanos
Las soluciones de software que realizamos en DevInnSoft, permiten a nuestros socios de negocio crecer y ser mas confiables.
Contactanos
Todos los Servicios
Servicios
SOLUCIONES CORPORATIVAS
Necesitas soluciones especificas para tu empresa? Estamos listos para desarrollarlas!
BUSINESS INTELLIGENCE
Ayudamos a tu organizacion a tomar desiciones mas confiables y en menos tiempo.
DESARROLLO EN LA NUBE
Desarrollamos sistemas locales y en la nube.
Proyctos Recientes
En nuestra cartera de productos, puedes encontrar sistemas desarrollados para nuestros clientes en diferentes tipos de negocio. Nuestro equipo calificado de desarrolladores esta siempre listo para crear algo nuevo para ti.
Todos
Aplicaciones Moviles
Software a la Medida
QA & Testing
UX & UI
Dashboard Web
Nuestro Dashboard Web permite al equipo estrategico tomar mejores desiciones.
Dashboard Movil
Con la version movil del dashboard, puedes tener la informacion a la mano en todo momento.
Business Intelligence
Con nuestro modulo de Analitics, ayudamos a tu organizacion a tomar desiciones mas confiables y en menos tiempo.
Empaque
We work hard on every app to deliver top-notch features with great UI that you won’t find anywhere else.
Calidad
We work hard on every app to deliver top-notch features with great UI that you won’t find anywhere else.
DevInnClock
El modulo de registro de entradas y salidas permite a los empleados y empresa estar informados en todo momento.
Alice Messenger
We work hard on every app to deliver top-notch features with great UI that you won’t find anywhere else.
WiseMoney
We work hard on every app to deliver top-notch features with great UI that you won’t find anywhere else.
2k
apps desarrolladas
40
Consultores
12
Reconocimientos
160
Empleados
Clientes Opinan
Juan Antonio Bautista
Regular client
DevInnSoft nos ha facilitado el crecimiento tecnologico en todas las areas. Desde el desarrollo de nuestro sistema ERP hasta la mejora en la senal WiFi.
Francisco Garcia
Regular client
Desde que nos asociamos con DevInnSoft, las tareas de sistemas se me hab facilitado mucho. Ellos nos asesoran para realizar nuestras tareas mas rapido y tener un mejor resultado.
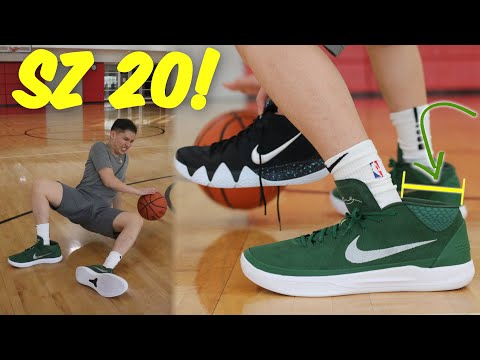
What Are Basketball Shoes Made Of?
Depending on the specific shoe of reference, basketball shoes are made from different materials. This is clear right from the starting point of the shoes manufacture.
There is what is called the last model which is like the blueprint you use to mass produce other pairs of your basketball shoes. It can be a metallic or plastic material which is shaped like a completed basketball shoe.
From there, you evolve your shoe patterns and the kinds of materials you are using, materials like leather, rubber, plastic, textiles, etc., which are basically what basketball shoes are made of.
These materials are what impacts what is used for the laces, or the kinds of materials used for the sole and insole, or the inner footwear of the shoe itself, and so on. Invariably, the basketball shoe is assembled based on what needs to be put at the higher and lower parts of the shoes.Photo by Jason Mowry on Unsplash
Basic Design Of Basketball Shoes
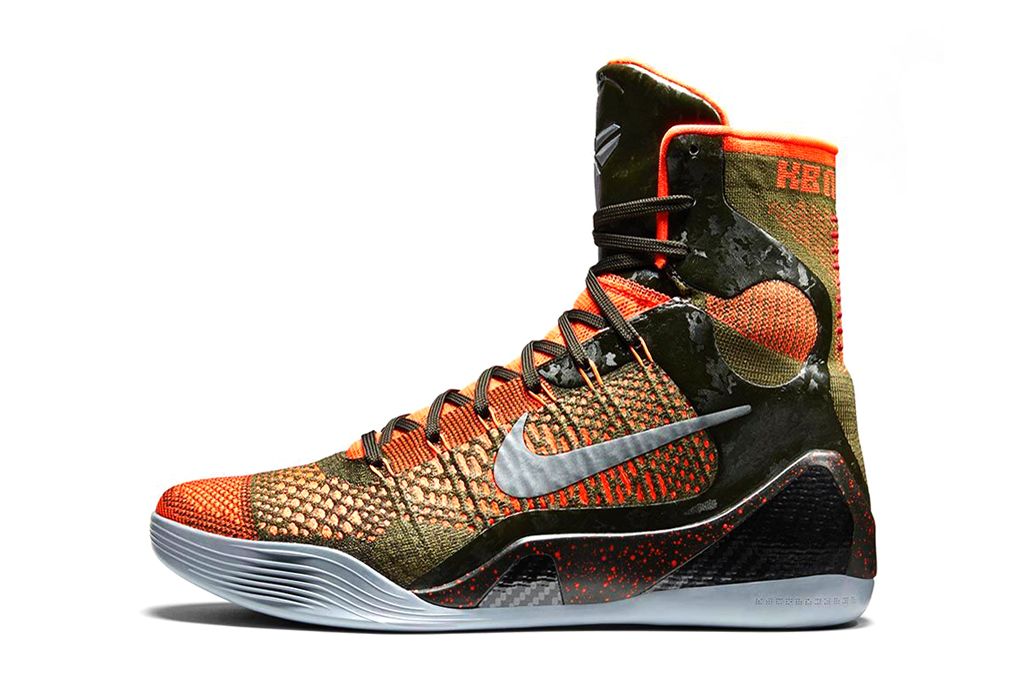
Generally, the best basketball shoes are specifically designed at the upper end with leather materials. Although there are more sneaker types made from synthetic mesh. It has a growing influence on the texture and type of shoes on the court these days.
The intervention in such kind of changes is helpful for athletes who play the game. For example, there have been criticisms in the past about the downside of using leather materials for basketball shoes. Those kinds of shoes are often criticized to be too heavy and that’s unlike sneakers like tennis shoes that do have penetrable mesh upper.
The mesh material is lightweight, and far superiorly so, if compared to leather upper. That kind of material allows for breathability, unlike the leather material.
The popularity of mesh materials now is also owing to its durable qualities. This, it supports without taking away the user’s prime attractions and fancies as they would have in leather-laden sneakers – especially the support the foot is touted to enjoy in leather shoes.
There have, however, been many other shoes that offer combination of the synthetic mesh and leather, and in some other cases, either combination with canvas. Such a thrill!
Technology is also changing the face of the basketball shoes and its makeup. We will be talking briefly about that much later.
Key Component Parts And Materials Used
Perry Hua’s images are a useful guide here in simplifying the various parts of a basketball shoe and how that ties into achieving the overall cushioning effects of the peculiar sneakers. Look at the diagrams below:
There are different basketball shoes designed for different “basketballing” reasons – top of them are ankle support and mobility. There are low-tops basketball shoes, mid-top basketball shoes, and the high-tops, offering different styles and support systems.
For instance, the low-top shoes’ preference is for speed. So, the materials pushed into making this comes with certain cons that doesn’t insure the bodies of athletes who play the game.
Remember the Kobe Bryant’s starred, hilarious commercial for Nike Zoom Kobe IV? He’s President, CEO, CFO, CMO, and Owner of Ankle Insurance Co. But beyond the hilarity of the fuzzy, funny, fear-scented “broken ankles” voice-over in the commercial, is the legitimate fears that the advert addresses.
There are shoes that offer zero ankle support and low-top shoes can turn out like that. That’s a design many on-court players of the game like to avoid, although your speed and agility are top notch because low-tops are very light shoes.
However, mid-tops shoes address that. They offer speed + safety for players whose game is to jump up high and get a little physical. But they also pale in protection value in restricting potential ankle dangers when making fast turns when playing.
That’s what high-tops solve, and power players generally go all out for this. They are also heavy, but your ankle gets the stability it deserves. Pay attention to the upper, the insole, outsole, midsole, and you can pretty sum up what a basketball shoe is generally made up of.
Therefore, at the upper part of the shoes (refer to diagram below for easy and quick identification) that were majorly made of leather, you can now also find ones made from synthetic mesh or canvas or synthetic leather, and so on.
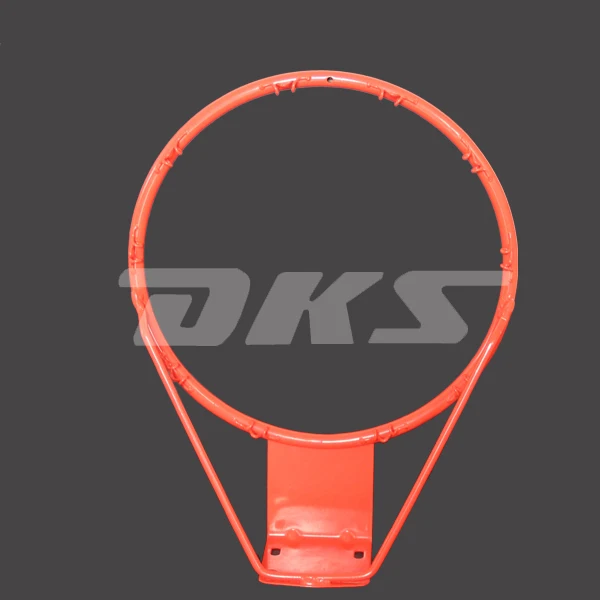
In the diagram, you can also see the eyelets. They are the shoelaces holders and they have small holes where you tuck the laces in place. They are generally made of metal like steel, aluminum, or brass.
The laces themselves are straps made of cotton or rope variants. Like some parts that are basically changing in terms of texture, many shoelaces now use synthetic fibers. It makes more slippery now but the eyestays (refer to diagram) help to maximally keep them in place.
Just close to the insoles are midsoles that generally dictate the longevity of your shoes. It is a predictable taste. We all want durable shoes. The midsole is largely responsible for that. So, it behaves more like rubber or foam, but it is basically made of plastic materials.
The insole itself is made of synthetic insole board. They are there to offer some basic warmth and comfort while in your shoes.
Perhaps, an important measure also is the outsoles of a basketball shoe. They are typically made of synthetic material or rubber. A good basketball shoe with a perfect outsole will naturally provide you with balance.
Overview of Basketball Shoes’
History
There is a history behind the evolution of basketball shoes that makes the basketball game an interesting one on so many levels.
That evolution, or the knowledge of it, indicates where certain categorizations fall; whether the shoe is a classic or perhaps the trendy cool one. That’s why basketball shoes remain one of the famous athletic footwear in the world.
Perhaps a little history lesson here. Now, the basketball game began in about 1892, but not until the early 1920s did basketball shoes become a thing in the game.
The first ever pair of basketball shoes specifically designed for the game was released by Converse, an American shoe company who later became a subsidiary of Nike specializing in the design, production and sales of sneakers, apparels, footwear, amongst other accessories.
They released the first ever All-Star shoe in basketball, and that move has morphed into a big business; the huge market that branded designs and basketball shoes have become.
Not long after the shoes became popular, Chuck Taylor — who was at one time himself a semi-professional basketball player — joined the company, and lent his name to a new brand of a basketball shoe that has become a synonym for basketball shoes.
Click here to check out this pair of Chuck Taylors and buy on Amazon.
The shoe, popularly called ‘Chuck Taylors’ was made from materials like leather cotton versions which is the material common with the popular versions of the brand.
Chuck Taylor himself had requested for this type of shoes because he wanted and campaigned for a sneaker that provides flexibility for players and allows you dominate the game.
It is important to put that in context, because every update and improvement on basketball shoes have been to increase the user’s stability, comfort, and in-court performances.
Therefore, making basketball shoes with the right materials, especially for players of the game, could be the difference between winning and losing, or enjoying your game and going home with avoidable blisters.
The Chuck Taylors became a dominant force and then came the Puma Clyde. The Puma Clyde was also a signature brand, becoming the first to be given an NBA star’s name.
Click here to check this Puma Clyde out and buy on Amazon.
Walt Clyde Frazier was playing for the New York Knicks at this time and this gave rise to the ‘The Puma Clyde’. The shoe had a suede upper design with a wider sole that allows your foot slip into the shoes easily, with better stance.
It became a hit outside the court and began a success of basketball shoes used by fans and players alike. There were inspired changes from brand competitors that saw the likes of Larry Bird and Magic Johnson — very popular players of the game, too — join the frame of basketball shoes popularity.
However, it wasn’t until the 1980s when Air Jordan (named after arguably the best basketball player of all time; Michael Jordan) was released that more people started paying attention.
The Air Jordan series by Michael Jordan has been a hit from the 80s even till now. The Air Jordan series was touted as a higher flier. Everyone really wanted a pair because they thought it could made fly.
These shoes, over the years — centuries now — are designed using materials like phylon, phyllite, synthetic rubber compounds, polyurethane, amongst others.
Nike Air Jordan 1:
Click here to check it out and buy a pair on Amazon.
What Is Changing In Their Makeups?
Maybe nothing much!
However, we must mention here that technology is generally making basketball shoes safer and more effective for athletes who play the game. These changes make basketball players move faster, while feeling lighter and stronger from their feet up.
Whether it is Adidas, Nike, Puma, or other shoemakers, a lot is going into prioritizing the comfort and stability of users.
For example, when Nike Air Force One came into the basketball space, the features that are visible now in updates were nonexistent. Features with better cushioning, rubber outsoles with less toxins, more environment-friendly choices regarding recycling (synthetic) leather wastes, amongst other things, there is always that scaled attempt to outdo the past or the previous ones.
No doubt, basketball shoes are no longer what they used to be in the days of first releases of Chuck Taylors, Puma Clyde’s, or Air Jordan. Life itself abhors redundancy. Even those signature brands have new updates and features.
However, what defines the core and shape of a basketball shoe has not so much changed. The same motivation that drove Chuck to experiment with new shoes is the same theme that runs through the features of shoes that are developed now.
We all want shoes that feel great on our feet, give the stability and flexibility our feet crave, and influence the performances that we love to see on the court as basketball players or fans, or perhaps as just casual, uninvested users.
How to learn to play basketball from scratch
"School 2.0" - the best educational project in the history of Russian basketball, has collected in one material all the basic skills that are needed for those who want to jump like Michael Jordan and throw a three-pointer like Steph Curry . We literally chew on you how to play basketball and become cool. Lots of videos are included.
Passion for basketball usually begins with the ball hitting the basket. Do not deprive yourself of this pleasure, learn to score from under the basket, then from two steps ... But after that, you should think about what elements to master in order to become a “correct” basketball player. We won't let you get bored - we won't fill all basketball practice with boring stops and turns. But in general, you can’t do without it, because the correct work of the legs, the habit of standing firmly, not mincing, not taking extra steps, quickly and correctly changing the direction of movement is an absolute must for a basketball player. Plus, of course, dribbling and passing.
In general, to start the basketball path, “School 2.0” recommends exercises to develop the following skills during basketball training:
Throw
Footwork
Transmission
Maintaining
Do two or three dozen workouts, combining the exercises from the following list, and you will notice real progress. Start each workout with 2-4 minutes of quiet running and such a joint warm-up:
Exercises are performed one after the other without stopping.
Shoulder warm-up. Stand up straight and stretch your arms out to the sides. Make circular movements with straight arms 10 times forward, then 10 times back.
Pelvic warm-up. Put your hands on your belt, feet shoulder-width apart. Perform rotations in the hip joint, as if twisting a hoop, 10 times in each direction.
Back workout. Bend your elbows and press to your chest, feet shoulder-width apart. Do rotations in the lower back 5-10 times in each direction.
Knee warm-up. Stand up straight, feet together. Squat down a bit and put your hands on your knees. Then perform rotational movements with your knees, helping yourself with your hands. Do 10 times in each direction.
Ankle warm-up. Put your hands on your belt. Place one foot on the toe slightly behind you. Resting on your toes, do 10 rotations in the ankle joint in each direction, then change legs.
Squats. At the end, do 5 deep squats, keeping your heels on the floor and extending your arms in front of you.
Throwing
Get used to throwing correctly right away - with one hand (the other can only hold the ball), with reverse spin. The forearm is perpendicular to the floor, the arm straightens completely, the hand “closes”. Listen to how the ball blows up the net - it's a thrill.
1. Shooting stand
Stand straight, feet shoulder-width apart, ball in hand.
At the signal, take a throwing stance, and at the next signal, return to the starting position.
Ready to throw: legs bent, back straight, slightly tilted forward. Throwing hand behind the ball (not sideways!), the second hand holds the ball in front-side.
Raise the ball to shoulder level.
Repeat 10 times with right and left hand.
2. Single handed throw on the spot
Get into the throwing position. The ball lies in one hand at the level of the head, the elbow is directed forward, the second hand does not help.
Squat down a little and with the simultaneous extension of the legs and elbow, throw the ball up in front of you. Stay in the final position until the ball hits the floor.
Repeat 10 times with right and left hand.
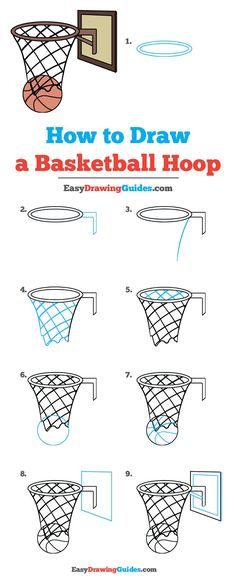
3. Throw with one hand into the hoop from one meter
Stand under the hoop with the ball in your hand at shoulder level. The other hand does not help!
Squat down and at the same time extend your legs and arms, make a throw around the ring. Keep the final position of the straightened arm and closed hand until the ball hits the floor.
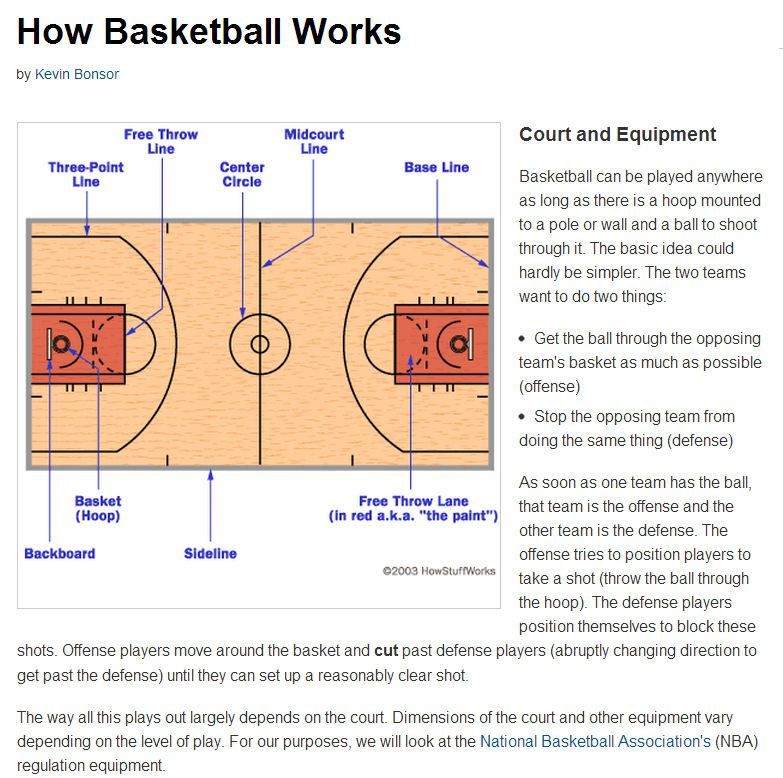
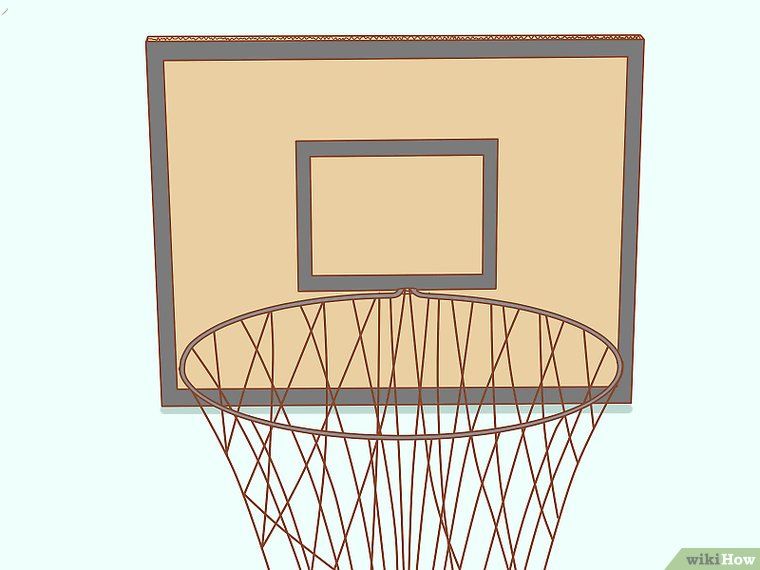
Try to hit the ball in the corner of the rectangle drawn on the shield, then the ball will be in the ring.
Throw from different positions. 10 times with the right and left hand.
4. Medium throw
Stand at a distance of 3-4 meters from the ring and take a throwing stance. Sit down and with the simultaneous extension of the legs and arms, make a throw around the ring. Keep the final position of the straightened arm and closed hand until the ball hits the floor.
Throw from different positions.
Stand a few meters from the ring. Make yourself an autopass, take a small jump forward, catch the ball, take a shooting stance, and hit the basket.
Perform the exercise 10 times with your stronger arm.
5. Two steps - throw
Stand three meters from the ring. Take two steps from the spot and throw the ring.
Get on the three-point line. Take a couple of hits with the ball, then two steps and throw the ring.
From the three-point line, make yourself an autopass. Then catch the ball, take two steps and shoot the ring.
Try to hit the ball in the corner of the rectangle drawn on the shield.
Repeat 10 times with right and left hand.
6. Two steps - low shot
Get on the three-point line. Take a couple of hits with the ball, then two steps and throw from the bottom of the ring.
Stand three meters from the ring. Take two steps from the spot and throw the ring from below.
From the three-point line, make yourself an autopass. Then catch the ball, take two steps and shoot the ring.
Try to hit the ball in the corner of the rectangle drawn on the shield.
Repeat 10 times with right and left hand.
Footwork
Glue your feet to the floor. No extra steps! Otherwise - "jog", whistle, give the ball to the opponents.
1. Jump stop
The exercise is performed on the spot. Make yourself an autopass, catch the ball with two hands and at the same time do a two-foot jump into a basketball stance.
Determine the axial (supporting) leg and perform turns on this leg forward and backward.
Then imitate the following sequence of actions: take the ball in your hands, being completely in the air; land on both (!) feet at the same time; do turns around the same (!) leg.
Repeat the exercise 10 times: 5 times turning on the right foot and 5 times on the left.
2. Step stop
The exercise is performed on the spot. Make yourself an autopass, catch the ball with both hands and stop at the same time with two steps into the basketball stance.
The axial (supporting) leg will be the one with which you took the first step - on this leg, perform turns forward and backward.
Repeat the exercise 10 times: turning 5 times on the right foot and 5 times on the left.
3. Zigzag without a ball with a jump stop
All changes in the direction of movement are made by a clear turn around the near leg - even through the “face”, even through the “back”. This is very important in basketball!
4. Zigzag without a ball with a stop in steps
It is performed in the same way as the previous exercise, but the stop at the cone is one-two, not a jump.
Transmission
Mastering the culture of passing will not only earn you the respect of your playmates, but it will also give you a lot of fun. Maybe even more than hitting the ring.
1. Passing with two hands into the wall
Stand 3-5 meters from the wall. Pass the ball into the wall with both hands from the chest.
Hold the ball with both hands from the sides and direct it to the wall with a wrist movement. As a result, the arms at the elbows should straighten, and the hands should “close”.
Move further back to make longer passes. At the moment of such a transfer, one leg takes a step forward. Catch such a transmission from the floor.
Repeat the exercise 15-20 times.
2. Passing with one hand into the wall
Stand 3-5 meters from the wall. Pass the ball into the wall with one hand from the shoulder.
Hand behind the ball, thumbs up. Carpal movement.
Repeat the exercise 15-20 times for each hand.
3. Lying One-Hand Pass
Lying on your back, pass with one hand up.
Repeat the exercise 15-20 times for each hand.
Dribbling
Great basketball dribbling is the key to all doors. Not to mention how effective it is.
1. Palms on the ball
Take the ball in your hands and move it from hand to hand, hitting it with your palms.
Start slowly and then speed up. 15 seconds slow, 15 fast.
Repeat 1-2 times.
2. Ball on fingers
Quickly toss the ball with your fingertips from one hand to the other: raise and lower in front of you; sit down and get up; raise and lower in motion.
Perform each exercise 2-3 times for 15 seconds.
3. Ball around the body
Move the ball from one hand to the other as quickly as possible: around the body; around the head; in the round-leg basketball stance; in a basketball stance figure eight around the legs.
Do 5 reps each side.
4. Low dribbling on the spot
Low ball dribbling in different positions:
Basketball stance, feet parallel. Dribble to the side of your foot. Free hand in defense position.
Sit on the floor and dribble the ball from your side, bringing the ball closer or further away.
Repeat 15 times with each hand. Do 2-3 sets.
5. Medium dribbling in motion
Medium dribbling of the ball (height - to the waist) in motion. Do it at speed.
Make a turn leaving the ball in place and picking it up with your other hand.
Dribble two courts with each hand.
6. V-dribbling in front of you
Stand in a basketball stance.
Dribble with one hand in front of you in a V, with your right and left hands in turn.
Repeat 15 times with each hand. Do 2-3 sets.
7. Crossover
Move the ball in place in front of you from one hand to the other.
First do the exercise for each stroke.
Then - for every third hit.
After translation, touch the floor with your free hand.
Repeat 15 times with each hand. Do 2-3 sets.
8. Underfoot transfers
Transfer the ball between the legs from one hand to the other.
Translate every third hit with the ball.
After translation, touch the floor with your free hand.
Repeat 15 times with each hand. Do 2-3 sets.
That's it for starters. Of course, it would be nice to learn how to fly - in the sense of jumping high without a trampoline. But that's another story. If you only jump, you are a jumper. And if you have mastered these exercises, you are almost a basketball player. Then you can already learn to play in a team, in real contact conditions.
Why Andrey Kirilenko created School 2.0:
And remember,
"School 2.0"
will introduce you to people who you want to follow an example from: winners in whom at first no one believed; music and movie stars going crazy about basketball; heroes who, thanks to sports, managed to overcome themselves.
School 2.0 will recommend movies and books, and they will help you move mountains. With us you will be in trend and understand that success breeds success.
School 2.0 has no entrance exams. Do you want to be beautiful, healthy and smart?
You are already accepted.
BTW, WE ARE DOING FREE OPEN TRAININGS TOGETHER WITH THE GREATEST GROUND #HARDCOURT. ON THIS WEDNESDAY, FOR EXAMPLE, VICTOR CHEIRU WILL TEACH EVERYBODY TO THROW THE BALL.
FOLLOW ALL OUR TRAINING HERE
If you liked this material, you can subscribe to our Facebook page or "
Vkontakte
". With us, you will know how to take care of your health and become so beautiful that everyone around you will simply envy you.
Our juicy Instagram is here.
Subscribe to The Challenger!
Share
How to learn how to spin a basketball on your finger
To skillfully spin a basketball on your finger, you need to learn a few simple techniques, find the ball and set aside 10 minutes of training per day. After a week of practicing your skills, you will master the technique of this trick and show it to your friends. In the step-by-step instructions below, we will show you how to learn how to spin a basketball on your finger.
Throwing the ball correctly
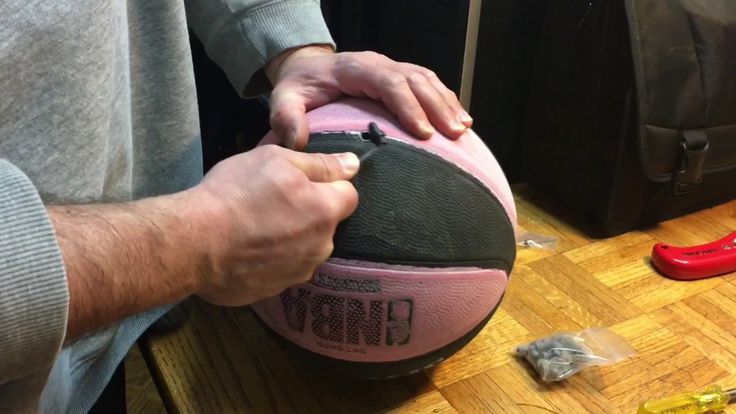
You can train on the sports ground, near the house or even in the apartment, but in any place you need to take into account the environment. For example, when practicing a trick in a room, the ball can bounce and break fragile objects. When a place is found and inventory is prepared, you can begin training. Initially, you need to learn how to properly hold and throw the ball in the air:
Hold the ball with the stripes vertical. Horizontal scrolling looks ineffective and it is very difficult to catch a projectile from this position.
Select throw method:
Two hands. You need to keep the ball not on the sides, but so that 1 hand “looks” at you, and the second from you. Having fixed the object, sharply spread your arms and slightly “throw” the ball up.
With one hand. To throw with one hand, place your fingers along the lines of the ball. It is important that there is free space between the palm and the inventory. Lightly squeeze the ball. Turn the brush outward until it stops, and then gently turn it back. At the last moment, you need to give additional rotation to the ball with your fingertips. But we do not recommend using a large one, because. this will upset the balance and the ball will fly away.
Throw the ball parallel to the floor, do not allow the projectile to “wobble”. It is important that when thrown, the projectile rises above eye level. When its bottom surface is visible, the ball is easier to catch.
These steps must be repeated until fully automatic. Usually it takes two days. When the throws are confident, you can move on to the second level.
Learning to catch the ball
Once you have learned how to throw correctly, try catching the ball with your finger. To do this, remember the following nuances:
You need to catch the projectile on the nail, not the finger itself. In this case, it is important that the brush is turned with the palm towards you.
The finger must be placed strictly in the center, at the junction of the vertical lines, otherwise the ball will slide off.


 This is clear right from the starting point of the shoes manufacture.
 Although there are more sneaker types made from synthetic mesh. It has a growing influence on the texture and type of shoes on the court these days.
 Such a thrill!
 But beyond the hilarity of the fuzzy, funny, fear-scented “broken ankles” voice-over in the commercial, is the legitimate fears that the advert addresses.
 A good basketball shoe with a perfect outsole will naturally provide you with balance.

 Features with better cushioning, rubber outsoles with less toxins, more environment-friendly choices regarding recycling (synthetic) leather wastes, amongst other things, there is always that scaled attempt to outdo the past or the previous ones.
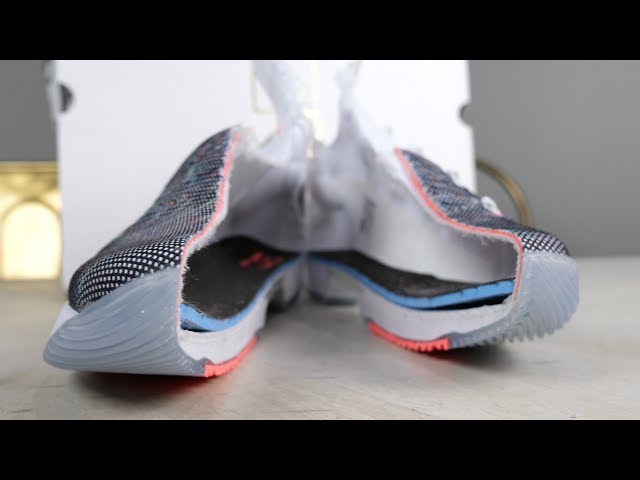
 Plus, of course, dribbling and passing.
  Perform rotations in the hip joint, as if twisting a hoop, 10 times in each direction.
  The forearm is perpendicular to the floor, the arm straightens completely, the hand “closes”. Listen to how the ball blows up the net - it's a thrill.
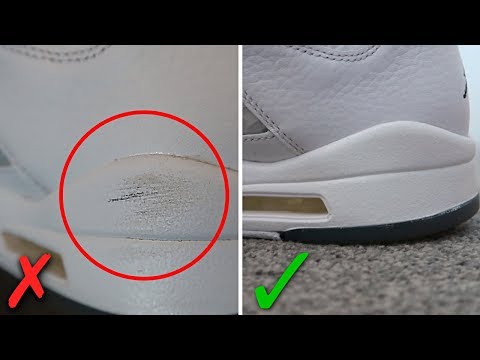
 Take two steps from the spot and throw the ring from below.
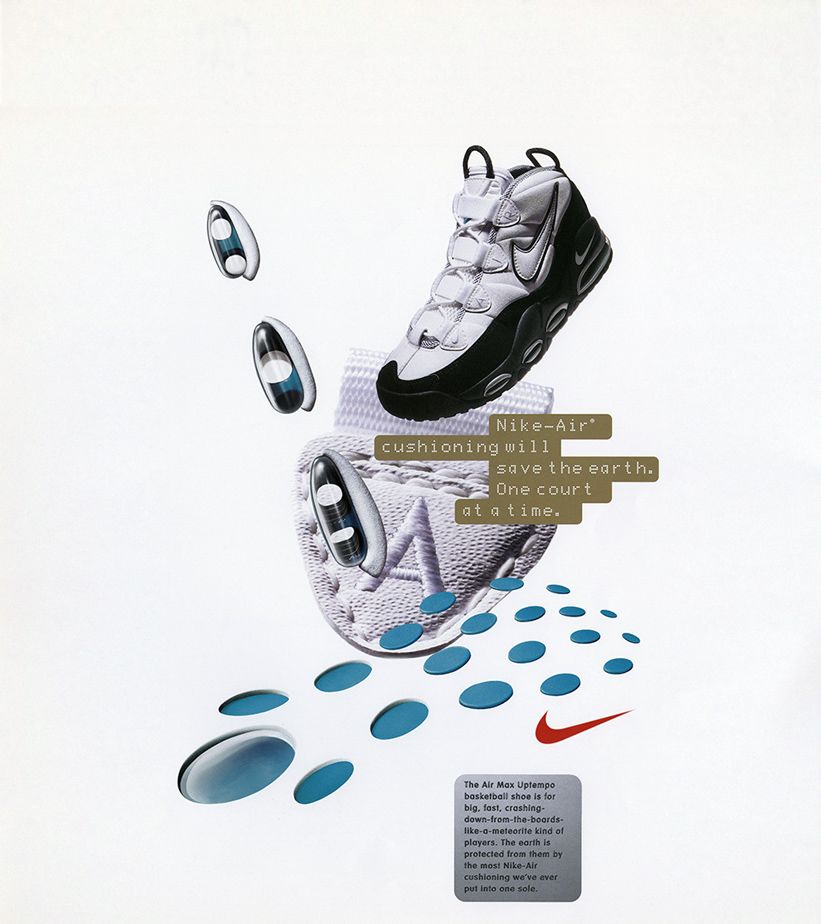
 Carpal movement.
 Do 2-3 sets.
 With us, you will know how to take care of your health and become so beautiful that everyone around you will simply envy you.
  For example, when practicing a trick in a room, the ball can bounce and break fragile objects. When a place is found and inventory is prepared, you can begin training. Initially, you need to learn how to properly hold and throw the ball in the air:
  But we do not recommend using a large one, because. this will upset the balance and the ball will fly away.