Home » Misc » How to make a homemade basketball net
How to make a homemade basketball net
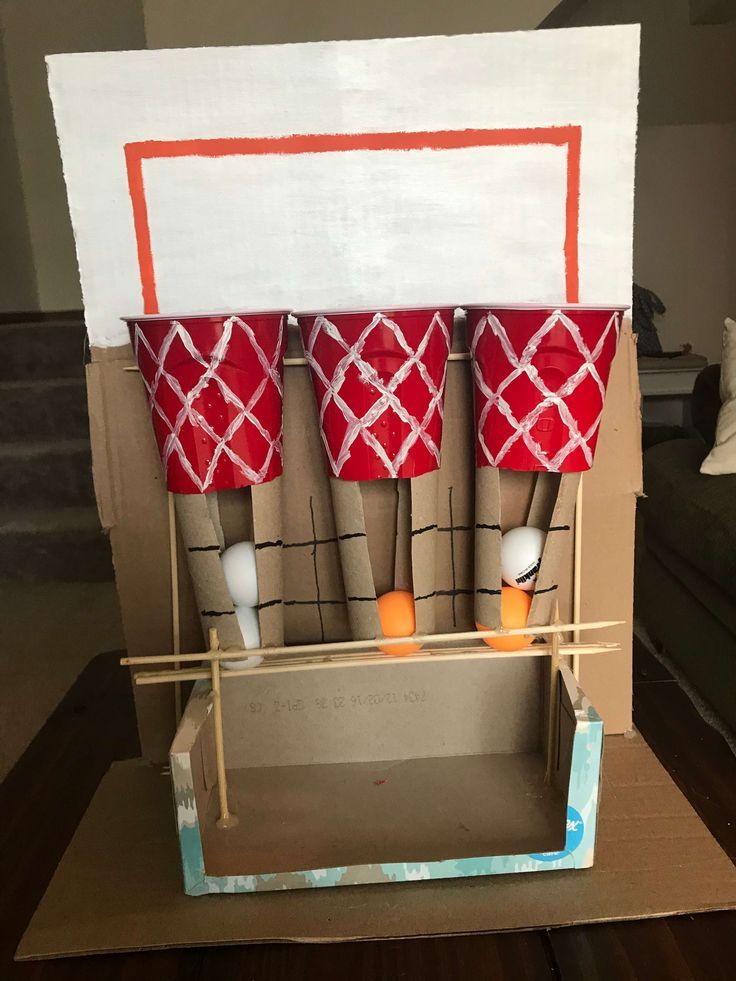
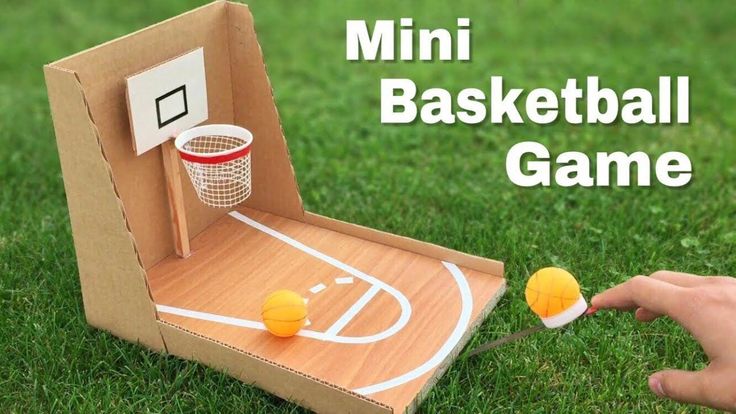
STEAM@Home: Make Your Own Basketball Hoop!
No application or registration needed.
Location
Only virtual (online or over the phone).
Find an area where you can lay out materials and do some hands-on construction.
Additional information
Materials:
A wire hanger. It cannot be a partially metal hanger made substantially of wood or plastic.
A large, flat piece of cardboard.
The tape of your choosing. Masking tape may be the easiest to work with; duct tape would certainly make the hoop durable.
Markers or paint.
Scissors.
String (optional).
Instructions:
Bend the wire hanger into a circle. You do not even have to dismantle the hanger, but just reshape it into a hoop.
Bend the hook of the hanger so that it is at a 90 degree angle with the hoop. Do not cut away the hook, as it still can be of some use.
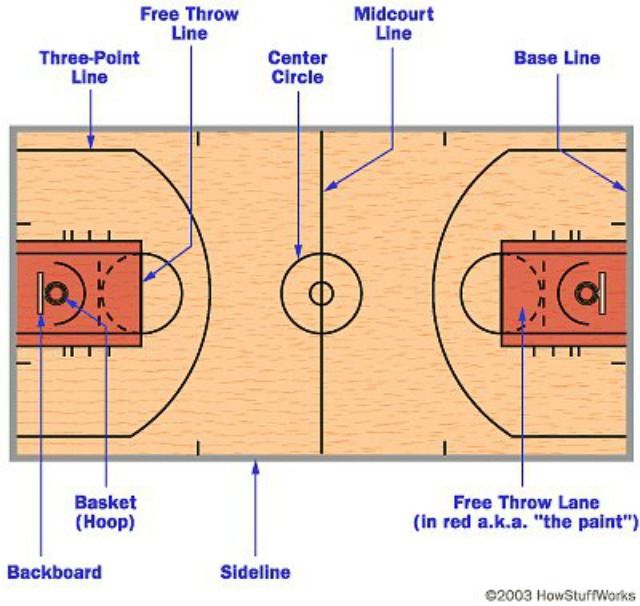
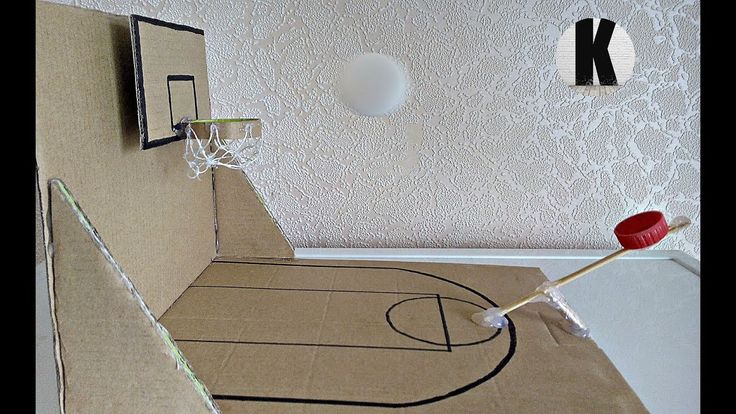
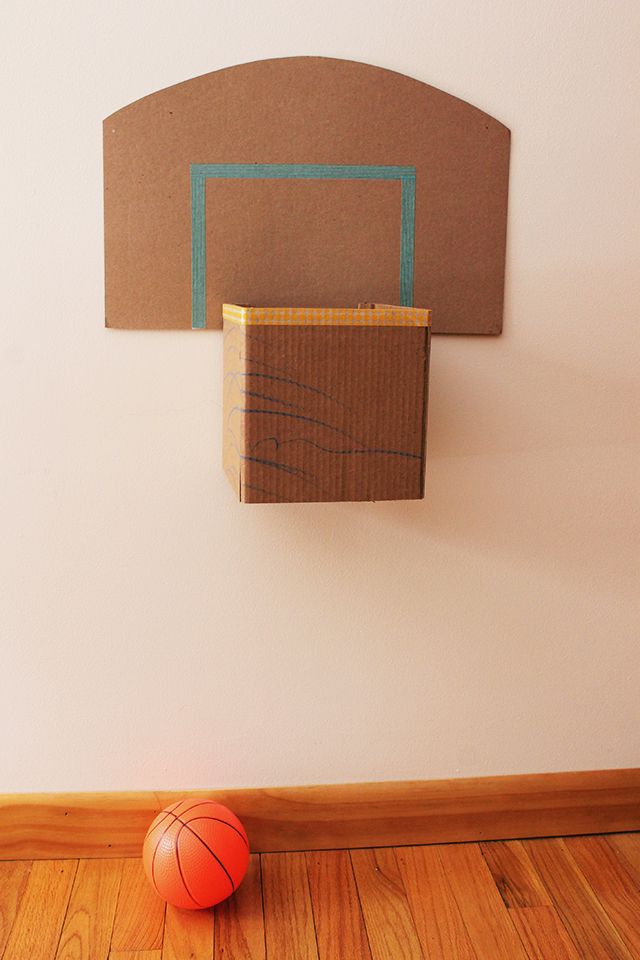
Cut the cardboard to the size and shape of your liking. Standard high school, college, and NBA backboards are rectangular, if you are looking to replicate that appearance. Try to make sure the relative scale of the hoop and backboard seem reasonable. For comparative purposes, an NBA backboard is 6 feet wide, while the basket opening is 18 inches (1.5 feet). That means the basket width is 1/4 (or 25%) as wide.
Decorate the hoop and backboard to your liking. Traditional hoops are painted red, but you can certainly customize it to fit whatever you desire. The backboard of most high schools, colleges, and all NBA franchises are now made of transparent glass; as there is no transparent cardboard, you can really be as creative as you want.
Tape the hoop to the backboard. You can attach the hook (which you bent up earlier) to lower back side of the backboard. Make sure the rim is as close to the backboard as possible.
Attach a net to the basketball rim (optional). You can make make a net out of string, or even out of twisted tape.
Hang the completed basket to a wall or door. Masking tape will work well for this purpose, as it will not leave a sticky mess behind like duct tape would. There are two different taping methods you can employ.
This activity supports the practice of these STEAM Habits of Mind: Develop craft, engage & persist, observe, reflect, stretch & explore.
Tips for Supporting Your Children's Learning
Get your child actively involved in their own learning and having their questions drive the learning. Let them observe and figure out, and try to hold back from answering questions for them. Instead, try to ask: What do we know? What else can we find out? How might we figure that out? Don't be afraid to ask your child questions. Also, don't be afraid to say "I don't know--let's find out together!" as a way to respond to their questions. Here's an article to help you support this kind of learning: Of the Value of Saying I Don’t Know
Want to learn more about making your own sports equipment?
Science Club for Girls at Home - Make you own sports equipment challenge
Instructables - MYO Basketball hoops
More hands on activities and learning opportunities:
Homecourt - basketball skill building app
Cambridge Public Schools Virtual Enrichment Recommendations
Exploratorium - Sports Science
Design Squad - Sports design challenges
Parkour Generations - Classes
Department of Human Services Sports Leagues
More STEAM@Home suggestions!
MIT Full STEAM Ahead
STEAM Habits of Mind - observe, reflect, engage & persist, stretch & explore, imagine, develop craft
DIY Chain Basketball Net – The Sports Installer
Skip to content
Search for:
Sports Equipment
by Michael Westhead
Anyone that has played basketball has enjoyed the sound of the basketball making the swoosh sound. In fact, the expression “nothing but net” is one of the most popular expressions in all of sports.
This popular sound is almost always associated with a nylon net. If you’ve played long enough, however, you’ve had a chance to play on a playground court with chain nets. It’s a different sound and experience but can be even more enjoyable than the sound of the swoosh. It’s something you should experience.
What’s cool about chain nets is they’re easy to make happen. So much of the equipment used in the sports-equipment industry is made from raw materials like steel and glass. Most items, like basketball hoops, require bending, molds and other such items that make fabricating them way too expensive and troublesome for a DIY project. However, there are other products such as pull-up bars and chain basketball nets where you can get the raw materials from a hardware or lumber store and build it yourself.
Below are some instructions on how to build your own chain basketball net.
First off, this is something you should do just for the fun of it. It may be worth it if you have a bank of basketball hoops and you can buy a larger supply of chain with volume pricing or if time is an issue and you need something right away. Otherwise, you’re kind of better off just buying one. I say this because there is not a great deal of cost savings mainly because chain nets themselves aren’t that expensive.
Yes, they’re $50 but building them is going to take a couple hours and sourcing material for one net and doing it yourself is going to save you $10.
$36 to $40 dollars (Not including taxes or shipping)
You can see by the pricing above that you’re looking at roughly $36 to $40 for a new net. I’m not sure what shipping to you will cost but shipping from Kansas to New Jersey is roughly $16. Add it up and you’re looking at $51-$55. (If you want to avoid all this and buy it brand new, I can provide it to you.)
$42.80 total cost of DIY materials to include taxes and, obviously, shipping.
As you can see from my receipt, you’re saving a little money by doing it yourself. What I’m describing below is more for fun than anything.
Materials needed:
2″ Zinc plated chain
Chain link– I purchased 2″ zinc-plated welded steel loops. You can save a little more money if you were to buy larger lengths of chain. For the vertical lengths, I went with 13 links which equals roughly 18″. For the horizontal links, I went with a 48″ length chain for the upper ring and 36″ for the lower ring. I had a little chain leftover but I wanted to play it safe and not run out of chain and have to go back to Home Depot.
Bolt Cutters
There is a cutting station at Home Depot right next to the chain but, funny enough, there are usually bolt cutters sitting right next to it to use too.
S-Clips
S-Clips- I went with a small S-Clips because it’s not like this net is load bearing. I also wanted something that was a little pliable so I could crimp it easier. I went with four packs of four.
S-Clips
Hang each individual 13-link chain from the rim with open S-Clips.
Up-close look at net
From here feed the top horizontal chain through each of the 5th links from the top all the way around and use one S-clip to attach the chain together. When attaching the chain together, I also attached the S-Clip to one the vertical chain in the rear of the net. One item of note, the top horizontal chain had exactly 39 links.
S-Clip on bottom chain
I then fed the bottom horizontal chain through the 4th link from the bottom. With this phase, I actually cut the chain into three equal lengths of seven links and attached them with S-Clips. I did this because the chain needed to be secured on the bottom to not get tangled and unravelled.
Your last step is to crimp all the S-Clips to the rim.
VOILA!
A couple items of note. I put roughly 100 balls through the net. (Mikan drill baby!) There were times when the chain wasn’t perfectly aligned but it corrected itself as time went on. I will keep an eye on my net to see if I have to adjust the chains or add S-Clips.
I hope you enjoyed this and, if you ever need sports equipment for your playground, school or home, feel free to reach out to me at www.oncallsports.com.
Like this:
Like Loading...
how to weave a basketball net
HOW TO QUICKLY WEAVED A BASKETBALL NET Homemade Basketball Hoop Nets
play تشغيل
download تحميل
How to weave a basketball net with your own hands The easy way How I made a basketball hoop
play تشغيل
download تحميل
Do not buy a basketball net, but quickly weave it from a clothesline
play تشغيل
download تحميل
How to knit a basketball net
play تشغيل
download تحميل
DIY basketball hoop
play تشغيل
download تحميل
Outdoor Basketball Hoop Net Fast Just Sami
play تشغيل
download تحميل
Netting for billiards or basketball hoop
play تشغيل
download تحميل
metal chain basketball net
play تشغيل
download تحميل
Basketball hoop How to tie the net yourself
play تشغيل
download تحميل
Basketball hoop basketball net
play تشغيل
download تحميل
WHY THE NBA SCORE SO MANY POINTS
play تشغيل
download تحميل
Paracord net 2
play تشغيل
download تحميل
Basketball net with Banggood Com
play تشغيل
download تحميل
How to make a basketball net out of an ordinary thing
play تشغيل
download تحميل
How to make a net for a basketball hoop The easiest weave
play تشغيل
download تحميل
Plain shop basketball net
play تشغيل
download تحميل
DIY BASKETBALL HINGE
play تشغيل
download تحميل
Macramé mesh dress
play تشغيل
download تحميل
Basketball net for hoop shop BASKET FAMILY
play تشغيل
download تحميل
How to make a basketball hoop DIY basketball hoop
play تشغيل
download تحميل
مقالات ذات صلة
Basketball hoop - how to make a stand with a backboard with your own hands
Do you like basketball and want to make a hoop? I wanted to make it myself, not buy it, and I ended up making it. It's pretty cheap, especially if you have some of the stuff you need to assemble.
Let's start assembling a basketball hoop with our own hands.
Step 1: Shape the Ring
The first thing you need is a ring, I made it with 12mm rod, but it doesn't have to be that size. The standard diameter of a basketball hoop is 450 mm.
To make it flat you need something to wrap it around, this thing should be about 400mm in diameter.
I found an old car rim of the right size, you will need to clamp it to the table with a clamp using a piece of wood.
As shown in photo 2, place another clamp a little further from the first with a rod between them.
As shown in photo 3, slowly wrap the rod around the disk, once you wrap the rod and its edges overlap, cut off the straight ends.
Use a clamp to press the ends together, then weld them together.
To finish this part, place the ring on the ground and straighten out all the curves.
Step 2: Frame
Bend a piece of flat metal, mine was 4mm thick.
Weld it to a flat spot in the ring.
Cut two rods 320 mm long.
Weld them as shown in the photo.
Drill four holes to match your existing bolts.
If you need a netball ring, you can simply attach it to the pole and skip the rest of the steps.
Step 3: Mesh Staples (Optional)
Show 7 more images
Do this step if you need mesh. If you need a network, you will have to buy it. This step is not as difficult as it seems.
cut 12 pieces of wire 90 mm long (I would recommend making a few spare parts as they are easy to ruin.)
bend them in the middle (it doesn't matter if the ends are the same length)
clamp the wire in a vise with a steel rod at one end
bend wire over rod
repeat this with all parts of
retighten the wire wrapped around the rod (see photo)
bend it
repeat with all parts of
retighten wire wrapped around stem
bend it (at this point you can't just remove the wire from the rod - you will need to slide it to one of its edges and remove it from the edge)
repeat with all parts of
divide into 12 pieces and weld on the brackets
Step 4: Backboard
Cut the board to size. My board does not fit the full size of basketball boards. (the second picture shows the dimensions of a standard shield).
My measurements are 1100mm wide, 700mm high and 25mm thick. (You don't have to be that size.)
Step 5: Paint the shield
Once you've drawn all the lines on the shield, lay masking tape over them. If you try, everything will look neat.
If you are using MDF, you will need to take care to protect the edges from moisture (as shown in photo 2).
Carefully paint over the areas around the masking tape.
Remove masking tape after enough coats of paint have been applied and the board looks complete.
Step 6: Paint the ring
First you need to sand the metal. I used a grinding disc on a grinder.
The ring must not be black or white, it must stand out from the shield. Usually the ring is painted orange or red.


 Here's an article to help you support this kind of learning: Of the Value of Saying I Don’t Know
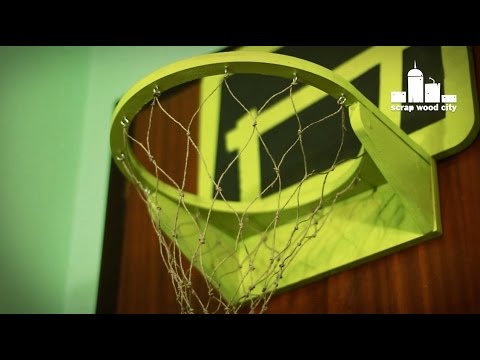 In fact, the expression “nothing but net” is one of the most popular expressions in all of sports.
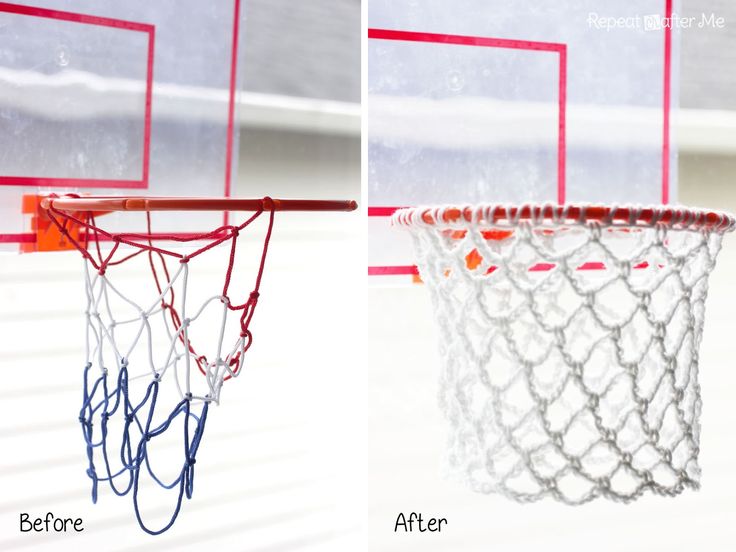
 I will keep an eye on my net to see if I have to adjust the chains or add S-Clips.
 It's pretty cheap, especially if you have some of the stuff you need to assemble.
 My board does not fit the full size of basketball boards. (the second picture shows the dimensions of a standard shield).