Home »
Misc »
How to make a portable basketball hoop
How to make a portable basketball hoop
5 Different Ways to Convert Portable Basketball Hoop to Inground
In some areas, portable basketball hoops are just not that safe as advertised. And for some people, converting them to inground is the only option.
For example, my acquaintance filled the portable basketball hoop base with almost 350 lbs of sand, and it still managed to fall over onto the hood of his mom’s car four times. He bought it for $600 and wasn’t planning on letting it go.
Fortunately, he’s got me who gets these things. We’ve chosen a bit complicated route, but we got there. Today we’re spilling it all out.
As for the easiest way to convert portable basketball hoop to inground, that would be to remove the support base from the backboard and pole and cement the pole in the ground. Making sure that you follow the rule-of-thumb. For example, for a 3.5” diameter pipe dig a 3.5′ hole.
If you decide to go with this, you don’t need any conversion kits, mountain brackets or anything similar, but you risk an uneven pole and rim.![]() Be careful.
Be careful.
But there are more ways to do it the right way. Just keep in mind that this is at least a 2-day project and with some of these options it will likely take about 7 hours of actual work time.
Safety first, we all know that. It might be time-consuming, but it doesn’t cost much to do it, and it can definitely be worth it. Without further ado, we’ll now go over five best ways to convert portable basketball hoop to a permanent one and show you how to execute the job with ease.
1. Mount old portable backboard on an in-ground pole
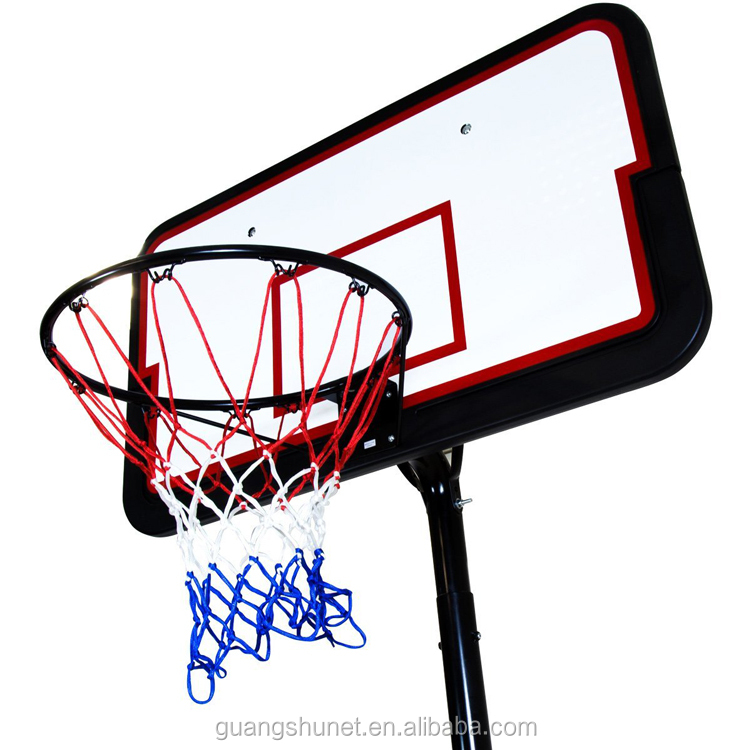
This is a clean job, without much risk of messing up if you have patience. First, you’ll need to put a portable basketball hoop in the position that will allow you to dismantle the rim and backboard easily. You can lay it down carefully.
Then, use a screwdriver to unscrew the upper part of the hoop from the pole. If the backboard and rim are all alone, you’re done with the first phase. Sadly, they don’t make extension poles to turn these portable systems to in-ground systems, so you have two options here:
Option A – Get a new in-ground rounded pole from the manufacturer
The new in-ground pole should preferably come from the same brand as the portable hoop backboard.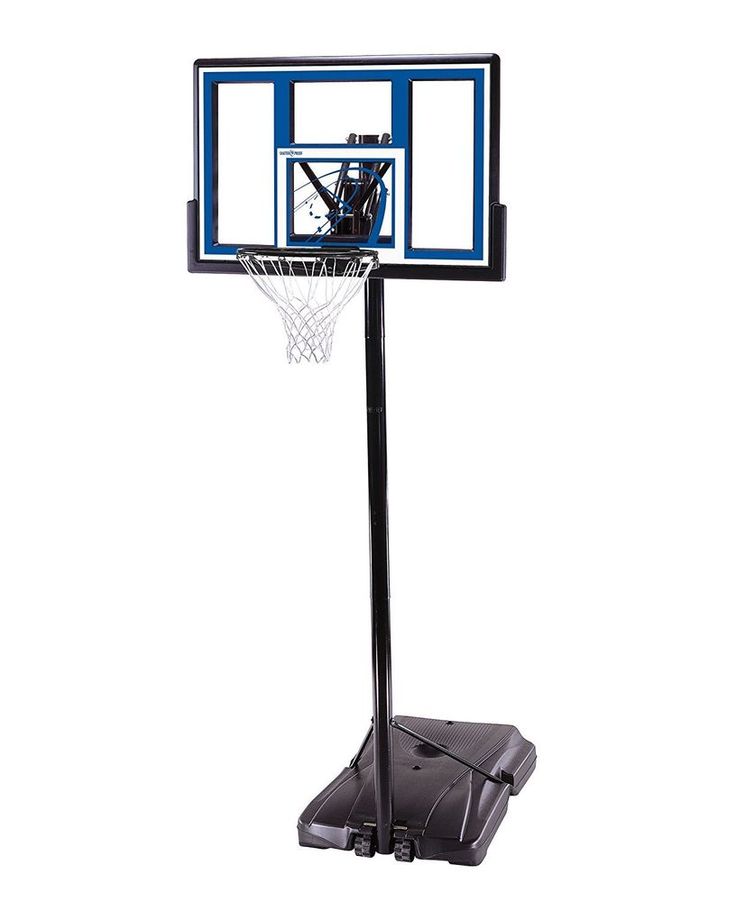
Here you’ll need to be careful to buy the pole with the same diameter. If you have Spalding portable basketball hoop or Lifetime, you’ll easily find something. But if you have any other, it’s probably best to choose the same diameter pole or go with the second option.
Option B – Use an old support pole with a mountain bracket (a better option)
You can use the mountain bracket from a different brand than basketball hoop backboard as long as it fits your pole and backboard.
MOUNTING BRACKETS->
| Lifetime Mounting Kit model 9594 | Spalding U-turn Lifting System | Lifetime 1044 Quick Adjust Conversion Kit |
|---|
| Shape and diameter of suitable pole | Round: 3.5'' | Round: 3.5'', 4''
Square: 4'' | Round: 3.5''
Round: 4'' |
| Compatible backboard models | Spalding 44''
Lifetime 44'' – 54'' | Lifetime 48'' – 54''
Spalding 48'' – 54'' | Huffy, Spalding 44''
Lifetime 44'' - 54'' |
We found out that the only bracket that supports attaching to a square pole is Spalding 316 U-Turn Lift System. Also, it can be attached to a rounded backboard with “Y” bracket as well as rectangular backboards with either straight or “Y” brackets. Definitely the best bracket out there. You can find Spalding 316 U-Turn on Amazon.
2. Cement the pole directly in the ground
This is one of the easiest options. But first, you’ll need assistance (at least one man) and a few things to get started. Prepare the ready-mix cement and water. Make sure you have a screwdriver for dismantling the backboard and rim from the pole.
You’ll also use a shovel for digging a hole. If you’re adding concrete to the existing area, you’ll need to use a jackhammer. A level is for leveling the hoop after pouring the cement. And the last thing – ladders, to attach the backboard back to the pole.
After laying the hoop down with care and dismantling the rim and backboard, you have two options:
Option A – Dig a hole
To maintain a 10 ft rim height your new basketball hoop should have an extension. You’ll need to get a long piece of the pole that will fit the original pole to give it the proper length. 6-7 feet long piece of steel pipe should do the work. Make sure it fits tight.
As we already mentioned, there is a rule-of-thumb that says for every inch of the pole diameter, you dig the hole that amount of feet. It means that for a 5″ diameter pole you dig a 5′ hole.
Because it is a basketball hoop, it’s maybe best to go broader and deeper. I’d stick it about 2.5-3.5 ft in the ground and use about 3-4 bags of ready mix (70 lbs). We wrote a quick 5-step guide on how to dig a hole for a basketball pole so you can check it out if you want.
Option B – Make an improvised base
For those who don’t want to dig any holes, making an improvised base is a perfect solution. But be aware that it might get a little messy even when you finish the work.
As you can assume, it’s not so pretty to see the cemented base around the house. But if the place for a hoop is actually behind the house, then it shouldn’t be a problem.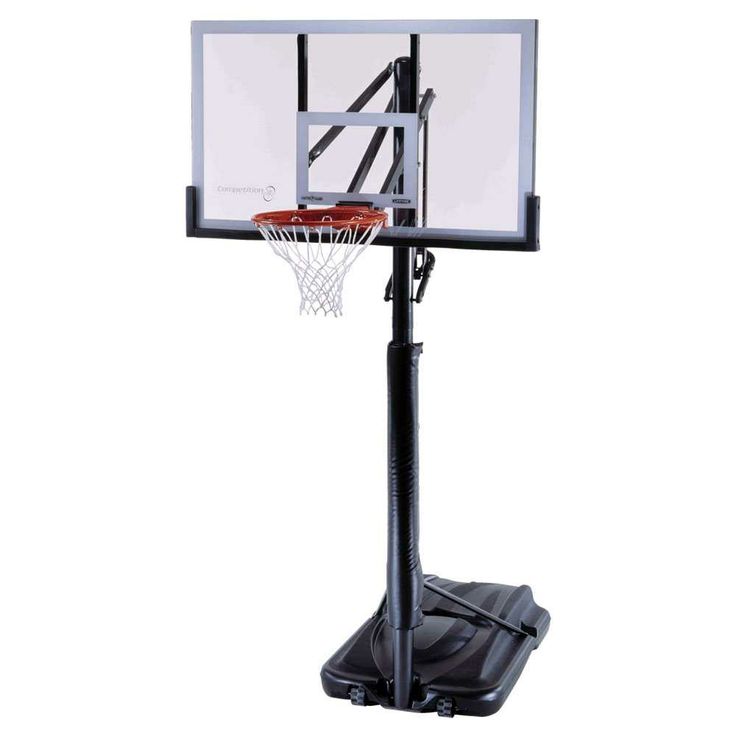
Use one of these old wooden boxes (like the one on the right or this one on Amazon) to have the base that you will fill with ready-mix cement. Place the pole in a wooden box around the middle but closer to court. Use the assistant to help you. Fixate the pol and make sure you level the rim with the ground.
Attach the backboard back on to the pole. For more stability add more cement to the new base after the cement has completely dried.
3. Cut the part of the pole and cement it on a short wall
This option requires a bit of hacksaw work, but if it fits your needs, you can do it. This is for people who have some kind of wall in the backyard that just stands there with a lot of space around it. Why not use it for something useful?
First steps are simple, just follow the procedure we talked about. Lay the portable basketball hoop down, separate the backboard and rim using the method.
Take the measuring tape and measure the wall height to see how much of the pole you’ll need to cut.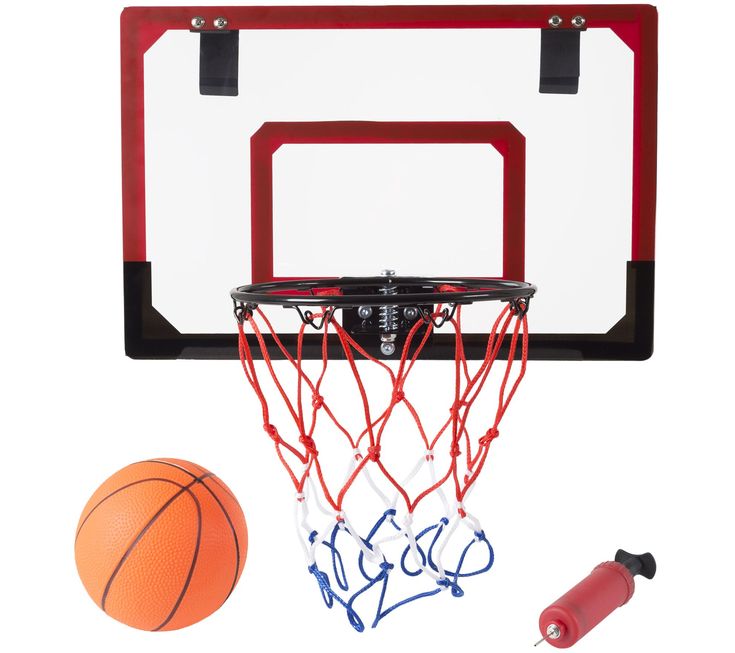 Then take a marker and mark the spot on the pole where you’ll cut.
Now comes the hard part. You’ll need to actually use the hacksaw for metal cutting (this one will do the work if you don’t own one) and cut the pole just enough so that the hoop stand on the wall in an appropriate height (this is up to you).
After finishing that step, it’s time to cement it in the ground, or this case – the wall. You can use some kind of metal or wooden box to pour the ready-mix concrete into. Follow the instructions to find out how much water to add.
Level the hoop, fixate it and let the cement dry. Attach the backboard and rim back on to the pole.
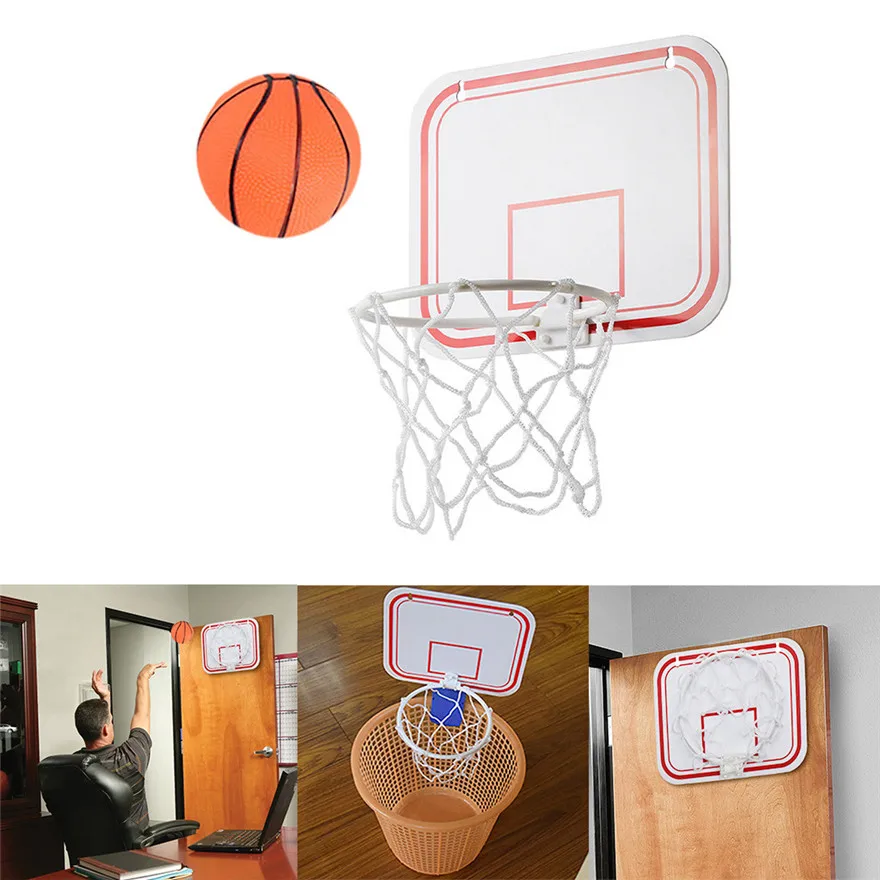
4. Mount the backboard on a garage or wall
This is by far the best you can do if you’re converting a portable basketball hoop to permanent. Of course, it depends on if you have a garage or not. And even then, it depends if you have a roof over the garage. You don’t want the ball going over the garage, over and over again.
Here we’ll do things little differently. You’ll need one of the mounting brackets available out there. As we said, this depends on the size and backboard brand.
If your backboard is Spalding 44”, go with Huffy conversion kit (you can find these on Amazon, as the manufacturer will, as usually, rip you off). If your brand is Lifetime go with Lifetime 1044 Quick Adjust Conversion Kit, and if you have any other hoop, you can’t go wrong with Spalding 316.
You’ll also need a latter and screwdriver. Then just make sure you follow the conversion kit guidelines, and you’ll be alright. This option is also the least time-consuming, as you can finish the job in less than 2 hours.
5. Cement the base into the ground
Along with option number 2, by far the most straightforward option out there. If you want to add more stability and make it safer, and you don’t care about the looks of your backyard, go for it.
During Irene hurricane, my friend’s pole came off the base and broke it. He did exactly this and hadn’t had a problem with a basketball hoop since.
You don’t even need to remove the backboard and rim from the pole. Just place the hoop on the spot you want it forever on.
Put a few pieces of wood around a base just to have something to pour cement into. Follow the steps we talked about in the article to cement it into the ground.
Wrapping up
Guys, there you have it, the best ways to convert a basketball hoop to inground. Make sure you arm your self with patience and goodwill before doing this. Anyone can do it; you just need to follow the instructions.
Safety has no price, and if you can add to it, why not. For more information on basketball hoops treatment, stay tuned to Improve Hoops.
Tips for Filling a Portable Basketball Hoop
Skip to content
Your basketball hoop needs a solid foundation. Find out what you need to fill your hoop’s base.
Looking to bring the excitement of the basketball court to your home? Portable basketball hoops can be a great option for playing a pickup game with friends or a round of HORSE with your family.
But once you find the right portable hoop and get it home, don’t forget the most important step: filling the base. It’s crucial to properly fill the base to help increase the hoop’s stability during play, as well as in windy weather.
There are two common ways to fill a basketball hoop: with water and with sand. The owner’s manual you receive with your hoop will let you know how much to use of either. You can also use a base gel that mixes with water to become solid.
WATERAdding water to the base is as simple as hooking a hose to the base hole. This is a cheaper and easier option than sand. If you plan on moving the hoop around a lot, water is a good choice since you can easily empty it from the base.
There are a few things you can do to help with stability and keep the base strong over time when using water:
- Adding a small amount of bleach to the water can help avoid the growth of algae in the base.
- If you live in an area with cold winters, the water in the base could freeze and expand.
 This can cause the base to crack. To avoid this, add a small amount of nontoxic antifreeze. You can also empty the base and store it indoors during colder months.
 - Water can evaporate and leave the hoop less stable, so checking the water level regularly is key.
- Examine the base for any leaks over time. This can help to keep it upright for your next pickup game.
SANDSand is denser than water, and it weighs more per gallon, so it can help increase stability. But while it may make for a more stable hoop, sand can also make hoops difficult to move.
Another drawback to sand is that it can be hard to add — especially if wet — and even harder to get out of the base of your hoop.
Many hoop owners choose “play sand,” like the kind used to fill kids’ sandboxes, to fill the base since it can be smoother and more even. Using a funnel while filling the base can help decrease the chances of spilling sand.
BASE GELA third option for your hoop is a special gel designed to stabilize bases. Made of absorbent polymer, you will mix the gel with water. This mixture can become the equivalent weight of several bags of sand. Designed to be both mold-resistant and freeze-thaw durable, base gel can last several years. Once firm, it can also resist small holes or cracks that can cause leaks.
No matter what you use to fill your base, it’s always a good idea to have two adults move the portable hoop if needed. Also, it’s advised not to use weights, bags of cement or bricks to hold the hoop down.
Now that you know what to do to keep your portable hoop firmly on the ground, it’s time for tip-off. With a solid base for your hoop, you’ll be able to focus on hitting a long-range three or guarding against uncle Joe’s legendary jump shot during your next family pickup game.
Related Articles
Basketball stand with a ring in the category "Sports and recreation"
Basketball stand with a ring Superbasketball Little Tikes (folding, adjustable height up to 210 cm) 433910060
Delivery from Dnipro
"Internet store
Children's basketball hoop on the rack Home basketball with ball Set for children
Delivery from Odessa
for 1 199 UAH
from 2 sellers
2 398 UAH
1 199 UAH
Buy
Basketball mobile mobile EXIT Galaxy + Ring with shock -absorption
Delivery in Ukraine
to 36 700 UAH
from 5 sellers
9000 36 700 UAH
Buy
Batu Prom - Batu Batu Butti - Batten toy supermarket for kids!
EXIT Galaxy black mobile basketball stand + ring with cushioning
0003
Buy
TRAMPOLINE PROM - a supermarket of toys for children!
Basketball stand EXIT Galaxy + ring with cushioning
Delivery across Ukraine
for 27 500 hryvnia
from 5 sellers
27 500 hryvnia
Buy
toys for children
Basketball stand EXIT Galaxy black + ring with cushioning
0002 27 500 UAH
Buy
TRAMPOLINE PROM - a supermarket of toys for children!
Basketball stand for a nursery with a shield of 160-200cm Junior SP-SPORT / Basketball stand for children with a ring
Delivery in Ukraine
5 200 UAH
4 790 UAH
Buy
Progress
Basketball stand with a miter with a mart NF704 basketball hoop
Delivery from Lviv
695 UAH
Buy
Deodatus
Basketball ring with a stance and darts wt666
in a warehouse in Lviv
Delivery in Ukraine
1 385 UAH
9000 1 204.
95 UAH
Dodatatus
Basketballs Blacks portable on wheels with a shield + ring with cushioning
Delivery across Ukraine
39 636 UAH
Buy
GOODSZON
Basketball stand Exit Toys Galaxy Black portable on wheels with a shield + ring with cushioning 9Ol000
Basketball stand Exit Toys Galaxy Transparent/Green stationary for concreting + ring with
Delivery across Ukraine
29 700 UAH
Buy
Goodszon
Children's gaming tent Manege tent for balls with a basketball ring Ball Pool Tent Blue and Pink Top
In stock
Delivery in Ukraine 9000 with shield KID SP-Sport S881R
Delivery across Ukraine
3 950 UAH
Buy
Big-Monkey
See also
Children's basketball hoop on the stand Home basketball with ball Set for kids 9Ol000 from 2 sellers
2 920 UAH
Buy
Igrashka
Children's basketball hoop on the stand Home basketball with ball Set for children
Delivery from Odessa 9
2 398 UAH
1 199 UAH
Buy
Chiki Bamboni
EXIT Galaxy black basketball stand ring 46.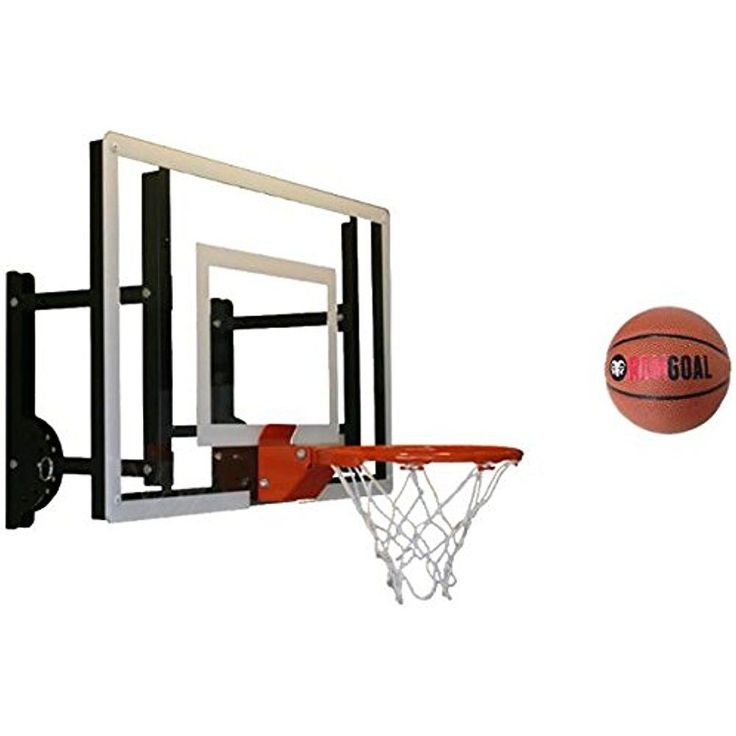 03.11.00
Delivery across Ukraine
27 500 UAH
Buy
Groosha
Basketball stand EXIT Galaxy green/black with amort. ring 46.05.11.00
Delivery across Ukraine
36 700 UAH
Buy
Groosha
Basketball stand EXIT Galaxy black with amort. ring 46.15.11.00
Delivery across Ukraine
UAH 36,700
Buy
Groosha
EXIT Galaxy black basketball stand with shock absorber. Ring 46.13.11.00
Delivery in Ukraine
27 500 UAH
Buy
Groosha
Children's basketball ring on a home basketball stand for children
Delivery from Odessa
2 398 GRN
1 199 UAH
Buy
Interflow
In stock
Delivery across Ukraine
709 UAH
Buy
Rosumashki - toy and children's goods store
Basketball hoop on a rack with an electronic scoring scale art. 3548
Delivery in Ukraine
1 341-1 504 UAH
from 5 sellers
1 341 UAH
Buy
Lovely Toys online store
Polestar Exit + Ring with depreciation on wheels
Delivery in Ukraine
to 27 200 UAH
from 3 sellers
27 200 UAH
Buy
Shoploft
90,000 basketball ring - how to make a barltered basketball rack and want to make a ring? I wanted to make it myself, not buy it, and I ended up making it.
It's pretty cheap, especially if you have some of the stuff you need to assemble.
Let's start assembling the basketball hoop with our own hands.
Step 1: Shape the ring
The first thing you need is a ring, I made it with 12mm rod, but it doesn't have to be that size. The standard diameter of a basketball hoop is 450 mm.
To make it flat you need something to wrap it around, this thing should be about 400mm in diameter.
I found an old car rim of the right size, you will need to clamp it to the table with a clamp using a block of wood.
As shown in photo 2, place another clamp a little further from the first with a rod in between.
As shown in photo 3, slowly wrap the rod around the disk, once you wrap the rod and its edges overlap, cut off the straight ends.
Use a clamp to press the ends together, then weld them together.
To complete this part, place the ring on the ground and straighten out all the curves.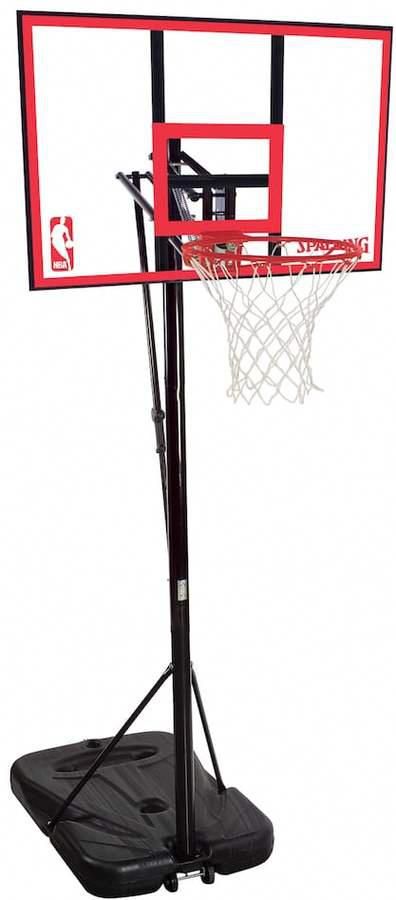
Step 2: Frame
- Bend a piece of flat metal, mine was 4mm thick.
- Weld it to a flat spot in the ring.
- Cut two rods 320 mm long.
- Weld them as shown in the photo.
- Drill four holes to match your existing bolts.
- If you need a netball ring, you can simply attach it to the pole and skip the rest of the steps.
Step 3: Mesh Staples (Optional)
Show 7 More Images
Do this step if you need mesh. If you need a network, you will have to buy it.
This step is not as difficult as it seems.
- cut 12 pieces of 90 mm wire (I would recommend making a few spare parts as they are easy to ruin.)
- bend them in the middle (it doesn't matter if the tips are the same length)
- clamp the wire in a vise with a steel rod at one end
- bend wire over rod
- repeat this with all parts of
- retighten the wire wrapped around the rod (see photo)
- bend it
- repeat with all parts
- retighten wire wrapped around stem
- bend it (at this point you can't just remove the wire from the rod - you will need to slide it to one of its edges and remove it from the edge)
- repeat with all parts of
- divide into 12 parts and weld on the brackets
Step 4: Backboard
Cut the board to size. My board does not fit the full size of basketball boards. (the second picture shows the dimensions of a standard shield).
My measurements are 1100mm wide, 700mm high and 25mm thick. (You don't have to be that size.)
Step 5: Paint the Shield
Once you've drawn all the lines on the shield, lay masking tape over them. If you try, everything will look neat.
If you are using MDF, you will need to take care to protect the edges from moisture (as shown in photo 2).
Carefully paint over the areas around the masking tape.
Remove masking tape after enough coats of paint have been applied and the board looks complete.
Step 6: Paint the ring
First you need to sand the metal. I used a grinding disc on a grinder.
The ring must not be black or white, it must stand out from the shield. Usually the ring is painted orange or red.
The easiest way to paint inventory is from a spray can.
Step 7: Assemble
Put it all together.