Home »
Misc »
How to make the perfect shot in basketball science fair
How to make the perfect shot in basketball science fair
How to Make the Perfect Shot in Basketball | Science project
Science project
Grade Level: 5th to 8th; Type: Physics
The point of this project is to discover the best way to make the perfect shot every time.
Download Project
Grade
Fifth GradeMiddle School
Subject
ScienceLife ScienceHealth ScienceSports
- Did you discover the best way to make the perfect shot?
- Is it better to throw the ball from chest level or waist level?
- Did you prefer getting a running start to make the shot or was it easier to make a shot standing in front of the hoop?
- Does distance away from the hoop matter in determining the best type of shot?
- Basketball
- Basketball Court
- A Piece of paper and a helper to chart/record your shooting skills
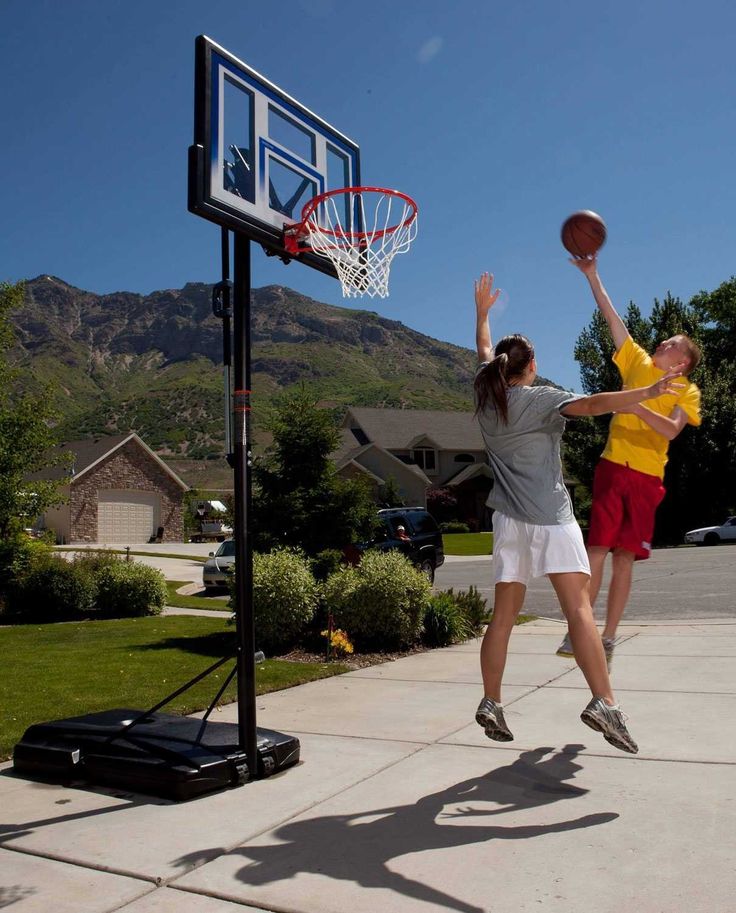
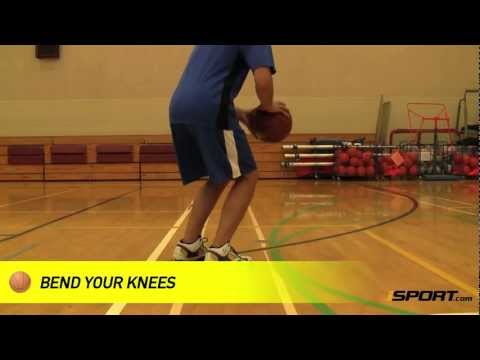
- Stand approximately four to five feet in front of the basketball hoop.
![]()
- Dribble the ball around to get a feel for the bounce and weight of the ball.
- Using an overhand motion shoot the ball towards the hoop from chest level. Continue practicing this about five times.
- Repeat step three, but try shooting the ball from waist level. Continue practicing this about five times.
- Next, repeat steps three and four, except try to shoot the ball towards the hoop while jumping slightly in the air.
- For the final experiment, place yourself halfway down the court, dribble the ball and get a running start. Practice this shooting the ball at chest level then try it shooting the ball from waist level.
- Based on the questions in the “research question” section, were you able to discover the best way to make a perfect shot every time?
- Follow the steps above and try taking some shots from the left side of the hoop and the right side of the hoop.
Terms/Concepts: proper form, accuracy, free throw, rim shot
References:
Breakthrough Basketball (2011) http://www. breakthroughbasketball.com/fundamentals/shooting-technique.html
Nothing But Net: The Science of Shooting Hoops (Dragonfly 02/07/2011) http://www.sciencebuddies.org/science-fair-projects/project_ideas/Sports_p010.shtml
The Coach’s Clipboard, by James A. Gels (2001-2011) http://www.coachesclipboard.net/FreeThrowShooting.html
Basketball Coaches Home: The Art of Shooting a Basketball (2009/2010) http://coacheshome.tripod.com/shooting.html
Disclaimer and Safety Precautions
Education.com provides the Science Fair Project Ideas for informational
purposes only. Education.com does not make any guarantee or representation
regarding the Science Fair Project Ideas and is not responsible or liable for
any loss or damage, directly or indirectly, caused by your use of such
information. By accessing the Science Fair Project Ideas, you waive and
renounce any claims against Education. com that arise thereof. In addition, your
access to Education.com's website and Science Fair Project Ideas is covered by
Education.com's Privacy Policy and site Terms of Use, which include limitations
on Education.com's liability.
com that arise thereof. In addition, your
access to Education.com's website and Science Fair Project Ideas is covered by
Education.com's Privacy Policy and site Terms of Use, which include limitations
on Education.com's liability.
Warning is hereby given that not all Project Ideas are appropriate for all
individuals or in all circumstances. Implementation of any Science Project Idea
should be undertaken only in appropriate settings and with appropriate parental
or other supervision. Reading and following the safety precautions of all
materials used in a project is the sole responsibility of each individual. For
further information, consult your state's handbook of Science Safety.
Nothing But Net: The Science of Shooting Hoops
Science Projects
Abstract
Swish! What a great sound when you hit the perfect shot and get nothing but net. Here's a project to get you thinking about how you can make that perfect shot more often.
Summary
Sports Science
Average (6-10 days)
None
Readily available
Very Low (under $20)
No issues
Andrew Olson, Ph.D., Science Buddies
Sources
The idea for this project came from this DragonflyTV Podcast:
- TPT, 2006. Basketball by Jai and Jonathan. DragonflyTV, Twin Cities Public Television .
Objective
The goal of this project is to determine if the ball's starting position for shooting a basketball affects a player's shooting percentage. In this project, you'll measure shooting percentage when players shoot baskets from chest height, chin height, and over the head.
Introduction
If you're an avid basketball player, then few things are more satisfying than sinking a perfect jump shot, hitting nothing but net. What goes into making that perfect shot? What can you do to make your shots more accurate?
Jai and Jonathan both like basketball, and they're also pretty observant. They noticed that some kids liked to shoot from chest height, others from chin height, and others from over their heads. They wondered what effect the different starting positions had on shooting success. They set up an experiment to find out. Check out the video clip at right to see what they did.
Jai and Jonathan took a great approach to their project. Starting with a subject they knew and liked, they used observations about shooting styles to come up with an interesting question: does the height where the player holds the ball affect shooting percentage? They designed an experiment to test their hypothesis, keeping all experimental conditions constant, except for the variable of interest. Jai and Jonathan also did a great job with their data analysis. When their data disproved their initial hypothesis, they didn't stop.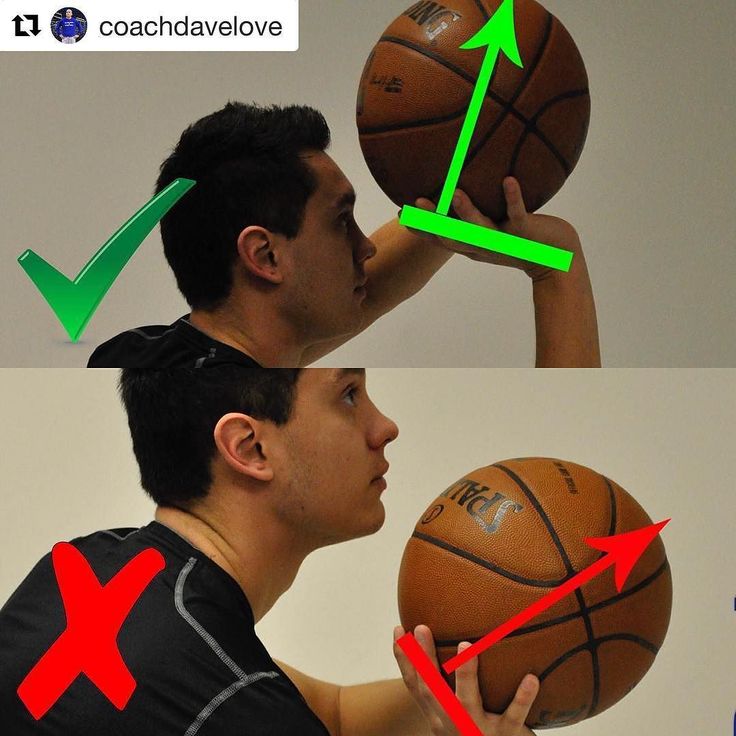 They dug deeper to see if their data might hold some other clue for shooting success.
If you've read this far, it's a good bet you're thinking about doing a basketball-related project, too. You could repeat Jai and Jonathan's experiment yourself. We've suggested a couple of improvements in the Experimental Procedure section and you can probably come up with some of your own. Or, you could use your powers of observation to come up with your own basketball question to test scientifically. The Variations section also has some ideas that might help you get started.
Terms and Concepts
- Arc
- Trajectory
- Backspin
- Basketball shooting percentage
More advanced students should also study:
- Physics of projectile motion.
Questions
- Which trajectory do you think improves your chance of making a basket: higher or lower? Explain why.
- Do you think that there will be a relationship between the ball's starting position (chest height, chin height, or over the head) and the ball's trajectory? Why or why not?
Bibliography
- TPT.
 (2006). Basketball by Jai and Jonathan. DragonflyTV, Twin Cities Public Television.
 - Cull, T. (1999). Why is putting rotation on a basketball when you shoot good? MadSci Network: Physics. Retrieved June 15, 2006.
- Henderson, T. (2004). Lesson 2: Projectile Motion, The Physics Classroom, Glenbrook South High School, Glenview, IL. Retrieved February 7, 2011.
Materials and Equipment
To do this experiment you will need the following materials and equipment:
- Basketball
- Basketball court, hoop, and backboard
- Volunteer players to shoot baskets (the more the better)
- Masking tape
The following items are optional, but can give you a better understanding of what is going on with the different hand positions.
- Video camera and tripod to record the shots
- Small TV or video monitor for camera playback
- Transparencies
- Marker or stickers to mark ball position
- Protractor for measuring launch angle
Experimental Procedure
- Pick a single location on the court for all players to shoot from, and mark it with masking tape.
 Choose the location so that your volunteers can make a good percentage of their shots. A straight-on shot would be a good choice, e.g., from the middle of the free-throw line. If your volunteers are younger players, you may want to move the shooting location in closer.
 - If you have a video camera, set it up on a tripod to record the shots. Make sure that the camera can capture the ball all the way from the player's hands to the basket. The camera should be perpendicular to the path of the ball. The camera should remain in the same position for the entire experiment.
- Have each player shoot the same number of baskets from each hand position (chest height, chin height, and over the head). Things to think about:
- How many shots? You want to collect a large enough sample so that your results are reliable. Ten shots per hand position per player is a bare minimum.
- You might want to let each player take a few "warm-up" shots that don't count, so that they can home in on the right distance.
- Along that same line, since the players are getting practice as they go along, it would be a good idea to change the order of the hand positions from player to player. Have the first player shoot chest high, then chin high, then over the head. Have the second player shoot chin high, then over the head, then chest high. Have the third player shoot over the head, then chest high, then chin high. Keep rotating through the hand positions like this, so that each hand position is first, second, or third equally often.
- To help keep everyone's mind on doing their best, you might want to make a contest out of it. For example, you could offer prizes for the top three shooters, or for all the players who make a certain percentage of their shots.
- Keep track of how many shots each player made from each hand position. Keep track of the order you assigned them for making the shots.
Analyze Your Data
- Calculate the shooting percentage for each individual for each hand position.
 Make a bar graph of the results. Is any position clearly better for all players? Is any position clearly better for individual players?
 - Did the players' shooting percentage improve or worsen during the experiment? Make symbol-and-line graph of shooting percentage vs. 1st, 2nd, and 3rd hand position to find out.
- If you were able to videotape the experiments, you can analyze the trajectory of the ball, as Jai and Jonathan did in the video clip in the Introduction.
- Connect the video camera to a small TV or video monitor for playback.
- For each shot you analyze, tape a transparency over the monitor.
- Label the transparency with the player, shot number, hand position, and whether the shot was made (1) or not (0).
- Use your video camera's frame-by-frame playback mode to "freeze" the ball on the screen so that you can mark the position of the ball on the transparency. Trace the ball's position with a marker.
- You will want to advance the video by something like 3-6 frames between each position. Use the same number of frames each time. (Each video frame represents 1/30 of a second. If you mark the ball's position at 10-12 points on its way to the basket, you'll have a good picture of its trajectory.)
- You can use a protractor to measure the launch angle. Fit a line through the first few points, and measure the angle between the floor and the line.
- Calculate the average launch angle for each hand position for each player and graph the results. Is there a clear relationship between between launch angle and hand position?
Ask an Expert
Do you have specific questions about your science project? Our team of volunteer scientists can help. Our Experts won't do the work for you, but they will make suggestions, offer guidance, and help you troubleshoot.
Post a Question
Variations
- There are other aspects of hand position that are important for good shooting technique.
 A basketball coach will have you work on shooting with one hand (the other hand supports the ball, but the shooting hand launches the ball). Design an experiment to compare shooting percentage for one-handed vs. two-handed shooting. Which works better and why?
 - You could focus your study on the trajectory of the ball. Is a higher trajectory really more successful as Jai and Jonathan hypothesized? Design an experiment to see whether a high, medium, or low arc results in a better shooting percentage.
- What are the effects of backspin on shooting percentage? Have players shoot from the same position both with and without backspin. Calculate shooting percentage for each method and compare. Does video analysis show any difference in average trajectory for the two cases? Does the ball bounce differently for the two cases? Does this have any effect on shooting success? (TPT, 2006)
- What's the scientific difference between a "soft" shot, and a "brick?" Is it the speed of the ball, the spin, or the arc? Design an investigation to figure out the difference! (TPT, 2006)
- More advanced students can do a quantitative analysis of the video data.
 Make sure that you have an accurate distance reference in the frame to use for calibration (built-in if you're shooting from a free-throw line—just measure the distance to the basket). Using the equations for projectile motion, you should be able to reproduce the trajectory of the ball. This will give you the launch angle and initial velocity of the ball. What range of launch angles yields the best shooting percentage?
Careers
If you like this project, you might enjoy exploring these related careers:
- Science Fair Project Guide
- Other Ideas Like This
- Sports Science Project Ideas
- My Favorites
News Feed on This Topic
, ,
Cite This Page
General citation information is provided here. Be sure to check the formatting, including capitalization, for the method you are using and update your citation, as needed.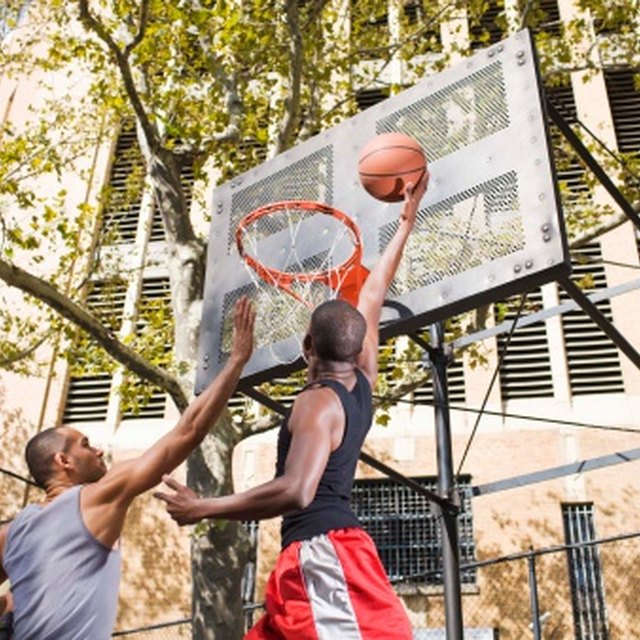
MLA Style
Science Buddies Staff. "Nothing But Net: The Science of Shooting Hoops." Science Buddies, 11 July 2020, https://www.sciencebuddies.org/science-fair-projects/project-ideas/Sports_p010/sports-science/shooting-hoops. Accessed 17 Oct. 2022.
APA Style
Science Buddies Staff. (2020, July 11). Nothing But Net: The Science of Shooting Hoops. Retrieved from https://www.sciencebuddies.org/science-fair-projects/project-ideas/Sports_p010/sports-science/shooting-hoops
Last edit date: 2020-07-11
Explore Our Science Videos
How to Make a Homopolar Motor - Science Experiment
Build a motion-activated guard robot
Lift Ice with Yarn STEM activity
Shooting exercises
replica swiss watches
Basketball is a great team game, the team consists of players whose skill is achieved with great effort. The only person who can understand that you are working hard is yourself. Remember, you only get out of the game what you put into it. Give yourself to her without a trace.
Jump shot
In basketball, an outstanding sniper is a piece item. If you want to be a great sniper, all you need to do is just want to be one.
First, you must improve your skills.
This includes having a good coach and years of training. Secondly, you must improve in game mode.
This means that you must perform throwing drills at the same intensity as in the game. It's far better to hit 100 shots in play than 500 sloppy shots that a good defender would never let you make in a game. Finally, you must understand that working on a roll is like investing in a bank. If you don't deposit anything into your account, you won't receive dividends when you need them.
The sniper must have "throw school". When throwing after a dribble, one of the main features is the last hit of the ball on the court, which must be fast and strong so that it bounces higher, right into your hands - this will help you not waste time handling the ball.
Individual Shooting Exercises
Exercise 1 Attention Concentration
- Start from a distance close to the ring.
- Throw with one hand. Follow correct technique.
- Make five from each position. Take a step back and repeat (Fig. 1).
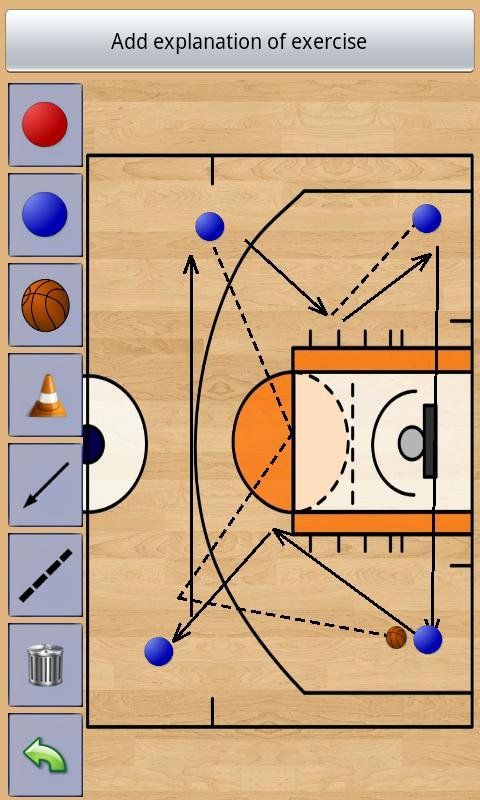
Exercise 2 7 throwing positions and rebound (4 meters)
- Jump shot from position 1.
- Pick up the ball, dribble quickly to position 7, shoot.
- Pick-up, fast with guiding back to position 1.
- Make 10 rolls.
- Repeat the same steps using positions 6 and 2, 5 and 3, 4 (Fig. 2).
Exercise 3 7 shooting positions and a rebound (from behind the three-point line)
1. Repeat the same steps as in exercise 2 (fig. 3).
Exercise 4 Throw after stop
- Start from position 1, toss the ball to position
- Pick it up, while you have to run around the ball so that you are facing the ring.

- Make 10 rolls, then advance to the next position.
Ex.5 Shooting from five positions after a fake move (from four meters or from behind the three-point line)
- Start from any position.
- On bent knees and with your head up, you do a throw feint, hit the ball one or two with your right hand, stop and jump.
- Return to position, throw feint, one or two hits with the ball with the left hand, stop, throw.
- At each position, 5 attempts (Fig. 5).
Exercise 6 Jump shots after dribbling
- Start the exercise from the center of the field, move towards the hoop with dribbling at game speed, after stopping quickly shoot.
- The shot must be taken from a middle distance or from behind a three-point arc. Perform the exercise, both on the right and on the left and in the middle of the site.
- Use different types of dribbles: fast dribbles, broken tempos, pivots, etc.
- Make 5 attempts in each direction (Fig. 6).
Exercise 7 Playing with a virtual opponent
- Perform a free throw. If you have implemented it, you get one point. If not, then your "opponent" is three.
- You make subsequent throws from any position except the three-second zone, imitating the rhythm of the game. Work on different moves and throws. Each of your successful attempts is estimated at the bottom of the point, unsuccessful at two for the "opponent". The game goes to 11 points.
- This is a very good exercise to consolidate what you have learned. Try! Improve! (Fig. 7).
Double shots
Dr. 8 2 players, shot and rebound (4 meters or from behind the three-point line)
- The drill starts with a good, clear pass. The player who made the pass from under the basket goes to the place of the thrower.
- The player in position 1 catches the ball and shoots.
- After the shot, the player runs to the rebound and then passes the ball 1 position and so on.
- Each player must make five throws. The exercise is performed at a fast pace, but the throws should not be sloppy.
- Then move to another position and everything is the same (Fig. 8).
Exercise 9 Two players, throw and rebound (per result)
- The exercise is performed as described above.
- The player who made the pass tries to interfere with the shot, but does not block.
- Game up to 5 hits.
- Then we move to another position, and so on. (Fig. 9).
Exercise 10 Two players, throw and rebound, throw feint
- The exercise is performed in the same way as the previous one.
- The defender who made the pass tries to interfere with the player in position 1, but does not block the shot.
- The attacker makes a throw feint and beats the defender.
- Performs a short dribble, stops and throws.
- Do 5 times each and change position (Fig. 10).
Ex. 11 2 players, shot after a stoppage (from four meters or from behind the three-point line)
- The attacker is in position 1, ready to receive the pass.
- The player under the basket passes.
- After the throw, the attacker waits for the rebound to be made.
- The player receives a pass by making a stop, but already in position 2. Then back.
- Make 7 throws, two free throws and switch (fig. 11).
Ex. 12 Shooting with movement (from four meters or from behind a three-point arc)
- The attacker moves around the perimeter at game speed.
- A player passes to the hand farthest from the ring.
- The attacker must stop, catch the ball and throw.
- Make seven throws, two free throws and change (fig. 12).
Note: The previous exercise has three options.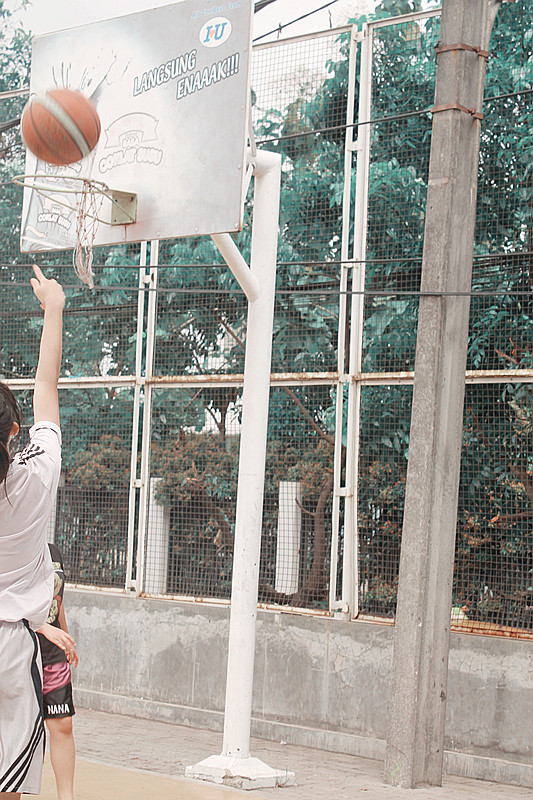
A) Receive the ball and throw it.
B) After receiving, throwing feint, dribbling in the same direction, throwing.
B) Receives a pass, throw feint, dribbling to the ring in the other direction, stop, throw.
Ex.13 Various dribbling options and a jump shot
- The attacker starts from the center of the field and, dribbling at game speed, moves towards the ring, stops and takes a jump shot.
- The player under the basket picks up the ball, the attacker runs to the center of the field, and receives the ball on the opposite flank. Moves with dribbling to the ring, stop, jump shot.
- On the right side, dribble with the right hand, on the left - with the left (Fig. 13)
Note: Use speed dribbling, change of pace, transitions, pivots.
Three players, two balls
Exercise 14 Warm-up exercise
- One player throws, another passes, a third rebounds.
- Thrower becomes rebounder after seven tries.
- Passer - thrower. Picking up - passing (Fig. 14).
Note: different options are possible
1) From seven positions (four meters)
2) From seven positions (from behind the three-point arc)
3) From five points with feints to shoot
4) Throw after stoppage
5) Throw and rebound (constant rotation around the circle)
Double shots: using screens
To use the screen effectively, you must read the defender correctly. You must always see the player with the ball and how the defender defends against you. A player who moves well off the ball and knows how to use screens correctly is very useful offensively. When you watch a match that has good players, notice how well they move off the ball. The hardest thing to defend against is a well-moving attacker.
Exercise 15 Back screen and snatch
- The player imitates opening and screening behind his back, makes a dash to the corner of the court.
- Throw to the nearest hand.
- Attacker catches the ball and shoots.
- The attacker picks up his shot, passes to a partner and returns to his original position.
- Make seven attempts and change (Fig. 15)
Note: do not back away when dashing, turn around and run, but do not lose sight of the ball.
Exercise 16 Screening behind the back, "false" screening
- 1. Attacker starts on the base of the trapezoid and moves up to imitate the screening.
- 2. After the imaginary breakout runs, the screening attacker rises to the ball and prepares to receive the pass.
- 3. Having caught the pass, he immediately makes a throw.
- 4. Make seven attempts and change (Fig. 16).
0003
- An attacker imitates a defender aiming for a screen and rises sharply towards the ball.
- The player must be ready to receive the ball.
- The attacker catches the ball and makes a quick throw.
![]()
- Make seven attempts and change (Fig. 17)
Exercise 18 Screening the ball carrier, moving away from the ring
- The attacker screens the ball carrier.
- The ball carrier passes through the screen aggressively.
- Instead of pulling back to the basket (deuce), the screening attacker moves away from the basket and prepares to receive the pass.
- Having caught the ball, he immediately makes a throw.
- Make seven attempts, then change.
Exercise 19 Barrier at the base of the trapezoid - opening to the flank
- The attacker takes the player under the ring, breaks shoulder to shoulder through the barrier and makes a dash to the flank.
- When catching the ball, the player must turn to the ring.
- Use different throw options: just throw, and dribbling to the right or left after a throw feint. Change after five attempts (Fig. 19).
Exercise 20 Screening at the base of the trapezoid - opening into the corner of the court
- The attacker takes the player into the three-second zone, pretends that he will break through to the flank through the screen, the defender starts running around the screener through the three-second zone.
- The attacker makes a dash to the corner of the court, and the defender hits the screen.
- Further, the same as in the previous exercise (Fig. 20).
Ex. 21 Screen at the base of the trapezoid - dash inward
- The defender is chasing you, not falling behind until the very screen.
- Then you run through the screen as close to the screener as possible and break into the three-second zone or foul line area.
- Receive the ball by turning towards the hoop and throw it.
- Also work out various options for continuing after receiving the ball. After five attempts, change (Fig. 21).
Throws in pairs: pass and discount
Exercise 22 Pass and discount - starting from the center of the field flank.
The receiving player is opened for transmission. Player receives a pass and shoots. The player who made the pass picks up the ball and gives it to the thrower. Players switch roles. Everyone makes ten throws (Fig. 22).
Exercise 23 Pass and discount - start from the flank
Variation of exercise 22 (Fig. 23)
Exercise 24 Pass and discount - start from the corner of the site one more
exercise 2
more variation 3 .24).
How to make a perfect free throw?
After a dunk and lay-up (in other words, a double step) alone facing the circle, where the player only needs to throw the ball (with or without the board) up in the air, the Free Throw is the third attacking game action in during which the percentage of successful shots is the highest for most basketball players. Indeed, if it’s true that there are goonies on the field (like Shaquille O’Neal, whose autobiography you can find Unfiltered), the free throw is a very effective way (provided it’s mastered) to score extra points one at a time. on the scoreboard in favor of his team.
Located 4 meters and 60 centimeters from the basket, the free-throw line could well be likened to a penalty kick when comparing basketball to football. With the difference that in football the shooter is not completely on his own (because the opposing goalkeeper intervenes), unlike in basketball... that caused the defender to foul on a full shot attempt. One of the match referees whistles for a foul and the game is stopped. As you more or less slowly and more or less confidently move towards the foul line with the opportunity to punish your opponents for your mistake, the eyes of all the spectators present in the hall are riveted to you. The pressure builds up as you get closer to the racquet head. At the same time, you get encouragement from teammates, sometimes nice words from opponents, as well as love or hate from the public (depending on whether you play at home or away). Once in position and with the ball in your hands, you officially have a maximum of five seconds to let go of your skin on your first attempt to score 1 point by throwing the ball into the circle. Regardless of whether your first attempt was successful or unsuccessful, you will be offered a second opportunity to score a new extra point if the defensive foul did not result in a valid throw in the action in question.
Your state of mind must remain positive. You should know that self-confidence is one of the main keys to a successful free throw. The mental aspect is extremely important. You must visualize the ball in a circle throughout the free throw process, from the moment you receive the ball on the pass from the referee, to the wrist strike that directs the ball into the basket, passing by the preparatory phase of concentration and slight bending of the legs.
In order not to be distracted by the external environment, athletes learn to protect their body and mind from bad vibes, shaping the universe. Thinking only about the sound and feel of the ball hitting the net from the inside is good advice, for example, to create your own bubble. This also often includes setting up a routine specific to each player. Many professional basketball players have a gesture that they constantly repeat before tossing an orange ball into the air. With each free throw, their movements and gestures become instinctive and help achieve perfection through repetition. It can be several dribbles performed on the ground, touching or moving a part of the body, etc. Everyone has their own style and habits.
Clearly, technique, and in particular the throwing gesture, is also important and necessary for hitting the target and making free throws with a high probability of success. An excellent shooter stands straight and legs slightly apart, facing the circle about a centimeter from the foul line, to be sure not to bite him. Then, with legs outstretched, one or two dribblings from the spot to really soak the skin and take it in hand when shooting. These dribblings are also important for initiating the first movement of the arm that will shoot before the shot is more or less smoothly executed. At the time of shooting at the level of setting, the skin should be held on the fingertips of the shooting hand and located above his head (while being visible to his own eyes) so that a right angle forms in the elbow joint. Once this position has been reached, the legs should be slightly bent and then straightened before the shooting arm is also straightened and the flick of the wrist intervenes.