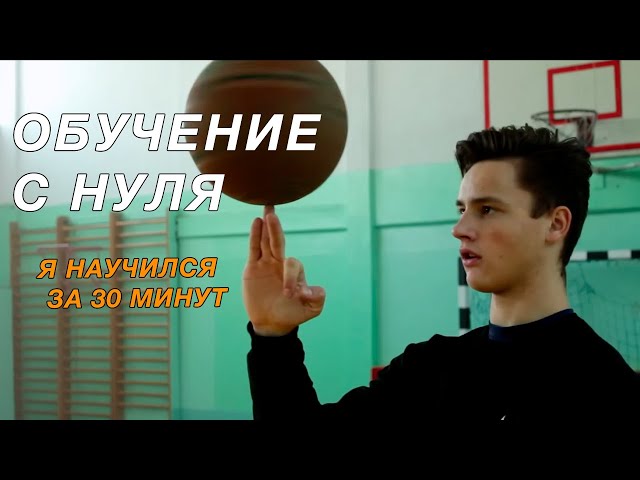
Steph Curry may be one of the best basketball players in the world, but in 2017 he admitted he couldn’t spin a basketball on his finger. He could be forgiven, considering he’s regarded as one of the greatest point guards of all time, and as the greatest shooter in NBA history. Although, Handles Franklin and Scooter Christensen from the legendary Harlem Globetrotters were on hand to teach him this famous basketball trick.
The Harlem Globetrotters are an American exhibition basketball team, combining athleticism, theatre, and comedy in their style of play. Their acts often feature incredible coordination and skillful handling of one or more basketballs, such as passing or juggling balls between players, and balancing or spinning balls on their fingertips. It sure is impressive to watch. But have you ever tried to do it yourself? It’s not as easy as it looks, though almost anyone can learn how to do this famous basketball trick. Check out our step-by-step guide to learning how to spin a basketball on your finger like a pro.
Looking to improve your game? Any basketball player worth his salt will tell you learning the fundamentals and actually implementing them on court are two very different things! Our article, Basketball 101, gives you 5 ways you can be effective right from your very next game.
What do I need to spin a basketball?
Once you start learning how to spin a basketball on your finger, it can become quite addictive. You can really learn to spin a ball on any finger, though most people start with their index or middle finger.
This trick doesn’t require any special equipment, but here are a few tips to help you get started.
Use an old basketball: It’s best to use an older basketball for this trick. One that’s worn and possibly even slick will spin easier on your finger. A new basketball will have more grip and will cause more friction, making it more difficult to spin.
Trim your fingernails: If your nails are too long it may make it more difficult to spin the ball. Or worse, you might bend a fingernail back which can be really painful. So you might want to give your nails a trim before you start.
Have plenty of space: When you’re just starting out, the ball is going to be flying all over the place. Beware of breakable objects in the house, and try to practice outside or in the garden if you can.
Be patient: It’s unlikely you’re going to be able to spin a basketball on your finger on your first go. This trick will take some time to master, and like any skill, you need to practice. You’ll need to do it over and over again until your muscle memory takes over and it becomes second nature.
Once you get really good at spinning a basketball on your finger, there are lots of different variations you can try. You can try spinning the ball on other things like your head or your toes. Or you can see how long you can keep it spinning for. Did you know, the longest time a person has been able to spin a basketball on one finger is more than 11 minutes? Narayan Bhattarai of Nepal set the record in 2018, and he practised for more than 15 months! But of course you can have fun without breaking records. So how do you actually spin a basketball on your finger?
How to spin a basketball on your finger?
Spinning a basketball on your finger, like any skill, takes practice. But it is something you can learn relatively quickly if you follow a few basic steps. Of course there is always more than one way to learn or do something, so you might find a better way that works for you. But here are our tips to get you started.
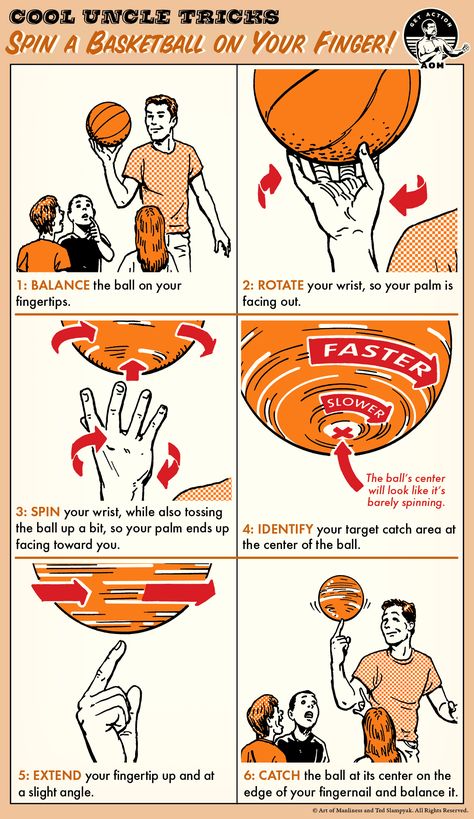
Step 1 - Get ready
Get an old basketball and find yourself some space. Spinning a basketball may not seem strenuous, but if you do it too hard or too quickly you can strain your wrists or even fracture a finger. So spend a minute or two stretching your fingers and arms to warm them up before you start.
Step 2 - Mastering the toss
Before you can spin the basketball on your finger, you need to first learn how to toss it up and spin it in the air. You want to get a good straight rotation and the faster it spins the better.
There are two methods of spinning the ball: the one-handed spin and the two-handed spin. The two-handed spin gives you more control and power, and allows you to get more speed on your initial spin. Though the one-handed spin does look cooler. You can use either or both, whichever works for you.
ONE-HANDED SPIN:
Hold the ball at chest level in your dominant hand with the stripes vertical. Rest the ball on your fingertips with your hand at the bottom of the ball. Your thumb should be pointing away from your body.
Twist your hand and fingers so that your thumb comes towards your body. As you are twisting your hand, move your hand slightly up in one motion and release the ball straight up into the air.
Don’t worry about the speed to start off with, just concentrating on getting a good steady spin on the ball. And then once you have a consistent spin, you can increase the speed by putting more power into it.
TWO-HANDED SPIN:
Hold the ball at about chest level on its side with the grips (black lines) vertical. Put one hand with your fingertips extended around the bottom of the ball and the other flat on the side.
Twist your hands with a slight upwards motion, and spin the ball, releasing it up into the air. Don’t throw it too high in the air or you’ll lose control of the ball or injure yourself.
At this point, just concentrate on getting a good feel of the ball and getting a good constant, stable spin in the air - you should see the stripes moving steadily around in a nice circle. You can then work on increasing the speed.
Step 3 - Spinning the basketball
Once you’re getting a good spin, you’re ready to try spinning the basketball on your finger. Use your preferred method to spin the ball up into the air, though be careful not to get too much height on it as you’ll lose control of the ball and you might hurt your finger.
Toss the ball up quickly but gently onto your index finger. Once you've mastered the speed and height of the ball toss, you should be able to catch the ball on your finger without too much difficulty. The closer you can keep your hand to the ball, the easier it will be. Keep your finger in the centre of the ball where the grooves meet - this position will make it easiest to keep the ball in a steady position. You might need to adjust the position of your finger slightly until the spinning ball is balanced on your finger.
Step 4 - Keeping it spinning
Eventually, the ball will begin to slow down and lose momentum. And if it slows too much it will fall. You can keep the ball spinning by slightly slapping the side of the ball with your free hand to keep it going. Make sure you do this lightly so you don’t knock the ball off of your finger.
Continue practising until you can balance the ball perfectly. It might take a while for you to master the spin, but you’ll get there if you practice every day. And once you’re able to spin the basketball for more than 30 seconds, you’re a pro!
Need a new basketball? There are different balls for all ages and skill levels, for training and competition. Take a look at our basketball size guide to help you find the right basketball for you.
VISIT DECATHLON’S ONLINE BASKETBALL SHOP. With the expert help of our in-house basketball brand, Tarmak, you'll pass, dribble and shoot better than ever before. Shop everything you could possibly need courtside from moisture-wicking T-shirts and shorts, to shoes, basketballs and equipment.
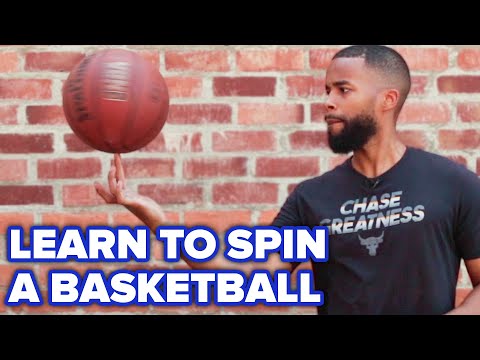
How to Spin a Basketball on Your Finger (4 Steps)
Have you ever seen the Harlem Globetrotters play live? Or have you ever seen basketball players do tricks with a basketball? They can be really fun to watch and one of the most popular ones is to spin a basketball on your finger. It looks really cool. It’s like the ball is floating or spinning in the air.
One of the great things about this trick is that almost anyone can learn to do it. It may look really hard and it does take some good balance and hand-eye coordination but, using the proper steps and with some practice, you too can be spinning a basketball on your finger like one of the Harlem Globetrotters.
Quick Navigation
What Do I Need to Learn to Spin a Basketball on My Finger?
Since spinning a ball could prove difficult initially, you may be apprehensive at first. Don’t worry! Below are steps and a few tips to start you on your ball spinning journey.
In fact, once you start learning how to do it, it becomes addictive. You will find yourself trying to spin any ball that you have in your hands even when you are walking around the house. Just be careful not to lose control and break that expensive vase in your living room.
This trick does not require any special equipment but below is a list of things you should have or consider before you start.
An old basketball – you will want to use an older basketball that is worn and possibly even slick. It will have less grip or friction and it will spin easier on your finger.
A finger – Of course you will need a finger to spin the ball on. Any of them will work but most people start with their index finger or middle finger. If you get really good you can try spinning the ball on other things like your head or your toes.
Trimmed Fingernails – You might want to give your fingernails a trim first. If they are too long it may make it more difficult and even worse, you might bend a fingernail back and that will really hurt.
Space – Make sure you have adequate space, especially when you start learning. The ball is going to be flying all over the place and as I mentioned, fragile objects in your house may not stand a chance.
Patience and Persistence – This trick does take some time to get good at and like any skill it will take repetition to learn. The more you practice, the better you will get and eventually your muscle memory will take over and it will be as easy as dribbling.
How to Spin a Basketball on Your Finger
Spinning a basketball on your finger, like any other skill, is something that you need to learn and then practice. The following are tips and steps to help you but keep in mind that there is always more that one way to learn or do something. The goal of this is to give some advice and direction to help you learn the skill.
Step 1: Preparation
Make sure you have everything in the list above and plenty of space for that trial and error period.
Step 2: Learn how to spin the ball in the air
Before trying to spin the ball on your finger, you first need to learn how to spin the ball well. You want to get a good straight rotation and the faster it spins the better. So, the goal of this step is just to learn to spin the ball in the air.
There are two methods of spinning that I will go over here. The two-handed spin and the one-handed spin. You can use either or both, whichever works best for you.
Method 1: Two-handed spin
This is my personal preferred method. It gives you more control and power and allows you to get more speed on your initial spin.
Holding the ball for the Two-handed spin. Photo by Melissa Medina.
Hold the ball at about chest level on its side with the grips (black lines) vertical. Have one hand with fingertips extended around the bottom of the ball and the other flat on the side.
With a slight upward motion, twist your hands, spinning the ball and releasing it up into the air. Don’t throw it to high in the air.
At this point just work on getting a good feel of how to spin the ball and getting a good constant, stable spin in the air. You should see the stripes moving steadily around in a circle, not wobbling in all different directions.
Once you can get a good steady spin work on getting more speed.
Method 2: One-handed spin
The one-handed spin looks a little cooler and can sometimes be easier to get onto your finger. The only drawback is its harder to get a fast spin, but once you get good you can speed the ball up by slapping it and spinning it more (we will discuss this a little later).
Holding the ball for one-handed spin. Photo by Melissa Medina.
Hold the ball at about chest level in your dominant hand with the stripes vertical. The ball should be resting on your fingertips with your hand at the bottom of the ball. Your thumb should be pointing outward from your body.
In one motion, twist your hand and fingers so that your thumb comes towards your body. This is important because it is much harder to spin the other direction. As you are twisting your hand move your hand slightly up in one motion and release the ball straight up into the air.
At first, don’t worry about the speed. Just try to get a good steady spin on the ball.
Once you have consistent spin, you can try to put more power into it to increase the speed.
Step 3: Spinning Ball on Finger
Once you can get a good consistent spin, it’s time to go for it. Use one of the methods above to spin the ball into the air, be careful not to get too much height on it or it will bounce off of your finger or even hurt your finger.
As you release the ball into the air, extend the index finger of your dominant hand and move it upward along with the ball as it is traveling upward, until your finger comes in contact with the ball. By moving your finger slowly upward with the ball, you can gently contact the ball giving it a soft landing so it does not bounce off. Your finger should contact the ball on the bottom center of the ball.
Once your finger comes into contact with the ball, you may need to adjust the position of your hand slightly back and forth until the spinning ball is balanced on your finger. At that point, the momentum of the spinning ball will help to keep it balanced and you doing it!
See the photos below showing both the two-handed and the one-handed methods.
Spinning using the two-handed method.
Spinning using the one-handed method.
Step 4: Keeping the Momentum
Eventually, the ball will begin to slow down and lose momentum. Once it slows too much it will fall. You can keep the momentum going by slightly slapping or grazing the side of the ball with your free hand to keep it spinning. Make sure you do this lightly or you will knock the ball off of your finger.
Additional Resources
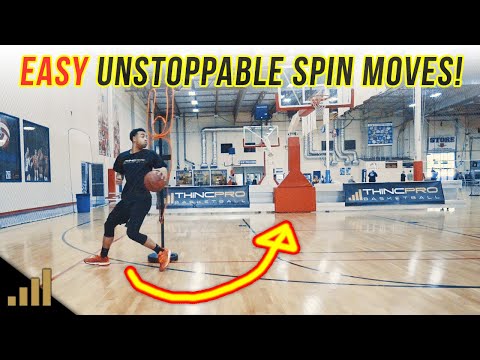
If you want to see a video that uses a similar method to the one above, take a look at this.
Final Words
That’s it! It seems simple, right? It can be for some and for others it may take a while to get the hang of it. It really depends on your level of coordination. If you have trouble at first, don’t get discouraged, keep trying and keep practicing. The more you do it, the better you will get.
Do you know any other cool tricks with a basketball? We’d love to hear from you, so please leave your comments.
How to learn how to spin a basketball on your finger
To skillfully spin a basketball on your finger, you need to learn a few simple techniques, find the ball and set aside 10 minutes of training per day. After a week of practicing your skills, you will master the technique of this trick and show it to your friends. In the step-by-step instructions below, we will show you how to learn how to spin a basketball on your finger.
Tossing the ball correctly
You can train on the sports ground, near the house or even in the apartment, but in any place you need to take into account the environment. For example, when practicing a trick in a room, the ball can bounce and break fragile objects. When a place is found and inventory is prepared, you can begin training. Initially, you need to learn how to properly hold and throw the ball in the air:
Hold the ball with the stripes vertical. Horizontal scrolling looks ineffective and it is very difficult to catch a projectile from this position.
Select throw method:
Two hands. You need to keep the ball not on the sides, but so that 1 hand “looks” at you, and the second from you. Having fixed the object, sharply spread your arms and slightly “throw” the ball up.
With one hand. To throw with one hand, place your fingers along the lines of the ball. It is important that there is free space between the palm and the inventory. Lightly squeeze the ball. Turn the brush outward until it stops, and then gently turn it back. At the last moment, you need to give additional rotation to the ball with your fingertips. But we do not recommend using a large one, because. this will upset the balance and the ball will fly away.
Throw the ball parallel to the floor, do not allow the ball to wobble. It is important that when thrown, the projectile rises above eye level. When its bottom surface is visible, the ball is easier to catch.
These steps must be repeated until fully automated. Usually it takes two days. When the throws are confident, you can move on to the second level.
Learning to catch the ball
Once you have learned how to throw correctly, try catching the ball with your finger. To do this, remember the following nuances:
You need to catch the projectile on the nail, not the finger itself. In this case, it is important that the brush is turned with the palm towards you.
The finger must be placed strictly in the center, at the junction of the vertical lines, otherwise the ball will slide off.
When your finger touches the ball, gently and smoothly lower your hand down. So you will improve the cushioning, the inventory will not bounce, and you will not damage your finger.
This stage is one of the most difficult and requires patience on the part of the freestyler, athlete and just wanting to master the skill. When you learn how to catch the ball, at first it can control you: jump off and make you “run” after it to keep your balance. Be patient and keep practicing.
Once you are comfortable with a spinning ball, try to keep it spinning and spin it further. To do this, with light flapping movements, move your free hand along a tangent. But remember that strong twists can shift the center of gravity and the projectile will lose balance.
Tips
Here are some helpful tips from the pros:
practice throwing a few times a day before moving on to other stages;
workouts can be quite tiring, so take breaks between sets to give your hands a rest;
use only a well-inflated ball;
when accelerating the rotational movements, do not apply much force, otherwise the ball will slip off the finger;
Trim your nails before practicing, this will increase rotation control;
do not throw the ball very high: you can damage or break the phalanges;
You can reduce the risk of wrist injury by warming up before practicing the exercise.
Knowing how to spin a basketball on your finger and approaching the matter responsibly, in a week you will be able to show a cool trick to friends or sports colleagues.
How to learn to play basketball from scratch
“School 2.0” is the best educational project in the history of Russian basketball, which has collected in one material all the basic skills that are needed for those who want to jump like Michael Jordan and throw a three-pointer like Steph Curry. We literally chew on you how to play basketball and become cool. Lots of videos are included.
Passion for basketball usually begins with the ball hitting the basket. Do not deprive yourself of this pleasure, learn to score from under the basket, then from two steps ... But after that, you should think about what elements to master in order to become a “correct” basketball player. We won't let you get bored - we won't fill all basketball practice with boring stops and turns. But in general, you can’t do without it, because the correct work of the legs, the habit of standing firmly, not mincing, not taking extra steps, quickly and correctly changing the direction of movement is an absolute must for a basketball player. Plus, of course, dribbling and passing.
In general, to start the basketball path, School 2.0 recommends exercises to develop the following skills during basketball training:
Shooting
Footwork
Transmission
Maintenance
Do two or three dozen workouts, combining the exercises from the following list, and you will notice real progress. Start each workout with 2-4 minutes of quiet running and such a joint warm-up:
Exercises are performed one after the other without stopping.
Shoulder warm-up. Stand up straight and stretch your arms out to the sides. Make circular movements with straight arms 10 times forward, then 10 times back.
Pelvic warm-up. Put your hands on your belt, feet shoulder-width apart. Perform rotations in the hip joint, as if twisting a hoop, 10 times in each direction.
Back workout. Bend your elbows and press to your chest, feet shoulder-width apart. Do rotations in the lower back 5-10 times in each direction.
Knee warm-up. Stand up straight, feet together. Squat down a bit and put your hands on your knees. Then perform rotational movements with your knees, helping yourself with your hands. Do 10 times in each direction.
Ankle warm-up. Put your hands on your belt. Place one foot on the toe slightly behind you. Resting on your toes, do 10 rotations in the ankle joint in each direction, then change legs.
Squats. At the end, do 5 deep squats, keeping your heels on the floor and extending your arms in front of you.
Throwing
Get used to throwing correctly right away - with one hand (the other can only hold the ball), with reverse spin. The forearm is perpendicular to the floor, the arm straightens completely, the hand “closes”. Listen to how the ball blows up the net - it's a thrill.
1. Shooting stand
Stand straight, feet shoulder-width apart, ball in hand.
At the signal, take a throwing stance, and at the next signal, return to the starting position.
Ready to throw: legs bent, back straight, slightly leaning forward. Throwing hand behind the ball (not sideways!), the second hand holds the ball in front-side.
Raise the ball to shoulder level.
Repeat 10 times with right and left hand.
2. Single handed throw on the spot
Get into the throwing position. The ball lies in one hand at the level of the head, the elbow is directed forward, the second hand does not help.
Sit down a bit and with simultaneous extension of the legs and elbow, throw the ball up in front of you. Stay in the final position until the ball hits the floor.
Repeat 10 times with right and left hand.
3. Throw with one hand into the ring from one meter
Stand under the ring, the ball is in your hand at shoulder level. The other hand does not help!
Squat down and at the same time extend your legs and arms, make a throw around the ring. Keep the final position of the straightened arm and closed hand until the ball hits the floor.
Try to hit the ball in the corner of the rectangle drawn on the shield, then the ball will be in the ring.
Throw from different positions. 10 times with the right and left hand.
4. Medium throw
Stand at a distance of 3-4 meters from the ring and take a throwing stance. Sit down and with the simultaneous extension of the legs and arms, make a throw around the ring. Keep the final position of the straightened arm and closed hand until the ball hits the floor.
Throw from different positions.
Stand a few meters from the ring. Make yourself an autopass, take a small jump forward, catch the ball, take a shooting stance, and hit the basket.
Perform the exercise 10 times with your stronger arm.
5. Two steps - throw
Stand three meters from the ring. Take two steps from the spot and throw the ring.
Get on the three-point line. Take a couple of hits with the ball, then two steps and throw the ring.
From the three-point line, make yourself an autopass. Then catch the ball, take two steps and shoot the ring.
Try to hit the ball in the corner of the rectangle drawn on the shield.
Repeat 10 times with right and left hand.
6. Two steps - low shot
Get on the three-point line. Take a couple of hits with the ball, then two steps and throw from the bottom of the ring.
Stand three meters from the ring. Take two steps from the spot and throw the ring from below.
From the three-point line, make yourself an autopass. Then catch the ball, take two steps and shoot the ring.
Try to hit the ball in the corner of the rectangle drawn on the shield.
Repeat 10 times with right and left hand.
Footwork
Glue your feet to the floor. No extra steps! Otherwise - "jog", whistle, give the ball to the opponents.
1. Jump stop
The exercise is performed on the spot. Make yourself an autopass, catch the ball with two hands and at the same time do a two-foot jump into a basketball stance.
Determine the pivot (supporting) leg and perform forward and backward turns on this leg.
Then imitate the following sequence of actions: take the ball in your hands, being completely in the air; land on both (!) feet at the same time; make turns around the same (!) leg.
Repeat the exercise 10 times: 5 times turning on the right foot and 5 times on the left.
2. Walking stop
The exercise is performed on the spot. Make yourself an autopass, catch the ball with both hands and stop at the same time with two steps into the basketball stance.
The axial (supporting) leg will be the one with which you took the first step - on this leg, perform forward and backward turns.
Repeat the exercise 10 times: 5 times turning on the right foot and 5 times on the left.
3. Zigzag without a ball with a jump stop
All changes in the direction of movement are made by a clear turn around the near leg - even through the “face”, even through the “back”. This is very important in basketball!
4. Zigzag without a ball with a stop in steps
It is performed in the same way as the previous exercise, but the stop at the cone is one-two, not a jump.
Transmission
Mastering the culture of passing will not only earn you the respect of your playmates, but it will also give you a lot of fun. Maybe even more than hitting the ring.
1. Passing with two hands into the wall
Stand 3-5 meters from the wall. Pass the ball into the wall with both hands from the chest.
Hold the ball with both hands from the sides and direct it to the wall with a wrist movement. As a result, the arms at the elbows should straighten, and the hands should “close”.
Move further back to make longer passes. At the moment of such a transfer, one leg takes a step forward. Catch such a transmission from the floor.
Repeat the exercise 15-20 times.
2. Passing with one hand into the wall
Stand 3-5 meters from the wall. Pass the ball into the wall with one hand from the shoulder.
Hand behind the ball, thumbs up. Carpal movement.
Repeat the exercise 15-20 times for each hand.
3. Lying One-Hand Pass
Lying on your back, pass with one hand up.
Repeat the exercise 15-20 times for each hand.
Dribbling
Great basketball dribbling is the key to all doors. Not to mention how effective it is.
1. Palms on the ball
Take the ball in your hands and move it from hand to hand, hitting it with your palms.
Start slowly and then speed up. 15 seconds slow, 15 fast.
Repeat 1-2 times.
2. Ball on fingers
Quickly toss the ball with your fingertips from one hand to the other: raise and lower in front of you; sit down and get up; raise and lower in motion.
Perform each exercise 2-3 times for 15 seconds.
3. Ball around the body
Pass the ball from one hand to the other as quickly as possible: around the body; around the head; in the round-leg basketball stance; in a basketball stance figure eight around the legs.
Do 5 reps each side.
4. Low dribbling on the spot
Low ball dribbling in different positions:
Basketball stance, feet parallel. Dribble to the side of your foot. Free hand in defense position.
Sit on the floor and dribble the ball from your side, bringing the ball closer or further away.
Repeat 15 times with each hand. Do 2-3 sets.
5. Medium dribbling on the move
Medium dribbling of the ball (height to the waist) on the move. Do it at speed.
Make a turn leaving the ball in place and picking it up with your other hand.
Dribble two courts with each hand.
6. V-dribbling in front of you
Stand in a basketball stance.
Dribble with one hand in front of you in a V, with your right and left hands in turn.
Repeat 15 times with each hand. Do 2-3 sets.
7. Crossover
Move the ball in place in front of you from one hand to the other.
First do the exercise for each stroke.
Then - for every third hit.
After translation, touch the floor with your free hand.
Repeat 15 times with each hand. Do 2-3 sets.
8. Underfoot transfers
Transfer the ball between the legs from one hand to the other.
Translate every third hit of the ball.
After translation, touch the floor with your free hand.
Repeat 15 times with each hand. Do 2-3 sets.
That's it for a start. Of course, it would be nice to learn how to fly - in the sense of jumping high without a trampoline. But that's another story. If you only jump, you are a jumper. And if you have mastered these exercises, you are almost a basketball player. Then you can already learn to play in a team, in real contact conditions.
Why Andrey Kirilenko created School 2.0:
And remember,
"School 2.0"
will introduce you to people who you want to follow an example from: winners in whom at first no one believed; music and movie stars going crazy about basketball; heroes who, thanks to sports, managed to overcome themselves.
School 2.0 will recommend movies and books, and they will help you move mountains. With us you will be in trend and understand that success breeds success.


 Or worse, you might bend a fingernail back which can be really painful. So you might want to give your nails a trim before you start.
  So how do you actually spin a basketball on your finger?
 The two-handed spin gives you more control and power, and allows you to get more speed on your initial spin. Though the one-handed spin does look cooler. You can use either or both, whichever works for you.
 Put one hand with your fingertips extended around the bottom of the ball and the other flat on the side.
 The closer you can keep your hand to the ball, the easier it will be. Keep your finger in the centre of the ball where the grooves meet - this position will make it easiest to keep the ball in a steady position. You might need to adjust the position of your finger slightly until the spinning ball is balanced on your finger.
 Take a look at our basketball size guide to help you find the right basketball for you.
 If you get really good you can try spinning the ball on other things like your head or your toes.
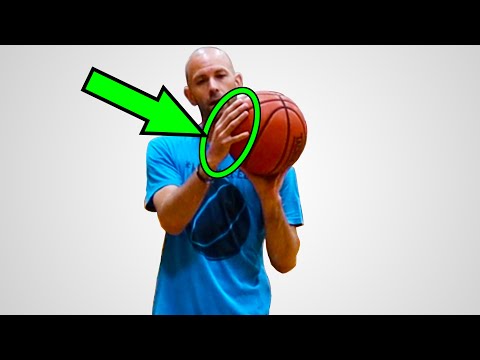 The following are tips and steps to help you but keep in mind that there is always more that one way to learn or do something. The goal of this is to give some advice and direction to help you learn the skill.
 You can keep the momentum going by slightly slapping or grazing the side of the ball with your free hand to keep it spinning. Make sure you do this lightly or you will knock the ball off of your finger.
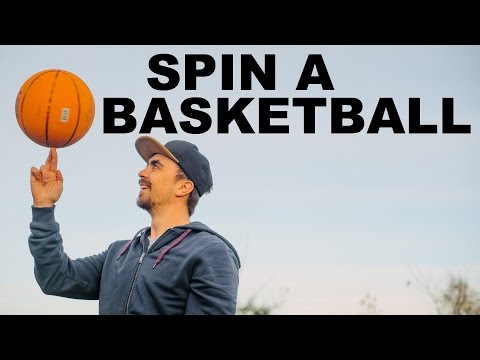
 Usually it takes two days. When the throws are confident, you can move on to the second level.
 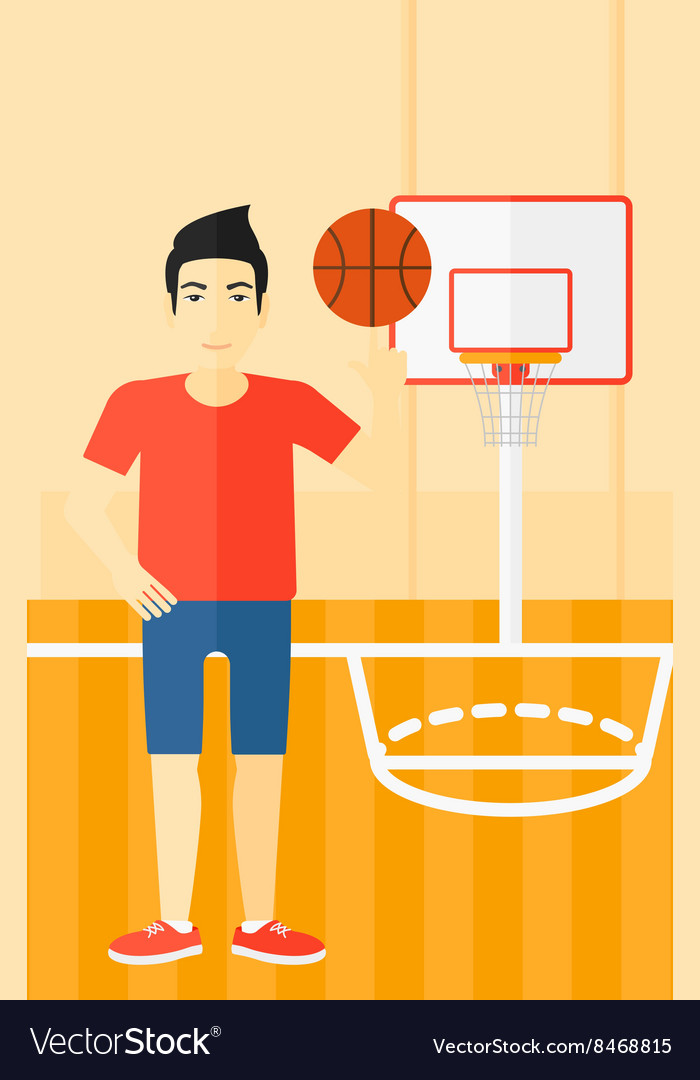 Be patient and keep practicing.
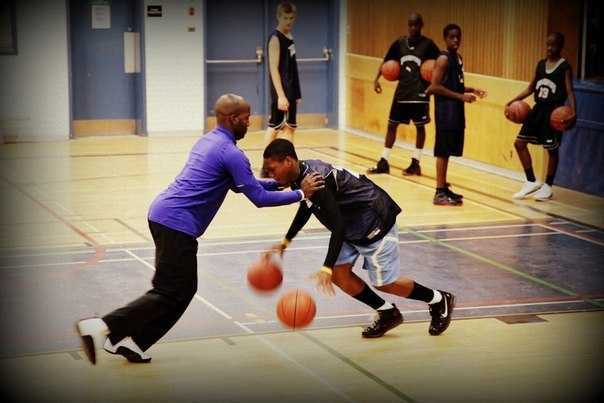
 But in general, you can’t do without it, because the correct work of the legs, the habit of standing firmly, not mincing, not taking extra steps, quickly and correctly changing the direction of movement is an absolute must for a basketball player. Plus, of course, dribbling and passing.
 Keep the final position of the straightened arm and closed hand until the ball hits the floor.
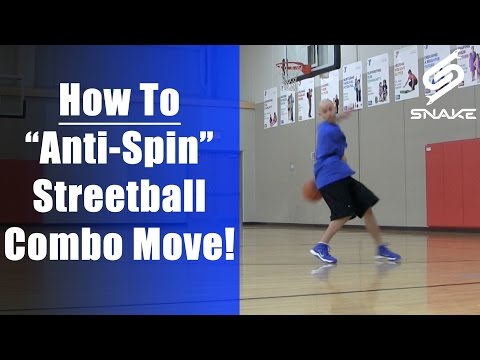


 Do 2-3 sets.