Find an area where you can lay out materials and do some hands-on construction.
Additional information
Materials:
A wire hanger. It cannot be a partially metal hanger made substantially of wood or plastic.
A large, flat piece of cardboard.
The tape of your choosing. Masking tape may be the easiest to work with; duct tape would certainly make the hoop durable.
Markers or paint.
Scissors.
String (optional).
Instructions:
Bend the wire hanger into a circle. You do not even have to dismantle the hanger, but just reshape it into a hoop.
Bend the hook of the hanger so that it is at a 90 degree angle with the hoop. Do not cut away the hook, as it still can be of some use.
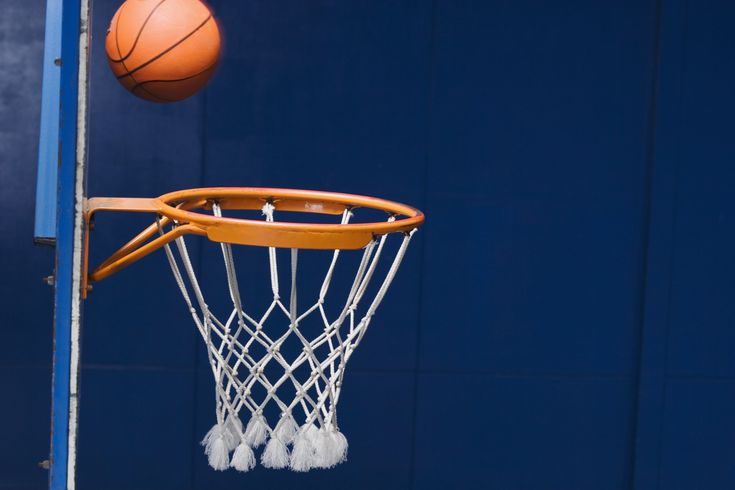
Cut the cardboard to the size and shape of your liking. Standard high school, college, and NBA backboards are rectangular, if you are looking to replicate that appearance. Try to make sure the relative scale of the hoop and backboard seem reasonable. For comparative purposes, an NBA backboard is 6 feet wide, while the basket opening is 18 inches (1.5 feet). That means the basket width is 1/4 (or 25%) as wide.
Decorate the hoop and backboard to your liking. Traditional hoops are painted red, but you can certainly customize it to fit whatever you desire. The backboard of most high schools, colleges, and all NBA franchises are now made of transparent glass; as there is no transparent cardboard, you can really be as creative as you want.
Tape the hoop to the backboard. You can attach the hook (which you bent up earlier) to lower back side of the backboard. Make sure the rim is as close to the backboard as possible.
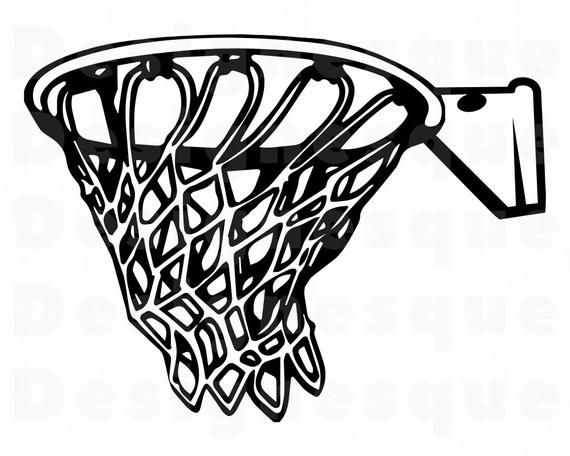
Attach a net to the basketball rim (optional). You can make make a net out of string, or even out of twisted tape.
Hang the completed basket to a wall or door. Masking tape will work well for this purpose, as it will not leave a sticky mess behind like duct tape would. There are two different taping methods you can employ.
This activity supports the practice of these STEAM Habits of Mind: Develop craft, engage & persist, observe, reflect, stretch & explore.
Tips for Supporting Your Children's Learning
Get your child actively involved in their own learning and having their questions drive the learning. Let them observe and figure out, and try to hold back from answering questions for them. Instead, try to ask: What do we know? What else can we find out? How might we figure that out? Don't be afraid to ask your child questions. Also, don't be afraid to say "I don't know--let's find out together!" as a way to respond to their questions. Here's an article to help you support this kind of learning: Of the Value of Saying I Don’t Know
Want to learn more about making your own sports equipment?
Science Club for Girls at Home - Make you own sports equipment challenge
Instructables - MYO Basketball hoops
More hands on activities and learning opportunities:
Homecourt - basketball skill building app
Cambridge Public Schools Virtual Enrichment Recommendations
Exploratorium - Sports Science
Design Squad - Sports design challenges
Parkour Generations - Classes
Department of Human Services Sports Leagues
More STEAM@Home suggestions!
MIT Full STEAM Ahead
STEAM Habits of Mind - observe, reflect, engage & persist, stretch & explore, imagine, develop craft
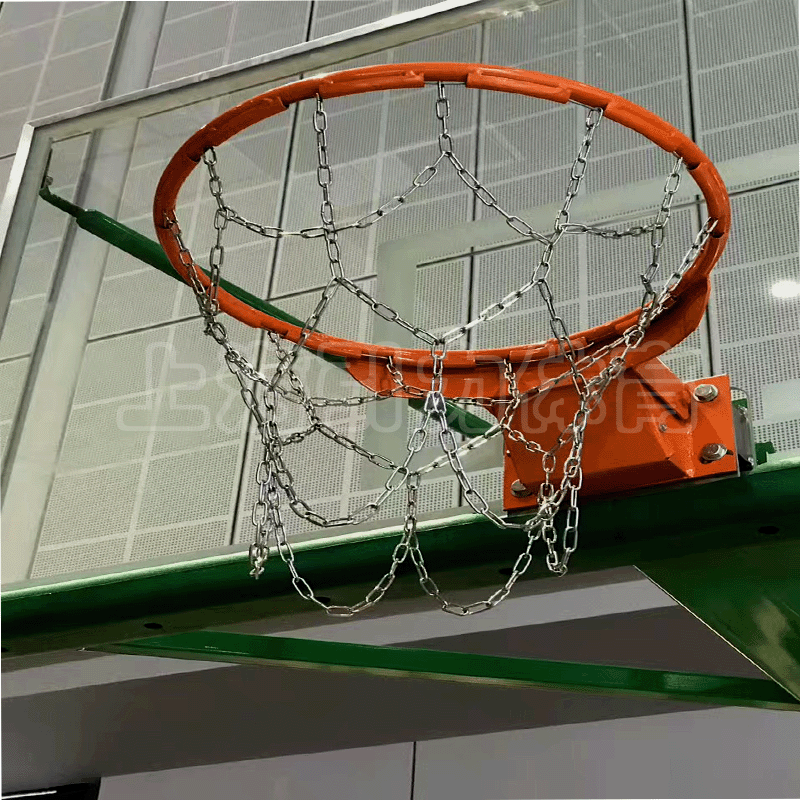
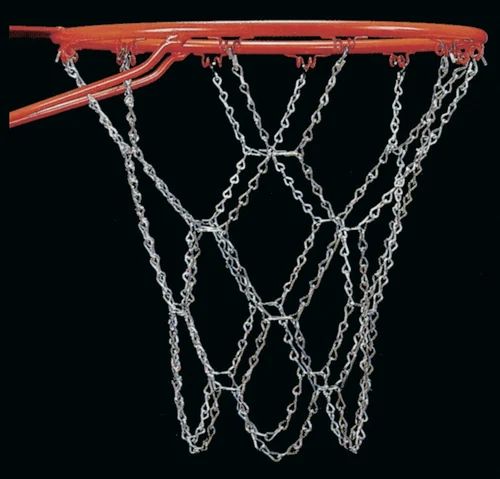
DIY Chain Basketball Net – The Sports Installer
Skip to content
Search for:
Sports Equipment
by Michael Westhead
Anyone that has played basketball has enjoyed the sound of the basketball making the swoosh sound. In fact, the expression “nothing but net” is one of the most popular expressions in all of sports.
This popular sound is almost always associated with a nylon net. If you’ve played long enough, however, you’ve had a chance to play on a playground court with chain nets. It’s a different sound and experience but can be even more enjoyable than the sound of the swoosh. It’s something you should experience.
What’s cool about chain nets is they’re easy to make happen. So much of the equipment used in the sports-equipment industry is made from raw materials like steel and glass. Most items, like basketball hoops, require bending, molds and other such items that make fabricating them way too expensive and troublesome for a DIY project. However, there are other products such as pull-up bars and chain basketball nets where you can get the raw materials from a hardware or lumber store and build it yourself.
Below are some instructions on how to build your own chain basketball net.
First off, this is something you should do just for the fun of it. It may be worth it if you have a bank of basketball hoops and you can buy a larger supply of chain with volume pricing or if time is an issue and you need something right away. Otherwise, you’re kind of better off just buying one. I say this because there is not a great deal of cost savings mainly because chain nets themselves aren’t that expensive.
Yes, they’re $50 but building them is going to take a couple hours and sourcing material for one net and doing it yourself is going to save you $10.
$36 to $40 dollars (Not including taxes or shipping)
You can see by the pricing above that you’re looking at roughly $36 to $40 for a new net. I’m not sure what shipping to you will cost but shipping from Kansas to New Jersey is roughly $16. Add it up and you’re looking at $51-$55. (If you want to avoid all this and buy it brand new, I can provide it to you.)
$42.80 total cost of DIY materials to include taxes and, obviously, shipping.
As you can see from my receipt, you’re saving a little money by doing it yourself. What I’m describing below is more for fun than anything.
Materials needed:
2″ Zinc plated chain
Chain link– I purchased 2″ zinc-plated welded steel loops. You can save a little more money if you were to buy larger lengths of chain. For the vertical lengths, I went with 13 links which equals roughly 18″. For the horizontal links, I went with a 48″ length chain for the upper ring and 36″ for the lower ring. I had a little chain leftover but I wanted to play it safe and not run out of chain and have to go back to Home Depot.
Bolt Cutters
There is a cutting station at Home Depot right next to the chain but, funny enough, there are usually bolt cutters sitting right next to it to use too.
S-Clips
S-Clips- I went with a small S-Clips because it’s not like this net is load bearing. I also wanted something that was a little pliable so I could crimp it easier. I went with four packs of four.
S-Clips
Hang each individual 13-link chain from the rim with open S-Clips.
Up-close look at net
From here feed the top horizontal chain through each of the 5th links from the top all the way around and use one S-clip to attach the chain together. When attaching the chain together, I also attached the S-Clip to one the vertical chain in the rear of the net. One item of note, the top horizontal chain had exactly 39 links.
S-Clip on bottom chain
I then fed the bottom horizontal chain through the 4th link from the bottom. With this phase, I actually cut the chain into three equal lengths of seven links and attached them with S-Clips. I did this because the chain needed to be secured on the bottom to not get tangled and unravelled.
Your last step is to crimp all the S-Clips to the rim.
VOILA!
A couple items of note. I put roughly 100 balls through the net. (Mikan drill baby!) There were times when the chain wasn’t perfectly aligned but it corrected itself as time went on. I will keep an eye on my net to see if I have to adjust the chains or add S-Clips.
I hope you enjoyed this and, if you ever need sports equipment for your playground, school or home, feel free to reach out to me at www.oncallsports.com.
Like this:
Like Loading...
how to weave a basketball net
HOW TO QUICKLY WEAVED A BASKETBALL NET Homemade Basketball Hoop Nets
play تشغيل
download تحميل
How to weave a basketball net with your own hands The easy way How I made a basketball hoop
play تشغيل
download تحميل
Do not buy a basketball net, but quickly weave it from a clothesline
play تشغيل
download تحميل
How to knit a basketball net
play تشغيل
download تحميل
DIY basketball hoop
play تشغيل
download تحميل
Outdoor Basketball Hoop Net Fast Just Sami
play تشغيل
download تحميل
Netting for billiards or basketball hoop
play تشغيل
download تحميل
metal chain basketball net
play تشغيل
download تحميل
Basketball hoop How to tie the net yourself
play تشغيل
download تحميل
Basketball hoop basketball net
play تشغيل
download تحميل
WHY THE NBA SCORE SO MANY POINTS
play تشغيل
download تحميل
Paracord net 2
play تشغيل
download تحميل
Basketball net with Banggood Com
play تشغيل
download تحميل
How to make a basketball net out of an ordinary thing
play تشغيل
download تحميل
How to make a net for a basketball hoop The easiest weave
play تشغيل
download تحميل
Plain shop basketball net
play تشغيل
download تحميل
DIY BASKETBALL HINGE
play تشغيل
download تحميل
Macramé mesh dress
play تشغيل
download تحميل
Basketball net for hoop shop BASKET FAMILY
play تشغيل
download تحميل
How to make a basketball hoop DIY basketball hoop
play تشغيل
download تحميل
مقالات ذات صلة
How to tie a basketball net — Stroy Obzor
NET WITH SQUARE MESH
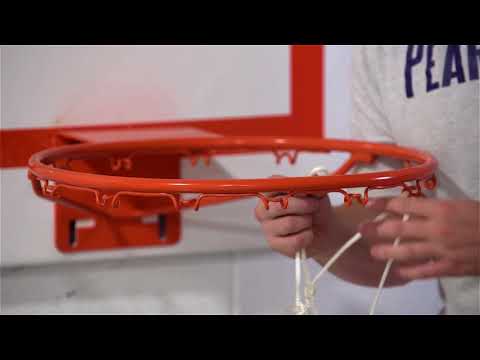
Entering the sports halls of schools in the district and the region, I often pay attention to the lack of a net on the basketball hoops or their poor condition. “It seems that a year ago they hung new nets, but now they are barely “breathing”!” - so, usually, physical education teachers say. After all, I'm right! Is not it? I solved this problem for myself 5 years ago.
At that time, I was very dissatisfied with the quality of the basketball nets I bought in the store. And, without hesitation, I bought a rope in a hardware store and wove my first basketball net. I had to work a little and experiment so that it turned out to be beautiful, durable and correct. To my surprise and joy, having made 6 nets 5 years ago, I hung them on basketball hoops in my school gym and ... they are still like new (note that students play basketball in the gym every day)!
Today I want to bring to your attention a master class on making a net for a basketball hoop. What is needed for this: a nylon rope (household cord) 20 meters long (5 mm in diameter), a thin metal cable 160 cm and a template (a bar with five nails driven in without hats as shown in the picture).
So, let's get to work:
Cut the rope into 12 equal pieces (160 cm each). Melt all ends of the ropes (so that they do not fray over time) using matches or a lighter.
Each piece of rope is folded in half.
Take one piece, loop over the nail and tie a knot (see photo) after 100 mm. The node is called a "simple conductor". By the way, all subsequent knots are knitted in this way.
Follow the same steps as in step 3 with the remaining 11 pieces of rope.
The next step is to link 12 blanks together (see photo).
Tie the ends of the ropes together last when 5 rows are completed.
5 rows of woven mesh is sufficient. I gave the optimal rope sizes and cell sizes between the knots. A thin metal cable 160 cm is designed to be attached to the ring. A basketball flying into a ring with such a net is slightly delayed (by 0.5 - 1 second) and falls to the floor. Visual effect of slow motion. Just CLASS. Try it and you won't regret it! I spent no more than two hours on weaving one net. Wish you success!
P.S. The net is attached to the basketball hoop with a cable or rope. To do this, the cable is threaded through the ears of the ring and mesh loops and its two ends are connected with a clamp. In my gym, I used to use not a cable, but a rope (see photo). However, practice shows that the cable is more reliable and durable.
No related records
Vyacheslav May 24, 2014 12:57 pm
Thank you. I'm trying to build one for myself.
Valery Pavlovich, more articles like this. Young teachers need your experience and your wisdom.
Vyacheslav, a little advice: for the first time, take the pieces of rope a little longer, that is, not 160 cm, but 170-180 cm.
Attach the mesh to the ring with a rope and a clamp. I'll take a photo and post it.
Then the length of the cable should be 160 cm, and not as you indicated 160 mm
Thank you for the article and the answers.
You're right, I'll correct the typo now. The rope should be 160 cm.
So, a little epic about my first woven mesh.
Of course, I could not miss the chance to knit such a wonderful net, but for some reason this event was constantly postponed until later. But with a strong-willed decision, I overcame myself and went to the store for a rope.
As a graduate of Physics and Mathematics, I calculated that with a length of ropes of 165 cm (yes, I decided to risk 8)) two skeins of 20 m each would be enough for me for 2 nets. Imagine my surprise when a skein of "20 meters" was enough for me only for 9 segments
Advice to everyone who is going to repeat the experiment: count on a skein of no more than 16 meters.
I made the weaving tool in 5 minutes, after which I wove the mesh in 40 minutes (of which a third of the time was spent on the last sections, as the mesh was constantly tangled).
A little later I will attach the nets to the ring and write what the average cost of each set is.
Vyacheslav, I am glad for your success! You are right that in one skein there are not 20 meters, but much less.
Advice: when I wove the mesh, I tighten each knot until after the completion of all the work, that is, when I attached it to the ring. Why am I doing this? During the test (by throwing the basketball), the ball may not fall out of the net. That's when I tighten the first loops in particular (that is, expand). I like it when the ball gets stuck in the net for a split second.
Thank you very much. Everything is described in an accessible way, and with the photo it was very easy for me to create a grid for my son. By the way, I experimented with colored ropes. Vishlo very cool and original. Thank you Valery!
I am glad that my article was useful to you in practice, Roman!
Thank you. I made a net, it turned out very cool. I hung the “people” in the yard and started to get ready to play (before that, it was flimsy and tore, and they stopped playing). I decided to search on the Internet how to weave a strong one (for a long time). for a simple visual way. By the way, I also like it, the delay of the ball in the net for a fraction of a second. I think to weave another one, but take from the second knot not 5 cm, but 4 cm (from 5 cm it passes freely).
Maybe I made a mistake, not 4 cm, but 6 cm! I'll try.
Thank you, great article)
I am glad that the article was useful to you!
Good afternoon! Please tell me what is the distance between the carnations horizontally. And how to finish weaving? Thank you.
Horizontal spacing between nails approx. 25 - 30 mm.
6 rows of mesh is sufficient. As you tied the 6th row, align the ends with scissors and singe them with matches or a lighter.
Good afternoon Valery! Thank you very much for the answer. I probably did not express myself correctly!? “Finish weaving” I meant how to connect this weaving to each other (the first and twelfth laces). Thank you very much, I couldn't find a better description.
Vitaly, there is an answer to your question: you need to complete the circle of weaving by tying the first and twelfth laces.
The Soviet ring needs 11 sections of 180 cm each. There are 11 fastening loops, there are also 11 gaps, respectively.
0381 Valery, thank you very much for a simple and reliable recipe! I wish there were more people like you. you look and life would get better, and the children would be healthier!
Thank you for your positive feedback! I love it when my experience comes in handy for you!
Thank you very much, everything worked out!
These nets are actually very durable.
Good afternoon! Tell me, how to narrow the size of the outlet? It turned out to be a big cadet for me. I have not hung the net yet, but the ball passes and there is still a gap between the net and the ball of 5 cm. Is this normal?
I left too much space horizontally on the template, it looks like I have 5 cm between them
If you reduce the distance between the nodes a little, then all problems will be solved. Read the comments above and everything will become clear. By the way, if the ball freely passes through the net, then this is not bad. so it should be.
In order to tie a net for basketball hoops, you will need 21 meters of nylon cord or rope and a template. To make a template, you need to take a wooden block 50mm / 50mm in cross section, 400 mm long and 4 nails per 100 without hats (bit off the hats or saw off with a hacksaw). Mark the bar: 170mm, 110mm, 50mm, 50mm. Drive nails into the bar according to the markup. (see photo)
The markings on the template are designed for knitting with cord or rope 5 mm thick or thinner.
Step by step:
Make 12 pieces of rope 1700 mm long. To prevent the ends of the rope from fraying, they need to be melted over a fire. We take one piece (blank), fold it in half, put it on a nail on a template with a marking of 170 mm and on the side where there is one nail (it’s more convenient to tie a knot). (see photo)
Knit knots in such a way that the loops on the nails are stretched, and since the nails are without hats, the loops will be easy to remove.
Thus, we make 12 blanks with loops. With these loops we will hook the finished net to the basketball hoop.
Further, these blanks are connected to each other in a circle. We first take 2 workpieces, put them on the loops on the nail, which is located on the template with a marking of 170 mm, one on the right side, so that one workpiece is a loop, knot and ends on the right side of the rest of the nails on the markup, and the other on the left. (Make sure that the loops and ends are not twisted). We connect the two ends that are closer to the nail, pulling the rope so that the first knots on the workpieces are in the center of the 50 mm markup. (See photo.)
So we move in a circle to the right or left side until all the blanks are connected to each other. Thus, on our grid, after two stages, we get two rows of nodes.
The third row of knots and subsequent ones are knitted in the same way: the knot of the first row is put on a nail with a 50 mm marking, which is located in the center of the template, so that the two knots of the second row and the ends are one on the right side and the other on the left side of the nail , which is located in the center of the 50 mm markup. We knit knots of the third row. (see photo ).
The number of rows depends on the length of the pieces. From our blanks we get a grid of 7 rows.
App.
Magazine Young Technician No. 5-84g.
Drawings by E. ORLOV
BADMINTON NET
For this work you will need a shuttle and a template. You must make them yourself from a thin, well-dried plank.
The best hook shape is shown in picture 1 on the left. Nearby you see how to properly wind the cord on such a shuttle, from which the net is woven. Figure 1 on the right shows a simpler shape of the shuttle, much easier to make. But the first shuttle, of course, is more convenient for work.
A template is a small wooden ruler, its width should be 1.4 times less than the size of the grid cells. According to the rules, the mesh size for badminton is 2 cm. This means that the pattern in this case should be 1.4 cm wide. The length of the pattern is 20–30 cm. - 7 times the width. Both the shuttle and the template should be smooth, without burrs. Sand them thoroughly with fine sandpaper. The badminton net is dark in color, most often green, so that the white shuttlecock can be better seen against its background. A mesh is made of twisted twine with a thickness of 0.8 mm. For weaving larger sports nets - volleyball, football - a linen cord, cotton or synthetic, is suitable. Wind the twine or cord from the skeins into balls. Wind more cord around the shuttle, but so that the shuttle can easily pass into the mesh cells. As the cord is used up, you will wind a new one on the shuttle, connecting the ends with a marine knot (Fig. 2).
There are several ways to weave netting. We offer you the simplest. A net woven in this way will have diamond-shaped meshes, while real volleyball, football and tennis nets will have square meshes. However, this is not so important for a friendly meeting of yard teams. For those who want to weave a grid according to the standard, we will tell you at the end how to get square cells.
Take a piece of rope 155 cm long and stretch it between two supports. Fasten the end of the cord to the rope with a knot, as shown in Figure 3. To do this, follow the pattern / course of the cord and repeat it with a shuttle. Now attach a template to the rope and wrap it around it with a cord, each time fixing the loop, as shown in Figure 4. After collecting 40 loops, take out the template and start weaving the cells of the first row. Lay the cord over the template (fig. 5a) and insert the shuttle from behind into the first loop of the base (fig. 56). Pull the cord so that the edge of the block touches the loop of the previous row. Once again, pull the cord over the template (fig. 5c) and press it with your thumb just where the cord kinks over the edge of the template. In figure 5c, the place where the thumb should be is indicated by a circle with a cross.
Now throw the cord with the shuttle to the left in a semicircle and drag the shuttle from right to left under the first loop of the base (Fig. 5d). Carefully tighten the knot without releasing your thumb (Fig. 5e). If you release your finger earlier, the node will shift and the mesh will be uneven. The first grid cell is ready. Continue like this until the end of the row, moving the template. It is more convenient to weave the net all the time in one direction, from left to right. But for this you need to turn the work over every time at the end of the row. Tie the ends of the rope on which the loops were typed with a sea knot and fasten it on a hook, nail, or tie it with a piece of cord to some support at a height convenient for work (Fig. 6).
When the mesh reaches the desired length, thread another 155 cm long rope into the cells of the last row and tie it into a loop with a sea knot. Two such ropes - at the beginning and at the end of the work - will limit the width of the grid, preventing it from stretching too much. The width of the finished badminton net is 76 cm, the length is 6 m.Yu cm. Thread two strong cords into the extreme cells along the length of the net on both sides, on which the net is stretched on two racks 155 cm high. Edge the edges of the net with strips of white cloth 7 cm wide In the same way, you can weave a volleyball net. Volleyball net width - 1m, length - 9m 50 cm. The tennis net has a length of 12 m 80 cm and a width of 91 cm. The football net is woven according to the size of the football goal: the height of the posts is 2.44 m, the length of the crossbar is 7.32 m.
Cut the cord into lengths. The length of each piece should be 160 cm. The inner diameter of the metal ring of the basket is 45 cm, and it takes 35 such pieces to get a mesh with cells of 4 cm. First, fasten all the pieces of cord to the ring at regular intervals (4 cm ). To do this, fold each segment in half, put the fold on the edge of the ring and thread the ends of the segment through it (Fig. 7). Having fixed all the segments on the ring, begin to tie the ends of the segments of neighboring pairs with a sea knot (Fig. 8). To make the grid even, with the same cells, throw up a template (the width of the template in this case is 2 cm). When the mesh reaches a length of 40 cm, trim the ends of the segments, leaving a fringe of 5 - 6 cm.
In the same way you can weave a mesh bag for a billiard pocket (fig. 8). In this case, the free ends of the segments are tied at the bottom into one large knot. It is convenient to carry a ball or even several balls with you in a specially woven mesh (Fig. 9). You can make it from a thin cord or even from harsh threads. The net is woven in the same way as a basketball, on a wire ring with a diameter slightly larger than the size of the ball. The ends of the segments are tied into a knot at the bottom. Pull the cord through the first row of cells along the wire and tie its ends. Now take out the wire ring. The knots with which the pieces of cord were attached to the wire will unravel, and the cord will easily tighten the mesh.
SQUARE MESH NET
If you need to weave a square mesh, start at the corner (fig. 10).
To do this, make only one loop at the end of the cord using a template and fasten the end as shown in figure 10. In the same way as shown in figure 5, weave in each row one more loop than in the previous one. To do this, at the end of each row, make two loops on its last loop.


 Here's an article to help you support this kind of learning: Of the Value of Saying I Don’t Know
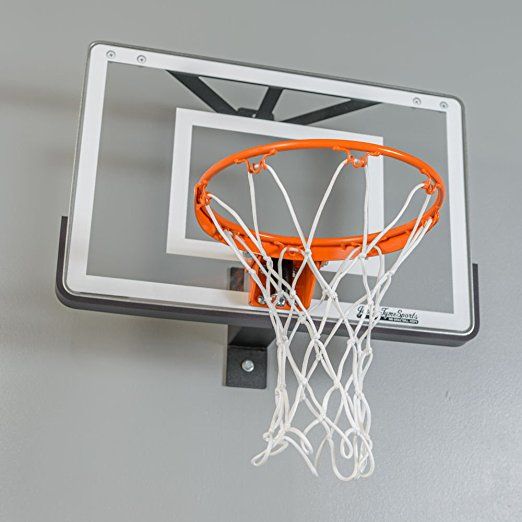 In fact, the expression “nothing but net” is one of the most popular expressions in all of sports.

 I will keep an eye on my net to see if I have to adjust the chains or add S-Clips.
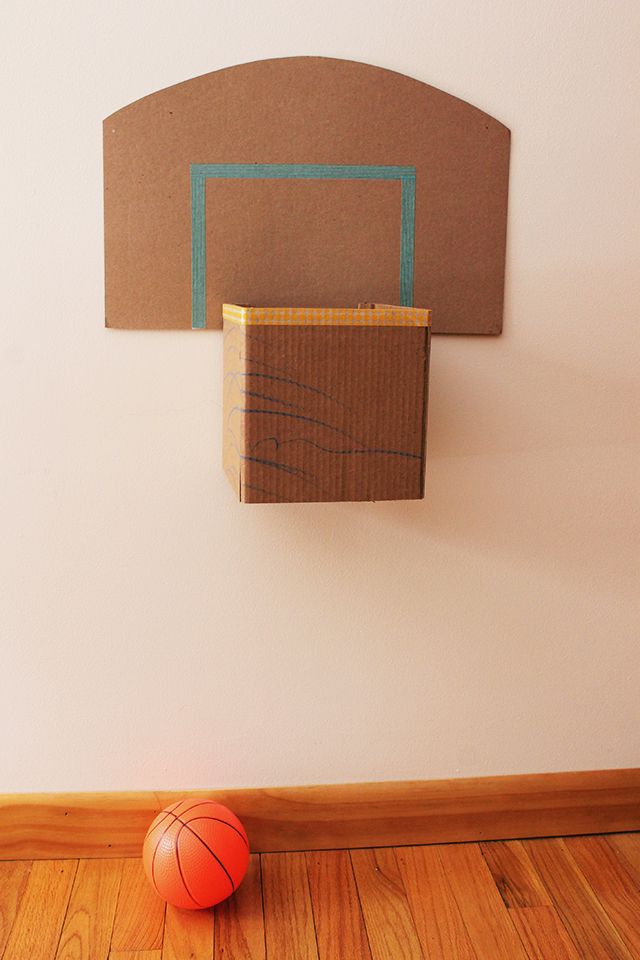 “It seems that a year ago they hung new nets, but now they are barely “breathing”!” - so, usually, physical education teachers say. After all, I'm right! Is not it? I solved this problem for myself 5 years ago.
 Try it and you won't regret it! I spent no more than two hours on weaving one net. Wish you success!
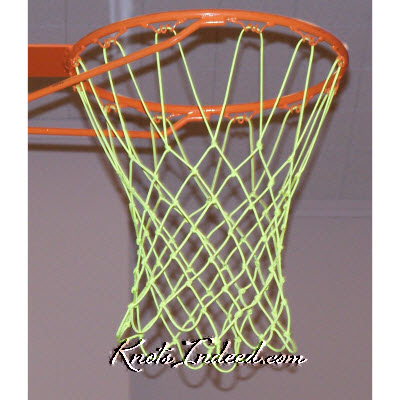

 I decided to search on the Internet how to weave a strong one (for a long time). for a simple visual way. By the way, I also like it, the delay of the ball in the net for a fraction of a second. I think to weave another one, but take from the second knot not 5 cm, but 4 cm (from 5 cm it passes freely).
 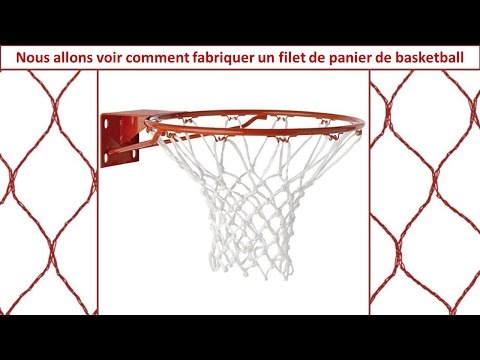 Thank you very much, I couldn't find a better description.
 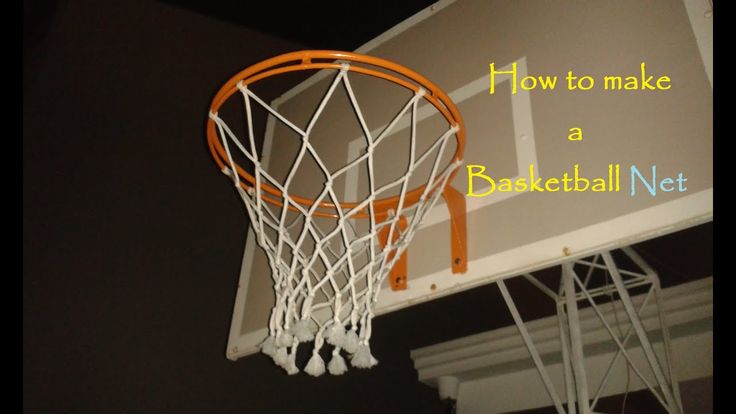 Read the comments above and everything will become clear. By the way, if the ball freely passes through the net, then this is not bad. so it should be.
 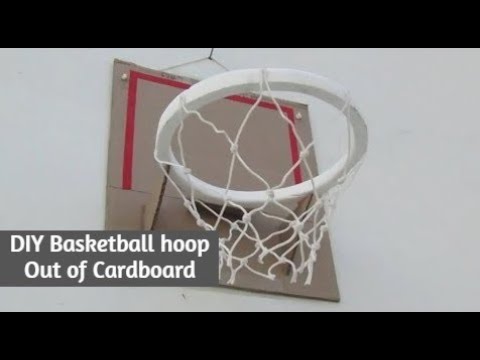 (see photo)
 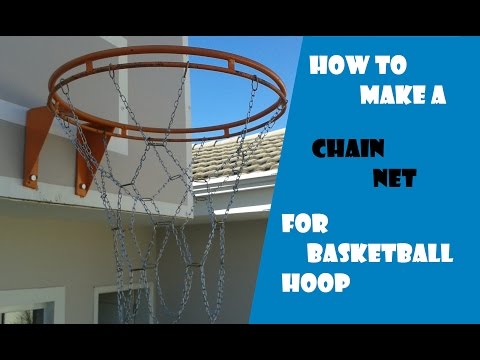 (Make sure that the loops and ends are not twisted). We connect the two ends that are closer to the nail, pulling the rope so that the first knots on the workpieces are in the center of the 50 mm markup. (See photo.)
 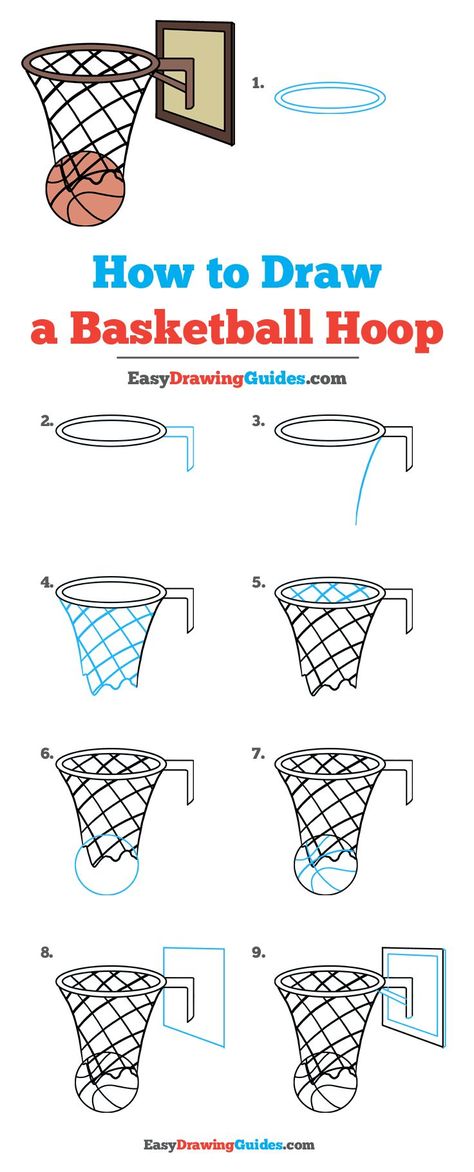 Magazine Young Technician No. 5-84g.
  A mesh is made of twisted twine with a thickness of 0.8 mm. For weaving larger sports nets - volleyball, football - a linen cord, cotton or synthetic, is suitable. Wind the twine or cord from the skeins into balls. Wind more cord around the shuttle, but so that the shuttle can easily pass into the mesh cells. As the cord is used up, you will wind a new one on the shuttle, connecting the ends with a marine knot (Fig. 2).
 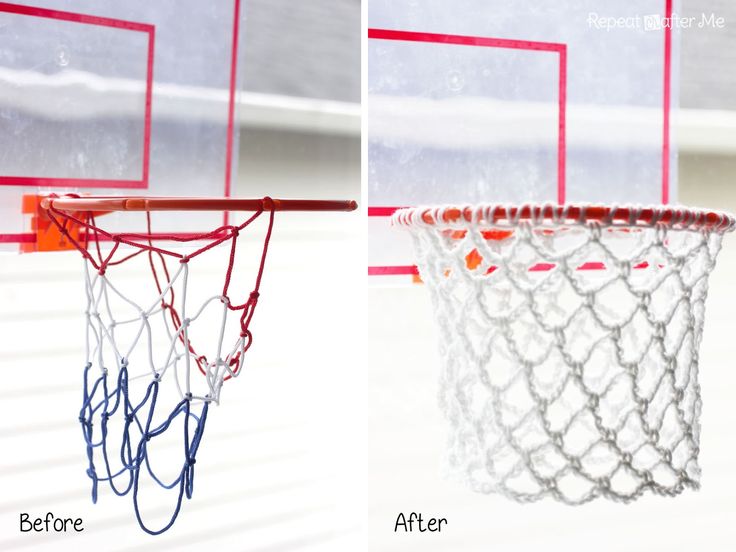 Now attach a template to the rope and wrap it around it with a cord, each time fixing the loop, as shown in Figure 4. After collecting 40 loops, take out the template and start weaving the cells of the first row. Lay the cord over the template (fig. 5a) and insert the shuttle from behind into the first loop of the base (fig. 56). Pull the cord so that the edge of the block touches the loop of the previous row. Once again, pull the cord over the template (fig. 5c) and press it with your thumb just where the cord kinks over the edge of the template. In figure 5c, the place where the thumb should be is indicated by a circle with a cross.
 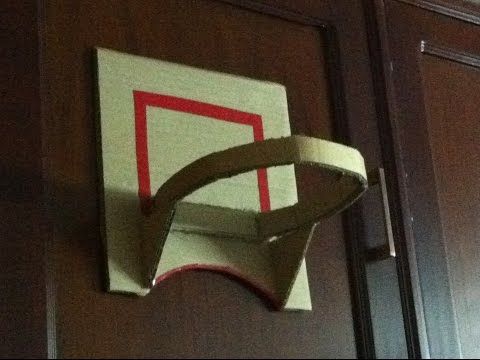 It is more convenient to weave the net all the time in one direction, from left to right. But for this you need to turn the work over every time at the end of the row. Tie the ends of the rope on which the loops were typed with a sea knot and fasten it on a hook, nail, or tie it with a piece of cord to some support at a height convenient for work (Fig. 6).
  The tennis net has a length of 12 m 80 cm and a width of 91 cm. The football net is woven according to the size of the football goal: the height of the posts is 2.44 m, the length of the crossbar is 7.32 m.
  8). In this case, the free ends of the segments are tied at the bottom into one large knot. It is convenient to carry a ball or even several balls with you in a specially woven mesh (Fig. 9). You can make it from a thin cord or even from harsh threads. The net is woven in the same way as a basketball, on a wire ring with a diameter slightly larger than the size of the ball. The ends of the segments are tied into a knot at the bottom. Pull the cord through the first row of cells along the wire and tie its ends. Now take out the wire ring. The knots with which the pieces of cord were attached to the wire will unravel, and the cord will easily tighten the mesh.