Home » Misc » How to tape a sprained wrist for basketball
How to tape a sprained wrist for basketball
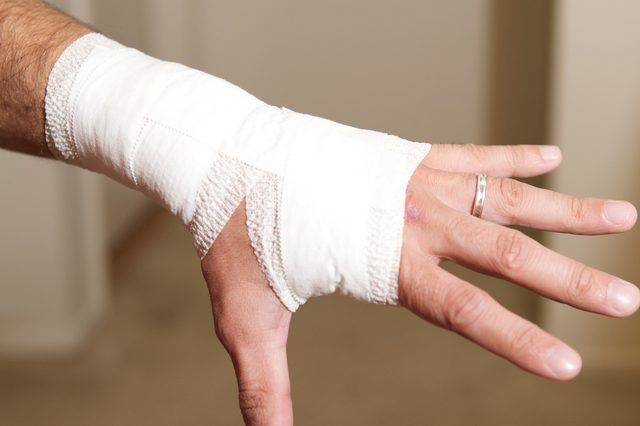
How to Wrap a Sprained Wrist - What are My Options?
Benefits Athletic Tape Kinesio Tape When to Wrap Wrist Splint Safety
Learning how to wrap a sprained wrist may be one of the fastest ways to heal an injury, improve recovery time, ease symptoms, and prevent further injury. Whether using traditional wrapping techniques or trying out athletic or kinesiology tape, there are plenty of benefits to take advantage of. Keep reading to learn more about how to wrap your sprained wrist.
Benefits of Wrapping and Taping
You can wrap your wrist with an elastic bandage or tape your wrist with athletic tape after a sprain or prevent one even before it happens. It’s an easy way to provide wrist support quickly and with minimal cost. See some of the other benefits here.
Restricts movement within the wrist
Provides compression
Reduces swelling
Minimizes pain
Prevents additional injury
Increases awareness of the injury
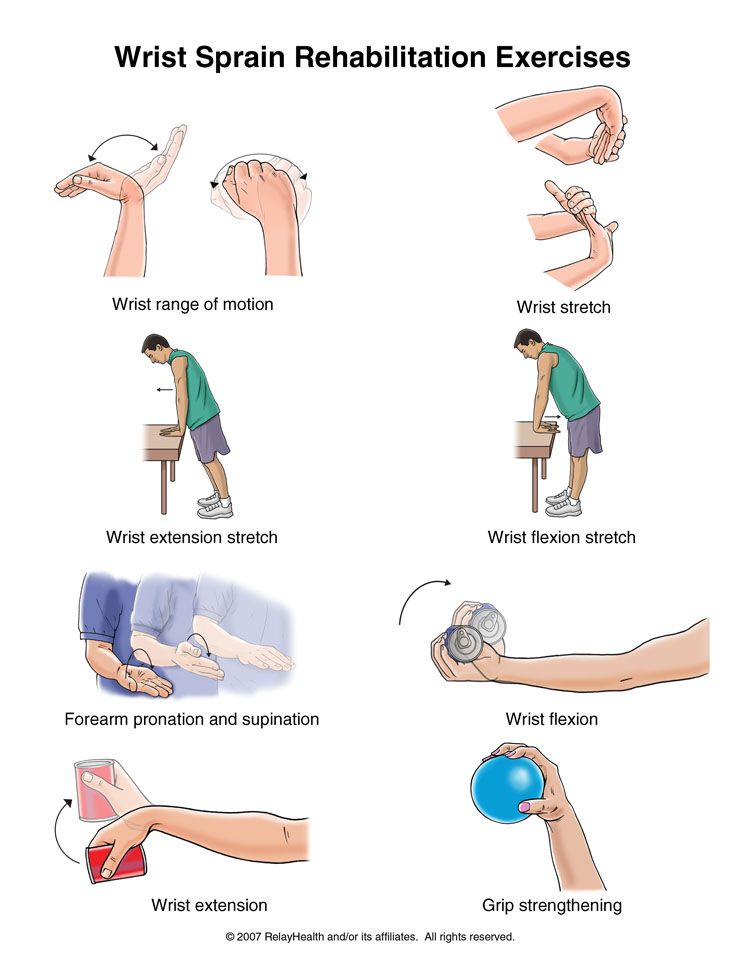
Wrapping and taping can be especially effective when used to stabilize the wrist during exercise. See more sprained wrist exercises here.
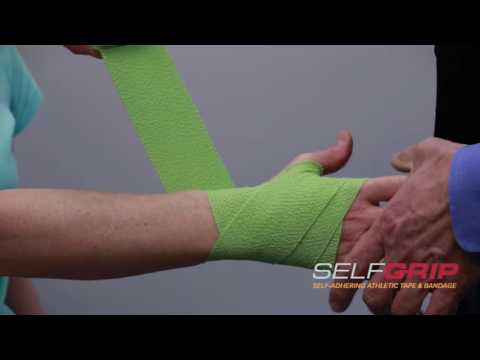
Athletic Tape vs Kinesio Tape
Athletic tape and kinesiology tape are similar, although it’s important to understand their differences to make the best use of them.
Athletic tape
Athletic tape is wrapped around the wrist injury and limits movement. It is the more straightforward of the two options, with no adhesive backing and limited to no elasticity. Since it is not as flexible, it is a good choice for short-term recovery, early in the healing process.
Kinesiology Tape
With an adhesive backing, highly elastic material, and many different types to choose from, kinesio tape offers plenty of unique benefits. Since it doesn’t restrict movement, it’s a good option for athletes or those who want to stay active during their recovery.
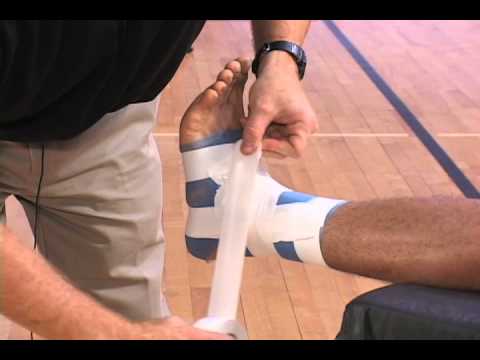
Athletic Tape
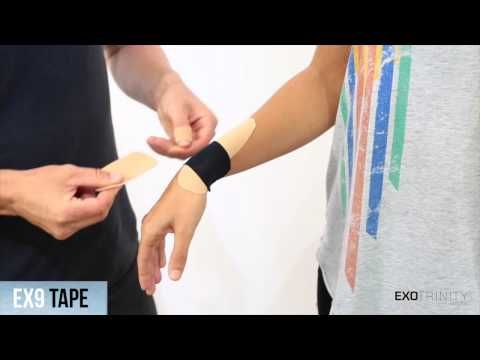
Looking to try wrapping your sprained wrist with athletic tape? Follow these simple instructions to get started.
Start by wrapping the wrist and hand in a protective pre-wrap.
With all the fingers and thumb spread apart, which tightens the muscles, place three pieces of tape around the wrist with each one ascending up the arm as you go.
Place a piece of tape starting at the inside of the wrist on the anchor wrap up between the thumb and index finger back down to the back of the wrist. Do not wrap this piece tightly.
Flex the hand slightly and apply three to five pieces of tape from the wrist anchor to the top of the palm. Each piece needs to be placed so that you are making an X or fan shape.
Anchor the last pieces of tape you place around your wrist and again on the top of your palm with a piece wrapping around your hand. Be sure to keep your wrist in a flexed position as you secure the anchor tape.
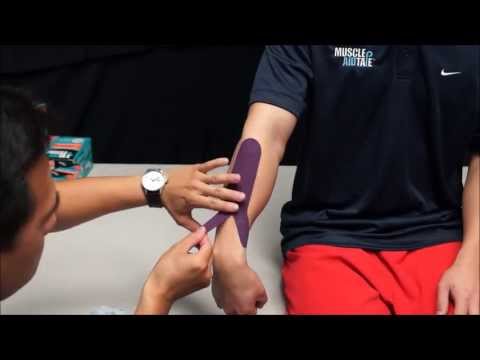
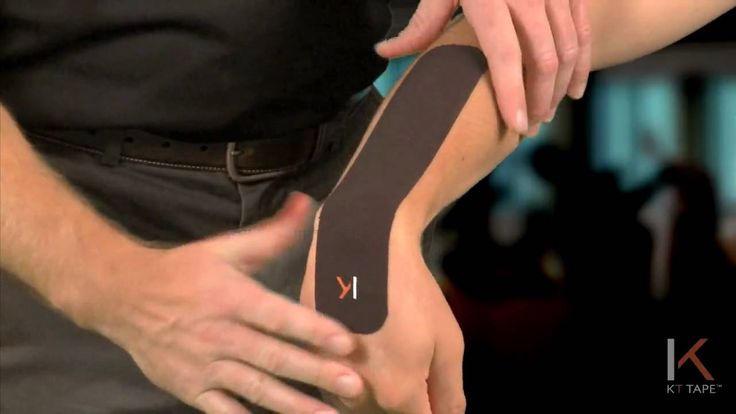
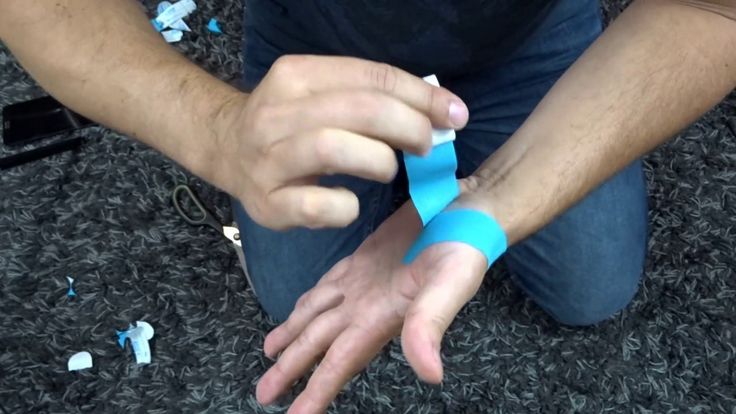
Kinesio Tape
Kinesio tape might take a bit more practice to get right, but with these simple instructions, you should have it down in no time.
Take a full piece of kinesiology tape and anchor it to the back of your hand. Stretch it up the length of your forearm, while keeping the arm flexed forward.
Anchor a second piece of tape on the side of your wrist, beneath the thumb joint. With a moderate stretch, wrap the tape around the wrist and secure in place.
Rub the kinesiology tape with your hand to help it adhere to your skin.
When to Wrap Your Wrist Injury
If you have a mild wrist sprain then wrapping your wrist can be a safe option, in conjunction with other home treatments. Mild (or Grade 1) wrist sprains are characterized by ligaments that are stretched but not torn. You may experience mild to moderate pain and have bruising and tenderness at the site. A wrist wrap is quick and will reduce swelling and help speed up healing.
Try Using Hot & Cold Therapy for Added Relief
How Long Should You Wrap a Sprained Wrist?
The length and duration of your wrap will depend on the severity of your injury. Although wrapping can protect your wrist, overusing a wrap or tape can hinder recovery and your muscles may become reliant on the extra support instead of strengthening and recovering.
For more serious sprains, it is best to talk to your doctor for more information.
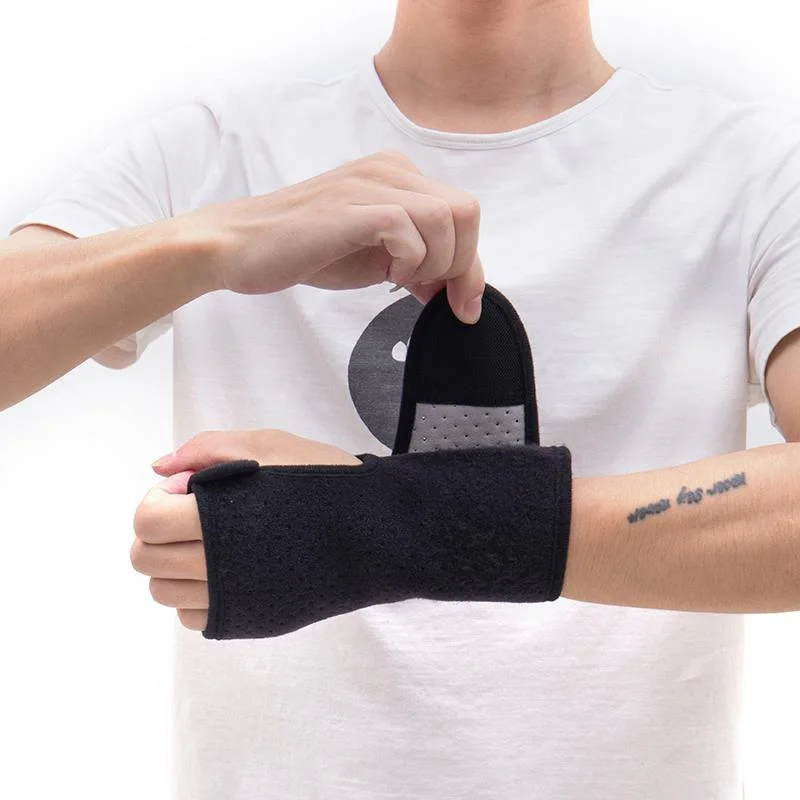
Using a Wrist Splint Instead
A wrist splint can be a good alternative to wrapping if you are unable to wrap your wrist alone or need something that can be put on and taken off quickly. It incorporates some of the same elements of a wrist wrap, along with a rigid element that helps keep the wrist stabilized.
How to Put on a Wrist Splint
First, open the Velcro straps and secure your arm in place. Then simply tighten the splint until it is snug around the wrist, but not so tight that it is cutting off circulation. You can reuse a wrist splint as long as you need it, making it a handy recovery tool.
Learn About Different Wrist Splints Here
Wrapping a Wrist Sprain Safely
Wrapping your wrist after a sprain is an effective and safe way to treat mild wrist sprains. Before you begin treatment talk to your doctor to make sure you don’t have a bone fracture or ligament tears. Once you’ve been given the go-ahead, wrap your wrist using an elastic bandage or tape will provide compression and reduce swelling. It can help speed up the healing process and get you back to all the activities you enjoy.
Broken vs. Sprained Wrist - How to Tell the Difference
KINESIO TAPPING FOR WRIST SPRAIN : KT Taping -
Akshita Mehta
1 Comment
how to tape for ulnar wrist pain, how to tape sprained wrist, how to tape wrist pain, how to use kt tape for wrist support, kinesio tape for radial wrist pain, kinesio tape for wrist sprain
Table of Contents
Introduction :
Kinesiological tapping for wrist sprain is a rehabilitative cum protective use of stretcheble kinesiological tapes to provide relief of
reduction of pain
enhancing performance
preventing injuries
support to the joint
repositioning of structure
facial and ligamentous correction.
It facilitate the healing process while providing full ROM with support to the joints suppotive
structure as well as mobilization effects.
A wrist sprain is an injury where the ligaments in your wrist stretch or tear.Stretching or tearing of tissues (ligaments) connecting bones and joints in the wrist
A sprained wrist can be caused by a sports injury or trauma.Typically, the injury happens during a fall. Your wrist can suddenly twist or bend, causing damage to the ligaments.
A wrist sprain is an injury to the ligaments of the wrist region, including the ligaments connecting the carpal bones and the ligaments connecting the proximal row of carpal bones with the radius and the ulna.
Anatomy of wrist joint :
anatomy of wrist sprain
There are two types of wrist sprains, namely radial and ulnar wrist sprain. The radial wrist sprain is most common, with mostly an injury of the ligaments connecting the lunate with the scaphoid, including the scapholunate ligament and the radioscapholunate ligament. In case of an ulnar wrist sprain, it can be a torn of the ligaments of the triangular fibrocartilagenous complex or the luno-triquetrum complex
Wrist sprain causes :
wrist sprain
Usually, a wrist pain is caused by physical trauma to the wrist. This typically happens when you fall onto an outstretched hand, an injury known as FOOSH.
You can sprain your wrist if it:
suddenly twists
moves in an abnormal position
bends backward
sustains heavy impact
This often happens during sports that commonly involve falls, such as:
basketball
gymnastics
mountain biking
skateboarding
The injury can also be caused by overuse, which might occur in sports like tennis and boxing.
Wrist sprains can happen to anyone, not just athletes. You can sprain your wrist during accidents like slipping on ice or tripping over an object.
Symptoms :
What does a sprained wrist feel like?
A sprained wrist is very painful, especially when you move it. It might also:
feel tender
feel warm
make popping or tearing sounds
be difficult to move
feel weak
What does a sprained wrist look like?
A mildly sprained wrist might be slightly swollen. In more serious sprains, the swelling can be severe. You may have bruising.
Types of wrist sprain:
grades of sprain
Wrist sprains are categorized based on their severity. The types of wrist sprains include: Grade 1 sprained wrist (mild) In a grade 1 wrist sprain, the ligaments are overstretched. There are no tears. Grade 2 sprained wrist (moderate) If the ligament has partly torn, it’s a grade 2 wrist sprain. You may lose some mobility and need a splint or brace. Grade 3 sprained wrist (severe) This is the most serious type of wrist sprain. The ligaments have completely torn. In some cases, the ligament might separate from the bone. If you have a grade 3 wrist sprain, you may need surgery.
Types of tapping technique :
Two types of tapping technique 1.kinesio tapping : Kinesio Taping Method is a therapeutic tool utilised by the rehabilitation specialists in all programs (paediatric, geriatric, orthopaedic, neurological, oncology and others) and levels of care (acute care, inpatient rehabilitation,outpatient, home care and Day Rehab). The idea of using elastic tape to mimic the therapist’s hands was first presented by Dr Kenzo Kase in the 1970s. Since then it became the modality used in pain management, soft tissue injury, tissues and joints malalignment, oedema, and more.
2.Rigid tapping : Rigid tapping also known as athlet tapping. Mainly Useful in Joint Injuries, Such as sprains, or conditions that need rest, support and immobilization to facilitate healing of tissues. eg.Muscle Pull,Strain,Sprain, Ligament Laxity, Subluxation Of Weak Joint. They include regular white cloth athletic tapes and brown tapes. The white athletic tapes are commonly used for Preventive Measure purposes whereas the stronger brown tapes are designed for specific taping techniques, like joint realignment, deformity corrective measures etc.
KT for wrist sprain :
Kinesiology tape for your wrist sprain may be one option that your physical therapist uses to treat your condition . Kinesiology taping, also known as K-tape, is a treatment that can be used to decrease your pain, inhibit muscle spasm, or facilitate the correct muscle contraction of your elbow and wrist muscles.
Application of KT :
kt for wrist sprsin
General application
Before applying tape make sure skin is clear and dry. After applying rub brisky to activate adhesive. Do not shower for at least 30 mins after applying tape.
It is normal for wrinkles to appear in the skin and muscle are relaxed.
Application:
Step 1 : Take one I strip if necessary,use cutting guide on backing to cut ends to correct length. Take one black I strip and cut in half where the tape backing
indicates tear paper here the second black I strip can be used for additional wrist support if necessary.
Step 2 : Take the blue I strip and tear backing where indicate place wrist in flexed position ( Finger pointing down) remove backing from base end of tape and apply end of tape to back of hand above knuckles. Continue removing backing and applying tape with no stretch along top of arm.
Step 3 : Take one of the cut black I strip and tear backing across center of tape. Remove backing in both direction to expose middle of tape.Holding both ends of tape apply a slight stretch,then apply center of the tape on top of wrist. ends should not meet. To avoid skin irritation,
ends should be applied with no stretch.
Step 4 : Repeat previous step with second black I strip,but apply tape to bottom of wrist joint. Ends should not meet to avoid skin irritation ends of tape should be applied with no stretch. For additional wrist support, the second black I strip can be cut and applied directly over or slightly above the first.
Rigid tapping for wrist sprain :
rigid tapping for wrist sprain
rigid tape, the tried and true method of taping. With its tight structure and its ease of application, many clinicians have reached for the rigid tape to treat sprain of the wrist. “Rigid tape is used to support ligaments and the wrist joint capsule by limiting movement and providing proprioceptive input…
Rigid tape can also be used as a temporary substitute and/or means of assessing for orthotic use and may also be used to address soft tissue issues at the wrist”. The authors offered up the following taping method to assist in the treatment of ligamentous laxity at the scapholunate interval.
To start, place the patient’s forearm in supination with the wrist in ulnar deviation and the digits grasping the thumb to promote extension of the scaphoid.Place a short piece of white tape over the scaphoid tubercle around the radial half of the wrist, ending at the central aspect of the dorsal wrist.
Place a second piece of white tape over the pisiform, wrapped around the ulnar half of the wrist to end slightly overlapping the first piece.
Now with rigid tape, apply the first piece over the white tape, anchoring over the scaphoid tubercle and pulled circumferentially over the radial wrist, again ending at the central aspect of the dorsal wrist.
Place a second piece of rigid tape along the ulnar aspect of the wrist over the pisiform and pulled circumferentially along the ulnar wrist, ending at the central aspect of the dorsal wrist.
How to remove tape :
So now you’ve got your tape on and you’ve gotten that extra support during your chosen sporting activity, it’s time to take it off, so let us ease the process of removing kinesiology tape for you The best tip we can offer when it comes to removing your kinesiology tape is to peel the skin from the tape, not the tape from the skin. But in terms of the actual process, firstly make sure you’re removing the tape in the same direction as the growth of the hair underneath it,and whatever you do don’t rip the tape off like a plaster! Start slowly, folding the corners of the edge back gradually, ensuring that you’re laying the removed tape on the back of the applied tape, as opposed to pulling the tape above and away from your arm. As you’re peeling off the tape, hold your skin down with your other hand and either tap it or pull it gently in the opposite direction of the tape.This helps the skin and the tape to separate more efficiently but with no discomfort. If the tape has been applied over a particularly hairy part of the body, it helps to press down on the tape as you are peeling it off, as the pressure helps avoid further pain. It’s wise to have shaved the area before applying the tape but, as this isn’t always practical, taking this precaution will be necessary to some.Need a little extra assistance? Apply oil directly onto the tape, rub it in and wait around 10 to 20 minutes before removing it slowly.This will help reduce the stickiness of the tape and make it easier to remove.
kinesio tapping for wrist sprain
If you want to know more about Taping technique you can click here.
Sprained thumb is a very common injury in sports such as volleyball, basketball, softball, skiing, sledding, tennis and ping pong. Whether you sprained your finger while playing sports or under other circumstances, you will need to know how to bandage it so that the healing process can begin faster.
Steps
1
Have everything ready and hold the injured hand with the palm up. You will need sticky, non-elastic athletic tape (available from a pharmacy) and scissors. Place the end of the ribbon in front of your wrist with your non-dominant hand. Then wrap the back of your hand and little finger with the other end of the ribbon. Pull the tape over your finger using your dominant hand. [1] X The source of information
2
Pull the band through your palm and wrap it around your wrist. Use scissors to cut off the end of the band and place it tightly around your wrist.
Make sure it stays in place by pressing it against the skin.
3
Place the end of the tape over the first layer of tape in front of the wrist. Wrap it around the back of your hand and pull it to form circles on your palm and finger. [2] X The source of information
After that, when you look at your hand, you should see a strip of tape running diagonally across the palm and back of the hand, and two strips running across the wrist.
4
Attach the end of the ribbon to the diagonal strip across your palm. Wrap the tape around your finger and fasten it in place to the diagonal strip of tape that runs across the back of your hand. [3] X The source of information
Cut off the tape from the end of the roll and press it firmly against the back of your hand.
5
Wrap the tape around your finger from one diagonal strip to the other. Do not wrap tightly so as not to interfere with the normal blood supply. With each circle, move the tape slightly towards the top of your finger, overlapping the tape. The higher you wind, the better the support. [4] X The source of information
6
Check the blood supply to the injured finger. You can do this by pressing on your fingernail for two seconds. Look at your nail as soon as you release it. [5] X The source of information :
If the nail turns pink again after one or two seconds, then the normal blood supply has been preserved in the finger.
If it takes more than two seconds for the nail to turn pink again, the tape is too tight. Unfortunately, the only way to fix this is to remove the tape and try again.
Advertising
1
Follow the RICE rule to speed up your recovery time. The abbreviation RICE stands for Rest, Ice, Compress, Elevate. Doing all these four things will help to significantly reduce the healing time of a dislocated toe. [6] X Reliable source FamilyDoctor.org Go to source
Place your finger on a soft surface and try not to use it, especially for physical activities, so as not to injure it further.
Apply ice to your finger to help reduce pain and swelling. An ice pack can be a pack of ice or frozen vegetables. Make sure you wrap the ice pack in a washcloth so it doesn't come into direct contact with your skin. Hold an ice pack on your finger at 20 minute intervals.
Apply a pressure bandage as described in method 1.
Raise your finger for 5 seconds and then return to rest. Repeat this procedure approximately every hour.
2
Take medication to relieve the pain of a sprained toe. Non-steroidal anti-inflammatory drugs (NSAIDs) can be used to relieve pain caused by sprained fingers. They also work by reducing inflammation caused by sprains. Ibuprofen is one of the most common NSAIDs used for sprains. [7] X The source of information
The recommended dose is 200 to 400 mg orally every four to six hours. Eat something while taking ibuprofen to prevent stomach upset.
You can also use NSAID gels that can be applied to the skin where the pain is most noticeable. Rub the gel into the skin so that it is completely absorbed.
3
Use arnica to prevent bruising. Arnica is an herb that can help reduce bruising and swelling caused by sprains. To get rid of swelling, you can take arnica as a dietary supplement or apply it directly to the painful area. [8] X The source of information To do this:
Apply arnica ointment, available from your local pharmacy, to the sprained toe.
4
Do exercises to develop finger mobility. When a finger is stretched, its range of motion is likely to be limited. In order to regain range of motion, you need to do some finger exercises. These exercises include:
Moving the thumb away from all main fingers. Keep your thumb as far away from the rest as possible for 5 seconds, then return it back to its normal position.
Flexion of the finger to the palm. Hold your finger as close to your palm as possible for 5 seconds. After that, return it back to its normal position.
Finger movement away from the palm. This action should be similar to what you do when you toss a coin. Extend your thumb away from your palm for 5 seconds, then return it to its normal position.
5
Eat healthy foods to promote healing. Eating healthy will help you recover faster. In particular, in the treatment of sprains, protein and calcium are needed. Try not to use your finger when you eat, so as not to aggravate the damage. For a balanced diet, eat the following:
Vegetables rich in calcium.
Fruit.
Vegetable proteins.
Whole grain products.
Omega fatty acids.
Advertising
1
Identify the symptoms of finger dislocation. If you're not sure if you've really sprained your thumb, they can help you find out what symptoms indicate a sprain. These symptoms include [9] X The source of information :
Pain. The pain can be sharp, throbbing and excruciating. When a finger is broken or injured, pain receptors send signals about it to the brain and the pain is perceived.
Edema. The body's immune system releases inflammatory chemicals in order to eliminate harmful effects, including irritants, damaged cells, or pathogens, and begin the repair process.
Blueing. Bruises appear from rupture of blood vessels due to the application of force or a blow to the skin. Blood flows out of the vessels and forms red, black or purple spots on the skin.
2
Check out the most common causes of finger sprains. While you can dislocate your finger in a variety of ways, the most common causes of finger sprains include:
Repetitive actions involving the finger and excessive stress on its joints.
Sports such as basketball, volleyball, and others where there is a high chance that the ball will put excessive pressure on your finger.
Contact sports such as rugby and martial arts.
3
Understand the benefits of bandaging your finger. Compression bandage not only helps to fix the injured finger, but also compresses it. Compression is aimed at stimulating the flow of lymphatic fluid, which carries important nutrients to the damaged tissues surrounding the injury site. The lymph fluid also removes waste from cells and tissues, which is an important function during the tissue repair process. Bandage on the finger also:
Speeds up the recovery process.
Prevents injury from progressing for the worse.
Advertising
Tips
Various tapes and bandages are available. These include sticky, non-elastic sports tape and Fixomull (hypoallergenic tape).
A 25 mm wide tape is usually suitable for a thumb band.
Advertising
Sources
About this article
Other languages
How to bandage a sprained thumb - Wiki How English
A sprained thumb is a very common injury in sports such as volleyball, basketball, softball, skiing, sledding, tennis, and ping pong. Whether you sprained your finger while playing sports or under other circumstances, you will need to know how to bandage it so that the healing process can begin faster.
This page has been viewed 18,184 times.
Advertisement
symptoms, methods of therapy, medical advice
Dislocation of the hand is an injury associated with displacement of the articular part of one or more bones of the wrist joint. This condition is a serious injury, as the hand consists of many small bones. When even one of them is displaced, a person loses his motor ability, while experiencing severe pain.
Type of dislocation
Due to the large number of bones in the hands of a person, this part of the human body is the most mobile and, as a result, the most susceptible to damage. For the correct treatment of a dislocation of the hand joint, it is necessary to understand what type of injury the victim received:
Perilunar dislocation - the ulna, capitate, navicular, radius and styloid process are displaced. In this case, the lunate and radius bones remain in their places.
Transscaphoid-perilunar dislocation - the reverse side of the navicular bones is displaced. This injury usually results from a broken bone.
The true type of dislocation - all upper row bones are displaced relative to the radius bones. Often with this type of injury, a fracture occurs with the opening of the styloid processes. In this case, the injury is accompanied by severe pain syndrome. This type of damage is treated longer than all the others.
Transscaphoid-translunate displacement - the position of the scaphoid and lunate bones in relation to the distal bones change.
Finger dislocation refers to hand injury and can occur in any of the five fingers on any hand.
Peritrihedral-lunar type of dislocation - the lunate bone is displaced in relation to the capitate bones.
There are a number of dislocations of the hand, but they are mostly of a mixed type, combining several types of injuries.
Given the complexity of the structure of the wrist joint, you need to understand that only an experienced trauma surgeon can help the victim, and, as a rule, only in a hospital setting, where there are appropriate diagnostic devices, tools for stretching and repositioning the joints. Attempts to correct the dislocation on their own usually end in torn ligaments and fractures.
What causes an injury to the hand
Dislocation of the hand is the most common injury, as a person uses his hands in any life situation, for example, to protect his face when falling. Stretching the arms in front of you in this case occurs reflexively, the person with his entire mass falls on them. Also, the joint can be dislocated when it is stretched when lifting weights or hanging on the hands.
Often a dislocation of the hand occurs in children when an adult pulls hard on the child's arm or lifts him by it. You need to understand that the bones and ligaments in children are much weaker than in adults, and a slight effort is enough to injure the baby’s hand.
Sports injuries are classified as a separate category. Athletes, when performing exercises, subject their bones to overload, so their injuries are the most complex (include several types at once). Also, in athletes, dislocations are usually combined with fractures.
Dislocation of the hand joint can occur due to a pathological cause. This is caused by destruction of the joint due to some systemic disease, such as gout, polio, osteomyelitis, tuberculosis, or arthritis.
Symptoms of injury
Symptoms of a dislocated hand usually appear immediately after the incident, i.e. falling or lifting heavy objects. They can be:
Combat syndrome. It occurs immediately after an injury or when you try to move your hand.
Swelling of the soft tissues around the injured joint.
Visual change of the joint. The arm may be arched at an unnatural angle, or an unusual protrusion or depression appears at the site of the joint.
The victim cannot move the injured limb not only in the area of injury, but also along its entire length - from the shoulder to the hand.
The skin in the area of the damaged joint changes its temperature - it becomes several degrees higher than the rest of the body.
Loss of feeling in fingers. This indicates damage to the nerve fibers in the joint area.
Diagnosis of dislocations
Dislocation of the hand according to ICD 10 (international classification of diseases) has the code S63, is a separate disease and, accordingly, is diagnosed by a complex set of measures.
First of all, an external examination of the affected limb is performed. Attention is drawn to the presence of edema, increased skin temperature, anatomical location of the bones. During the examination, the doctor tries to find out from the victim how exactly he was injured, in what situation, whether it was a compression blow or sprain. This gives additional insight into the type of damage.
X-ray of the affected joint is performed to clarify the diagnosis. In the pictures, in addition to dislocation, cracks and fractures in the bones are found.
First aid
It is not always possible for a person to see a doctor immediately after an injury. In order to reduce pain and not damage the hand even more, the victim must be given first aid.
Bandaging the wrist joint is a mistake. It is necessary to fix the whole hand. To do this, it is bent at the elbow and fixed to the torso with a wide piece of matter, for example, a scarf. Then you need to apply ice to the affected joint to relieve swelling from the soft tissues and restore blood circulation. In addition, this measure can reduce pain.
You can give the patient any pain reliever in the dosage prescribed in the instructions for it. It can be "Nurofen", "Ketorol", "Nise" or "Nimesil".
After completing all first aid procedures, you should call a doctor or take the victim to an emergency room.
Do not self-adjust the joint. Hand dislocation treatment is a very delicate process. You can easily hurt your hand more if you do it the wrong way.
Joint reduction
Joint reduction is carried out only by professionals. There are several methods for this procedure. Which one is suitable in each individual case, the doctor decides based on the type and severity of the injury.
For example, only one shoulder joint is reduced according to the methods of Janelidze, Kocher, Mukhinu-Motu, Hippocrates. And this despite the fact that in the shoulder there is only one joint and two bones, while in the radial joint of the hand there are 8 bones.
Before the reduction, the patient takes an anesthetic to relax the muscles around the affected area. Sometimes it takes 10 to 30 minutes. Adjusting a joint with tense muscles can damage the ligaments and break the bone.
Dislocation treatment
Conservative treatment of dislocation involves the use of various medications used after the joint has been repositioned. They are aimed at relieving pain, swelling and restoring muscles and ligaments stretched during injury. They are prescribed by a doctor, indicating the dosage and scheme of application.
For pain, it is suggested to take Ketorolac, Ibuprofen or Diclofenac, as these drugs also relieve inflammation.
Local therapeutic ointments are widely used - "Hydrocortisone", "Prednisolone", "Diclofenac", "Indomethacin", "Ketonal", "Ketoprofen". There are also products containing natural ingredients such as bee or snake venom. These are Viprosal, Kapsikam or Kapsitrin.
Ointments should be applied by rubbing gently into the skin. This accelerates their absorption and has a healing effect on soft tissues, as it is a gentle massage.
Surgical treatment
If the dislocation was accompanied by torn ligaments, blood vessels or nerve fibers, surgical treatment is performed. During the operation, all damaged soft tissues are sutured, but it is especially important to restore blood circulation and the ability to move the arm.
The technique of the operation is selected depending on the type of dislocation and associated injuries. The operation is performed under general anesthesia.
Postoperative joint repair
Usually, after surgery or (if not performed) after repositioning of the joint, the hand is fixed at the site of injury for a long time (from 1 to 4 weeks). During this time, the muscles of the hand lose their tone, and the nerve fibers lose their conductivity. Restorative therapy is used to restore the functions of the wrist. It includes a number of physiotherapy techniques, such as shock wave therapy, magnetic therapy, paraffin applications, and so on.
Medical massage is widely used, during which blood circulation in soft tissues and joint mobility are restored.
An important aspect of joint therapy is therapeutic exercises. You can start doing it while still in a cast or tight bandage. For this, manual expanders are used, which are a rubber ring, a ball or a spring with finger rests.
The sooner the gymnastics can be started, the faster the function of the wrist will be restored.
Gymnastics can be done independently at any free time. To do this, put your hand on some kind of emphasis with your palm up, take a dumbbell or a steel ball in your hand and slowly bend and unbend the joint.
You can gradually accustom the joints of the hand to the load, leaning on the table with your hands and transferring the weight of the body to the hands, each time increasing the load.
Treatment of a joint with folk remedies
There is a method of treating a dislocated joint with compresses made from medicinal herbs and roots. Such therapy is effective only in combination with drug treatment and only after the dislocation is reduced. Not a single compress will set the bones in the joints. This must be understood.
In general, this therapy relieves swelling and inflammation, but before using this method of treatment, you should consult a doctor.
Bryony root or elecampane root is most commonly used. The plant must be ground into a fine powder, pour boiling water in a ratio of 1 tbsp. l. funds for 500 g of water and boil for about 15-20 minutes. After cooling the broth, you need to strain it, soak the bandage in it and bandage the joint.
An ointment is made on the basis of rubbed plant roots. To do this, you need to mix the resulting powder with vegetable oil until it becomes a homogeneous slurry and apply the resulting product to the damaged joint.


 Although wrapping can protect your wrist, overusing a wrap or tape can hinder recovery and your muscles may become reliant on the extra support instead of strengthening and recovering.
 Before you begin treatment talk to your doctor to make sure you don’t have a bone fracture or ligament tears. Once you’ve been given the go-ahead, wrap your wrist using an elastic bandage or tape will provide compression and reduce swelling. It can help speed up the healing process and get you back to all the activities you enjoy.
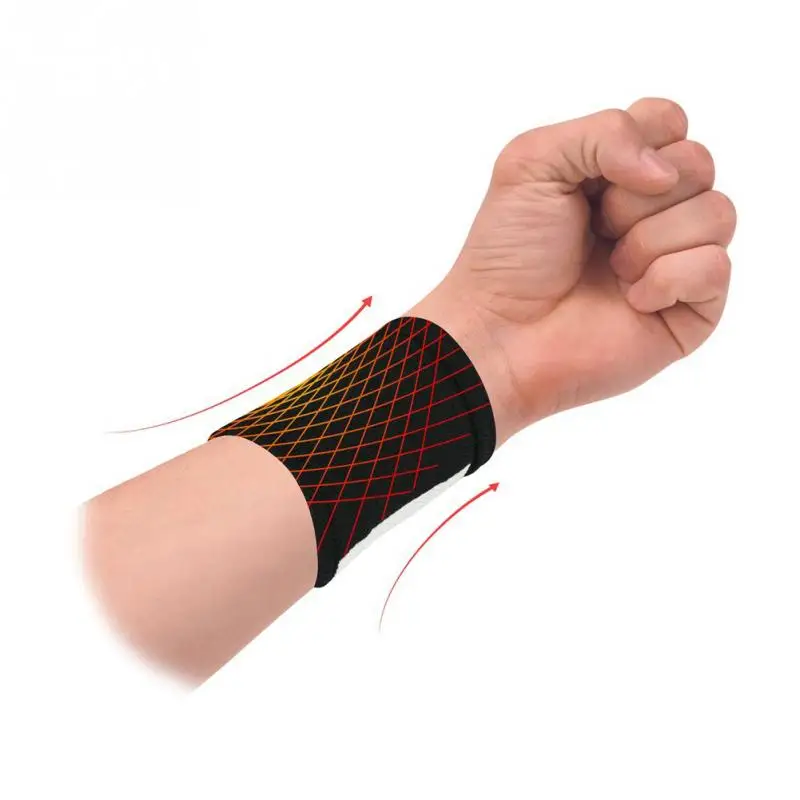

 It might also:
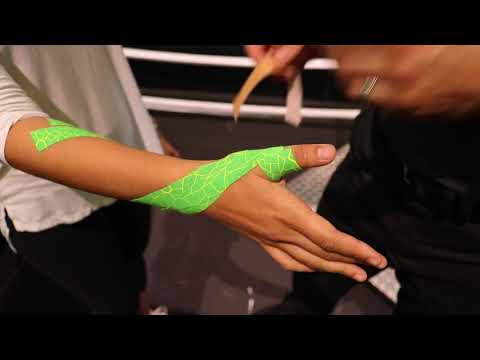
 Take one black I strip and cut in half where the tape backing
 For additional wrist support, the second black I strip can be cut and applied directly over or slightly above the first.
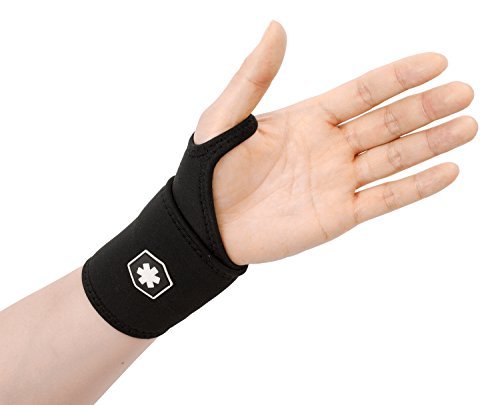


 You will need sticky, non-elastic athletic tape (available from a pharmacy) and scissors. Place the end of the ribbon in front of your wrist with your non-dominant hand. Then wrap the back of your hand and little finger with the other end of the ribbon. Pull the tape over your finger using your dominant hand. [1] X The source of information
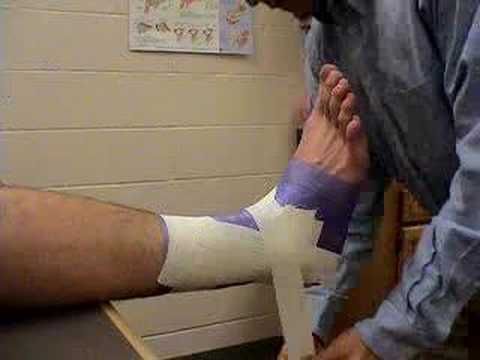
 Look at your nail as soon as you release it. [5] X The source of information :
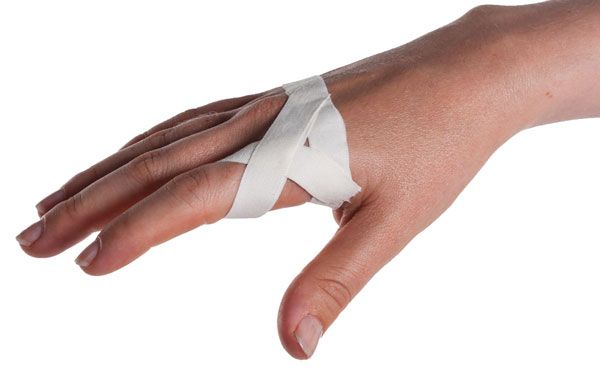
 Keep your thumb as far away from the rest as possible for 5 seconds, then return it back to its normal position.
 While you can dislocate your finger in a variety of ways, the most common causes of finger sprains include:
 This condition is a serious injury, as the hand consists of many small bones. When even one of them is displaced, a person loses his motor ability, while experiencing severe pain.
 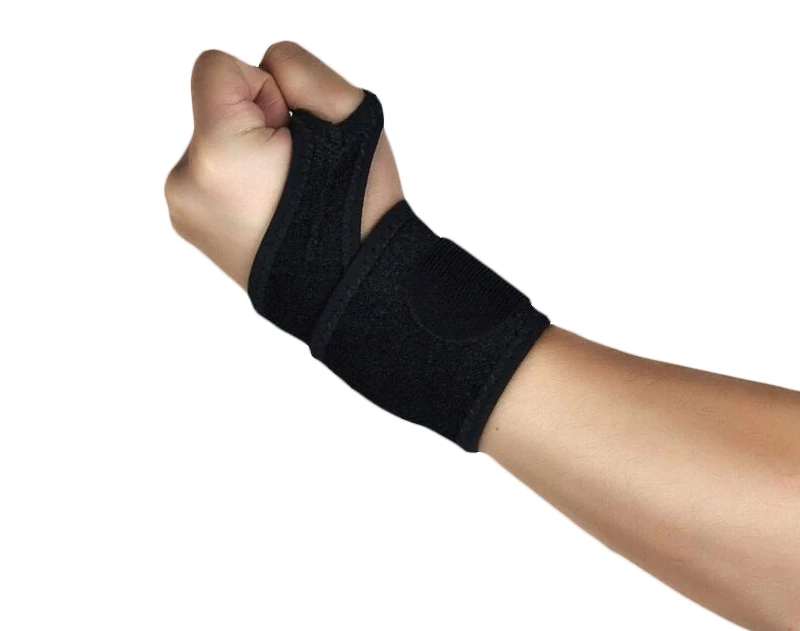 In this case, the injury is accompanied by severe pain syndrome. This type of damage is treated longer than all the others.
 This is caused by destruction of the joint due to some systemic disease, such as gout, polio, osteomyelitis, tuberculosis, or arthritis.
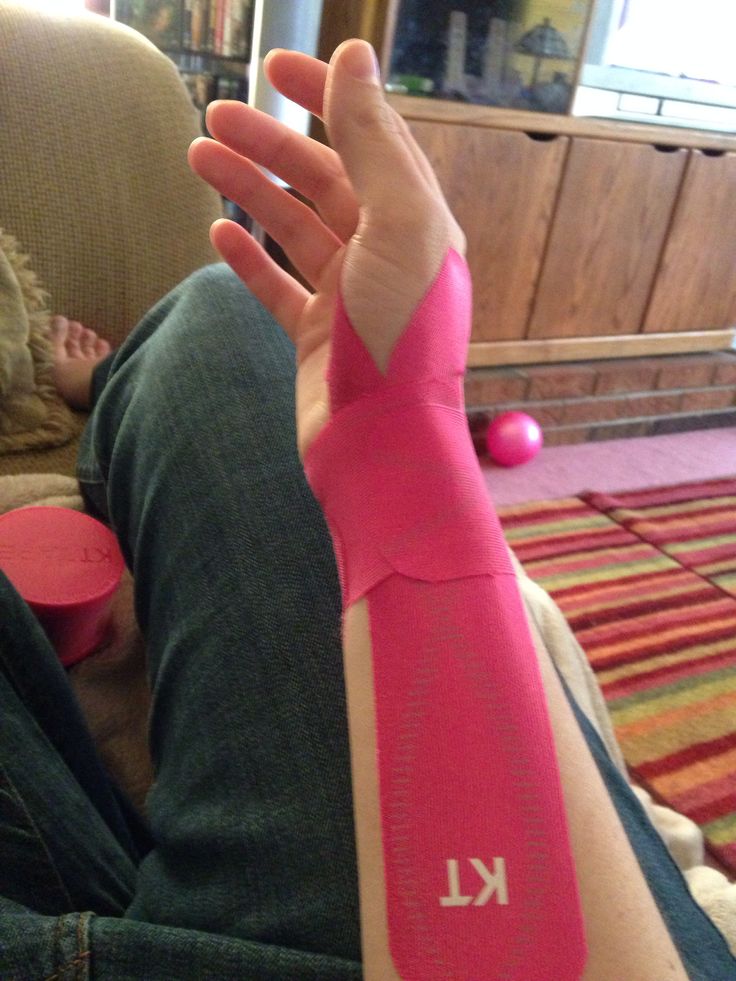

 There are also products containing natural ingredients such as bee or snake venom. These are Viprosal, Kapsikam or Kapsitrin.
  Restorative therapy is used to restore the functions of the wrist. It includes a number of physiotherapy techniques, such as shock wave therapy, magnetic therapy, paraffin applications, and so on.