Home » Misc » How to build a wooden basketball court
How to build a wooden basketball court
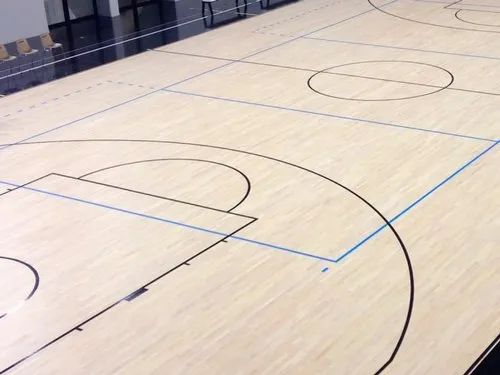
Installing a Wood Gym Floor | Sports Floors, Inc.
So, you’ve decided to put a new wood gym floor in your facility. Now what? A lot of people don’t know the process that takes place in order to make that new gym floor into a reality.
A common misconception about installing a new wood gym floor is how long it takes. Most people think it can be done in a week or so, but they would be wrong. It is a 6 week process. Sounds long, doesn’t it? Don’t worry, once we explain all the steps involved, you’ll understand why we need 6 weeks to do it right.
Step 1: Subfloor
Once all the paperwork is in place and we have scheduled an install date, the first thing we will do is send a pre-start checklist for the client to fill out. This checklist will tell you what temperature the room needs to be, humidity levels, concrete requirements, etc. Once you have signed off on those requirements, we will have the subfloor and maple delivered. At that point, our crew will immediately install the subfloor. Depending on the size of your gym, this process could take 3-5 days.
Step 2: Racking Out
Once the subfloor is installed, our crew will rack out the maple. What does that mean? Our guys will lay out the maple in a puzzle-like pattern across the subfloor. This allows the maple to evenly absorb any moisture in the air and it will acclimate as it does. Acclimating means that the maple will adapt to its environment by absorbing a certain amount of moisture. Each area of the country has a certain acclimation level that the maple must meet before we can begin nailing. This will ensure that we can install the maple properly, leaving enough room for fluctuations in humidity. You see, as the humidity outside fluctuates, wood expands and contracts. If it is a dry day, the maple will shrink up. If it is a humid day, the maple will expand and grow bigger. If it is nailed before it can absorb the proper amount of moisture, then about 6 months down the road the maple will expand so much that your floor will begin to buckle.
Step 3: Wait
Once the maple is racked out, our crew leaves the jobsite so that it has time to acclimate to the environment. Depending on the time of year and the requirements for your area, this usually takes 5-10 days. No one will be working on the floor during that time, but have no fear. We will monitor the moisture levels of the maple and we will return as soon as the floor is ready.
Step 4: Nailing
Once we have confirmed that the maple is properly acclimated, our crew will return to nail the maple. This is quite a sight to see. Our guys have (very heavy) nail guns and they work one board at a time, hitting the nail gun with a sledgehammer to insert the nail every 12″ on center. It is back-breaking work, especially because our crew has to stay bent over, hitting and moving the nail guns the entire time. So do not be alarmed if you see them take frequent breaks to rest their backs (they will even lay down on the floor sometimes so that they are not bent over for a while). Depending on the size of your floor, nailing a gym floor usually takes 5-6 days.
As they nail, our crew will leave gaps in the floor called expansion rows. These are required so that the floor still has room to expand as the weather changes, if need be. Over time, they will close up, but you’ll notice that they are there for a while.
Step 5: Sanding & Sealing
So the subfloor and maple are installed. What now? Now, we get on our giant ride-on sander and sand that wood! This is a messy, dusty process. We will sand the floor 3 times – once with coarse sand paper, once with medium sand paper, and once with fine sandpaper – until it is smooth and even. This process takes 4-5 days.
Next, we tack the floor until it is clean and prepare it for the seal coats. We will apply 2 coats of seal to the floor, allowing 24 hours of dry time between coats, and after the last coat of seal.
Step 6: Painting
After the last coat of seal dries, it’s time for most of our clients’ favorite steps: painting the floor! Our artist will arrive and will begin the process of making your floor distinctly YOURS. The painting process can take anywhere from 2 days to 5 days, depending on how much paint is going on your floor, and how detailed the painting is (i.e. if logos are multiple colors or have fades). The paint must dry for 48 hours when complete.
Step 7: Finish
The final step is to apply two coats of finish to the floor. First, we screen the floor. Then, we tack it clean, and apply a coat of finish. Then we repeat the process. Finish is what makes the floor shiny and a little sticky. It is the reason tennis shoes squeak on a gym floor. If your floor ever gets slippery, that usually means it’s time to apply another coat of finish to it – which should happen once a year.
Always make sure that whatever company is applying finish to your floor is using an MFMA-approved finish. If they aren’t, insist that they do or switch companies. There are hundreds of finishes to choose from, but not all of them are made for gym floors. For the safety of your players, ALWAYS use a finish that has been approved by the MFMA.
Once the last coat of finish is on your floor, the gym must remain empty until the finish is dry. This happens in two phases: after 72 hours, foot traffic is allowed on the floor. However, you must wait 7-10 days before any rolling loads can go on the floor (i.e. bleachers, chairs, podiums, etc.).
How to DIY Build a Basketball Court (8 Step Guide)
Inspired to build your own backyard basketball court?
If you're interested in DIY'ing a basketball court or having a local contractor install a court for you then you've come to the right place.
Last Updated 2nd of April, 2020.
1. Choose the Size and Location of Your Court
Ideally you’ll choose a location that is reasonably flat, to keep excavation needs to a minimum.
Recommended subsurface base: Concrete (100mm thick, 25MPA, Reinforced, Helictoper/smooth finish, Standard slope to allow water to drain off the slab)
We strongly recommend a concrete base for any new base being built for a MSF PRO sports court. Concrete provides by far the best longevity, performance and value over the long run and requires virtually no ongoing maintenance or repairs for many years. Other suitable bases include Pavers, Asphalt or Decking.
Option 1: Have an elevated concrete slab & then fit your landscaping requirements around it.
Option 2: Level the slab with the rest of your backyard. This option involves more excavation work/costs.
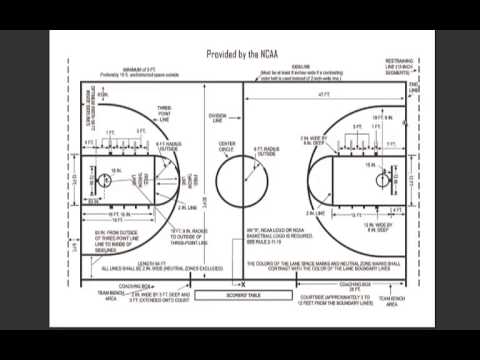
The size of a full size NBL court is identical to the FIBA regulation sized basketball court of 28m x 15m (420sqm), which is usually too large to fit into the average backyard. We recommend considering a half court, which can be customised to suit your space. Sizing can range from very small approx 4m x 6m (24sqm), 9m x 5m (45sqm), 10m x 7m (70sqm) to a 3X3 regulation half court of 15m x 11m (165sqm).
Precise measurements and planning are crucial in order to end up with the best result.
2. Purchase the Hoop & Sports Court Surface Tiles
The in-ground Hoop anchor kit should be installed during the concrete pour, so ensure you’ve ordered your Hoop in time to arrive before you schedule the concrete. Take note of the hoop's overhang in centimetres so you can plan accurate placement of the hoop anchor, free throw and three point lines.
Surfacing your court with a specially designed synthetic sports surface such as Australia's #1 selling, top rated MSF Pro™ will not only produce an amazing looking result, but will also provide more accurate ball bounce, sound reduction and minimises joints strain/injuries.
3. Level the Ground
Prior to concreting, the space must be dug up and levelled. If you require the concrete to be flush with the surrounding ground then you must excavate 115mm below surface level to allow for the concrete slab (100mm) and sports surface tile (15mm). If you are opting for the elevated slab then you may not need to excavate but you do need to remove any grass and level the ground.
IMPORTANT SAFETY PRECAUTION:Before you dig, call 1100 (Australia) or your local utilities to rule out the presence of buried cables including power, water, gas and phone lines. Failure to do so could result in serious or fatal injury. Dial Before You Dig is a FREE national referral service designed to assist in preventing damage and disruption to Australia’s vast infrastructure networks which provide essential services we use every day.
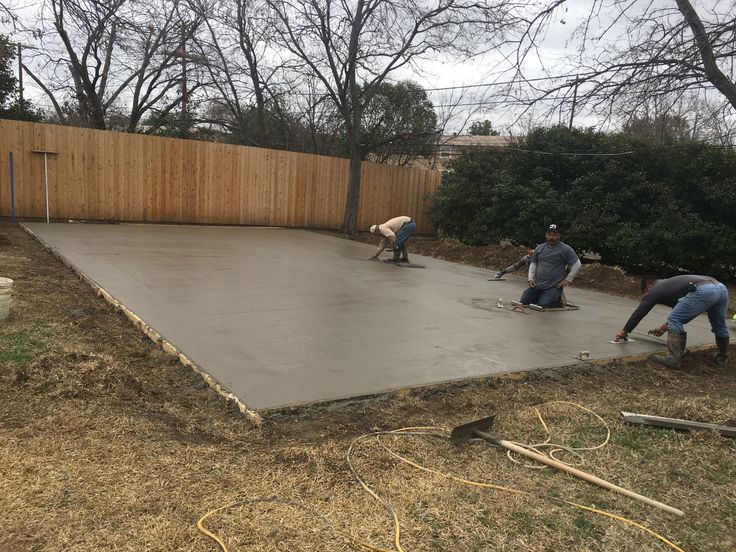
4. Pour a 100mm Concrete Slab
Prepare and pour a 100mm thick slab of concrete (25MPA, reinforced, standard slope, helicopter/smooth finish) matching your exact MSF PRO™ Court Design measurements. Ensure you have someone experienced with concrete slabs on hand for this step. Plan the concreting for when the weather is dry and allow for 72 hours to let the concrete set.
It's recommended to install the hoop anchor at the same time as pouring the slab to save on expenses. The recommended hole size for a hoop anchor system is approx 500mm x 500 mm and 1.2m deep. Please note: Always remember to closely follow the installation & safety instructions that come with your in-ground hoop.
Always be sure to follow the official basketball hoop installation instructions. Goalrilla in-ground hoops generally require 3-5 strong labourers with multiple ladders and power tools. Hoop installation can take up to a few hours for those inexperienced with installing. The below videos provide an example of the procedure involved for installing a popular Goalrilla in-ground basketball hoop system yourself...
Homemade basketball hoop with your own hands
DIY
Reading 2 min Views 5. 4k.
Basketball is a sport that is popular not only in America but also in Russia. Many fathers seek to build a playground for their children in the yard. What are the requirements to follow when arranging a basketball hoop.
Shield and ring standards:
Height 105 cm;
Width 180 cm;
Square in the center of the shield - height 45 cm, width 59 cm;
Indent from the edge of the shield to the red square - 15 cm;
Ring diameter -45 cm;
Mesh for a ring 45 cm long;
The ring is attached at a distance of 15 cm from the shield;
The shield itself is raised to a height of 3.05 meters.
Contents
Required materials for ring and shield
Making the backboard
Making the hoop
Fixing the structure
Required materials for the hoop and backboard
A basketball circle can be made from plastic pipe, metal rod or other suitable materials. Also, the ring needs a mesh, which is made of lace, rope, braid or chain.
The shield is made of fiberboard, MDF, multilayer plywood, high-quality and thick organic glass, plastic. You also need fasteners and red or black paint for marking, white for the base.
Weather conditions must be taken into account when choosing the material for the shield. The location for the basketball court should be comfortable and allow the hoop to be hung at the desired height.
Making the shield
Steps:
With a pencil, draw the lines along which the blank will be cut.
Cut out the shield with a jigsaw.
Paint white.
In the center, draw with black or red lines a rectangle for aiming before throwing. The base of the target must be at the top edge of the ring.
Rectangle stripes must be 5 cm wide.
You also need to circle the outer edge of the shield.
Making a ring
Steps:
Choose a pipe or twig 45 centimeters long with a little margin. Using the formula, calculate the exact length:
D(ex.). \u003d D (o) * Pi;
L(pr.) = 45*3.14=141.3 cm.
Take a length of approx.
Bend the ring on the round template, bolt the remainder to the shield.
You can make a mesh from a metal chain or rope.
On the twig you need to make ears for the net.
Take 20 m of rope, cut it to the number of eyes, tie it to the ring. Perpendicular to the sea knot, tie all the pieces. Should be 4-5 rows.
To prevent the ends of the mesh from fluffing, you need to tar them with fire.
Structural fastening
Strong steel brackets are installed on the rear side of the shield. Together with another person, securely attach the structure to the support. The bottom edge of the shield should be at a height of 290 cm, and the basket is 3 meters.
This is how you can organize a basketball ring at home.
Share with friends
Basketball court, its equipment and supplies
For basketball lessons, especially in youth sports schools or large basketball sections, it is necessary to have two or three good courts with additional equipment, of which one must be adapted for open competitions. The presence of such a complex basketball "town" will allow to cover classes at the same time up to 50-60 people. Such a "town" is desirable to be located near green spaces, which protect from wind and dust. It is also advisable to make special green spaces.
Basketball court equipment
Backboard stands . Racks can be wooden or metal, permanent or portable. However, in all cases, they must be strong and not vibrate from the impact of the ball. Modern most durable are racks made of metal pipes (Fig. 97). Their main advantage is that they can be taken out further than wooden ones, beyond the front line. Thanks to this, the game under the shields is freer and the amount of damage is reduced.
In addition to the main racks with shields, there should be additional, portable ones. They can be placed anywhere for shooting practice. Instead of racks, there can only be one shield mounted on the walls. The dimensions required for the construction of racks and shields are available in the rules of the game of basketball.
Training shield (fig. 98). The shield is made of smooth board. Shield dimensions: length 6 m, height 3 m. Exactly in the middle of the shield on both sides, three concentric circles with a diameter of 30, 60 and 9 are drawn0 cm. These circles are painted in different colors. On both sides of the circles and 1.5 m from the edges of the shield, human figures 160-180 cm in height are drawn, and it is desirable that one of them be with arms raised up. The shield is intended for individual training of players in various passing techniques and catching the ball.
Wooden portable rack with baskets (Fig. 99). A pillar with a section of 12-15 cm and a height of 3.2 m is fixed on a cross. At a height of 3.05 m from the surface of the site, two basketball baskets are attached to the upper end of the pole from its two opposite sides. The stance is used to train players in throws without reflecting the ball from the backboard. The stand is easy to carry and set up anywhere. At such a rack, you can work without interference with four players at the same time.
Metal portable stand (fig. 100). The main rod of the rack and the bottom stand can be of any shape and size, preferably no more than 4-5 cm in cross section. The upper arched stand and the ring must be made of 2 cm pipes. This stand is also intended for training players in throws. The lack of baskets further complicates the throw. Players develop the ability to aim at the leading edge of the ring, which is very important for hit accuracy.
Free throw training stand (Fig. 101). The rack is a pole 3.6 m high, 5-6 cm in diameter, mounted on a cross. At the upper end of the pole, a transverse bar 0.5 m long is strengthened. The stance is used to develop the ability of players to throw with a hinged trajectory. This is especially important when training in free throws.
Game scoreboard (Fig. 102). The game scoreboard is made of thick plywood, fixed on permanent or portable stands. The dimensions of the board should be such that the indicators are clearly visible from afar. The plates with the names of the teams, the names of the judges and the score numbers are cut out of plywood. These signs can be inserted into slots or hung on nails.
Game score column (fig. 103). The game score column is a wooden box made of plywood at least 3-4 m high with two windows. Inside the box, two cylindrical rollers are fixed on each side. Handles are brought out from the lower rollers. On each pair of rollers, a tape of white matter is tightly stretched, on which numbers are written. By turning the handle, the tape is set in motion, and the account changes in the “windows”. Nameplates with the names of the teams and the names of the judges are inserted into special slots.
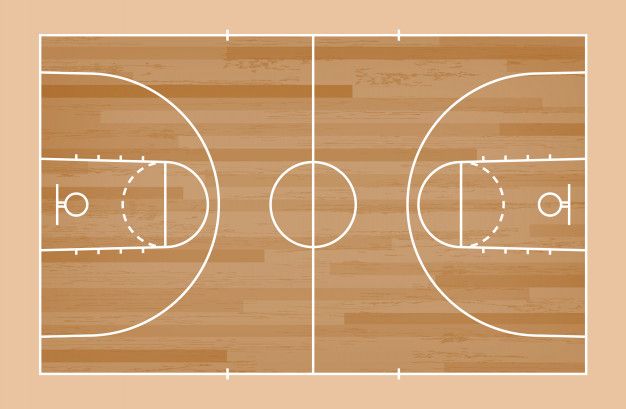
Layout of the court
Layout of the court should be a necessary accessory for each basketball section. Its device is simple. On a sheet of thick plywood measuring 50 x 100 cm, the markings of the basketball court are applied with white paint, always in scale.


 Depending on the size of your floor, nailing a gym floor usually takes 5-6 days.
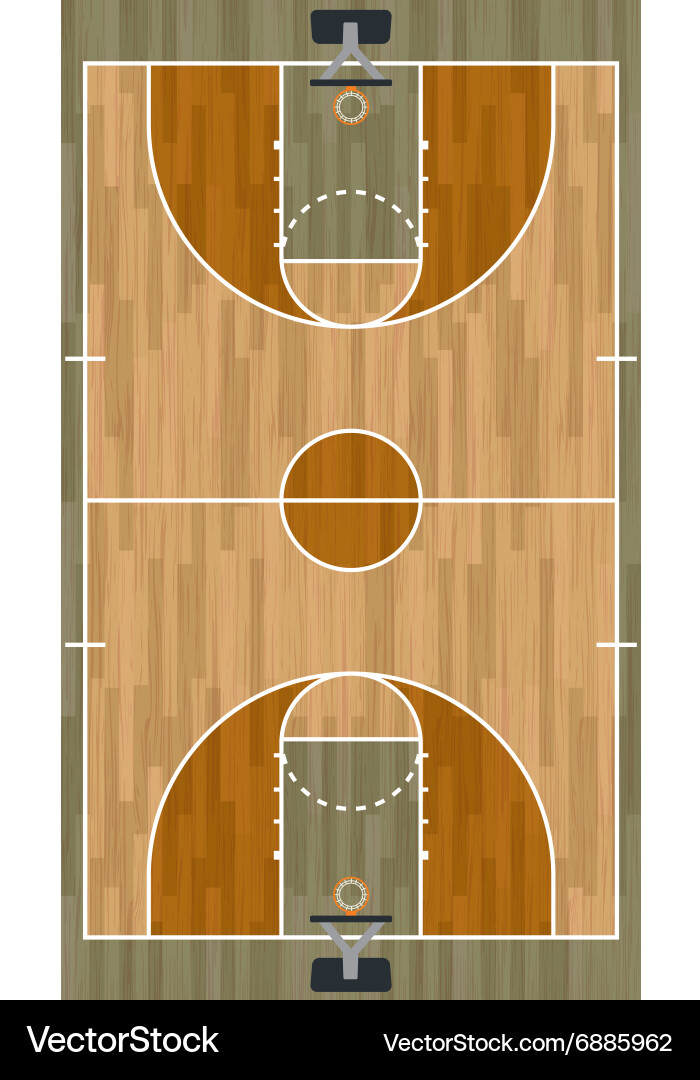
 If they aren’t, insist that they do or switch companies. There are hundreds of finishes to choose from, but not all of them are made for gym floors. For the safety of your players, ALWAYS use a finish that has been approved by the MFMA.
 Sizing can range from very small approx 4m x 6m (24sqm), 9m x 5m (45sqm), 10m x 7m (70sqm) to a 3X3 regulation half court of 15m x 11m (165sqm).
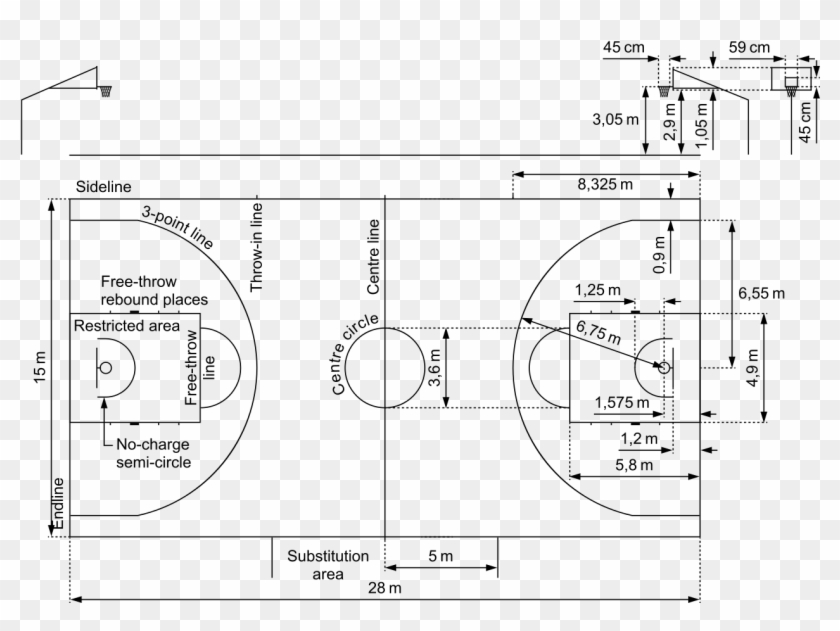 If you require the concrete to be flush with the surrounding ground then you must excavate 115mm below surface level to allow for the concrete slab (100mm) and sports surface tile (15mm). If you are opting for the elevated slab then you may not need to excavate but you do need to remove any grass and level the ground.
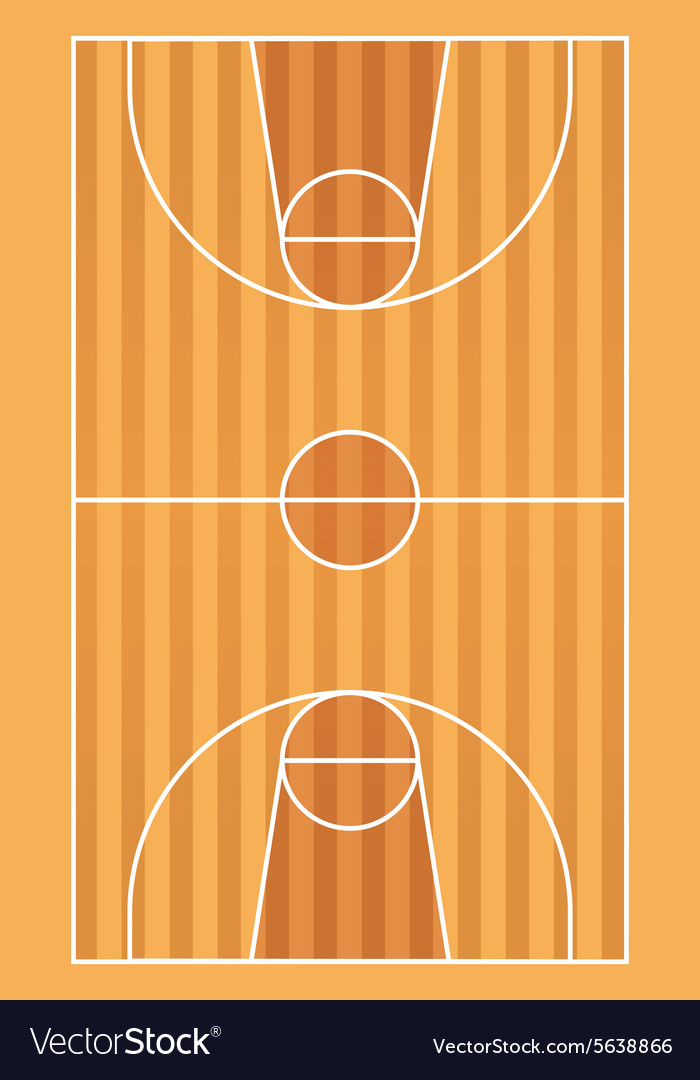 Ensure you have someone experienced with concrete slabs on hand for this step. Plan the concreting for when the weather is dry and allow for 72 hours to let the concrete set.
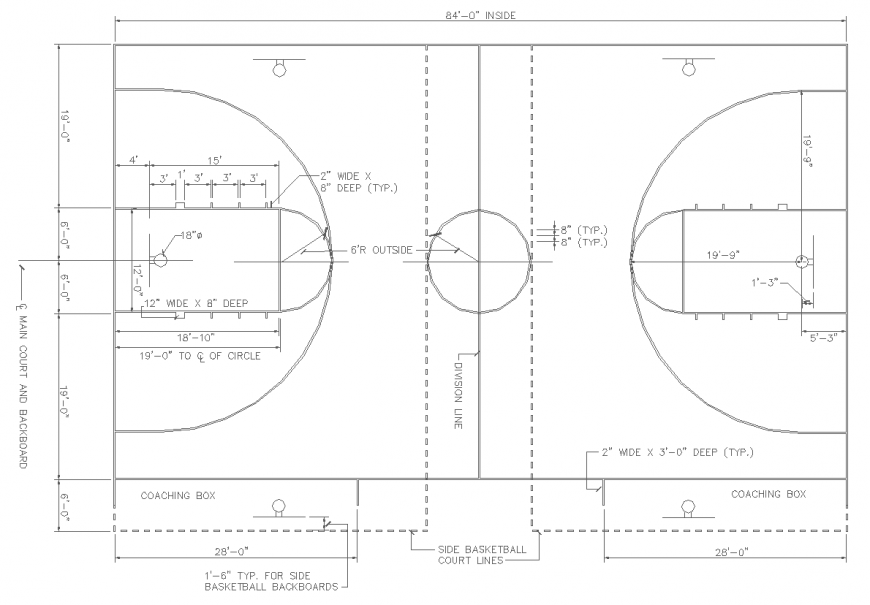 4k.
4k. 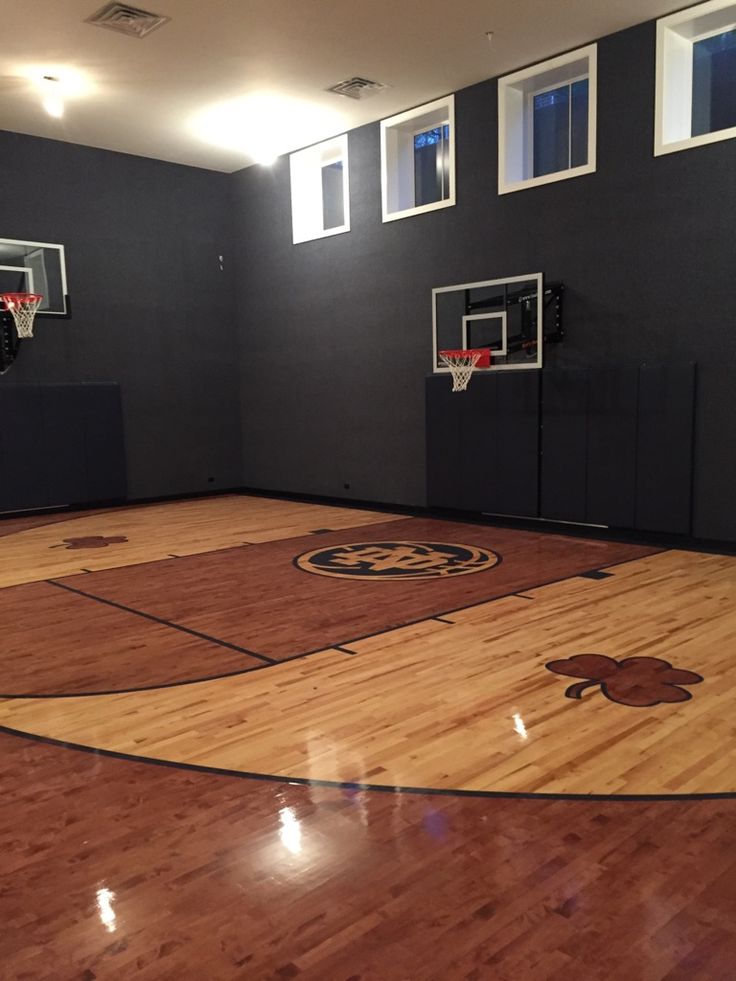 Also, the ring needs a mesh, which is made of lace, rope, braid or chain.
  Using the formula, calculate the exact length:
  The presence of such a complex basketball "town" will allow to cover classes at the same time up to 50-60 people. Such a "town" is desirable to be located near green spaces, which protect from wind and dust. It is also advisable to make special green spaces.
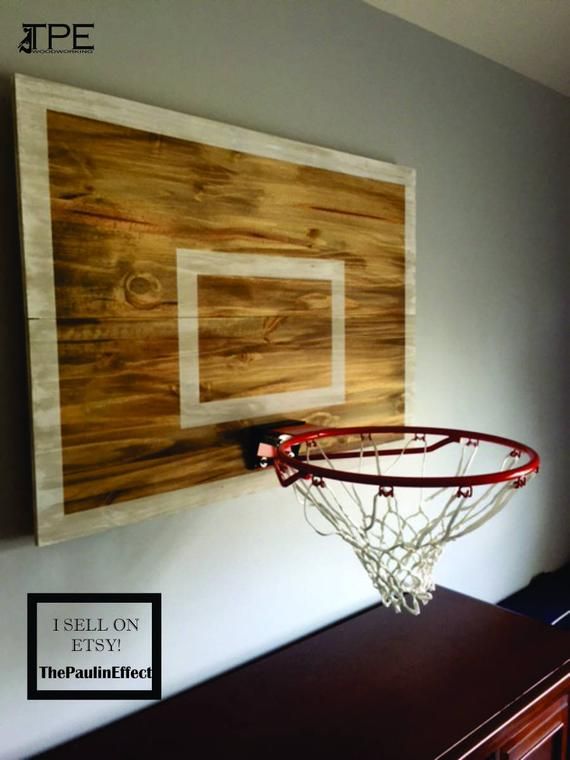
 At such a rack, you can work without interference with four players at the same time.
  The dimensions of the board should be such that the indicators are clearly visible from afar. The plates with the names of the teams, the names of the judges and the score numbers are cut out of plywood. These signs can be inserted into slots or hung on nails.