Home » Misc » How to improve first step in basketball
How to improve first step in basketball
3 Keys for Developing a Fast First Step in Basketball
Skip to content
“He has a quick first step!”
You hear it all the time from coaches who’ve just watched their defense get burnt to a crisp. Having an unstoppable first step in your arsenal will make it really hard for defenders to guard you. But as valuable as a lightning-quick first step can be, few players have one. Through my experience, there are a few common issues that often prevent players from having a fast, aggressive first step. After fixing these issues and making some changes to your training, the ability to explode with your first step levels up. Let’s break down each of these keys.
1. Clean-Up Pronation for a More Efficient First Step
When being ready to explode with that first step, a stable base is a must. To generate as much power as possible, you have to be able to push off the balls of your feet. Too often do I see a player making moves where one of their ankles gets pronated (falls inside). Along with the ankle, the knee will likely collapse inward, as well. This puts greater pressure on the knee ligaments and also leaves the player in an unstable, un-explosive position. As a player, you have to keep in mind that this position makes it extremely hard to push off that pronated foot to explode forward.
In the following graphic, note the difference between the “A” positions and the “B” positions:
The A positions see the foot planted in a stable position, minimizing injury risk and allowing the player to use his whole leg to push off the court. The B positions see the ankle fall inward, creating a less stable position where your weight is inefficiently distributed and your risk of injury is increased.
Adding drills with or without the ball where you focus first and foremost on the starting position and the way you push off is a good start to improve the efficiency of your first step.
2. React Fast
After you mastered the skill of executing an efficient first step without any outside distraction, it’s time to add a reaction component to make the skill more game-specific.
Below are some examples I use with Aaron Jackson, former Euroleague champion and now current CBA player, of how you can incorporate reaction into the drills to make them more game-like. Besides reaction, you can also see the focus on a fast, efficient push-off:
View this post on Instagram
A post shared by Basi Prokofyev (@basi.pro)
In the second part of the video, you can see how Aaron’s ankle turns inward. However, he was able to keep the knee lined up and prevent it from collapsing in. This is what allowed him to still execute a powerful push-off.
3. Create Separation with the Off Hand
After utilizing an efficient push-off with the correct timing, you’ll likely have created some separation. One key to enhancing this separation is by using your off hand to protect the ball and ward off the defender. By off hand, I mean the hand you’re not using to dribble the ball. When blowing by a defender, your off hand has two jobs:
Protect the ball.
Create momentum by pushing off the defender’s body to get an extra 5-10 inches of separation.
For a young basketball player, working on simple tennis ball catches with the off hand while dribbling the ball with their other hand can be a good start for improving hand-eye coordination and understanding how to use the off hand. The next step is to add a defensive presence, passive or active, depending on the player’s level of ball control. This will help a player understand how and when the off hand should be used. While tennis ball drills improve off-hand quickness and coordination, adding a defensive presence improves a real game skill.
This video shows the combination of a powerful push-off, a smart defensive read and reaction, and effective work by the off hand:
The key to improving your basketball game is to learn simple skills before training them in game-like situations. Follow these three keys and you’ll soon find your first step is faster than ever.
Photo Credit: vm/iStock
READ MORE:
5 Drills to Improve Your Lateral Quickness for Basketball
4 Basketball Quickness Drills to Help You Get Faster and More Explosive
5 Tips for Better Basketball Ball Control
Share This Story!
MOST POPULAR
“He has a quick first step!”
You hear it all the time from coaches who’ve just watched their defense get burnt to a crisp. Having an unstoppable first step in your arsenal will make it really hard for defenders to guard you. But as valuable as a lightning-quick first step can be, few players have one. Through my experience, there are a few common issues that often prevent players from having a fast, aggressive first step. After fixing these issues and making some changes to your training, the ability to explode with your first step levels up. Let’s break down each of these keys.
1. Clean-Up Pronation for a More Efficient First Step
When being ready to explode with that first step, a stable base is a must. To generate as much power as possible, you have to be able to push off the balls of your feet. Too often do I see a player making moves where one of their ankles gets pronated (falls inside). Along with the ankle, the knee will likely collapse inward, as well. This puts greater pressure on the knee ligaments and also leaves the player in an unstable, un-explosive position. As a player, you have to keep in mind that this position makes it extremely hard to push off that pronated foot to explode forward.
In the following graphic, note the difference between the “A” positions and the “B” positions:
The A positions see the foot planted in a stable position, minimizing injury risk and allowing the player to use his whole leg to push off the court. The B positions see the ankle fall inward, creating a less stable position where your weight is inefficiently distributed and your risk of injury is increased.
Adding drills with or without the ball where you focus first and foremost on the starting position and the way you push off is a good start to improve the efficiency of your first step.
2. React Fast
After you mastered the skill of executing an efficient first step without any outside distraction, it’s time to add a reaction component to make the skill more game-specific.
Below are some examples I use with Aaron Jackson, former Euroleague champion and now current CBA player, of how you can incorporate reaction into the drills to make them more game-like. Besides reaction, you can also see the focus on a fast, efficient push-off:
View this post on Instagram
A post shared by Basi Prokofyev (@basi.pro)
In the second part of the video, you can see how Aaron’s ankle turns inward. However, he was able to keep the knee lined up and prevent it from collapsing in. This is what allowed him to still execute a powerful push-off.
3. Create Separation with the Off Hand
After utilizing an efficient push-off with the correct timing, you’ll likely have created some separation. One key to enhancing this separation is by using your off hand to protect the ball and ward off the defender. By off hand, I mean the hand you’re not using to dribble the ball. When blowing by a defender, your off hand has two jobs:
Protect the ball.
Create momentum by pushing off the defender’s body to get an extra 5-10 inches of separation.
For a young basketball player, working on simple tennis ball catches with the off hand while dribbling the ball with their other hand can be a good start for improving hand-eye coordination and understanding how to use the off hand. The next step is to add a defensive presence, passive or active, depending on the player’s level of ball control. This will help a player understand how and when the off hand should be used. While tennis ball drills improve off-hand quickness and coordination, adding a defensive presence improves a real game skill.
This video shows the combination of a powerful push-off, a smart defensive read and reaction, and effective work by the off hand:
The key to improving your basketball game is to learn simple skills before training them in game-like situations. Follow these three keys and you’ll soon find your first step is faster than ever.
Photo Credit: vm/iStock
READ MORE:
5 Drills to Improve Your Lateral Quickness for Basketball
4 Basketball Quickness Drills to Help You Get Faster and More Explosive
5 Tips for Better Basketball Ball Control
Share This Story!
Page load link
USA Basketball - 3 Drills for an Explosive First Step
When you have the ball, you control the game. The defense is at your mercy. You know exactly where you want to go and when you want to go there. This alone gives you a decided advantage over the defense. But adding an explosive first step to your arsenal can give you an even bigger advantage. Quickness is one of the top three traits for a basketball player. The quicker you are with the ball, the more of a threat you are as an offensive player. In order to be quicker with the ball you need to utilize game speed ball handling drills and quickness/reaction drills in your training program.
These drills add an element of reaction. The ability to read and react to visual and audible cues is important in the game of basketball.
The following three drills will improve your quickness, agility and reaction time. Perform two to three of these drills twice a week during the offseason. The time each drill is performed and the rest time between sets can transform each drill from a quickness drill to a conditioning drill. Because there’s a time and place for conditioning, make sure to stick to the prescribed times to keep these drills improving your quickness so you can achieve the most benefit for your first-step and scoring ability.
Ball Drop
Benefits: Footwork, hand quickness, eye-hand coordination
Reps: 30 seconds
Sets: 4-6
Rest: 60-90 seconds
Instructions:
Stand arms length away from partner in defensive stance
Partner holds tennis ball in each hand
Sprint to ball after partner’s throw
Catch ball before second bounce
Toss back to partner and sprint back to starting position
React and sprint to next throw from partner
Partner should vary distance, direction and speed of throws
Coaching Point: Your partner should vary the hand he uses on throws and constantly change-up the pattern. For example, throw left hand, left hand, left hand and then right hand because it’s much more unpredictable then throwing left hand, right hand, left hand. This forces you to react faster and improve your first-step.
Block to Block
Benefits: Lateral quickness and agility
Reps: 12-15 seconds
Sets: 4-6
Rest: 60-90 seconds
Instructions:
Stand in lane in athletic position between the blocks
Partners kneels at top of key behind three point line with two tennis balls
Partner rolls one ball to either block
Defensive slide to block, tap ball back to partner, slide back to starting position
React to next roll and repeat
Coaching Point: Don’t ever cross your feet and make sure to stay low with your chest up and your hands up and active. You have to stay low to the ground so you can reach the ball and tap it back to your partner. Your hands should be in front and active like they are in a game so you can catch a pass or grab a rebound. If your hands are in by your sides you can’t do these things in a game and you can’t perform this drill. And most importantly, work hard. Your intensity of effort during this drill is crucial.
Star Drill
Benefits: Reaction and short burst quickness
Reps: 15 seconds
Sets: 4-6
Rest: 60-90 seconds
Instructions:
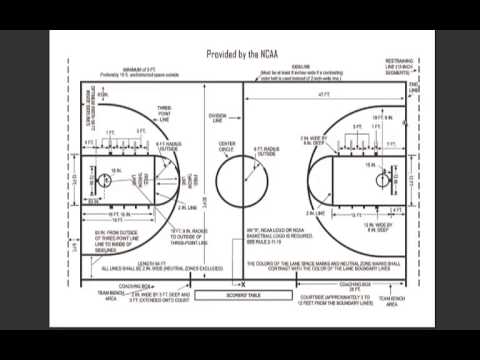
Place five cones around three point line
Perform athletic movement such as backboard taps, or defensive slides from block to block
When partner calls number of cone, sprint to cone, challenge an imaginary shot, and back pedal back to starting spot
Continue performing original movement
React to partner’s next call and sprint to and from cone
Repeat
Coaching Point: Adjust the drill by sprinting to the cone as if you are closing out on a shooter. Chop your feet as you get close to the cone, get low and keep a hand up to put a hand in the imaginary shooters face. Then sprint back to the start. You can also change the movement pattern used such as sprinting to the cone and then backpedaling back to the start. Each different movement helps work another part of your game.
Previous Article
Why In-Season Strength Training Is Important
By Alan Stein, CCS, CSCS
Next Article
13 Summer Training Tips for Basketball Players
By Alan Stein, CCS, CSCS
10 exercises for developing attacking skills of basketball players
Hello, dear visitors of basketball-training.org.ua! Today I want to tell you about a few basic exercises, by regularly performing which you can reach the next level, becoming a really good attacking player.
Yes, many articles have already been written about this and many videos have been shot. Yes, we all know a few dozen exercises that promise to make you at least the next Michael Jordan. I will not reinvent the wheel, but will tell you about a series of exercises that just a year ago helped me a lot to improve in the attacking aspects of the game. Let's start the story.
Basketball drills
Mikan Drill
This drill gets its name from the first really big guy in the NBA, George Mikan. Begin to perform the exercise, located on the right side of the basketball basket (a meter and a half from the ring). Take two steps to the left, parallel to the endline, and throw a half hook on the other side of the hoop using your left hand. Without letting the ball fall to the ground, pick it up and take 2 steps to the right (again parallel to the base line) and again throw the ball into the ring with a half hook using your right hand. Try to get into the rhythm and hit 10-20 in a row.
[youtube]CmFOj0nhUN8[/youtube]
This exercise will teach you how to attack with a weak hand and turn it into a formidable weapon. Personally, while doing this exercise, already on the second day I began to complete the passages with my left hand. And after a couple of weeks, the effectiveness of the attacks doubled: now the defender had to hold both sides, and I could always attack with the hand farthest from him.
Superman Drill
This exercise is very similar to the previous one. Position yourself almost on the border of the three-second zone (you always want to call it a “trapeze”, but with the change in the rules of basketball, it has lost its usual shape). We perform a throw on the ring with one single difference: do not try to hit the ring! On the contrary, raise the trajectory higher so that the ball, bouncing off the backboard, falls on the other side of the ring. This is where you need to catch him, not allowing him to fall to the floor. Important: try to take no more than three steps to overcome the distance from one side of the ring to the other. Follow the rhythm: let the entire exercise be performed in the same rhythm. Do 10 to 20 repetitions of this exercise.
[youtube]T2Jo-2ME-z4[/youtube]
Beat the Pro
Imagine that you are playing 1 on 1 against your favorite player. You just need to beat him by being the first to score 21 points. Perform game throws (with deviation, after strides, after crossovers and sudden stops). Be clear about your opponent, how he defends against you, how he tries to cover your every throw, how he waits for the slightest mistake in order to intercept. For each roll you make, you get 1 point. For each miss, the opponent receives 2 points. When you reach 20 points (if you haven't lost before) - you need to make a "buzzer beater" and it needs to be scored. How will you do it: with an incredible deflection after a fabulous dribbling or just hitting the ball with 9meters. Try to beat the best players in your imagination. Important: be realistic when playing against Shaquille, it is foolish to push him with your back or try to shoot the ball while in close contact. Also, it would be wrong to try to overtake Rose or Jordan. In general: adequately evaluate the opponent and try to complicate your life as much as possible.
Shoot the Shot
Do you remember the good old game "Around the World"? Sometimes it is called "Points", but that's not the point. Now we will try to add a hit percentage to this game. Also, we will add a couple of new points to it, the so-called "elbow spot".
In order to advance to the next point, you must make at least 3 out of 5 rolls. Naturally, if the level of your game (and especially your sniping skills) allows you to regularly shoot with a percentage higher than 60%, then increase the number of goals scored to 4 out of 5 from each point. Or up to 5 out of 5 from medium and 4 out of 5 from long range. Total: you have 18 points, 90 throws of which at least 54 must reach the goal. Challenge accepted?
Ball slaps and squeeze
Throw the ball up as if it had bounced off the ring after a bad throw. Jump up, grab the rebound and squeeze the ball as hard as you can with your hands. Imagine that you had difficulty getting this rebound and now they are trying to knock it out from you. Immediately after the rebound, rotate the ball around the body (at different heights): around the head, back, knees and calves. Repeat this exercise 10-20 times.
Figure 8's - with dribble and without dribble
Eight, the famous eight is back, now with dribbling. Do you remember how Petya Maravich taught us how to handle the ball? So, now we are doing the same thing, but using dribbling. For those who find it difficult to perform such dribbling - try to perform the exercise without it.
[youtube]DYAQoOxuskg[/youtube]
Quick hands
This is a cool exercise that is sure to be performed at every training session for young basketball players. Starting position: one hand in front, the second - behind, the ball is between the legs. After releasing the ball, you need to change the location of the hands: if the right one was in front and the left one was behind, then now the ball needs to be grabbed with the right one from behind, and the left one in front. Diversify the exercise: both hands in front, the ball between the legs. We release the ball and catch it with our hands, but from behind. Important: regular performance of this exercise will allow you to develop hand speed, which is very important for performing high-quality and fast feints.
How to do it: 30 seconds first option, 30 seconds second option. Write down how many times you managed to do the first time, and then compare with the results after a week.
[youtube]TGh81tj6zbU[/youtube]
Tom-Tom dribble
This movement is also familiar to many of us. Stand with your legs slightly apart so that you can easily transfer the ball between them. We start with the right hand. We transfer the ball in front of us from the right hand to the left; then from the left hand, transfer under the foot to the right hand. Now with the right hand we transfer the ball behind the back - it turns out to be in the left hand and we send it back (also behind the back) to the right. This is 1 repetition. Repeat 10 times and change hands (i.e. mirror).
Drum dribble
The point is to learn how to quickly and comfortably change the pace of dribbling and its pitch. For example, right after a screen or a run, you may find yourself kicking the ball out from behind (even though you already think your opponent is offside). The most elementary countermeasure is to sharply reduce the height of the dribbling. So, the exercise is that you need to knock the ball on the floor alternately with your right and left hand. Start from a normal static position (legs and back straight) and go down, increasing the intensity of the knocks on the floor. As soon as there is a space between your hands and the floor, a little more than a ball, begin to rise up. Make several series (for example, 5). For advanced players, try this exercise without looking at the ball, or by hitting it with 1 finger of your right hand and 1 finger of your left hand.
Summary
Here is a set of exercises I suggest you do every time you enter the court. Believe me, the results will shock you! Of course, if you are a professional player, then these exercises will be familiar to you and will be given easily. However, who, if not you, should know about their usefulness. Join our VKontakte group: https://vk.com/uroki_basketbola - there are a lot of useful and interesting things.
And this is the end of the article, I wish you successful training and look forward to visiting this site!
Training to improve protection
Training to improve protection
Learning how to move in defense.
1. Move in a defensive stance diagonally backwards. After 3-5 steps, turn around and change direction. Then do the same diagonally forward. 2. Do the same but add hand movements. The far hand works to protect against the transfer, the near hand imitates the capture of the ball. 2-3 sets of 5 diagonals forward and backward.
DETAILS : Increase and decrease your movement speed. Keep your back, don't jump in the move. The back leg drags along the floor.
CHIPS : Emphasis on the first step, it must be fast and taken with the lead foot.
Improving defensive actions.
1. Five attackers stand on the perimeter and pass the ball to each other, each of them has a defender. Defenders must change their stance and shift to the correct position depending on the ball. 2. The same, but with active defense, try to intercept or take the ball away. 3. At the signal of the teacher, the player with the ball goes into the aisle. For 30 seconds, then change roles, 3 times.
DETAILS : Defenders must always see the ball, keep their distance, actively use their hands.
CHIPS : The drill will be especially effective if performed without fouls.
Improving defensive actions.
1. Stand opposite each other with a partner. The attacker stands still and performs turns, moving the ball to the side. The defender reacts to the attacker's movements and moves accordingly, making defensive movements with both hands in front of the ball. 2. The defender tries to knock out or take the ball away from the attacker. 30 seconds each, 3 sets.
DETAILS : Low stance, keep distance, back straight.
CHIPS : The drill will be especially effective if performed without fouls.
Improving defensive actions.
One player (playing) has the ball, two other players - a defender and an attacker. The striker makes movements (forward / backward, right / left), trying to get a pass from the player with the ball. The defender plays in a closed stance, covering the passing line, making it difficult for the attacker to receive the ball. If the pass is still passed, then the attacker must perform turns (one circle forward or backward) and give a reverse pass to the playing along, and the defender must actively interfere with him, try to knock out or take the ball away. 30 seconds in each role, 3 times (change in a circle).
DETAILS : The defender must always have a view of the ball, keep his distance, actively use his hands. The attacker must perform turns without running.
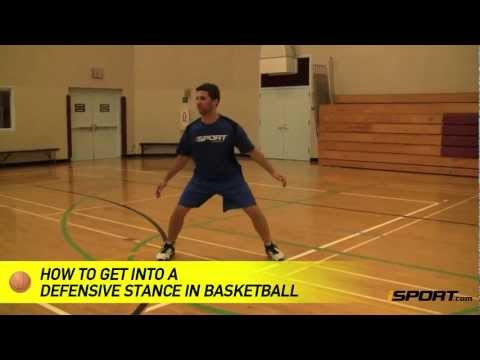
Learning the basic defensive stance.
From a standing position, take a protective stance at the signal. At the next signal, return to the starting position. 10-15 times.
DETAILS : Feet slightly wider than shoulder width and parallel, arms in line with legs, shoulders relaxed, arms half-bent, palms open towards attacker.
CHIPS : The stand must be very stable. To check this, you can knock a little.
Improving defensive actions.
1. Three attackers stand in a triangle and pass the ball to each other, each of them has a defender. The defensive stance varies depending on the ball. If your player has the ball, then a parallel stance with active hand work; if the ball is in the possession of a nearby player (in one pass), then a closed stance with overlapping of the transfer line; if the far player has the ball (in two passes), then the stance is open. 2. The same, but with active defense, try to intercept or take the ball away. For 30 seconds, then change roles, 3 times.
DETAILS : Defenders must always see the ball, keep their distance, actively use their hands.
Learning how to move in defense.
Get into a protective stance and move around: 1. Small steps to one side and the other. 2. Small steps to one and the other side with greater speed. 20-30 seconds each exercise.
DETAILS : Leading foot turned slightly in the direction of travel, the "back" foot does not approach the leading, the distance between the legs is maintained.
CHIPS : Emphasis on the first step, it must be fast and taken with the lead foot.
Learning how to move in defense.
1. Move backwards in a defensive stance in a zigzag from the beginning to the middle of the court, quickly, without stopping. Come back with an easy run. 2. Do the same in alternation with acceleration. Start with 2-3 times, and later increase the number of times or distance.
DETAILS : Keep your back, don't jump in the move.
CHIPS : Emphasis on the first step, it must be fast and taken with the lead foot.
Learning how to move in defense.
Move in a protective stance: 1. Back and forth, adding a normal run every three steps. 2. In one direction and in the other, adding the usual run at the command of the coach. 20-30 seconds each exercise.
DETAILS : Leading foot turned slightly in the direction of travel, the "back" foot does not approach the leading, the distance between the legs is maintained.
Improving defensive actions.
1. Stand opposite each other with a partner. The attacker dribbles the ball in place with cover, the defender tries to knock out or take the ball away. If he succeeds, then the defender gives the ball back to the attacker. 2. The same, but the attacker moves left and right along the line in 3-5 steps. 3. The same, but the attacker moves diagonally back and forth in 3-5 steps. 30 seconds each, 3 sets.
DETAILS : Keep your distance, back straight.
CHIPS : The drill will be especially effective if performed without fouls.
Learning how to move in defense.
Stand opposite each other in protective stances with a partner. One makes movements, the other repeats after him: 1. The host moves in one direction and the other, makes various movements with his hands (raises and lowers). 2. The leader moves in one direction and the other, sometimes adding a normal run. 30 seconds each, 3 sets.
DETAILS : Increase and decrease your movement speed. Keep your back, don't jump in the move. The back leg drags along the floor.
CHIPS : Turn on your imagination, perform different movements.
Learning how to move in defense.
Accelerating forward 1/4 of the landing, at the end of a step with active work of the hands - moving sideways in a protective stance - accelerating forward again with a step and so on.


 By off hand, I mean the hand you’re not using to dribble the ball. When blowing by a defender, your off hand has two jobs:
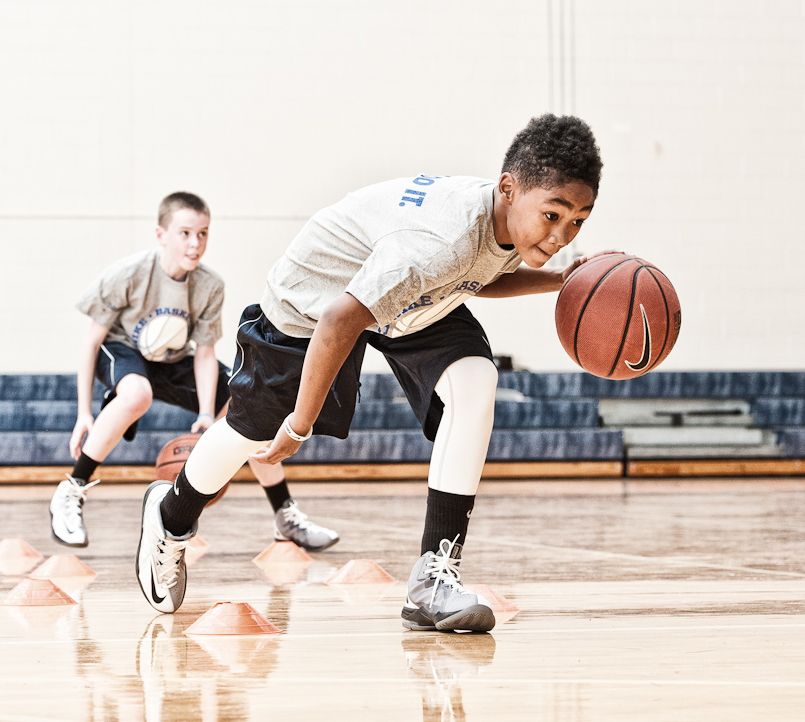 Follow these three keys and you’ll soon find your first step is faster than ever.
 Let’s break down each of these keys.
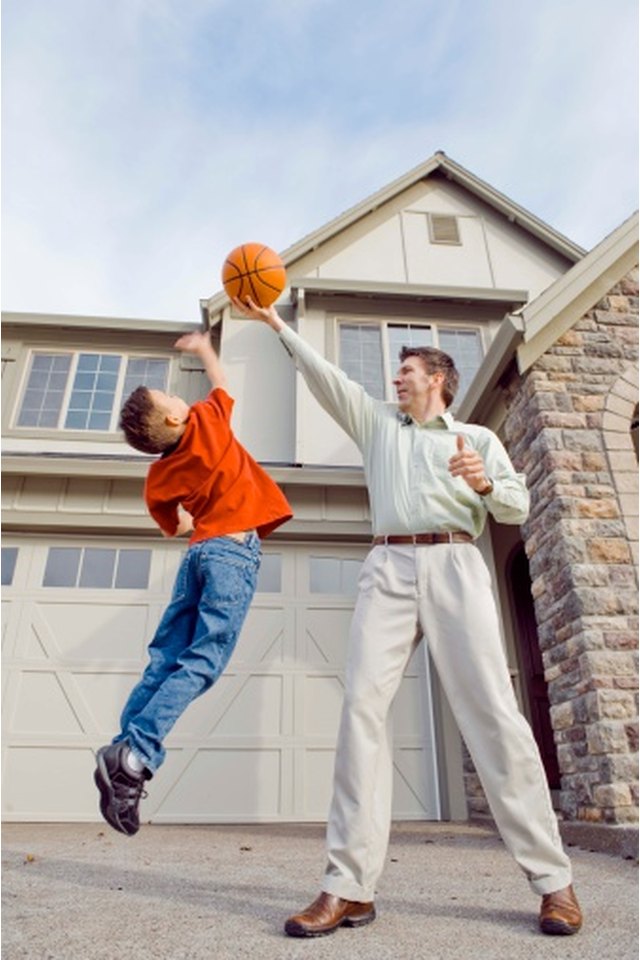
 However, he was able to keep the knee lined up and prevent it from collapsing in. This is what allowed him to still execute a powerful push-off.
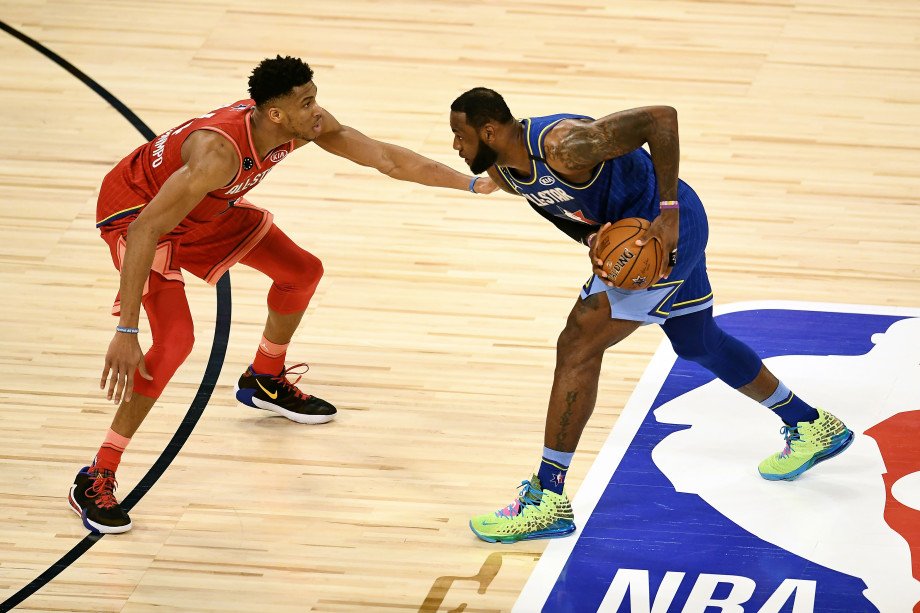 This will help a player understand how and when the off hand should be used. While tennis ball drills improve off-hand quickness and coordination, adding a defensive presence improves a real game skill.
 The defense is at your mercy. You know exactly where you want to go and when you want to go there. This alone gives you a decided advantage over the defense. But adding an explosive first step to your arsenal can give you an even bigger advantage. Quickness is one of the top three traits for a basketball player. The quicker you are with the ball, the more of a threat you are as an offensive player. In order to be quicker with the ball you need to utilize game speed ball handling drills and quickness/reaction drills in your training program.
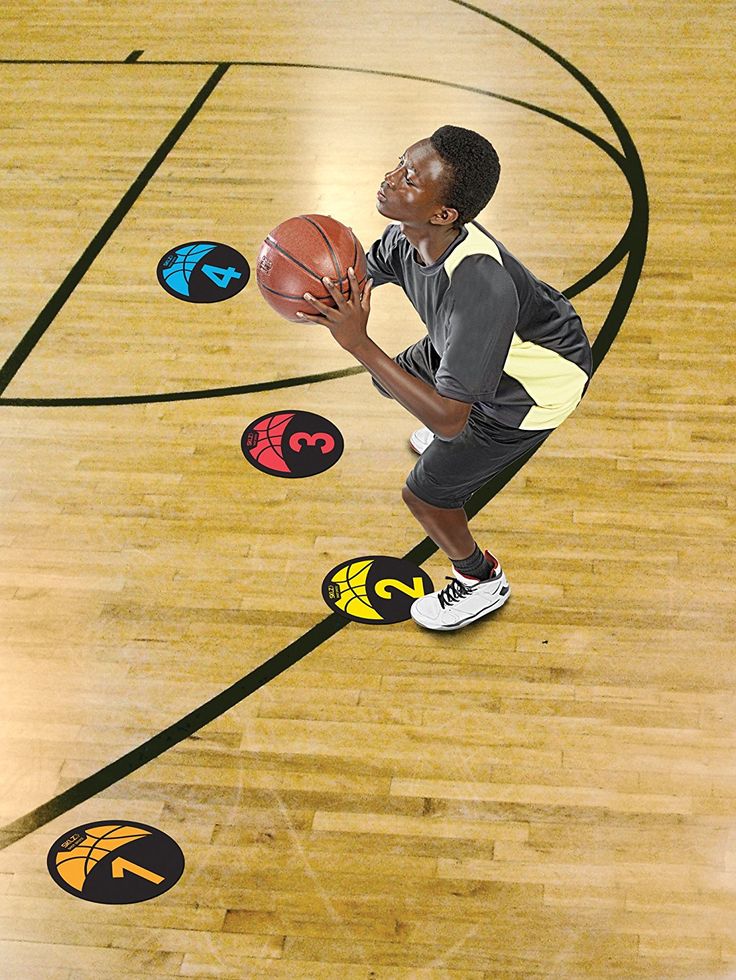
 And most importantly, work hard. Your intensity of effort during this drill is crucial.
  You can also change the movement pattern used such as sprinting to the cone and then backpedaling back to the start. Each different movement helps work another part of your game.
  I will not reinvent the wheel, but will tell you about a series of exercises that just a year ago helped me a lot to improve in the attacking aspects of the game. Let's start the story.
  And after a couple of weeks, the effectiveness of the attacks doubled: now the defender had to hold both sides, and I could always attack with the hand farthest from him.
  You just need to beat him by being the first to score 21 points. Perform game throws (with deviation, after strides, after crossovers and sudden stops). Be clear about your opponent, how he defends against you, how he tries to cover your every throw, how he waits for the slightest mistake in order to intercept. For each roll you make, you get 1 point. For each miss, the opponent receives 2 points. When you reach 20 points (if you haven't lost before) - you need to make a "buzzer beater" and it needs to be scored. How will you do it: with an incredible deflection after a fabulous dribbling or just hitting the ball with 9meters. Try to beat the best players in your imagination. Important: be realistic when playing against Shaquille, it is foolish to push him with your back or try to shoot the ball while in close contact. Also, it would be wrong to try to overtake Rose or Jordan. In general: adequately evaluate the opponent and try to complicate your life as much as possible.
  Now we will try to add a hit percentage to this game. Also, we will add a couple of new points to it, the so-called "elbow spot".
  Repeat this exercise 10-20 times.
  Important: regular performance of this exercise will allow you to develop hand speed, which is very important for performing high-quality and fast feints.
  For example, right after a screen or a run, you may find yourself kicking the ball out from behind (even though you already think your opponent is offside). The most elementary countermeasure is to sharply reduce the height of the dribbling. So, the exercise is that you need to knock the ball on the floor alternately with your right and left hand. Start from a normal static position (legs and back straight) and go down, increasing the intensity of the knocks on the floor. As soon as there is a space between your hands and the floor, a little more than a ball, begin to rise up. Make several series (for example, 5). For advanced players, try this exercise without looking at the ball, or by hitting it with 1 finger of your right hand and 1 finger of your left hand.
  However, who, if not you, should know about their usefulness. Join our VKontakte group: https://vk.com/uroki_basketbola - there are a lot of useful and interesting things.
 Stand opposite each other with a partner. The attacker stands still and performs turns, moving the ball to the side. The defender reacts to the attacker's movements and moves accordingly, making defensive movements with both hands in front of the ball. 2. The defender tries to knock out or take the ball away from the attacker. 30 seconds each, 3 sets.
  30 seconds in each role, 3 times (change in a circle).
 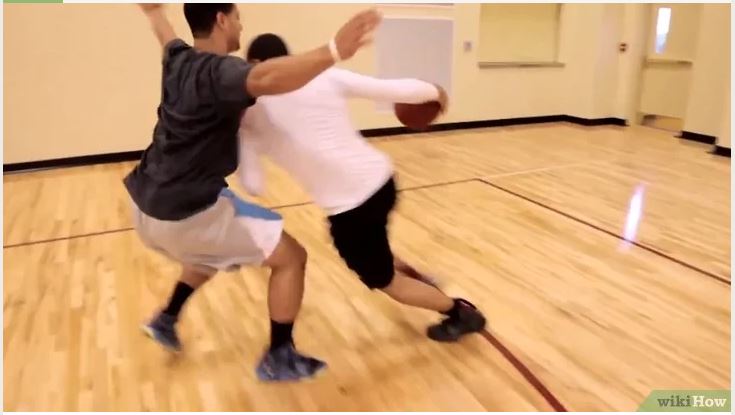 If your player has the ball, then a parallel stance with active hand work; if the ball is in the possession of a nearby player (in one pass), then a closed stance with overlapping of the transfer line; if the far player has the ball (in two passes), then the stance is open. 2. The same, but with active defense, try to intercept or take the ball away. For 30 seconds, then change roles, 3 times.
 20-30 seconds each exercise.