Home »
Misc »
How to make a wooden basketball hoop
How to make a wooden basketball hoop
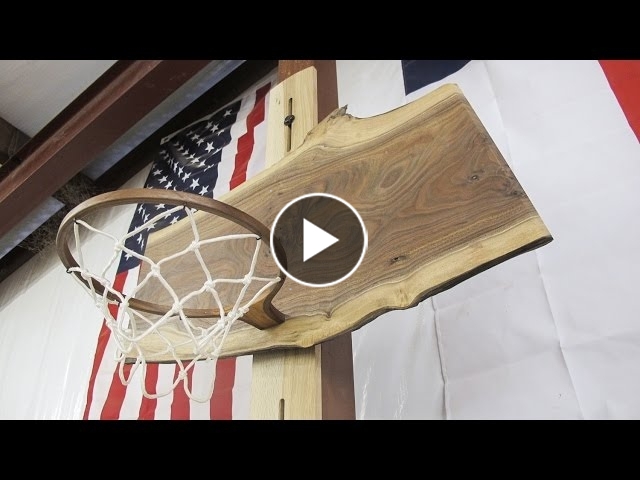
How to Build a Super DIY Wood Basketball Hoop in Hours!
Our DIY Reclaimed Wood basketball Hoop was incredibly easy to make & only took a few hours to build for just the cost of a basketball rim. Sharing all of our tips & tricks for how to make an awesome DIY wood basketball hoop with pictures. It’s a hit with our kids for those home bound rainy days when they are stuck indoors!
Table of Contents
DIY Reclaimed Wood Basketball Hoop
*this post contains affiliate links for more information check out our disclosure page here*
Hands down our family’s favorite sport is basketball.
With the kids home this Spring & so many rainy days to come we decided to make an indoor DIY wood Basketball Hoop for our new home gym/ office.
With most of the furniture out of the room, thanks to our new bookcase turned entertainment center (see that here) we have plenty of room for the kids to let out ALL this extra energy they have!!!
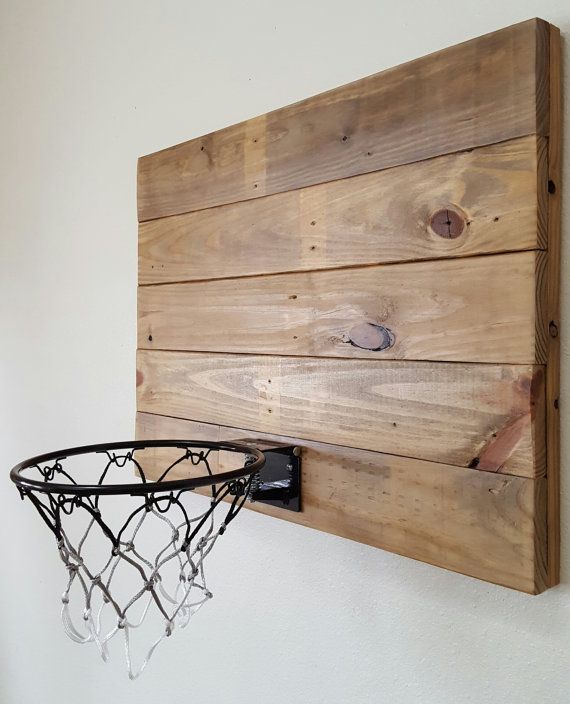
Although our basement ceilings are low (7 feet), we decided it would still be fun to make the kids a DIY reclaimed wood basketball hoop since they love playing basketball together & can’t play outside when the weather is bad.![]()
Supplies Needed for a DIY Wood Basketball Hoop
Our DIY Basketball Hoop Backboard Dimensions are 27″ inches high & 44″ wide.
- Reclaimed Wood for Basketball Wood Backboard
- Saw to Cut the Wood to Size
- Basketball Hoop (we purchased this one Here)
- Spray Paint
- Scrap Wood to Secure the Wood Basketball Backboard to the Wall
- Screws & Screwdriver
How to Build/ Make a DIY Wood Basketball Hoop in 4 Steps…
Step ONE – Creating the Wood Backboard for the DIY Basketball Hoop
Jason had some leftover wood from our former dining room church pew (see that here) that there had been some controversy over.
Long story short, I wanted to keep the church pew & Jason wanted to build benches for our dining room instead.
Jason won & he built 2 benches to replace the pew.
However, I do have to admit that I love the character the old reclaimed wood from our former church pew gives to both the DIY wood basketball hoop backboard as well as our bookcase/ entertainment center.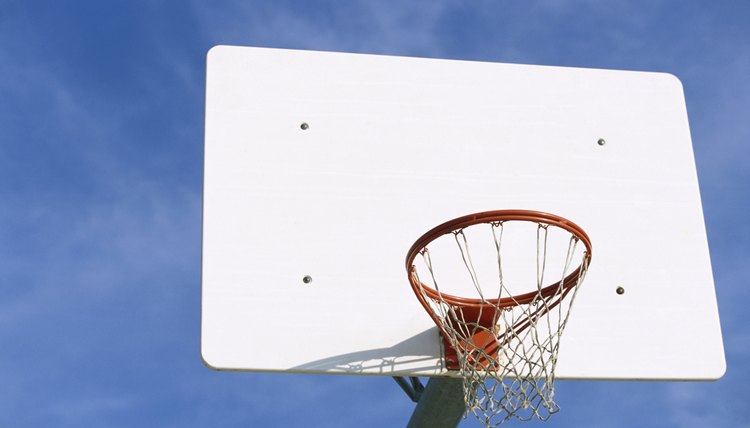
Our custom DIY wood basketball hoop backboard is a bit smaller than regulation size so we could fit it in our room. Jason cut the reclaimed wood boards for the backboard to be 27 inches high and 44 inches long.
Once the pew boards were cut to the same length Jason attached some spared oak boards to the attach to span any board seams and hold the boards together.
Step TWO – Painting the White Square on the Wood Backboard
Once the DIY wood basketball hoop backboard was together Jason painted on the white square with the same spray paint we used for Audrey’s nightstand & desk. (see those makeovers here)
Printer paper & masking tape did a great job creating the perfect square for our wood basketball hoop with spray paint.
Step THREE – Securing the Basketball Hoop Wood Backboard to the Wall
To secure something heavy to a wall a good method is to cut 2 boards at a 45 degree angle the length of it.
You can then attach one board to wall securely finding the studs to screw into such that it will receive the similar board attached to the backboard and draw it into the wall.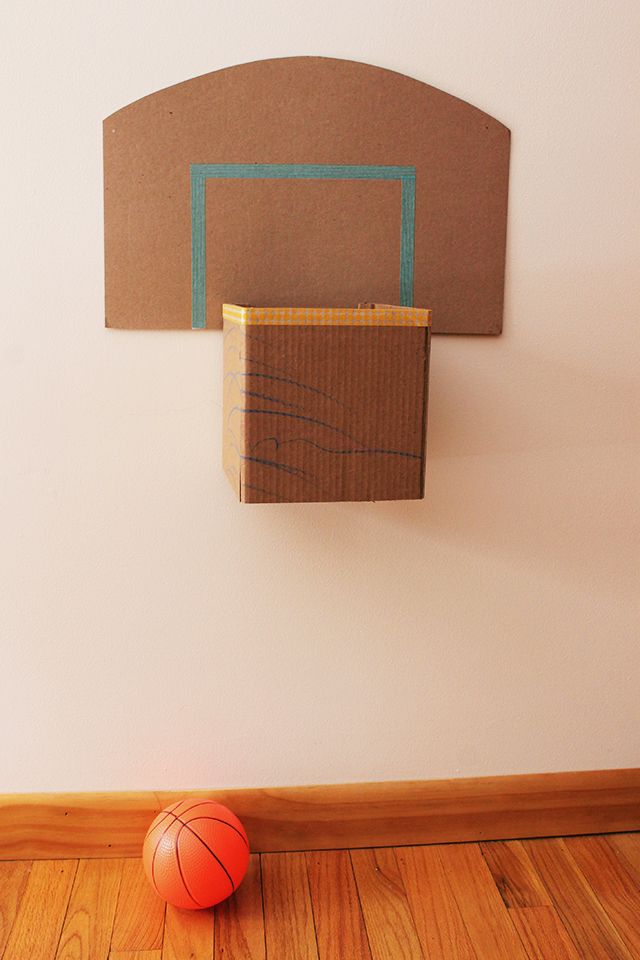
For the DIY wood basketball backboard Jason doubled this up and did 2 boards on the wall and 2 boards on the back of the backboard.
Measure carefully to space out the angled boards appropriately that are attached to the wall and the angled boards attached to the back of the wood basketball hoop backboard.
Once these are attached you should just be able to lift the backboard up to the wall and set it in place.
Jason found that the backboard rattled when a ball bounced against it more than he liked so he also put 2 screws through the front of the wooden backboard to the wood he had already screwed into the wall.
As you noticed from the picture of the back of the backboard Jason finished off the sides with some wood from the pew to give it a nice finished look and hide the support boards on the back of the wood basketball hoop backboard.
Step FOUR – Attaching the Hoop to our DIY Wood Basketball Hoop Backboard
We added this basketball hoop to the wood baseboard.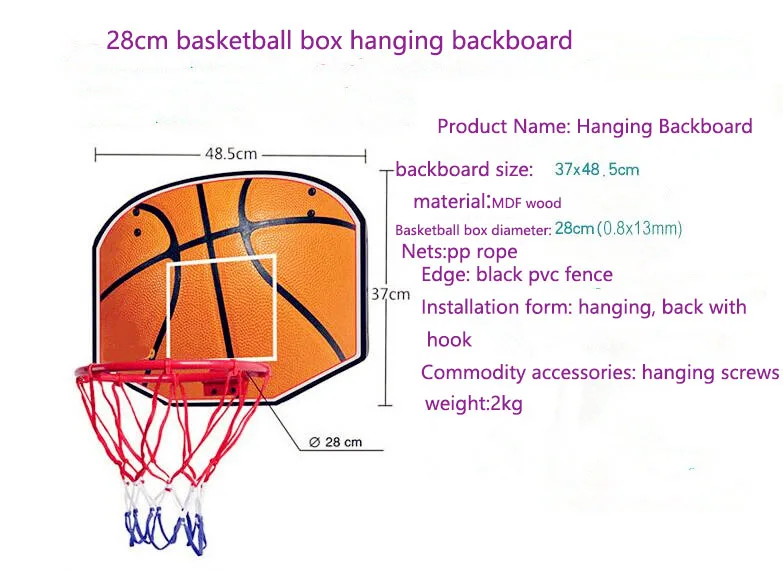
It took the kids no time to start putting our DIY Reclaimed Wood Basketball Hoop to use.
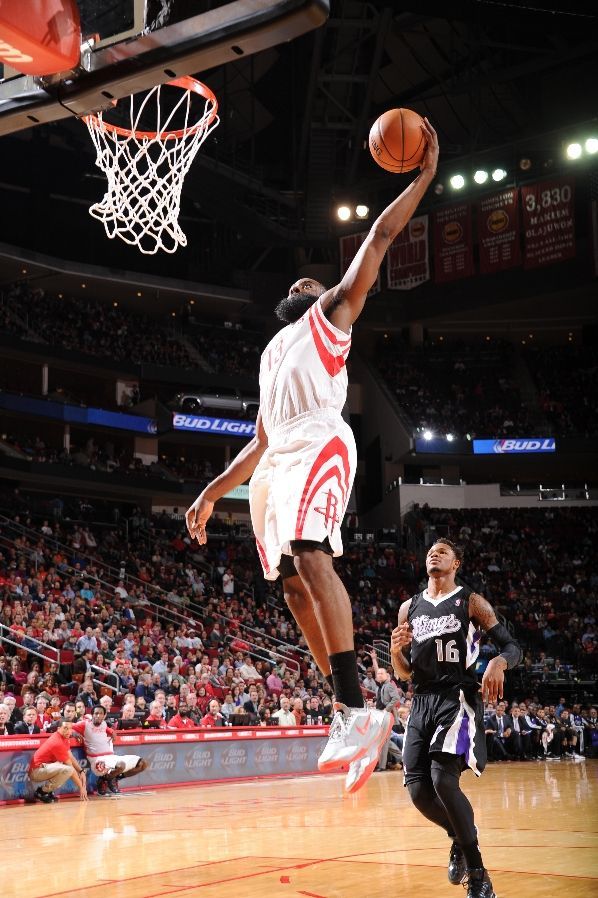
Our family is not known for our height & everyone was excited to FINALLY be able to dunk. 🙂
See our Home Gym & Exercise Room with our DIY Wood Basketball Hoop (
here)
I hope this inspires you & answers all your questions about how to create a DIY Wood Basketball Hoop at your home!
by Tara Lehman
DOn’t forget to pin & save our DIY Wood Basketball Hoop to your Favorite Pinterest Board!
Spray Painted Furniture Makeover
8 DIY Desks to Try
How to Build a Basketball Hoop Out of Wood
Building a basketball hoop out of wood is relatively inexpensive, requires only moderate woodworking skills, and can provide years of fun and excitement when completed. The nice thing about basketball hoops is that they are a standard size on all levels of play. While youth leagues often lower the height that the hoop suspends over the court, the backboard and rim continue to be uniform throughout all levels.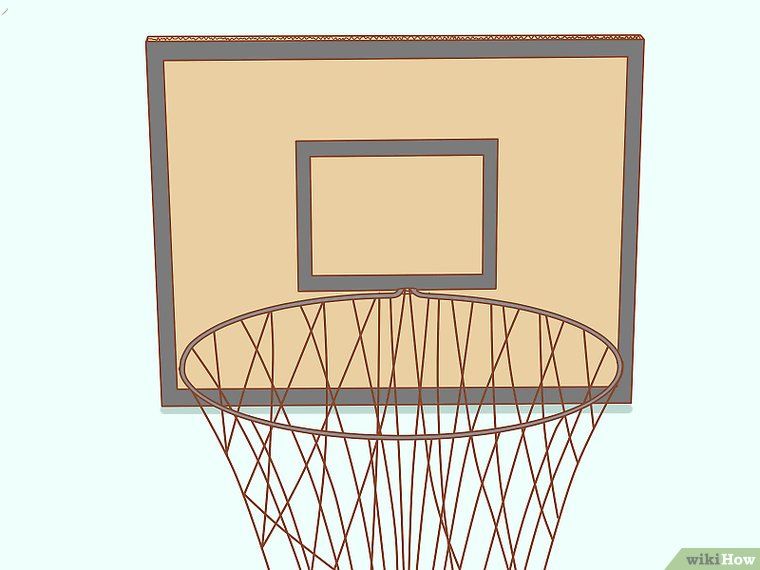 Here is a step-by-step guide on how to build a basketball hoop out of wood.
Cut a wooden board to the dimensions of 6 feet horizontally by 3.5 feet vertically. This board will serve as the backboard. This is the standard size of a basketball hoop backboard, although it can be reduced, or even rounded off at the top corners to fit any size restrictions.
Take a piece of wood at least 20 inches long and wide, and 3/4 inches thick. Using a ruler and compass, select a center point on the piece of wood and draw a circle 18 inches in diameter. Using the same center point, draw a second circle that is 18.75 inches in diameter. These two circles provide the outline for the rim of the basketball hoop. Cut along the two lines using a jigsaw.
Use a power sander, or sand paper if you prefer, and round the edges of the rim to create a cylindrical shape approximately 5/8" in diameter. Do not sand too much off the inside of the rim, as the hole inside the rim should be 18 inches in diameter at all points. Once complete, screw the rim onto the 6"x6" block of wood at the top of the square so the top of the rim and the top of the block are level. Once this is complete, you can make a diagonal cut in the block to eliminate the protruding corner if you wish. This is not required, but may keep the ball from taking odd bounces after passing through the net.
Attach the rim and block to the backboard. The rim should be positioned in the horizontal center of the backboard, with the 6"x6" block aligned to the bottom edge of the backboard. This setup allows for the required 6 inches of separation between the edge of the rim and the backboard. Using a ruler, draw a 2-inch-thick square centered directly above and touching the 6-inch block. This square should be 24 inches horizontally and 18 inches vertically. Paint the square outline in a solid color. Traditionally, white, orange, red or black is used.
Measure exactly 10 feet from the ground, where you plan to mount your basketball hoop. Mounting on a garage or barn provides stability, but mounting on a pole that is cemented into the ground provides flexible and will not damage your house. Decide where to place the basketball hoop, then secure mounting brackets to the back of the basketball hoop using nuts, bolts and washers. The location of these fasteners will depend on where you decide to mount your hoop. Attach a basketball net using tiny hooks screwed into the bottom of the basketball rim. Position the hooks around the bottom of the basketball rim to match the basketball net accordingly.
Tips
If mounting on a garage, be sure the basketball net hangs clear of the garage door. Having a net get caught in the door can be dangerous.
Before mounting the basketball hoop, considering spraying it with a heavy layer of water seal protection. The hoop will be outside in the elements year-round.
Homemade basketball hoop with your own hands
DIY
Reading 2 min Views 5.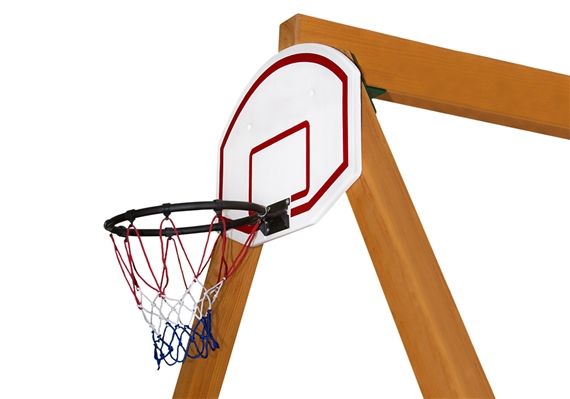 5k.
5k.
Basketball is a sport that is popular not only in America but also in Russia. Many fathers seek to build a playground for their children in the yard. What are the requirements to follow when arranging a basketball hoop.
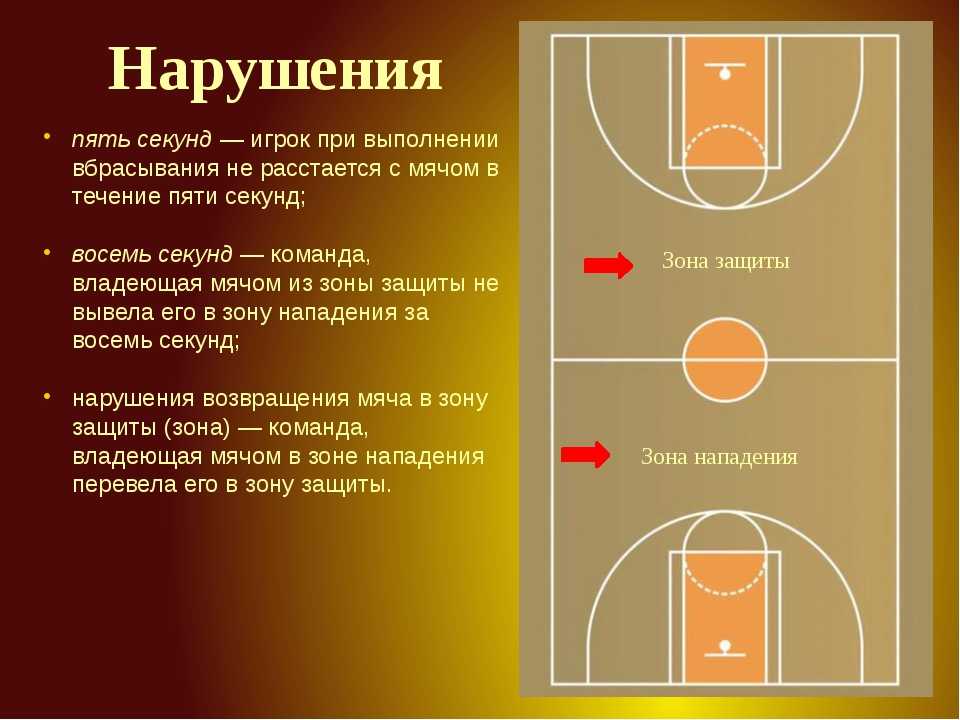
Shield and ring standards:
- Height 105 cm;
- Width 180 cm;
- Square in the center of the shield - height 45 cm, width 59 cm;
- Indent from the edge of the shield to the red square - 15 cm;
- Ring diameter -45 cm;
- Mesh for a ring 45 cm long;
- The ring is attached at a distance of 15 cm from the shield;
The shield itself is raised to a height of 3.05 meters.
Contents
- Required materials for ring and shield
- Making the backboard
- Making the hoop
- Fixing the structure
Required materials for the hoop and backboard
A basketball circle can be made from plastic pipe, metal rod or other suitable materials.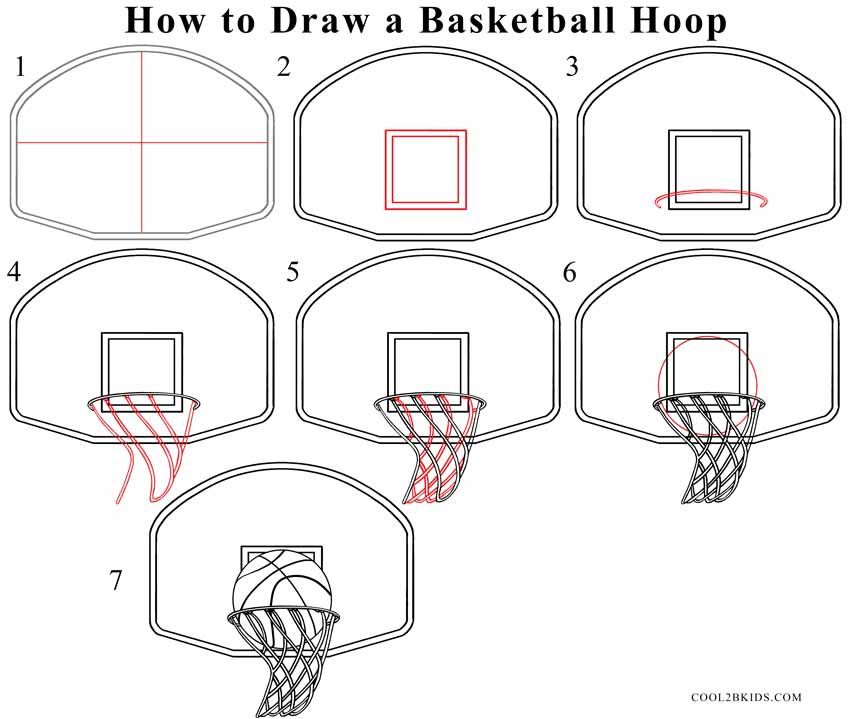 Also, the ring needs a mesh, which is made of lace, rope, braid or chain.
The shield is made of fiberboard, MDF, multilayer plywood, high-quality and thick organic glass, plastic. You also need fasteners and red or black paint for marking, white for the base.
Weather conditions must be taken into account when choosing the material for the shield. The location for the basketball court should be comfortable and allow the hoop to be hung at the desired height.
Making the shield
Steps:
- With a pencil, draw the lines along which the blank will be cut.
- Cut out the shield with a jigsaw.
- Paint white.
- In the center, draw with black or red lines a rectangle for aiming before throwing. The base of the target must be at the top edge of the ring.
- Rectangle stripes must be 5 cm wide.
- You also need to circle the outer edge of the shield.
Making a ring
Steps:
- Choose a pipe or twig 45 centimeters long with a little margin.
 Using the formula, calculate the exact length:
D(ex.). \u003d D (o) * Pi;
L(pr.) = 45*3.14=141.3 cm.
- Take a length of approx.
- Bend the ring on the round template, bolt the remainder to the shield.
- You can make a mesh from a metal chain or rope.
- On the twig you need to make ears for the net.
- Take 20 m of rope, cut it to the number of eyes, tie it to the ring. Perpendicular to the sea knot, tie all the pieces. Should be 4-5 rows.
- To prevent the ends of the mesh from fluffing, you need to tar them with fire.
Structural fastening
Strong steel brackets are installed on the rear side of the shield. Together with another person, securely attach the structure to the support. The bottom edge of the shield should be at a height of 290 cm, and the basket is 3 meters.
This is how you can organize a basketball ring at home.
Share with friends
DIY basketball backboard.
Project Made of Metal: print_design — LiveJournal
Oh sport, you are the world!
There is nothing to do in the country, only bending metal, fumbling shish kebab, drinking beer.
It is necessary to go in for sports both by ourselves and by children.
True, for this you will first have to "bend the metal" and celebrate this matter with beer and barbecue.
In the next series of the "Made of Metal" project - to make a basketball backboard.
Joint work of me and my father.
Batko studied the standards for the height and dimensions of a basketball backboard, made a wooden backboard, painted it, made wing screws, installed a pole. Well, he additionally made critical remarks to the metal part.
I - designed the whole metal part and welded the metal.
Let's go!
01. First I sit down at the computer and sketch out the drawing of the shield and the pole itself.
The original plan was to put the ring in another place and pull it with a solid hitch to the nearest tree.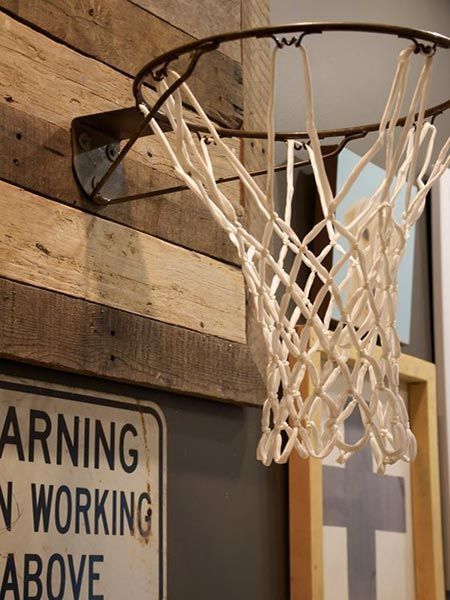 But there turned out to be a lot of roots and they decided to put them in free flight and without a screed, which is why the ring in the upper part of the column remained rudimentary only in the drawing. Diagonals that are not in the drawing (green) have also been cancelled. We decided that the rigidity of the wooden shield and metal fasteners would be enough not to "walk".
Also on the move I changed the method of strengthening the outboard knee. Not with a corner as in the drawing, but with two stripes on the sides, see the photo below.
A 5 cm profile was used for the pole, a 6 cm profile was used for the bracket strung on the pole. A strip is welded inside to prevent play.
Everything that adjoins the wooden shield is a 25 mm corner.
Important: the ring must be universal for both adults and children of different heights. Therefore, a height offset system was made.
02. The main large elements are welded: a pole, a knee, two stepson solid fuel boosters.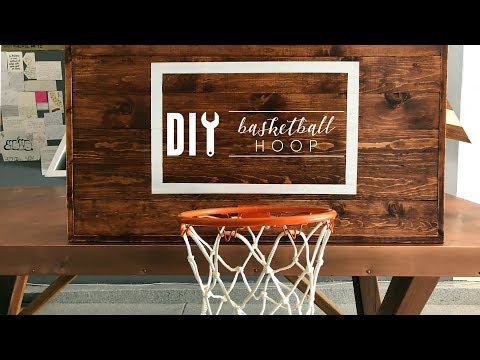 The upper edge of the pillar and stepchildren is bevelled: for rainfall and for beauty.
03. More different types
04.
05. There is a strip welded inside the elbow pipe. At the top of the hole.
06. Welded shield fixing system. No, this is not a bottle of Zhatetsky Gus beer, this is gasoline.
07. Stepchildren are welded on. There was an error in the calculations. It was assumed that the stepchildren would strengthen the pillar from swinging, but they were attached lower than necessary. Further in the photo you will see that they protrude quite a bit from the ground. It would be possible to raise 30-40 cm higher. And now, nevertheless, the pillar sways during the game.
08. The heels are welded to the part that goes underground.
09.
10. Everything is painted
11.
12. Hole
there was no putty for metal, to putty the seams. The putty was bought in addition, puttied and repainted a little later.