DIY Sports Netting- (The Post and Cable Solution) – The Sports Installer
There are really no easy backstop netting solutions. The post-and-cable solution, I've found, is the most reliable and functional system out there when compared to out-of-the-box netting solution that attach to goals or hoops.
Why do people search for a backstop netting solution? It’s ultimately to prevent the ball from either rolling down a steep hill or into vegetation like bushes or the woods. You basically want to keep the ball within the field of play and not have to go chasing it.
(I don’t know how some of you parents feel about it but there’s a subconscious part of me that feels kids should suffer for their sins of missing a shot and have to atone for said sins by having to run down and back up the hill or crawl into the bushes to get it. The fear of fetching outweighs the rewards of extra reps. But hey, that’s just me. I like to live old school.)
Speaking of old school, far be it for me to paraphrase the great Marine General, James Mattis, but I feel one of his quotes best sums up how I feel about sports netting.
To paraphrase his quote, “I come with the best advice I know. I’m not trying to sell you crap. But I’m pleading with you, with tears in my eyes: if you don’t take my advice on sports netting, I’ll ignore you.” (He was a little more colorful.) The key part of this quote is the part that says, “With tears in my eyes.”
I have this tension because sports netting is a cause of serious tension for me. Why? I try to sell and install quality products but there is just not a quality out-of-the-box backstop netting solution on the market. There just isn’t. It’s all really poor quality.
Every out of the box backstop netting solution has one of the following qualities:
Flimsy product that will fall apart in less than a year.
Made of tent pole stakes that, again, will fall apart in less than a year.
Isn’t cemented in the ground so the poles will lean over and fall down after the first heavy rain or winter thaw.
Airball Grabber
The inherit flaw of having something not fixed to two fully stable poles is you can’t get a sturdy enough or large enough system to meet your basic ball retention needs. Basically, in current configurations, they attach netting to the hoop or goal. As a result, the netting structure can’t be too heavy or the lacrosse or soccer goal itself will fall down. In the case of a basketball hoop, or the structure of the net itself can’t be too wide or heavy because it won’t be able to support itself.
Because of this, backstop nets don’t cover a wide enough distance to be useful for your court. You’re basically playing with a 10-foot wide net which will not provide the ‘Backstop’ you’re trying to achieve in the first place.
The common thread in all the out-of-the-box netting solutions is they won’t last and are inadequate to suit your purposes. So what is the solution?
I have two, both of which have the same basic solution. The backstop netting I suggest is setting two posts, running cabling between the two and hanging a net on it either via carabiners or zip ties.
Solution #1- Run a cable between two trees.
In this solution, the trees act as the posts. You then wrap cabling around the tree and then hang the netting via carabiners or zip ties.
This is a great setup, provided you have two trees that can be used as the pseudo posts. It’s much more doable with a lacrosse or soccer backstop goal as you can move your goal to accommodate the location of the trees.
It’s not so easy with a basketball hoop. You almost have to be lucky for a set up like this to work on a driveway basketball hoop set up.
When dealing with a driveway basketball hoop, most driveways are close to the home and typically don’t have the proper trees in which to attach cabling. If you even have trees, there is typically some sort of shrub or hedgerow which, again, are not conducive to attaching cabling. Therefore, in a driveway basketball hoop set up, your best bet is to set two pressure-treated wood posts and run cabling between them.
Pressure-treated wood posts backstop netting
I will confess that one of the issues homeowners don’t like with this option is the permanency of the poles. I hear you but, like I mentioned, this is why netting is a source of tension for me. There’s no good solution. So I usually resort to what is most functional which is the pressure-treated wood post option.
Also, they may have permanency and some may not like the look but they look a lot better than a net that’s broken and hanging half off the hoop. In addition, the picture above is in the wide open and protecting the ball from going off the backend of a retaining wall. In most cases, the net and posts will be blending in to a backdrop of woods giving it a camouflaged feeling.
Materials Needed: I will have all of these items bundled in my shopping cart should you not want to be bothered with going to Home Depot and just want to buy them and have them shipped to you.
Block for bottom of hole. You will need two, one for each hole. The purpose of the block is to maximize the height of the netting. If you have block in the bottom of the hole, it maximizes the depth and prevents heaving/leaning while giving the post the firmness it needs out of the ground. I prefer fast-setting concrete so it’s a one-day job. You need roughly 5 bags per post. You may have to take some back but it’s better to have more than less.4″X4″X12′ Pressure Treated Wood Posts. I like to keep a minimum of 2′ in the ground. This is why I like using the blocks. it increase the depth of the hole without sacrificing the height of the netting.You will need a washer on the outside of the post.You can go thicker but this is enough. You can get a longer run or a shorter run and buy it by the linear foot.This will be on the ends of the cable. You need two sets. One for each end.You really only need one but two can’t hurt. You can also go a little heavier duty but you don’t need it.A far less expensive option is to use zip ties.
As for the netting itself, the easiest solution is to order it from Gourock.com by the panel. Choose the netting you’re going to need by the sport. For instance, a basketball backstop net will not require the same netting as a lacrosse backstop net. Take a look on their site. Their calculator is pretty easy to follow.
Knowledge base needed: I didn’t go through a step-by-step instructional on how to do this because there are too many tools and variables that, if you don’t have them or know how to do this, I don’t think you’re going to be able to wing it. It’s not that it’s exceptionally difficult or challenging. It’s that you either have the tools and skill set or you probably don’t. For instance, working with cabling can be a pain in the butt if you don’t have cable cutters. As is digging without a digging bar, post-hole digger or wheel barrow. You will also need a drill with a decent-length wood drill bit. If you have them, again, it’s easy. But going to buy them for this project is too cost prohibitive. (I hope I don’t sound like an a-hole. I’m just shooting you straight.)
Like this:
Like Loading...
Summary
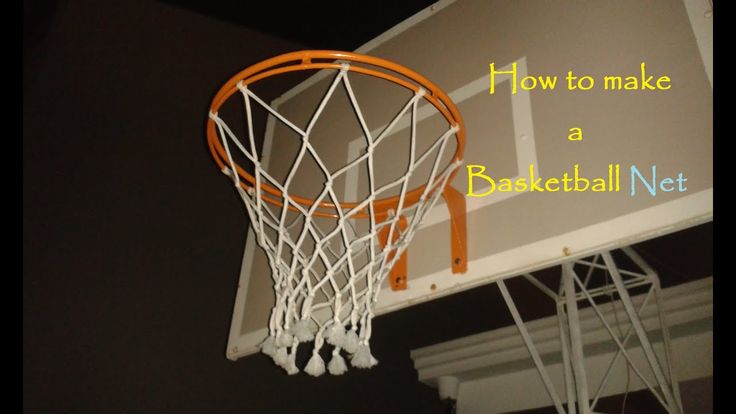
DIY Chain Basketball Net – The Sports Installer
Skip to content
Search for:
Sports Equipment
by Michael Westhead
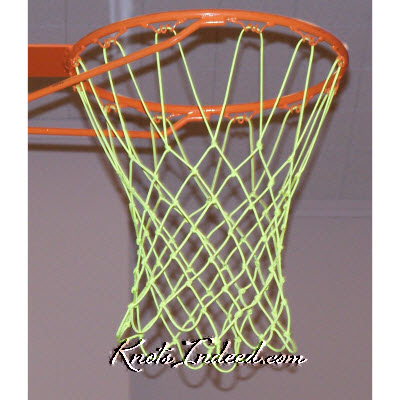
Anyone that has played basketball has enjoyed the sound of the basketball making the swoosh sound. In fact, the expression “nothing but net” is one of the most popular expressions in all of sports.
This popular sound is almost always associated with a nylon net. If you’ve played long enough, however, you’ve had a chance to play on a playground court with chain nets. It’s a different sound and experience but can be even more enjoyable than the sound of the swoosh. It’s something you should experience.
What’s cool about chain nets is they’re easy to make happen. So much of the equipment used in the sports-equipment industry is made from raw materials like steel and glass. Most items, like basketball hoops, require bending, molds and other such items that make fabricating them way too expensive and troublesome for a DIY project. However, there are other products such as pull-up bars and chain basketball nets where you can get the raw materials from a hardware or lumber store and build it yourself.
Below are some instructions on how to build your own chain basketball net.
First off, this is something you should do just for the fun of it. It may be worth it if you have a bank of basketball hoops and you can buy a larger supply of chain with volume pricing or if time is an issue and you need something right away. Otherwise, you’re kind of better off just buying one. I say this because there is not a great deal of cost savings mainly because chain nets themselves aren’t that expensive.
Yes, they’re $50 but building them is going to take a couple hours and sourcing material for one net and doing it yourself is going to save you $10.
$36 to $40 dollars (Not including taxes or shipping)
You can see by the pricing above that you’re looking at roughly $36 to $40 for a new net. I’m not sure what shipping to you will cost but shipping from Kansas to New Jersey is roughly $16. Add it up and you’re looking at $51-$55. (If you want to avoid all this and buy it brand new, I can provide it to you.)
$42.80 total cost of DIY materials to include taxes and, obviously, shipping.
As you can see from my receipt, you’re saving a little money by doing it yourself. What I’m describing below is more for fun than anything.
Materials needed:
2″ Zinc plated chain
Chain link– I purchased 2″ zinc-plated welded steel loops. You can save a little more money if you were to buy larger lengths of chain. For the vertical lengths, I went with 13 links which equals roughly 18″. For the horizontal links, I went with a 48″ length chain for the upper ring and 36″ for the lower ring. I had a little chain leftover but I wanted to play it safe and not run out of chain and have to go back to Home Depot.
Bolt Cutters
There is a cutting station at Home Depot right next to the chain but, funny enough, there are usually bolt cutters sitting right next to it to use too.
S-Clips
S-Clips- I went with a small S-Clips because it’s not like this net is load bearing. I also wanted something that was a little pliable so I could crimp it easier. I went with four packs of four.
S-Clips
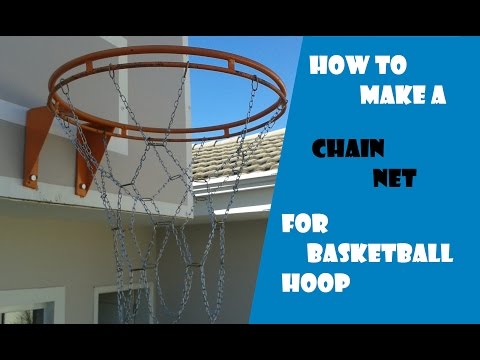
Hang each individual 13-link chain from the rim with open S-Clips.
Up-close look at net
From here feed the top horizontal chain through each of the 5th links from the top all the way around and use one S-clip to attach the chain together. When attaching the chain together, I also attached the S-Clip to one the vertical chain in the rear of the net. One item of note, the top horizontal chain had exactly 39 links.
S-Clip on bottom chain
I then fed the bottom horizontal chain through the 4th link from the bottom. With this phase, I actually cut the chain into three equal lengths of seven links and attached them with S-Clips. I did this because the chain needed to be secured on the bottom to not get tangled and unravelled.
Your last step is to crimp all the S-Clips to the rim.
VOILA!
A couple items of note. I put roughly 100 balls through the net. (Mikan drill baby!) There were times when the chain wasn’t perfectly aligned but it corrected itself as time went on. I will keep an eye on my net to see if I have to adjust the chains or add S-Clips.
I hope you enjoyed this and, if you ever need sports equipment for your playground, school or home, feel free to reach out to me at www.oncallsports.com.
Like this:
Like Loading...
how to weave a basketball net
HOW TO QUICKLY WEAVED A BASKETBALL NET Homemade Basketball Hoop Nets
play تشغيل
download تحميل
How to weave a basketball net with your own hands The easy way How I made a basketball hoop
play تشغيل
download تحميل
Do not buy a basketball net, but quickly weave it from a clothesline
play تشغيل
download تحميل
How to knit a basketball net
play تشغيل
download تحميل
DIY basketball hoop
play تشغيل
download تحميل
Outdoor Basketball Hoop Net Fast Just Sami
play تشغيل
download تحميل
Netting for billiards or basketball hoop
play تشغيل
download تحميل
metal chain basketball net
play تشغيل
download تحميل
Basketball hoop How to tie the net yourself
play تشغيل
download تحميل
Basketball hoop basketball net
play تشغيل
download تحميل
WHY THE NBA SCORE SO MANY POINTS
play تشغيل
download تحميل
Paracord net 2
play تشغيل
download تحميل
Basketball net with Banggood Com
play تشغيل
download تحميل
How to make a basketball net out of an ordinary thing
play تشغيل
download تحميل
How to make a net for a basketball hoop The easiest weave
play تشغيل
download تحميل
Plain shop basketball net
play تشغيل
download تحميل
DIY BASKETBALL HINGE
play تشغيل
download تحميل
Macramé mesh dress
play تشغيل
download تحميل
Basketball net for hoop shop BASKET FAMILY
play تشغيل
download تحميل
How to make a basketball hoop DIY basketball hoop
play تشغيل
download تحميل
مقالات ذات صلة
Basketball hoop - how to make a stand with a backboard with your own hands
Do you like basketball and want to make a hoop? I wanted to make it myself, not buy it, and I ended up making it. It's pretty cheap, especially if you have some of the stuff you need to assemble.
Let's start assembling a basketball hoop with our own hands.
Step 1: Shape the Ring
The first thing you need is a ring, I made it with 12mm rod, but it doesn't have to be that size. The standard diameter of a basketball hoop is 450 mm.
To make it flat you need something to wrap it around, this thing should be about 400mm in diameter.
I found an old car rim of the right size, you will need to clamp it to the table with a clamp using a piece of wood.
As shown in photo 2, place another clamp a little further from the first with a rod between them.
As shown in photo 3, slowly wrap the rod around the disk, once you wrap the rod and its edges overlap, cut off the straight ends.
Use a clamp to press the ends together, then weld them together.
To finish this part, place the ring on the ground and straighten out all the curves.
Step 2: Frame
Bend a piece of flat metal, mine was 4mm thick.
Weld it to a flat spot in the ring.
Cut two rods 320 mm long.
Weld them as shown in the photo.
Drill four holes to match your existing bolts.
If you need a netball ring, you can simply attach it to the pole and skip the rest of the steps.
Step 3: Mesh Staples (Optional)
Show 7 more images
Do this step if you need mesh. If you need a network, you will have to buy it. This step is not as difficult as it seems.
cut 12 pieces of wire 90 mm long (I would recommend making a few spare parts as they are easy to ruin.)
bend them in the middle (it doesn't matter if the ends are the same length)
clamp the wire in a vise with a steel rod at one end
bend wire over rod
repeat this with all parts of
retighten the wire wrapped around the rod (see photo)
bend it
repeat with all parts of
retighten wire wrapped around stem
bend it (at this point you can't just remove the wire from the rod - you will need to slide it to one of its edges and remove it from the edge)
repeat with all parts of
divide into 12 pieces and weld on the brackets
Step 4: Backboard
Cut the board to size. My board does not fit the full size of basketball boards. (the second picture shows the dimensions of a standard shield).
My measurements are 1100mm wide, 700mm high and 25mm thick. (You don't have to be that size.)
Step 5: Paint the shield
Once you've drawn all the lines on the shield, lay masking tape over them. If you try, everything will look neat.
If you are using MDF, you will need to take care to protect the edges from moisture (as shown in photo 2).
Carefully paint over the areas around the masking tape.
Remove masking tape after enough coats of paint have been applied and the board looks complete.
Step 6: Paint the ring
First you need to sand the metal. I used a grinding disc on a grinder.
The ring must not be black or white, it must stand out from the shield. Usually the ring is painted orange or red.


 Basically, in current configurations, they attach netting to the hoop or goal. As a result, the netting structure can’t be too heavy or the lacrosse or soccer goal itself will fall down. In the case of a basketball hoop, or the structure of the net itself can’t be too wide or heavy because it won’t be able to support itself.
 You then wrap cabling around the tree and then hang the netting via carabiners or zip ties.
 I hear you but, like I mentioned, this is why netting is a source of tension for me. There’s no good solution. So I usually resort to what is most functional which is the pressure-treated wood post option.
 I prefer fast-setting concrete so it’s a one-day job. You need roughly 5 bags per post. You may have to take some back but it’s better to have more than less.4″X4″X12′ Pressure Treated Wood Posts. I like to keep a minimum of 2′ in the ground. This is why I like using the blocks. it increase the depth of the hole without sacrificing the height of the netting.You will need a washer on the outside of the post.You can go thicker but this is enough. You can get a longer run or a shorter run and buy it by the linear foot.This will be on the ends of the cable. You need two sets. One for each end.You really only need one but two can’t hurt. You can also go a little heavier duty but you don’t need it.A far less expensive option is to use zip ties.
 Their calculator is pretty easy to follow.
 In fact, the expression “nothing but net” is one of the most popular expressions in all of sports.
 I will keep an eye on my net to see if I have to adjust the chains or add S-Clips.
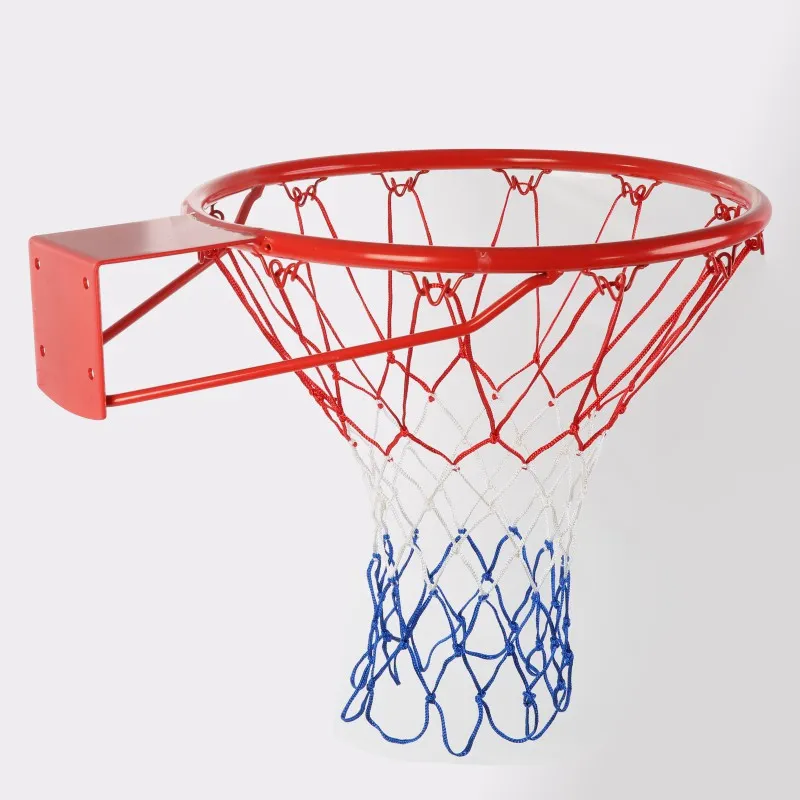 It's pretty cheap, especially if you have some of the stuff you need to assemble.
 My board does not fit the full size of basketball boards. (the second picture shows the dimensions of a standard shield).